


In my previous articles, we’ve covered what Docker is, and prepared our local environment. In the second article we got Docker to work with WordPress. In the third article, we saw how we can better use Docker Compose to build containers more easily and in a much more manageable way. Now, I’m going to show you how to deploy a project (WordPress) from a local machine to a DigitalOcean droplet.
在我以前的文章中,我们介绍了Docker是什么 ,并准备了我们的本地环境。 在第二篇文章中,我们让Docker与WordPress一起工作 。 在第三篇文章中,我们了解了如何更好地使用Docker Compose来更轻松,更易管理的方式构建容器。 现在,我将向您展示如何将项目(WordPress)从本地计算机部署到DigitalOcean Droplet。
设置您的DigitalOcean Droplet (Setting up Your DigitalOcean Droplet)
First, create an account on DigitalOcean. DigitalOcean is a popular and affordable VPS provider. It is one of the cheaper VPS providers out there, but that being said, it doesn’t mean that cheap=poor quality. You can run a 512MB instance with 20GB of SSD storage for only $5 per month.
首先,在DigitalOcean上创建一个帐户。 DigitalOcean是受欢迎且价格合理的VPS提供商。 它是目前最便宜的VPS提供商之一,但是,这并不意味着便宜=质量差。 您可以运行512MB实例以及20GB的SSD存储,每月只需$ 5。
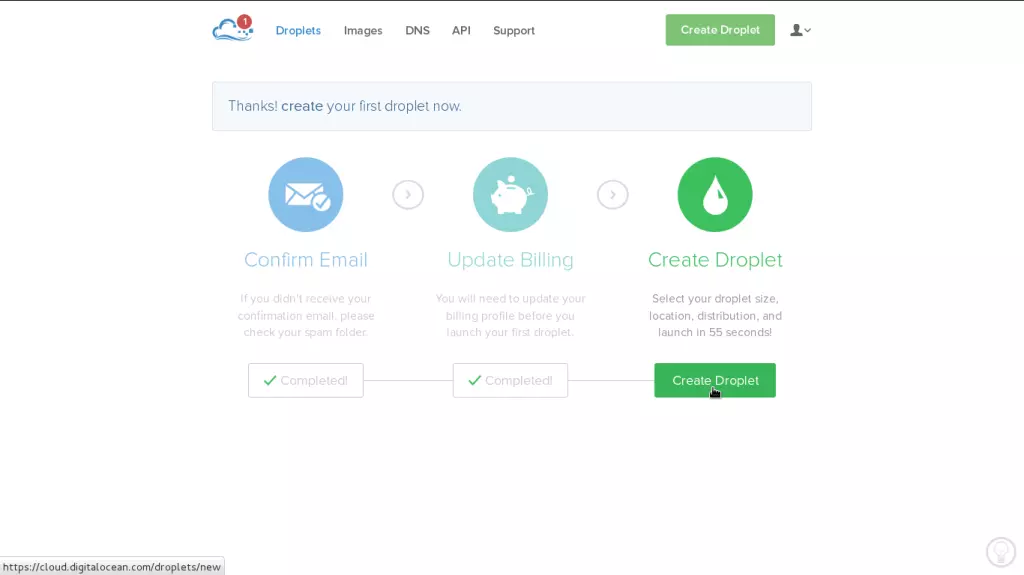
After updating the billing information (if you are new on DigitalOcean), you now need to create a droplet. A droplet is a single VPS instance (after all, cloud technology is all about cool names!).
更新账单信息之后(如果您是DigitalOcean的新用户),现在需要创建一个Droplet。 Droplet是单个VPS实例(毕竟,云技术全都涉及很酷的名字!)。
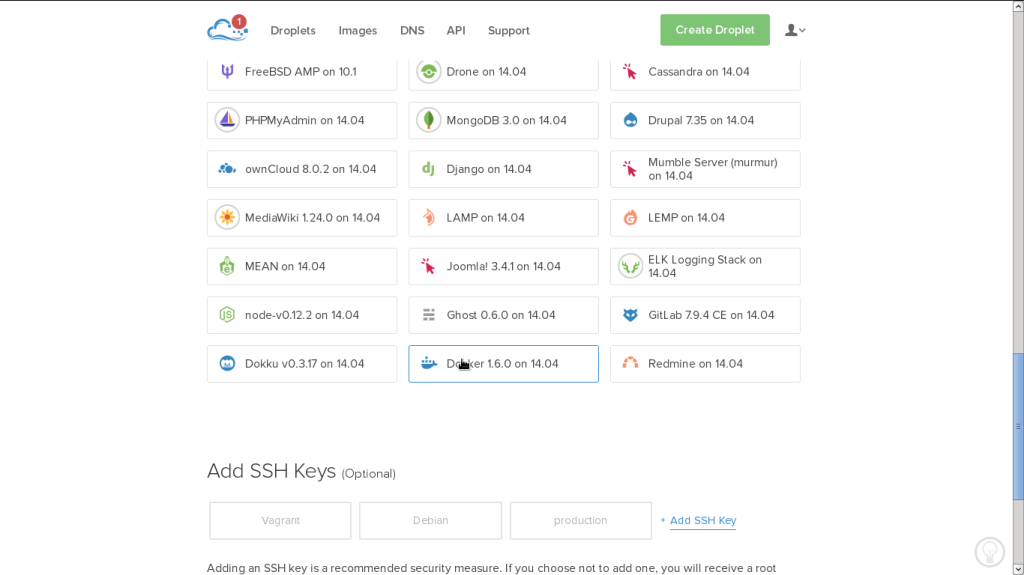
Next, select a name for your instance. When you’re starting out, 512MB instance for $5/month is pretty good. Later you can upgrade this instance to 1GB, or go all the way up to 64GB instances. The region is where your instance will live. Select your instance somewhere near the region where you and/or your users will be. After all, you want the best speed for your website. In my case I chose Amsterdam, as I live in Europe. For Images you can start with a plain OS or go with an application. There is an application (pre-built box) that comes with Docker installed. Select that image.
接下来,为您的实例选择一个名称。 刚开始使用时,每月$ 5美元的512MB实例相当不错。 稍后,您可以将该实例升级到1GB,或者一直升级到64GB实例。 您的实例将居住的区域。 选择您和/或您的用户所在区域附近的实例。 毕竟,您想要网站的最佳速度。 就我而言,我选择阿姆斯特丹,因为我住在欧洲。 对于图像,您可以从普通操作系统开始,也可以与应用程序一起使用。 安装了Docker随附的应用程序(预装盒)。 选择该图像。
Now you have to select an SSH key. SSH is a secure way that we can connect to our droplet and start working via the terminal. To better understand how SSH works and how to configure it for use with DigitalOcean, read this article on their blog. As I have an SSH key already configured I don’t need to add a new one. After that, simply click create droplet and it should only take a couple of seconds until it creates a fully functional Ubuntu 14.04 system with Docker pre-installed.
现在,您必须选择一个SSH密钥 。 SSH是一种安全的方法,我们可以连接到Droplet并通过终端开始工作。 为了更好地了解SSH的工作原理以及如何将其配置为与DigitalOcean配合使用,请在其博客上阅读此文章 。 由于我已经配置了SSH密钥,因此无需添加新密钥。 在那之后,只需单击创建Droplet,它只需几秒钟即可创建一个预装Docker的功能齐全的Ubuntu 14.04系统。
安装Docker Compose (Installing Docker Compose)
The easiest way to setup WordPress on DigitalOcean is to use Docker Compose. After all, who wants to be stuck working with cryptic commands all the time. To set up Docker Compose, we need a connection to our droplet. An SSH connection will let us execute commands on the droplet.
在DigitalOcean上设置WordPress的最简单方法是使用Docker Compose。 毕竟,谁愿意一直坚持使用神秘的命令。 要设置Docker Compose,我们需要连接到我们的Droplet。 SSH连接将使我们在Droplet上执行命令。
ssh root@[ip_of_the_machine]To install Compose, execute these two commands:
要安装Compose,请执行以下两个命令:
curl -L https://github.com/docker/compose/releases/download/1.2.0/docker-compose-`uname -s`-`uname -m` > /usr/local/bin/docker-composechmod +x /usr/local/bin/docker-composeNow we’ll check if Compose was installed properly:
现在,我们将检查Compose是否已正确安装:
docker-compose --versionIf you get the version number, you’ve done everything correctly.
如果获得版本号,则说明一切正确。
Next, create a folder for the project. Inside that, create a new docker-compose.yml file.
接下来,为项目创建一个文件夹。 在其中创建一个新docker-compose.yml文件。
⧸⧸mkdir wpdocker
cd wpdocker
touch docker-compose.yml
nano docker-compose.yml
Inside your docker-compose.yml file, add this:
在您docker-compose.yml文件中,添加以下内容:
web:
    image: wordpress
    links:
     - mysql
    environment:
     - WORDPRESS_DB_PASSWORD=password
    working_dir: /var/www/html
    volumes:
     - wordpress/wp-content/:/var/www/html/wp-content
    ports:
     - "80:80"
mysql:
    image: mysql:5.7
    environment:
     - MYSQL_ROOT_PASSWORD=password
     - MYSQL_DATABASE=wordpress
The only difference from our last example is that the IP address isn’t specified. The ports should be configured, even if port 80 on container is port 80 on the droplet, without this it wont work.
与我们上一个示例的唯一区别是未指定IP地址。 即使容器上的端口80是液滴上的端口80,也应配置端口,否则将无法工作。
Execute:
执行:
docker-compose up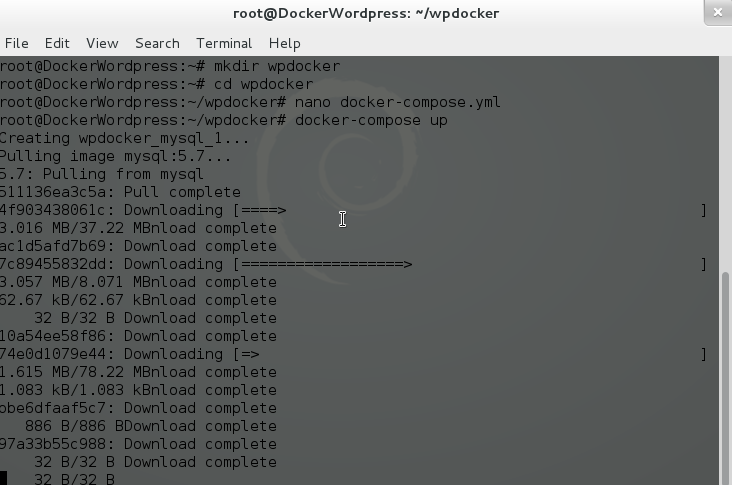
Because it’s the first time that this droplet will use Docker, it will pull all the images first. Now check on the browser for the droplet IP and you’ll get an installation WordPress page. Hurray, you have done it!
因为这是该Droplet第一次使用Docker,所以它将首先提取所有映像。 现在,在浏览器中检查Droplet IP,您将获得一个安装WordPress页面。 万岁,您已经做到了!
There are two problems with this example. First, if we close the terminal, the process (on the droplet) will shutdown. The second problem is that we may want to edit our theme files. This is not really a deployment, but rather just an installation on a VPS.
这个例子有两个问题。 首先,如果我们关闭终端,该过程(在液滴上)将关闭。 第二个问题是我们可能要编辑主题文件。 这实际上不是部署,而只是VPS上的安装。
For the first problem, you only need to add -d.
对于第一个问题,您只需要添加-d 。
docker-compose up -d将本地开发与DigitalOcean同步 (Sync Local Development with DigitalOcean)
This is where the fun part starts. We can use git and a repository to make changes to our local WordPress installation and push the changes to the repository. After pushing the changes to the repository we can pull those changes back to the droplet. You may want to choose a private repository. You can choose BitBucket as an alternative, since GitHub only offers public repositories if you’re not paying. In my example, I’m going to use BitBucket.
这是有趣的部分开始的地方。 我们可以使用git和存储库对本地WordPress安装进行更改,并将更改推送到存储库。 将更改推送到存储库后,我们可以将这些更改拉回到Droplet中。 您可能要选择一个私有存储库。 您可以选择BitBucket作为替代方案,因为GitHub仅在您不付款时才提供公共存储库。 在我的示例中,我将使用BitBucket。
Next we need an SSH key. If you don’t have an SSH key yet, read this article on GitHub.
接下来,我们需要一个SSH密钥。 如果您还没有SSH密钥,请在GitHub上阅读此文章 。
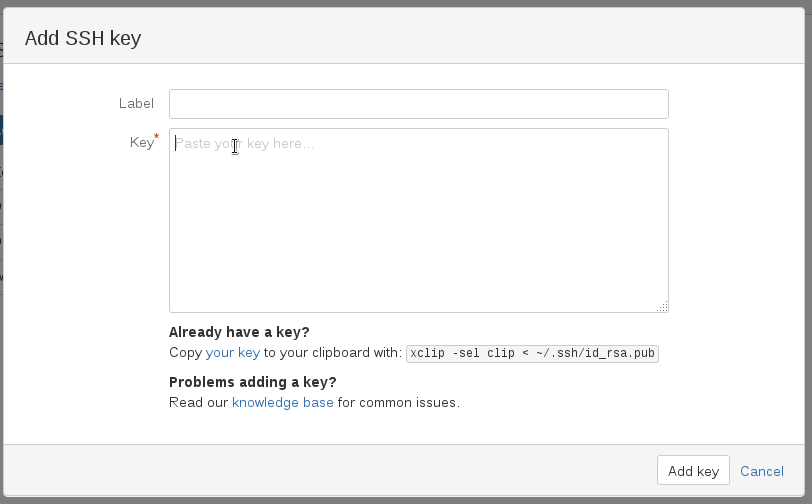
Once you have your SSH key, create an account on BitBucket. If you want to use GitHub feel free, it will work the same way. Create a new repository and configure your SSH keys. Your SSH keys are located under the ~/.ssh/ folder. Open the id_rsa.pub file under the SSH folder and copy the contents of that file.
拥有SSH密钥后,请在BitBucket上创建一个帐户。 如果您想随意使用GitHub,它将以相同的方式工作。 创建一个新的存储库并配置您的SSH密钥。 您的SSH密钥位于~/.ssh/文件夹下。 打开SSH文件夹下的id_rsa.pub文件,然后复制该文件的内容。
Next, go to your local project (the project that we created in the previous article if you’re following along). Execute docker-compose up -d if it isn’t running and start making changes. Install some plugins and a theme. Also, add new posts, pages or whatever else you want.
接下来,转到您的本地项目(如果您继续,我们将在上一篇文章中创建的项目)。 如果docker-compose up -d没有运行,请执行它并开始进行更改。 安装一些插件和一个主题。 另外,添加新的帖子,页面或其他所需的内容。
Now navigate inside the wp-content folder and execute these commands:
现在,在wp-content文件夹中导航并执行以下命令:
git init
git remote add origin git@bitbucket.org:[repository].git
git add .
git commit -m "first init"
git push -u origin master
The contents of the wp-content folder is now in your BitBucket repository. Next we need to pull them on to our droplet. SSH to your droplet, if you’re not already logged in.
wp-content文件夹wp-content现在位于您的BitBucket存储库中。 接下来,我们需要将它们拉到液滴上。 如果尚未登录,则SSH到Droplet。
ssh root@[droplet_ip]Once you’ve connected, navigate inside the project folder then:
连接后,在项目文件夹中导航,然后:
docker-compose stop
cd wordpress
rm -rf wp-content
You’ll see I’ve removed the wp-content folder on the droplet because we’ll use the content from the repository.
您会看到我已经删除了wp-content上的wp-content文件夹,因为我们将使用存储库中的内容。
Now we need to generate an SSH key for the droplet, we can do this by running:
现在我们需要为Droplet生成一个SSH密钥,我们可以通过运行以下命令来实现:
ssh-keygen -t rsa -C "your_email_here"We need to copy the id_rsa.pub contents again and register that SSH key on BitBucket:
我们需要再次复制id_rsa.pub内容,并在BitBucket上注册该SSH密钥:
cat ~/.ssh/id_rsa.pubCopy the contents that was echoed on the terminal and add that as a new key to BitBucket, making sure you give it a meaningful name.
复制在终端上回显的内容,并将其作为新密钥添加到BitBucket,确保为它指定一个有意义的名称。
git clone git clone git@bitbucket.org:[repository].git wp-contentYou’ve just cloned the repository and given the new folder the name ‘wp-content‘.
您刚刚克隆了存储库,并为新文件夹指定了名称“ wp-content ”。
After that, navigate back to the root of the project and start the containers again.
之后,导航回项目的根目录并再次启动容器。
cd ..
docker-compose up -d
Now you can check your site using your browser. You should be able to login to the Admin panel and you’ll see the new plugins and theme installed. You can also export the local WordPress data and use it on your droplet installation. I’ll let you tackle this step as homework (if you like that kind of homework).
现在,您可以使用浏览器检查您的网站。 您应该能够登录到管理控制台,并且会看到已安装新的插件和主题。 您还可以导出本地WordPress数据,并在您的Droplet安装中使用它。 我会让您将这步作为家庭作业解决(如果您喜欢这种家庭作业)。
结论 (Conclusion)
We’re now getting towards the end of this series on Docker. Docker is an exciting new technology, it’s looking like it will change the way we create applications and deploy them.
现在,我们即将结束本系列的Docker。 Docker是一项令人兴奋的新技术,它似乎将改变我们创建应用程序和部署它们的方式。
In this article we’ve seen how to deploy our local WordPress Docker installation to DigitalOcean. We created a repository on BitBucket and used that repository to sync with our DigitalOcean droplet. If you haven’t yet read our previous articles in this series on Docker, you can find them below:
在本文中,我们已经看到了如何将本地WordPress Docker安装部署到DigitalOcean。 我们在BitBucket上创建了一个存储库,并使用该存储库与DigitalOcean Droplet进行了同步。 如果您尚未阅读本系列有关Docker的先前文章,则可以在下面找到它们:
We really want to hear from you. And, the same question as last time, would you consider using Docker in production?
我们真的很想收到您的来信。 并且,与上次相同的问题,您是否考虑在生产中使用Docker?
翻译自: https://www.sitepoint.com/deploying-wordpress-with-docker/


 505
505

 被折叠的 条评论
为什么被折叠?
被折叠的 条评论
为什么被折叠?
 到【灌水乐园】发言


