


angular 开源案例
GateKeeper is a pretty nifty user registration, authentication and authorization library which uses its own database to store and query the user records. This means that it’s completely decoupled from your main app (so you can, essentially, use Postgre or Mongo for your business logic while using a completely different engine like MySQL for basic user records) and easy to tweak and extend.
GateKeeper是一个非常漂亮的用户注册,身份验证和授权库,它使用自己的数据库来存储和查询用户记录。 这意味着它与您的主应用程序完全脱钩(因此,从本质上讲,您可以将Postgre或Mongo用于您的业务逻辑,而将完全不同的引擎(如MySQL)用于基本用户记录),并且易于调整和扩展。

An example of the library’s use is clearly demonstrated in our post about [the skeleton no-framework project][nowf] which is a sample app composed entirely of Composer packages and acting like a framework-powered app, but completely free of any framework coupling.
我们关于[无框架的骨架项目] [nowf]的帖子中清楚地展示了该库的使用示例,该示例是一个示例应用程序,完全由Composer软件包组成,并且像框架驱动的应用程序一样工作,但是完全没有任何框架耦合。
This post isn’t about Gatekeeper per-se, though. It’s about contributing to open source, and going about the right way to doing it.
不过,这篇文章不是关于Gatekeeper本身的。 这是关于为开源做出贡献,并找到正确的方式来做到这一点。
In this tutorial, we’ll extend GateKeeper with a count feature. Currently, in order to find out the total number of users in the database one would have to fetch them all, then count them – either that or write a query to do so manually. But it might be better if this were built into the adapter interface so that it’s not only a native feature, but also a requirement for future database engines to be added.
在本教程中,我们将使用count功能扩展GateKeeper。 当前,为了找出数据库中的用户总数,必须先提取所有用户,然后对它们进行计数–要么写一个查询,要么手动进行查询。 但是,如果将它内置在适配器接口中可能会更好,这样它不仅是本机功能,而且是将来添加数据库引擎的要求。
第1步:询问所有者 (Step 1: Ask the owner)
The first step of contributing to open source is doing due diligence. This can be as simple as asking the repo owner about the status of this feature, in order to make sure it isn’t planned and is, in fact, desirable. An issue in the repo is often enough, as evident in this case.
为开源做贡献的第一步是尽职调查。 可以简单地向回购所有者询问此功能的状态,以确保它没有计划并且实际上是可取的。 如本例所示 ,回购中的问题通常就足够了。
第2步:叉,克隆,测试 (Step 2: Fork, clone, test)
Note: if you’d like to follow along, please clone an older version of Gatekeeper which doesn’t have this feature yet. This one should do.
注意:如果您想继续,请克隆一个没有此功能的旧版Gatekeeper。 这应该做。
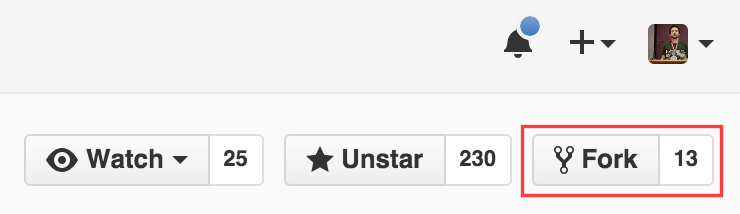
First, let’s fork the repo so we can start working on it.
首先,让我们分叉仓库,以便我们可以开始工作。
Next, we need to set up a development environment in which to work on the package. Naturally, we use our trusty Homestead Improved for this. Once the VM has been set up and SSHed into, we can clone our fork, install dependencies and run tests:
接下来,我们需要建立一个开发环境,以在该环境中使用该程序包。 自然,我们为此使用了值得信赖的Homestead改良版 。 设置好虚拟机并通过SSH将其插入后,我们可以克隆fork,安装依赖项并运行测试:
git clone https://github.com/swader/gatekeeper
cd gatekeeper
composer install
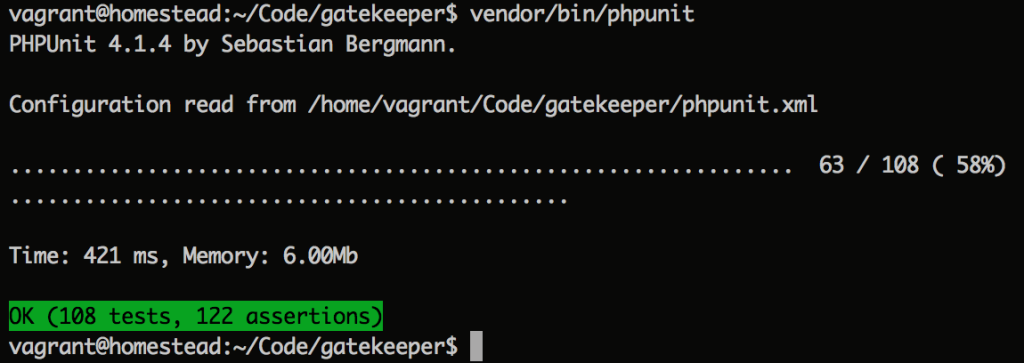
vendor/bin/phpunitAll the tests should be green:
所有测试应为绿色:
At this point, it’s preferred to make a separate branch for all the changes we’ll be making.
此时,最好为我们将要进行的所有更改创建一个单独的分支。
git checkout -b "feature-count"步骤3:行动计划 (Step 3: Plan of Action)
Gatekeeper currently only supports MySQL – this makes our job a bit easier, but still not trivial. Despite only supporting a single type of datasource (for now), abstract and interface classes still need to be updated, seeing as they’re written with future compatibility with different data sources in mind.
Gatekeeper当前仅支持MySQL –这使我们的工作更加轻松,但仍然不简单。 尽管仅支持一种类型的数据源(目前),但是抽象类和接口类仍需要更新,因为它们在编写时考虑到将来与不同数据源的兼容性。
We will, thus, need to modify:
因此,我们将需要修改:
Gatekeeper/DataSource– the abstract DataSource classGatekeeper/DataSource–抽象的DataSource类DataSource/MySQL– the MySQL datasource which contains the actual methods we useDataSource/MySQL– MySQL数据源,其中包含我们使用的实际方法DataSource/Stub– to upgrade the stub with which to write other datasources, so other contributors know they need acountmethod, tooDataSource/Stub–升级用于写入其他数据源的存根,因此其他贡献者也知道它们也需要一个count方法
We also need to create a new Count handler, because Gatekeeper uses magic static calls to create, find, update and delete entities, forwarding them to the appropriate handler depending on the name of the invoked method. For an example, see the __callStatic magic method in Gatekeeper/Gatekeeper.php, and how it defers method calls to handlers like Handler/Create.php or Handler/FindBy.php, etc.
我们还需要创建一个新的Count处理程序,因为Gatekeeper使用魔术静态调用来创建,查找,更新和删除实体,然后根据所调用方法的名称将它们转发到适当的处理程序。 有关示例,请参见Gatekeeper/Gatekeeper.php的__callStatic魔术方法,以及如何将方法调用推迟到Handler/Create.php或Handler/FindBy.php等Handler/FindBy.php 。
步骤4:Just Do It™ (Step 4: Just Do It ™)
委派静态电话 (Delegating the static call)
To prepare the foundation for our custom Count handler, we delegate the static call to it and pass forward the argument and the data source. This is all done by simply adding another elseif block to Gatekeeper::__callStatic:
为了为我们的自定义Count处理程序准备基础,我们将静态调用委派给它,并将参数和数据源传递给它。 只需在Gatekeeper::__callStatic添加另一个elseif块即可完成所有操作:
} elseif ($action == 'count') {
            $action = new \Psecio\Gatekeeper\Handler\Count($name, $args, self::$datasource);
        }
Since we added a new action, we need to modify the static property $actions as well:
由于添加了新操作,因此我们还需要修改静态属性$actions :
/**
     * Allowed actions
     * @var array
     */
    private static $actions = array(
        'find', 'delete', 'create', 'save', 'clone', 'count'
    );
计数处理程序 (Count handler)
We then create the handler in the file Psecio/Gatekeeper/Handler/Count.php:
然后,我们在文件Psecio/Gatekeeper/Handler/Count.php创建处理程序:
<?php

namespace Psecio\Gatekeeper\Handler;

class Count extends \Psecio\Gatekeeper\Handler
{
    /**
     * Execute the object/record count handling
     *
     * @throws \Psecio\Gatekeeper\Exception\ModelNotFoundException If model type is not found
     * @return int Count of entities
     */
    public function execute()
    {
        $args = $this->getArguments();
        $name = $this->getName();

        $model = '\\Psecio\\Gatekeeper\\' . str_replace('count', '',
                $name) . 'Model';
        if (class_exists($model) === true) {
            $instance = new $model($this->getDb());

            $count = (!$args) ? $this->getDb()->count($instance) : $this->getDb()->count($instance,
                $args[0]);
            return (int)$count['count'];
        } else {
            throw new \Psecio\Gatekeeper\Exception\ModelNotFoundException(
                'Model type ' . $model . ' could not be found'
            );
        }
    }
}
It’s almost identical to the Create handler, except for the unreachable return statement at the bottom which I’ve removed, small changes in the body, and a minor alteration to the class’ description.
它与Create处理程序几乎相同,除了我已删除的底部无法访问的return语句,主体上的细微更改以及对类的描述的较小改动之外。
数据源和存根 (DataSource and Stub)
Next, let’s get the easy ones out of the way.
接下来,让我们摆脱那些简单的问题。
In Psecio/Gatekeeper/DataSource/Stub.php, we add a new blank method:
在Psecio/Gatekeeper/DataSource/Stub.php ,我们添加了一个新的空白方法:
/**
     * Return the number of entities in DB per condition or in general
     *
     * @param \Modler\Model $model Model instance
     * @param array $where
     * @return bool Success/fail of action
     * @internal param array $where "Where" data to locate record
     */
    public function count(\Modler\Model $model, array $where = array()){}
We then add a similar signature to the abstract:
然后,我们向摘要添加类似的签名:
/**
     * Return the number of entities in DB per condition or in general
     *
     * @param \Modler\Model $model Model instance
     * @param array $where
     * @return bool Success/fail of action
     * @internal param array $where "Where" data to locate record
     */
    public abstract function count(\Modler\Model $model, array $where = array());
With all this out of the way, it’s time to write the actual logic that takes care of counting.
有了这一切,现在该是编写负责计数的实际逻辑的时候了。
MySQL (MySQL)
It’s time to change DataSource/MySQL.php now. We’ll add the count method right under the find method:
现在该更改DataSource/MySQL.php了。 我们将在find方法下面添加count方法:
/**
     * Find count of entities by where conditions.
     * All where conditions applied with AND
     *
     * @param \Modler\Model $model Model instance
     * @param array $where Data to use in "where" statement
     * @return array Fetched data
     */
    public function count(\Modler\Model $model, array $where = array())
    {
        $properties = $model->getProperties();
        list($columns, $bind) = $this->setup($where);

        $update = array();
        foreach ($bind as $column => $name) {
            // See if we keep to transfer it over to a column name
            if (array_key_exists($column, $properties)) {
                $column = $properties[$column]['column'];
            }
            $update[] = $column.' = '.$name;
        }

        $sql = 'select count(*) as `count` from '.$model->getTableName();
        if (!empty($update)) {
            $sql .= ' where '.implode(' and ', $update);
        }

        $result = $this->fetch($sql, $where, true);
        return $result;
    }
Harvesting the logic from the similar find method above, our count method does the following:
从上面类似的find方法中获取逻辑,我们的count方法执行以下操作:
Grab properties as defined in model in question (e.g. see
UserModel::$properties)抓住相关模型中定义的属性(例如,参见
UserModel::$properties)Separate the values as passed in via
$whereinto columns and their values将通过
$where传入的值分隔为列及其值Build the
WHEREpart of the query by looking into theproperties, seeing if any of them have different names to those requested (e.g. requestedFirstNamehas a database counterpart offirst_name)通过查看
properties构建查询的WHERE部分,查看它们是否具有与请求的名称不同的名称(例如,请求的FirstName具有与first_name对应的数据库)- Build whole query 建立整个查询
Execute with forced
singlemode ontrue(seefetchmethod) because we only expect to get a single value back – an integer indicating the count.在强制强制
single模式为true下执行(请参阅fetch方法),因为我们只希望返回单个值-表示计数的整数。- Return the count. 返回计数。
步骤5:测试 (Step 5: Testing)
Ordinarily, there would be a unit testing stage. This is out of the scope of this tutorial, and I encourage you to look at this tutorial instead. If there’s sufficient interest in seeing unit tests developed for this package, we will, of course, accommodate. Let us know in the comments.
通常,会有一个单元测试阶段。 这不在本教程的讨论范围之内,因此我建议您看一下本教程 。 如果有足够的兴趣查看为此程序包开发的单元测试,我们当然会提供。 让我们在评论中知道。
实施实验版 (Implementing the Experimental Version)
Let’s do a manual test. First, we’ll commit and push our work online.
让我们做一个手动测试。 首先,我们将在线提交并推动我们的工作。
git add -A
git commit -m "Adding count feature"
git push origin feature-count
The changes will now be in our fork, online. Then, let’s go ahead and create a brand new project in another folder with the following composer.json file:
现在,这些更改将在线上出现在我们的fork中。 然后,让我们继续使用下面的composer.json文件在另一个文件夹中创建一个全新的项目:
{
    "require": {
        "psecio/gatekeeper": "dev-master"
    },
    "repositories": [
        {
            "type": "vcs",
            "url": "https://github.com/swader/gatekeeper"
        }
    ]
}
Using Composer’s Repositories feature, we can make sure that Composer fetches our copy of Gatekeeper instead of the original, while still thinking it has the original – this allows us to test our changes as if in a real project using Gatekeeper – arguably a more realistic testing scenario than unit tests would be at this point. Save and exit this file, and then run:
使用Composer的存储库功能,我们可以确保Composer可以获取Gatekeeper的副本而不是原始版本,同时仍然认为它具有原始版本–这使我们可以像使用Gatekeeper一样在真实项目中测试我们的更改–可以说是更现实的测试在这种情况下,场景比单元测试要好。 保存并退出此文件,然后运行:
composer require symfony/var-dumper --devThis will both install the above defined custom package, and Symfony’s VarDumper for easier debugging. You might get asked for a Github token during installation – if that’s the case, just follow the instructions.
这将同时安装上面定义的自定义程序包和Symfony的VarDumper ,以便于调试。 在安装过程中可能会要求您提供Github令牌-如果是这种情况,请按照说明进行操作。
Lo and behold, if we look inside the Gatekeeper main class now, we’ll see that our count updates are all there. Next, let’s follow the typical Gatekeeper installation procedure now by executing vendor/bin/setup.sh and following instructions. If you’re using Homestead Improved, just enter the default values (localhost, homestead, homestead, secret).
瞧,如果我们现在看一下Gatekeeper主类,我们将看到count更新全部存在。 接下来,让我们通过执行vendor/bin/setup.sh并遵循以下说明来遵循典型的Gatekeeper安装过程。 如果您使用的是Homestead Improvement ,则只需输入默认值( localhost , homestead , homestead , secret )。
测试中 (Testing)
Now let’s create an index.php file which we’ll use for testing:
现在让我们创建一个index.php文件,我们将使用该文件进行测试:
<?php

require_once 'vendor/autoload.php';

use Psecio\Gatekeeper\Gatekeeper;
Gatekeeper::init('./');

$groups = [
    'admin' => 'Administrators',
    'users' => 'Regular users'
];

foreach ($groups as $name => $description) {
    if (!Gatekeeper::findGroupByName($name)) {
        Gatekeeper::createGroup([
            'name' => $name,
            'description' => $description
        ]);
    }
}
We activate the autoloader, initialize Gatekeeper (it uses the .env file from the root of our folder for credentials), and set up two default groups.
我们激活自动加载器,初始化Gatekeeper(它使用文件夹根目录中的.env文件获取凭据),并设置两个默认组。
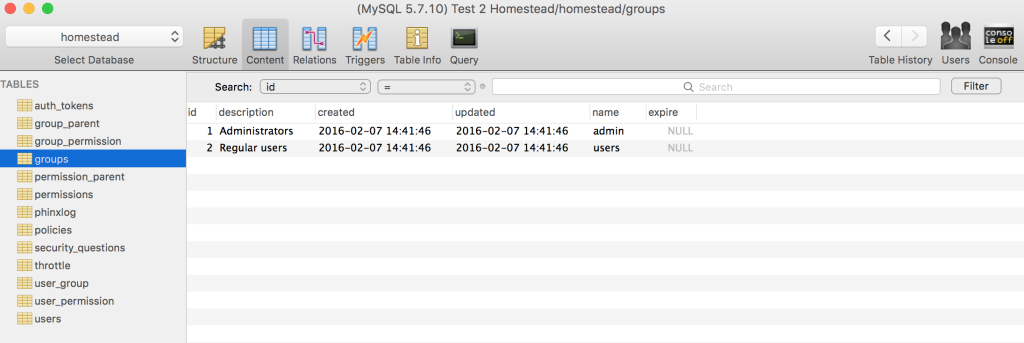
Then, let’s go ahead and test counting on the groups:
然后,让我们继续进行测试:
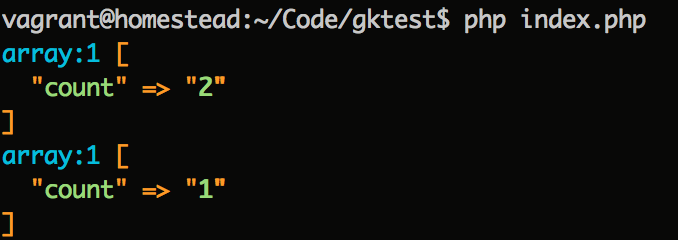
dump(Gatekeeper::countGroup());
dump(Gatekeeper::countGroup(['id' => 1]));
Sure enough, it works.
果然,它可行。
Let’s test users now.
让我们现在测试用户。
Gatekeeper::countUser();This accurately produces a count of 0. A common use case for out-of-the-box apps is seeing if there are no users in the database when a user is being created, and then giving that new user Admin privileges. The first user of a system is often considered its owner, so it’s a convenience for setting up super-user accounts. Let’s do that.
这将准确地产生一个为0的计数。开箱即用的应用程序的一个常见用例是,在创建用户时查看数据库中是否没有用户,然后赋予该新用户Admin特权。 系统的第一个用户通常被认为是其所有者,因此设置超级用户帐户很方便。 来做吧。
Gatekeeper::createUser([
    'username' => 'bruno-admin',
    'first_name' => 'Bruno',
    'last_name' => 'Skvorc',
    'email' => 'bruno.skvorc@sitepoint.com',
    'password' => '12345',
    'groups' => (Gatekeeper::countUser()) ? ['users'] : ['admin']
]);

Gatekeeper::createUser([
    'username' => 'reg-user',
    'first_name' => 'Reggie',
    'last_name' => 'User',
    'email' => 'reg@example.com',
    'password' => '12345',
    'groups' => (Gatekeeper::countUser()) ? ['users'] : ['admin']
]);


dump(Gatekeeper::findUserByUsername('bruno-admin')->groups[0]->name);
dump(Gatekeeper::findUserByUsername('reg-user')->groups[0]->name);
Sure enough, the output is accurate – the first group printed on screen is admin, and the second is users.
果然,输出是准确的–屏幕上打印的第一组是admin ,第二组是users 。
With the count mechanics correctly implemented, it’s time to submit a pull request.
正确实施计数机制后,就可以提交拉取请求了。
提交公关 (Submitting a PR)
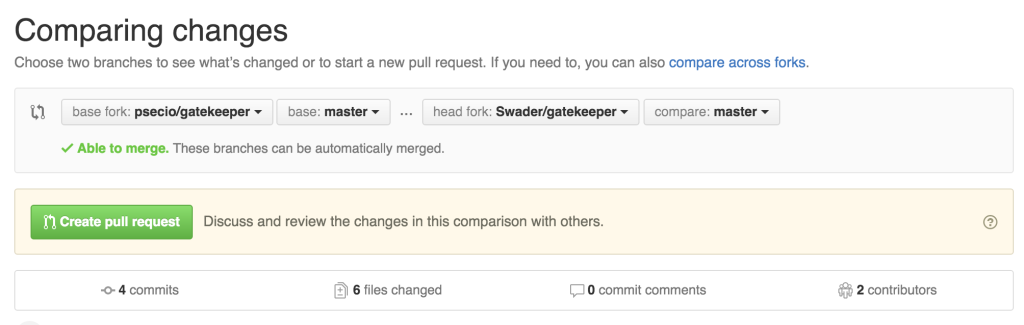
First, we go to our own fork of the project. Then, we click the “New Pull Request” button. On the next screen everything should be green – the UI should say “Able to merge”:
首先,我们进入项目的分支。 然后,我们点击“ New Pull Request”按钮。 在下一个屏幕上,所有内容均应为绿色–用户界面应显示“能够合并”:
Once we click the “Create Pull Request” button, we should add a title and a description as detailed as possible, preferably referencing the issue from Step 1 above.
单击“创建请求请求”按钮后,我们应添加尽可能详细的标题和描述,最好参考上述第1步中的问题。
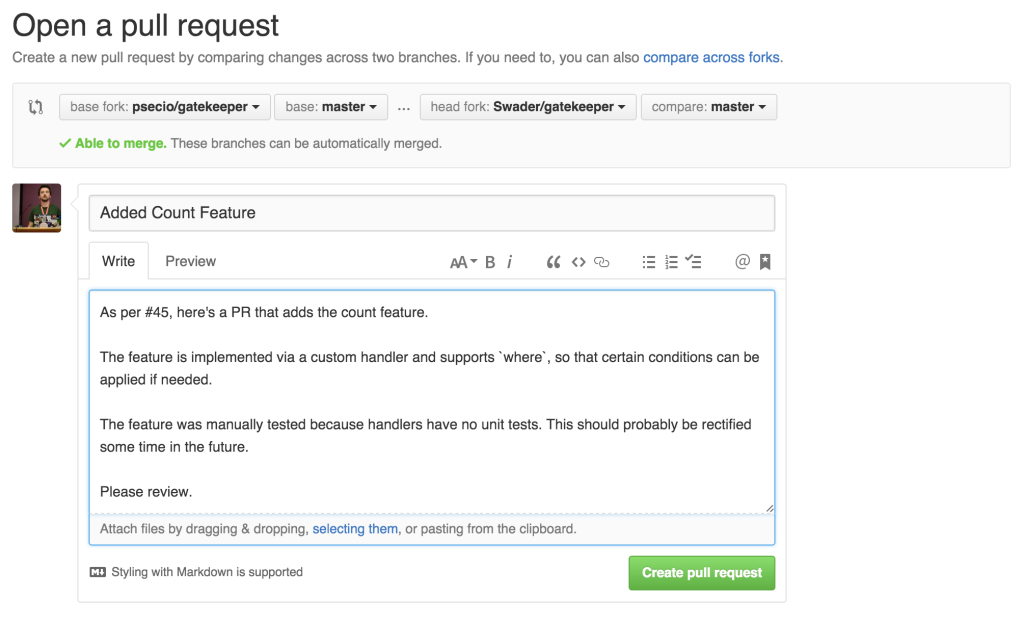
That’s it – pressing the “Create Pull Request” button wraps things up – all we can do now is wait for feedback from the project owner.
就是这样–按下“创建请求请求”按钮即可完成一切–我们现在所能做的就是等待项目所有者的反馈。
结论 (Conclusion)
This was a case study of contributing to a relatively popular PHP package. I hope it was useful as a learning material and a basic guide into giving back and the process of adding features into something you use.
这是为一个相对流行PHP软件包做出贡献的案例研究。 我希望它可以作为学习材料和对使用中的功能进行回馈和添加功能的基本指南。
It’s important to note that while this is a common process, as I mentioned before, it’s rather uncommon in that it had no unit tests. However, the original library doesn’t test the handlers either, and making a mocking framework for the handlers and the data they can interact with would be too out of scope for this particular post. Again, if you’re curious about that process and would like us to cover it in depth, please do let us know in the comments below that like button.
重要的是要注意,尽管这是一个常见的过程,正如我之前提到的,但由于它没有任何单元测试,因此相当不常见。 但是,原始库也不会测试处理程序,并且为处理程序及其可与之交互的数据创建模拟框架对于此特定文章来说也超出了范围。 同样,如果您对此过程感到好奇,并希望我们深入介绍它,请在“喜欢”按钮下面的评论中告知我们。
It should also be noted that while this was a very easy feature upgrade, sometimes things don’t go according to plan and the changes won’t work immediately in the new project where they’re being tested. In that case, changes can, for example, be made in the vendor folder of the test project until everything works, copied over to the development project, pushed online and then re-installed into the test project to make sure everything still works.
还应该注意的是,尽管这是一个非常容易的功能升级,但有时事情并没有按计划进行,并且所做的更改不会立即在正在测试中的新项目中起作用。 在这种情况下,例如,可以在测试项目的vendor文件夹中进行更改,直到一切正常,将其复制到开发项目,联机,然后重新安装到测试项目中以确保一切仍然正常。
Have your own contribution stories to share? Let us know – we’d love to explore them!
有您自己的贡献故事可以分享吗? 让我们知道–我们很乐意探索它们!
翻译自: https://www.sitepoint.com/contributing-to-open-source-gatekeeper-case-study/
angular 开源案例


 1万+
1万+

 被折叠的 条评论
为什么被折叠?
被折叠的 条评论
为什么被折叠?
 到【灌水乐园】发言


