


机器学习速成课程
Software is playing an ever bigger role in how companies compete across a broad range of industries. Large organizations are finding that their current approaches to managing software are limiting their ability to respond as quickly as business requires. Continuous delivery helps with this.
在公司如何跨广泛的行业竞争中,软件扮演着越来越重要的角色。 大型组织发现,他们当前的软件管理方法限制了他们根据业务需求做出快速响应的能力。 持续交付有助于此。

Understanding continuous delivery, a now already long-standing buzzword, is not a problem, but implementing it in the right way has been a challenge for quite a few of us, and one we’ll discuss in this post.
理解持续交付已经是一个长期存在的流行语,这不是问题,但是以正确的方式实施它对我们很多人来说都是一个挑战,我们将在本文中讨论。
入门 (Getting Started)
We can easily upload our files to a server using an open source desktop client like Filezilla. Those who have used this are aware that this process is cumbersome and irritating as it doesn’t let us automate the deployment process, and we always end up having to upload the whole project, even if we have modified only a part of it. Alternatively, we could do a git pull on the server and our application is instantly in its latest state, but this workflow doesn’t work in today’s world where we have to continuously deliver software to our end users bug-free.
我们可以使用Filezilla这样的开源桌面客户端轻松地将文件上传到服务器。 那些使用过此功能的人都知道,此过程很麻烦且令人烦恼,因为它不允许我们自动化部署过程,而且即使修改了一部分,我们仍然总是不得不上传整个项目。 另外,我们可以在服务器上进行git pull操作,并且我们的应用程序立即处于最新状态,但是在当今世界,我们必须不断地向最终用户交付无缺陷软件,因此该工作流无法正常工作。
In this article, we will cover the process of deploying a Laravel application on a Digital Ocean server through a continuous delivery pipeline using Semaphore. The source code for the application is present on Github.
在本文中,我们将介绍使用Semaphore通过连续交付管道在Digital Ocean服务器上部署Laravel应用程序的过程。 该应用程序的源代码位于Github上 。
在信号量上设置一个项目 (Set up a Project on Semaphore)
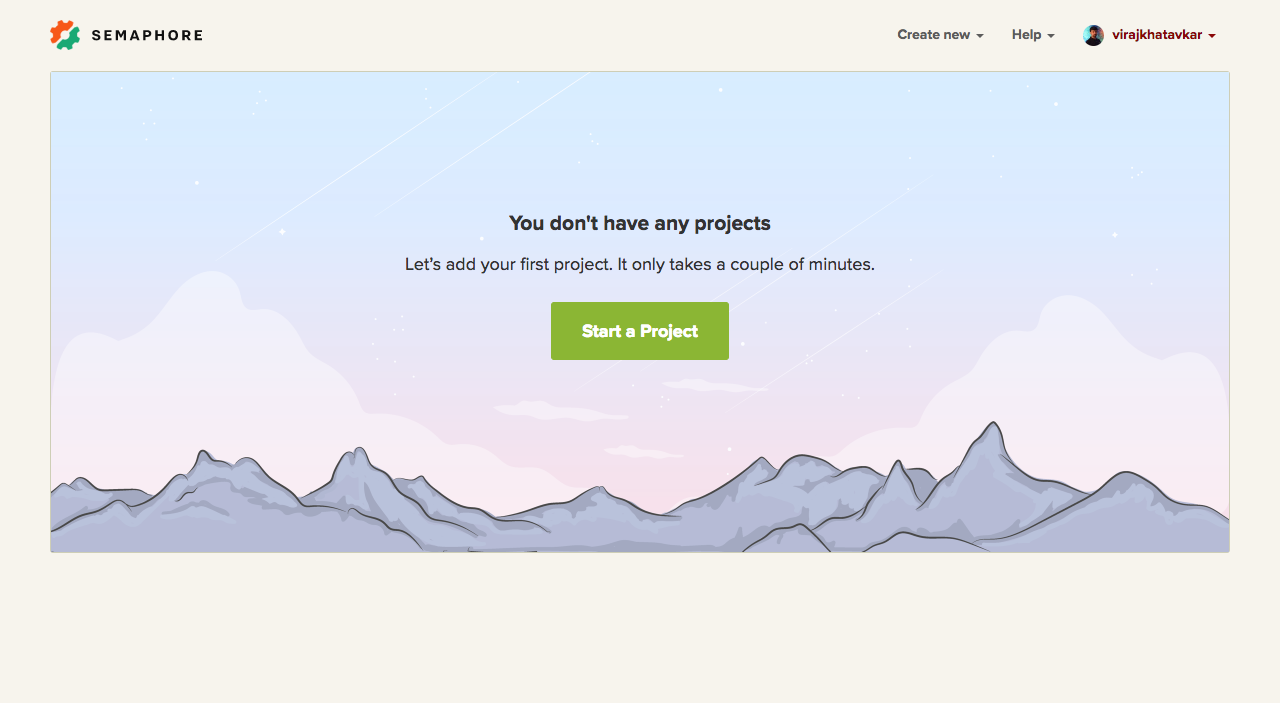
First, create a Semaphore account. After signing up, we see a page to create a new project.
首先,创建一个信号量帐户 。 注册后,我们会看到一个页面来创建一个新项目。
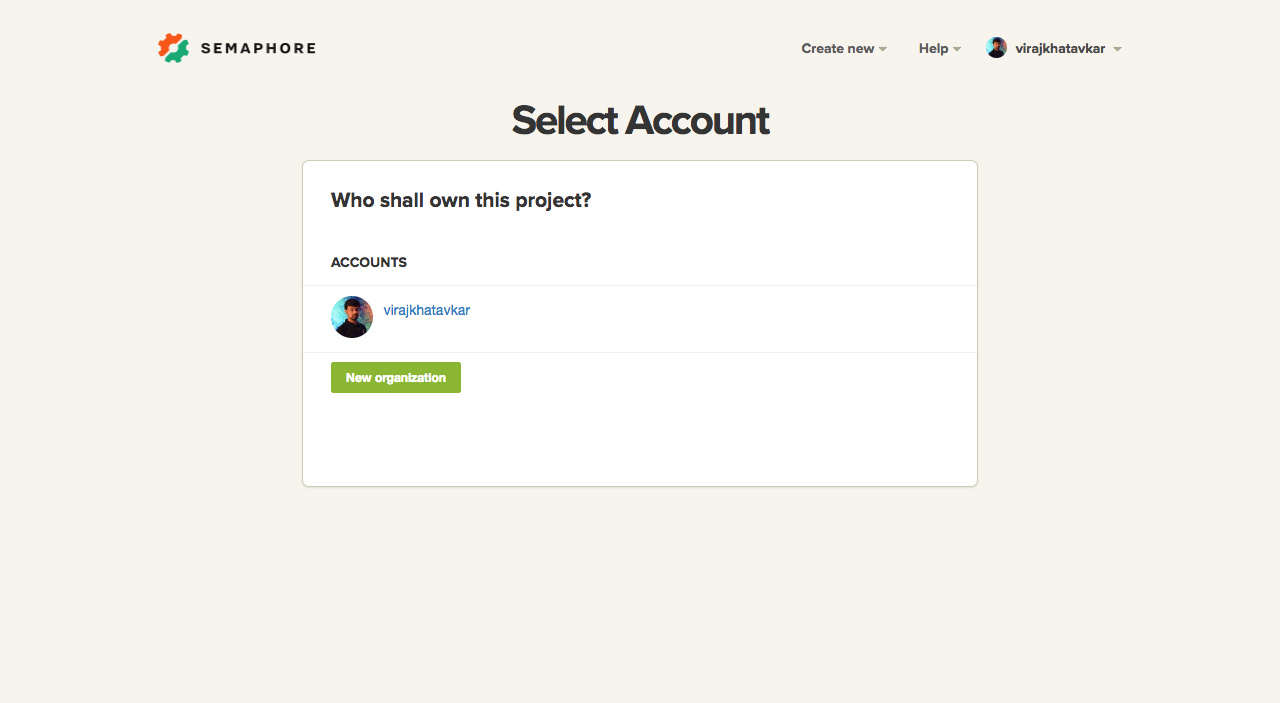
We then have to select the account where our repository is present. If you haven’t connected your source code repository provider with Semaphore, you can do so in this step. Semaphore natively supports Bitbucket and Github.
然后,我们必须选择存储库所在的帐户。 如果尚未将源代码存储库提供程序与Semaphore连接,则可以在此步骤中进行连接。 信号量本机支持Bitbucket和Github。
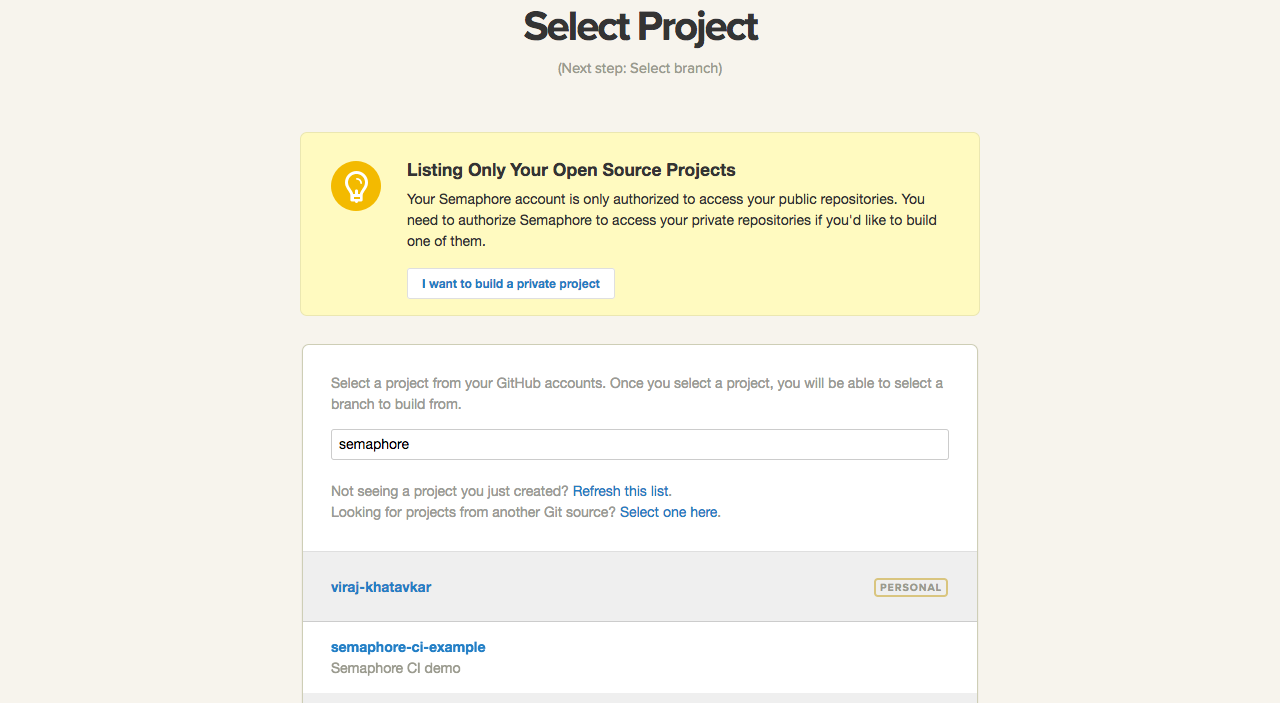
If you forked the aforementioned repo, you can select it in this step:
如果您分叉了上述仓库,则可以在此步骤中选择它:
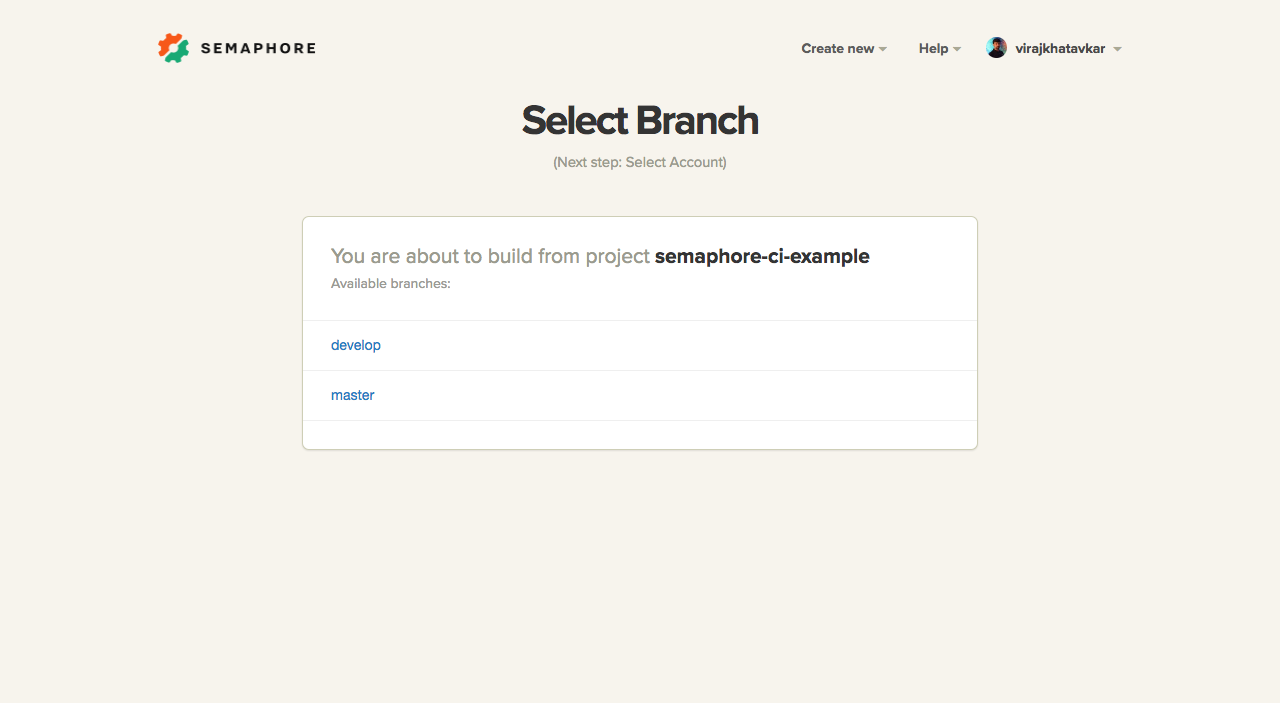
We will select the master branch for our case:
我们将为案例选择master分支:
Once we select a branch, Semaphore will start analyzing the project.
一旦选择了一个分支,Semaphore将开始分析项目。
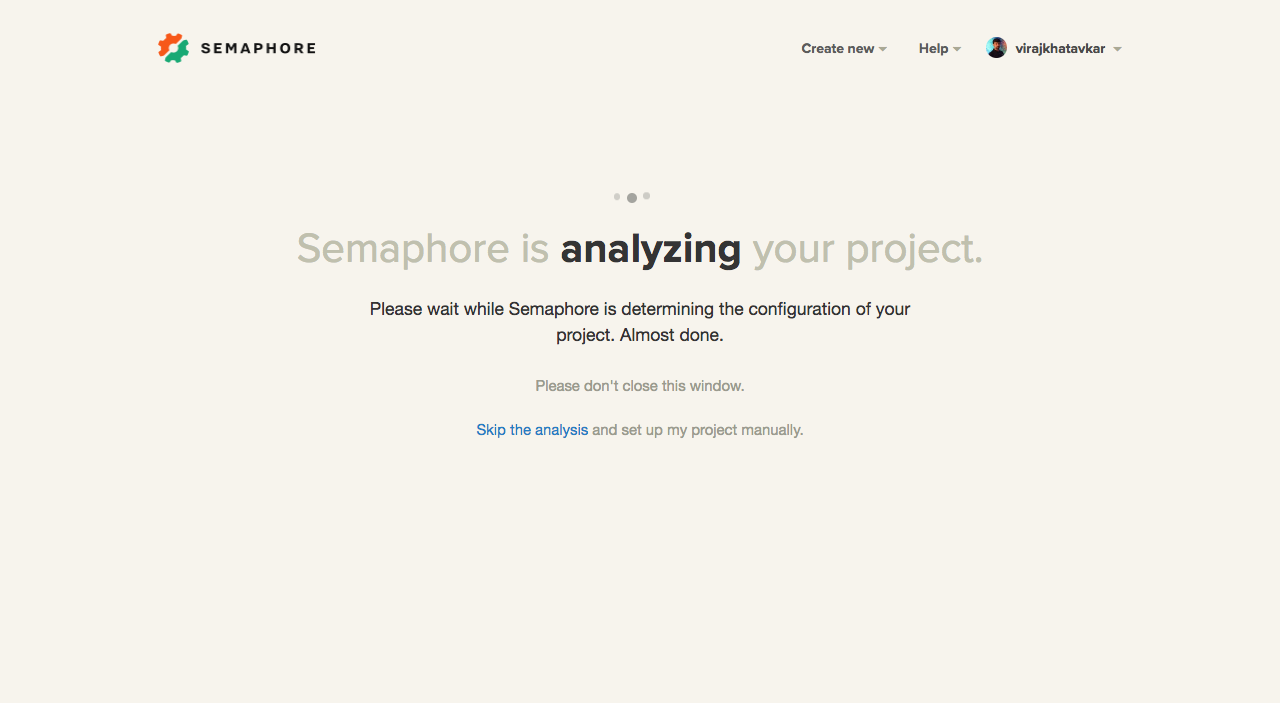
Semaphore will try to clone the repository on their server and fetch some meta information to get started. For our example project, the following meta information was identified:
Semaphore将尝试在其服务器上克隆存储库并获取一些元信息以开始使用。 对于我们的示例项目,确定了以下元信息:
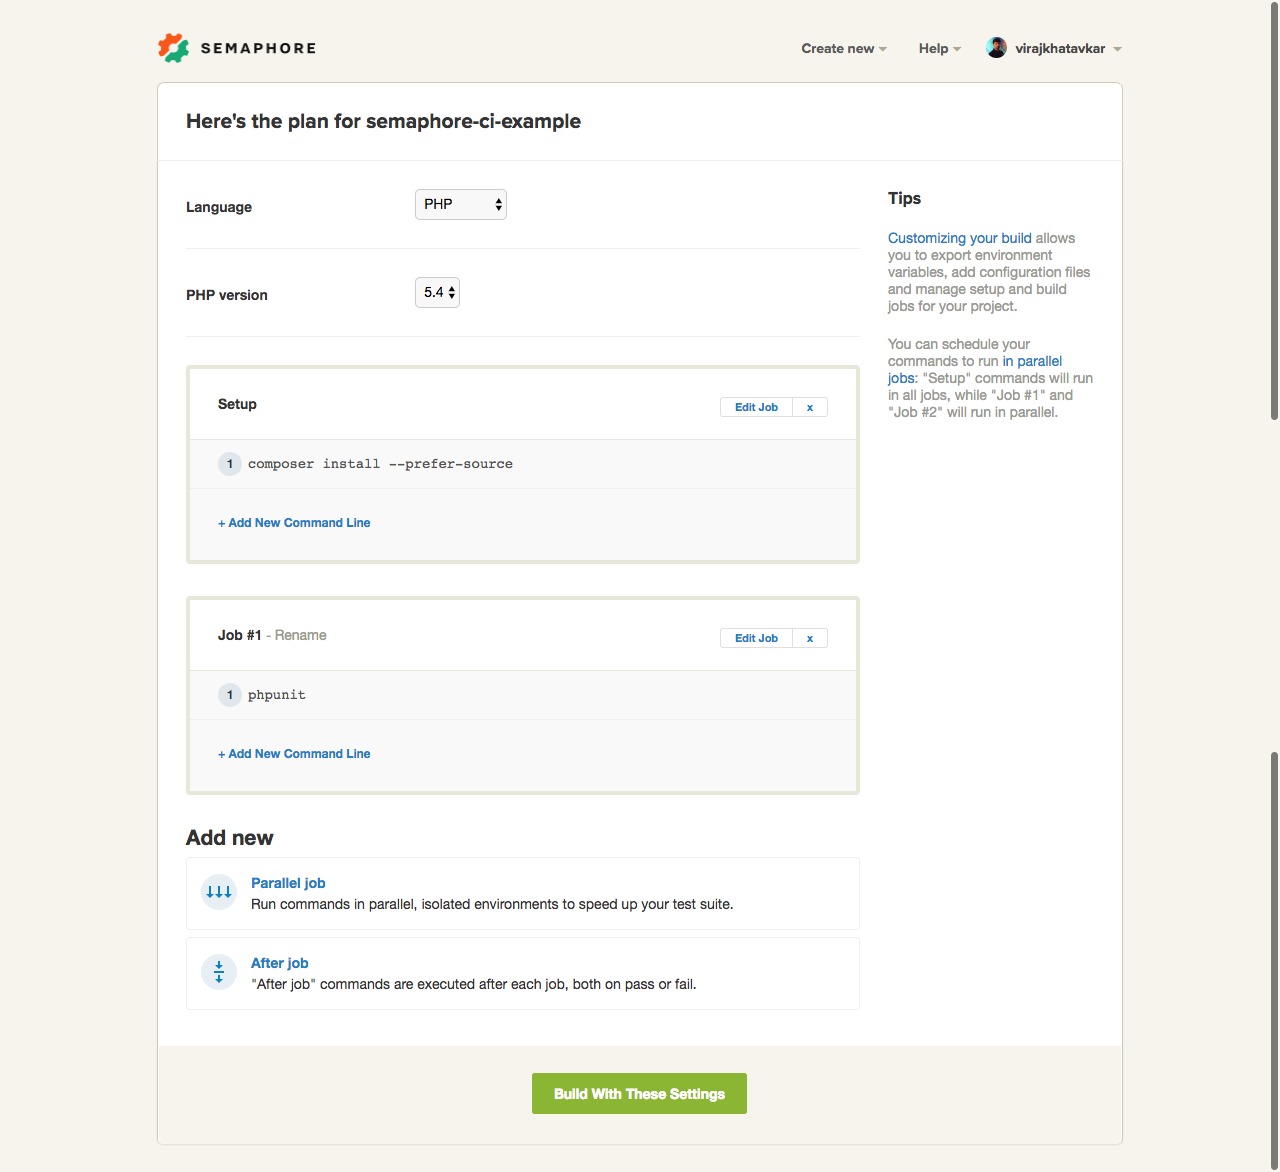
We will select PHP version 7 as our preferred PHP version and move on.
我们将选择PHP版本7作为我们首选PHP版本,然后继续。
配置构建 (Configure Builds)
We will modify the above settings to best suit our project. Please check the settings thoroughly before moving forward with a build to avoid errors.
我们将修改以上设置以最适合我们的项目。 在继续进行构建之前,请彻底检查设置,以免出错。
我们的第一个版本 (Our First Build)
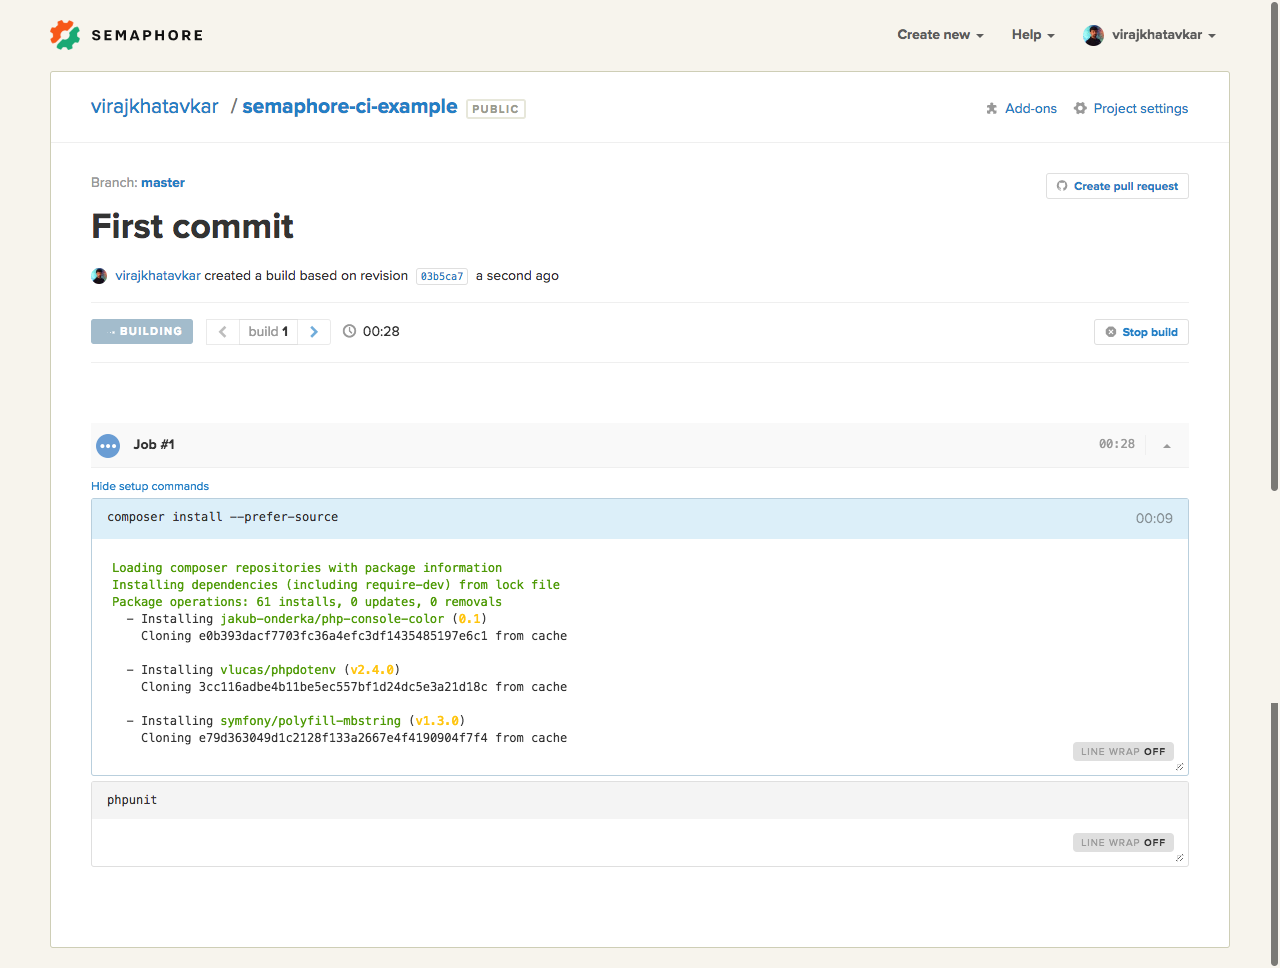
After configuring the appropriate settings, we can click Build in the above screen. The build’s progress will be printed on the screen.
配置适当的设置后,我们可以在上面的屏幕中单击Build 。 构建进度将打印在屏幕上。
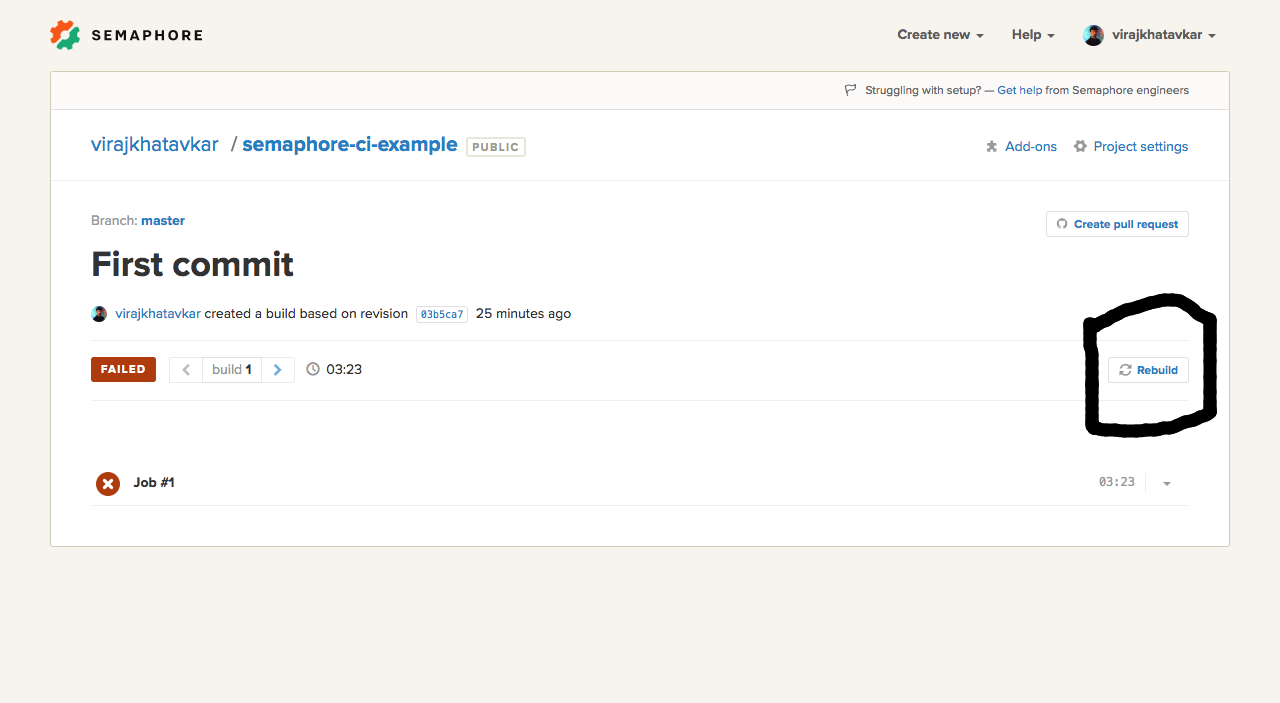
Oops! Our build fails due to failing tests. This indicates that there is a problem with our code.
糟糕! 我们的构建由于测试失败而失败。 这表明我们的代码有问题。
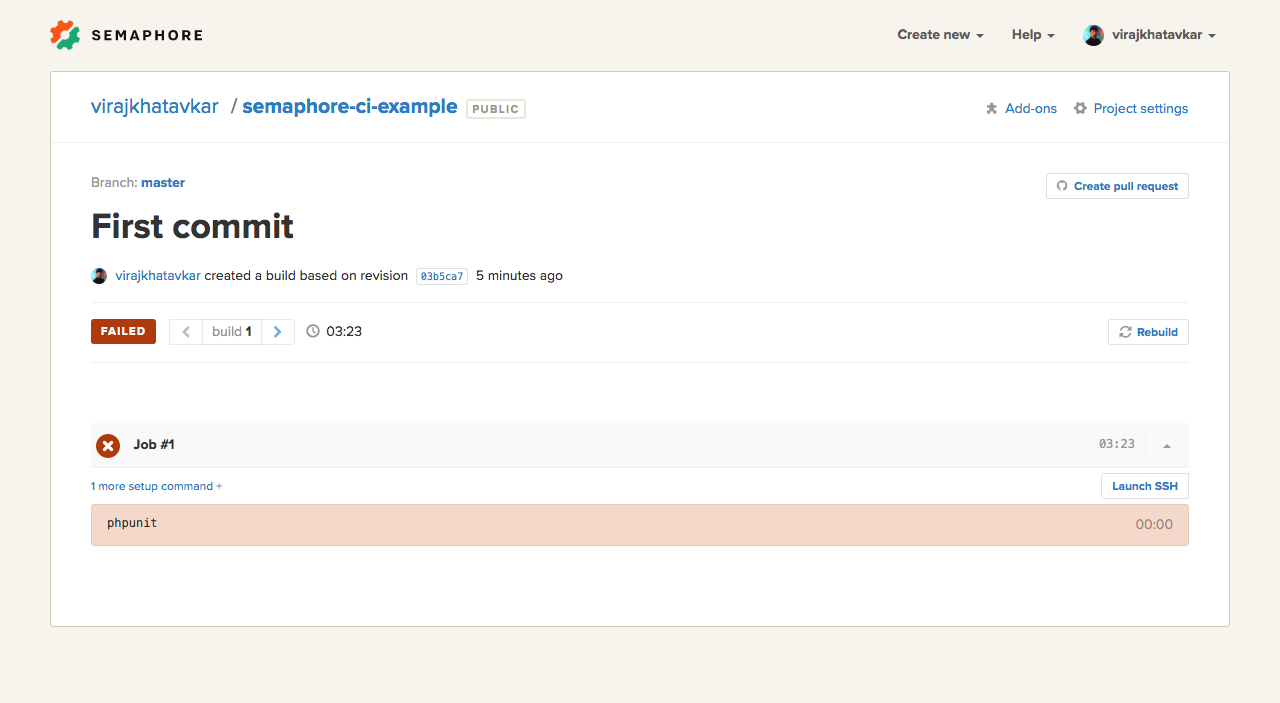
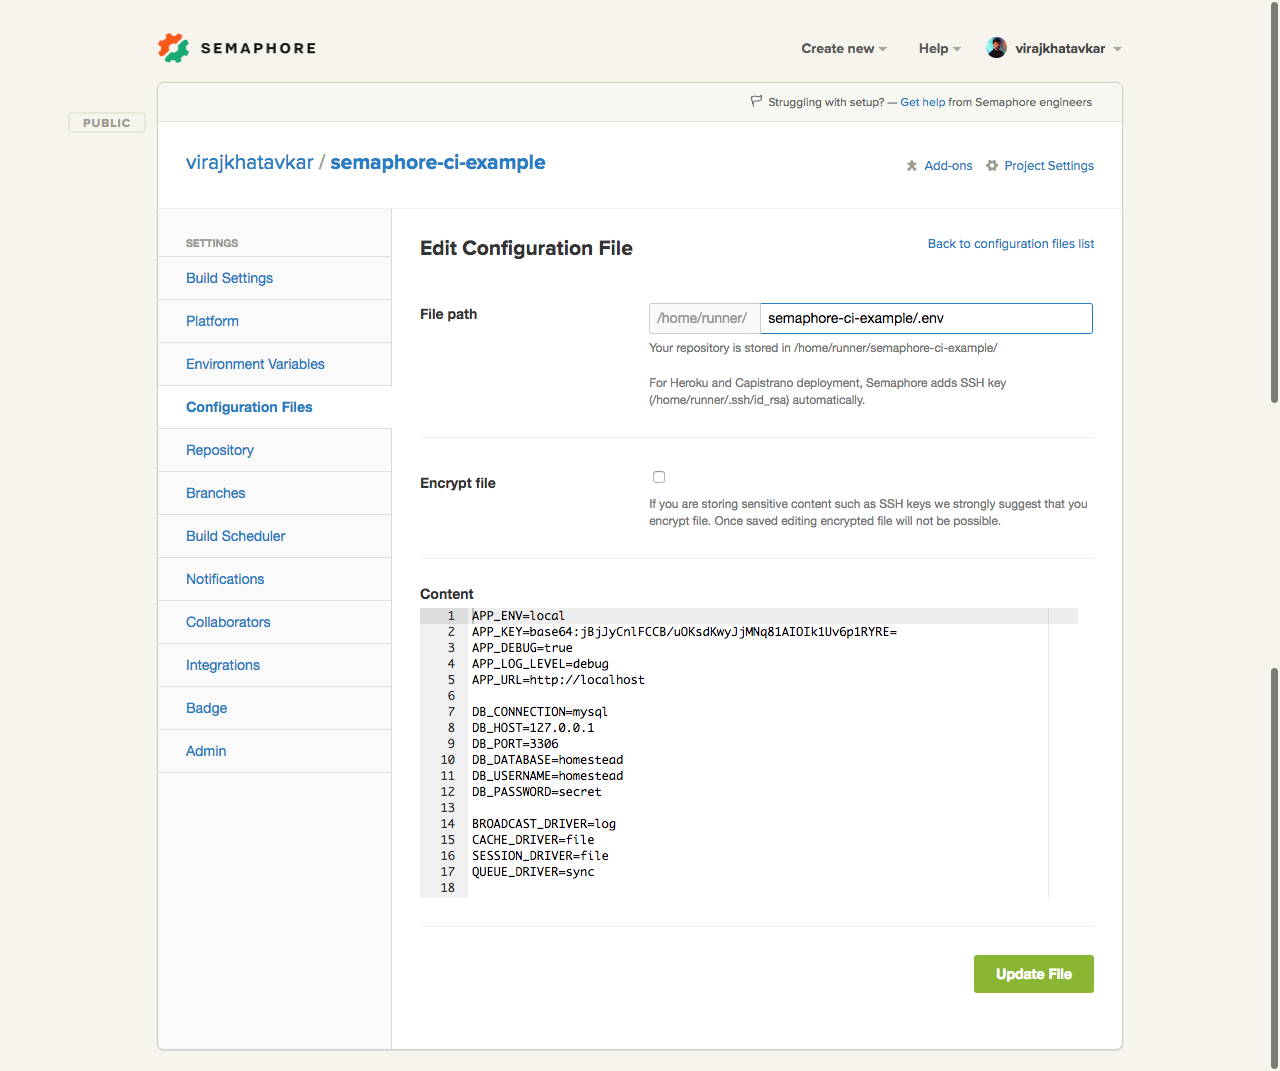
In this case, the problem lies in the configuration of our build. A typical Laravel application requires an environment file at its root with the necessary configuration parameters. We haven’t configured the file in our project yet. Let us create an environment file at the root of our project.
在这种情况下,问题出在我们构建的配置中。 典型的Laravel应用程序在其根目录需要一个环境文件,并带有必要的配置参数。 我们尚未在项目中配置文件。 让我们在项目的根目录下创建一个环境文件。
Go to Project Settings -> Configuration files and create the environment file for our project as follows:
转到项目设置->配置文件,并为我们的项目创建环境文件,如下所示:
We can either push to the master branch or rebuild from the Semaphore UI itself to start our build process again. For now, we will initiate a rebuild from the UI itself by clicking on the Rebuild button on the right-hand side of the last failed build.
我们可以推送到master分支,也可以从Semaphore UI本身进行重建以再次开始构建过程。 现在,我们将通过单击上次失败的构建右侧的Rebuild按钮从UI本身启动重建。
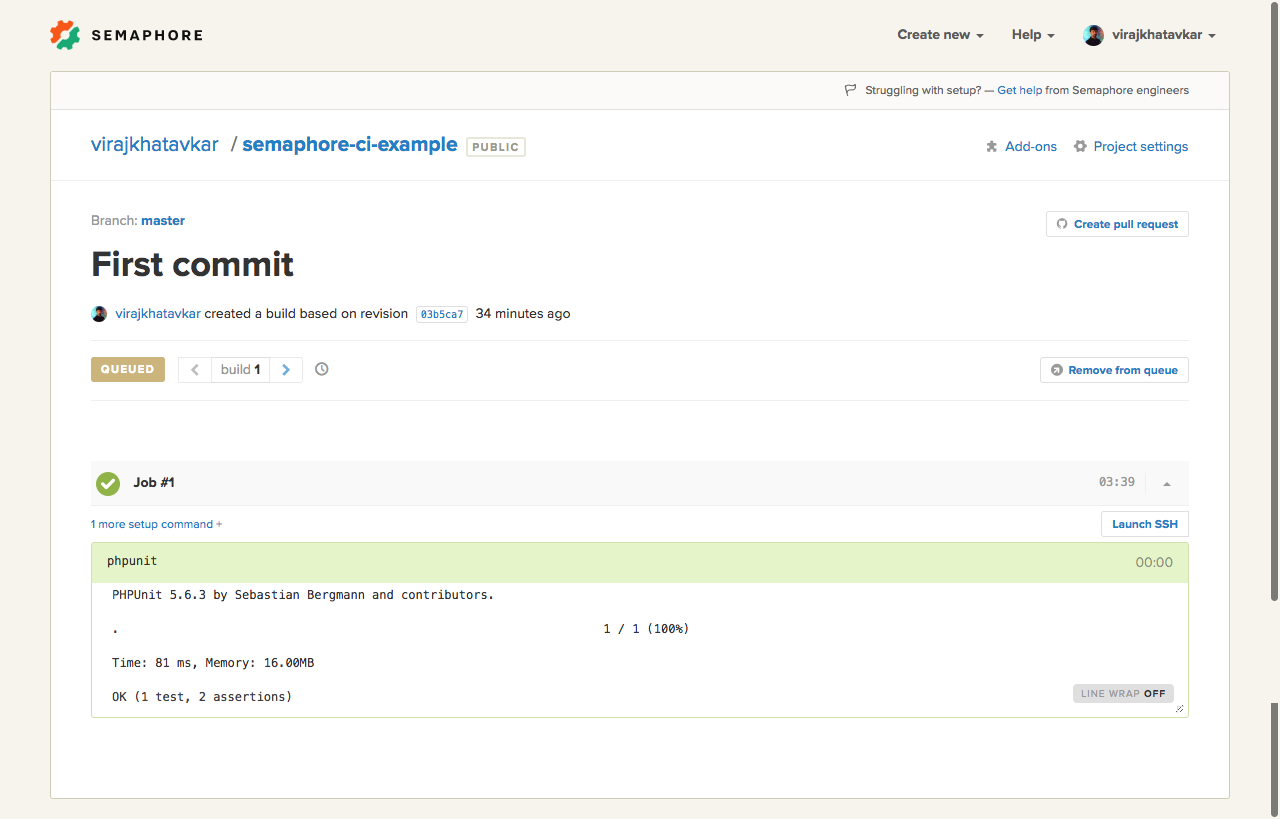
Semaphore will start rebuilding our repository by installing the necessary dependencies and running tests with PHPUnit. We can see that our build is passing sucessfully.
Semaphore将通过安装必要的依赖项并使用PHPUnit运行测试来开始重建我们的存储库。 我们可以看到我们的构建成功通过。
并行构建 (Parallelize Your Builds)
Massive test groups are a fact of any above-average sized project. The downside of having such impressive test coverage is that it takes a massive amount of time to run the build. In such scenarios, parallelization is essential.
大规模测试组是任何超出平均水平的项目的事实。 具有如此出色的测试覆盖范围的缺点是,运行构建需要大量时间。 在这种情况下,并行化至关重要。
The fundamentals behind parallelization are to divide our test suites into smaller groups which can be run in parallel. You can divide into groups on the basis of similar functional requirements or independent services or any other logical parameter that best suits your project. I would prefer to group these into similar functional requirements.
并行化的基本原理是将我们的测试套件分成较小的组,这些组可以并行运行。 您可以根据相似的功能要求或独立的服务或最适合您的项目的任何其他逻辑参数,将其分为几类。 我希望将它们归类为类似的功能需求。
In our application, I have written two simple test classes for the Login Page and the Register Page. Let us run parallel test builds in Semaphore. Below is the code for these two tests:
在我们的应用程序中,我为Login Page和Register Page编写了两个简单的测试类。 让我们在Semaphore中运行并行测试构建。 以下是这两个测试的代码:
#LoginTest.php

class LoginTest extends TestCase
{
    /**
     * A basic functional test example.
     *
     * @return void
     */
    public function testLoginPage()
    {
        $this->visit('/login')
             ->see('Login Now');
    }
}
//RegisterTest.php
class RegisterTest extends TestCase
{
/**
* A basic functional test example.
*
* @return void
*/
public function testRegisterPage()
{
$this->visit('/register')
->see('Register Now');
}
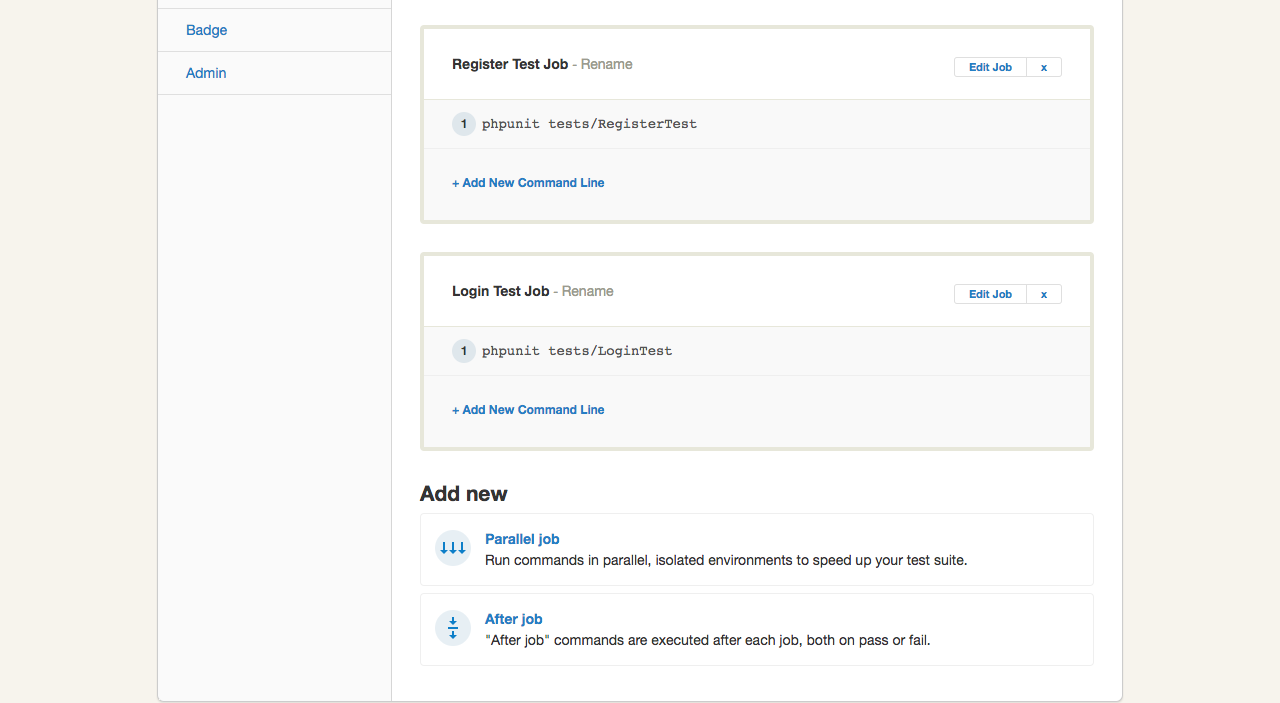
}Now we can configure a parallel job in our build settings to run these two tests separately. You can learn more about parallel test configuration in Semaphore’s documentation.
现在,我们可以在构建设置中配置并行作业,以分别运行这两个测试。 您可以在Semaphore的文档中了解有关并行测试配置的更多信息。
Let’s push to the master branch to trigger the build process.
让我们进入master branch以触发构建过程。
git push origin masterOnce we push to master, Semaphore will automatically detect the change and trigger our build with parallel jobs.
一旦我们掌握了一切,Semaphore将自动检测到更改并通过并行作业触发我们的构建。
Our tests are executed in parallel as shown in the screenshot above.
我们的测试是并行执行的,如上面的屏幕快照所示。
持续部署 (Continuous Deployment)
Finally, let’s set up the deployment process for our project. We will deploy our repository to a Digital Ocean server (make sure you set up a Droplet with the server pointed to home/USER/default before proceeding – good tutorial here). Let’s go through each of the steps:
最后,让我们为项目设置部署过程。 我们会将我们的存储库部署到Digital Ocean服务器(在继续之前,请确保您设置的Droplet的服务器指向home/USER/default在这里很好的教程)。 让我们完成每个步骤:
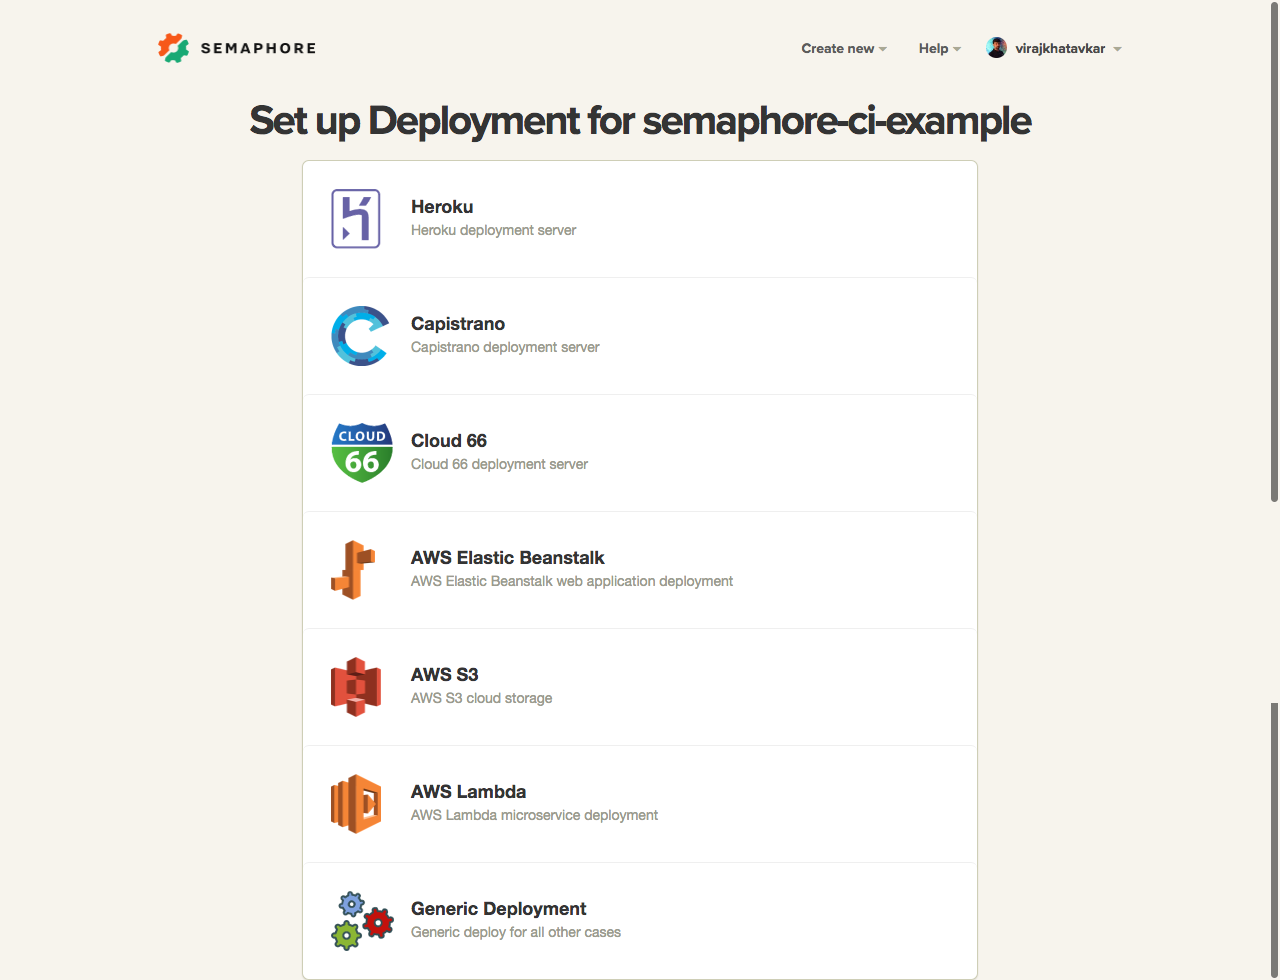
We will select a Generic Deployment option as we will run our own custom commands to deploy.
我们将选择“ 通用部署”选项,因为我们将运行自己的自定义命令来进行部署。
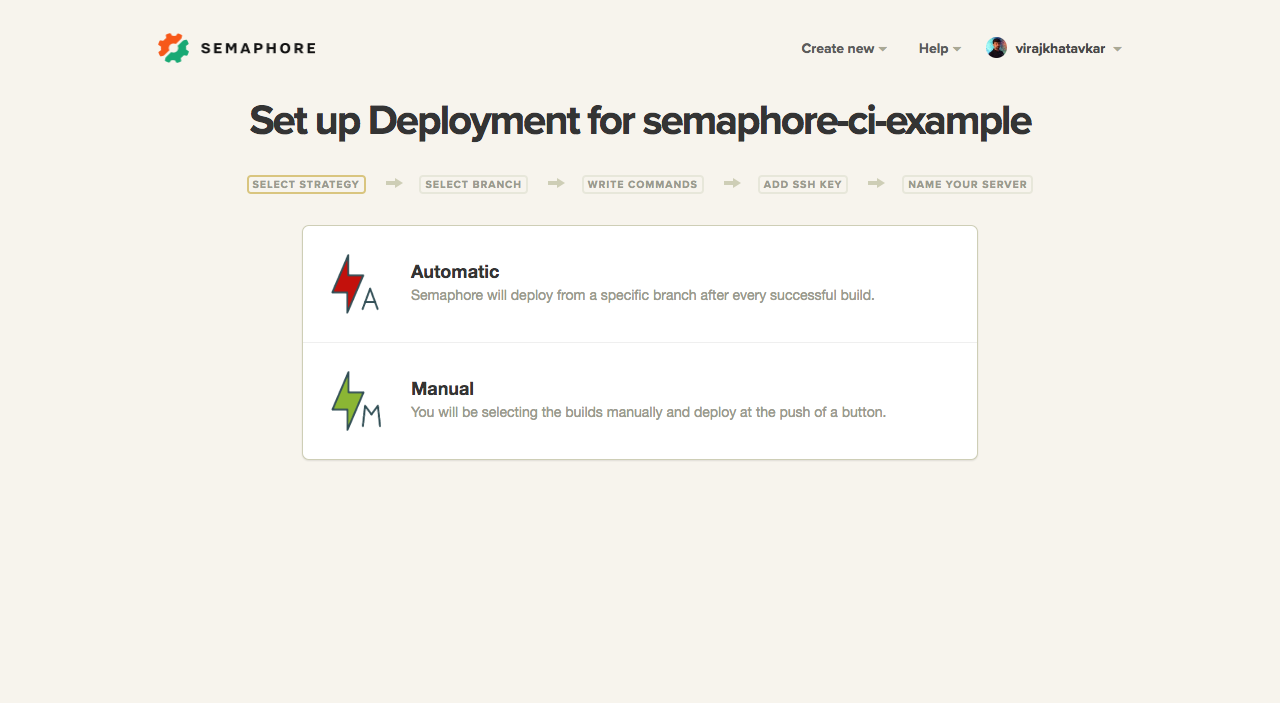
We can select either “Automatic” or “Manual” for deployment strategy. We will select “Automatic Deployment”. This will trigger an automatic deployment whenever we push to our master branch and the build passes.
我们可以选择“自动”或“手动”作为部署策略。 我们将选择“自动部署”。 每当我们推送到master分支并通过构建时,这将触发自动部署。
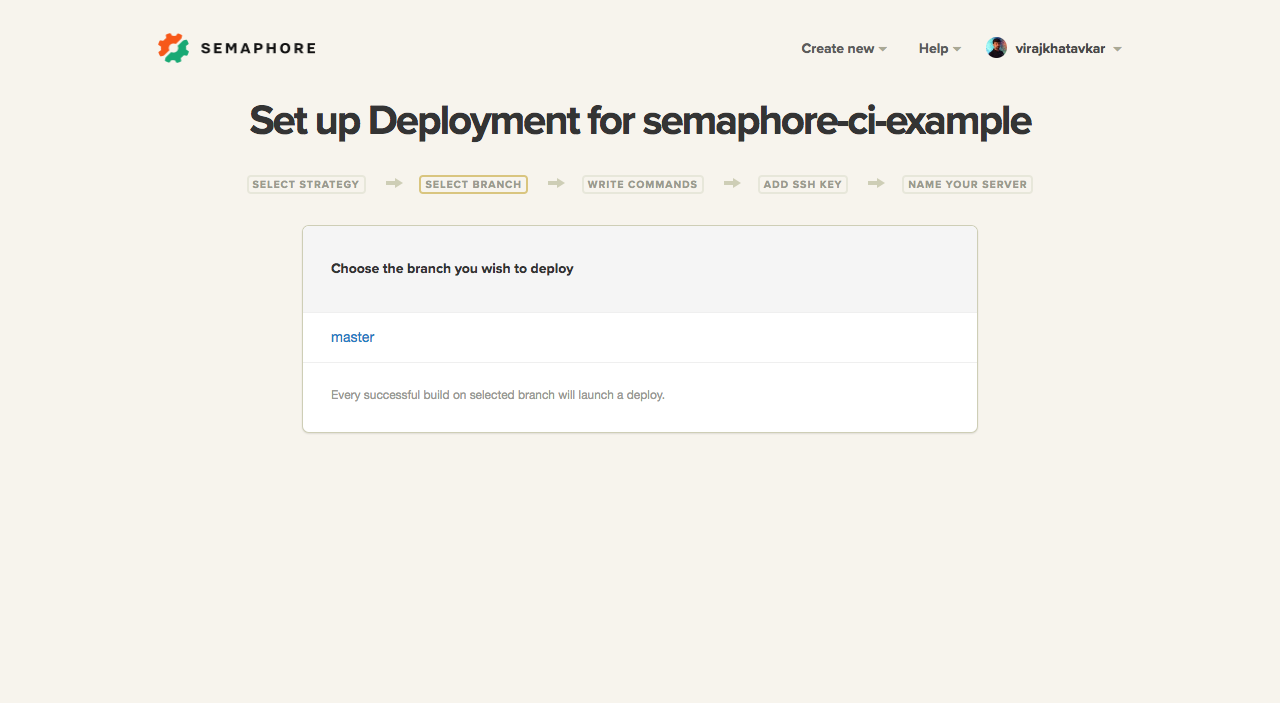
Here, we need to select the branch we wish to deploy. We will select the master branch.
在这里,我们需要选择要部署的分支。 我们将选择master分支。
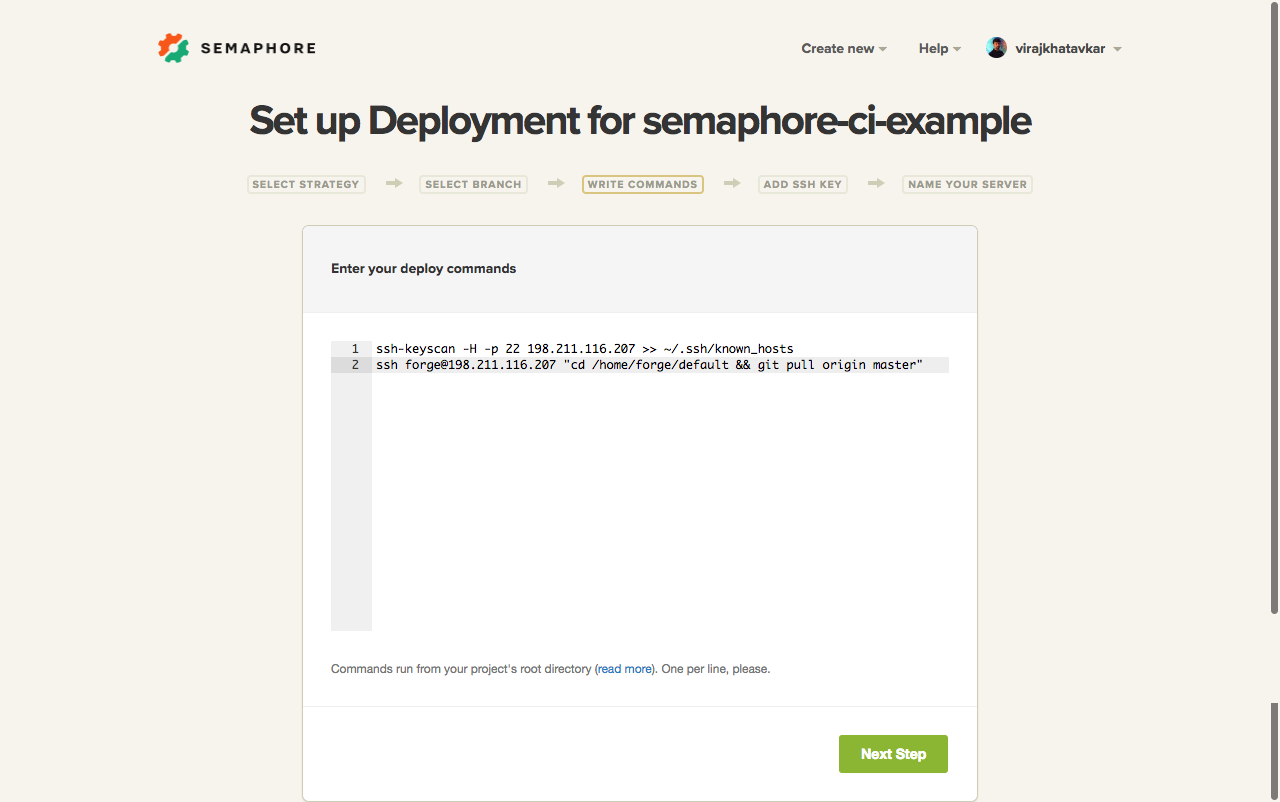
We will enter our custom deployment commands that we want Semaphore to execute for us. The first command gathers the public SSH host keys of our server(s) to avoid an authorization prompt during deployment.
我们将输入我们希望信号量为我们执行的自定义部署命令。 第一个命令收集我们服务器的公共SSH主机密钥,以避免在部署过程中出现授权提示。
Paste the private key of your deployment user in the text area given below. This will allow Semaphore to access our Digital Ocean server and execute the deployment commands.
将部署用户的私钥粘贴在下面的文本区域中。 这将使Semaphore可以访问我们的Digital Ocean服务器并执行部署命令。

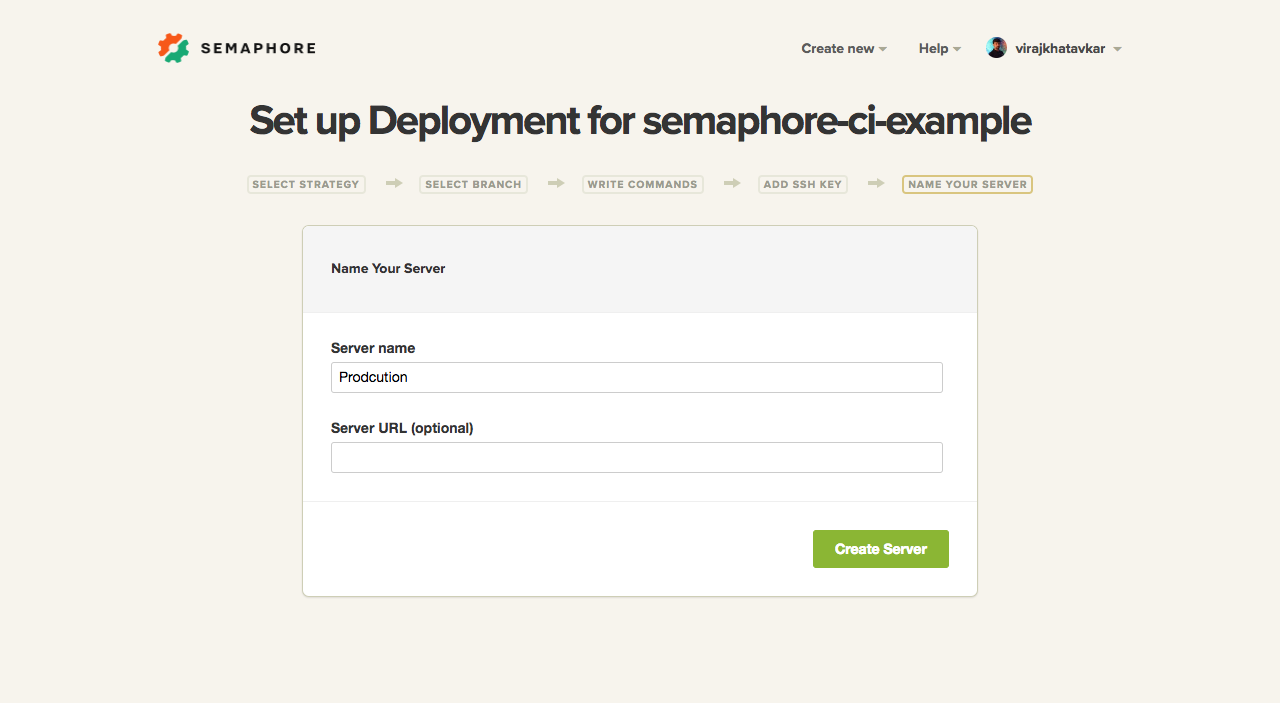
Enter your desired server name and continue:
输入所需的服务器名称,然后继续:
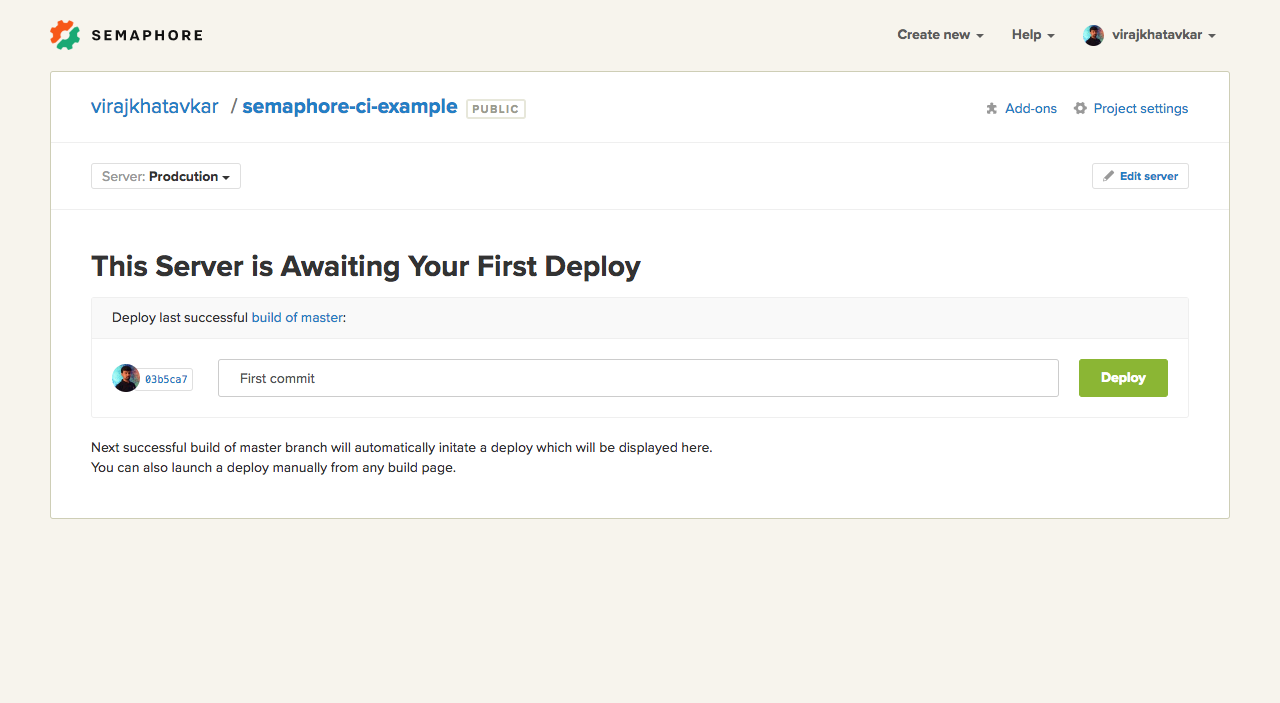
We have set up our deployment server successfully. Let’s initiate a manual deployment once to make sure that everything runs smoothly.
我们已经成功设置了部署服务器。 让我们开始一次手动部署,以确保一切顺利进行。
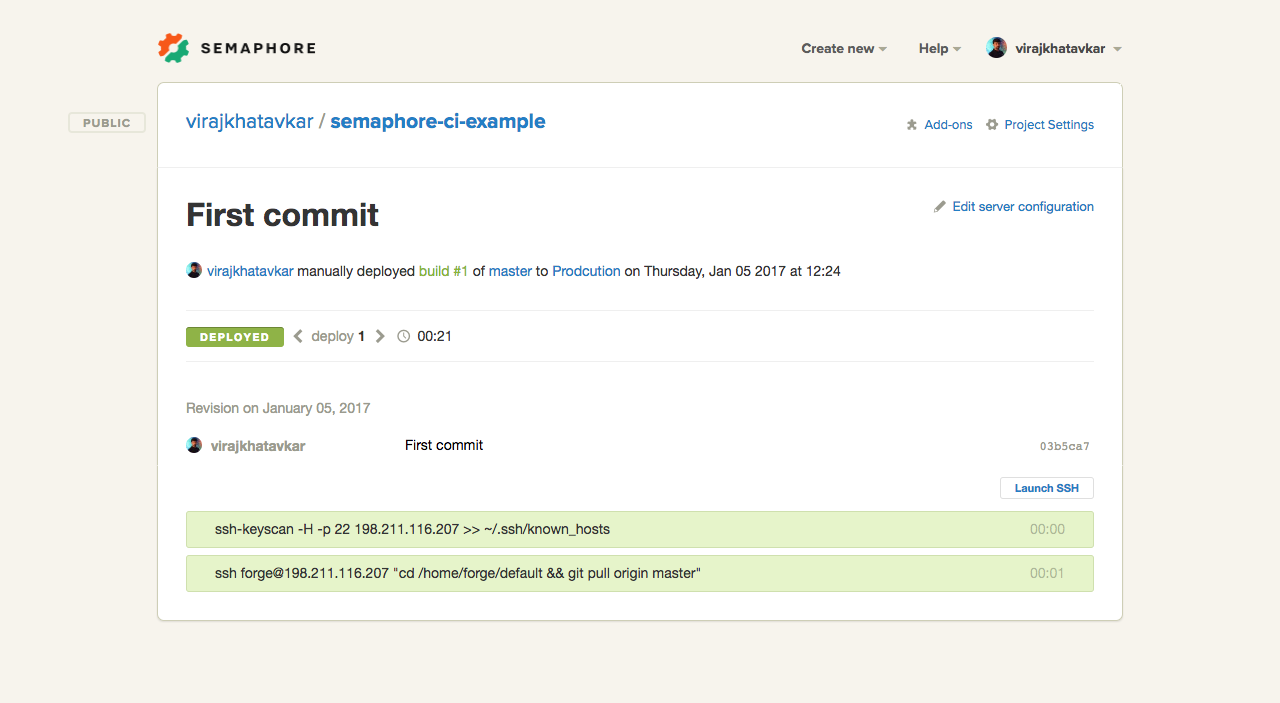
Congratulations! The first deployment has been completed without any errors.
恭喜你! 首次部署已完成,没有任何错误。
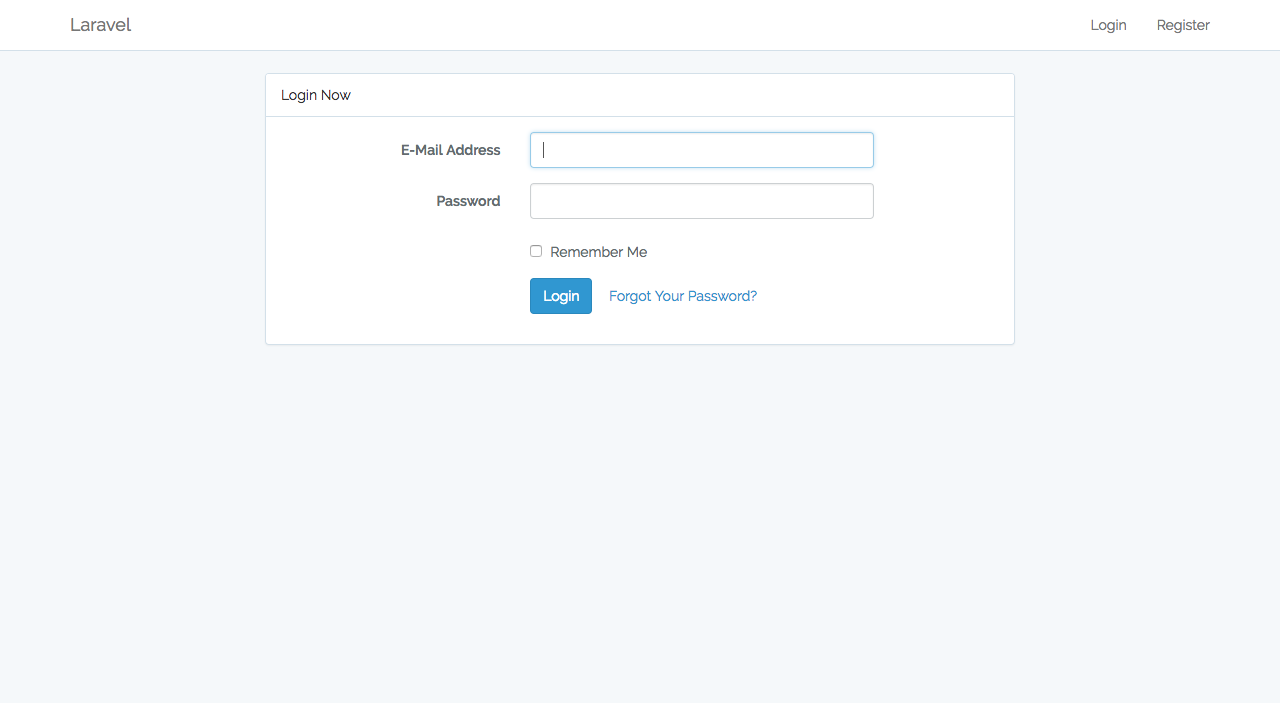
If we go to the actual website, we can see that the application has been deployed:
如果我们转到实际的网站,我们可以看到该应用程序已经部署:
Note: If your build fails, then any deployment configured to be run on your servers will not be triggered. Deployment is triggered only after a successful build.
注意 :如果构建失败,则不会触发配置为在服务器上运行的任何部署。 仅在成功构建后才触发部署。
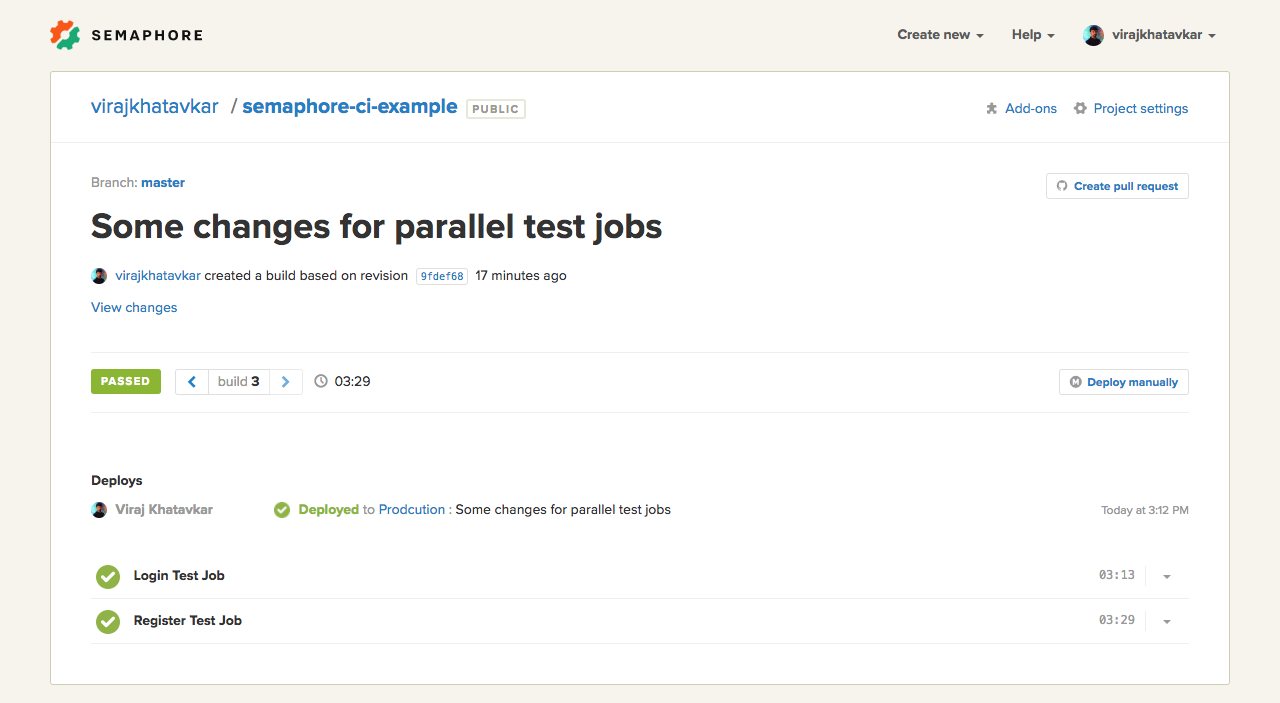
Henceforth, whenever you push to your master branch, Semaphore will build your project, run your tests and deploy automatically. Let’s do a test push and see the process.
从此以后,每当您推送到master分支时,Semaphore都会构建您的项目,运行测试并自动部署。 让我们进行一次测试推送,看看该过程。
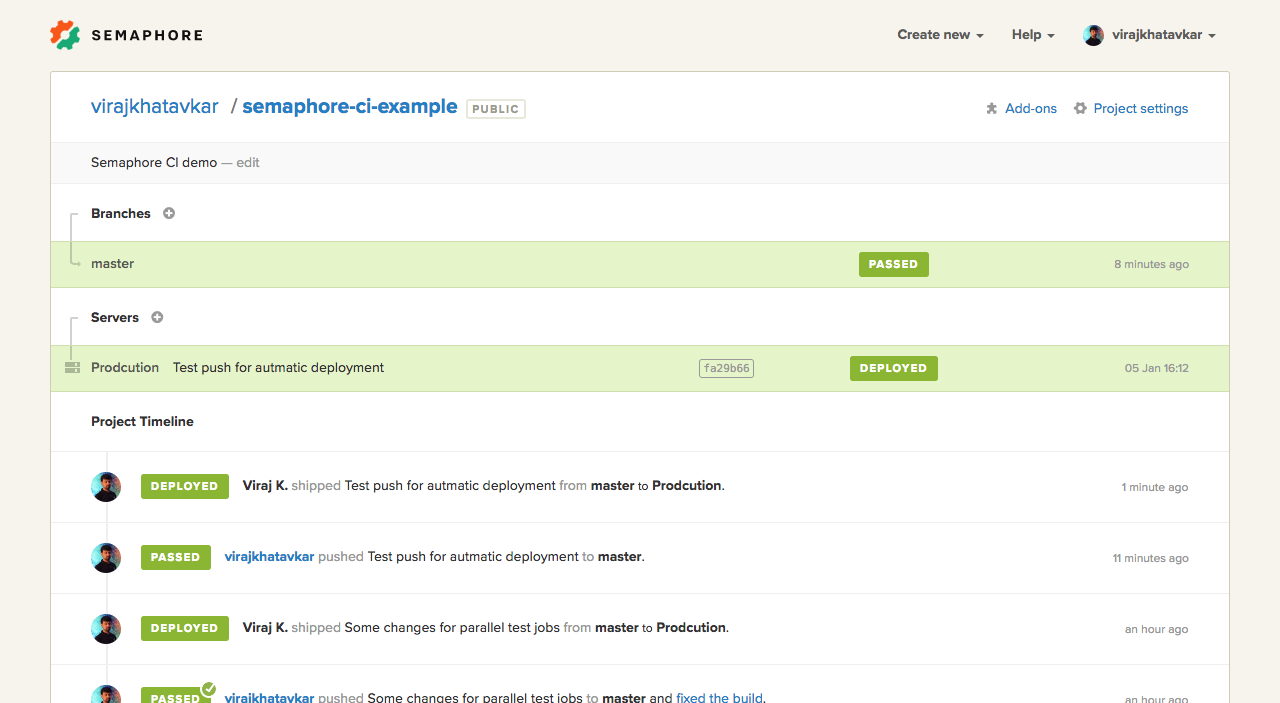
Our project was built successfully and deployed to our server.
我们的项目已成功构建并部署到我们的服务器。
开源替代品 (Open Source Alternatives)
Semaphore is a paid service, but gives a good bang for your buck. If paying for CD isn’t in your budget right now, Gitlab is one open source alternative to the Semaphore platform. The functionality is more or less identical, with the downside being that you have to set everything up manually, and performance can be a serious issue.
Semaphore是一项付费服务,但价格不菲。 如果CD的付款现在不在您的预算之内,则Gitlab是Semaphore平台的一种开源替代方案。 功能或多或少是相同的,缺点是您必须手动设置所有内容,而性能可能是一个严重的问题。
结论 (Conclusion)
We now have a PHP application deployed to a Digital Ocean server with a continuous delivery pipeline in place. Whenever you push to a specific branch or someone sends a pull request, the build will be triggered automatically. Semaphore will handle all the hassles for you and let you know the status of your build.
现在,我们已经将PHP应用程序部署到Digital Ocean服务器,并具有连续交付管道。 每当您推送到特定分支或有人发送拉取请求时,构建都会自动触发。 Semaphore将为您处理所有麻烦,并让您知道构建的状态。
Note that this is just a simple crash course into the above concepts – building assets like JS and CSS, and zero-downtime deployment is also possible with both Semaphore and custom solutions, and something we’ll cover in a future post. In the meanwhile, you can look into our past tutorial about Deployer – a tool that can assist the above stack in achieving that.
请注意,这只是上述概念的简单崩溃过程–构建诸如JS和CSS之类的资产,并且通过Semaphore和自定义解决方案也都可以实现零停机时间部署,我们将在以后的文章中介绍。 同时,您可以查看我们过去的有关Deployer的教程,该工具可以帮助上述堆栈实现该目标。
How do you deploy your PHP projects? Have you used Semaphore? How do you feel about it? Using any other free or paid alternatives? Let us know!
您如何部署PHP项目? 您是否使用过信号量? 你怎么看这件事? 使用其他免费或付费替代方案? 让我们知道!
翻译自: https://www.sitepoint.com/crash-course-continuous-deployment-semaphore-ci/
机器学习速成课程


 被折叠的 条评论
为什么被折叠?
被折叠的 条评论
为什么被折叠?
 到【灌水乐园】发言


