


wordpress表格筛选
The default login, registration and password reset forms included in WordPress (outside the website developed with it) often do not conform to the design and branding of the site.
WordPress中包含的默认登录,注册和密码重置表格(使用它开发的网站外部)通常不符合该网站的设计和品牌。
In the past when WordPress was a blogging engine, this was fine. WordPress has since evolved into a content management system, leading to an ever increasing demand for custom login, registration and password reset forms.
过去,当WordPress是博客引擎时,这很好。 自此,WordPress已发展成为内容管理系统,导致对自定义登录,注册和密码重置表格的需求不断增长。
In this tutorial, we’ll learn how to build a WordPress multi-step registration form using a plugin that I’ve developed called ProfilePress.
在本教程中,我们将学习如何使用我开发的名为ProfilePress的插件构建WordPress多步骤注册表单。
It is worth noting that we’ve previously covered how to build custom login, registration and password reset forms with ProfilePress and a tabbed login and signup widget.
值得注意的是,我们之前已经介绍了如何使用ProfilePress和选项卡式登录和注册窗口小部件构建自定义登录,注册和密码重置表单 。
Below is the design of the multi-step registration form which we will have built by the end of this tutorial.
下面是本教程末尾将要构建的多步骤注册表单的设计。
See the Pen Multi Step Registration Form with Progress Bar using jQuery and CSS3 by Agbonghama Collins (@collizo4sky) on CodePen.
见笔使用jQuery和CSS3进度条多步登记表由Agbonghama柯林斯( @ collizo4sky )上CodePen 。
If you want to jump ahead of this tutorial, here is a live demo of the form in a WordPress powered site.
如果您想跳到本教程的前面,这里是WordPress支持站点中表单的实时演示 。
Without further ado, let’s jump straight into building the multi-step registration form.
事不宜迟,让我们直接进入构建多步骤注册表单。
深入探讨编码 (Diving into Coding)
In the demo above, the SOCIAL PROFILES section contains a Facebook, Twitter and Google+ field, which aren’t present in the default WordPress user profile. As a result, we need to create contact methods for the above social profile fields in order for WordPress to save the data entered into the fields against the profile of registered users.
在上面的演示中, 社会PROFILES部分包含一个Facebook,Twitter和Google+的字段,该字段不存在于WordPress默认用户简档。 因此,我们需要为上述社交个人资料字段创建联系方式,以使WordPress将注册字段中输入的数据保存为注册用户的个人资料。
使用“ functions.php”文件添加联系人字段 (Adding Contact Fields Using the ‘functions.php’ File)
There are a number of online tutorials that describe how to add contact information fields to a WordPress user profile, including:
有许多在线教程描述了如何将联系信息字段添加到WordPress用户配置文件,包括:
These tutorials explain that if the following code is pasted into your theme’s functions.php file, it will add a Facebook, Twitter and Google+ field to the contact information section in a WordPress user profile.
这些教程说明,如果将以下代码粘贴到主题的functions.php文件中,它将在WordPress用户配置文件的联系信息部分中添加Facebook,Twitter和Google+字段。
function add_contact_methods( $user_contact ){
    /* Add user contact methods */
    $user_contact['facebook'] = __('Facebook Username');
    $user_contact['twitter'] = __('Twitter Username');
    $user_contact['google'] = __('Google+ Profile');

    return $user_contact;
}

add_filter('user_contactmethods', 'add_contact_methods');
使用ProfilePress插件添加联系人字段 (Adding Contact Fields Using the ProfilePress Plugin)
Using the plugin, contact information fields can be added by filling a key/label form (see image below). This is located in the Contact information settings page, where key is a unique name used internally by WordPress to recognize the field and label the field description displayed to users.
使用插件 ,可以通过填写key/label表格来添加联系信息字段(请参见下图)。 这位于“ 联系信息设置”页面中,其中key是WordPress内部用于识别字段并label显示给用户的字段描述的唯一名称。
For more information, take a look at Adding contact info to WordPress profile with ProfilePress plugin.
有关更多信息,请参阅使用ProfilePress插件将联系信息添加到WordPress配置文件中 。
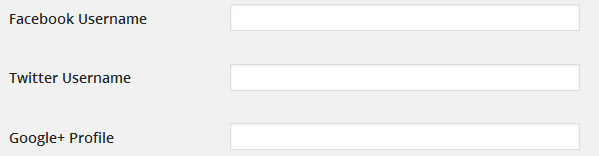
Navigate to your WordPress profile to see the Facebook, Twitter and Google+ field displayed.
导航到您的WordPress个人资料以查看显示的Facebook,Twitter和Google+字段。
Having added the Facebook, Twitter and Google+ contact info fields to your WordPress profile, you then need to build the multi-step form via the melange feature.
将Facebook,Twitter和Google+联系人信息字段添加到WordPress个人资料后,您需要通过混合功能构建多步骤表单。
建立多步骤表格 (Building the Multi-Step Form)
I’m not going to walk us through the process of how the multi-step form is built with HTML, CSS and JavaScript. Feel free to poke around the source code to learn about that. Rather, we’ll learn how to convert the form into an actual, functioning WordPress registration form.
我不会逐步介绍如何使用HTML,CSS和JavaScript构建多步骤表单。 随意浏览源代码以了解相关内容。 相反,我们将学习如何将表单转换为实际的,功能正常的WordPress注册表单。
The melange feature of the plugin is capable of converting just about any login, registration password reset and can even edit the profile form template so that a working WordPress equivalent is available (although, this is only available in the premium version of the plugin).
插件的混杂功能能够转换几乎所有登录信息,重置注册密码,甚至可以编辑配置文件表单模板,从而可以使用等效的WordPress(尽管仅在插件的高级版本中可用)。
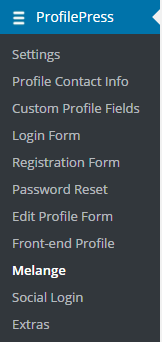
With the plugin installed, click the Melange menu as shown in the image below and then the Add New button to initiate the building process.
安装插件后,单击“ Melange菜单”,如下图所示,然后单击“ Add New按钮”以启动构建过程。
A form will be presented to you. Fill the fields as follows.
表格将呈现给您。 如下填写字段。
Enter a name for the form in the Name field. Let’s call it Stride Multistep Signup Form.
在Name字段中输入表单的Name 。 我们称其为“ Stride Multistep Signup Form 。
Copy the HTML code of the multi-step form to the Melange Design TinyMCE editor and then replace the input fields with their respective shortcode equivalents like so:
将多步骤表单HTML代码复制到Melange Design TinyMCE编辑器,然后将输入字段替换为其相应的短代码等效项,如下所示:
<form method="post" novalidate>
    <div id="msform">
        <!-- progressbar -->
        <ul id="progressbar">
            <li class="active">Account Setup</li>
            <li>Social Profiles</li>
            <li>Personal Details</li>
        </ul>
        <!-- fieldsets -->
        <fieldset>
            <h2 class="fs-title">Create your account</h2>

            <h3 class="fs-subtitle">This is step 1</h3>
            [reg-username placeholder="Username"]
            [reg-email placeholder="Email"]
            [reg-password placeholder="Password"]
            <input type="button" name="next" class="next action-button" value="Next"/>
        </fieldset>
        <fieldset>
            <h2 class="fs-title">Social Profiles</h2>

            <h3 class="fs-subtitle">Your presence on social networks</h3>
            [reg-cpf key="twitter" type="text" placeholder="Twitter"]
            [reg-cpf key="facebook" type="text" placeholder="Facebook"]
            [reg-cpf key="google" type="text" placeholder="Google Plus"]
            <input type="button" name="previous" class="previous action-button" value="Previous"/>
            <input type="button" name="next" class="next action-button" value="Next"/>
        </fieldset>
        <fieldset>
            <h2 class="fs-title">Personal Details</h2>

            <h3 class="fs-subtitle">We will never sell it</h3>
            [reg-first-name placeholder="First Name"]
            [reg-last-name placeholder="Last Name"]
            [reg-nickname placeholder="Nickname"]
            [reg-bio placeholder="Biography"]
            <input type="button" name="previous" class="previous action-button" value="Previous"/>
            [reg-submit class="submit action-button" value="Submit"]
        </fieldset>
    </div>
</form>
We could have left the fields in the form the way they were without replacing them with their ProfilePress shortcode equivalent. However, using the shortcodes takes care of adding the correct name attribute for the input fields.
我们可以按原样保留字段的形式,而不必用等效的ProfilePress短代码替换它们。 但是,使用简码需要为输入字段添加正确的name属性。
If you can determine the name attribute for the fields (for example, for the username field, the name attribute is reg_username), you might as well do away with using their shortcodes.
如果可以确定字段的名称属性(例如,对于用户名字段,名称属性为reg_username ),则最好不要使用它们的短代码。
Since ProfilePress doesn’t include a text area for inserting JavaScript, the JavaScript code will go into the Melange Design field immediately after the HTML code of the form.
由于ProfilePress不包含用于插入JavaScript的文本区域,因此JavaScript代码将在表单HTML代码之后立即进入“ Melange Design字段。
Note: the novalidate attribute was added to the <form> tag to circumvent the annoying “An invalid form control with name=” is not focusable” error in blink-based) browsers (such as Chrome and Opera) that prevents the form from being submitted.
注意: novalidate属性已添加到<form>标记中,以规避恼人的“ 基于眨眼的 )浏览器(例如Chrome和Opera)中“ name = ” 的无效表单控件不可聚焦 ”的错误,从而阻止表单被已提交。
Code explanation: firstly, we included a deferred call to the jQuery Easing library. This was done to add an easing effect to the form followed by the JavaScript codes that actually handle the multi-stepping.
代码说明:首先,我们包括了对jQuery Easing库的延迟调用。 这样做是为了在表单中添加放松效果,然后添加实际处理多步执行JavaScript代码。
Paste the CSS of the multi-step form into the CSS Stylesheet code area.
将多步骤表单的CSS粘贴到CSS样式表代码区域。
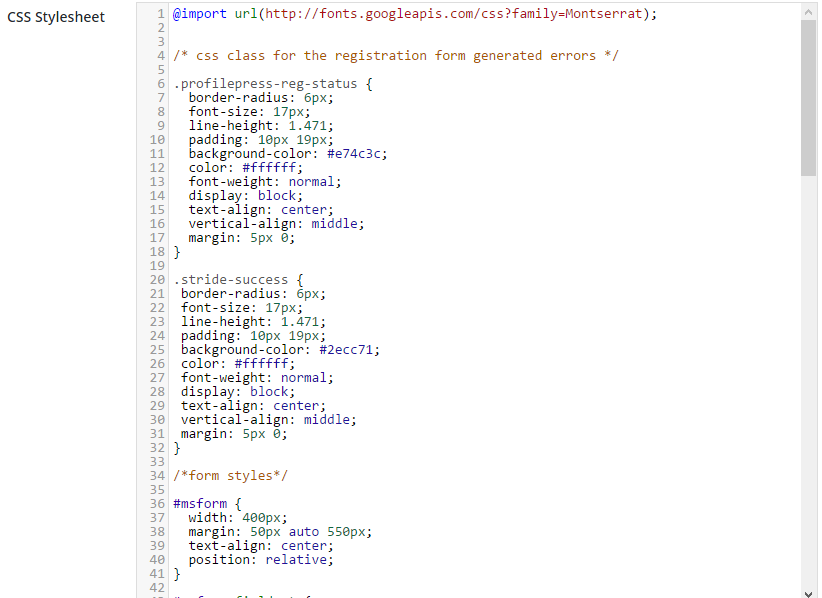
Note: Errors generated by registration forms powered by ProfilePress are wrapped in a div with class name profilepress-reg-status, hence the class in the style sheet.
注意:由ProfilePress驱动的注册表单生成的错误被包装在div中,其类名为profilepress-reg-status ,因此是样式表中的类。
Enter the code below in Registration Success field to display a customized notice on successful user registration.
在“ 注册成功”字段中输入以下代码,以显示有关成功注册用户的自定义通知。

Save the form and navigate back to the melange catalog.
保存表单,然后导航回混合物目录。
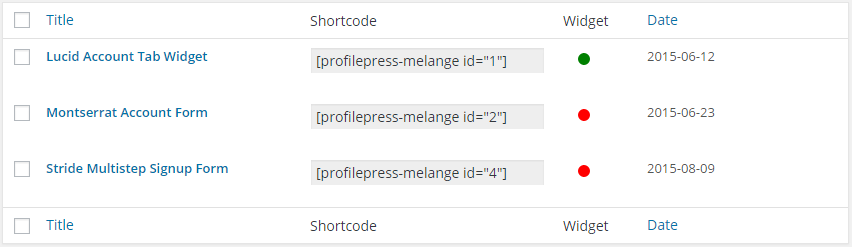
Copy the generated shortcode and paste it to a WordPress page of your choosing.
复制生成的简码并将其粘贴到您选择的WordPress页面。
Save the page, then preview to see the multi-step registration in action.
保存页面,然后预览以查看正在进行的多步骤注册。
A live demo of the multi-step registration form is available here.
此处提供多步注册表格的现场演示。
摘要 (Summary)
In this tutorial, we learned how to build a WordPress multi-step registration form using a plugin I developed called ProfilePress. This plugin handles server-side PHP validation, authentication and authorization of custom login, registration, password reset and front-end edit profile forms.
在本教程中,我们学习了如何使用我开发的名为ProfilePress的插件构建WordPress多步骤注册表单。 该插件处理服务器端PHP验证,自定义登录,注册,密码重置和前端编辑配置文件表单的身份验证和授权。
If you have any questions, suggestions or contributions, please let me know in the comments.
如果您有任何问题,建议或意见,请在评论中让我知道。
翻译自: https://www.sitepoint.com/building-a-multi-step-registration-form-for-wordpress/
wordpress表格筛选


 被折叠的 条评论
为什么被折叠?
被折叠的 条评论
为什么被折叠?
 到【灌水乐园】发言


