


ppt修复演示文稿
In the first part, we learned how to integrate impress.js into WordPress, for creating dynamic presentations with CSS transitions and transformations. impress.js is becoming one of the most popular JavaScript libraries in Github.
在第一部分中 ,我们学习了如何将impress.js集成到WordPress中,以创建具有CSS过渡和转换的动态演示。 impress.js成为Github中最受欢迎JavaScript库之一。
Flexibility and well structured codes might be the reason behind its success as a presentation generation library. In this tutorial, we are going to look at the possibilities of enhancing the default features of impress.js while building an interactive presentation with WImpress.
灵活性和结构良好的代码可能是其成功成为演示文稿生成库的原因。 在本教程中,我们将研究在使用WImpress构建交互式演示时增强impress.js的默认功能的可能性。
We completed the first part of this article by building a very basic presentation with the impress.js integrated WordPress plugin. Let’s start this tutorial by creating an options panel for our presentations. I hope you have already activated WImpress plugin in your WordPress installation. If so, you can update the code of that same plugin as we move on with the implementation.
我们通过使用impress.js集成的WordPress插件构建了非常基本的演示文稿,从而完成了本文的第一部分。 让我们通过为演示文稿创建一个选项面板来开始本教程。 我希望您已经在WordPress安装中激活了WImpress插件。 如果是这样,您可以在实施过程中继续更新该插件的代码。
规划选项面板 (Planning the Options Panel)
Design plays a vital role in building amazing presentations. With tools like PowerPoint, design of the presentation might be restricted to a certain level, depending on the available features in each version. impress.js is purely built on CSS and HTML and hence you have the freedom to be creative with your designs. In this section, we are planning to implement a basic options panel with two options listed here.
设计在构建出色的演示文稿中起着至关重要的作用。 使用PowerPoint之类的工具时,取决于每个版本中的可用功能,演示文稿的设计可能会受到限制。 impress.js完全基于CSS和HTML构建,因此您可以自由地进行设计创新。 在本节中,我们计划实现一个基本选项面板,其中列出了两个选项。
- CSS Customizer CSS定制器
- Background Image (Presentation Template) 背景图像(演示模板)
The purpose of creating this options panel is to let you know how to build basic options panel for any type of WordPress plugin.With CSS, you have no limitations and you can design your own options panel with more options to suit your needs. So let’s get started.
创建此选项面板的目的是让您知道如何为任何类型的WordPress插件构建基本的选项面板。使用CSS,您没有任何限制,您可以设计自己的选项面板并提供更多选项以满足您的需求。 因此,让我们开始吧。
创建选项页面 (Creating Options Page)
WordPress offers the capability of creating different types of pages in the admin panel. We can create menu pages to be displayed in the left menu as a main menu item or a sub menu item. Also we are allowed to create settings pages to be displayed under the default settings section. Here, we are going to use a menu page to configure the settings of WImpress plugin. So let’s get started by updating the plugin constructor with the following action.
WordPress提供了在管理面板中创建不同类型页面的功能。 我们可以创建菜单页面作为主菜单项或子菜单项显示在左侧菜单中。 我们也可以创建要在默认设置部分下显示的设置页面。 在这里,我们将使用菜单页面来配置WImpress插件的设置。 因此,让我们开始通过以下操作更新插件构造函数。
add_action('admin_menu', array($this, 'wimpr_presentation_settings_page'));Let’s look at the wimpr_presentation_settings_page function for adding a new menu page.
让我们看一下wimpr_presentation_settings_page函数,以添加一个新的菜单页面。
public function wimpr_presentation_settings_page() {
    	add_menu_page('WImpress Presentation Settings', 'WImpress Presentation Settings', 'administrator', 'wimpr_settings', array($this, 'wimpr_presentation_settings'));
}
Inside the function, we call WordPress add_menu_page for creating a top level menu item. First and second parameters are used to define the page title and menu title for the options page. The third parameter defines the capability required for displaying the menu. We need to provide a unique slug as the fourth parameter. The last parameter defines the function used for displaying the contents of the options panel. We will be using the wimpr_presentation_settings function for displaying the form fields for the options panel.
在函数内部,我们调用WordPress add_menu_page来创建顶级菜单项。 第一个和第二个参数用于定义选项页面的页面标题和菜单标题。 第三个参数定义了显示菜单所需的功能。 我们需要提供一个唯一的子弹作为第四个参数。 最后一个参数定义用于显示选项面板内容的功能。 我们将使用wimpr_presentation_settings函数显示选项面板的表单字段。
You can take a look at the complete list of parameters for the add_menu_page function at http://codex.wordpress.org/Function_Reference/add_menu_page.
您可以在http://codex.wordpress.org/Function_Reference/add_menu_page上查看add_menu_page函数的完整参数列表。
创建选项表格 (Creating Options Form)
Once we click the menu item, WordPress will execute the wimpr_presentation_settings function. So, we need to generate the necessary HTML content to be displayed for options page. The following code illustrates the implementation of the wimpr_presentation_settings function.
一旦我们单击菜单项,WordPress将执行wimpr_presentation_settings函数。 因此,我们需要生成必要HTML内容以显示在选项页面中。 以下代码说明了wimpr_presentation_settings函数的实现。
public function wimpr_presentation_settings() {


	$html = '<div class="wrap">

    	<form method="post" name="options" action="options.php">

    	<h2>Select Presentation Settings</h2>' . wp_nonce_field('update-options') . '
    	<table width="100%" cellpadding="10" class="form-table">
        	<tr>
            	<td align="left" scope="row">
            	<label>Background Image</label>
            	</td>

            	<td><input type="text" name="wimpr_bimage" id="wimpr_bimage"
            	value="' . get_option('wimpr_bimage') . '" />
            	<input type="button" name="wimpr_image_btn"  id="wimpr_image_btn"
            	value="Upload" />
            	<div name="wimpr_bimage_preview"  id="wimpr_bimage_preview"><img style="width:100px;height:100px" src="' . get_option('wimpr_bimage') . '" /></div>

            	</td>
        	</tr>
        	<tr>
            	<td align="left" scope="row">
            	<label>Custom CSS</label>
            	</td>

            	<td><textarea style="width:500px;height:300px;" name="wimpr_css" id="wimpr_css">' . get_option('wimpr_css') . '</textarea></td>
        	</tr>
    	</table>


    	<p class="submit">
        		<input type="hidden" name="action" value="update" />
        		<input type="hidden" name="page_options" value="wimpr_bimage,wimpr_css" />
        		<input type="submit" name="Submit" value="Update" />
    	</p>
    	</form>

	</div>';
	echo $html;
}
We start the HTML for settings page by creating a form with an action pointing to the options.php page. This allows us to use the WordPress built-in options saving process instead of a manual saving process. Next, we define the background image field as a text field with an additional upload button and DIV container for previewing the uploaded image. Here, we have used the get_option function for retrieving the existing value from the wp_options table. Then we define another textarea for adding custom CSS styles for presentations.
我们通过创建一个带有指向options.php页面的动作的表单来启动设置页面HTML。 这使我们可以使用WordPress内置选项保存过程,而不是手动保存过程。 接下来,我们将背景图像字段定义为带有附加上载按钮和DIV容器的文本字段,以预览上载的图像。 在这里,我们使用get_option函数从wp_options表中检索现有值。 然后,我们定义另一个文本区域,用于为演示文稿添加自定义CSS样式。
Now we have two fields for our options panel with the existing values. Finally, we define two hidden fields called action and page_options. Since we are using the existing options saving process, it’s mandatory to have these two fields with the exact names mentioned here. The field action should have the value update for processing the form submission. Then we have to define the names of each form field that we want to be saved, as a comma separated value of the page_options field. Now we can click the Submit button to save the data automatically into the wp_options table.
现在,我们的选项面板有两个具有现有值的字段。 最后,我们定义了两个隐藏的字段,分别称为action和page_options 。 由于我们使用的是现有的选项保存过程,因此必须具有此处提到的确切名称的这两个字段。 现场操作应具有值更新以处理表单提交。 然后,我们必须将要保存的每个表单字段的名称定义为page_options字段的逗号分隔值。 现在,我们可以单击Submit按钮将数据自动保存到wp_options表中。
上传背景图片 (Uploading Background Image)
In the previous section, we created the background image field with an upload button. Now we have to allow users to upload images using this button. So we are going to integrate the existing WordPress Media Uploader into our upload button.
在上一节中,我们使用上载按钮创建了背景图像字段。 现在,我们必须允许用户使用此按钮上传图像。 因此,我们将把现有的WordPress Media Uploader集成到我们的上传按钮中。
First, we have to include the necessary script files for loading the Media Uploader. Use the following action inside the plugin constructor to load the script files for WordPress admin.
首先,我们必须包括用于加载媒体上载器的必要脚本文件。 在插件构造函数中使用以下操作为WordPress管理员加载脚本文件。
add_action('admin_enqueue_scripts', array($this, 'wimpr_admin_scripts'));Now we can take a look at the wimpr_admin_scripts function for inclusion of the necessary script files.
现在我们来看看wimpr_admin_scripts函数,其中包含必要的脚本文件。
public function wimpr_admin_scripts() {
	wp_enqueue_script('jquery');

	if (function_exists('wp_enqueue_media')) {
    		wp_enqueue_media();
	} else {
    		wp_enqueue_style('thickbox');
    		wp_enqueue_script('media-upload');
    		wp_enqueue_script('thickbox');
	}

	wp_register_script('wimpr_init', plugins_url('js/wimpr_init.js', __FILE__), array("jquery"));
	wp_enqueue_script('wimpr_init');
}
WordPress 3.5 introduced a new version of Media Uploader using the wp_enqueue_media function. So we check for the existence of the wp_enqueue_media function before loading it into the plugin. In case it’s not available, we can fallback to the previous method of loading Media Uploader with wp_enqueue_script statements. Finally, we include a custom JavaScript file for handling the file upload for our upload button.
WordPress 3.5使用wp_enqueue_media函数引入了新版本的Media Uploader。 因此,我们在将wp_enqueue_media函数加载到插件之前检查其是否存在。 如果它不可用,我们可以回wp_enqueue_script使用wp_enqueue_script语句加载Media Uploader的先前方法。 最后,我们包含一个自定义JavaScript文件,用于处理我们上传按钮的文件上传。
Now let’s take a look at the wimpr_init.js file for handling the image upload.
现在,让我们看一下用于处理图像上传的wimpr_init.js文件。
jQuery(document).ready(function(){
	jQuery("#wimpr_image_btn").click(function(){
    		if ( typeof wp !== 'undefined' && wp.media && wp.media.editor )
        			wp.media.editor.open("wimpr");

    		var wimpr_image_btn = jQuery(this);
    		var send_attachments = wp.media.editor.send.attachment;

    		wp.media.editor.send.attachment = function(props, attachment) {

        			jQuery("#wimpr_bimage").val(attachment.url);
        			jQuery("#wimpr_bimage_preview").html("<img style='width:100px;height:100px;' src='"+attachment.url+"' />");


        			wp.media.editor.send.attachment = send_attachments;
    		}

    		wp.media.editor.open();

    		return false;
	});
});
Once the button is clicked, we open the media uploader by giving a unique ID to the wp.media.editor.open function. Then we assign the original media attachment function into a variable called send_attachments for avoiding conflicts with our custom Media Uploader. Next, we define the custom send attachment function for the upload button.
单击按钮后,我们通过为wp.media.editor.open函数提供唯一的ID来打开媒体上传器。 然后,我们将原始媒体附件功能分配到一个名为send_attachments的变量中,以避免与自定义媒体上载器发生冲突。 接下来,我们为上载按钮定义自定义发送附件功能。
We get the path to the uploaded file using attachment.url and assign it to the text field as the background image. Next, we assign the same URL as an image into the preview DIV container. Finally, we restore the original send attachment function by using the send_attachments variable.
我们使用attachment.url获取到上载文件的路径,并将其分配给文本字段作为背景图像。 接下来,我们将与图像相同的URL分配给预览DIV容器。 最后,我们使用send_attachments变量恢复原始的发送附件功能。
Having completed the upload handling code, we can now upload an image using our upload button. After uploading the image, we have to click the Insert into Page button and the URL and preview will be displayed in the settings page.
完成上传处理代码后,我们现在可以使用上传按钮上传图片。 上传图像后,我们必须单击“ 插入页面”按钮,URL和预览将显示在设置页面中。
应用演示设置 (Applying Presentation Settings)
So far, we have created a basic settings section with a background image and custom CSS for presentation steps. Now we have to apply those data into the actual presentation. Let’s update the single-wpresentations.php file to include the settings.
到目前为止,我们已经创建了一个基本设置部分,其中包含背景图像和用于演示步骤的自定义CSS。 现在,我们必须将这些数据应用于实际演示中。 让我们更新single-wpresentations.php文件以包含设置。
< ?php
        	$style[0] = (get_option('wimpr_bimage') != "") ? "background-image: url('" . get_option('wimpr_bimage') . "')" : "";

?>
<style>
        	body{
            	font-size:12px;
        		< ?php echo $style[0]; ?>
    	}

    	< ?php echo get_option('wimpr_css'); ?>
</style>
First, we prepare the necessary styles for the background image using the wimpr_bimage option value retrieved from get_option function. Styles for the background image are applied to the body of the HTML page. Next, we get the custom CSS data from the wp_options table using the wimpr_css key and apply it inside the style element. Now we have completed the implementation of the WImpress plugin with the settings page.
首先,我们使用从get_option函数获取的wimpr_bimage选项值为背景图像准备必要的样式。 背景图像的样式应用于HTML页面的正文。 接下来,我们使用wimpr_css键从wp_options表中获取自定义CSS数据,并将其应用于style元素中。 现在,我们已经通过设置页面完成了WImpress插件的实现。
You can add more settings based on your preferences. I would like to know what other settings you would like to have for this plugin. So use the comments section to let me know.
您可以根据自己的喜好添加更多设置。 我想知道您希望此插件还有哪些其他设置。 因此,请使用评论部分让我知道。
In this section, we are going to build an advanced presentation using the plugin we created throughout this tutorial. Presentation will be designed to illustrate various tutorials and categories in the SitePoint network. Let’s look at the preview of our final presentation using the following link.
在本节中,我们将使用在本教程中创建的插件来构建高级演示文稿。 演示文稿旨在说明SitePoint网络中的各种教程和类别。 让我们使用以下链接查看最终演示文稿的预览。
Demo – http://goo.gl/oMuO8c
Let’s get started.
让我们开始吧。
步骤1 –配置演示文稿设置 (Step 1 – Configuring presentation settings)
We can start the process by configuring the settings for presentations. Select your favorite background image for the presentation template and upload it by clicking the Upload button and finally click the Insert to Page button after uploading.
我们可以通过配置演示文稿的设置来开始该过程。 为演示模板选择您喜欢的背景图像,然后通过单击“上载”按钮上载它,最后在上载后单击“ 插入页面”按钮。
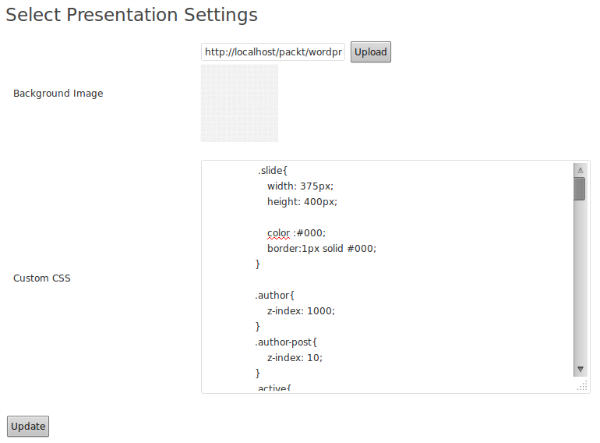
Then we have to provide custom CSS used for the presentations inside the textarea. The complete set of styles used for this presentation is lengthy and hence I am not going to include it inside this tutorial. You can all the styles in the source codes folder. Now your settings screen should look like the following image.
然后,我们必须提供用于文本区域内演示文稿的自定义CSS。 本演示文稿所用的完整样式集很长,因此我不会在本教程中包括它。 您可以在源代码文件夹中找到所有样式。 现在,您的设置屏幕应如下图所示。
步骤2 –建立简报 (Step 2 – Creating the presentation)
Now you can use the Impress Presentation item on the left menu to create a presentation. Use a meaningful name and click the Publish button to save the presentation.
现在,您可以使用左侧菜单上的Impress Presentation项目来创建演示文稿。 使用一个有意义的名称,然后单击“ 发布”按钮以保存演示文稿。
步骤3 –建立第一步 (Step 3 – Creating first step)
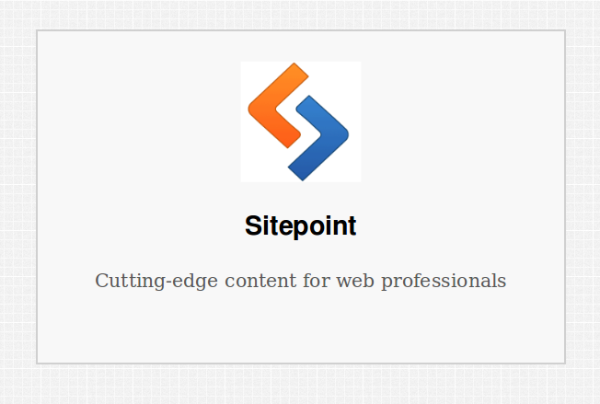
In the first step, we are going to include the SitePoint title with its logo and small tag line. Use the Impress Steps section to create the first step of the presentation. Add a unique title and the following code as the content.
第一步,我们将把SitePoint标题及其徽标和小标签行包括在内。 使用“ 印象步骤”部分创建演示文稿的第一步。 添加唯一的标题和以下代码作为内容。
<img src="http://localhost/wordpress-web-develop-test/wp-content/uploads/2013/09/logo.png" />
<p class="title1">Sitepoint</p>
<p class="title2">Cutting-edge content for web professionals</p>
Make sure to have the correct path to the image based on your WordPress installation. Then select the Presentation Name and add necessary CSS classes for this step. Here, I’ll be using a class called banner to style the first step. Next, define data-x as -1000 and data-y as 0 as the starting points of the presentation. Finally, click the Publish button.
根据您的WordPress安装,确保具有正确的映像路径。 然后选择表示名称,并为此步骤添加必要CSS类。 在这里,我将使用名为banner的类来设置第一步的样式。 接下来,将data-x定义为-1000,将data-y定义为0,作为演示的起点。 最后,单击“ 发布”按钮。
Now go to the Impress Presentations list and click the view link of the previously created presentation to load it inside the browser. You should get something similar to the following image.
现在转到Impress Presentations列表,然后单击先前创建的演示文稿的视图链接以将其加载到浏览器中。 您应该得到类似于下图的内容。
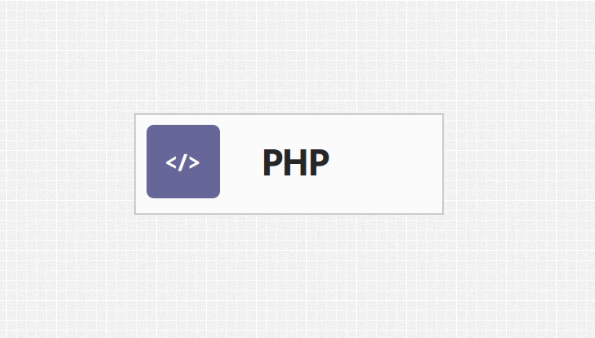
步骤4 –创建第二级步骤 (Step 4 – Creating second level steps)
Now we are going to create the tutorial categories as a sub level of SitePoint. So they will be placed below the first step. We can increase the data-y value to get steps to the bottom of the screen while decreasing data-x values will move the steps towards the left of the screen. Following code shows the HTML used for this step. Necessary CSS styles are placed in the settings section.
现在,我们将创建教程类别作为SitePoint的子级别。 因此,它们将被放置在第一步之下。 我们可以增加data-y值以将步长移至屏幕底部,而减小data-x值将使步长移至屏幕左侧。 以下代码显示了用于此步骤HTML。 必要CSS样式位于“设置”部分。
<img src="http://localhost/wordpress-web-develop-test/wp-content/uploads/2013/09/php.png" />As usual, select the same presentation from the list and define the CSS class as post-category. Finally, set the data-x value to -1500 and data-y value to 800, before clicking the Publish button. Now load the presentation again and use the spacebar or arrow keys to navigate. You should get something similar to the following image.
与往常一样,从列表中选择相同的表示形式,并将CSS类定义为post-category 。 最后,在单击“ 发布”按钮之前,将data-x值设置为-1500,将data-y值设置为800。 现在,再次加载演示文稿,并使用空格键或箭头键进行导航。 您应该得到类似于下图的内容。
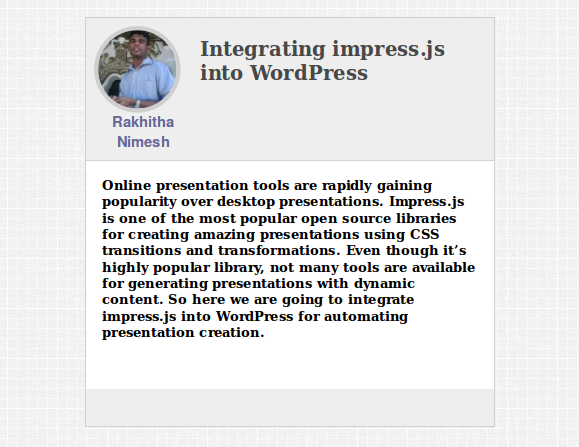
步骤5 –将教程创建为多维数据集 (Step 5 – Create tutorials as a cube)
Now we come to the third level of the presentation with the tutorials. Here, we are going to build a cube to contain information of six tutorials and will be placed far away from Step 2. Now consider the following code for HTML structure used for tutorial steps.
现在,我们通过教程进入了演示的第三级。 在这里,我们将构建一个包含六个教程信息的多维数据集,并将其放置在远离步骤2的位置。现在,考虑以下用于教程步骤HTML结构代码。
<div class="iauthor">
	<img src="http://localhost/wordpress-web-develop-test/wp-content/uploads/2013/09/auth1.jpeg" />
	<div class="iauth_name">Rakhitha Nimesh</div>
</div>

<div class="ipost_title">
	<p class="ipost_header">Integrating impress.js into WordPress</p>
</div>

<div style="clear:both"></div>
<div class="ipost_content">Tutorial Summery.</div>
Use the same structure for all the tutorial steps with modified values. As usual, select the presentation and define the CSS class as post. Next, keep the data-x value as -2000 and data-y value as 2500 to get step3 away from step2. Now you should have something similar to the following image.
所有教程步骤均使用相同的结构,并带有已修改的值。 与往常一样,选择演示文稿并将CSS类定义为post。 接下来,将data-x值保持为-2000,将data-y值保持为2500,以使step3远离step2。 现在,您应该具有类似于下图的内容。
Now we have to build remaining five steps of the cube for PHP category in a similar manner.
现在,我们必须以类似的方式为PHP类别构建多维数据集的其余五个步骤。
Step 2 of the cube – data-x = -1750, data-y=2500, data-z=-250, data-rotate-y=90 Here we have used data-z value to provide the depth for the cube. Also this step is rotated 90 degrees across the Y-axis to build the cube.
多维数据集的第2步 – data-x = -1750,data-y = 2500,data-z = -250,data-rotate-y = 90这里,我们使用data-z值提供了多维数据集的深度。 同样,此步骤沿Y轴旋转90度以构建立方体。
In the initial stages, it’s difficult to understand how the cube is built, by thinking about the values. So make sure to play with impress.js until you understand how to position the elements properly.
在初始阶段,通过考虑值很难理解多维数据集的构建方式。 因此,请确保使用impress.js,直到您了解如何正确定位元素为止。
Step 3 of the cube – data-x=-2000, data-y=2500, data-z=-500, data-rotate-y=180 In Step 3, we are increasing the depth while rotating another 90 degrees across Y-axis.
多维数据集的第3步 -data-x = -2000,data-y = 2500,data-z = -500,data-rotate-y = 180在第3步中,我们在增加深度的同时沿Y-轴。
Step 4 of the cube – data-x=-2250, data-y=2500, data-z=-250, data-rotate-y=270
多维数据集的第4步 -data-x = -2250,data-y = 2500,data-z = -250,data-rotate-y = 270
Step 5 of the cube – data-x=-2000, data-y=2250, data-z=-250, data-rotate-x=90 In Step 5, we use data-rotate-y attribute to place the top part of the cube by rotating across X-axis.
多维数据集的第5步 -data-x = -2000,data-y = 2250,data-z = -250,data-rotate-x = 90在第5步中,我们使用data-rotate-y属性放置顶部通过横过X轴旋转来旋转立方体。
Step 6 of the cube – data-x=-2000, data-y=2750, data-z=-250, data-rotate-y=270
多维数据集的第6步 -data-x = -2000,data-y = 2750,data-z = -250,data-rotate-y = 270
So now we have completed all three levels of the presentation for the PHP category. Now we have to complete the same process for JavaScript and Design categories. So start the process by creating the category step for JavaScript by using similar codes to Step 2. Once all three categories are completed you will get an image similar to the following.
现在,我们已经完成了PHP类别的所有三个层次的演示。 现在,我们必须完成JavaScript和Design类别的相同过程。 因此,请使用与步骤2类似的代码为JavaScript创建类别步骤,以开始该过程。完成所有三个类别后,您将获得与以下图像类似的图像。

Now you have to continue this process until the cubes for all three categories are designed. You can find the attribute values and the content for remaining steps inside the source codes folder.
现在,您必须继续执行此过程,直到设计了所有三个类别的多维数据集为止。 您可以在源代码文件夹中找到其余步骤的属性值和内容。
Find the demo of the final presentation at http://goo.gl/oMuO8c
在http://goo.gl/oMuO8c中找到最终演示的演示
Download the source codes at http://goo.gl/TdT1xZ
在http://goo.gl/TdT1xZ下载源代码
结语 (Wrap Up)
In this two part tutorial, we created a basic WordPress plugin to integrate impress.js into WordPress for automating presentation step creation. You can see why impress.js is considered to be one of the most powerful presentation creation libraries with the use of CSS3 transitions and transformations.
在这个由两部分组成的教程中,我们创建了一个基本的WordPress插件,将impress.js集成到WordPress中以自动执行演示步骤。 您可以看到为什么使用CSS3过渡和转换将impress.js视为最强大的演示文稿创建库之一。
We completed the tutorial by creating a simple and stylish presentation using this plugin. There are no limits in building presentations with impress.js. So it’s up to you to put the creativity into practice by designing amazing presentations.
我们通过使用此插件创建简单而时尚的演示文稿来完成了本教程。 使用impress.js建立演示文稿没有任何限制。 因此,您可以通过设计出色的演示文稿来将创意付诸实践。
Looking forward to hear your suggestions and seeing some amazing presentations in the comments section.
希望能听到您的建议,并在评论部分看到一些精彩的演示。
翻译自: https://www.sitepoint.com/building-amazing-presentations-wimpress/
ppt修复演示文稿


 被折叠的 条评论
为什么被折叠?
被折叠的 条评论
为什么被折叠?
 到【灌水乐园】发言


