


css3超链接文本样式
如何设置文本以某种字体显示? (How do I set my text to display in a certain font?)
The browser will display text in the default font used for that browser and operating system. How do you change it to the one used in your design?
浏览器将以用于该浏览器和操作系统的默认字体显示文本。 您如何将其更改为设计中使用的一种?
解 (Solution)
Specify the typeface that your text will adopt using the font-family property:
使用font-family属性指定文本将采用的font-family :
p {
  font-family: Verdana;
}
讨论区 (Discussion)
As well as specific fonts, such as Verdana or Times, CSS allows the specification of some more-generic family names:
除了特定字体(例如Verdana或Times)之外,CSS还允许指定一些更通用的家族名称:
- serif 衬线
- sans-serif 无衬线字体
- monospace 等宽
- cursive 草书
- fantasy 幻想
When you specify fonts, it’s important to remember that users are unlikely to have the same fonts installed on their computer as you do. If you define a font that the user doesn’t have, your text will display according to their browsers’ default fonts, regardless of what you’d prefer.
在指定字体时,请务必记住,用户不太可能在计算机上安装与您相同的字体。 如果定义了用户没有的字体,则无论您希望使用哪种字体,文本都将根据其浏览器的默认字体显示。
To avoid this, you can simply specify generic font names and let users’ systems decide which font to apply.
为避免这种情况,您只需指定通用字体名称,然后让用户的系统决定要应用哪种字体。
For instance, if you want your document to appear in a sans-serif font such as Arial, you could use the following style rule:
例如,如果您希望文档以无衬线字体(如Arial)显示,则可以使用以下样式规则:
p {
  font-family: sans-serif;
}
Now, you will probably want more control than this over the way your site displays—and you can. It’s possible to specify both font names and generic fonts in the same declaration block.
现在,您可能希望对网站的显示方式进行更多控制,而且可以。 可以在同一声明块中同时指定字体名称和通用字体。
Take, for example, the following style rule for the p element:
以p元素的以下样式规则为例:
p {
  font-family: Verdana, Geneva, Arial, Helvetica, sans-serif;
}
Here, we’ve specified that if Verdana is installed on the system, it should be used; otherwise, the browser is instructed to see if Geneva is installed; failing that, the computer will look for Arial, then Helvetica. If none of these fonts are available, the browser will then use that system’s default sans-serif font.
在这里,我们指定如果在系统上安装了Verdana,则应使用它; 否则,指示浏览器查看是否已安装Geneva; 否则,计算机将寻找Arial,然后寻找Helvetica。 如果这些字体均不可用,则浏览器将使用该系统的默认sans-serif字体。
If a font-family name contains spaces, it should be enclosed in quotation marks, like so:
如果字体系列名称包含空格,则应将其用引号引起来,如下所示:
p {
  font-family: "Courier New", "Andale Mono", monospace;
}
The generic font-family names should always be without quotes and appear last in the list. The list of fonts is often termed a “font stack,” which is a good term to search for if you’re looking for information on fonts to use in this way.
通用字体系列名称应始终不带引号,并出现在列表的最后。 字体列表通常被称为“字体堆栈”,如果您正在寻找要以这种方式使用的字体信息,这是一个很好的搜索条件。
Fonts that you can feel fairly confident using are:
您可以放心使用的字体有:
Windows Arial, Lucida, Impact, Times New Roman, Courier New, Tahoma, Comic Sans, Verdana, Georgia, Garamond
Windows Arial,Lucida,Impact,Times New Roman,Courier New,Tahoma,Comic Sans,Verdana,乔治亚州,Garamond
Mac Helvetica, Futura, Bodoni, Times, Palatino, Courier, Gill Sans, Geneva, Baskerville, Andale Mono
Mac Helvetica,Futura,Bodoni,Times,Palatino,Courier,Gill Sans,Geneva,Baskerville,Andale Mono
This list reveals the reason why we chose the fonts we specified in our style rule. We begin by specifying our first preference, a common Windows font (Verdana), then list a similar Mac font (Geneva). Then we follow up with other fonts that would be usable if neither of these fonts were available.
此列表显示了我们选择样式规则中指定的字体的原因。 首先,指定第一个首选项,即常见的Windows字体(Verdana),然后列出类似的Mac字体(Geneva)。 然后,我们将介绍如果这些字体均不可用的其他可用字体。
如何从链接中删除下划线? (How do I remove underlines from my links?)
The widely accepted default indicator that text on a web page links to another document is that it is underlined and displays in a different color from the rest of the text. However, there may be instances in which you want to remove that underline.
网页上的文本链接到另一个文档的默认指示符是带下划线的,并以与其余文本不同的颜色显示。 但是,在某些情况下,您想删除该下划线。
解 (Solution)
We use the text-decoration property to remove the underlines from link text. By default, the browser will set the text-decoration property of all elements to underline. To remove the underline, simply set the text-decoration property for the link to none:
我们使用text-decoration属性从链接文本中删除下划线。 默认情况下,浏览器会将所有元素的text-decoration属性设置为underline 。 要删除下划线,只需将链接的text-decoration属性设置为none :
text-decoration: none;The CSS used to create the effect shown in Figure 2.3 is as follows:
用于创建图2.3所示效果CSS如下:
a:link, a:visited {
  text-decoration: none;
}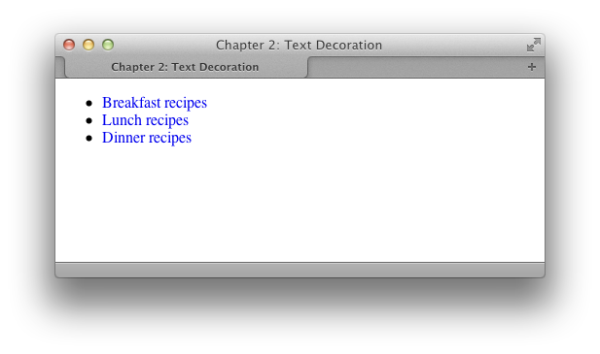
Figure 2.3. Removing underlines with text-decoration
图2.3。 删除带有文本装饰的下划线
讨论区 (Discussion)
In addition to underline and none, there are other values for text-decoration that you can try out:
除了下划线和无下划线外,您还可以尝试其他用于文本修饰的值:
- overline 上线
- line-through 直通
- blink 眨
It is possible to combine these values. For instance, should you wish to have an underline and overline on a particular link—as illustrated in Figure 2.4 — you’d use this style rule:
可以组合这些值。 例如,如果您希望在特定链接上具有underline和上overline (如图2.4所示),则可以使用以下样式规则:
a:link, a:visited {
  text-decoration: underline overline;
}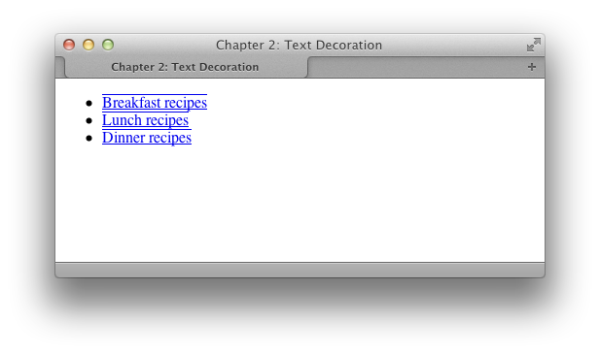
Figure 2.4. Links with text-decoration underline and overline set
图2.4。 具有文本装饰下划线和上划线集的链接
什么时候删除下划线是个坏主意? (When is removing underlines a bad idea?)
Underlining links is a standard convention followed by all web browsers, and, consequently, users expect to see links underlined. Removing the underline from links that appear within large areas of text can make it very difficult for people to realize that these words are, in fact, links, rather than just highlighted text. I’d advise against removing the underlines from links within text. There are other ways in which you can style links so that they look attractive, and removing the underline is rarely, if ever, necessary.
链接下划线是所有Web浏览器都遵循的标准约定,因此,用户希望看到带下划线的链接。 从出现在大面积文本中的链接中删除下划线会使人们很难意识到这些单词实际上是链接,而不仅仅是突出显示的文本。 我建议不要从文本链接中删除下划线。 您还可以通过其他方式设置链接的样式,以使链接看起来更具吸引力,并且很少(即使有必要)删除下划线。
Links that are used as part of a menu, or appear in some other situation in which the text is quite obviously a link—for instance, where the text is styled with CSS to resemble a graphical button—are a different story. If you wish, you can remove the underline from these kinds of links, because it should be obvious from their context what they are.
用作菜单的一部分的链接,或者出现在文本显然是链接的其他情况下(例如,使用CSS样式化文本以类似于图形按钮的文本)是另一回事。 如果需要,可以从这些类型的链接中删除下划线,因为从它们的上下文中应该可以清楚地看到它们是什么。
如何消除h1元素与以下段落之间的较大间隙? (How do I remove the large gap between an h1 element and the following paragraph?)
By default, browsers render a gap between all heading and paragraph elements. The gap is produced by default top and bottom margins that browsers apply to these elements. The margin on the heading shown in Figure 2.12 reflects the default value. This gap can be removed using CSS.
默认情况下,浏览器在所有标题和段落元素之间呈现间隙。 默认情况下,间隙是由浏览器应用于这些元素的顶部和底部边距产生的。 图2.12所示标题上的边距反映了默认值。 可以使用CSS消除此差距。
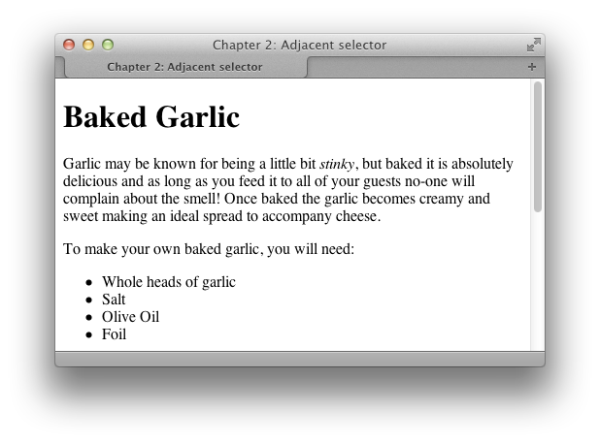
Figure 2.12. The default heading and paragraph spacing in Safari
图2.12。 Safari中的默认标题和段落间距
解 (Solution)
To remove all space between a heading and the paragraph that follows it, you must remove the bottom margin from the heading as well as the top margin from the paragraph. In modern browsers — including Internet Explorer 7 and above — we can do this through CSS using an adjacent selector. To achieve the same effect in older browsers, however, we need to revert to other techniques that are better supported.
要删除标题和其后的段落之间的所有空间,必须删除标题的底边距以及段落的顶边距。 在现代浏览器(包括Internet Explorer 7及更高版本)中,我们可以使用相邻的选择器通过CSS进行此操作。 为了在较旧的浏览器中实现相同的效果,我们需要恢复到其他更好支持的技术。
使用相邻选择器 (Using an Adjacent Selector)
An adjacent selector lets you target an element that follows another element, as long as both share the same parent. In fact, you can use adjacent selectors to specify an element that follows several other elements instead of just one. The element to which the style is applied is always the last element in the chain. If you’re confused, be assured that this concept will be clearer once we’ve seen it in action.
相邻的选择器可让您定位紧随另一个元素的元素,只要它们共享相同的父元素即可。 实际上,您可以使用相邻的选择器来指定一个跟在其他几个元素之后的元素,而不仅仅是一个。 应用样式的元素始终是链中的最后一个元素。 如果您感到困惑,请放心,一旦我们付诸实践,这个概念就会更加清晰。
The following style rules remove the top margin from any paragraph that immediately follows a level-one heading. Note that the top margin is actually removed from the paragraph that follows the h1, rather than the level-one heading itself:
下列样式规则从紧跟一级标题的任何段落中删除了上边距。 请注意,实际上从h1的段落中删除了上边距,而不是一级标题本身:
h1 {
  font: 1.6em Verdana, Geneva, Arial, Helvetica, sans-serif;
  margin-bottom: 0;
}

h1+p {
  margin-top: 0;
}
Figure 2.13 shows the display of the original page once this rule is applied.
图2.13显示了应用此规则后原始页面的显示。
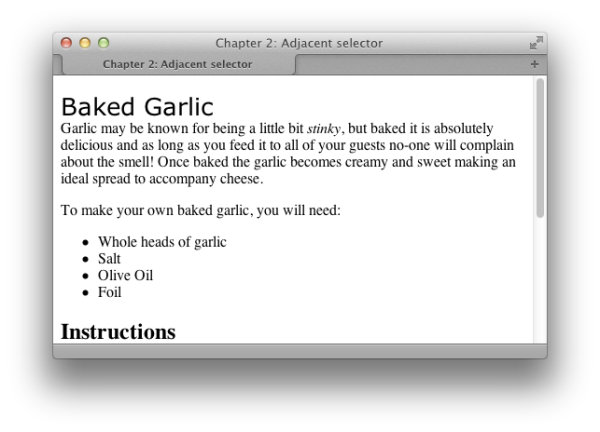
Figure 2.13. Using an adjacent selector to change the heading display
图2.13。 使用相邻的选择器更改标题显示
As you can see, the first paragraph that follows the h1 no longer has a top margin; all subsequent paragraphs, however, retain their top margins.
如您所见, h1第一段不再有顶部边距; 但是,所有后续段落均保留其最高边距。
讨论区 (Discussion)
The adjacent selector is supported in Internet Explorer 7 and above, and in all recent versions of other browsers.
Internet Explorer 7及更高版本以及其他浏览器的所有最新版本均支持相邻的选择器。
如何为列表中的第一项设置与其他项不同的样式? (How do I style the first item in a list differently from the others?)
Frequently, designers find that they need to style the first of a set of items — be they list items or a number of paragraphs within a container — distinct from the rest of the set. One way to achieve this is to assign a class to the first item, and then style that class uniquely from other items; however, there’s a more elegant way to create this effect using the pseudo-class selector first-child.
通常,设计人员发现他们需要对一组项目中的第一个进行样式化(无论是列出项目还是容器中的多个段落),而与其余部分不同。 实现此目的的一种方法是将一个class分配给第一个项目,然后从其他项目中唯一地设置class样式。 但是,有一种使用伪类选择器first-child来创建此效果的更优雅的方法。
解 (Solution)
Here’s a simple list of items marked up as an unordered list:
这是标记为无序列表的简单项目列表:
<ul>
  <li>Brie</li>
  <li>Cheddar</li>
  <li>Red Leicester</li>
  <li>Shropshire Blue</li>
</ul>
To change the color of the first item in the list without affecting its neighbors, we can use the first-child selector. This allows us to target the first element within the ul element, as shown in Figure 2.8:
要更改列表中第一项的颜色而不影响其相邻项,我们可以使用first-child选择器。 这使我们可以定位ul元素中的第一个元素,如图2.8所示:
li:first-child {
  color: red;
}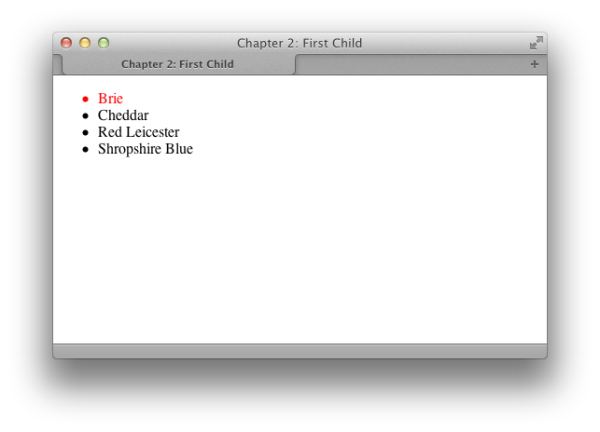
Figure 2.8. Displaying the first list item in red text
图2.8。 以红色文本显示第一个列表项
讨论区 (Discussion)
The first-child pseudo-class selector is well supported in browsers as it has existed since the CSS2.1 specification. The only browser you’re likely to be concerned about without support is IE6.
自CSS2.1规范以来, first-child伪类选择器在浏览器中得到很好的支持。 IE6是您可能会担心的唯一不受支持的浏览器。
如何在文本中添加阴影? (How do I add a drop shadow to my text?)
A drop shadow can be used to add a tiny shadow, whether to gently highlight some text, or allow a more dramatic shadow effect.
可以使用阴影添加一个微小的阴影,以柔和突出显示某些文本,或者允许使用更具戏剧性的阴影效果。
解 (Solution)
The text-shadow property lets you add shadows to text—from the subtle to the completely crazy:
使用text-shadow属性,您可以为文本添加阴影-从微妙到完全疯狂:
<h1>Baked Garlic</h1>
<p>Garlic may be known for being a little bit <em>stinky</em>, but
  baked it is absolutely delicious and as long as you feed it to all
  of your guests no-one will complain about the smell! Once baked
  the garlic becomes creamy and sweet making an ideal spread to
  accompany cheese.</p>
h1 {
font-size: 250%;
color: #256579;
text-shadow: 3px 3px 3px #999;
}
Figure 2.23. The drop shadow on a heading
图2.23。 标题上的投影
讨论区 (Discussion)
The syntax for the text-shadow property is straightforward:
text-shadow属性的语法很简单:
text-shadow: 5px, 5px, 5px, #999;The first value is the horizontal distance from the text; the second is the vertical distance; the third is the blur radius or spread of the shadow; and the final value is the color. The easiest way to see how text-shadow works is to create a large heading so you can easily see your changes—and then play around with the values. You can also have a play around with text-shadow and many other CSS3 properties at the online CSS3 Generator.
第一个值是距文本的水平距离; 第二个是垂直距离; 第三个是模糊半径或阴影的扩散; 最终值是颜色。 查看文本阴影如何工作的最简单方法是创建一个较大的标题,以便您可以轻松查看所做的更改,然后使用这些值。 您还可以在在线CSS3 Generator上体验text-shadow和许多其他CSS3属性。
超越怀疑的阴影 (Beyond a Shadow of Doubt)
When adding shadows to text, make sure that your text is still legible. I find text-shadow most useful when adding effects to form buttons and big headings, but large quantities of body copy can be hard to read with a shadow applied. Sadly, the text-shadow property is unsupported in Internet Explorer (including version 9).
在文本上添加阴影时,请确保您的文本仍然清晰可见。 在将效果添加到表单按钮和大标题时,我发现text-shadow最有用,但是使用阴影很难阅读大量的正文。 遗憾的是,Internet Explorer(包括版本9)不支持text-shadow属性。
如何突出显示页面上的文字? (How do I highlight text on the page?)
A common feature on many websites is to highlight an important term on a page, such as the search terms visitors have used to locate our web page through a search engine. It’s easy to highlight text using CSS.
许多网站上的常见功能是突出显示页面上的重要术语,例如访问者用来通过搜索引擎定位我们网页的搜索词。 使用CSS突出显示文本很容易。
解 (Solution)
If you wrap the text to be highlighted with span tags and add a class attribute, you can easily add a CSS rule for that class. For example, in the following paragraph, we’ve wrapped a phrase in span tags that apply the class hilite:
如果使用span标签将要突出显示的文本换行并添加class属性,则可以轻松地为该class添加CSS规则。 例如,在下面的段落中,我们将一个短语包装在应用了hilite class span标签中:
<p>Garlic may be known for being a little bit <span class="hilite">
  stinky</span>, but baked it is absolutely delicious and as long as
  you feed it to all of your guests no-one will complain about the
  smell! Once baked the garlic becomes creamy and sweet making an
  ideal spread to accompany cheese.</p>
The style rule for the hilite class is shown below; the highlighted section will display as seen in Figure 2.14:
hilite类的样式规则如下所示; 高亮显示的部分将显示,如图2.14所示:
.hilite {
  background-color: #FFFFCC;
  color: #B22222;
}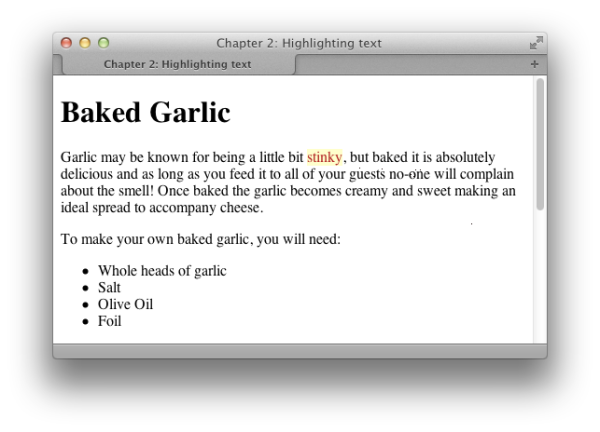
Figure 2.14. Highlighting text with a class
图2.14。 用班级突出显示文字
当一切都完成了 (When It’s All Done for Show)
You should only highlight text in this way if the effect is purely presentational, and only relevant to those who can see the text in the browser. If the text needs to be highlighted in order to convey its meaning, consider using em (for emphasis) or strong instead, and then style the em or strong element. By using em or strong, you affect the meaning of the document. In such cases where highlighting is for looks only and no additional semantic elements are required, the technique explained here is the best one to use.
如果效果纯粹是呈现性的,并且仅与可以在浏览器中看到文本的人员相关,则仅应以这种方式突出显示文本。 如果需要突出显示文本以传达其含义,请考虑使用em (为了强调)或strong ,然后设置em或strong元素的样式。 通过使用em或strong ,您会影响文档的含义。 在突出显示仅用于外观且不需要其他语义元素的情况下,此处说明的技术是最好的使用方法。
如何使用CSS将文字更改为全部大写? (How do I change text to all capitals using CSS?)
解 (Solution)
You can change text to all capitals, and perform other transformations, by using the text-transform property:
您可以使用text-transform属性将text-transform更改为全部大写,并执行其他转换:
<p class="transform">Garlic may be known for ...</p>.transform {
text-transform: uppercase;
}Note the uppercase text in Figure 2.20.
注意图2.20中的大写文本。
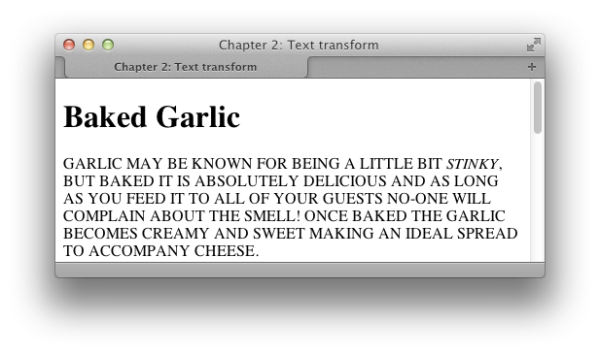
Figure 2.20. The paragraph has been transformed to uppercase
图2.20。 该段已转换为大写
讨论区 (Discussion)
The text-transform property has other useful values. The value capitalize will capitalize the first letter of each word, as illustrated in Figure 2.21. This is very useful for transforming headings when text is being entered via a CMS. Users are unlikely to remember to capitalize everything correctly, but with CSS you can ensure that text will display neatly, regardless of what has been entered. You should be aware, however, that words such as “a” and “the” will also be capitalized.
text-transform属性具有其他有用的值。 大写的值将capitalize每个单词的第一个字母,如图2.21所示。 当通过CMS输入文本时,这对于转换标题非常有用。 用户不太可能记得正确地大写所有内容,但是使用CSS可以确保无论输入了什么内容,文本都能整齐显示。 但是,您应该知道,“ a”和“ the”等词也会大写。
.transform {
  text-transform: capitalize;
}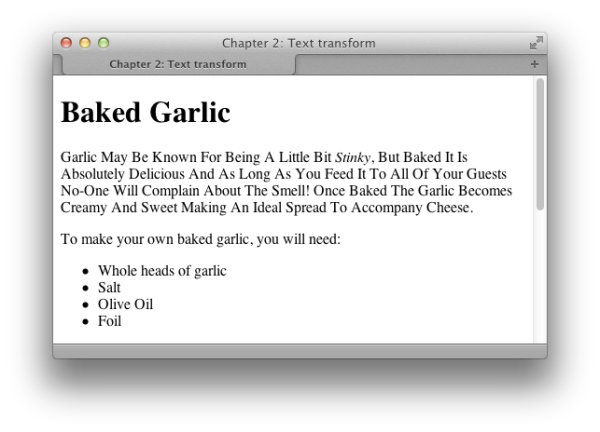
Figure 2.21. The first letter of each word has been capitalized
图2.21。 每个单词的首字母已大写
The other values that the text-transform property can take are:
text-transform属性可以采用的其他值为:
- lowercase 小写
- none 没有
如何创建首字下沉效果? (How do I create a drop-caps effect?)
Making the first letter in a paragraph larger — a simple drop-capitals effect — is easily achieved with CSS.
使用CSS可以轻松实现将段落中的第一个字母放大(一个简单的首字母大写效果)。
解 (Solution)
This can be achieved by using the first-letter pseudo-class selector:
这可以通过使用第first-letter伪类选择器来实现:
<h1>Baked Garlic</h1>
<p>Garlic may be known for being a little bit <em>stinky</em>, but
  baked it is absolutely delicious and as long as you feed it to all
  of your guests no-one will complain about the smell! Once baked
  the garlic becomes creamy and sweet making an ideal spread to
  accompany cheese.</p>
h1 + p:first-letter {
font-size: 200%;
font-weight: bold;
float: left;
width: 1em;
line-height: 1;
}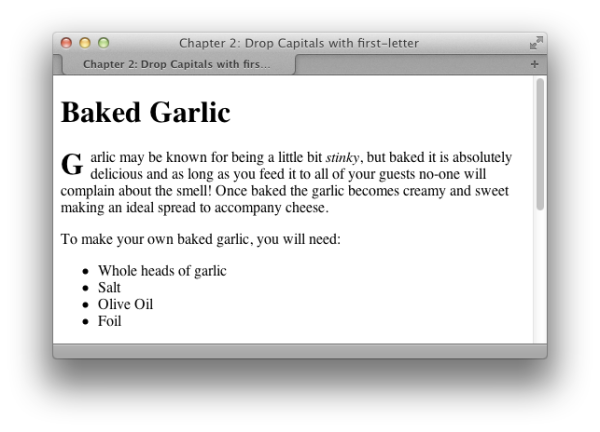
Figure 2.22. The simple drop-capitals effect
图2.22。 简单的大写效应
讨论区 (Discussion)
This is a basic example demonstrating the use of the pseudo-class selector first-letter. I’ve also used an adjacent selector to only target the paragraph that comes directly after an h1; without this, the first letter of every paragraph would have a drop cap. Because browsers interpret line-height differently, the results can be a little inconsistent, so you’ll need to experiment a little for a pleasing effect.
这是一个基本示例,演示了伪类选择器first-letter 。 我还使用了相邻的选择器,仅将h1之后的段落作为目标; 没有这个,每个段落的第一个字母都会有一个首字下沉。 由于浏览器对line-height解释不同,因此结果可能会有些不一致,因此您需要进行一些实验以获得令人满意的效果。
There is a useful article by James Edwards on the SitePoint website that discusses creating a drop-caps effect in some detail.
James Edwards在SitePoint网站上有一篇有用的文章,其中详细讨论了创建首字下沉效果 。
如何更改或删除列表项上的项目符号? (How do I change or remove the bullets on list items?)
解 (Solution)
You can change the style of bullets displayed on an unordered list by altering the list-style-type property. First, here’s the markup for the list:
您可以通过更改list-style-type属性来更改无序列表上显示的项目符号list-style-type 。 首先,这是列表的标记:
<ul>
  <li>Brie</li>
  <li>Cheddar</li>
  <li>Red Leicester</li>
  <li>Shropshire Blue</li>
</ul>
To display square bullets as in Figure 2.24, set the list-style-type property to square:
要显示如图2.24所示的方形项目符号,请将list-style-type属性设置为square:
ul {
  list-style-type: square;
}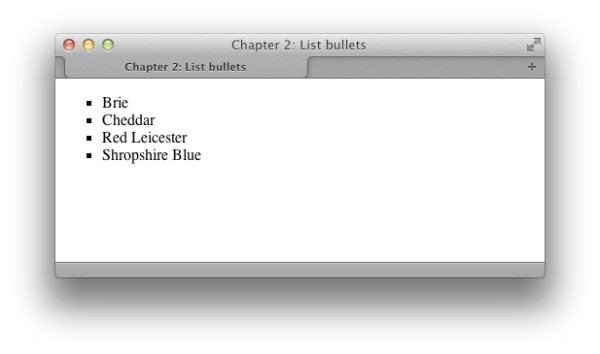
Figure 2.24. Square list bullets
图2.24。 方列表子弹
讨论区 (Discussion)
Some of the other values that the list-style-type property can take are disc, circle, decimal-leading-zero, decimal, lower-roman, upper-roman, lower-alpha, upper-alpha, and none.
list-style-type属性可以采用的其他一些值是disc , circle , decimal-leading-zero , decimal , lower-roman , upper-roman , lower-alpha , upper-alpha和none 。
You’ll find that some of these values have no support in certain browsers; those browsers without support for a particular bullet type will display the default type instead. You can see the different types, and check the support your browser has for them, at the CSS Test Suite for list-style-type. Setting list-style-type to none will remove bullets from the display, although the list will still be indented as if the bullets were there, as Figure 2.25 shows:
您会发现其中某些值在某些浏览器中不支持; 那些不支持特定项目符号类型的浏览器将显示默认类型。 您可以在CSS测试套件中的list-style-type中查看不同的类型,并检查浏览器对它们的支持。 将list-style-type设置为none会从显示中删除项目符号,尽管列表仍会缩进,就像项目符号在其中一样,如图2.25所示:
ul {
  list-style-type: none;
}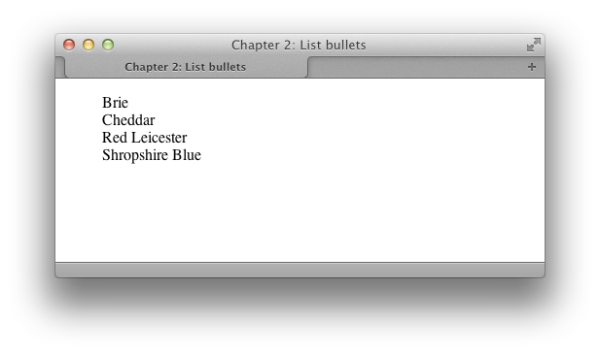
Figure 2.25. No list bullets
图2.25。 没有清单项目符号
如何将图像用于列表项目符号? (How do I use an image for a list-item bullet?)
解 (Solution)
Create your image, then use the list-style-image property to set your bullets rather than list-style-image. This property accepts a URL, which can incorporate the path to your image file as a value:
创建图像,然后使用list-style-image属性设置项目符号,而不是list-style-image 。 此属性接受URL,该URL可以将图像文件的路径作为值合并:
ul {
  list-style-image: url(bullet.gif);
}
Figure 2.26 shows how this effect can be used to spruce up a list.
图2.26显示了如何使用这种效果来整理列表。
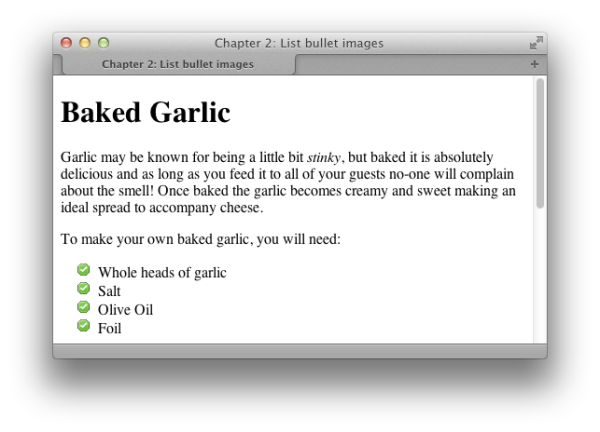
Figure 2.26. Images used for list bullets
图2.26。 用于列表项目符号的图像
在个人清单项目上设置项目符号 (Setting Bullets on Individual List Items)
The list-style-image property applies to the list item (li) elements in the list. But if you apply list-style-image to the list as a whole (the ul or ol element), each individual list item will inherit it. You do, however, have the option of setting the property on individual list items by assigning a class or id to each, giving individual items their own unique bullet images.
list-style-image属性适用于列表中的列表项( li )元素。 但是,如果将list-style-image整体应用于list-style-image ( ul或ol元素),则每个单独的列表项都将继承它。 但是,您可以通过为每个列表项分配一个class或id来为每个列表项设置属性,从而为各个项目提供自己的唯一项目符号图像。
This is an excerpt from The CSS3 Anthology, 4th Edition, by Rachel Andrew
这是Rachel Andrew撰写CSS3 Anthology,4th Edition的摘录
css3超链接文本样式


 1981
1981

 被折叠的 条评论
为什么被折叠?
被折叠的 条评论
为什么被折叠?
 到【灌水乐园】发言


