


The traditional way of running PHP is with Apache HTTP Server using mod_php. In fact, mod_php was the most popular Apache module up until 2009 when that claim went to mod_ssl. But as the Internet grew and the technologies that power it evolved, other ways of serving PHP sites and applications became available. nginx, a server written to solve the C10k problem, is eating into Apache’s marketshare, and running PHP behind nginx with FastCGI is becoming an increasingly commonplace alternative.
运行PHP的传统方法是使用mod_php与Apache HTTP Server一起运行。 实际上,直到2009年mod_ssl才使用mod_php,它是最受欢迎的 Apache模块。 但是随着Internet的发展以及支持Internet的技术的发展,提供了其他服务PHP站点和应用程序的方式。 为解决C10k问题而编写的服务器nginx正在吞噬Apache的市场份额 ,并且通过FastCGI在nginx后面运行PHP变得越来越普遍。
Configuring a PHP and nginx setup is a bit more involved than the traditional Apache one, although it has become easier in the recent past with better packaging and default configurations. This article will guide you through the process of configuring PHP and nginx for serving up your own high performance website. I assume you’re working on Ubuntu Server (I’m using Ubuntu 13.04, 64-bit), and we’ll install the core applications using Apt.
与传统的Apache相比,配置PHP和nginx设置要涉及更多的工作,尽管最近通过更好的打包和默认配置,它变得更加容易。 本文将指导您完成配置PHP和nginx的过程,以提供自己的高性能网站。 我假设您正在使用Ubuntu Server (我使用的是Ubuntu 13.04,64位),我们将使用Apt安装核心应用程序。
简而言之FastCGI (FastCGI in a Nutshell)
In the early days of the web, developers needed a way to run scripts on the server to generate page content and spawn other processes, and so the CGI (Common Gateway Interface) protocol was devised as a means to facilitate this.
在网络的早期,开发人员需要一种在服务器上运行脚本以生成页面内容并生成其他进程的方法,因此,CGI(通用网关接口)协议被设计为促进此目的的一种方法。
CGI defines the environment (environment variables, request-specific variables, etc.) a script will execute in, and how data is passed between the script and the web server. For each request, CGI sets up the environment, spawns a running instance of the script and passes any incoming data to it, and captures and sends the script’s output to the server.
CGI定义了将在其中执行脚本的环境(环境变量,特定于请求的变量等),以及如何在脚本和Web服务器之间传递数据。 对于每个请求,CGI都会设置环境,产生一个正在运行的脚本实例,并将所有传入的数据传递给它,然后捕获并将脚本的输出发送到服务器。

Of course, CGI has its pros and cons. On the pro side, CGI is language-independent, meaning scripts can be written in any programming language the developer is comfortable with (for example: Perl, C, bash, etc.), and each execution runs in isolation from the web server which prevents bugs in a script from potentially crashing the entire web stack. On the con side, a new process is created for each request which can be CPU-intensive and time-consuming.
当然,CGI有其优点和缺点。 在专业方面,CGI与语言无关,这意味着脚本可以用开发人员熟悉的任何编程语言编写(例如:Perl,C,bash等),并且每次执行都独立于Web服务器运行防止脚本中的错误可能导致整个Web堆栈崩溃。 从另一方面来说,将为每个请求创建一个新的进程,这可能会占用大量CPU并耗时。
FastCGI is essentially CGI with some enhancements that addresses CGI’s shortcomings. It reduces time/CPU-overhead by using a persistent process to execute scripts, and data between the web server and FastCGI is passed using sockets which encourages more-scalable service architectures (server farms and load balancing, asynchronous communication between web server and FastCGI, etc.).
FastCGI本质上是CGI,具有一些增强功能,可以解决CGI的缺点。 它通过使用持久性进程来执行脚本来减少时间/ CPU开销,并且使用套接字在Web服务器和FastCGI之间传递数据,从而鼓励了可扩展的服务体系结构(服务器场和负载平衡,Web服务器与FastCGI之间的异步通信,等等。)。
For more information on FastCGI, check out the white paper on the FastCGI website, and for PHP’s implementation specifically check out the PHP manual.
有关FastCGI的更多信息,请查看FastCGI网站上的白皮书 ,有关PHP的实现,请查看PHP手册 。
基本安装和配置 (Basic Installation and Configuration)
To install PHP via Apt, execute the following at the command-line:
要通过Apt安装PHP,请在命令行执行以下命令:
sudo apt-get install php5-cli php5-fpm
Then, to install nginx, execute:
然后,要安装nginx,请执行:
sudo apt-get install nginx
Apt will identify the required dependencies in each case and prompt for confirmation to continue. Once granted, Apt will download and install the requested packages and their dependencies.
Apt将在每种情况下标识所需的依赖关系,并提示确认以继续。 获得授权后,Apt将下载并安装请求的软件包及其依赖项。
Ubuntu places nginx’s configuration files in /etc/nginx and its sub-directories. Shared configuration fragments are kept in that root, and specific server setups reside in sites-available with symlinks in sites-enabled to make them active.
Ubuntu将nginx的配置文件放在/etc/nginx及其子目录中。 共享的配置片段保留在该根目录中,特定的服务器设置驻留在sites-available通过sites-enabled符号链接sites-available ,以使其处于活动状态。
It’s a good idea to avoid editing the original configuration files, so I suggest using copies and keeping the originals pristine. This way, you can configure nginx to your liking and not worry about your efforts being over-written by Apt during future upgrades. You also have the original default configuration to refer back to if you never need to.
避免编辑原始配置文件是一个好主意,因此我建议使用副本并保持原始状态。 这样,您可以根据自己的喜好配置nginx,而不必担心将来升级时Apt会覆盖您的工作。 如果您永远不需要,也可以使用原始的默认配置进行引用。
Delete the symlink in sites-enabled, duplicate the default file in sites-available, and create a new symlink.
删除sites-enabled的符号链接,复制sites-available的default文件,并创建一个新的符号链接。
cd /etc/nginx
sudo rm sites-enabled/default
sudo cp sites-available/default sites-available/my-default
sudo ln -s /etc/nginx/sites-available/my-default sites-enabled/default
To have nginx proxy PHP requests to the FastCGI service, open the freshly duplicated configuration file and locate the section that starts with:
要使Nginx代理PHP请求FastCGI服务,请打开刚复制的配置文件,然后找到以以下内容开头的部分:
# pass the PHP scripts to FastCGI server listening on 127.0.0.1:9000
#
#location ~ \.php$ {
Uncomment the location line and it’s matching close brace, the fastcgi_split_path_info line, and the lines that pertain to running with php5-fpm. When you’re done, the section should look like this:
取消注释location行及其匹配的fastcgi_split_path_info括号, fastcgi_split_path_info行以及与使用php5-fpm运行相关的行。 完成后,该部分应如下所示:
# pass the PHP scripts to FastCGI server listening on 127.0.0.1:9000
#
location ~ \.php$ {
    fastcgi_split_path_info ^(.+\.php)(/.+)$;
#   # NOTE: You should have "cgi.fix_pathinfo = 0;" in php.ini
#
#   # With php5-cgi alone:
#   fastcgi_pass 127.0.0.1:9000;
#   # With php5-fpm:
    fastcgi_pass unix:/var/run/php5-fpm.sock;
    fastcgi_index index.php;
    include fastcgi_params;
}
Save your changes, and then start nginx.
保存更改,然后启动nginx。
sudo service nginx start
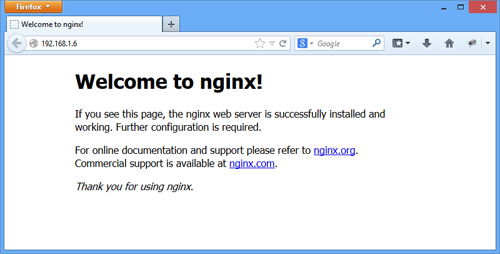
Connect to the server with your browser and you should see nginx’s welcome screen.
使用浏览器连接到服务器,您应该会看到nginx的欢迎屏幕。
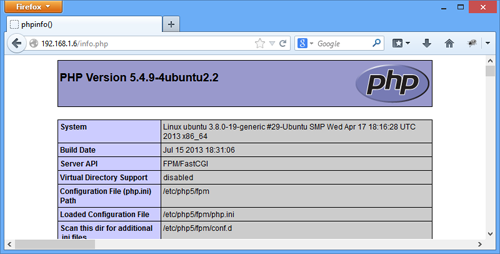
The default configuration specifies /usr/share/nginx/html as the web root. In that directory, create a file named info.php with a call to phpinfo() and then load it in your web browser to verify nginx can communicate with PHP. In the output, you should see the Server API listed as “FPM/FastCGI”.
缺省配置将/usr/share/nginx/html为Web根目录。 在该目录中,创建一个名为info.php的文件,并调用phpinfo() ,然后将其加载到您的Web浏览器中,以验证nginx是否可以与PHP进行通信。 在输出中,您应该看到服务器API列为“ FPM / FastCGI”。
附加配置 (Additional Configuration)
Congratulations! You have a basic nginx and PHP install set up and serving files! But there are a few additional configuration steps that I recommend.
恭喜你! 您已经完成了基本的nginx和PHP安装设置并提供文件! 但是,我建议您执行一些其他配置步骤。
Web根权限 (Web Root Permissions)
A quick check of the web root’s permissions shows that it’s not writable by anyone other than root. Constant sudo-ing grows tiresome, and tinkering around as root is generally a bad idea, so I recommend executing the following:
快速检查Web根目录的权限表明,除根目录外,其他任何人都无法写该目录。 持续进行sudo -ing变得很烦人,而以root身份进行修补通常是个坏主意,因此我建议执行以下操作:
sudo adduser <username> www-data
sudo chgrp -R www-data /usr/share/nginx/html
sudo chmod -R g+rw /usr/share/nginx/html
sudo chmod g+s /usr/share/nginx/html
adduser adds your username (replace <username> with your own login) to the www-data group, the same group that nginx runs under in the default Ubuntu install. chgrp recursively updates the html directory and its children to belong to the www-data group.
adduser将您的用户名(用您自己的登录名替换<username> )添加到www-data组,该组与nginx在默认Ubuntu安装中运行的组相同。 chgrp递归更新html目录及其子目录,使其属于www-data组。
The first chmod command then grants read and write group privileges recursively to html and its children, and the second sets the SGID bit so that any files or directories created in html will take on the www-data group as its group owner. Note that the second chmod is not run recursively.
然后,第一个chmod命令以递归方式授予html及其子级的读取和写入组特权,第二个chmod命令将SGID位置1,以便在html创建的任何文件或目录都将以www-data组作为其组所有者。 请注意,第二个chmod不是递归运行的。
After the four commands have been run, you’ll need to reload your shell for the group association on your user account to take effect. Log out and then back in again. Once you’re in, you’ll be able to create, edit, and delete files in the web root to your heart’s content under your standard login without any escalated privileges.
运行这四个命令后,您需要重新加载外壳程序以使用户帐户上的组关联生效。 注销,然后再次登录。 进入后,无需任何升级权限,就可以在标准登录名下创建,编辑和删除Web根目录中心意的文件。
不存在的脚本 (Non-existent Scripts)
I also recommend adding a try_files directive somewhere in the location block you uncommented earlier in the configuration, like this:
我还建议在您之前在配置中未注释的location块中的某处添加try_files指令,如下所示:
location ~ \.php$ {
    fastcgi_split_path_info ^(.+\.php)(/.+)$;
    try_files $uri $uri/ =404;
...
This protects you from a known vulnerability that results from an incorrectly configured system where nginx tries various patterns to satisfy a request. You may want to tweak the exact list of values after reading the documentation for try_files and take into consideration the needs of your application, but the above should provide a minimum level of protection.
这样可以保护您免受已知漏洞的影响 ,该漏洞是由配置不正确的系统(其中nginx尝试各种模式来满足请求)导致的。 阅读try_files文档并考虑应用程序的需求后,您可能希望调整值的确切列表,但是以上内容应提供最低级别的保护。
移植.htaccess文件 (Porting .htaccess Files)
At some point you’ll want to serve an existing PHP application that was previously served by Apache, and most likely it will have some configuration details for the server either in an .htaccess file or in Apache’s static configuration files (mod_rewrite directives, for example). There are a couple online converters that “translate” Apache directives to nginx, and these are a good starting point in porting your configuration. But be careful not to rely on them entirely. As the saying goes, “Pasting code from the Internet into production is like chewing gum found in the street.” Familiarize yourself with nginx’s documentation and double check the converter’s output to make sure everything is in order.
在某个时候,您需要提供一个以前由Apache提供的现有PHP应用程序,并且很可能它将在.htaccess文件或Apache的静态配置文件(例如mod_rewrite指令)中包含一些服务器的配置详细信息。 )。 有几个在线 转换器将Apache指令“翻译”为nginx,这是移植配置的一个很好的起点。 但是请注意不要完全依赖它们。 俗话说 :“将代码从Internet粘贴到生产中就像在街上发现口香糖一样。” 熟悉nginx的文档,并仔细检查转换器的输出,以确保一切正常。
结论 (Conclusion)
The traditional way of running PHP (Apache and mod_php) is stable and mature, and for the majority of applications is an excellent platform. But the landscape is changing, and more performant solutions like nginx are gaining widespread acceptance, even eating into Apache’s market share. In this article you saw how to configure PHP to run behind nginx with FastCGI. And with your shiny new installations ready to server your own high performance website to the masses, I wish you success!
运行PHP的传统方式(Apache和mod_php)稳定且成熟,对于大多数应用程序而言,它是一个出色的平台。 但是,情况正在发生变化,越来越多的高性能解决方案(如nginx)也得到了广泛认可,甚至吞噬了Apache的市场份额。 在本文中,您了解了如何配置PHP以使其在FastCGI之后在nginx后面运行。 有了闪亮的新安装程序,您可以将自己的高性能网站服务于大众,祝您成功!
翻译自: https://www.sitepoint.com/setting-up-php-behind-nginx-with-fastcgi/


 442
442

 被折叠的 条评论
为什么被折叠?
被折叠的 条评论
为什么被折叠?
 到【灌水乐园】发言


