


codeigniter
PHPFog is a cloud hosting solution for PHP applications. It offers a free shared cloud that includes access to a MySQL database, and the ability to add 3 apps to your account. The main idea behind PHPFog, is that it looks after all the server requirements for you, leaving you free to design and write your application.
PHPFog是用于PHP应用程序的云托管解决方案。 它提供了一个免费的共享云,其中包括对MySQL数据库的访问以及向您的帐户添加3个应用程序的能力。 PHPFog的主要思想是,它可以满足您对服务器的所有要求,使您可以自由设计和编写应用程序。
In this article, I will explain how to create an account with PHPFog, and set up your first CodeIgniter application. I’ll explain how this is done with the source code for your application being managed through the Git Source Code Management System.
在本文中,我将解释如何使用PHPFog创建帐户,以及如何设置您的第一个CodeIgniter应用程序。 我将解释如何通过Git源代码管理系统管理您的应用程序的源代码。
创建一个账户 (Creating an Account)
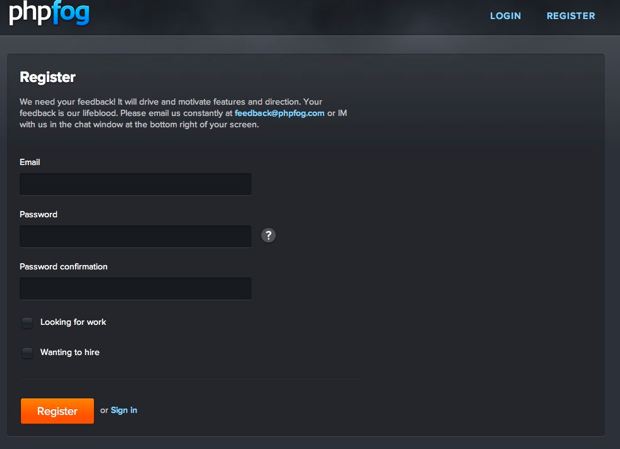
To get started, all you need to do is sign up for an account. This takes seconds to do, and will give access to to the app console.
首先,您需要注册一个帐户。 这需要几秒钟的时间,并且可以访问应用程序控制台。
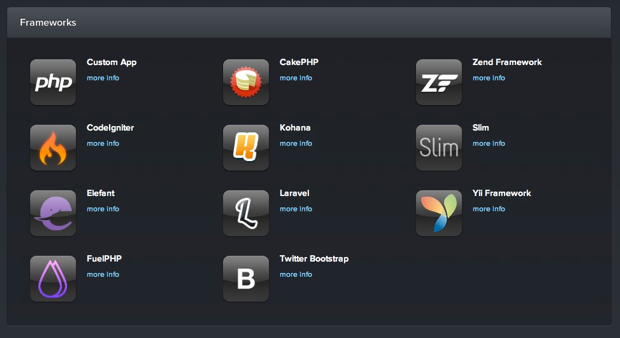
Once your account has been registered, you will be presented with the ‘Create your app’ screen. This comes in 2 sections: either a predefined application such as WordPress, or a framework:
注册帐户后,将显示“创建您的应用”屏幕。 它分为两个部分:预定义的应用程序(例如WordPress)或框架:
创建一个应用程序 (Create an Application)

使用框架安装创建应用 (Create an App with a Framework Installation)
创建一个应用 (Create an App)
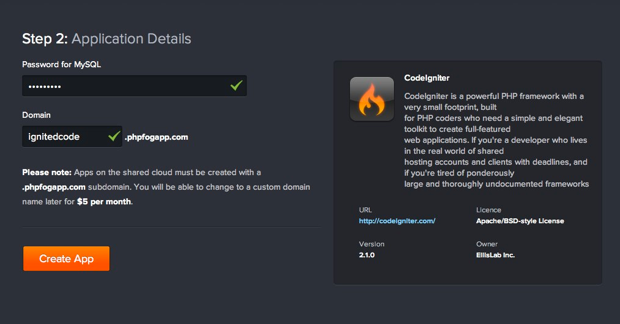
For this article, I am going to guide you though how to create a skeleton app using the CodeIgniter framework. So in the lower half of the window, click the CodeIgniter icon:
对于本文,我将指导您如何使用CodeIgniter框架创建框架应用程序。 因此,在窗口的下半部分,单击CodeIgniter图标:
Your app will be created straight away, and you will see a screen like this:
您的应用程序将立即创建,您将看到如下屏幕:
Notice that you can launch phpMyAdmin from here, and that the database connection information you need will be presented to you too.
请注意,您可以从此处启动phpMyAdmin,并且还将向您显示所需的数据库连接信息。
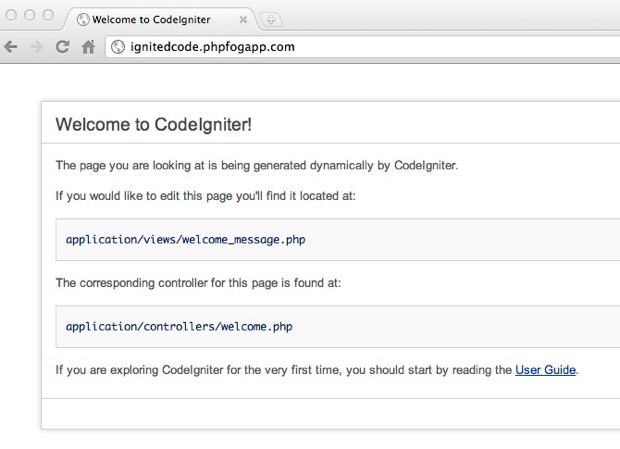
Once the app has finished deploying, you can click the ‘View live site’ button at the top right of the app console. You should be presented with the default CodeIgniter welcome page in a new browser tab:
应用程序完成部署后,您可以单击应用程序控制台右上方的“查看实时站点”按钮。 应该在新的浏览器选项卡中为您提供默认的CodeIgniter欢迎页面:
创建一个SSH密钥 (Create an SSH Key)
It might be that you have created a public/private key pair on your computer already. But if you haven’t you will need to create one. PHPFog have a very useful guide that explains how to do that. It covers Mac and Windows; the procedure for Linux is much the same as for a Mac.
可能是您已经在计算机上创建了公钥/私钥对。 但是,如果没有,则需要创建一个。 PHPFog有一个非常有用的指南 ,解释了如何执行此操作。 它涵盖了Mac和Windows; Linux的步骤与Mac的步骤大致相同。
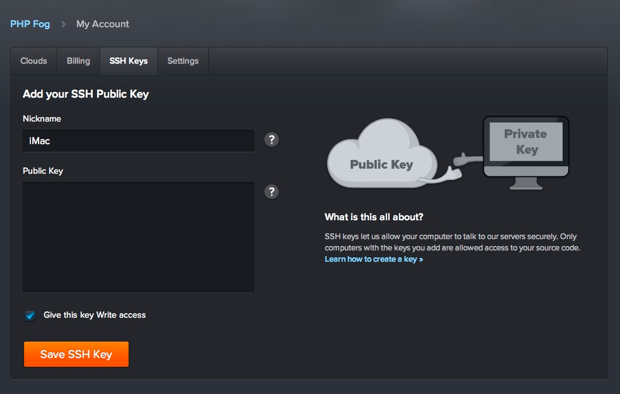
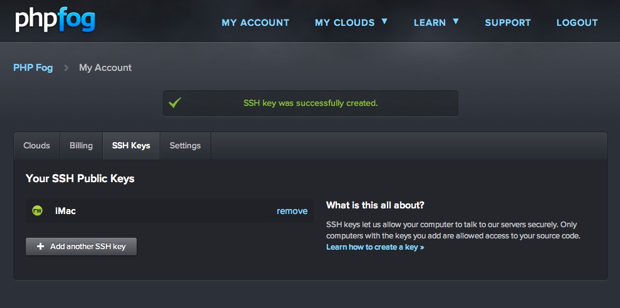
You need the ssh keys, so that the PHPFog server can communicate securely with your computer. From the account window, click on SSH Keys. Here, you can add the public part of the key you just created:
您需要ssh密钥,以便PHPFog服务器可以与您的计算机安全地通信。 在帐户窗口中,点击SSH密钥 。 在这里,您可以添加刚创建的密钥的公共部分:
Once your key has been successfully loaded, you will see the success message:
成功加载密钥后,您将看到成功消息:
将应用程序克隆到计算机 (Cloning the App to your Computer)
Now the fun really starts. I’m going to assume that you already have Git installed on your computer. If you don’t have it you can find it here.
现在,乐趣真正开始了。 我将假设您已经在计算机上安装了Git。 如果没有,可以在这里找到。
You can use Git to clone the repository PHPFog created for you. If you look at the top right of the app console window, you will see the Git clone url that you need to use:
您可以使用Git克隆为您创建的存储库PHPFog。 如果您查看应用程序控制台窗口的右上角,将会看到需要使用的Git克隆URL:
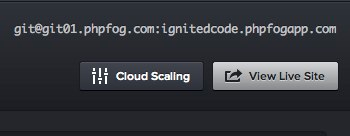
Obviously, the url will reflect the domain/account name you have chosen.
显然,URL将反映您选择的域/帐户名称。
Now, you can open a terminal window, change into the directory where you want to store the source code, and then type the clone command:
现在,您可以打开一个终端窗口,切换到要存储源代码的目录,然后键入clone命令:
git clone git@git01.phpfog.com:your-domain.phpfogapp.com your-project-nameYou will see Git download the code from your PHPFog app into the directory you named at the end of the clone command. Now you can open the code as a project in your favourite IDE/text editor. Next we’ll make some adjustments to the configuration of the framework, and push the changes back to the PHPFog repository.
您将看到Git将代码从PHPFog应用程序下载到克隆命令末尾命名的目录中。 现在,您可以在您喜欢的IDE /文本编辑器中将代码作为项目打开。 接下来,我们将对框架的配置进行一些调整,并将更改推回PHPFog存储库。
使用源代码 (Working with the Source Code)
The first thing we will do, so that we can use pretty url’s in our CodeIgniter web app, is add a .htaccess file. That will serve as a good quick test of pushing code back to the PHPFog repository too. Here is a .htaccess file you can use with CodeIgniter:
我们要做的第一件事是添加一个.htaccess文件,以便可以在我们的CodeIgniter网络应用程序中使用漂亮的url。 这也可以作为将代码推回PHPFog存储库的快速测试。 这是可以与CodeIgniter一起使用的.htaccess文件:
<IfModule mod_rewrite.c>
    RewriteEngine On
    RewriteBase /
    RewriteCond %{REQUEST_URI} ^system.*
    RewriteRule ^(.*)$ /index.php?/$1 [L]

    #Checks to see if the user is attempting to access a valid file,
    #such as an image or css document, if this isn't true it sends the
    #request to index.php
    RewriteCond %{REQUEST_FILENAME} !-f
    RewriteCond %{REQUEST_FILENAME} !-d
    RewriteRule ^(.*)$ /index.php?/$1 [L]
</IfModule>

<IfModule !mod_rewrite.c>
    # If we don't have mod_rewrite installed, all 404's
    # can be sent to index.php, and everything works as normal.
    # Submitted by: ElliotHaughin

    ErrorDocument 404 /index.php
</IfModule>
Add this to a .htaccess file in the root directory of the project. Now, back in your terminal window, you can run:
将此添加到项目的根目录中的.htaccess文件。 现在,回到终端窗口,您可以运行:
git statusAnd the reply will show you the newly added file. Do a:
回复将显示新添加的文件。 做一个:
git add .to stage the file, and then commit the changes:
暂存文件,然后提交更改:
git commit -am 'add a .htaccess file for pretty url's'Finally, to send this file to the server, you can push:
最后,要将这个文件发送到服务器,您可以推送:
git push origin master更新框架配置 (Updating the Framework Config)
You have just updated the source code on the PHPFog server in the last step. You can’t really see this change yet though. Also, although you have the database configuration information, you still need to add it to the framework so it knows how to talk the the MySQL database.
在最后一步中,您刚刚更新了PHPFog服务器上的源代码。 不过,您实际上还看不到这种变化。 另外,尽管您具有数据库配置信息,但仍需要将其添加到框架中,以便它知道如何使用MySQL数据库。
更新数据库配置 (Update the Database Config)
Open the file application/config/database.php and add the database configuration options PHPFog created for you:
打开文件application / config / database.php并添加为您创建的数据库配置选项PHPFog:
$db['default']['hostname'] = 'mysql-shared-02.phpfog.com';
$db['default']['username'] = 'your username';
$db['default']['password'] = 'your password';
$db['default']['database'] = 'your database name';
$db['default']['dbdriver'] = 'mysql';
Commit your changes, and push up to the PHPFog server again. Refresh the site in your browser, and the CodeIgniter default page should appear. You might think nothing has happened, but if the refresh worked without error, in means CodeIgniter is now connecting to your database.
提交您的更改,然后再次推送到PHPFog服务器。 在浏览器中刷新站点,然后将出现CodeIgniter默认页面。 您可能认为没有任何React,但是如果刷新正常进行,则意味着CodeIgniter现在正在连接到数据库。
更新站点配置 (Update the Site Config)
Next, we will add the correct site url and remove the index.php file from our url’s since we are using a .htaccess file. Open application/config/config.php:
接下来,由于我们使用的是.htaccess文件,因此我们将添加正确的网站网址,并从我们的网址中删除index.php文件。 打开application / config / config.php:
$config['base_url'] = 'http://your-name-here.phpfogapp.com/';
$config['index_page'] = '';
While we are at it, we will autoload a couple of resources that will be useful. Open application/config/autoload.php, and update the libraries and helpers sections:
在此过程中,我们将自动加载一些有用的资源。 打开application / config / autoload.php,并更新库和帮助器部分:
$autoload['libraries'] = array('database');
$autoload['helper'] = array('url');
Commit and push your changes.
提交并推送您的更改。
证明事情有效 (Proving Things Work)
We are now ready to do some coding that will actually affect the web site in a way that we can see. Open application/views/welcome_message.php and copy the contents into a new file called page2.php in the views folder. Then open application/controllers/welcome.php, and create a new method:
现在,我们准备进行一些编码,这些编码实际上会以我们可以看到的方式影响网站。 打开application / views / welcome_message.php并将内容复制到views文件夹中的新文件page2.php中。 然后打开application / controllers / welcome.php,并创建一个新方法:
public function page2()
{
    $this->load->view('page2');
}
Then, you can make a minor change to application/views/welcome_message.php:
然后,您可以对application / views / welcome_message.php进行较小的更改:
<div id="body">
    <p><?=anchor(base_url() . 'welcome/page2', 'Go to page 2')?></p>
We are using CodeIgniters’ url helper here. You can do something similar in application/views/page2.php:
我们在这里使用CodeIgniters的网址帮助程序。 您可以在application / views / page2.php中执行类似的操作:
<div id="body">
    <p><?=anchor(base_url() . 'welcome', 'Go to the home page')?></p>
Commit and push your changes, then try it out in your browser:
提交并推送您的更改,然后在浏览器中进行尝试:
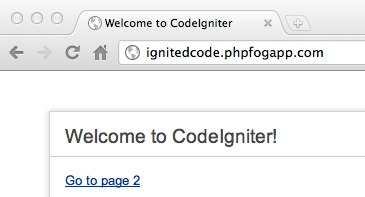
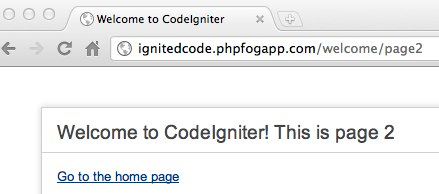
Here, we can see that our simple code updates got pushed to the server, and we can also see that our pretty urls are working.
在这里,我们可以看到我们的简单代码更新已推送到服务器,并且还可以看到我们漂亮的url在起作用。
测试数据库 (Testing the database)
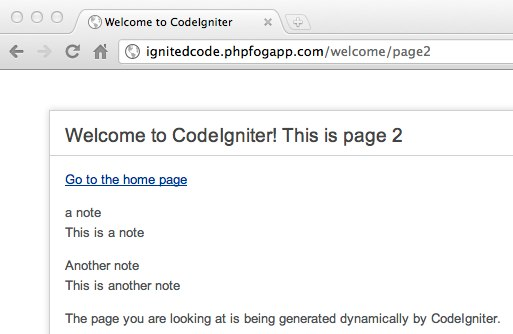
I created a simple table called ‘notes’ via the phpMyAdmin installation provided by PHPFog. I added the following fields: id, title, note. Then I created a couple of test notes.
我通过PHPFog提供的phpMyAdmin安装创建了一个简单的表,称为“笔记”。 我添加了以下字段:id,标题,注释。 然后,我创建了一些测试笔记。
Back in your editor, create a new file in application/models called ‘notes_model.php’. Then add a method for retrieving all the notes:
返回编辑器,在应用程序/模型中创建一个名为“ notes_model.php”的新文件。 然后添加一种检索所有注释的方法:
<?php
class Notes_model extends CI_Model
{
    public function __construct()
    {
        parent:: __construct();
    }

    public function get_notes()
    {
        $data = array();
        $sql = "SELECT * FROM notes";
        $q = $this->db->query($sql);
        if($q->num_rows() > 0)
        {
            foreach($q->result() as $row)
            {
                $data[] = $row;
            }

            return $data;
        }
        else
        {
            return 0;
        }
    }
}
Now we need to hook up the model to a method in the controller (application/controllers/welcome.php):
现在我们需要将模型连接到控制器中的方法(application / controllers / welcome.php):
public function page2()
{
    $this->load->model('notes_model');
    $data['notes'] = $this->notes_model->get_notes();
    $this->load->view('page2',$data);
}
Here, you can see that we are loading our notes model, calling the ‘get_notes()’ method, and assigning the results to an array ($data) that can be passed to the view.
在这里,您可以看到我们正在加载Notes模型,调用'get_notes()'方法,并将结果分配给可以传递给视图的数组($ data)。
In application/views/page2.php add the following code:
在application / views / page2.php中添加以下代码:
<div id="body">
    <p><?=anchor(base_url() . 'welcome', 'Go to the home page')?></p>
    <?php if($notes > 0):?>
    <?php foreach($notes as $n):?>
        <p>
            <?=$n->title?><br />
            <?=$n->note?>
        </p>
    <?php endforeach;?>
    <?php else:?>
        No notes found.
    <?php endif?>
Add, commit, and push your changes, then check the results in your browser:
添加,提交和推送更改,然后在浏览器中检查结果:
结论 (Conclusion)
PHPFog makes it really easy to set up and deploy PHP web apps to the cloud. You don’t have to worry about the server set up, or databases, or any updating. It is all done for you. Coding on the cloud also makes it possible to streamline your own development tool chain too, since all you really need, is a text editor and Git. No more FTP pain!
通过PHPFog,可以非常轻松地设置和将PHP Web应用程序部署到云中。 您不必担心服务器设置,数据库或任何更新。 一切都为您完成。 在云上进行编码还可以简化您自己的开发工具链,因为您真正需要的只是文本编辑器和Git。 FTP不再痛苦!
Ignition of match with smoke via Shutterstock
通过Shutterstock 点燃烟雾
翻译自: https://www.sitepoint.com/how-to-build-a-codeigniter-web-app-on-phpfog/
codeigniter


 被折叠的 条评论
为什么被折叠?
被折叠的 条评论
为什么被折叠?
 到【灌水乐园】发言


