


tt作曲家简谱打谱软件
While preparing my technical materials for WebSummerCamp, I realized my workshop would rely on a fairly stable internet connection, as we’d have a lot of ground to cover and a lot of packages to install. Rather than rely on the gods of live demos, or pre-installing everything and ruining the experience, I picked another route.
在准备WebSummerCamp的技术资料时,我意识到我的讲习班将依靠相当稳定的Internet连接,因为我们需要大量基础知识并要安装很多软件包。 我选择了另一条路线,而不是依靠现场演示的神灵,或者预先安装一切并破坏体验。
In this post, I’ll show you how to set up a local Satis instance and have it host the packages over the network it’s currently on, so that everyone who’s also connected to it can put the address into composer.json as a custom repository source, and retrieve all packages from your machine locally – no internet connection required!
在本文中,我将向您展示如何设置本地Satis实例,并使其通过当前所在的网络托管程序包,以便所有与之连接的人都可以将该地址作为自定义存储库放入composer.json中。来源,然后从本地计算机上检索所有软件包-无需Internet连接!

先决条件 (Prerequisites)
Due to a habit of never installing programming-related software on my main OS (more about that here), I’m using Homestead Improved, as usual. If you have a working PHP installation on your host machine, or prefer Docker or something similar, please feel free to use that. Note, however, that for the sake of cross-platform friendliness and simplicity, this tutorial will be Homestead Improved-specific.
由于从不习惯在我的主OS上安装与编程相关的软件的习惯( 此处有更多信息),所以我照常使用Homestead Improvement 。 如果您在主机上安装了可以正常工作PHP,或者更喜欢Docker或类似工具,请随时使用。 但是请注意,为了跨平台友好和简单起见,本教程将特定于Homestead Improvement 。
Before booting up the VM, make sure you share an arbitrary port. This can be done by editing the bottom section of Homestead.yaml. I picked 6789, so that my local “packagist” will be hosted on IP:6789 where IP will be the IP address of my host machine.
在启动VM之前,请确保共享一个任意端口。 这可以通过编辑Homestead.yaml的底部部分来完成。 我选择了6789,这样我的本地“包装专家”将托管在IP:6789 ,其中IP将是我的主机的IP地址。
满足 (Satis)
Inside the VM, in an arbitrary location of your choice (I picked /home/vagrant/Code/) install a new Satis project with:
在VM内,在您选择的任意位置(我选择了/home/vagrant/Code/ ),安装一个新的Satis项目,其内容如下:
composer create-project composer/satis --stability=dev --keep-vcsThis will create the subfolder satis.
这将创建子文件夹satis 。
满意如何运作 (How Satis Works)
Satis accepts a satis.json file which tells it which repositories to download, which versions of those repos to download, where to place them after the download, and more. For a more comprehensive overview of all options you can use in satis.json, see the docs.
Satis接受satis.json文件,该文件告诉它要下载的存储库,要下载的存储库的版本,下载后的放置位置等等。 有关可在satis.json使用的所有选项的更全面概述,请参阅docs 。
Let’s create satis.json in the Code/satis folder created earlier. Then, inside satis.json, we place the packages we need. For example:
让我们在之前创建的Code/satis文件夹中创建satis.json 。 然后,在satis.json ,放入所需的包。 例如:
{
    "name": "NoFW Websc",
    "homepage": "http://nofw.websc:6789",
    "repositories": [
        { "type": "vcs", "url": "https://github.com/twigphp/Twig" },
        { "type": "vcs", "url": "https://github.com/sitepoint/Rauth" },
        { "type": "vcs", "url": "https://github.com/PHP-DI/PHP-DI" },
        { "type": "vcs", "url": "https://github.com/nikic/FastRoute" },
        { "type": "vcs", "url": "https://github.com/guzzle/guzzle" },
        { "type": "vcs", "url": "https://github.com/Respect/Validation" },
        { "type": "vcs", "url": "https://github.com/doctrine/annotations" },
        { "type": "vcs", "url": "https://github.com/thephpleague/glide" },
        { "type": "vcs", "url": "https://github.com/tamtamchik/simple-flash" },
        { "type": "vcs", "url": "https://github.com/Seldaek/monolog" },
        { "type": "vcs", "url": "https://github.com/cakephp/orm" },
        { "type": "vcs", "url": "https://github.com/Bee-Lab/bowerphp" },
        { "type": "vcs", "url": "https://github.com/markstory/mini-asset" },
        { "type": "vcs", "url": "https://github.com/natxet/CssMin" },
        { "type": "vcs", "url": "https://github.com/linkorb/jsmin-php" },
        { "type": "vcs", "url": "https://github.com/consolidation-org/Robo" },
        { "type": "vcs", "url": "https://github.com/symfony/var-dumper" },
        { "type": "vcs", "url": "https://github.com/consolidation-org/Robo" },
        { "type": "vcs", "url": "https://github.com/twigphp/Twig-extensions" }
    ],
    "require-all": true,
    "require-dependencies": true,
    "require-dev-dependencies": true,
    "archive": {
        "directory": "dist"
    }
}
As you can see, the list is non-trivial. Depending on the conference connection, downloading all this in a room of 50 people would indeed be overly optimistic, especially considering mine is only one of three simultaneous workshops on the same internet connection, not counting the hotel guests. Keep in mind that in order to target VCS repos (they can be of any type), the full URL to their repo is required – that’s why we’re using Github URLs here, and not the package names like we would in a typical require.
如您所见,该列表非常重要。 取决于会议连接,在50人的房间中下载所有文件确实会过分乐观,特别是考虑到我的会议只是同一互联网上同时举办的三个讲习班之一,还不包括酒店客人。 请记住,为了定位VCS存储库(它们可以是任何类型 ),需要其存储库的完整URL –这就是为什么我们在此处使用Github URL的原因,而不是像通常require那样使用包名。
The require-* values mean all versions and all their dependencies are to be installed. The archive section makes sure the distributions of the packages are downloaded into dist for full offline access.
require-*值表示将安装所有版本及其所有依赖项。 archive部分确保将软件包的发行版下载到dist以进行完全脱机访问。
Note that I’ve used an actual host name for the URL, not the IP of my machine. I could have used an IP and it would have worked, but only at home – at the conference, the IP of my machine would change, and things would break. You should always define the URL with a host name, rather than an IP.
请注意,我使用的是实际的主机名作为URL,而不是机器的IP。 我本来可以使用IP,但只能在家里使用-在会议上,我的机器的IP会更改,并且事情会破裂。 您应该始终使用主机名而不是IP定义URL。
Once we’ve listed everything we need, we build the local repo with:
列出所需的所有内容后,我们将使用以下命令构建本地存储库:
php bin/satis build satis.json web/This will read the satis.json file and save all the packages at all their required versions into web/ (depending on the number of packages and the version required, this can take a while). You’ll likely be asked for a Github token to get past the download limit. If so, just follow the on screen instructions.
这将读取satis.json文件,并将所有所需版本的所有软件包保存到web/ (取决于软件包数量和所需版本,这可能需要一段时间)。 您可能会被要求提供Github令牌以超过下载限制。 如果是这样,只需按照屏幕上的说明进行操作。
Note that the above setup is absolutely brutal in terms of installation times because Satis will download and install all version of all packages, and all their binary distributions. This is handy when altering/developing these packages, but not in everyday use. I recommend you define the exact versions of packages you need, rather than requiring “all”.
请注意,就安装时间而言,上述设置绝对是残酷的 ,因为Satis将下载并安装所有软件包的所有版本及其所有二进制发行版。 这在更改/开发这些软件包时很方便,但在日常使用中并不方便。 我建议您定义所需软件包的确切版本,而不是“全部”。
代管 (Hosting)
Now that the packages have been downloaded, we need to point a server at the web folder, so that it’s accessible via the web. Composer will download packages from it via HTTP, so some basic web hosting needs to be put in place. This doesn’t need to be robust, so a simple PHP built-in webserver instance will do just fine:
现在已经下载了软件包,我们需要将服务器指向web文件夹,以便可以通过Web对其进行访问。 Composer将通过HTTP从其下载软件包,因此需要一些基本的虚拟主机。 这不需要很健壮,因此一个简单PHP内置Web服务器实例就可以了:
cd web
php -S 0.0.0.0:6789
The server is now live, and the index page should be accessible from the host machine. For example, if you added an etc/hosts entry like nofw.websc (this was my host entry for the conference), you should be able to open it as such:
服务器现在处于活动状态,并且应该可以从主机访问索引页面。 例如,如果您添加了一个诸如nofw.websc类的etc/hosts条目(这是我参加会议的主持人条目),那么您应该能够这样打开它:
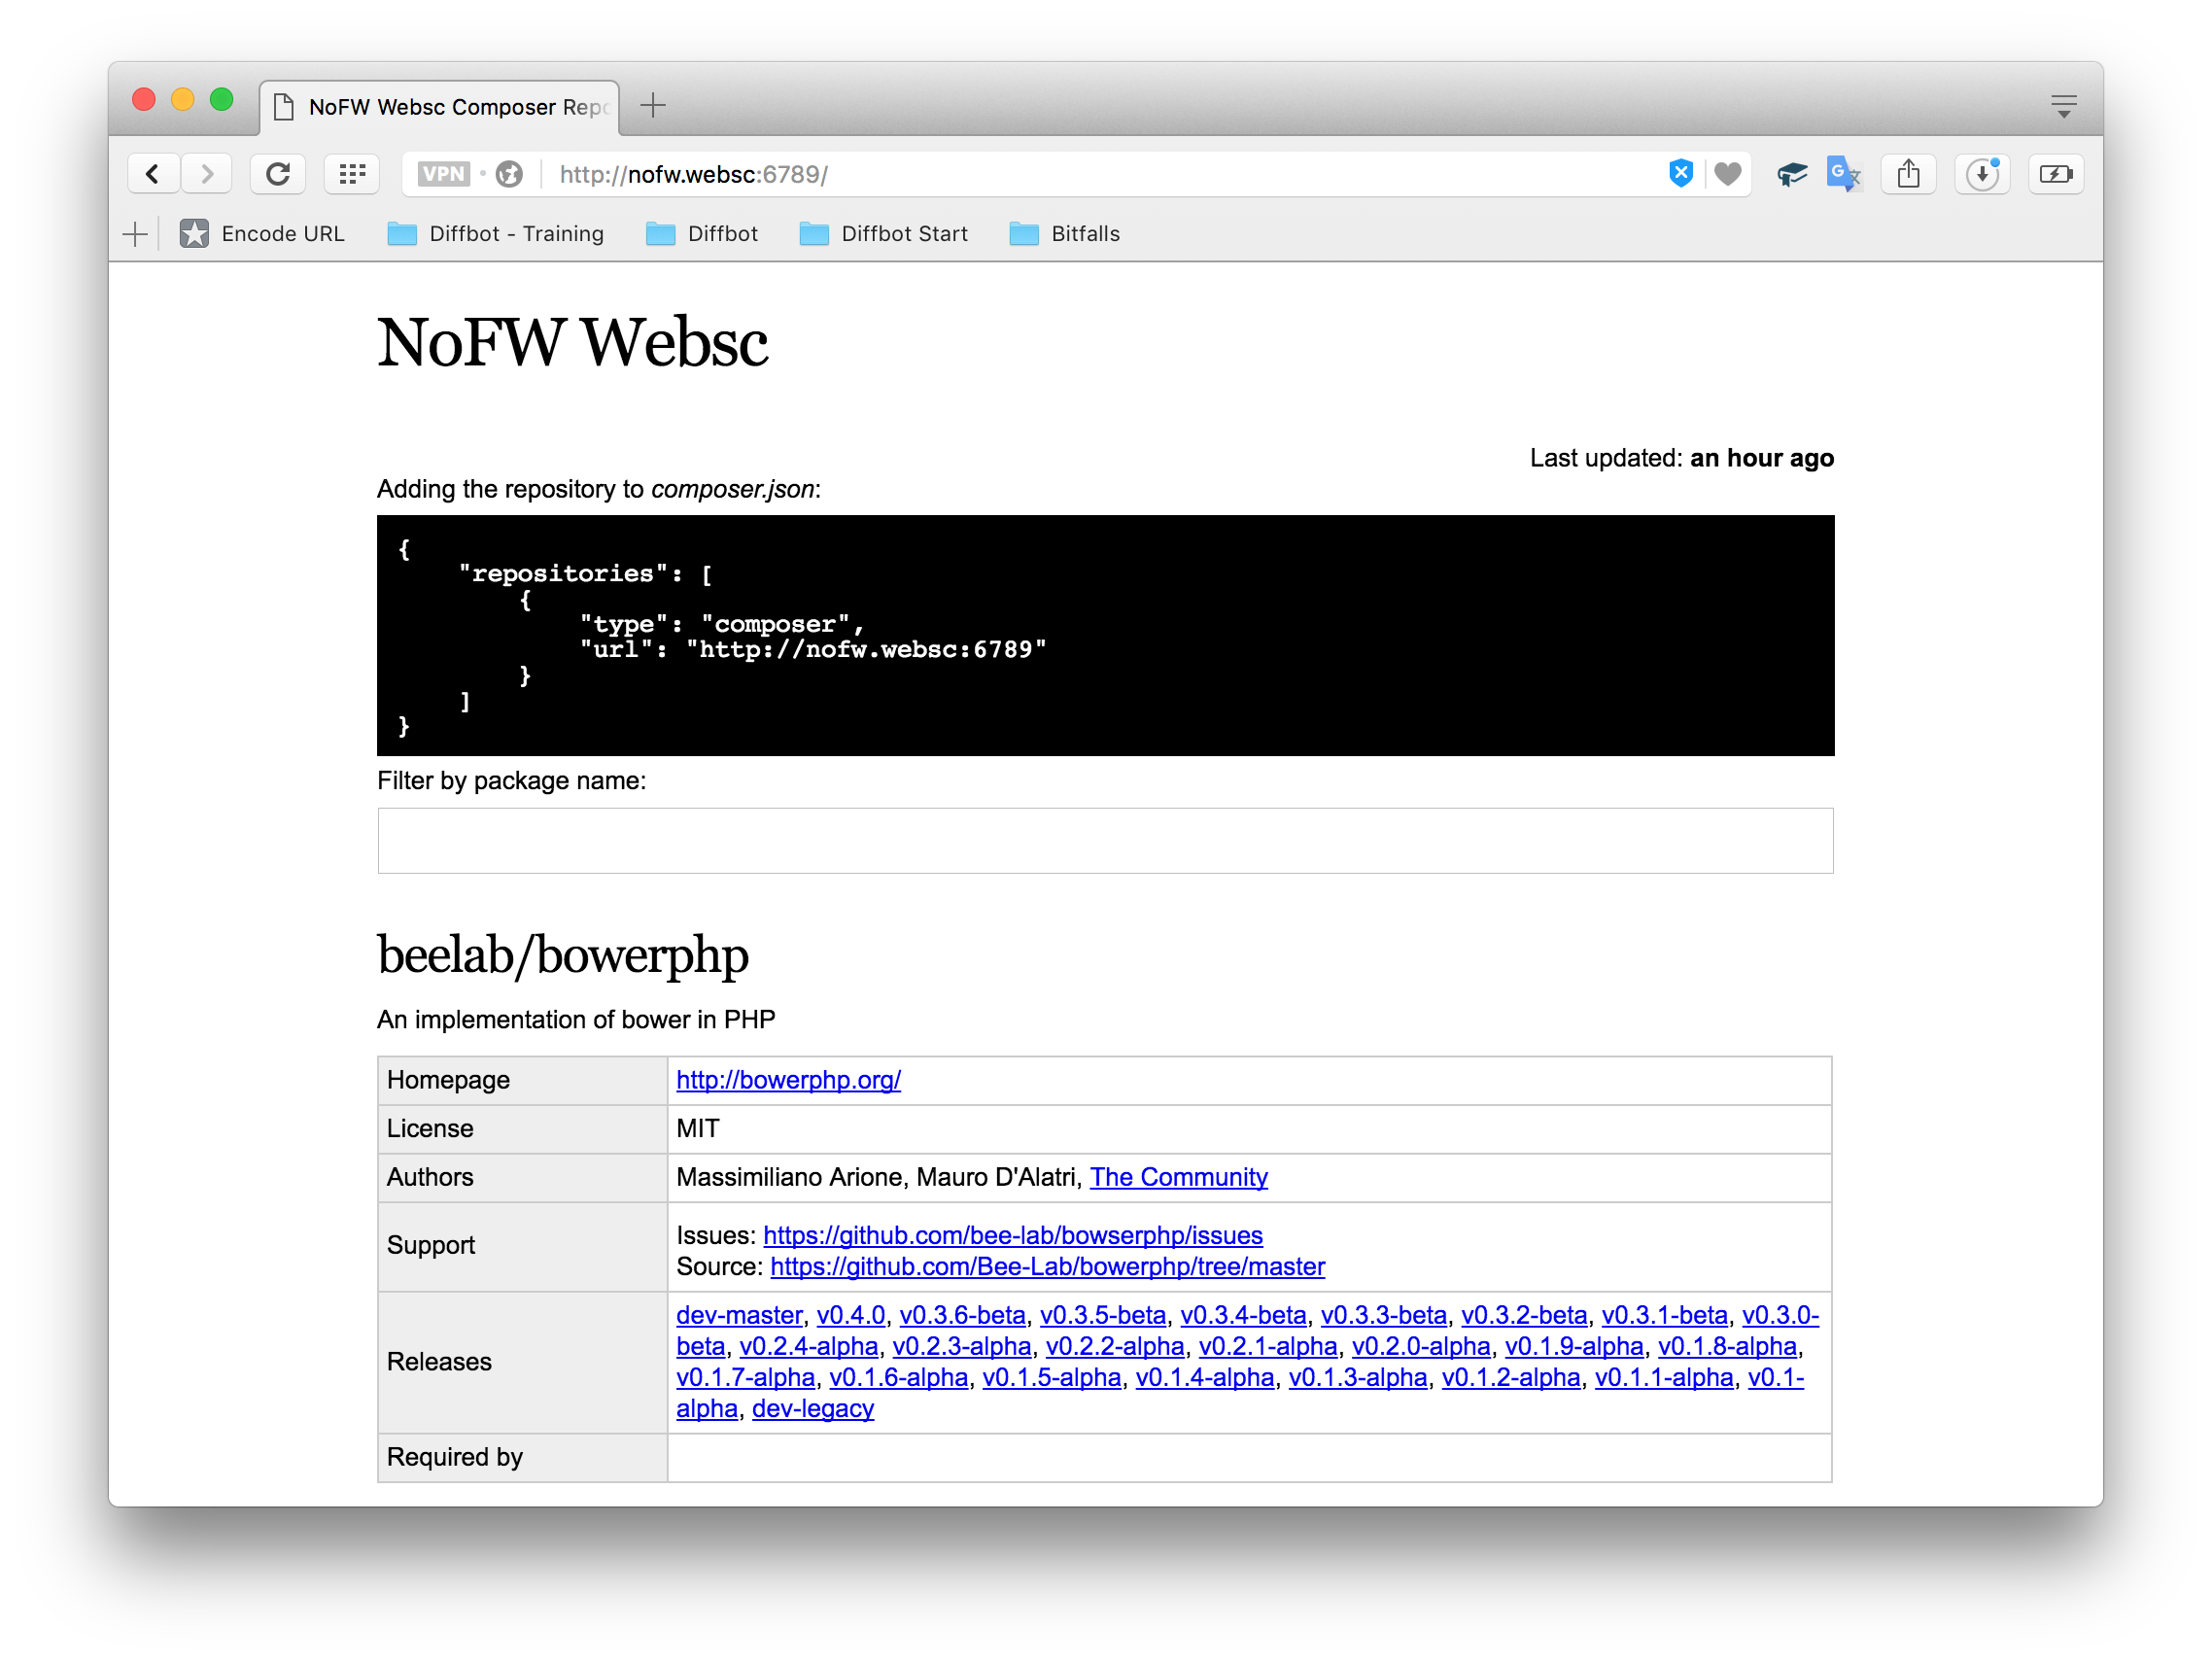
This screen lists all installed packages at their installed versions, and lets you search them.
该屏幕列出了所有已安装软件包的安装版本,并允许您搜索它们。
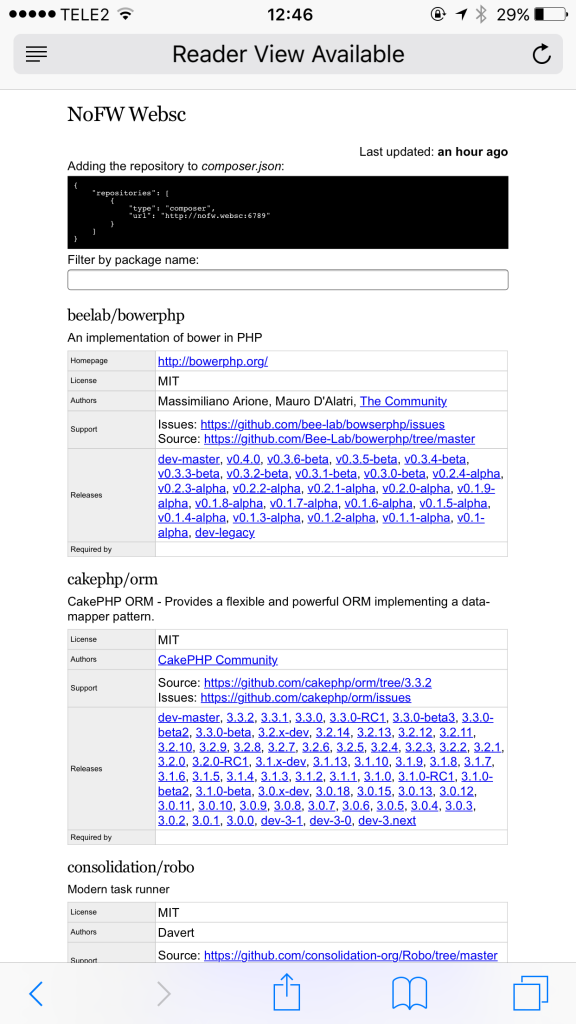
If you have a phone connected to your wifi, you should be able to access the same screen by using your host machine’s IP address. At the time of writing, my Macbook’s IP address was 192.168.5.11, so I could access it via 192.168.5.11:6789:
如果您的手机已连接到wifi,则应该能够使用主机的IP地址访问同一屏幕。 在撰写本文时,我的Macbook的IP地址为192.168.5.11 ,因此我可以通过192.168.5.11:6789访问:
That’s not very useful, though, so let’s try and access it from another machine to make sure it works. I’ll try my Windows 10 laptop:
不过,这不是很有用,因此让我们尝试从另一台计算机上访问它以确保其正常工作。 我将尝试使用Windows 10笔记本电脑:
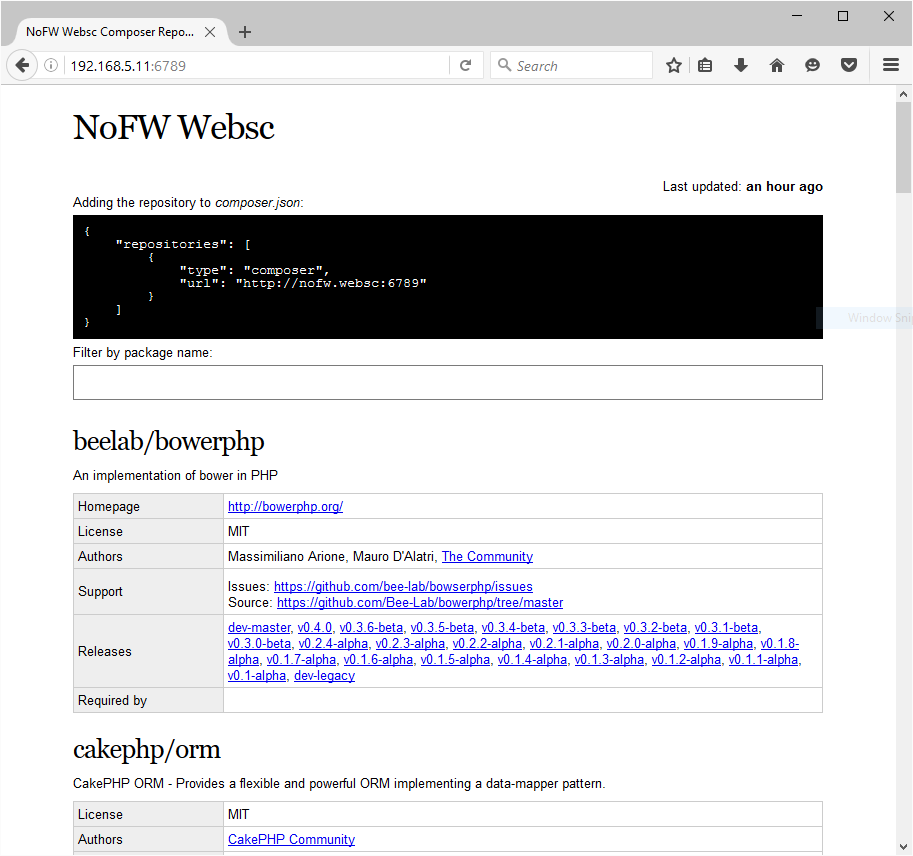
Sure enough, it works.
果然,它可行。
用法 (Usage)
Finally, let’s try and pull some of those packages in on the Windows machine. Naturally, I use Vagrant there as well. I’ll assume you’ve also set up a new Homestead Improved instance for trying this out.
最后,让我们尝试在Windows计算机上拉入其中一些软件包。 当然,我也在那里使用Vagrant。 我假设您还设置了一个新的Homestead Improvement实例来进行尝试。
Once it’s up and running, we need to modify the etc/hosts file of the VM to include the “address” of our repo – corresponding to the one in satis.json. In my case, that’s:
一旦启动并运行,我们需要修改VM的etc/hosts文件,使其包含存储库的“地址” –对应于satis.json中的satis.json 。 就我而言,那就是:
192.168.5.11 nofw.webscThen, as per instructions on the home page of our Satis repo, we add the repositories key into the composer.json file of the projects we want to pull from our Satis server:
然后,按照Satis repositories主页上的说明,将repositories密钥添加到要从Satis服务器中提取的项目的composer.json文件中:
{
    "repositories": [
        {
            "type": "composer",
            "url": "http://nofw.websc:6789"
        }
    ],
    "config": {
        "secure-http": false
    }
}
We have to use secure-http: false because we’re serving from a local server, one without an SSL certificate. By default, Composer won’t let us install anything over HTTP.
我们必须使用secure-http: false因为我们是从本地服务器提供服务的,该服务器没有SSL证书。 默认情况下,Composer不允许我们通过HTTP安装任何内容。
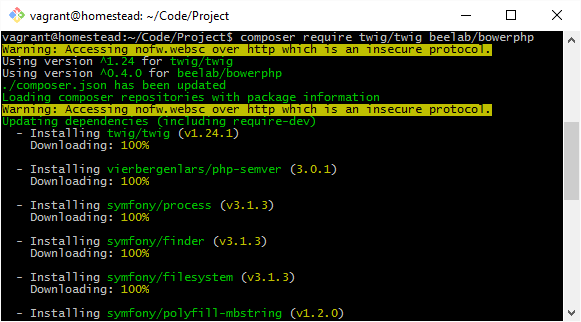
Now, we can require packages in that project as usual:
现在,我们可以照常要求该项目中的软件包:
composer require twig/twig beelab/bowerphpComposer should now take into account our new repo address, and pull from there:
Composer现在应该考虑到我们的新回购地址,并从那里开始:
故障排除 (Troubleshooting)
This section will list some common problems and their solutions.
本节将列出一些常见问题及其解决方案。
Windows无法打开“ Intranet”(192.168.xx)网站 (Windows won’t open “intranet” (192.168.x.x) sites)
The issue can be a WiFi extender which mimics the main network – it replicates the SSID and password to allow for seamless connection throughout the house. The problem is that if the devices aren’t connected to the same device (all on router, or all on extender) this intranet communication won’t work.
问题可能是模仿主网络的WiFi扩展器–它复制了SSID和密码,以实现整个房屋的无缝连接。 问题是,如果设备未连接到同一设备(全部在路由器上,或全部在扩展器上),则此Intranet通信将无法正常工作。
To solve the problem, make sure all devices are connected to the same router / extender by, for example, powering off the extender.
要解决此问题,请确保所有设备都连接到同一路由器/扩展器,例如通过关闭扩展器的电源。
拒绝连接 (Connection refused)
Make sure you opened the ports in Homestead.yaml, like so:
确保您在Homestead.yaml打开了端口,如下所示:
ports:
     - send: 6789
       to: 6789
If you’re using another Vagrant box which doesn’t have this simple setup procedure, go raw and modify the ports in the Vagrantfile.
如果您使用的另一个Vagrant框没有简单的设置过程,请原始操作并修改Vagrantfile中的端口 。
为什么不使用Ngrok或Localtunnel? (Why not use Ngrok or Localtunnel?)
Because those require internet access, silly, and need a stable connection. They’re just for sharing a local server with the public, not for sharing stuff via WiFi.
因为那些需要互联网访问,所以很傻,并且需要稳定的连接。 它们仅用于与公众共享本地服务器,而不用于通过WiFi共享内容。
结论 (Conclusion)
In this tutorial, we saw how easy it is to host your own required Composer packages locally, so that everyone in an offline environment, or an environment with an unstable internet connection, can still connect and download all packages. This is useful not only for conferences, but also as a “packagist backup” for companies – no more downtime when Github is down!
在本教程中,我们看到了在本地托管自己所需的Composer程序包有多么容易,这样,处于脱机环境或Internet连接不稳定的环境中的每个人仍然可以连接并下载所有程序包。 这不仅对会议有用,而且对公司来说是“包装专家的备份” –当Github关闭时,不再有停机时间!
Another idea is putting together a small Raspberry Pi box with this exact same setup, and carry it with you. That way, there’s no need to host a heavy Vagrant image, and you still have all your needed packages with you – ready to be shared with anyone connecting to your Wifi. Developing on a train or plane and want to share your work with another tethered colleague? No problem! Just boot up the RasPi hosting your Satis and it’s ready to roll!
另一个想法是将一个具有相同设置的小Raspberry Pi盒子放在一起,并随身携带。 这样,就无需托管沉重的Vagrant映像,并且您仍然拥有所有需要的软件包-准备与连接到Wifi的任何人共享。 在火车或飞机上进行开发,并想与另一位受束缚的同事共享您的工作? 没问题! 只需启动托管您的Satis的RasPi,即可开始滚动!
翻译自: https://www.sitepoint.com/local-composer-for-everyone-a-conference-friendly-satis-setup/
tt作曲家简谱打谱软件


 1364
1364

 被折叠的 条评论
为什么被折叠?
被折叠的 条评论
为什么被折叠?
 到【灌水乐园】发言


