In this tutorial we’re going to see how easy it is to create a basic paid membership website using the Laravel Cashier package. You can see a demo of the app here and download the source code here.
在本教程中,我们将看到使用Laravel Cashier软件包创建基本的付费会员网站是多么容易。 你可以看到应用程序的演示在这里和下载的源代码在这里 。
建立工作环境 (Setting up a working environment)
We need to create a boilreplate project to get started, and we can do that in two different ways:
我们需要创建一个boilreplate项目来开始,我们可以通过两种不同的方式来做到这一点:
we can clone the Github repo to our project folder.
我们可以克隆Github上回购我们的项目文件夹。
Assuming that you have
composerinstalled, ( check installation guide for more details).假设您已安装
composer,(请参阅安装指南以获取更多详细信息)。we run
我们跑
composer create-project laravel/laravel laravel_membership --prefer-dist, this will create a laravel boilerplate project in ourlaravel_membershipfolder.composer create-project laravel/laravel laravel_membership --prefer-dist,这将在我们的laravel_membership文件夹中创建一个laravel样板项目。
Now we need to require the Laravel Cashier package to the project by adding "laravel/cashier": "~1.0" to our composer.json on the require section and run composer update to update our dependencies.
现在,我们需要要求Laravel Cashier加入包项目"laravel/cashier": "~1.0"我们composer.json在require部分和运行composer update来更新我们的依赖。
After that we need to tell our app to load the Cashier service provider class. We can do that by adding "Laravel\Cashier\CashierServiceProvider" to the providers array on the config/app.php file.
之后,我们需要告诉我们的应用加载Cashier服务提供商类。 我们可以通过将"Laravel\Cashier\CashierServiceProvider"到config/app.php文件上的providers数组中来实现。
Note: You must run composer dump-autoload to update the classMap package.
注意 :您必须运行composer dump-autoload来更新classMap package 。
使用迁移创建数据库 (Creating the database using migrations)
If you are new to Laravel Migrations be sure to check the documentation. We are going to use two tables:
如果您不Laravel Migrations ,请务必检查文档 。 我们将使用两个表:
posts table: – INT id – STRING title – LONG_TEXT content – BOOL is_premium
posts表:– INT id – STRING title – LONG_TEXT content – BOOL is_premium
users table: – INT id – VARCHAR(60) email – VARCHAR(60) password
users表:– INT id – VARCHAR(60) email – VARCHAR(60) password
The Laravel artisan command line tool makes it easy to create and manage migration classes.
Laravel artisan命令行工具使创建和管理迁移类变得容易。
php artisan migrate:make create_posts_table --create="posts"

php artisan migrate:make create_users_table --create="users"
and then we fill the Schema::create callback function argument with the necessary code that looks like this
然后我们用如下所示的必要代码填充Schema::create回调函数参数
Schema::create('posts', function(Blueprint $table)
{
    $table->increments('id');
    $table->string('title');
    $table->longText('content');
    $table->boolean("is_premium");
    $table->timestamps();
});

Schema::create('users', function(Blueprint $table)
{
    $table->increments('id');
    $table->string('email', 100)->unique();
    $table->string('password', 60);
    $table->timestamps();
});
To let Laravel Cashier know about our billable table we need to create a specific migration for that. Laravel Cashier has a built in command for that purpose.
为了让Laravel Cashier知道我们的计费表,我们需要为此创建一个特定的迁移。 Laravel Cashier为此目的有一个内置命令。
php artisan cashier:table usersNow we are ready to migrate our database
现在我们准备迁移数据库
php artisan migrateif you open your users table you will see a bunch of fields added when the package migration is executed. – stripe_active if you have an active subscription. – stripe_id user id on Stripe server. – stripe_plan Stripe subscription plan. – last_four credit card last four digits. – trial_ends_at an end date is stored if you specify a trial period. – subscription_ends_at subscription end date.
如果打开users表,则在执行包迁移时会看到一堆字段。 – stripe_active如果您有活动的订阅。 – Stripe服务器上的stripe_id用户ID。 – stripe_plan条纹订阅计划。 – last_four信用卡的后四位数字。 –如果您指定试用期,则将存储终止日期的trial_ends_at 。 – subscription_ends_at订阅结束日期。
Now we will seed the database with some dummy data to get started; check the final result on GitHub.
现在,我们将使用一些虚拟数据为数据库播种以开始使用; 在GitHub上检查最终结果。
条纹计费过程 (Stripe billing process)
Dealing with payment can be a pain in the neck, and Stripe can help you with that, they use tokens instead of card numbers etc.., and that’s how you can make sure that your customers stay secure while paying for your service.
处理付款可能会让人不胜其烦,Stripe可以帮助您解决这一问题,他们使用tokens而不是卡号等。这就是您确保客户在付款时保持安全的方式。
NOTE: Check if Stripe is supported in your country, but you can still use it for testing if not.
注意:请检查您所在国家/地区是否支持 Stripe,但仍然可以使用它进行测试。
To get started we need to get an account first. Stripe doesn’t have a monthly fee for the subscription, you only pay when you get paid.
首先,我们需要先获得一个帐户。 Stripe没有订阅的月租费,只有在收到付款后才付款。
Now, after getting an account you need to create Plans for your application (Monthly, Yearly, Silver, Gold…).
现在,获得一个帐户后,您需要为您的应用程序创建计划(每月,每年,白银,黄金…)。
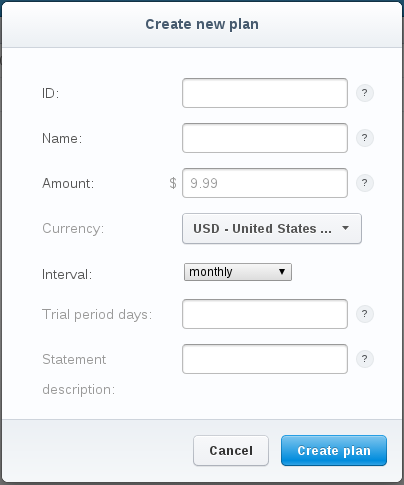
Every field is self explanatory, so lets create a Gold membership that will cost $40 and a Basic membership for $10. They will be billed every month.
每个字段都是不言自明的,因此让我们创建一个Gold会员资格,其价格为40美元,而一个基本会员价为10美元。 他们将每月收取费用。
We have already added the necessary columns to our users table, now we need to let Laravel Cashier know that we will use the User class as our billing class.
我们已经在users表中添加了必要的列,现在我们需要让Laravel Cashier知道我们将使用User类作为计费类。
use Laravel\Cashier\BillableInterface;
use Laravel\Cashier\BillableTrait;

class User extends Eloquent implements BillableInterface {

    use BillableTrait;
    protected $dates = ['trial_ends_at', 'subscription_ends_at'];
Note: we’re using BillableTrait and traits require PHP 5.4 or greater.
注意:我们使用的是BillableTrait ,特征需要PHP 5.4或更高版本。
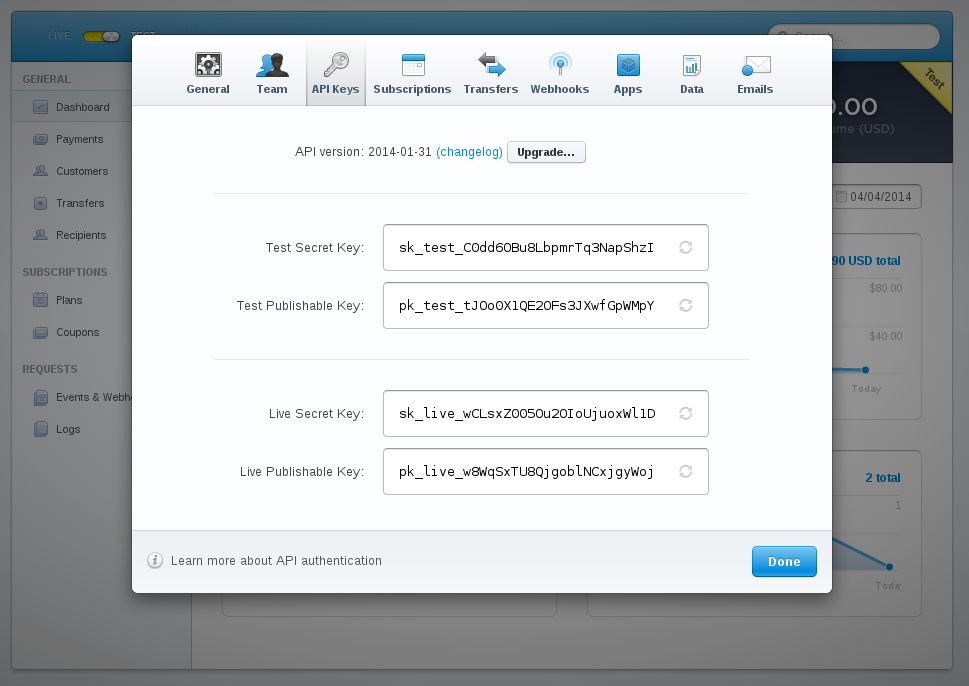
Now we have to set our Stripe API access key, which you can get from Your account > Account settings > API Keys and copy your Test Secret Key.
现在,我们必须设置我们的Stripe API访问密钥,您可以从Your account > Account settings > API Keys获取该Your account > Account settings > API Keys然后复制您的Test Secret Key 。
By using the BillableTrait we get access to the User::setStripeKey(key) method which can be called anywhere in our code, but the preferred way is to create a services.php file under your config directory and return an array like this:
通过使用BillableTrait我们可以访问User::setStripeKey(key)方法,该方法可以在代码中的任何位置调用,但是首选方法是在config目录下创建services.php文件并返回如下数组:
return [
    'stripe' => [
            'secret'    => 'Your key'
        ]
];
When getStripeKey tries to load your key it will look for a property called stripeKey. If not found, it will automatically load your services file.
当getStripeKey尝试加载您的密钥时,它将寻找一个名为stripeKey的属性。 如果找不到,它将自动加载您的services文件。
创建我们的页面 (Creating our pages)
To keep things simple we will create only a few pages: – Signup: where user can signup with a membership plan ( Basic, Gold ). – Login: members login page. – Upgrade: upgrade from basic to gold membership. – Post: display a single post page.
为简单起见,我们将只创建几个页面:–注册:用户可以在其中注册会员计划(Basic,Gold)。 –登录:成员登录页面。 –升级:从基本会员升级为金牌会员。 –发布:显示单个发布页面。
To speed up the process we will use bootsnipp. You can get the final code from the GitHub repo.
为了加快该过程,我们将使用bootsnipp 。 您可以从GitHub存储库中获取最终代码。
登录页面: (Login page:)
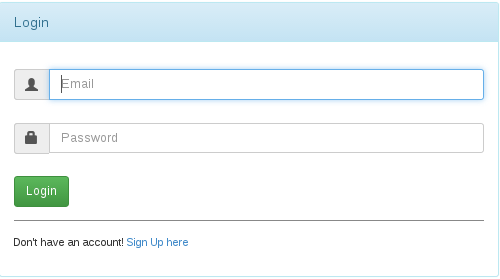
The login page has a basic email and password field, with a LoginController page that looks like this:
登录页面具有一个基本的电子邮件和密码字段,以及一个LoginController页面,如下所示:
public function index(){
    return View::make('login');
}
public function store(){
    if( Auth::attempt( Input::only( ['email', 'password'] ), true)){
        return Redirect::to('/');
    }
    else{
        return Redirect::back()->withInput()->with( 'message', 'Email or password incorrect' );
    }
}
public function destroy(){
    Auth::logout();
    return Redirect::route("login");
}
注册页面: (Signup page:)
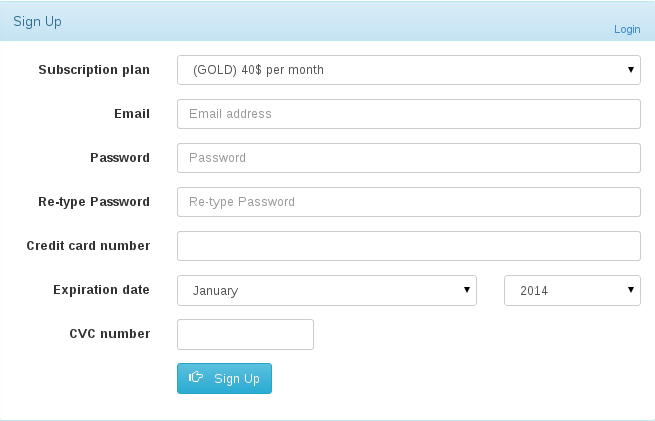
The signup page has a Subscription plan field used to assign a user to plan. We have also a Credit card number, Expiration date, CVC.
注册页面上有一个“ Subscription plan字段,用于分配用户进行计划。 我们还有一个Credit card number , Expiration date , CVC 。
As we said earlier, we will never have to deal with any payment or verification process, we pass those values to the Stripe server to take care of the charging and verification process. The return value is a token in case of success otherwise we get an error message that we can show to the user.
如前所述,我们将永远不必处理任何付款或验证过程,我们会将这些值传递给Stripe服务器以负责计费和验证过程。 如果成功,则返回值是一个令牌,否则我们会收到一条错误消息,可以向用户显示。
Let’s see what the front-end code looks like:
让我们看看前端代码是什么样的:
<script type="text/javascript" src="https://js.stripe.com/v2/"></script>
<script>
    Stripe.setPublishableKey('Your public key');
    jQuery(function($) {
        $('#subscription-form').submit(function(event) {
            var $form = $(this);
            $form.find('button').prop('disabled', true);
            Stripe.card.createToken($form, stripeResponseHandler);

            return false;
        });
    });

    var stripeResponseHandler = function(status, response) {
        var $form = $('#subscription-form');

        if (response.error) {
            $form.find('.payment-errors').text(response.error.message);
            $form.find('button').prop('disabled', false);
        } else {
            var token = response.id;
            $form.append($('<input type="hidden" name="stripeToken" />').val(token));
            $form.get(0).submit();
        }
    };
</script>
First we include the JavaScript API file, then we set our public key that we grabbed from our Stripe dashboard settings.
首先,我们包含JavaScript API文件,然后设置从Stripe仪表板设置中获取的公共密钥。
Next we attach a callback function to our submit form (be sure that your form ID matches the one used on the event handler), to prevent a double submission we disable our submit button. The Stripe.card.createToken accepts two arguments, the first one is a JSON object that has some required and optional values.
接下来,我们在提交表单上附加一个回调函数(确保您的表单ID与事件处理程序上使用的表单ID匹配),为防止重复提交,我们禁用了提交按钮。 Stripe.card.createToken接受两个参数,第一个是具有一些必需和可选值的JSON对象。
Required values:
必要值:
number: card number as a string without any separators.number:卡号,为字符串,没有任何分隔符。exp_month: two digit number representing the card’s expiration month.exp_month:两位数字,代表卡的到期月份。exp_year: two or four digit number representing the card’s expiration year.exp_year:两位或四位数的数字,代表卡的有效期限。
Optional values:
可选值:
cvc: card security code as a string, thecvcnumber is optional but recommended to help prevent fraud.cvc:卡安全码为字符串,cvc编号为可选,但建议使用以防止欺诈。name: cardholder name.name:持卡人姓名。address_line1: billing address line 1.address_line1:帐单地址行1。address_line2: billing address line 2.address_line2:帐单地址行2。address_city: billing address city.address_city:帐单地址城市。address_state: billing address state.address_state:帐单地址状态。address_zip: billing zip as a string.address_zip:帐单邮递区号,为字串。address_country: billing address country.address_country:帐单邮寄地址的国家/地区。You can notice that we’re passing a form object instead of a JSON object, you can choose to grab the values manually or use the
您会注意到我们传递的是表单对象而不是JSON对象,您可以选择手动获取值或使用
data-stripehtml5 attribute on your inputs and Stripe will use some helper methods to grab those values automatically for you. Ex:data-stripehtml5属性,Stripe将使用一些帮助器方法自动为您获取这些值。 例如:
<input data-stripe="number" type="text">The second argument passed to Stripe.card.createToken method is a callback function to handle the response.
传递给Stripe.card.createToken方法的第二个参数是处理响应的回调函数。
In case of failure the stripeResponseHandler will try to find an element with a class of payment_errors to display some descriptive errors to the user. In case of success a stripeToken hidden input will be appended to the form and it will be available on submit.
在失败的情况下, stripeResponseHandler会尝试查找带有payment_errors类的元素,以向用户显示一些描述性错误。 如果成功, stripeToken隐藏的输入追加到表单中,并且在提交时可用。
附加选项 (Additional options)
Trial periods: as we stated before, when you create a new plan you have a choice to specify a trial period for users to test your product, and they won’t be charged until the specified period has elapsed.Trial periods:如前所述,当您创建新计划时,可以选择指定用户试用产品的试用期,直到指定的期限过后才向他们收费。Coupons: you create coupons via your dashboard menu where you can specify a fixed amount or by percentage,with some other useful options.Coupons:您可以通过信息中心菜单创建优惠券,您可以在其中指定固定金额或百分比以及其他一些有用的选项。
Now let’s move to our SignupController to see how we will handle this.
现在,让我们SignupController看看我们将如何处理它。
public function store(){
    $user = new User;
    $user->email = Input::get( 'email' );
    $user->username = Input::get( 'username' );
    $user->password = Hash::make( Input::get( 'password' ) );
    $user->save();
    $user->subscription(Input::get( 'subscription' ))->create( Input::get( 'stripeToken' ) );

    return 'you are now registred';
}
We will skip the validation process to keep things simple.
为了简化起见,我们将跳过验证过程。
After creating a new User and saving it, we now have the option to subscribe the user to a new membership plan. The subscription method accepts an already registered plan as an argument, that can be either a PlanInterface or a String and return a StripeGateway. The create method accepts a token as a parameter; we pass the new hidden input value with the name stripeToken.
创建新User并保存后,我们现在可以选择将该用户预订为新的会员计划。 subscription方法接受已经注册的计划作为参数,可以是PlanInterface或String并返回StripeGateway 。 create方法接受令牌作为参数; 我们使用名称stripeToken传递新的隐藏输入值。
升级页面: (Upgrade page:)
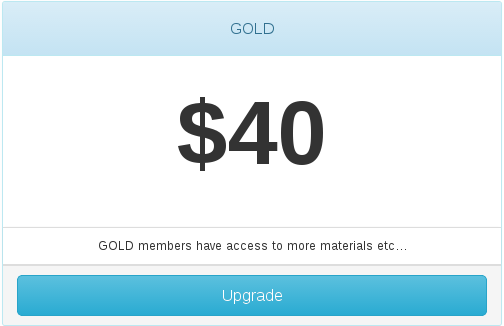
The upgrade page will submit to the UpgradeController that looks like this:
升级页面将提交到如下所示的UpgradeController :
public function store(){
    if( !Auth::check() )
        return Redirect::route("login");

    Auth::user()->subscription('gold')->swap();

    return 'You are now a GOLD member';
}
We check if the user is logged in first, then we create a new subscription with the new plan and we call the swap method, obviously in a real project you will have some fees adjustments and a downgrade option, but it should work the same way.
我们先检查用户是否已登录,然后使用新计划创建一个新的subscription ,然后调用swap方法,显然,在实际项目中,您将进行一些费用调整和降级选项,但工作方式应相同。
帖子页面: (Post page:)
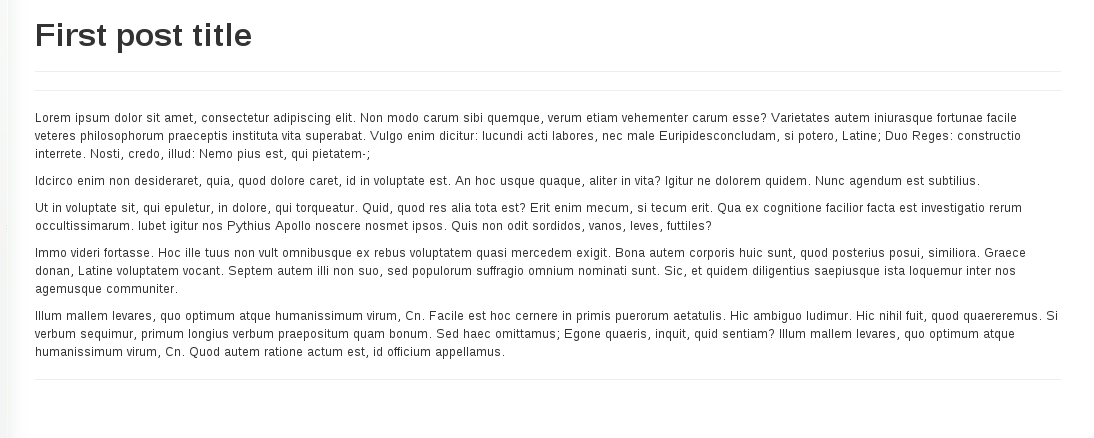
The PostController checks if the post is_premium, and if so, we test if the user is a gold member who can see the post, else we return a simple error message.
PostController检查帖子是否为is_premium ,如果是,则测试用户是否是可以看到该帖子的黄金会员,否则我们返回一条简单的错误消息。
public function show( $id ){
    $post = Post::find( $id );

    if( $post->is_premium && Auth::user()->stripe_plan != 'gold' )
        return View::make('error', [ 'message' => 'Only GOLD members can read this post, <a href="/upgrade">upgrade</a> your membership to get access' ] );

    return View::make('post', [ 'post' => $post ] );
}//show
Of course in our routes.php file we need to add an auth filter to prevent unauthenticated users from accessing the page. Our routes file will look like this:
当然,在我们的routes.php文件中,我们需要添加一个auth过滤器,以防止未经auth验证的用户访问该页面。 我们的路线文件将如下所示:
Route::get('/', function()
{
    $posts = Post::all();

    return View::make('index', [ 'posts' => $posts ]);
})->before('auth');


Route::get('/post/{id}', [ 'as' => 'post', 'uses' => 'PostsController@show' ])->before('auth');
Route::resource('login', 'LoginController', [ 'only' => [ 'index', 'store', 'destroy' ] ]);
Route::resource('signup', 'SignupController', [ 'only' => [ 'index', 'store' ] ]);
Route::resource('upgrade', 'UpgradeController', [ 'only' => [ 'index', 'store' ] ]);
其他有用的方法 (Other useful methods)
withCoupon: we said before that we have the possibility to create discount coupons, in our example we can do that like so:withCoupon:我们之前说过,我们可以创建折扣券,在我们的示例中,我们可以这样做:
$user->subscription(Input::get( 'subscription' ))->withCoupon('coupon code')->create( Input::get( 'stripeToken' ) );cancel: you can easily cancel a subscription using this method, but you have to check whether the user isonGracePeriodto be sure you don’t block them immediately:cancel:您可以使用此方法轻松取消订阅,但必须检查用户是否为onGracePeriod,以确保您不会立即阻止他们:
User::find(1)->onGracePeriod();onPlan: see if a user is on a certain plan.onPlan:查看用户是否在某个计划上。onTrial: see if a user still on trial period.onTrial:查看用户是否仍处于试用期。canceled: if the user has canceled their subscription.canceled:如果用户已取消订阅。getLastFourCardDigits: get the user card last four digits.getLastFourCardDigits:获取用户卡的后四位数字。getSubscriptionEndDate: get the subscription end date.getSubscriptionEndDate:获取订阅的结束日期。getTrialEndDate: get the trial end date.getTrialEndDate:获取试用结束日期。invoices: get the list of user invoices.invoices:获取用户发票列表。findInvoice: find an invoice by id.findInvoice:按ID查找发票。downloadInvoice: generate a downloadable invoice by id.downloadInvoice:按ID生成可下载的发票。
结论 (Conclusion)
In this tutorial we explored how Laravel Cashier can ease the billing process and help manage your customers more easily.
在本教程中,我们探讨了Laravel Cashier如何简化计费流程并帮助更轻松地管理客户。
We certainly didn’t cover everything here, but it’s a start for you to dig into the source code to explore what else you can do. If you’d like to see a Nitrous-hosted demo of this app, see here.
我们当然不会在这里介绍所有内容,但这是您开始研究源代码以探索其他功能的开始。 如果您想查看该应用程序的Nitrous托管演示,请参见此处 。


 714
714

 被折叠的 条评论
为什么被折叠?


