


小数视力表转换成对数视力表

This article was sponsored by Acuity Scheduling. Thank you for supporting the partners who make SitePoint possible.
本文由Acuity Scheduling赞助。 感谢您支持使SitePoint成为可能的合作伙伴。
I recently wrote an article about building an online class booking system to book lessons with a driving instructor. Teaching someone to drive is relatively unique, in that it’s guaranteed to be a one-to-one class — or at least, if you did find yourself sharing an instructor’s time, then you’d have every right to feel short-changed.
我最近写了一篇文章,内容涉及建立在线课程预订系统,以与驾驶教练预约课程。 教别人开车是相对独特的,因为可以保证这是一对一的课程,或者至少,如果您确实发现自己与老师共度时光,那么您将无所适从。
Most other types of class, though, tend to have multiple participants. Unless they’re delivered online, they’ll most likely have a limit on the number of students due to logistical considerations.
但是,大多数其他类型的课程倾向于有多个参与者。 除非他们是在线交付的,否则出于后勤考虑,他们很可能会限制学生人数。
Cookery classes usually have a very well-defined limit on the number of students — you can only really teach as many people as you have cooking stations or cookers. That’s going to be the theme of this article — managing those “slots” in a cookery class. The principles remain the same for all sorts of other forms of tuition.
烹饪班通常对学生人数有非常明确的限制-您实际上只能教多少个拥有烹饪台或炊具的人。 这将成为本文的主题-在烹饪课上管理那些“插槽”。 各种其他形式的学费的原则保持不变。
As before, we’re going to take advantage of Acuity Scheduling in order to manage bookings for our classes, and everything that entails.
和以前一样,我们将利用Acuity Scheduling来管理课程的预订以及所有需要的东西。
All of the code for this tutorial is available on Github.
本教程的所有代码都可以在Github上找到 。
我们将要建立的 (What We’re Going to Build)
Thanchanok delivers Thai cookery classes. There’s a general introductory course, as well as two more specialised courses – one covering the many and varied Thai curry pastes, and one that focuses specifically on the region in which she was brought up — the swelteringly hot Northern region around Chiang Mai. She owns a specially fitted-out kitchen to deliver these classes. Each has eight cooking stations. She typically runs around four classes a week — two of those slots for the introductory class which, as you might expect, is by far her most popular.
Thanchanok提供泰国烹饪课程。 这里有一个普通的入门课程,还有另外两个专业课程–一门课程涵盖了泰国咖喱酱的种类繁多,一门课程专门针对她成长的地区–清迈周围闷热的北部地区。 她拥有专门布置的厨房来教授这些课程。 每个都有八个烹饪台。 她通常每周上四节课,其中有两个是入门班的,正如您所期望的那样,到目前为止她是最受欢迎的。
Currently her website includes an email address and telephone number for making bookings, but there are a number of issues with that. First is that it’s easy to forget to update the website to indicate that it’s fully-booked, which on occasion has left potential attendees disappointed and with a poor impression of the company.
目前,她的网站上包含用于预订的电子邮件地址和电话号码,但与此同时存在许多问题。 首先,很容易忘记更新网站以表明网站已被预订满,这有时使潜在的与会者感到失望,并对公司印象不佳。
The second is that she has to rely on good old-fashioned pen-and-paper to manage her list of pupils, along with their contact details and whether they’ve paid for the lesson ahead of time. She’d very much like to add a feature to her website that allows people to view class availability as well as book online, and to then help her class schedule and attendee lists. That’s what we’re going to do in the course of this tutorial.
第二个原因是她必须依靠老式的纸笔来管理她的学生名单,他们的联系方式以及他们是否提前付款。 她非常想在自己的网站上添加一个功能,使人们可以查看课程的可用性并在线预订,然后帮助她安排课程表和参加者名单。 这就是我们在本教程中要做的。
Let’s break down the requirements as far as the public-facing website is concerned:
就面向公众的网站而言,让我们分解一下要求:
- The website needs to show all of the upcoming classes. 该网站需要显示所有即将举行的课程。
- If a class is fully booked, it needs to say so. 如果一堂课已经订满了,那就需要这样说。
- Classes not fully booked should show the number of available slots. 未完全预订的课程应显示可用插槽的数量。
- Visitors should be able to book a place on classes that have availability. 访客应该能够在有空位的课程上预订位置。
By integrating all of this with Acuity Scheduling, we effectively get the back-end requirements handled without having to develop it ourselves:
通过将所有这些与Acuity Scheduling集成在一起,我们可以有效地处理后端需求,而不必自己开发:
- The number of people who’ve booked for each upcoming class. 预定每个即将上课的人数。
- A list of attendees, along with their contact details. 与会者列表及其联系方式。
- Constant updates about upcoming classes and bookings. 有关即将上课的课程和预订的不断更新。
- Thanchanok’s calendar, all in one place. Thanchanok的日历,全都放在一个地方。
Let’s get started.
让我们开始吧。
设置视力调度 (Setting Up Acuity Scheduling)
The first thing you’ll need to do, if you haven’t already, is to sign up at Acuity Scheduling. The free trial will be perfectly adequate for following along.
如果您尚未做的第一件事,就是在Acuity Scheduling进行注册。 免费试用将非常适合后续使用。
The next thing we need to do is set up the three classes. In Acuity terminology these are appointment types.
我们需要做的下一件事是设置三个类。 在Acuity术语中,这些是约会类型 。
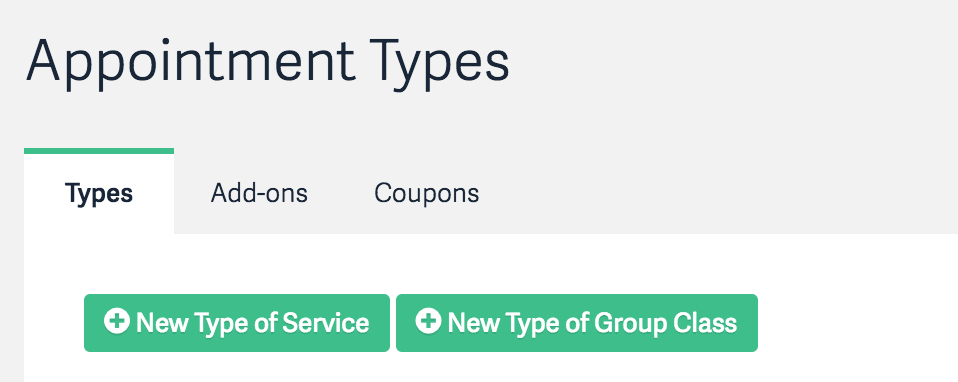
If you’ve just signed up, click the Create your Appointment types button at the top of the screen, or click Appointment Types under Business Settings on the sidebar.
如果您刚刚注册,请单击屏幕顶部的“ 创建约会类型”按钮,或单击侧栏上“ 业务设置”下的约会类型 。
Next, click the New Type of Group Class button.
接下来,单击“ 新建组类型”按钮。
You’ll need to name the class. For the purposes of this tutorial we’ll call them Introduction to Thai Cookery, Thai Curry Pastes and Taste of the North, but you can call them whatever you want.
您需要为课程命名。 在本教程中,我们将其称为“泰国烹饪入门” ,“ 泰国咖喱酱和北方风味” ,但您可以根据需要将其命名。
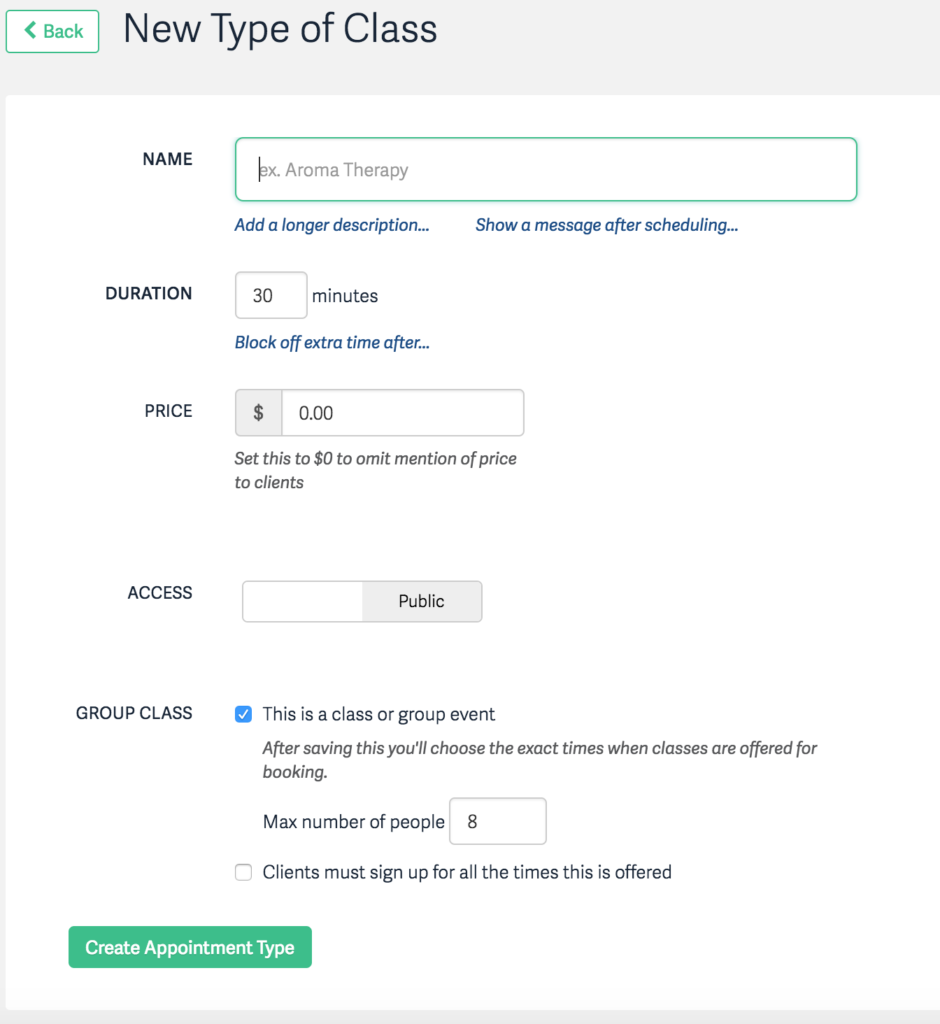
Enter a duration in minutes — for example, 180 — and optionally provide a price. In order to keep things simple, we won’t be covering payment.
输入以分钟为单位的持续时间,例如180,并选择提供价格。 为了简单起见,我们将不涉及付款。
Click the Create Appointment Type button to save the information. Once we’ve created the appointment type — i.e., the class — we need to provide some dates and times. To do this, click the Offer Class button.
单击创建约会类型按钮以保存信息。 创建约会类型(即班级)后,我们需要提供一些日期和时间。 为此,请单击“ 优惠等级”按钮。
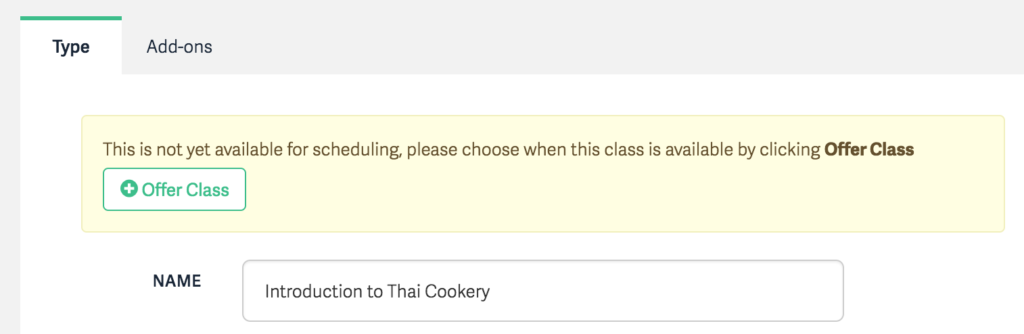
Enter the date and time that the course will run. If it’s a regular thing then you can set it as recurring — this allows you to enter multiple dates in bulk. Thanchanok offers the introductory class twice weekly at 1pm, and the other two courses once per week.
输入课程开始的日期和时间。 如果这是正常现象,则可以将其设置为定期发生-这使您可以批量输入多个日期。 Thanchanok每周两次在下午1点提供入门班,其他两门课程则每周一次。
Next, go to the Appointment Types and check the three URLs to the newly-created classes. They contain an id query parameter which we’ll need shortly, so make a note of those now.
接下来,转到“ 约会类型”并检查指向新创建的类的三个URL。 它们包含一个id查询参数,我们很快将需要它,所以现在记下那些。
The final step on the Acuity side is to get the API credentials for our integration:
Acuity方面的最后一步是获取用于集成的API凭据:
Click Integrations under Business Settings on the sidebar.
单击侧栏上“ 业务设置”下的“ 集成 ” 。
Click API to scroll down to the relevant part of the page.
单击API向下滚动到页面的相关部分。
Click view credentials.
单击查看凭证 。
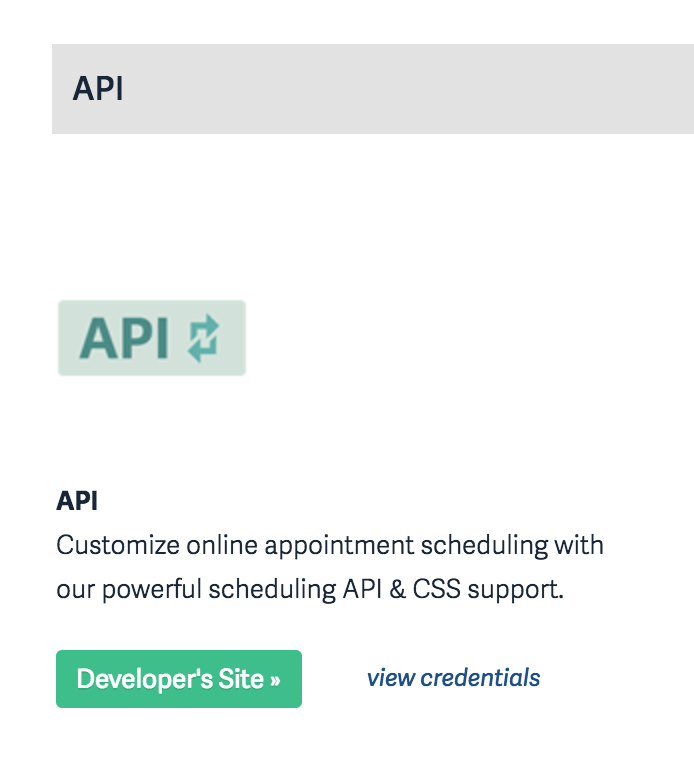
Copy and paste the User ID and API Key for use later.
复制并粘贴用户ID和API密钥,以供以后使用。
开始实施 (Beginning the Implementation)
For the purposes of this tutorial we’re going to use Lumen, although the principles are pretty much the same whatever your framework of choice happens to be.
就本教程而言,我们将使用Lumen ,尽管无论选择哪种框架,其原理都几乎相同。
Start by creating the project from the command-line:
首先从命令行创建项目:
composer create-project --prefer-dist laravel/lumen thaicookeryCreate a file in your project folder named .env and add the following lines, replacing the values appropriately:
在您的项目文件夹中创建一个名为.env的文件,并添加以下几行,并相应替换这些值:
ACUITY_USER_ID=your_user_id
ACUITY_API_KEY=your_api_key
APP_DEBUG=true
This will allow you to retrieve the user ID and API key like this:
这将允许您检索用户ID和API密钥,如下所示:
$userId = env( 'ACUITY_USER_ID' );
$apiKey = env( 'ACUITY_API_KEY' );
As I hinted at earlier, we’re going to integrate with Acuity Scheduling via the API. This is even easier with an SDK. There are SDKs for Node.js and PHP on the developer site; we’re going to be using the one for PHP. It’s avalailable on Packagist, so we simply need to install it using Composer:
如前所述,我们将通过API与Acuity Scheduling集成。 使用SDK更加容易。 开发者站点上有用于Node.js和PHP的SDK; 我们将在PHP中使用那个。 它在Packagist上可用,因此我们只需要使用Composer安装它即可:
composer require acuityscheduling/acuityschedulingNow we need to make the Acuity Scheduling SDK available throughout the site. The ideal way to do this is to use a service provider to inject it into the application’s service container.
现在,我们需要在整个站点上提供Acuity Scheduling SDK。 做到这一点的理想方法是使用服务提供者将其注入到应用程序的服务容器中。
Open up app/Providers/AppServiceProvider.php and add a use statement to the top of the file:
打开app/Providers/AppServiceProvider.php并在文件顶部添加一个use语句:
use AcuityScheduling;Then add the following to the register() method:
然后将以下内容添加到register()方法:
$this->app->singleton( 'AcuityScheduling', function ( $app ) {
    return new AcuityScheduling( [
        'userId' => env( 'ACUITY_USER_ID' ),
        'apiKey' => env( 'ACUITY_API_KEY' ),
    ] );
} );
Now register the service provider by opening up bootstrap/app.php and uncommenting the following line:
现在,通过打开bootstrap/app.php并取消注释以下行来注册服务提供商:
$app->register(App\Providers\AppServiceProvider::class);The next step is to define the classes for displaying them on the site. In practice you’d probably store these in a database, but for the purposes of this exercise we’ll simply hard-code them in an array as a property of the base controller — you’ll find this in app/Http/Controllers/Controller.php.
下一步是定义用于在网站上显示它们的类。 在实践中,您可能会将它们存储在数据库中,但是出于本练习的目的,我们将它们简单地硬编码为数组作为基本控制器的属性-您可以在app/Http/Controllers/Controller.php找到它。 app/Http/Controllers/Controller.php 。
Create the array, being sure to substitute your own appointment type IDs:
创建数组,确保替换您自己的约会类型ID:
protected $classes = [
    [
        'name'  =>  'Introduction to Thai Cookery',
        'key'   =>  'introduction-to-thai-cookery',
        'description' => 'A basic introduction to Thai cookery, which teaches you to make three popular Thai dishes - Tom Yum, a ferocious hot and sour prawn soup, a fragrant green chicken curry and a dessert of mangoes with cocounut and sticky rice"',
        'acuity_id' => 3027517,
    ],
    [
        'name'  =>  'Thai Curry Pastes',
        'key' => 'thai-curry-pastes',
        'description' => 'Pestle and mortar at the ready, as we take a look at Thai curry pastes, the foundation of all Thai curries. Specifically, the course teaches you to make red, green and Panang curry pastes. We will also be cooking a roast duck red curry with sticky rice.',
        'acuity_id' => 3027529,
    ],
    [
        'name'  =>  'Taste of the North',
        'key' => 'taste-of-the-north',
        'description' => 'An in-depth look at the cusine of the North of Thailand.',
        'acuity_id' => 3027535,
    ],
];
As you can probably gather from the code, we’re defining a key for identifying each course in an SEO-friendly manner, along with some basic information about each class and that all-important appointment type ID that allows us to integrate with Acuity.
正如您可能从代码中收集到的那样,我们正在定义一个以SEO友好的方式标识每门课程的密钥,以及有关每个班级的一些基本信息以及使我们能够与Acuity集成的最重要的约会类型ID。
Now all of that’s set up, it’s time to integrate with Acuity Scheduling.
现在所有这些都已经设置好了,是时候与Acuity Scheduling集成了。
列出类及其可用性 (Listing the Classes and their Availability)
The first thing we need to do is list the classes, and the dates on which each class is offered. We’ve already set all of that up on the Acuity side, along with our meta-data, so the next step is to call the API to get the availability. The endpoint for this is availability/classes. The SDK makes calling this a breeze.
我们需要做的第一件事是列出班级,以及提供每个班级的日期。 我们已经在Acuity端设置了所有这些功能以及元数据,因此下一步就是调用API以获得可用性。 终结点是availability/classes 。 SDK使调用它变得轻而易举。
availability/classes gives you the classes for a specified month. By default it only includes those classes with available slots, although you can override that behaviour. We’ll do that, but mark the ones with no available slots appropriately.
availability/classes为您提供指定月份的课程。 默认情况下,它仅包括具有可用插槽的那些类,尽管您可以覆盖该行为。 我们将这样做,但是请适当地标记没有可用插槽的插槽。
Create a new controller class — app/Http/Controllers/HomeController — and add the following method:
创建一个新的控制器类app/Http/Controllers/HomeController并添加以下方法:
/**
 * Get the available classes for the given month
 *
 * @param Carbon $month
 * @return array
 */
public function getAvailablity( $month )
{
    return app( 'AcuityScheduling' )->request(
        'availability/classes',
        [
            'query' => [
                'month' => $month->format( 'Y-m' ),
                'includeUnavailable' => 'true',
            ],
        ]
    );
}
Now for the homepage. Create a new method called index(), and we’ll begin by getting the availability for the current and next month:
现在进入主页。 创建一个名为index()的新方法,我们将从获取当前和下个月的可用性开始:
/**
 * The homepage
 *
 * @return \Illuminate\View\View
 */
public function index( )
{
    // Get the dates for this month...
    $availability = $this->getAvailablity( Carbon::now( ) );

    // ...and next month
    $availability += $this->getAvailablity( Carbon::now( )->addMonth( ) );

}
This will return an array of results. Before we render that out, let’s use the power of Lumen’s collections to do two things:
这将返回结果数组。 在进行渲染之前,让我们使用Lumen系列的强大功能做两件事:
“Inject” a Carbon instance that represents the date and time of each class; this is a property of the results called
time“注入”一个Carbon实例,它代表每个类的日期和时间; 这是结果的一个属性,称为
timeGroup the results by the class; this is represented by the
appointmentTypeIDproperty将结果按班级分组; 这由
appointmentTypeID属性表示
Here’s the code for that:
这是代码:
// Now go through and inject the date as a Carbon instance, then group by the class
$instances = collect(
    $availability
)->map( function( $instance ) {
    $instance[ 'date' ] = Carbon::parse( $instance[ 'time' ] );
    return $instance;
} )->groupBy( 'appointmentTypeID' );
Finally, return the page:
最后,返回页面:
The layout template isn’t included here for brevity, but you can grab a copy from GitHub.
// Return the rendered homepage
return view( 'home.index', [ 'classes' => $this->classes, 'instances' => $instances ] );
Now create a new file in resources/views/home/index.blade.php:
现在,在resources/views/home/index.blade.php创建一个新文件:
@extends( 'layouts.default' )

@section( 'content' )

<p>We offer three different classes, detailed below.</p>

@foreach( $classes as $class )
    <h2>{{ $class[ 'name' ] }}</h2>
    <p>{{ $class[ 'description' ]  }}</p>
    <ul class="instances">
    @foreach( $instances->get( $class[ 'acuity_id' ] ) as $instance )
        <li>
            <h5>
                <time datetime="{{ $instance[ 'date' ]->toIso8601String( ) }}">{{ $instance[ 'date' ]->format( 'l jS F') }} at {{ $instance[ 'date' ]->format( 'ga') }}</time>
                @if ( $instance[ 'slotsAvailable' ] == 0 )
                    <span class="badge badge-danger">Fully booked</span>
                @elseif ( $instance[ 'slotsAvailable' ] < 2 )
                    <span class="badge badge-warning">Only {{ $instance[ 'slotsAvailable' ] }} available</span>
                @else
                    <span class="badge badge-success">{{ $instance[ 'slotsAvailable' ] }} slots available</span>
                @endif
            </h5>

            @if ( $instance[ 'slotsAvailable' ] > 0 )
                <a href="/{{ $class[ 'key' ] }}/{{ $instance[ 'date' ]->toIso8601String( ) }}/{{ $instance[ 'calendarID' ] }}/book" class="btn btn-primary btn-sm">Book Now</a>
            @endif
        </li>
        @endforeach
    </ul>
@endforeach

@stop
The code should be relatively straightforward. We’re iterating through the available classes and displaying the information about them. Then we’re going through and listing the actual classes along with a label that provides some information about availability, and finally showing a button for booking into classes which have available slots.
该代码应该相对简单。 我们在遍历可用的类并显示有关它们的信息。 然后,我们浏览并列出实际的班级以及提供一些有关可用性的标签的标签,最后显示一个用于预订具有可用空位的班级的按钮。
You can take what we’ve done so far for a spin — fire up Terminal and enter:
您可以旋转到目前为止所做的一切—启动终端并输入:
php -S localhost:8000 -t public/The final step for building the homepage is to define the route — open up routes/web.php. Depending on the version of Lumen you’ve installed (I’m using 5.4), the route definitions might be in app/Http/routes.php. Replace the default route with the following:
建立首页的最后一步是定义路线-打开routes/web.php 。 根据您安装的Lumen版本(我使用的是5.4),路由定义可能在app/Http/routes.php 。 将默认路由替换为以下内容:
$app->get( '/', 'HomeController@index' );Now we’re going to build a booking form. Create another new controller in app/Http/Controllers/ClassesController:
现在,我们将构建一个预订表格。 在app/Http/Controllers/ClassesController创建另一个新的控制器:
<?php

namespace App\Http\Controllers;

use Illuminate\Http\Request;
use Carbon\Carbon;

class ClassesController extends Controller
{

     /**
      * The booking page
      *
      * @param string $key
      * @param string$date
      * @param integer $calendarId
      * @return \Illuminate\View\View
      */
     public function book( $key, $date, $calendarId )
     {
         $class = collect( $this->classes )->where( 'key', $key )->first( );

         return view(
             'classes.book',
             [
                 'class' => $class,
                 'date' => Carbon::parse( $date ),
             ]
         );

     }

 }
Pretty simple stuff, and pretty self-explanatory. Now the booking form — this goes in resources/views/classes/book.blade.php and looks like this:
很简单的东西,很不言自明。 现在,预订表格-进入resources/views/classes/book.blade.php ,如下所示:
@extends( 'layouts.default' )

@section( 'content' )

    <p>You are booking a place on <strong>{{ $class[ 'name' ] }}</strong> on <time datetime="{{ $date->toIso8601String( ) }}">{{ $date->format( 'l jS F') }} at {{ $date->format( 'ga') }}</time></p>

    <form method="post">
        <div class="form-group">
            <label>Please enter your forename</label>
            <input name="firstName" placeholder="Your forename" class="form-control" required>
        </div>
        <div class="form-group">
            <label>Please enter your surname</label>
            <input name="lastName" placeholder="Your surname" class="form-control" required>
        </div>
        <div class="form-group">
            <label>Please enter your e-mail address</label>
            <input type="email" name="email" placeholder="Your e-mail address" class="form-control" required>
        </div>
        <button type="submit" class="btn btn-primary">Book Now</button>
    </form>

@stop
This is simply asking for the information that Acuity Scheduling requires in order to make a booking.
这只是在询问Acuity Scheduling进行预订所需的信息。
Now we need to create a method to actually make the booking. Once again the SDK makes this incredibly easy. We just need to grab the relevant information from a combination of the URL and the request. Here’s the code:
现在,我们需要创建一种方法来实际进行预订。 SDK再次使此操作变得异常简单。 我们只需要从URL和请求的组合中获取相关信息。 这是代码:
/**
 * POST callback for making the booking
 *
 * @param string $key
 * @param string$date
 * @param integer $calendarId
 * @param Request $request
 * @return \Illuminate\View\View
 */
public function confirmBooking( $key, $date, $calendarId, Request $request )
{
    $class = collect( $this->classes )->where( 'key', $key )->first( );

    $appointment = app( 'AcuityScheduling' )->request('/appointments', array(
        'method' => 'POST',
        'data' => array(
            'appointmentTypeID' => $class[ 'acuity_id' ],
            'calendarId'        => $calendarId,
            'datetime'          => $date,
            'firstName'         => $request->input( 'firstName' ),
            'lastName'          => $request->input( 'lastName' ),
            'email'             => $request->input( 'email' ),
        )
    ) );

    // Return the rendered homepage
    return view( 'classes.booking-confirmation', compact( 'class', 'appointment' ) );
}
The next step is to create the confirmation page – resources/views/classes/booking-confirmation.blade.php:
下一步是创建确认页面– resources/views/classes/booking-confirmation.blade.php :
@extends( 'layouts.default' )

@section( 'content' )

    <div class="alert alert-success" role="alert">
        <strong>Your booking is confirmed!</strong> Your booking reference is {{ $appointment[ 'id' ] }}.
    </div>

@stop
As you can see, the result from Acuity should include an id property, which we’re using as a booking reference.
如您所见,Acuity的结果应包含一个id属性,我们将其用作预订参考。
Finally, define these two routes:
最后,定义以下两条路线:
$app->get( '/{key}/{date}/{calendarId}/book', 'ClassesController@book' );
$app->post( '/{key}/{date}/{calendarId}/book', 'ClassesController@confirmBooking' );
That’s it! The final result should look something like this:
而已! 最终结果应如下所示:

结语 (Wrapping Up)
Acuity Scheduling makes the process of managing and booking classes really easy. Using the API allows you to integrate with a new or existing website, giving you full control over the look and feel. In this tutorial we’ve done just that, providing a “live” overview of availability and allowing users to book online.
Acuity Scheduling使课程的管理和预订过程变得非常简单。 使用API,您可以与新网站或现有网站集成,从而完全控制外观。 在本教程中,我们只是提供了实时的可用性概述,并允许用户在线预订。
There’s more to do, of course — we’ve not done much validation or error handling, for example, nor have we incorporated a payment mechanism. That’s left as an optional exercise.
当然,还有更多要做的事情-例如,我们没有做太多的验证或错误处理,也没有采用付款机制。 剩下的是可选练习。
This content is sponsored via Syndicate Ads.
该内容是通过辛迪加广告赞助的 。
翻译自: https://www.sitepoint.com/booking-cookery-classes-with-acuity-scheduling-and-lumen/
小数视力表转换成对数视力表


 被折叠的 条评论
为什么被折叠?
被折叠的 条评论
为什么被折叠?
 到【灌水乐园】发言


