


自定义注释
In this article, we are going to look at how we can create and use our own custom annotations in a Symfony 3 application. You know annotations right? They are the docblock metadata/configuration we see above classes, methods and properties. You’ve most likely seen them used to declare Controller routes (@Route()) and Doctrine ORM mappings (@ORM()), or even to control access to various classes and methods in packages like Rauth. But have you ever wondered how can you use them yourself? How you can define your own annotation and then use it to read information about a class or method without actually loading it?
在本文中,我们将研究如何在Symfony 3应用程序中创建和使用我们自己的自定义注释。 您知道注解对吗? 它们是我们在上面的类,方法和属性中看到的docblock元数据/配置。 您很可能已经看到它们用于声明Controller路由( @Route() )和Doctrine ORM映射( @ORM() ),甚至用于控制对Rauth之类的包中各种类和方法的访问 。 但是您是否曾经想过如何自己使用它们? 如何定义自己的注释,然后使用它读取有关类或方法的信息,而无需实际加载它?
Before we do this, a small disclaimer is in order. Annotations have nothing to do with Symfony. They are a concept developed as part of the Doctrine project to solve the problem of mapping ORM information to class methods.
在执行此操作之前,需要先声明一个小的免责声明。 注释与Symfony无关。 它们是作为Doctrine项目的一部分而开发的概念,用于解决将ORM信息映射到类方法的问题。
In this article we are going to build a small reusable bundle called WorkerBundle. Reusable yes, but still only for demo purposes so not really package-able. We’re going to develop a small concept that allows the definition of various Worker types which “operate” at various speeds and which can then be used by anyone in the application. The actual worker operations are outside the scope of this post, since we are focusing on setting up the system to manage them (and discover them via annotations).
在本文中,我们将构建一个名为WorkerBundle的小型可重用包。 是可重用的,但仍仅用于演示目的,因此不是真正可打包的。 我们将开发一个小的概念,该概念允许定义各种工作类型,这些类型可以以不同的速度“运行”,然后可由应用程序中的任何人使用。 实际的工作人员操作不在本文讨论范围之内,因为我们专注于设置系统来管理它们(并通过注释发现它们)。
To see where we’re going, you can check out this repository and follow the instructions covered there for setting up the bundle in your local Symfony app.
要查看我们要去的地方,您可以签出该存储库,并按照此处介绍的说明在本地Symfony应用中设置捆绑包。
工人 (The Workers)
The workers will implement an interface that requires one method: ::work(). Inside our new WorkerBundle, let’s create a Workers/ directory to keep things tidy and add the interface there:
工作人员将实现需要一个方法的接口::work() 。 在我们的新WorkerBundle ,我们创建一个Workers/目录以保持工作整洁并在其中添加接口:
<?php

namespace WorkerBundle\Workers;

interface WorkerInterface
{
    /**
     * Does the work
     *
     * @return NULL
     */
    public function work();
}
注释 (The Annotation)
Each worker has to implement the above interface. That’s clear. But aside from that, we need them to also have an annotation above the class in order to find them and read some metadata about them.
每个工作人员都必须实现上述接口。 很清楚 但是除此之外,我们还需要它们在类上方有一个注释,以便找到它们并读取有关它们的一些元数据。
Doctrine maps the docblock annotation to a class whose properties represent the keys inside the annotation itself. Let’s create our own and see this in practice.
Doctrine将docblock注释映射到一个类,该类的属性表示注释本身内的键。 让我们创建自己的视图,并在实践中看到这一点。
Each WorkerInterface instance will have the following annotation in its docblock:
每个WorkerInterface实例的WorkerInterface都将具有以下注释:
/**
 * @Worker(
 *     name = "The unique Worker name",
 *     speed = 10
 * )
 */
We’re going to keep things simple and have only two properties: the unique name (string) and the worker speed (integer). In order for this annotation to be recognized by Doctrine’s annotation library, we’ll have to create a matching class which, not unexpectedly, has some annotations of its own.
我们将使事情保持简单,只有两个属性:唯一名称(字符串)和工作速度(整数)。 为了使该注释可以被Doctrine的注释库识别,我们必须创建一个匹配类,这并不奇怪,它具有一些自己的注释。
We’ll put this class in the Annotation folder our bundle namespace and call it simply Worker:
我们将把这个类放到我们的bundle名称空间的Annotation文件夹中,并简单地命名为Worker :
<?php

namespace WorkerBundle\Annotation;

use Doctrine\Common\Annotations\Annotation;

/**
 * @Annotation
 * @Target("CLASS")
 */
class Worker
{
    /**
     * @Required
     *
     * @var string
     */
    public $name;

    /**
     * @Required
     *
     * @var int
     */
    public $speed;

    /**
     * @return string
     */
    public function getName()
    {
        return $this->name;
    }

    /**
     * @return int
     */
    public function getSpeed()
    {
        return $this->speed;
    }
}
As you can see, we have the two properties with some simple getters. More importantly, though, we have two annotations at the top: @Annotation (which tells Doctrine that this class represents an annotation) and @Target("CLASS") which tells it that it’s supposed to be used above an entire class and not a method or property. And that’s it, WorkerInterface classes can now use this annotation by making sure the corresponding class is also imported with a use statement at the top of the file like so:
如您所见,我们有两个带有一些简单吸气剂的属性。 不过,更重要的是,我们在顶部有两个注释: @Annotation (告诉Doctrine该类表示一个注释)和@Target("CLASS")告诉它应该在整个类之上使用,而不是方法或属性。 就是这样, WorkerInterface类现在可以通过确保也use文件顶部的use语句导入相应的类来使用此批注,如下所示:
use WorkerBundle\Annotation\Worker;管理者 (The Manager)
Next, we need a manager our application can use to get a list of all the available workers and to create them. In the same namespace as the WorkerInterface, we can have this simple manager class:
接下来,我们需要一个经理,我们的应用程序可以使用该经理来获取所有可用工作程序的列表并进行创建。 在与WorkerInterface相同的名称空间中,我们可以有一个简单的管理器类:
<?php

namespace WorkerBundle\Workers;

class WorkerManager
{
    /**
     * @var WorkerDiscovery
     */
    private $discovery;


    public function __construct(WorkerDiscovery $discovery)
    {
        $this->discovery = $discovery;
    }

    /**
     * Returns a list of available workers.
     *
     * @return array
     */
    public function getWorkers() {
        return $this->discovery->getWorkers();
    }

    /**
     * Returns one worker by name
     *
     * @param $name
     * @return array
     *
     * @throws \Exception
     */
    public function getWorker($name) {
        $workers = $this->discovery->getWorkers();
        if (isset($workers[$name])) {
            return $workers[$name];
        }

        throw new \Exception('Worker not found.');
    }

    /**
     * Creates a worker
     *
     * @param $name
     * @return WorkerInterface
     *
     * @throws \Exception
     */
    public function create($name) {
        $workers = $this->discovery->getWorkers();
        if (array_key_exists($name, $workers)) {
            $class = $workers[$name]['class'];
            if (!class_exists($class)) {
                throw new \Exception('Worker class does not exist.');
            }
            return new $class();
        }

        throw new \Exception('Worker does not exist.');
    }
}
The WorkerManager class does two things: retrieves worker definitions (::getWorker() and ::getWorkers()) and instantiates them (::create()). As a constructor argument it retrieves a WorkerDiscovery object which we will write in a minute. The rest is pretty easy to understand. The ::create() method expects that each worker definition is an array which has a class key to be used for instantiation. We keep things simple here but of course in a real world scenario a next step would be to represent this definition using a separate class and delegate the actual instantiation to a factory.
WorkerManager类有两件事:检索工作程序定义( ::getWorker()和::getWorkers() )并实例化它们( ::create() )。 作为构造函数参数,它检索一个WorkerDiscovery对象,我们将在一分钟内编写该对象。 其余的很容易理解。 ::create()方法期望每个工作程序定义都是一个数组,该数组具有用于实例化的class键。 我们在这里使事情保持简单,但是当然在现实世界中,下一步将是使用单独的类表示此定义,并将实际的实例委托给工厂。
发现 (The Discovery)
The crucial part of our annotation demo is actually part of the Discovery process. Why? Because we are using the Worker annotation to determine whether the respective class should be considered a Worker. In doing so, we are using the metadata before actually instantiating the object. So let’s see our WorkerDiscovery class:
我们的注释演示的关键部分实际上是发现过程的一部分。 为什么? 因为我们使用Worker批注来确定是否应将各个类视为Worker。 这样做时,我们在实际实例化对象之前就使用了元数据。 因此,让我们看WorkerDiscovery类:
<?php

namespace WorkerBundle\Workers;

use WorkerBundle\Annotation\Worker;
use Doctrine\Common\Annotations\Reader;
use Symfony\Component\Finder\Finder;
use Symfony\Component\Finder\SplFileInfo;
use Symfony\Component\HttpKernel\Config\FileLocator;

class WorkerDiscovery
{
    /**
     * @var string
     */
    private $namespace;

    /**
     * @var string
     */
    private $directory;

    /**
     * @var Reader
     */
    private $annotationReader;

    /**
     * The Kernel root directory
     * @var string
     */
    private $rootDir;

    /**
     * @var array
     */
    private $workers = [];


    /**
     * WorkerDiscovery constructor.
     *
     * @param $namespace
     *   The namespace of the workers
     * @param $directory
     *   The directory of the workers
     * @param $rootDir
     * @param Reader $annotationReader
     */
    public function __construct($namespace, $directory, $rootDir, Reader $annotationReader)
    {
        $this->namespace = $namespace;
        $this->annotationReader = $annotationReader;
        $this->directory = $directory;
        $this->rootDir = $rootDir;
    }

    /**
     * Returns all the workers
     */
    public function getWorkers() {
        if (!$this->workers) {
            $this->discoverWorkers();
        }

        return $this->workers;
    }

    /**
     * Discovers workers
     */
    private function discoverWorkers() {
        $path = $this->rootDir . '/../src/' . $this->directory;
        $finder = new Finder();
        $finder->files()->in($path);

        /** @var SplFileInfo $file */
        foreach ($finder as $file) {
            $class = $this->namespace . '\\' . $file->getBasename('.php');
            $annotation = $this->annotationReader->getClassAnnotation(new \ReflectionClass($class), 'WorkerBundle\Annotation\Worker');
            if (!$annotation) {
                continue;
            }

            /** @var Worker $annotation */
            $this->workers[$annotation->getName()] = [
                'class' => $class,
                'annotation' => $annotation,
            ];
        }
    }
}
The first two constructor arguments are part of configuring our bundle. They are both a string that tells our discovery which folder it should look into and which namespace to use for loading the found classes. These two are fed from the service container definition we will see at the end. The rootDir argument is the simple path to the Kernel directory and the Reader instance is the Doctrine class we use for reading annotations. All of the magic happens inside ::discoverWorkers().
前两个构造函数参数是配置包的一部分。 它们都是告诉我们发现它应该查找哪个文件夹以及用于加载找到的类的名称空间的字符串。 这两个是从服务容器定义中获取的,我们将在最后看到。 rootDir参数是Kernel目录的简单路径,而Reader实例是我们用于读取注释的Doctrine类。 所有的魔术都发生在::discoverWorkers()内部。
First, we establish the path where to look for workers. Then, we use the Symfony Finder component to look up all the files in that folder. Iterating through all the found files, we establish the class names of all the found classes based on the file name and create ReflectionClass instances we then pass to the annotation reader’s ::getClassAnnotation(). The second argument to this method represents the namespace of the Annotation class to be used. And for all the annotations we find, we build an array of definitions containing the class name that can be used for instantiation and the entire annotation object if somebody needs it. That’s it! Our discovery service can now look up workers without instantiating any of them.
首先,我们确定了寻找工人的途径。 然后,我们使用Symfony Finder组件查找该文件夹中的所有文件。 遍历所有找到的文件,我们根据文件名建立所有找到的类的类名,并创建ReflectionClass实例,然后将其传递给注释阅读器的::getClassAnnotation() 。 此方法的第二个参数表示要使用的Annotation类的名称空间。 对于找到的所有注释,我们构建了一个定义数组,其中包含可用于实例化的类名,如果有人需要,还可以使用整个注释对象。 而已! 我们的发现服务现在可以查找工人,而无需实例化任何工人。
For more information, inspect the AnnotationReader class for the possibilities you have for extracting annotation data. There are also methods for reading method and property annotations which you can use by passing the relevant reflection objects.
有关更多信息,请检查AnnotationReader类以了解提取注释数据的可能性。 还有一些读取方法和属性注释的方法,您可以通过传递相关的反射对象来使用。
接线 (Wiring It Up)
Now that we have our main components, it’s time to wire everything up. First, we need our service definitions, so inside the Resource/config folder of our bundle we can have this services.yml file:
现在我们有了主要组件,是时候将所有内容连接起来了。 首先,我们需要服务定义,因此在包的Resource/config文件夹中,我们可以拥有以下services.yml文件:
services:
    worker_manager:
        class: WorkerBundle\Workers\WorkerManager
        arguments: ["@worker_discovery"]
    worker_discovery:
        class: WorkerBundle\Workers\WorkerDiscovery
        arguments: ["%worker_namespace%", "%worker_directory%", "%kernel.root_dir%", "@annotation_reader"]
Nothing major is happening here. The WorkerManager gets the WorkerDiscovery as a dependency while the latter gets some parameters and the Doctrine annotation reader service.
这里没有大事发生。 WorkerManager将WorkerDiscovery作为依赖项,而后者将获取一些参数和Doctrine注释阅读器服务。
But in order for our service definitions to be picked up centrally by the container, we need to write a small extension class. So inside the DependencyInjection folder of our bundle, create a class called WorkerExtension. Both the location and name are important for Symfony to pick it up automatically.
但是,为了使服务定义能够被容器集中接收,我们需要编写一个小的扩展类。 因此,在包的DependencyInjection文件夹中,创建一个名为WorkerExtension的类。 位置和名称对于Symfony自动获取都很重要。
<?php

namespace WorkerBundle\DependencyInjection;

use Symfony\Component\DependencyInjection\Loader\YamlFileLoader;
use Symfony\Component\Config\FileLocator;
use Symfony\Component\HttpKernel\DependencyInjection\Extension;
use Symfony\Component\DependencyInjection\ContainerBuilder;

class WorkerExtension extends Extension
{
    public function load(array $configs, ContainerBuilder $container)
    {
        $loader = new YamlFileLoader($container, new FileLocator(__DIR__.'/../Resources/config'));
        $loader->load('services.yml');
    }
}
In here we are just using the ::load() method to include our services into the container copy that gets merged with the main container.
在这里,我们只是使用::load()方法将服务包含到与主容器合并的容器副本中。
The last thing that we need to do is to register our bundle. Inside our AppKernel:
我们需要做的最后一件事是注册我们的捆绑软件。 在我们的AppKernel :
public function registerBundles()
{
    return array(
        // ...
        new WorkerBundle\WorkerBundle(),
        // ...
    );
}
And that’s it.
就是这样。
开始干活! (Let’s Work!)
Now we are ready to work. Let’s configure where our workers will be found inside the central parameters.yml file:
现在我们准备工作。 让我们配置在中央parameters.yml文件中的哪里找到我们的工作人员:
worker_namespace: AppBundle\Workers
worker_directory: AppBundle/Workers
These parameters are passed from the container to the WorkerDiscovery class as we’ve seen above.
如上所述,这些参数从容器传递给WorkerDiscovery类。
The location is up to you but for now let’s put our workers in the main AppBundle bundle of our application. Our first worker can look like this:
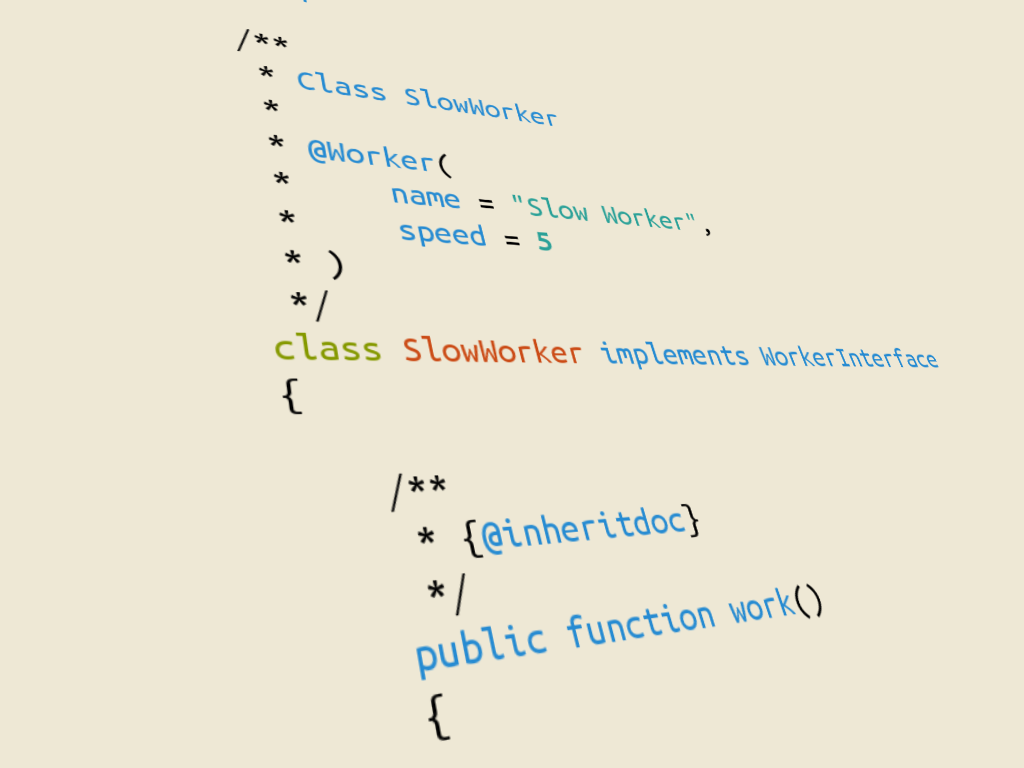
该位置由您决定,但现在让我们将工作人员放在应用程序的主AppBundle捆绑包中。 我们的第一个工人看起来像这样:
<?php

namespace AppBundle\Workers;

use WorkerBundle\Annotation\Worker;
use WorkerBundle\Workers\WorkerInterface;

/**
 * Class SlowWorker
 *
 * @Worker(
 *     name = "Slow Worker",
 *     speed = 5
 * )
 */
class SlowWorker implements WorkerInterface
{

    /**
     * {@inheritdoc}
     */
    public function work()
    {
        return 'I work really slowly';
    }
}
Our annotation is up there, the use statement is in place so there is nothing preventing some business logic from finding it and instantiating it. Let’s assume inside a Controller method:
我们的注释就在那儿, use语句就位,因此没有什么可以阻止某些业务逻辑找到并实例化它。 让我们假设在Controller方法内部:
$manager = $this->get('worker_manager');
$worker = $manager->create('Slow Worker');
$worker->work();
or
要么
$workers = $manager->getWorkers();
$workers = array_filter($workers, function($definition) {
    return $definition['annotation']->getSpeed() >= 5;
});
foreach($workers as $definition) {
    /** @var WorkerInterface $worker */
    $worker = $manager->create($definition['annotation']->getName());
    $worker->work();
}
Pfff… our SlowWorker barely made it in to work today!
Pfff…我们的SlowWorker勉强能立即投入工作!
结论 (Conclusion)
We now have the power of using annotations to express metadata about our classes (or methods and properties). In this tutorial, we’ve built a small package that exposes the possibility for the application (or other external bundles) to declare workers capable of performing some work by defining some metadata about them. This metadata not only makes them easily discoverable, but also provides information on whether or not they should actually be employed.
现在,我们可以使用注释来表达有关我们的类(或方法和属性)的元数据。 在本教程中,我们构建了一个小程序包,该程序包揭示了应用程序(或其他外部捆绑包)通过定义有关它们的元数据来声明能够执行某些工作的工作程序的可能性。 该元数据不仅使它们易于发现,而且还提供有关是否应实际使用它们的信息。
Do you use custom annotations in your own projects? If so, how do you implement them the Rauth way, or like we did here? Perhaps a third approach? Let us know!
您是否在自己的项目中使用自定义注释? 如果是这样,您如何以Rauth方式实现它们,或者像我们在这里一样? 也许是第三种方法? 让我们知道!
Interested in learning more about Symfony, Doctrine, annotations, and all manner of enterprisey PHP things? Join us for a fully packed three days of hands-on workshops at WebSummerCamp – the only conference that’s exclusively hands-on, and also takes care of anyone you’d like to bring along!
有兴趣了解有关Symfony,Doctrine,注释和各种形式的企业级PHP东西的更多信息吗? 加入我们,在WebSummerCamp上进行为期三天的动手研讨会, 这是唯一一个完全动手的会议,也可以照顾任何您想带的人!
自定义注释


 2779
2779

 被折叠的 条评论
为什么被折叠?
被折叠的 条评论
为什么被折叠?
 到【灌水乐园】发言


