


lumen 注入验证器
In this tutorial, we’re going to build a reader for Hacker News. We will be using the Hacker News API and the Lumen framework to implement this.
在本教程中,我们将为Hacker News建立读者。 我们将使用Hacker News API和Lumen框架来实现这一点。
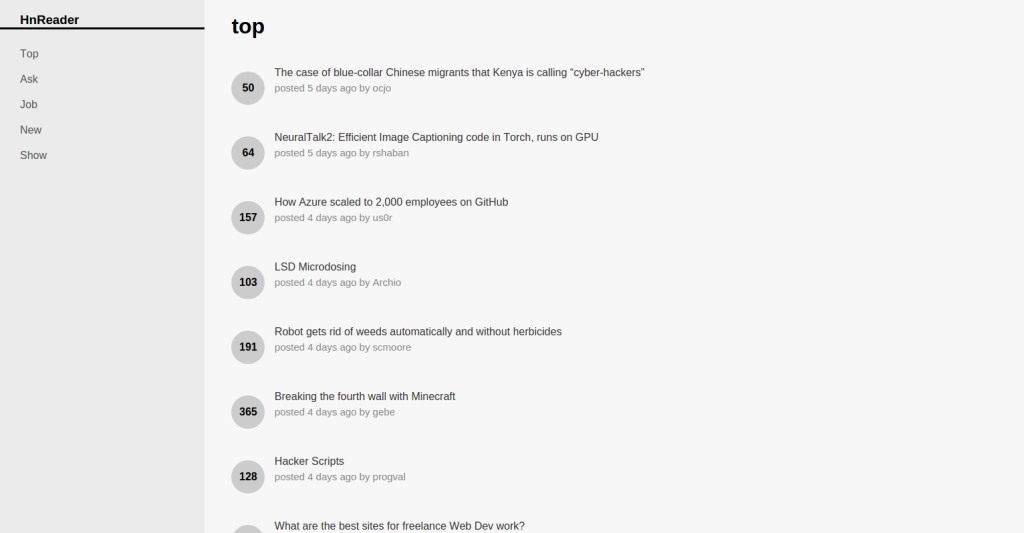
The final output looks something like this:
最终输出如下所示:
If you’re excited, let’s go ahead and jump right into it.
如果您很兴奋,那就继续前进吧。
安装和配置流明 (Installing and Configuring Lumen)
The first thing that you need to do is to install Lumen. You can do so with the following command, where hnreader is the folder you want the project installed into and --prefer-dist just speeds up the download of the required Composer packages:
您需要做的第一件事是安装Lumen。 您可以使用以下命令来执行此操作,其中hnreader是要将项目安装到的文件夹,而--prefer-dist可以加快所需Composer软件包的下载速度:
composer create-project laravel/lumen hnreader --prefer-distCreate an .env file with the contents:
创建一个.env文件,其内容如下:
APP_DEBUG=true

APP_TITLE=HnReader

DB_CONNECTION=mysql
DB_HOST=localhost
DB_PORT=3306
DB_DATABASE=hnreader
DB_USERNAME=homestead
DB_PASSWORD=secret
APP_DEBUG allows us to turn on debugging in Lumen so that we can see the errors in the app. And the DB_* is for the database configuration. We will be using the MySQL database for storing the items that we will be getting from the Hacker News API. This way, we won’t need to make a separate HTTP request every time a user accesses the app. You will probably just leave the values for DB_CONNECTION, DB_HOST, DB_PORT as they are if you’re using Homestead Improved. Of course, we need to create the database, too.
APP_DEBUG允许我们在流明中打开调试,以便我们可以在应用程序中看到错误。 DB_*用于数据库配置。 我们将使用MySQL数据库来存储将从Hacker News API获得的项目。 这样,我们就不需要在每次用户访问应用程序时都发出单独的HTTP请求。 如果您使用的是Homestead DB_CONNECTION ,则可能只保留DB_CONNECTION , DB_HOST和DB_PORT的值。 当然,我们也需要创建数据库。
mysql -u homestead -psecret
CREATE DATABASE hnreader;
Next, let’s open the bootstrap/app.php file and uncomment the following line:
接下来,让我们打开bootstrap/app.php文件,并取消注释以下行:
Dotenv::load(__DIR__.'/../');This specific line loads the configuration options from the .env file created earlier.
此特定行从.env创建的.env文件中加载配置选项。
Also uncomment the following line so that you can use facades such as DB:
还要取消注释以下行,以便可以使用诸如DB外观:
$app->withFacades();数据库 (Database)
For this app, we’re only going to need one table for storing the items that we’ve fetched from the API. You can create the table by creating a new migration with the following command:
对于此应用程序,我们只需要一个表来存储从API提取的项目。 您可以使用以下命令通过创建新迁移来创建表:
php artisan make:migration create_items_tableThat will create a new migration in the database/migrations directory. Open the file and update the contents of the up and down method to the following:
这将在database/migrations目录中创建一个新的迁移。 打开文件并将up和down方法的内容更新为以下内容:
public function up()
{
    Schema::create('items', function(Blueprint $table){
        $table->integer('id')->primary();
        $table->string('title');
        $table->text('description');
        $table->string('username');
        $table->char('item_type', 20);
        $table->string('url');
        $table->integer('time_stamp');
        $table->integer('score');
        $table->boolean('is_top');
        $table->boolean('is_show');
        $table->boolean('is_ask');
        $table->boolean('is_job');
        $table->boolean('is_new');
    });
}

public function down()
{
    Schema::drop('items');
}
What the up method does is create the items table. Here’s a brief description of each of the fields:
up方法的作用是创建项目表。 这是每个字段的简要说明:
id – the unique item ID that comes from the API.
id –来自API的唯一商品ID。
title – the title of the item. This is the field that we’ll be displaying later on in the news page.
标题 –项目的标题。 这是我们稍后将在新闻页面中显示的字段。
description – a brief description of the item. This will be displayed on hover in a tooltip.
说明 -项目的简要说明。 这将显示在悬停工具提示中。
username – the username of the user who submitted the item on hacker news.
用户名 –在黑客新闻上提交项目的用户的用户名。
item_type – the type of item. This can either be story or job.
item_type –项目的类型。 这可以是故事,也可以是工作 。
url – the URL pointing to the full details of the item. This is usually the website of the item that was added but it can also be empty, in which case the full description of the item is available on the hacker news website itself.
url –指向项目完整详细信息的URL。 这通常是所添加项目的网站,但也可以为空,在这种情况下,黑客新闻网站本身可以提供该项目的完整说明。
time_stamp – the unix timestamp for time of submission.
time_stamp –提交时间的unix时间戳。
score – the current ranking of the item.
分数 –项目的当前排名。
The following are flags representing whether the item belongs to the top stories, show HN, ask HN, Hacker News job postings or if it is newly posted.
以下是表示该项目是否属于热门新闻,显示HN,询问HN,Hacker News职位发布或是否已发布的标志。
is_top
我停下
is_show
is_show
is_ask
is_ask
is_job
is_job
is_new
是新的
Under the down method we simply drop the table.
在down方法下,我们只需删除表。
Schema::drop('items');To run the migration use the following command:
要运行迁移,请使用以下命令:
php artisan migrateThis will create the table in the database.
这将在数据库中创建表。
添加路线 (Adding the Routes)
Open the app/routes.php file and add the following:
打开app/routes.php文件并添加以下内容:
$app->get('/{type}', 'HomeController@index');
$app->get('/', 'HomeController@index');
The first route allows us to respond to requests for a specific type of items. Things like jobs, new stories, top stories, and others. The second route is for the home page.
第一条路线使我们能够响应对特定类型物品的请求。 诸如工作,新故事,热门故事等内容。 第二条路线是主页。
新闻更新 (News Updater)
In order to add or update the news items in the database, we use Laravel’s task scheduler. Lumen is basically the lightweight version of Laravel, so the task scheduler is available in Lumen as well. This allows us to update the database at a specific time. For example, at 8:00pm every day.
为了添加或更新数据库中的新闻项,我们使用Laravel的任务计划程序 。 流明基本上是Laravel的轻量级版本,因此任务调度程序在流明中也可用。 这使我们可以在特定时间更新数据库。 例如,每天8:00 PM。
To work with the task scheduler, we first need to create a task. You can do that by creating a new file inside the app/Console/Commands directory. Name the file UpdateNewsItems.php:
要使用任务计划程序,我们首先需要创建一个任务。 您可以通过在app/Console/Commands目录中创建一个新文件来实现。 将文件命名为UpdateNewsItems.php :
<?php
namespace App\Console\Commands;

use Illuminate\Console\Command;

use DB;
use GuzzleHttp\Client;

class UpdateNewsItems extends Command
{

    protected $name = 'update:news_items';

    public function fire()
    {


        $client = new Client(array(
            'base_uri' => 'https://hacker-news.firebaseio.com'
        ));

        $endpoints = array(
            'top' => '/v0/topstories.json',
            'ask' => '/v0/askstories.json',
            'job' => '/v0/jobstories.json',
            'show' => '/v0/showstories.json',
            'new' => '/v0/newstories.json'
        );

        foreach($endpoints as $type => $endpoint){

            $response = $client->get($endpoint);
            $result = $response->getBody();

            $items = json_decode($result, true);

            foreach($items as $id){
                $item_res = $client->get("/v0/item/" . $id . ".json");
                $item_data = json_decode($item_res->getBody(), true);

                if(!empty($item_data)){

                    $item = array(
                        'id' => $id,
                        'title' => $item_data['title'],
                        'item_type' => $item_data['type'],
                        'username' => $item_data['by'],
                        'score' => $item_data['score'],
                        'time_stamp' => $item_data['time'],
                    );

                    $item['is_' . $type] = true;

                    if(!empty($item_data['text'])){
                        $item['description'] = strip_tags($item_data['text']);
                    }

                    if(!empty($item_data['url'])){
                        $item['url'] = $item_data['url'];
                    }

                    $db_item = DB::table('items')
                        ->where('id', '=', $id)
                        ->first();

                    if(empty($db_item)){

                        DB::table('items')->insert($item);

                    }else{

                        DB::table('items')->where('id', $id)
                            ->update($item);
                    }
                }
            }
        }
        return 'ok';

    }
}
This class inherits from Illuminate’s Command class, so we need to import it.
该类继承自Illuminate的Command类,因此我们需要导入它。
use Illuminate\Console\Command;Import the database class and Guzzle so that we can work with the database and make HTTP requests using the Guzzle HTTP Client.
导入数据库类和Guzzle,以便我们可以使用数据库并使用Guzzle HTTP Client发出HTTP请求。
use DB;
use GuzzleHttp\Client;
Specify the name of the command:
指定命令的名称:
protected $name = 'update:news_items';This allows us to use artisan to execute this command from the terminal like so:
这使我们可以使用artisan从终端执行此命令,如下所示:
php artisan update:news_itemsUnder the fire method, create a new instance of the Guzzle Client and declare an array containing the various endpoints in the Hacker News API. In the case of this app, we’ll only be using the endpoints for the top stories, ask HN, jobs, show HN and new stories.
在fire方法下,创建Guzzle Client的新实例,并在Hacker News API中声明一个包含各个端点的数组。 就此应用而言,我们将仅使用热门故事的端点,询问HN,职位,显示HN和新故事。
$client = new Client(array(
    'base_uri' => 'https://hacker-news.firebaseio.com'
));

$endpoints = array(
    'top' => '/v0/topstories.json',
    'ask' => '/v0/askstories.json',
    'job' => '/v0/jobstories.json',
    'show' => '/v0/showstories.json',
    'new' => '/v0/newstories.json'
);
Loop through all of the endpoints so that we can add or update the news items available to each of those.
遍历所有端点,以便我们可以添加或更新每个端点可用的新闻项。
foreach($endpoints as $type => $endpoint){
    ...
}
Inside the loop we make a request to the Hacker News API and convert the contents of the response body to an array. This array contains the IDs of the news items that have been returned for the current endpoint.
在循环内部,我们向Hacker News API发出请求,并将响应主体的内容转换为数组。 该数组包含为当前端点返回的新闻项的ID。
$response = $client->get($endpoint);
$result = $response->getBody();

$items = json_decode($result, true);
Loop through all those IDs and make a separate request to the API to get more information about each item. Here we’re using the item endpoint (/v0/item/{ITEM_ID}.json). Once we get the response back, we construct the data that we will be saving in the database based on the data that has been returned by the API. Notice that we’re checking if the response actually has some content. This is because sometimes the IDs returned from a specific endpoint (e.g. top stories) don’t actually point to an actual item.
遍历所有这些ID,并向API发出单独的请求,以获取有关每个项目的更多信息。 在这里,我们使用项目终结点 ( /v0/item/{ITEM_ID}.json )。 一旦获得响应,我们将根据API返回的数据来构建将保存在数据库中的数据。 注意,我们正在检查响应是否确实包含某些内容。 这是因为有时从特定终结点(例如,故事)返回的ID实际上并不指向实际项目。
foreach($items as $id){
    $item_res = $client->get("/v0/item/" . $id . ".json");
    $item_data = json_decode($item_res->getBody(), true);

    if(!empty($item_data)){

        $item = array(
            'id' => $id,
            'title' => $item_data['title'],
            'item_type' => $item_data['type'],
            'username' => $item_data['by'],
            'score' => $item_data['score'],
            'time_stamp' => $item_data['time'],
        );
    }

    ...
To be able to easily fetch items based the route the user accesses later on, we set the value of a specific type to true.
为了能够根据用户以后访问的路线轻松获取项目,我们将特定类型的值设置为true 。
$item['is_' . $type] = true;Set the description and URL if they are present in the item.
设置说明和URL(如果项目中存在)。
if(!empty($item_data['text'])){
    $item['description'] = strip_tags($item_data['text']);
}

if(!empty($item_data['url'])){
    $item['url'] = $item_data['url'];
}
Create a new row for the item in the database if it doesn’t already exist, and update it if it already exists.
如果该项目在数据库中尚不存在,请为其创建新行;如果已存在,则对其进行更新。
$db_item = DB::table('items')
    ->where('id', '=', $id)
    ->first();

if(empty($db_item)){

    DB::table('items')->insert($item);

}else{

    DB::table('items')->where('id', $id)
        ->update($item);
}
Return something at the end of the function to signal that this is where the function ends.
在函数末尾返回一些内容,以表明这是函数结束的地方。
return 'ok';Now that we’re done creating a new task, it’s time to add it to the console kernel. Open the app/Console/Kernel.php file to do that. Under the commands array, add the path to the task that we’ve just created.
现在我们已经完成了创建新任务的时间,是时候将其添加到控制台内核了。 打开app/Console/Kernel.php文件即可。 在命令数组下,将路径添加到我们刚刚创建的任务。
protected $commands = [
     'App\Console\Commands\UpdateNewsItems',
];
Under the schedule function, add the command and specify the time at which it will run. 19:57 here means that the command update:news_items should run every day at 7:57pm.
在schedule功能下,添加命令并指定运行时间。 19:57在这里意味着命令update:news_items应该每天晚上7:57运行。
protected function schedule(Schedule $schedule)
{
    $schedule->command('update:news_items')->dailyAt('19:57');
}
Next, you need to make sure that the app uses the same timezone used in the server. Open the .env file and add the timezone configuration:
接下来,您需要确保该应用使用服务器中使用的相同时区。 打开.env文件并添加时区配置:
APP_TIMEZONE=Asia/ManilaJust change Asia/Manila to a valid PHP timezone which applies to your server. You can get a list of valid timezones in the List of Supported Timezones page.
只需将Asia/Manila更改为适用于您的服务器的有效PHP时区即可。 您可以在“ 支持的时区列表”页面中获得有效时区的列表 。
Lastly, add a new item to cron by executing the following command:
最后,通过执行以下命令将新项目添加到cron中:
sudo crontab -eAnd on the last line add the following:
在最后一行添加以下内容:
* * * * * php /path/to/hn-reader/artisan schedule:run >> /dev/null 2>&1Be sure to change /path/to/hn-reader/ to the actual path of the app in your file system. You can test things out by executing the following command while inside the root directory of the app.
确保将/path/to/hn-reader/更改为文件系统中应用程序的实际路径。 您可以在应用的根目录中执行以下命令来测试内容。
php artisan schedule:runOf course, this will have no effect if the time specified in the scheduler doesn’t match the time you’re running the command at, so tweak it for a real test.
当然,如果调度程序中指定的时间与您在其上运行命令的时间不匹配,则这将无效,因此请对其进行调整以进行实际测试。
新闻页面 (News Page)
For the news page, create app/Http/controllers/HomeController.php:
对于新闻页面,创建app/Http/controllers/HomeController.php :
<?php

namespace App\Http\Controllers;

use Laravel\Lumen\Routing\Controller as BaseController;
use DB;

class HomeController extends BaseController {

    private $types;

    public function __construct(){
        $this->types = array(
            'top',
            'ask',
            'job',
            'new',
            'show'
        );
    }

    public function index($type = 'top'){

        $items = DB::table('items')
            ->where('is_' . $type, true)
            ->get();

        $page_data = array(
            'title' => $type,
            'types' => $this->types,
            'items' => $items
        );

        return view('home', $page_data);
    }

}
Inside the class we declare a private variable called $types. This is where we store the types of items that can be viewed in the news page. Note that these are the same as the keys that we’ve used earlier in the $endpoints array in the task for updating news items.
在类内部,我们声明一个名为$types的私有变量。 我们在这里存储可以在新闻页面中查看的项目类型。 请注意,这些键与我们先前在任务中的$endpoints数组中用于更新新闻项的键相同。
In the index function, we’re accepting the type as an argument and default it to top. This way, the home page shows the top stories by default.
在index函数中,我们接受类型作为参数,并将其默认设置为top 。 这样,主页默认显示了热门新闻。
Then, we fetch the items depending on the type that was set to true. Each item can have more than one type enabled. For example, a job posting might also be one of the top stories so it has a value of true for both is_job and is_top fields in the table, which means that some items are repeated across different pages.
然后,根据设置为true的type获取项目。 每个项目可以启用多个类型。 例如,职位发布也可能是is_job is_top之一,因此表中的is_job和is_top字段都具有true值,这意味着某些项目会在不同页面上重复。
Once we have fetched the items, we can now add them to an array to be supplied as the data for the news page. Here we’re also passing in the different types, so that the user can select which HN items they want to view. The title of the page is set to the current type.
提取项目后,我们现在可以将它们添加到数组中,以作为新闻页面的数据提供。 在这里,我们还传递了不同的类型,以便用户可以选择他们要查看的HN项目。 页面标题设置为当前类型。
$page_data = array(
    'title' => $type,
    'types' => $this->types,
    'items' => $items
);

return view('home', $page_data);
The view for displaying news (resources/views/home.blade.php) contains the following:
用于显示新闻的视图( resources/views/home.blade.php )包含以下内容:
<!DOCTYPE html>
<html lang="en">
<head>
    <meta charset="UTF-8">
    <title>{{ env('APP_TITLE') }}</title>
    <link rel="stylesheet" href="{{ url('assets/css/hint.min.css') }}">
    <link rel="stylesheet" href="{{ url('assets/css/style.css') }}">
</head>
<body>
    <div id="sidebar">
        <h3>{{ env('APP_TITLE') }}</h3>
        <ul id="types">
            @foreach($types as $type)
            <li>
                <a href="/{{ $type }}">{{ ucwords($type) }}</a>
            </li>
            @endforeach
        </ul>
    </div>

    <div id="items-container">
        <h1>{{ $title }}</h1>
        <ul id="items">
            @foreach($items as $item)
            <li class="item">
                <span class="item-score">{{ $item->score }}</span>
                <a href="{{ URLHelper::getUrl($item->id, $item->url) }}">
                    <span class="item-title hint--bottom" data-hint="{{ str_limit(strip_tags($item->description), 160) }}">{{ $item->title }}</span>
                    <span class="item-info">posted {{ \Carbon\Carbon::createFromTimestamp($item->time_stamp)->diffForHumans() }} by {{ $item->username }}</span>
                </a>
            </li>
            @endforeach
        </ul>
    </div>
</body>
</html>
We’re loading APP_TITLE from the .env file earlier by calling the env function.
我们通过调用env函数从.env文件中加载APP_TITLE 。
We then generate the URL for hint.css and the main stylesheet using the url helper. Following that, we loop through all the types and format the unordered list accordingly.
然后,我们使用url帮助器生成hint.css的URL和主样式表。 接下来,我们遍历所有类型并相应地格式化无序列表。
The next part shows the current type that’s being viewed and loops through all the items that have been fetched from the database. Here we’re using a custom helper class called URLHelper to return the correct URL that links to the actual item. This is needed because some items doesn’t actually have a website, so the URL would be the hacker news page assigned to that specific item. This is true for all Ask HN items. We’ll look at the code for that helper shortly. For now, just remember that we’re passing in the ID and the URL to the getURL function of that class.
下一部分显示了正在查看的当前类型,并遍历了从数据库中获取的所有项目。 在这里,我们使用名为URLHelper的自定义帮助程序类来返回链接到实际项目的正确URL。 这是必需的,因为某些商品实际上没有网站,因此URL将是分配给该特定商品的黑客新闻页面。 所有Ask HN项目都是如此。 我们将很快查看该帮助程序的代码。 现在,请记住我们正在将ID和URL传递给该类的getURL函数。
For the time that the item is posted, we are converting the unix timestamp to a human friendly time such as 4 seconds ago. This is done with the help of Carbon.
对于项目发布的时间,我们正在将unix时间戳转换为人类友好的时间,例如4 seconds ago 。 这是在Carbon的帮助下完成的。
For the item description, we’re using hint.css to display it. In the span that contains the item title we added the hint--bottom class to control the position of the tooltip, while data-hint contains the description text which is limited to 160 characters by using the str_limit helper function.
对于项目描述,我们使用hint.css进行显示。 在包含项目标题的范围中,我们添加了hint--bottom类来控制工具提示的位置,而data-hint包含通过使用str_limit helper函数将描述文本限制为160个字符的情况。
In URLHelper (app/Helpers/URLHelper.php), the getURL function checks if the URL is empty. If it’s not, then it returns the URL. Otherwise, it returns the HN URL pointing to the page assigned to the item.
在URLHelper ( app/Helpers/URLHelper.php )中, getURL函数检查URL是否为空。 如果不是,则返回URL。 否则,它将返回指向分配给该项目的页面的HN URL。
<?php

class URLHelper {

    public static function getURL($id, $url = ''){
        if(!empty($url)){
            return $url;
        }
        return "https://news.ycombinator.com/item?id={$id}";
    }
}
Before we can use this helper, we need to do one more modification in composer.json. Under the autoload object, look for classmap. That’s an array containing the paths to the directories whose files are autoloaded. Since we’ve saved the URLHelper under the app/Helpers directory, we add in app/Helpers to the classmap array.
在使用此帮助程序之前,我们需要在composer.json再进行一次修改。 在autoload对象下,查找classmap 。 这是一个数组,其中包含自动加载文件的目录的路径。 由于我们已将URLHelper保存在app/Helpers目录下,因此将app/Helpers添加到classmap数组中。
"autoload": {
    "psr-4": {
        "App\\": "app/"
    },
    "classmap": [
        "database/",
        "app/Helpers"
    ]
},
Finally, we add the stylesheet (public/assets/css/style.css).
最后,我们添加样式表( public/assets/css/style.css )。
body {
    font-family: Helvetica Neue, Helvetica, Arial, sans-serif;
    padding: 0;
    margin: 0;
}

h1 {
    padding-left: 40px;
}

#sidebar {
    width: 20%;
    float: left;
    background-color: #EBEBEB;
    position: fixed;
    height: 100%;
}

#items-container {
    width: 80%;
    float: left;
    position: relative;
    margin-left: 20%;
    background-color: #F7F7F7;
}

ul li {
    list-style: none;
}

#sidebar h3 {
    border-bottom: 3px solid;
    padding: 0;
    padding-left: 30px;
}

#types li {
    padding: 10px 30px;
}

ul#types {
    padding: 0;
}

#types li a {
    text-decoration: none;
    color: #575757;
}

#items {
    padding: 0 20px;
}

#items li a {
    text-decoration: none;
    color: #3A3A3A;
    display: inline-block;
}

#items li {
    padding: 20px;
}

#items li:hover {
    background-color: #DFDFDF;
}

.item-score {
    font-weight: bold;
    display: inline-block;
    width: 50px;
    border-radius: 50%;
    background-color: #ccc;
    height: 50px;
    text-align: center;
    line-height: 50px;
    margin-right: 10px;
}

.item-info {
    display: inline-block;
    width: 100%;
    font-size: 15px;
    color: #8A8A8A;
    margin-top: 5px;
}
结论 (Conclusion)
That’s it! In this tutorial, you’ve learned how to work with the Hacker News API to build a news reader. We’ve only used a portion of the API in this tutorial, so be sure to check out the documentation if you want to use more of its features. All the source code used in this tutorial is available in this Github repo. Questions? Comments? Suggestions? Leave them below!
而已! 在本教程中,您学习了如何与Hacker News API一起构建新闻阅读器。 在本教程中,我们仅使用了一部分API,因此,如果您想使用其更多功能,请务必查看文档 。 Github存储库中提供了本教程中使用的所有源代码。 有什么问题吗 注释? 有什么建议吗? 把它们留在下面!
翻译自: https://www.sitepoint.com/building-a-hacker-news-reader-with-lumen/
lumen 注入验证器


 208
208


 被折叠的 条评论
为什么被折叠?
被折叠的 条评论
为什么被折叠?
 到【灌水乐园】发言


