


angularjs api
In part 1, we built our server part. Now we can build our client. We are going to use AngularJS to make a Single Page Application. We will use a very basic bootstrap template, built on the fly.
在第1部分中,我们构建了服务器部分。 现在我们可以建立我们的客户。 我们将使用AngularJS制作单页应用程序 。 我们将使用动态构建的非常基本的引导程序模板。
规划 (Planning)
Our application will be made up of three screens.
我们的应用程序将由三个屏幕组成。
Login Screen: a simple login screen. The user will insert their email and password. If something goes wrong, an error will be shown. Otherwise, the user will be redirected to the Main Screen. They will also be able to click on a “Signup” link, to open the Signup Screen;
登录屏幕 :一个简单的登录屏幕。 用户将输入他们的电子邮件和密码。 如果出现问题,将显示错误。 否则,用户将被重定向到主屏幕 。 他们还可以单击“注册”链接以打开“注册” 屏幕 ;
Signup Screen: a simple signup screen, used to create a new account in the application. After specifying all the required data, the user will automatically log in;
注册屏幕 :一个简单的注册屏幕,用于在应用程序中创建一个新帐户。 指定所有必需的数据后,用户将自动登录;
Main Screen: the main application screen. From here, the user will be able to get a list of their books, add new titles, and update and remove the existing ones;
主屏幕 :主应用程序屏幕。 从这里,用户将能够获得他们的书籍清单,添加新书名以及更新和删除现有书名;
准备基本的前端工作环境 (Preparing a Basic Frontend Work Environment)
We need to plan where we are placing our app. We can do as we like, but for this article series and for the sake of continuation, a very simple and “integrated” setup will do.
我们需要计划要放置应用程序的位置。 我们可以根据自己的意愿进行操作,但是对于本系列文章以及为了继续,我们将使用非常简单且“集成”的设置。
First we’ll create a basic Laravel Blade view, named index.blade.php, that will “host” the app. Frontend dependencies will be handled by Bower, which is already included in Homestead Improved. Another good reason to switch to VMs, if you have not already done so.
首先,我们将创建一个名为index.blade.php的基本Laravel Blade视图,它将“托管”该应用程序。 前端依赖项将由Bower处理, Bower已包含在Homestead Improvement中 。 切换到虚拟机的另一个很好的理由(如果尚未这样做)。
Let’s prepare our basic view. In the terminal, we go to the public folder of the project and type, in sequence:
让我们准备一下基本视图。 在终端方面,我们去public项目和种类,在序列文件夹:
bower install jquery bootstrap angular angular-route angular-local-storage restangularWe already know the first three elements: jquery, bootstrap and angular. The fourth, angular-route, will be used as a router for our single page application. The fifth, angular-local-storage, will be used to locally store our authentication token. We will use the last one, restangular, to create a “resource” in Angular that will communicate directly with our server via HTTP requests.
我们已经知道前三个元素: jquery , bootstrap和angular 。 第四个, angular-route ,将用作我们单页应用程序的路由器 。 第五个, angular-local-storage ,将用于本地存储我们的身份验证令牌。 我们将使用最后一个restangular在Angular中创建一个“资源”,该资源将通过HTTP请求与我们的服务器直接通信。
Let’s come back to Laravel for a second now. Let’s go to the app/Http/routes.php file and add this entry:
现在让我们回到Laravel。 让我们转到app/Http/routes.php文件并添加以下条目:
Route::get('/', function () {
    return view('index');
});
Other entries can be deleted.
其他条目可以删除。
Note: don’t confuse the routes.php file with the api_routes.php file.
注意:不要混淆routes.php与文件api_routes.php文件。
Let’s build the Blade template we are going to use and create a new file named index.blade.php in resources/views.
让我们构建我们将要使用的Blade模板,并在resources/views创建一个名为index.blade.php的新文件。
<!DOCTYPE html>
<html lang="en">
    <head>
        <meta charset="utf-8">
        <meta http-equiv="X-UA-Compatible" content="IE=edge">
        <meta name="viewport" content="width=device-width, initial-scale=1">

        <title>Book Wishlist Application</title>

        <link href="bower_components/bootstrap/dist/css/bootstrap.min.css" rel="stylesheet">

        <script src="bower_components/angular/angular.min.js"></script>
        <script src="bower_components/lodash/lodash.min.js"></script>
        <script src="bower_components/angular-route/angular-route.min.js"></script>
        <script src="bower_components/angular-local-storage/dist/angular-local-storage.min.js"></script>
        <script src="bower_components/restangular/dist/restangular.min.js"></script>

        <style>

            li {
                padding-bottom: 8px;
            }

        </style>
    </head>

    <body>
        <div class="container">
            <div class="row">
                <div class="col-md-12">
                    <h1>Book Wishlist Application</h1>
                </div>
            </div>
        </div>

        <script src="bower_components/jquery/dist/jquery.min.js"></script>
        <script src="bower_components/bootstrap/dist/js/bootstrap.min.js"></script>
    </body>
</html>
In this file, we can find everything we need.
在此文件中,我们可以找到所需的一切。
基本路由 (Basic Routing)
We will start with the first two screens: the Login screen and the Signup screen. This will involve our angular-router. The basic principle is very similar to the Laravel routing process: we assign a certain “screen” to a certain route.
我们将从头两个屏幕开始:“ 登录”屏幕和“ 注册”屏幕。 这将涉及我们的角度路由器。 基本原理与Laravel路由过程非常相似:我们将特定的“屏幕”分配给特定的路由。
For every single screen, we are going to build an Angular controller. This controller will handle every logic operation, leaving the presentation responsibility to the view.
对于每个屏幕,我们将构建一个Angular控制器。 该控制器将处理所有逻辑操作,将表示责任留给视图。
Let’s create a folder in public named js. Then, we will make a new app.js file inside. It will be our main single page application file:
让我们在public文件夹中创建一个名为js的文件夹。 然后,我们将在其中创建一个新的app.js文件。 这将是我们的主要单页应用程序文件:
var bookWishlistApp = angular.module('bookWishlistApp', [
  'ngRoute',
  'bookWishlistAppControllers'
]);

bookWishlistApp.config(['$routeProvider', function($routeProvider) {

    $routeProvider.
    when('/login', {
        templateUrl: 'partials/login.html',
        controller: 'LoginController'
    }).
    when('/signup', {
        templateUrl: 'partials/signup.html',
        controller: 'SignupController'
    }).
    when('/', {
        templateUrl: 'partials/index.html',
        controller: 'MainController'
    }).
    otherwise({
        redirectTo: '/'
    });

}]);
We are defining the routing structure of our application. As you can see, we have three possible routes.
我们正在定义应用程序的路由结构。 如您所见,我们有三种可能的路线。
the
/loginroute, for the Login screen;/login路径,用于“登录”屏幕;the
/signuproute, for the Signup screen;/signup路线,用于“注册”屏幕;the
/, for the Main application screen;/,用于主应用程序屏幕;
Declaring the module, at the top of the file, we are injecting two dependencies. The first one is ngRoute, used for the routing functionality. The second one is bookWishlistAppControllers, the module that is going to contain all our application controllers.
声明模块,在文件的顶部,我们注入两个依赖项。 第一个是ngRoute ,用于路由功能。 第二个是bookWishlistAppControllers ,该模块将包含我们所有的应用程序控制器。
Let’s create another file in the same folder, named controllers.js.
让我们在同一文件夹中创建另一个文件,名为controllers.js 。
var bookWishlistAppControllers = angular.module('bookWishlistAppControllers', []);

bookWishlistAppControllers.controller('LoginController', ['$scope', '$http', function ($scope, $http) {

}]);

bookWishlistAppControllers.controller('SignupController', ['$scope', '$http', function ($scope, $http) {

}]);

bookWishlistAppControllers.controller('MainController', ['$scope', '$http', function ($scope, $http) {

}]);
As we can see, they are all empty right now. We will fill them out later. Right now, we just want to test our routing system.
如我们所见,它们现在都是空的。 我们稍后会填写。 现在,我们只想测试路由系统。
Let’s create another folder in the public one: partials. We’ll place three files inside: index.html, login.html and signup.html. Inside each of them, just place some demo text for now.
让我们在public文件夹中创建另一个文件夹: partials 。 我们将在其中放置三个文件: index.html , login.html和signup.html 。 在其中每个文件中,暂时放置一些演示文本。
In index.html insert:
在index.html插入:
<p>main screen</p>In login.html:
在login.html :
<p>login screen</p>… and in signup.html:
…以及在signup.html :
<p>signup screen</p>We now change our Blade view:
现在,我们更改刀片视图:
<!DOCTYPE html>
<html lang="en" ng-app="bookWishlistApp">
    <head>
        <meta charset="utf-8">
        <meta http-equiv="X-UA-Compatible" content="IE=edge">
        <meta name="viewport" content="width=device-width, initial-scale=1">

        <title>Book Wishlist Application</title>

        <link href="bower_components/bootstrap/dist/css/bootstrap.min.css" rel="stylesheet">

        <script src="bower_components/angular/angular.min.js"></script>
        <script src="bower_components/lodash/lodash.min.js"></script>
        <script src="bower_components/angular-route/angular-route.min.js"></script>
        <script src="bower_components/angular-local-storage/dist/angular-local-storage.min.js"></script>
        <script src="bower_components/restangular/dist/restangular.min.js"></script>

        <script src="js/app.js"></script>
        <script src="js/controllers.js"></script>

        <style>

            li {
                padding-bottom: 8px;
            }

        </style>
    </head>

    <body>

        <div class="container">
            <div class="row">
                <div class="col-md-12">
                    <h1>Book Wishlist Application</h1>
                </div>
            </div>

            <div ng-view></div>
        </div>

        <script src="bower_components/jquery/dist/jquery.min.js"></script>
        <script src="bower_components/bootstrap/dist/js/bootstrap.min.js"></script>
    </body>
</html>
We added the ng-app="bookWishlistApp" attribute in the html element, and the ng-view attribute to a new div element. This will be the “container” for our partials.
我们在html元素中添加了ng-app="bookWishlistApp"属性,并将ng-view属性添加到了新的div元素中。 这将是我们部件的“容器”。
We will also need to add the
我们还需要添加
<script src="js/app.js"></script>
<script src="js/controllers.js"></script>
lines, to load the main app file and the bookWishlistAppControllers module that will be injected as a dependency.
行,以加载主应用程序文件和将作为依赖项注入的bookWishlistAppControllers模块。
If we test it, this is what we will see:
如果我们对其进行测试,将会看到以下内容:
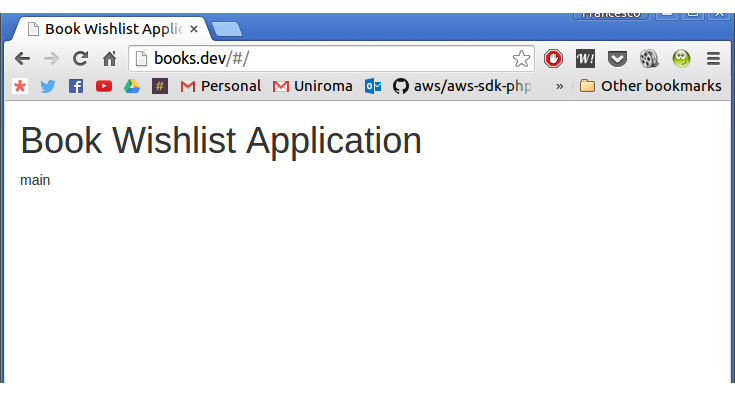
The Angular routing component automatically added the /#/ to the URL. Now, if we manually add login to the string, this is what we will get:
Angular路由组件自动将/#/添加到URL。 现在,如果我们手动将login添加到字符串,则将得到以下信息:
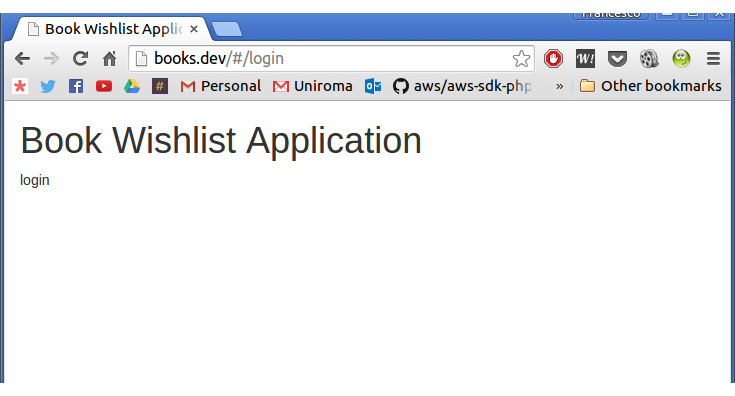
Yay! Our routing works perfectly.
好极了! 我们的路由完美运行。
注册和登录 (Signup and Login)
In order to build the Login and Signup screens, we will encapsulate some user access related logic in a separate userService.
为了构建“登录”和“注册”屏幕,我们将一些与用户访问相关的逻辑封装在单独的userService 。
Let’s create a new file in public/js and name it services.js:
让我们在public/js创建一个新文件,并将其命名为services.js :
var bookWishlistAppServices = angular.module('bookWishlistAppServices', [
    'LocalStorageModule'
]);

bookWishlistAppServices.factory('userService', ['$http', 'localStorageService', function($http, localStorageService) {

    function checkIfLoggedIn() {

        if(localStorageService.get('token'))
            return true;
        else
            return false;

    }

    function signup(name, email, password, onSuccess, onError) {

        $http.post('/api/auth/signup',
        {
            name: name,
            email: email,
            password: password
        }).
        then(function(response) {

            localStorageService.set('token', response.data.token);
            onSuccess(response);

        }, function(response) {

            onError(response);

        });

    }

    function login(email, password, onSuccess, onError){

        $http.post('/api/auth/login',
        {
            email: email,
            password: password
        }).
        then(function(response) {

            localStorageService.set('token', response.data.token);
            onSuccess(response);

        }, function(response) {

            onError(response);

        });

    }

    function logout(){

        localStorageService.remove('token');

    }

    function getCurrentToken(){
        return localStorageService.get('token');
    }

    return {
        checkIfLoggedIn: checkIfLoggedIn,
        signup: signup,
        login: login,
        logout: logout,
        getCurrentToken: getCurrentToken
    }

}]);
We used the basic Angular $http functionality to make some HTTP calls. To be more precise, we implemented:
我们使用了基本的Angular $http功能来进行一些HTTP调用。 更确切地说,我们实现了:
a
checkIfLoggedInmethod that checks if a token is actually present or not;一个
checkIfLoggedIn方法,用于检查令牌是否实际存在;a
signupmethod which takes a name, an email and a password as parameters. If the sign up process goes well, a token is automatically stored in local storage, ready to be used;使用名称,电子邮件和密码作为参数的
signup方法。 如果注册过程顺利进行,则令牌会自动存储在本地存储中,随时可以使用;a
loginmethod which takes an email and a password as parameters. If everything goes well, a token is stored in local storage;以电子邮件和密码为参数的
login方法。 如果一切顺利,令牌将存储在本地存储中;a
logoutmethod to delete the stored token;logout方法以删除所存储的令牌;a
getCurrentTokenmethod, used to get the actual stored token. We will use it later, when making requests to protected endpoints of our APIs;一个
getCurrentToken方法,用于获取实际存储的令牌。 向API的受保护端点发出请求时,我们将在以后使用它;
Obviously, we will have to add this file to the main blade view as well: resources/views/index.blade.php.
显然,我们也必须将此文件也添加到刀片的主视图中: resources/views/index.blade.php 。
<script src="js/app.js"></script>
<script src="js/controllers.js"></script>
<script src="js/services.js"></script>
Now that we have our service, we can start with the signup screen. It will be a very simple one: just a welcome text, three text boxes and a submit button.
现在我们有了服务,我们可以从注册屏幕开始。 这将是非常简单的一个:只是一个欢迎文本,三个文本框和一个提交按钮。
Let’s start from the view. We’ll open public/partials/signup.html and add:
让我们从视图开始。 我们将打开public/partials/signup.html并添加:
<div class="row">
    <div class="col-md-4 col-md-offset-4">
        <h2>Signup</h2>
        <p>Welcome! If you want to sign up to our awesome service, fill this form and press on "Signup"!</p>

        <hr>

        <p><input type="text" class="form-control" placeholder="Name..." ng-model="name" required /></p>
        <p><input type="text" class="form-control" placeholder="Email Address..." ng-model="email" required /></p>
        <p><input type="password" class="form-control" placeholder="Password..." ng-model="password" required /></p>

        <hr>

        <p><button type="button" class="btn btn-success form-control" ng-click="signup()">Signup</button></p>

        <hr>

        <p><a href="#login">Already signed up? <b>Log in!</b></a></p>
    </div>
</div>
With the ng-click in the button, we will call our controller’s signup() method.
用ng-click按钮,我们将调用控制器的signup()方法。
Now, let’s open the js/controllers.js file and fill the SignupController with
现在,让我们打开js/controllers.js文件,并在SignupController填充
bookWishlistAppControllers.controller('SignupController', ['$scope', '$location', 'userService', function ($scope, $location, userService) {

    $scope.signup = function() {
        userService.signup(
            $scope.name, $scope.email, $scope.password,
            function(response){
                alert('Great! You are now signed in! Welcome, ' + $scope.name + '!');
                $location.path('/');
            },
            function(response){
                alert('Something went wrong with the signup process. Try again later.');
            }
        );
    }

    $scope.name = '';
    $scope.email = '';
    $scope.password = '';

    if(userService.checkIfLoggedIn())
        $location.path('/');

}]);
Let’s explain.
让我们解释一下。
First we made the signup method. Due to this being an already very long tutorial, we skipped form validation. The only thing it does is call the signup method of the userService we just made. If everything is ok, it shows an alert and redirects the user to the main application screen.
首先,我们制定了signup方法。 由于本教程已经很长了,因此我们跳过了表单验证。 它唯一要做的就是调用我们刚刚建立的userService的signup方法。 如果一切正常,它将显示警报,并将用户重定向到主应用程序屏幕。
Note: Don’t forget that the signup method already saves our token in the storage. This is why we are redirecting the user immediately if the operation is successful.
注意:不要忘记signup方法已经将我们的令牌保存在存储中。 因此,如果操作成功,我们将立即重定向用户。
Finally, we do a very basic login check:
最后,我们做一个非常基本的登录检查:
if(userService.checkIfLoggedIn())
        $location.path('/');
If a token is already present, the user will be automatically redirected to the main page.
如果已经存在令牌,则用户将自动重定向到主页。
The login page will be very similar. Let’s edit public/partials/login.html:
登录页面将非常相似。 让我们编辑public/partials/login.html :
<div class="row">
    <div class="col-md-4 col-md-offset-4">
        <h2>Login</h2>
        <p>Welcome! Use this form to log into your application.</p>

        <hr>

        <p><input type="text" class="form-control" placeholder="Email Address..." ng-model="email" required /></p>
        <p><input type="password" class="form-control" placeholder="Password..." ng-model="password" required /></p>

        <hr>

        <p><button type="button" class="btn btn-success form-control" ng-click="login()">Login</button></p>

        <hr>

        <p><a href="#signup">First time here? <b>Sign up!</b></a></p>
    </div>
</div>
We will create a login() method in the LoginController now. Open public/js/controllers.js and add:
现在,我们将在LoginController创建一个login()方法。 打开public/js/controllers.js并添加:
bookWishlistAppControllers.controller('LoginController', ['$scope', '$http', '$location', 'userService', function ($scope, $http, $location, userService) {

    $scope.login = function() {
        userService.login(
            $scope.email, $scope.password,
            function(response){
                $location.path('/');
            },
            function(response){
                alert('Something went wrong with the login process. Try again later!');
            }
        );
    }

    $scope.email = '';
    $scope.password = '';

    if(userService.checkIfLoggedIn())
        $location.path('/');

}]);
Once again, we used the userService login() method. If everything goes well, the user is redirected to the main page. Otherwise, an error alert is shown.
再一次,我们使用了userService login()方法。 如果一切顺利,则将用户重定向到主页。 否则,将显示错误警报。
图书管理 (Books Management)
The last thing we have to do is to implement the book management part. We will do everything in the MainController, from showing the list and the creation process, to update and removal.
我们要做的最后一件事是实现图书管理部分。 我们将在MainController进行所有操作,从显示列表和创建过程到更新和删除。
Again, we will build a service for everything we need about books’ persistence – something like a repository. In public/js/services.js we add a new service: bookService.
同样,我们将为需要的有关书的持久性的所有内容(例如存储库)构建服务。 在public/js/services.js我们添加了一个新服务: bookService 。
bookWishlistAppServices.factory('bookService', ['Restangular', 'userService', function(Restangular, userService) {

    function getAll(onSuccess, onError){
        Restangular.all('api/books').getList().then(function(response){

            onSuccess(response);

        }, function(){

            onError(response);

        });
    }

    function getById(bookId, onSuccess, onError){

        Restangular.one('api/books', bookId).get().then(function(response){

            onSuccess(response);

        }, function(response){

            onError(response);

        });

    }

    function create(data, onSuccess, onError){

        Restangular.all('api/books').post(data).then(function(response){

            onSuccess(response);

        }, function(response){

            onError(response);

        });

    }

    function update(bookId, data, onSuccess, onError){

        Restangular.one("api/books").customPUT(data, bookId).then(function(response) {

                onSuccess(response);

            }, function(response){

                onError(response);

            }
        );

    }

    function remove(bookId, onSuccess, onError){
        Restangular.one('api/books/', bookId).remove().then(function(){

            onSuccess();

        }, function(response){

            onError(response);

        });
    }

    Restangular.setDefaultHeaders({ 'Authorization' : 'Bearer ' + userService.getCurrentToken() });

    return {
        getAll: getAll,
        getById: getById,
        create: create,
        update: update,
        remove: remove
    }

}]);
Note: Don’t forget to add restangular as a module dependency.
注意:不要忘记将restangular添加为模块依赖项。
As we can see, Restangular was used to deal with the API endpoints. To be more precise, we have five methods.
如我们所见, Restangular用于处理API端点。 更准确地说,我们有五种方法。
a
getAllmethod, to retrieve the complete books list for the current user;getAll方法,用于检索当前用户的完整书籍清单;a
getByIdmethod, to retrieve a specific book, given its id;一个
getById方法,用于在给定书ID的情况下检索特定的书;a
createmethod, to store a new book;create方法,用于存储新书;an
updatemethod, to update an existing one, given its id;一种
update方法,用于在给定其ID的情况下更新现有的方法;a
removemethod, to remove an existing book from the list, given its id;remove方法,用于从列表中移除给定ID的现有书籍;
In this service we are also dealing with headers and their settings, using the getCurrentToken method of the userService we already have.
在此服务中,我们还使用已拥有的userService的getCurrentToken方法处理标头及其设置。
Note: a thing worth noting is the presence of a custom update method. Usually, the update flow is made up of two steps. Getting the entity, and then updating it. We already have a getById method here, so we don’t need the get part because we already know the book id. By using the customPUT we managed to build an “alternative” version of the update procedure, without the need for an extra call to the API service.
注意:值得注意的是自定义更新方法的存在。 通常,更新流程由两个步骤组成。 获取实体,然后更新它。 我们已经在这里有了一个getById方法,因此我们不需要get部分,因为我们已经知道书的ID。 通过使用customPUT我们成功构建了更新过程的“替代”版本,而无需额外调用API服务。
We can start by showing the list. public/partials/index.html:
我们可以从显示列表开始。 public/partials/index.html :
<hr>

<div class="pull-right"><button type="button" class="btn btn-info" ng-click="logout()">Logout!</button></div>

<div class="clearfix"></div>

<hr>

<div class="row">
    <div class="col-md-12">
        <p>You currently have <b>{{ books.length }}</b> books in your wishlist.</p>
        <ul>
            <li ng-repeat="book in books">
                <b>{{ book.title }}</b> by <i>{{ book.author_name }}</i>
            </li>
        </ul>
    </div>
</div>
In this first template, we are just showing a list of books. To retrieve our data we will create a refresh method in the controller. In the controllers.js logout method which calls the method with the same name in the userService, we add this code to the MainController:
在第一个模板中,我们仅显示书籍清单。 为了检索我们的数据,我们将在控制器中创建一个refresh方法。 在controllers.js logout方法(该方法在userService使用相同名称调用该方法)中,我们将此代码添加到MainController :
bookWishlistAppControllers.controller('MainController', ['$scope', '$location', 'userService', 'bookService', function ($scope, $location, userService, bookService) {

    $scope.logout = function(){
        userService.logout();
        $location.path('/login');
    }

    $scope.refresh = function(){

        bookService.getAll(function(response){

            $scope.books = response;

        }, function(){

            alert('Some errors occurred while communicating with the service. Try again later.');

        });

    }

    if(!userService.checkIfLoggedIn())
        $location.path('/login');

    $scope.books = [];

    $scope.refresh();

}]);
We added two methods: logout calls the one with the same name in the userService, and refresh. The latter calls the getAll method in the booksService. Then, it assigns the result to the $scope.books variable which is already bound to the view. If something goes wrong, an error is displayed.
我们添加了两种方法: logout调用userService具有相同名称的一种方法,并refresh 。 后者调用booksService的getAll方法。 然后,它将结果分配给已经绑定到视图的$scope.books变量。 如果出现问题,将显示错误。
Now we have to implement the book creation functionality. For this purpose, let’s return to our public/partials/index.html view. Let’s add a modal that we will use to add a new book, and a button to toggle it.
现在,我们必须实现图书创建功能。 为此,让我们返回public/partials/index.html视图。 让我们添加一个用于添加新书的模式,以及一个用于切换它的按钮。
<hr>
<div class="pull-left"><button type="button" class="btn btn-success" data-toggle="modal" data-target="#addBookModal">+ Add Book</button></div>
<div class="pull-right"><button type="button" class="btn btn-info" ng-click="logout()">Logout!</button></div>
<div class="clearfix"></div>
<hr>
<div class="row">
<div class="col-md-12">
<p>You currently have <b>{{ books.length }}</b> books in your wishlist.</p>
<ul>
<li ng-repeat="book in books">
<b>{{ book.title }}</b> by <i>{{ book.author_name }}</i>
</li>
</ul>
</div>
</div>
<div class="modal fade" id="addBookModal">
<div class="modal-dialog">
<div class="modal-content">
<div class="modal-header">
<button type="button" class="close" data-dismiss="modal" aria-label="Close"><span aria-hidden="true">×</span></button>
<h4 class="modal-title">Add a Book</h4>
</div>
<div class="modal-body">
<p><input class="form-control" ng-model="currentBookTitle" placeholder="Title..." type="text"></p>
<p><input class="form-control" ng-model="currentBookAuthorName" placeholder="Author Name..." type="text"></p>
<p><input class="form-control" ng-model="currentBookPagesCount" placeholder="Pages Count..." type="text"></p>
</div>
<div class="modal-footer">
<button type="button" class="btn btn-default" data-dismiss="modal">Close</button>
<button type="button" class="btn btn-primary" ng-click="create()">Save Book</button>
</div>
</div><!-- /.modal-content -->
</div><!-- /.modal-dialog -->
</div><!-- /.modal -->Now, let’s go back to the MainController and implement the create method:
现在,让我们回到MainController并实现create方法:
bookWishlistAppControllers.controller('MainController', ['$scope', '$location', 'userService', 'bookService', function ($scope, $location, userService, bookService) {

    $scope.logout = function(){
        userService.logout();
        $location.path('/login');
    }

    $scope.create = function(){

        bookService.create({
            title: $scope.currentBookTitle,
            author_name: $scope.currentBookAuthorName,
            pages_count: $scope.currentBookPagesCount
        }, function(){

            $('#addBookModal').modal('toggle');
            $scope.currentBookReset();
            $scope.refresh();

        }, function(){

            alert('Some errors occurred while communicating with the service. Try again later.');

        });

    }

    $scope.refresh = function(){

        bookService.getAll(function(response){

            $scope.books = response;

        }, function(){

            alert('Some errors occurred while communicating with the service. Try again later.');

        });

    }

    $scope.currentBookReset = function(){
        $scope.currentBookTitle = '';
        $scope.currentBookAuthorName = '';
        $scope.currentBookPagesCount = '';
    }

    if(!userService.checkIfLoggedIn())
        $location.path('/login');

    $scope.books = [];

    $scope.currentBookReset();
    $scope.refresh();

}]);
Our controller grows: we can see the create, and the currentBookReset method that resets all the scope variables. The create method obviously uses the create method of the bookService. The app should now already work well!
我们的控制器在增长:我们可以看到create ,以及currentBookReset方法,该方法将重置所有范围变量。 create方法显然使用bookService的create方法。 该应用程序现在应该已经可以正常运行了!
We still have to implement the updating and removal of books. Let’s start with the easier one, the remove method.
我们仍然必须实施图书的更新和删除。 让我们从一个简单的方法开始,即remove方法。
In public/partials/index.html we add a delete button in the Angular repeater that will call the remove method in the MainController:
在public/partials/index.html我们在Angular中继器中添加了一个删除按钮,该按钮将在MainController调用remove方法:
<ul>
    <li ng-repeat="book in books">
        <b>{{ book.title }}</b> by <i>{{ book.author_name }}</i> |
        <button ng-click="delete(book.id)" class="btn btn-danger btn-xs">Delete</button>
    </li>
</ul>
We then add the remove method to the MainController:
然后,我们将remove方法添加到MainController :
$scope.remove = function(bookId){

    if(confirm('Are you sure to remove this book from your wishlist?')){
        bookService.remove(bookId, function(){

            alert('Book removed successfully.');

        }, function(){

            alert('Some errors occurred while communicating with the service. Try again later.');

        });
    }

}
The bookService will do its job. If something goes wrong, an alert will be displayed to the user.
bookService将完成其工作。 如果出现问题,将向用户显示警报。
We can finally implement our update feature, the last one. In the public/partials/index.html view we’ll add a button to our repeater. This time a blue “info” one. The repeater will now look like this:
我们终于可以实现我们的更新功能,最后一个功能。 在public/partials/index.html视图中,我们将向转发器添加一个按钮。 这次是蓝色的“信息”。 现在,中继器将如下所示:
<ul>
    <li ng-repeat="book in books">
        <b>{{ book.title }}</b> by <i>{{ book.author_name }}</i> |
        <button ng-click="load(book.id)" class="btn btn-info btn-xs">Update</button>
        <button ng-click="remove(book.id)" class="btn btn-danger btn-xs">Remove</button>
    </li>
</ul>
and this is the modal we are going to add:
这是我们要添加的模式:
<div class="modal fade" id="updateBookModal">
<div class="modal-dialog">
<div class="modal-content">
<div class="modal-header">
<button type="button" class="close" data-dismiss="modal" aria-label="Close"><span aria-hidden="true">×</span></button>
<h4 class="modal-title">Update a Book</h4>
</div>
<div class="modal-body">
<input type="hidden" ng-model="currentBookId" />
<p><input class="form-control" ng-model="currentBookTitle" placeholder="Title..." type="text"></p>
<p><input class="form-control" ng-model="currentBookAuthorName" placeholder="Author Name..." type="text"></p>
<p><input class="form-control" ng-model="currentBookPagesCount" placeholder="Pages Count..." type="text"></p>
</div>
<div class="modal-footer">
<button type="button" class="btn btn-default" data-dismiss="modal">Close</button>
<button type="button" class="btn btn-primary" ng-click="update()">Save Changes</button>
</div>
</div><!-- /.modal-content -->
</div><!-- /.modal-dialog -->
</div><!-- /.modal -->We will also need some methods in our controller. Back in MainController we add:
我们还将在控制器中需要一些方法。 回到MainController我们添加:
$scope.load = function(bookId){

    bookService.getById(bookId, function(response){

        $scope.currentBookId = response.book.id;
        $scope.currentBookTitle = response.book.title;
        $scope.currentBookAuthorName = response.book.author_name;
        $scope.currentBookPagesCount = response.book.pages_count;

        $('#updateBookModal').modal('toggle');

    }, function(){

        alert('Some errors occurred while communicating with the service. Try again later.');

    });

}

$scope.update = function(){

    bookService.update(
        $scope.currentBookId,
        {
            title: $scope.currentBookTitle,
            author_name: $scope.currentBookAuthorName,
            pages_count: $scope.currentBookPagesCount
        },
        function(response){

            $('#updateBookModal').modal('toggle');
            $scope.currentBookReset();
            $scope.refresh();

        }, function(response){
            alert('Some errors occurred while communicating with the service. Try again later.');
        }
    );
}
The load method will retrieve the book data from the API, and show it in the modal. Then, after the edit procedure, the user will click on the “Save Changes” button, which will call the update method. This final method will call the bookService accordingly, storing the edit using the APIs.
load方法将从API中检索图书数据,并以模式显示。 然后,在完成编辑过程之后,用户将单击“保存更改”按钮,这将调用update方法。 最后一种方法将相应地调用bookService ,并使用API存储编辑内容。
Our controller, in its final form, will look like this.
我们的控制器最终形式将如下所示 。
Our application is now complete… and we can use it! Time to store tons of books.
现在我们的应用程序已经完成……我们可以使用它! 该存储大量书籍了。
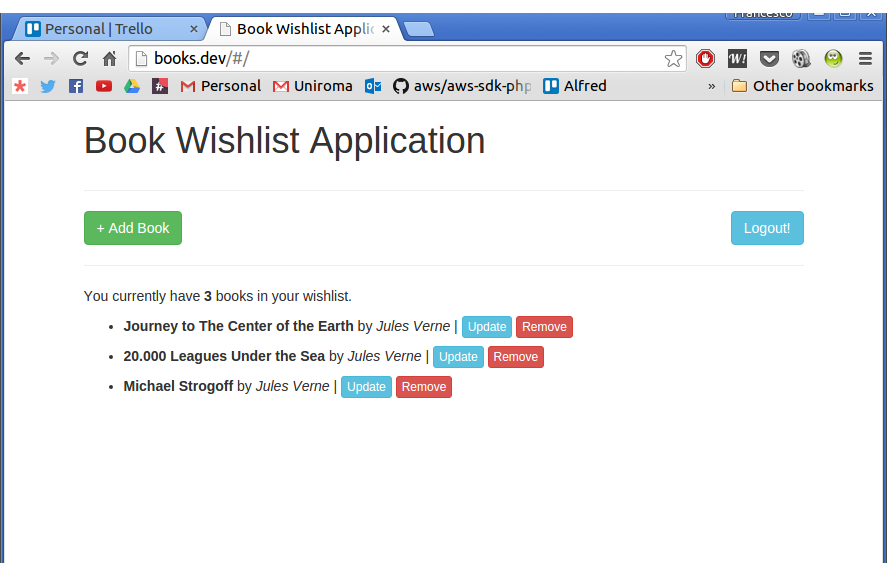
Yeah, I love Jules Verne.
是的,我爱儒勒·凡尔纳。
结论 (Conclusion)
In this series, we used two separate technologies to build a complete (and complex) application in a really easy way. Thanks to some tools like the Laravel API Boilerplate and Restangular, we focused almost entirely on the real business logic instead of wasting time on bootstrapping.
在本系列中,我们使用了两种独立的技术以一种非常简单的方式构建了一个完整(复杂)的应用程序。 由于使用了Laravel API Boilerplate和Restangular等工具,我们几乎完全专注于实际的业务逻辑,而不是浪费时间进行引导。
In this part, we took a look at implementing an Angular front end for our Laravel API back end, going from nothing to a fully fledged app. Obviously, the journey doesn’t end here: as an exercise, my suggestion is to implement a mechanism to check if the token has expired, and create another one to refresh it.
在这一部分中,我们介绍了为Laravel API后端实现Angular前端的过程,从无到有到功能完善的应用程序。 显然,旅程并不止于此:作为练习,我的建议是实现一种机制,以检查令牌是否已过期,并创建另一个令牌来刷新令牌。
In future posts, we might look at various different JS frameworks to achieve the same thing, and judge which one is the simplest. Any suggestions on which ones we should try first?
在以后的文章中,我们可能会研究各种不同的JS框架来实现同一件事,并判断哪个框架最简单。 关于我们应该首先尝试哪些建议?
翻译自: https://www.sitepoint.com/how-to-consume-laravel-api-with-angularjs/
angularjs api


 99
99

 被折叠的 条评论
为什么被折叠?
被折叠的 条评论
为什么被折叠?
 到【灌水乐园】发言


