


cloudfoundry
Today, we are learning how to get in the cloud with CloudFoundry, a cloud platform by VMWare. On the way, we are going to setup a whole bunch of things that are reusable assets for some future adventures! So without further ado, let’s take a dive.
今天,我们正在学习如何使用VMWare的云平台CloudFoundry进入云。 在途中,我们将设置一整套可重复使用的资产,用于将来的冒险! 因此,事不宜迟,让我们开始潜水。
使用Spring Roo实例启动并运行 (Get up and running with Spring Roo Example)
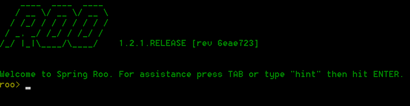
Spring roo is a rapid application development (RAD) tool for Java. It offers a wide variety of capabilities, and integrates with various frameworks. What we are interested in, is getting a project up and running which we can use in this tutorial. You can download Roo from here and then extract in an appropriate directory. Modify the PATH variable to include the “bin” subdirectory of Roo. To check if we are all set properly, type “roo” at command prompt and it should show a screen like following:
Spring Roo是Java的快速应用程序开发(RAD)工具。 它提供了多种功能,并与各种框架集成。 我们感兴趣的是启动并运行一个项目,我们可以在本教程中使用它。 您可以从此处下载Roo,然后提取到适当的目录中。 修改PATH变量以包含Roo的“ bin”子目录。 要检查所有设置是否正确,请在命令提示符下键入“ roo”,它应显示如下屏幕:
If Roo is running fine, then we are just one step away from our project being ready. Go to the samples directory in the Roo directory and copy the “clinic.roo” file to where you want your project to be located. Navigate to directory where you have placed clinic.roo file. Now enter “roo” which will take you to roo command prompt, and then run following command.
如果Roo运行良好,那么我们距离项目准备就绪仅一步之遥。 转到Roo目录中的samples目录,然后将“ clinic.roo”文件复制到您要放置项目的位置。 导航到放置clinical.roo文件的目录。 现在输入“ roo”,它将带您到roo命令提示符,然后运行以下命令。
[sourcecode]
[源代码]
script –file clinic.roo
脚本–file clinic.roo
[/sourcecode]
[/源代码]
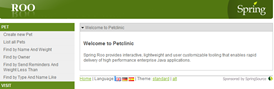
This will generate the code for a sample pet clinic project. You can see what commands are fired to roo by checking the clinic.roo file in any text editor. Once the project is generated, you can quit the roo prompt with “exit” command. To test if the project we have created, run the command “mvn tomcat:run” from the directory where project and pom.xml file is located. The command will invoke an embedded container and host project within it. When the command execution finishes you will notice the port and project host:
这将生成示例宠物诊所项目的代码。 您可以通过在任何文本编辑器中检查clinic.roo文件来查看向roo触发了哪些命令。 生成项目后,您可以使用“ exit”命令退出roo提示。 要测试我们是否创建了项目,请从项目和pom.xml文件所在的目录中运行命令“ mvn tomcat:run”。 该命令将调用嵌入式容器并在其中托管项目。 命令执行完成后,您会注意到端口和项目主机:
[sourcecode]
[源代码]
2012-04-11 09:29:11,657 [main] INFO org.springframework.web.servlet.DispatcherServlet – FrameworkServlet ‘petclinic’: initialization completed in 1918 ms Apr 11, 2012 9:29:11 AM org.apache.coyote.http11.Http11Protocol init INFO: Initializing Coyote HTTP/1.1 on http-8080 Apr 11, 2012 9:29:11 AM org.apache.coyote.http11.Http11Protocol start INFO: Starting Coyote HTTP/1.1 on http-8080
2012-04-11 09:29:11,657 [main]信息org.springframework.web.servlet.DispatcherServlet – FrameworkServlet'petclinic':初始化完成于1918 ms 2012年4月11日上午org.apache.coyote。 http11.Http11Protocol初始化INFO:在http-8080上初始化初始化Coyote HTTP / 1.1 Apr 11,2012 org.apache.coyote.http11.Http11Protocol start INFO:在http-8080上启动Coyote HTTP / 1.1
[/sourcecode]
[/源代码]
To check the application hit the URL “http://127.0.0.1:8080/petclinic/“. You can play around the application to understand the functionality that it offers. If all looks good, we have created a project from scratch in less than ten minutes!
要检查应用程序,请单击URL“ http://127.0.0.1:8080/petclinic/ ”。 您可以在应用程序中玩转以了解其提供的功能。 如果一切顺利,我们将在不到十分钟的时间内从头开始创建一个项目!
Go back to roo command prompt and fire command
返回到roo命令提示符并触发命令
[sourcecode] $perform package [/sourcecode]
[源代码] $ perform包[/源代码]
This command takes some time and will package our application with needed dependencies and in web-application format. If you check target directory, it will have a snapshot directory of the build for example in my case: “petclinic-0.1.0.BUILD-SNAPSHOT”. This will be ready for deployment when we have our cloud server ready.
该命令将花费一些时间,并将需要的依赖项和Web应用程序格式打包到我们的应用程序中。 如果检查目标目录,则将具有该版本的快照目录,例如,在我的情况下:“ petclinic-0.1.0.BUILD-SNAPSHOT”。 当我们准备好云服务器后,就可以部署了。
安装Ruby和CloudFoundry VMC (Install Ruby and CloudFoundry VMC)
Install the supported versions of ruby (1.8.7 & 1.9.2) from here suitable for your platform, and check the correctness of installation with “ruby -v”. We will install the command line interface (CLI) – “vmc” which is a ruby gem. We will be using vmc cli for all operations on CloudFoundry. Our interface is going to be same irrespective of if we are firing commands for a PaaS instance, or a micro instance hosted on our machine. For installing vmc gem, fire the command (For linux/unix based systems you will have to prefix with “sudo” and have appropriate permissions):
从此处安装适合您平台的受支持的ruby版本(1.8.7和1.9.2),然后使用“ ruby -v”检查安装的正确性。 我们将安装命令行界面(CLI)–“ vmc”,这是一个Ruby。 我们将对CloudFoundry上的所有操作使用vmc cli。 无论我们是针对PaaS实例还是在计算机上托管的微型实例触发命令,我们的界面都将相同。 要安装vmc gem,请启动命令(对于基于linux / unix的系统,您必须以“ sudo”为前缀并具有适当的权限):
[sourcecode] $ gem install vmc [/sourcecode]
[源代码] $ gem install vmc [/源代码]
For testing our installation quickly, use the command “vmc info” which will give output similar to the following text. We will test with an application in later sections.
为了快速测试我们的安装,请使用命令“ vmc info”,其输出将类似于以下文本。 我们将在后面的部分中使用一个应用程序进行测试。
[sourcecode] VMware’s Cloud Application Platform For support visit http://support.cloudfoundry.com Target: http://api.cloudfoundry.com (v0.999) Client: v0.3.15 [/sourcecode]
[源代码] VMware的云应用程序平台有关支持,请访问http://support.cloudfoundry.com目标:http://api.cloudfoundry.com(v0.999)客户端:v0.3.15 [/ sourcecode]
For getting a complete list of commands:
要获取完整的命令列表:
[sourcecode] $ vmc help [/sourcecode]
[源代码] $ vmc帮助[/源代码]
安装VM Player并启动CloudFoundry Micro (Install VM Player and start CloudFoundry Micro)
You can skip this section and jump to “Deploy your app to Cloudfoundry cloud” if you want to skip CloudFoundry micro instance installation etc, or just quickly want to test cloud instance before going into details of setting up a micro instance.
如果要跳过CloudFoundry微型实例安装等,或者只是想在设置微型实例的详细信息之前快速测试云实例,则可以跳过此部分并跳至“将应用程序部署到Cloudfoundry云”。
Before we install CloudFoundry micro, go ahead and sign up for an account at http://cloudfoundry.com/ this will help us later. After creating account, go to https:// cloudfoundry.com/micro/dns and create a domain name for your micro CloudFoundry & note down the configuration token created. As soon as you create domain, there will be links to download “Micro CloudFoundry VM” and a “VM player”, start downloading those while we understand what exactly is happening.
在安装CloudFoundry micro之前,请继续在http://cloudfoundry.com/上注册一个帐户,这将对以后有所帮助。 创建帐户后,转到https:// cloudfoundry.com/micro/dns并为您的微型CloudFoundry创建域名,并记下创建的配置令牌。 创建域后,将提供下载“ Micro CloudFoundry VM”和“ VM Player”的链接,在我们了解发生了什么的同时开始下载它们。
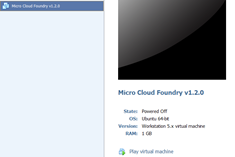
The CloudFoundry micro is a virtual machine & we need a player which can run the virtual machine. You can use one of “VMWare fusion”, “VMWare workstation” or “VMWare player”. The easiest and of course free option is to use VMWare player. Install the VMWare player and extract CloudFoundry micro into desired destination. Start VMWare Player open the “micro.vmx” in VMWare Player. You will see the “micro CloudFoundry vm” in a powered off state, turn it on.
CloudFoundry micro是一个虚拟机,我们需要一个可以运行该虚拟机的播放器。 您可以使用“ VMWare融合”,“ VMWare工作站”或“ VMWare播放器”之一。 最简单,当然也是免费的选择是使用VMWare播放器。 安装VMWare播放器,然后将CloudFoundry micro提取到所需的目标位置。 启动VMWare Player,在VMWare Player中打开“ micro.vmx”。 您将看到“ micro CloudFoundry vm”处于关闭状态,将其打开。
Turning on the virtual machine will take you to a configuration menu; let’s choose 1 to do the configuration. After password configuration is done, the next step is to configure network, I chose DHCP and no proxy, you can make configuration as per your settings. After this the menu you will be asked for CloudFoundry configuration token which we generated online at CloudFoundry.com. It will take couple of minutes before the VM contacts servers and CloudFoundry micro is ready to use. The console will show current configuration, i.e. the URL at which your local CloudFoundry micro instance is available etc. For example in my case it shows configuration on information like below:
打开虚拟机将带您进入配置菜单。 让我们选择1进行配置。 密码配置完成后,下一步是配置网络,我选择了DHCP并且没有代理,您可以根据设置进行配置。 在此菜单之后,将要求您提供我们在CloudFoundry.com在线生成的CloudFoundry配置令牌。 VM需要等待几分钟才能联系服务器,并且CloudFoundry micro可以使用。 控制台将显示当前配置,即本地CloudFoundry微型实例可用的URL等。例如,在我的情况下,它将显示有关以下信息的配置:
[sourcecode] Current configuration:
[源代码]当前配置:
Identity: cf-hostname.cloudfoundry.me (ok)
身份:cf-hostname.cloudfoundry.me(确定)
Admin: <a href="mailto:email_addd@gmail.com">email_addd@gmail.com</a>
管理员:<a href="mailto:email_addd@gmail.com"> email_addd@gmail.com </a>
IP Address: 122.156.80.122 (network up)
IP地址:122.156.80.122(网络连接)
To access your Micro Cloud Foundry instance, use:
要访问您的Micro Cloud Foundry实例,请使用:
vmc target http://api.cf-hostname.cloudfoundry.me [/sourcecode]
vmc目标http://api.cf-hostname.cloudfoundry.me [/源代码]
将您的应用程序部署到CloudFoundry micro (Deploy your app to CloudFoundry micro)
We are all set! Assuming all previous steps have been done successfully, open the Ruby vmc command prompt, let’s try to register the CloudFoundry micro instance in vmc, for this let’s first set target and then do registration.
我们都准备好了! 假设先前的所有步骤均已成功完成,请打开Ruby vmc命令提示符,让我们尝试在vmc中注册CloudFoundry微型实例,为此,我们首先设置目标,然后进行注册。
[sourcecode] $vmc target http://api.cf-hostname.cloudfoundry.me
[源代码] $ vmc目标http://api.cf-hostname.cloudfoundry.me
$vmc register [/sourcecode]
$ vmc寄存器[/ sourcecode]
This registration will create a username for CloudFoundry micro Ubuntu VM, and will use password we supplied when creating virtual machine in previous section. Provide an appropriate username and previously used password. Now navigate to directory where we had our snapshot of the project built and fire command
该注册将为CloudFoundry微型Ubuntu VM创建一个用户名,并将使用上一节中创建虚拟机时提供的密码。 提供适当的用户名和以前使用的密码。 现在导航到我们已构建项目快照并执行命令的目录
[sourcecode] $vmc push Would you like to deploy from the current directory? [Yn]: y
[源代码] $ vmc push您要从当前目录部署吗? [Yn]:y
Application Deployed URL [petclinic.vishalbiyani.cloudfoundry.me]:
应用程序部署的URL [petclinic.vishalbiyani.cloudfoundry.me]:
Detected a Java SpringSource Spring Application, is this correct? [Yn]: y
检测到Java SpringSource Spring应用程序,这是正确的吗? [Yn]:y
Memory Reservation (64M, 128M, 256M, 512M, 1G) [512M]:
内存预留(64M,128M,256M,512M,1G)[512M]:
Creating Application: OK
创建应用程序:确定
Would you like to bind any services to ‘petclinic’? [yN]: y
您想将任何服务绑定到“宠物诊所”吗? [yN]:y
The following system services are available
提供以下系统服务
1: mongodb
1:mongodb
2: mysql
2:mysql
3: postgresql
3:PostgreSQL
4: rabbitmq
4:rabbitmq
5: redis
5:redis
Please select one you wish to provision: 2
请选择您要设置的一个:2
Specify the name of the service [mysql-e3d94]: vb-test
指定服务名称[mysql-e3d94]:vb-test
Creating Service: OK
创建服务:确定
Binding Service [vb-test]: OK
绑定服务[vb-test]:确定
Uploading Application:
上载申请:
Checking for available resources: OK
检查可用资源:确定
Processing resources: OK
处理资源:OK
Packing application: OK
包装申请:确定
Uploading (18M): OK
上传(18M):确定
Push Status: OK
推送状态:确定
Staging Application: OK
登台申请:确定
Starting Application: OK [/sourcecode]
正在启动应用程序:确定[/ sourcecode]
Now the application is successfully hosted at http://petclinic.cf-hostname.cloudfoundry.me and you will see a screen similar to when we ran Roo application using embedded container.
现在,该应用程序已成功托管在http://petclinic.cf-hostname.cloudfoundry.me上 ,您将看到类似于我们使用嵌入式容器运行Roo应用程序时的屏幕。
将您的应用程序部署到CloudFoundry云 (Deploy your app to CloudFoundry cloud)
If you have your app up and running on CloudFoundry, simply change your target to point to CloudFoundry
如果您已在CloudFoundry上启动并运行应用程序,只需更改目标以指向CloudFoundry
[sourcecode] $vmc target api.cloudfoundry.com [/sourcecode]
[源代码] $ vmc目标api.cloudfoundry.com [/源代码]
Your cloud application is just a “vmc push” away J refer to previous section, and same prompts are going to repeat to configure your app for cloud.
您的云应用程序只是“ vmc推送”而已,请参阅上一节,并且将重复相同的提示以针对云配置您的应用程序。
在云中扩展和管理 (Scaling & managing in cloud)
Let’s look at some handy commands to configure and scale your application.
让我们看一些方便的命令来配置和扩展您的应用程序。
To look at services you have currently available and provisioned:
要查看您当前可以使用和配置的服务:
[sourcecode] $vmc services ============== System Services ============== +————+———+—————————————+ | Service | Version | Description | +————+———+—————————————+ | mongodb | 1.8 | MongoDB NoSQL store | | mysql | 5.1 | MySQL database service | | postgresql | 9.0 | PostgreSQL database service (vFabric) | | rabbitmq | 2.4 | RabbitMQ message queue | | redis | 2.2 | Redis key-value store service | +————+———+—————————————+ =========== Provisioned Services ============ +—————–+————+ | Name | Service | +—————–+————+ | mongodb-7fb72 | mongodb | | mysql-4cd0 | mysql | | vb-postgres | postgresql | | vbtest-postgres | postgresql | +—————–+————+ [/sourcecode]
[源代码] $ vmc services ==============系统服务============== + ———— ++ ———— + ———— ————————— + | 服务| 版本| 描述 + ———— ++ ———— + ———————————— + mongodb | 1.8 | MongoDB NoSQL存储| | mysql | 5.1 | MySQL数据库服务| | PostgreSQL | 9.0 | PostgreSQL数据库服务(vFabric)| | rabbitmq | 2.4 | RabbitMQ消息队列| | redis | 2.2 | Redis键值存储服务| + —————————— + ———————————— + + ===========预置服务============ ——————— ++ ———— + | 姓名| 服务| + ————————– + ———— + | mongodb-7fb72 | mongodb | | mysql-4cd0 | mysql | | vb-postgres | PostgreSQL | | vbtest-postgres | PostgreSQL | + ———————— + ———— + [/源代码]
To look at applications deployed in your instance:
要查看实例中部署的应用程序,请执行以下操作:
[sourcecode] $vmc apps +———————–+—-+———+—————————————————-+————-+ | Application | # | Health | URLS | Services | +———————–+—-+———+—————————————————-+————-+ | cloudspring-petclinic | 1 | RUNNING | cloudspring-petclinic.vishalbiyani.cloudfoundry.me | mysql-bf5bd | | petclinic | 1 | RUNNING | petclinic.vishalbiyani.cloudfoundry.me | vb-test | +———————–+—-+———+—————————————————-+————-+ [/sourcecode]
[源代码] $ vmc apps + ————————– + ——- + ———— + ——————————————————- + ————- + | 申请| #| 健康| 网址| 服务| + ———————————— + ——- + ———— + ————————————————-- + ————- + | cloudspring-petclinic | 1 | 正在运行| cloudspring-petclinic.vishalbiyani.cloudfoundry.me | mysql-bf5bd | | 宠物诊所| 1 | 正在运行| petclinic.vishalbiyani.cloudfoundry.me | vb测试| + ——————————– + ——- + ———— + ————————————————- + ————- + [/源代码]
To scale your application to two instances and looking at instances running
将应用程序扩展到两个实例并查看正在运行的实例
[sourcecode] $vmc instances petclinic 2 Scaling Application instances up to 2: OK
[源代码] $ vmc实例petclinic 2扩展应用程序实例,最多2个:OK
$vmc instances petclinic +——-+———-+——————–+ | Index | State | Start Time | +——-+———-+——————–+ | 0 | RUNNING | 04/15/2012 11:50AM | | 1 | STARTING | 04/15/2012 03:33PM | +——-+———-+——————–+ [/sourcecode]
$ vmc实例petclinic + ——- + ————- + ——————– + | 索引| 州| 开始时间 + ——- + ————- + ——————– + | 0 | 正在运行| 2012年4月15日上午11:50 | | 1 | 开始| 2012年4月15日03:33 PM | + ——- + ————- + ——————– + [/源代码]
最后! (Finally!)
We developed an application using RAD techniques. We installed Ruby which is going to be extremely useful tool in our cloud journey. We created a CloudFoundry micro instance and ran an application locally within it. We also deployed the same app to cloud, all this quite quickly! Although what we did with CloudFoundry today is just a small pice of the cake! Explore and enjoy your journey in this open source PAAS and in cloud.
我们使用RAD技术开发了一个应用程序。 我们安装了Ruby,它将在我们的云之旅中成为极为有用的工具。 我们创建了一个CloudFoundry微型实例,并在其中本地运行了一个应用程序。 我们还将同一应用程序部署到了云中,所有这些操作都非常快! 尽管我们今天对CloudFoundry所做的只是小事一桩! 在此开源PAAS和云中探索并享受您的旅程。
Foundry image via Shutterstock
通过Shutterstock 铸造图片
翻译自: https://www.sitepoint.com/get-in-the-cloud-with-cloudfoundry/
cloudfoundry


 2057
2057

 被折叠的 条评论
为什么被折叠?
被折叠的 条评论
为什么被折叠?
 到【灌水乐园】发言


