


photoshop在蒙版
This article was written in 2011 and remains one of our most popular posts. If you’re keen to learn more about Photoshop, you may find this recent article on getting started with Photoshop of great interest.
本文写于2011年,至今仍是我们最受欢迎的帖子之一。 如果您想了解有关Photoshop的更多信息,您可能会发现这篇有关Photoshop 入门的最新文章引起了极大的兴趣。
Masking is an essential part of Photoshop. Mastering masks and how to create them to fit different situations is what sets a novice apart from an expert. There are different masking techniques and tools available to help you create the perfect mask for your Photoshop project.
遮罩是Photoshop的重要组成部分。 掌握口罩以及如何创建适合不同情况的口罩,使新手与专家脱颖而出。 有多种遮罩技术和工具可用来帮助您为Photoshop项目创建完美的遮罩。
The reason we mask out a background or delete it in the first place is so that we can smoothly and convincingly composite images together. You can do some amazing things with Photoshop, and masking is at the center of achieving great effects and realism.
首先我们遮掩背景或将其删除的原因是为了使我们可以平滑而令人信服地将图像合成在一起。 您可以使用Photoshop做一些令人惊奇的事情,而遮罩是实现出色效果和逼真度的核心。
When removing the background from images, you can either delete the unwanted background, or you can remove it using a mask. Professionally, a mask is technically better, because if you take too much of an image, you can paint it back in with a white brush if you use a mask. If you delete it, you have to undo your last action. A major problem is that you only have so many history states, so if you delete something by accident and don’t realize it until much later, you may not be able to retrieve that portion of the image. You would lose valuable time by having to remove the background all over again.
从图像中删除背景时,可以删除不需要的背景,也可以使用遮罩将其删除。 在专业上,遮罩在技术上会更好,因为如果您摄取过多的图像,则使用遮罩可以用白色画笔将其重新涂上。 如果删除它,则必须撤消上一个操作。 一个主要的问题是您只有这么多的历史状态,因此如果您意外删除某些内容并且直到很晚才意识到,您可能无法检索图像的该部分。 您将不得不重新删除背景,从而浪费宝贵的时间。
橡皮擦工具 (The Eraser Tool)
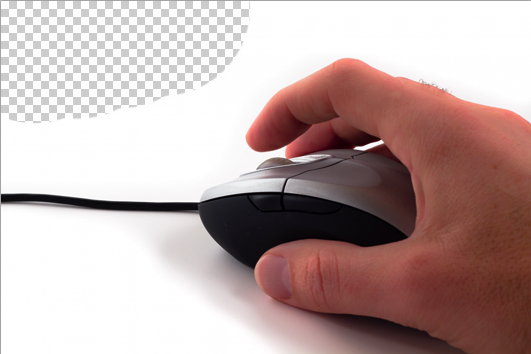
You can download the sample file here. You can use the eraser tool to remove large areas that you know you do not need. You could theoretically come in with the eraser and remove finer details, but that is more complicated and time consuming than other methods. The Eraser Tool has opacity, hardness, and size settings just like a brush, and you can also use different shapes and brush tips as well.
您可以在此处下载示例文件。 您可以使用橡皮擦工具删除不需要的大区域。 从理论上讲,您可以使用橡皮擦并删除更精细的细节,但这比其他方法更加复杂且耗时。 橡皮擦工具就像画笔一样具有不透明度,硬度和大小设置,您也可以使用不同的形状和画笔笔尖。
后台橡皮擦工具 (The Background Eraser Tool)
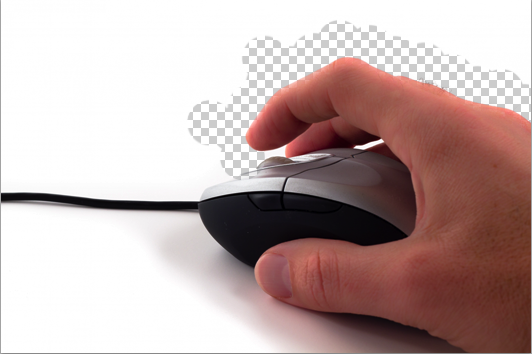
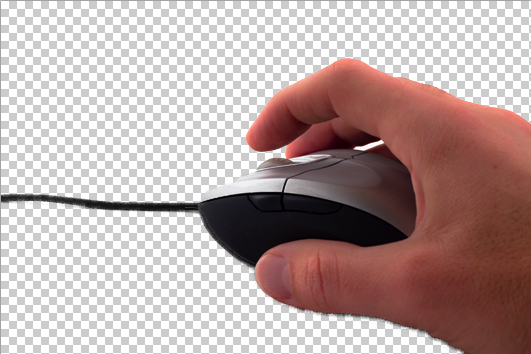
This can be very handy for erasing simple background such as those with solid colors, but anything complicated becomes a hassle. Notice in our example that I was able to remove the white from around the hand, but when I came too close to the mouse, it erased some of it as well. This can be counterintuitive, because the tool is meant to be clicked and dragged along an edge, and the tool detects where edges are.
这对于删除简单的背景(例如纯色的背景)非常方便,但是任何复杂的事情都会变得很麻烦。 请注意,在我们的示例中,我能够去除手周围的白色,但是当我离鼠标太近时,它也会擦除其中的一部分。 这可能是违反直觉的,因为要沿着边缘单击并拖动该工具,并且该工具会检测到边缘在哪里。
魔术橡皮擦工具 (The Magic Eraser Tool)
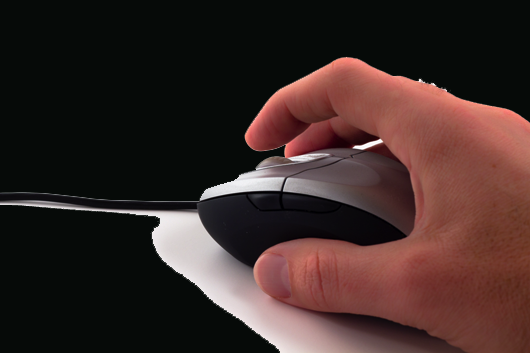
This tool is very handy, as it can remove a background with one click. You have to adjust the tolerance level of the Magic Eraser, but with the right setting, you can remove a great deal of the background. With a tolerance set to 32, the Magic Eraser took some of the top portion of the mouse away. When I lowered the tolerance to 20, it removed nearly all of the white background above the mouse cord. Turning off Contiguous allowed me to remove a large portion of the background with one click, but some of the shadow area under the hand was still present. Another problem is that the Magic Eraser tool can leave pieces of the background behind, so it is a good idea to make a new layer below the image that you are trying to isolate, and fill it with a solid color that contrasts the colors in your image. That will allow you to see artifacts left behind.
该工具非常方便,因为它可以一键删除背景。 您必须调整魔术橡皮擦的容差级别,但是如果设置正确,则可以消除大量背景。 设置为32的容差后,Magic Eraser删除了鼠标顶部的某些部分。 当我将公差降低到20时,它几乎消除了鼠标线上方的所有白色背景。 关闭“连续”可以使我一键删除大部分背景,但是手下的一些阴影区域仍然存在。 另一个问题是Magic Eraser工具会留下部分背景,因此,最好在要隔离的图像下方新建一个图层,并用与您的颜色形成对比的纯色填充该图层图片。 这将使您看到留下的工件。
魔术棒工具 (The Magic Wand Tool)
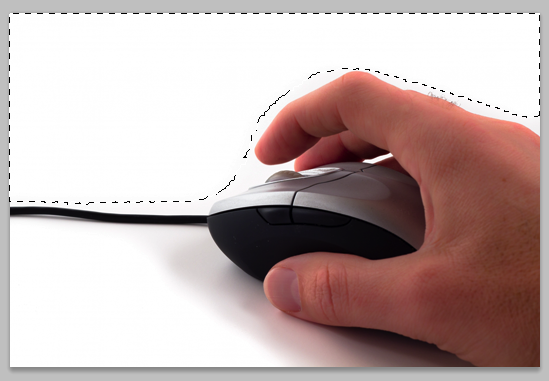
The Magic Wand Tool is a one-click selection tool that you use to make selections in your images. It relies on a tolerance setting much like the ones found with the Background Eraser and the Magic Eraser Tools. What is nice about the magic wand tool, as with other selection tools, you can add to a selection and subtract from a selection without consequence. Simply Hold Shift to add to the current selection, and hold Option/Alt to subtract from a selection. If you select too much, Hold the Alt/Option key and click the area that you wish to deselect, while keeping the other areas selected.
魔术棒工具是一键选择工具,可用于在图像中进行选择。 它依赖于容差设置,与背景橡皮擦和魔术橡皮擦工具中的设置非常相似。 与其他选择工具一样,魔术棒工具的优点是,您可以添加到选区中,也可以从选区中减去选区而不会产生任何后果。 只需按住Shift键即可添加到当前选择,按住Option / Alt键即可从选择中减去。 如果选择过多,请按住Alt / Option键,然后单击要取消选择的区域,同时保持其他区域不变。
快速选择工具 (The Quick Selection Tool)
The Quick Selection tool makes selecting objects quick and easy. It is similar to the Magic Wand tool, except that it has no tolerance. There are 3 options available in the options bar. You can set the Quick Selection Tool to always make a new selection, our you can set it to add too a selection, or subtract from it. I set the default to add to you selection. This allows you to click and drag over the areas that you want to include in your selection. Like the other tools, simply hold the Option/Alt key and click you mouse to subtract from your selection.
快速选择工具使快速,轻松地选择对象成为可能。 它与“魔术棒”工具相似,但没有公差。 选项栏中有3个可用选项。 您可以将“快速选择工具”设置为始终进行新选择,也可以将其设置为添加或从中减去。 我将默认设置为添加到您的选择中。 这使您可以单击并拖动要包括在选择中的区域。 与其他工具一样,只需按住Option / Alt键并单击鼠标即可从选择中减去。
选择后可用的选项 (Options Available Once You Make a Selection)
用它制作一层面膜 (Make A Layer Mask From It)
Instead of deleting the area that you want to remove, simply mask it out. This will allow you to edit your object, so that you can make the edges smoother, and you won’t lose any image information permanently. This gives you a great deal of flexibility.
无需删除要删除的区域,只需将其掩盖即可。 这将允许您编辑对象,以便可以使边缘更平滑,并且不会永久丢失任何图像信息。 这给您很大的灵活性。
使用优化边缘功能 (Use the Refine Edge Feature)
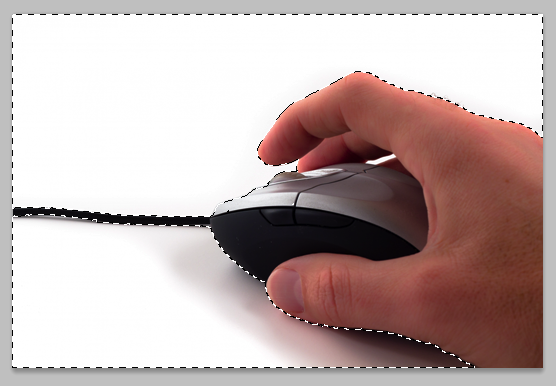
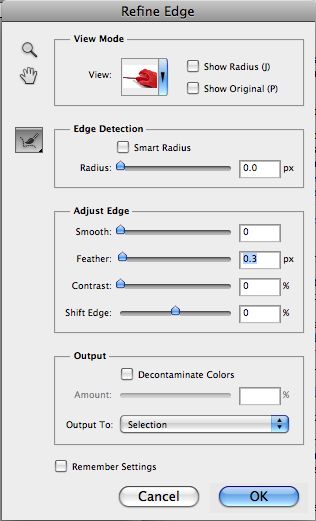
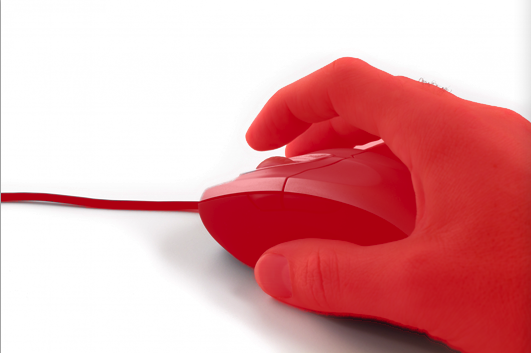
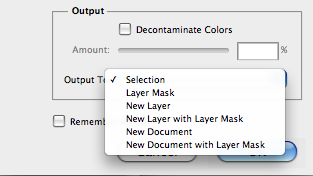
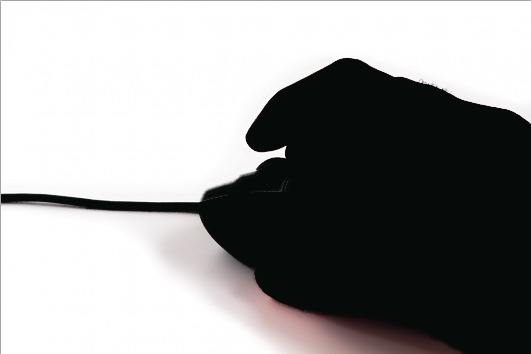
Using Refine Edge will allow you to control your mask with sliders and settings to smooth harsh edges in your image extraction, and make transitions much smoother. You can also shift the edge, as well as create more contrast between the edge and the background. A great feature inside of the Refine Mask feature is the Output section. Here, you can specify that your selection is output to layer mask, a new layer with a layer mask, or even a new document altogether. Since I had the background selected, It masked out everything but the background, but with the mask selected, if you hold command/ctrl and hit the I key, it will invert your mask, revealing the hand and mouse. If you are 100% happy with your mask, right click on the mask icon and choose Apply Mask. However, if you want to keep the mask, when you move this layer into another document, it will bring the mash with it.
使用“优化边缘”将使您可以使用滑块和设置控制蒙版,以平滑图像提取中的粗糙边缘,并使过渡更加平滑。 您还可以移动边缘,以及在边缘和背景之间创建更多的对比度。 “优化蒙版”功能内部的一个重要功能是“输出”部分。 在这里,您可以指定将选择内容输出到图层蒙版,带有图层蒙版的新图层,甚至是一个新文档。 由于我选择了背景,因此它会掩盖除背景以外的所有内容,但是在选择遮罩的情况下,如果按住Command / Ctrl并按I键,它将反转遮罩,露出手和鼠标。 如果您对面膜感到百分百满意,请右键单击面膜图标,然后选择“应用面膜”。 但是,如果要保留遮罩,则在将该层移到另一个文档中时,它将带上混搭。
If you enjoyed reading this post, you’ll love Learnable; the place to learn fresh skills and techniques from the masters. Members get instant access to all of SitePoint’s ebooks and interactive online courses, like Foundations of Photoshop.
如果您喜欢阅读这篇文章,您会喜欢Learnable的 ; 向大师学习新鲜技能的地方。 会员可以立即访问所有SitePoint的电子书和交互式在线课程,例如Photoshop的基础 。
翻译自: https://www.sitepoint.com/masking-techniques-photoshop/
photoshop在蒙版


 被折叠的 条评论
为什么被折叠?
被折叠的 条评论
为什么被折叠?
 到【灌水乐园】发言


