


glide android
Here you will get android glide tutorial with example.
在这里,您将获得带有示例的android glide教程。
Glide is an android library that allows us to fetch image from internet or url in single line of code. In one of my previous tutorial I have shown you the usage of picasso image library. Glide is a good alternative of Picasso library. Most of the features are common in both of them.
Glide是一个Android库,可让我们以单行代码从Internet或url获取图像。 在上一篇教程中,我向您展示了毕加索图像库的用法。 Glide是Picasso库的不错选择。 大多数功能在两者中都是相同的。
Glide is popular android image library which is recommended by Google and even Google used it in various applications. Below are some features of this library.
Glide是Google推荐的流行的android图像库,甚至Google也在各种应用程序中使用了它。 以下是该库的一些功能。

滑行影像库的功能 (Features of Glide Image Library)
- Supports fetching of images, gifs and video stills. 支持获取图像,GIF和视频静止图像。
- Placeholder and error image can be added. 可以添加占位符和错误图像。
- Support disk caching. 支持磁盘缓存。
- Image resize and cropping. 图像调整大小和裁剪。
One of the biggest advantage of Glide over Picasso is that Glide supports gifs.
相较于毕加索,Glide的最大优势之一是Glide支持gif。
Android Glide教程 (Android Glide Tutorial)
Lets quickly jump to the actual tutorial part.
让我们快速跳到实际的教程部分。
How to fetch image using Glide?
如何使用Glide获取图像?
For this you just have to use one line of code given below.
为此,您只需要使用下面给出的一行代码即可。
Glide.with(context).load(IMAGE_URL).into(imageView);Placeholder and Error Image
占位符和错误图片
You can add a placeholder image until the image loaded from internet. You can also add an error image in case any error occurs while fetching image.
您可以添加一个占位符图像,直到从Internet加载该图像为止。 您也可以添加错误图像,以防在获取图像时发生任何错误。
Glide.with(context)
	.load(IMAGE_URL)
	.placeholder(R.drawable.PLACEHOLDER_IMAGE_NAME)
	.error(R.drawable.ERROR_IMAGE_NAME)
	.into(imageView);
Loading GIFs
加载GIF
You can load a gif by just adding asGif() method.
您只需添加asGif()方法即可加载gif。
Glide.with(context)
	.load(IMAGE_URL)
	.asGif()
	.into(imageView);
Resizing and Cropping Image
调整大小和裁剪图像
The following line of code resizes image to 300×300 pixel and make it center cropped.
下面的代码行将图像大小调整为300×300像素,并使其居中裁剪。
Glide.with(context)
	.load(IMAGE_URL)
	.override(200, 200)
	.centerCrop()
	.into(imageView);
Android Glide示例 (Android Glide Example)
Lets make a simple android app that shows the usage of Glide image library.
让我们制作一个简单的android应用,以显示Glide图片库的用法。
1. Create an android studio project with package name com.androidglide
1.创建一个名为com.androidglide的android studio项目
2. Now include Glide library to your project by adding following line of code under dependencies section in app level build.gradle file.
2.现在,通过在应用程序级别build.gradle文件的“ dependencies”部分下添加以下代码行,将Glide库包含到您的项目中。
compile 'com.github.bumptech.glide:glide:3.7.0'3. Add internet access permission in AndroidManifest.xml file.
3.在AndroidManifest.xml文件中添加Internet访问权限。
<uses-permission android:name="android.permission.INTERNET"/>4. Add following code in respective files.
4.在相应文件中添加以下代码。
activity_main.xml
activity_main.xml
<?xml version="1.0" encoding="utf-8"?>
<LinearLayout xmlns:android="http://schemas.android.com/apk/res/android"
    xmlns:app="http://schemas.android.com/apk/res-auto"
    xmlns:tools="http://schemas.android.com/tools"
    android:layout_width="match_parent"
    android:layout_height="match_parent"
    tools:context="com.androidglide.MainActivity"
    android:orientation="vertical">

    <Button
        android:layout_width="match_parent"
        android:layout_height="wrap_content"
        android:text="Load Image"
        android:id="@+id/button"
        android:layout_marginBottom="5dp"/>

    <ImageView
        android:layout_width="match_parent"
        android:layout_height="wrap_content"
        android:id="@+id/image"/>

</LinearLayout>
MainActivity.java
MainActivity.java
package com.androidglide;

import android.support.v7.app.AppCompatActivity;
import android.os.Bundle;
import android.view.View;
import android.widget.Button;
import android.widget.ImageView;

import com.bumptech.glide.Glide;

public class MainActivity extends AppCompatActivity {
    String IMAGE_URL = "https://www.thecrazyprogrammer.com/wp-content/uploads/2015/09/Neeraj-Mishra.png";
    Button button;
    ImageView image;

    @Override
    protected void onCreate(Bundle savedInstanceState) {
        super.onCreate(savedInstanceState);
        setContentView(R.layout.activity_main);

        button = (Button)findViewById(R.id.button);
        image = (ImageView)findViewById(R.id.image);

        //load image on button click
        button.setOnClickListener(new View.OnClickListener() {
            @Override
            public void onClick(View v) {
                Glide.with(MainActivity.this).load(IMAGE_URL).into(image);
            }
        });
    }
}
5. Save and run the project.
5.保存并运行项目。
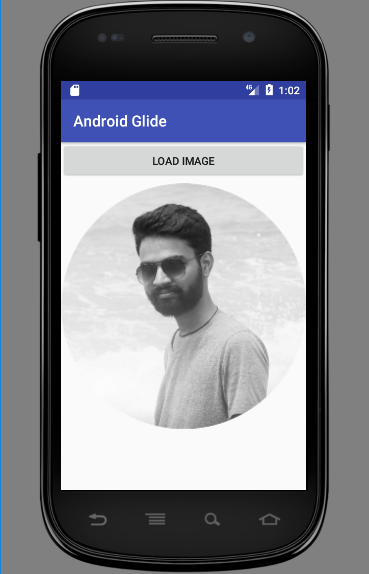
The image is fetched from internet on button click, see below screenshot.
图像是从Internet上单击按钮获取的,请参见下面的屏幕截图。
Screenshot
屏幕截图
Comment below if you have any queries related to above glide android tutorial.
如果您有与上述glide android教程相关的任何查询,请在下面评论。
翻译自: https://www.thecrazyprogrammer.com/2017/05/android-glide-tutorial.html
glide android


 558
558

 被折叠的 条评论
为什么被折叠?
被折叠的 条评论
为什么被折叠?
 到【灌水乐园】发言


