


Photoshop is a big, complex application. When you’re just starting out, it can feel like it takes forever to get things done. There are, however, a few ways you can speed up both Photoshop’s performance and your own workflow.
Photoshop是一个大型,复杂的应用程序。 当您刚入门时,可能感觉需要花费很多时间才能完成工作。 但是,有几种方法可以加快Photoshop的性能和您自己的工作流程。
优化Photoshop的性能 (Optimize Photoshop’s Performance)
Out of the box, Photoshop does a pretty great job of optimizing itself to the computer on which you’re working. It was first released in 1990, so the developers have some experience with getting it to run on low-spec machines. Even the latest version of Photoshop CC runs fine on a mid-2012 MacBook Air. Still, there are some tweaks you can make.
开箱即用,Photoshop可以非常出色地针对正在使用的计算机进行自我优化。 它于1990年首次发布,因此开发人员具有使它在低规格计算机上运行的经验。 即使是最新版本的Photoshop CC,也可以在2012年中期的MacBook Air上正常运行。 不过,您仍然可以进行一些调整。
On a PC, go to Edit > Preferences > Performance; on a Mac, go to Photoshop > Preferences > Performance.
在PC上,转到“编辑”>“首选项”>“性能”; 在Mac上,请转到Photoshop>“偏好设置”>“性能”。
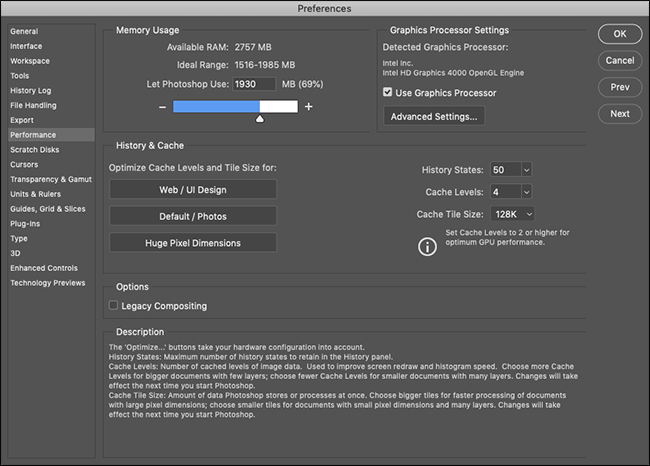
Under “Memory Usage,” you can control the amount of RAM Photoshop uses. Generally, more RAM means better performance so you can crank the upper limit a bit.
在“内存使用情况”下,您可以控制Photoshop使用的RAM数量。 通常,更多的RAM意味着更好的性能,因此您可以稍微提高一下上限。
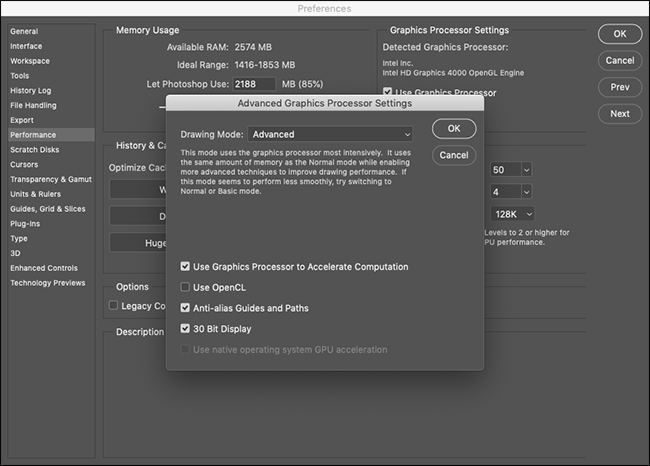
Most of what Photoshop does is CPU intensive, but your graphics processor can speed up certain tasks. Check “Use Graphics Processor” and, under “Advanced Graphics Processor Settings,” select “Advanced” from the “Drawing Mode” menu to allow Photoshop to use it as much as possible.
Photoshop所做的大部分工作都是CPU密集型的,但是您的图形处理器可以加快某些任务的速度。 选中“使用图形处理器”,然后在“高级图形处理器设置”下,从“绘图模式”菜单中选择“高级”,以允许Photoshop尽可能多地使用它。
Also, if Photoshop offers OpenCL support here for your graphics processor, check “Use OpenCL” to speed up some features, like the Blur Gallery.
另外,如果Photoshop在此处为图形处理器提供OpenCL支持,请选中“使用OpenCL”以加快某些功能,例如“模糊图库”。
The “History and Cache” settings control how much information Photoshop keeps in RAM. The three Optimize buttons take into account your system configuration, so the simplest thing to do is pick the one that best matches your work.
“历史记录和缓存”设置控制Photoshop在RAM中保留的信息量。 三个“优化”按钮会考虑您的系统配置,因此最简单的选择是选择最适合您工作的按钮。
If you like to tinker, you can also manually set the “History State” (how many times you can “Undo” something), “Cache Levels,” and “Cache Tile Size.” Upping the “Cache Levels” and choosing smaller cache tiles makes moving and zooming faster, but it’ll be slower to open.
如果您想修改,也可以手动设置“历史记录状态”(可以“撤消”多少次),“缓存级别”和“缓存切片大小”。 增大“缓存级别”并选择较小的缓存块可以使移动和缩放更快,但打开起来会更慢。
After making any changes, you’ll have to restart Photoshop for them to take effect.
进行任何更改后,您必须重新启动Photoshop才能使它们生效。
了解键盘快捷键 (Learn the Keyboard Shortcuts)
Photoshop has roughly a million menus and a billion submenus. Combined with all its tools, panels, and sliders, you can spend 90 percent of your time just clicking different items on the screen.
Photoshop大约有100万个菜单和10亿个子菜单。 结合其所有工具,面板和滑块,您只需花费90%的时间即可单击屏幕上的不同项目。
The easiest way to work faster in Photoshop is to learn some of the keyboard shortcuts for the things you do all the time. Let’s look at an example.
在Photoshop中更快工作的最简单方法是学习一些键盘快捷键,这些键盘快捷键可以始终执行。 让我们来看一个例子。
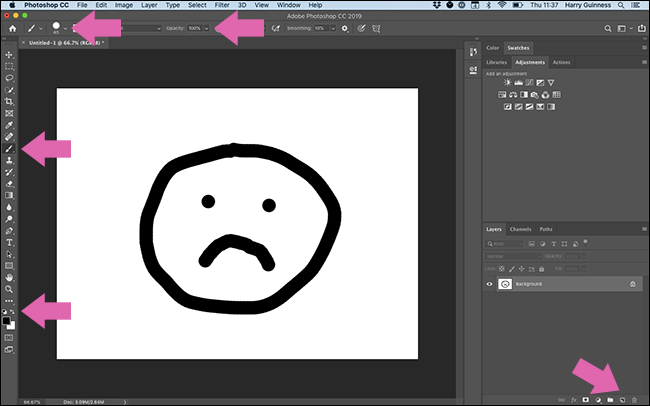
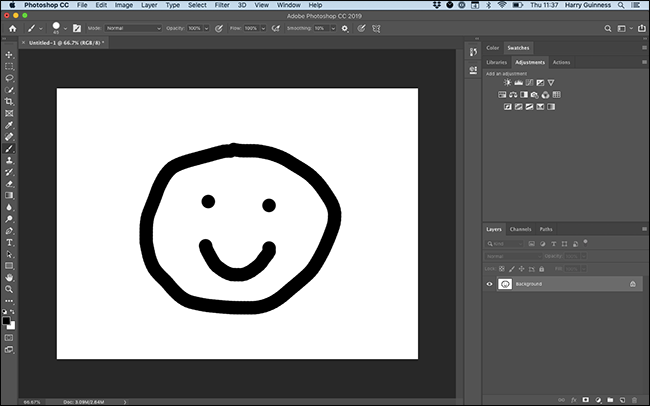
Say you want to paint a black circle on a new layer. If you’re using your mouse, you’ve got to go down to the bottom-right corner and click the New Layer icon. Then, you have to click the Brush icon, configure how soft and opaque you want your brush. Finally, you have to click the Default Colors button (which will set your brush color to black), before you can even start painting.
假设您要在新图层上绘制黑色圆圈。 如果您使用的是鼠标,则必须转到右下角,然后单击“新建图层”图标。 然后,您必须单击“画笔”图标,配置想要画笔的柔软度和不透明度。 最后,您必须单击“默认颜色”按钮(它将您的笔刷颜色设置为黑色),然后才能开始绘画。
That’s a lot of clicking around in the interface.
界面中有很多点击。
On the other hand, you can use the following keyboard shortcuts:
另一方面,您可以使用以下键盘快捷键:
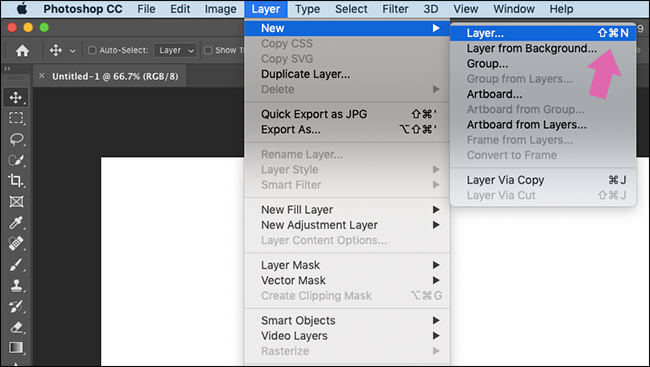
Control+Shift+N on a PC, Command+Shift+N on a Mac: Create a new layer.
在PC上为Control + Shift + N,在Mac上为Command + Shift + N:创建一个新层。
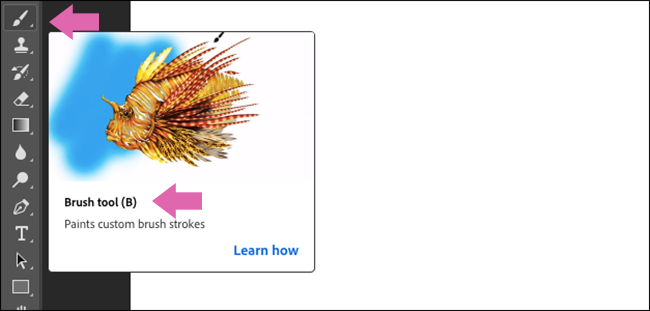
B: Select the brush tool.
B:选择画笔工具。
0: Set opacity to 100 percent.
0:将不透明度设置为100%。
Shift+]: Set hardness to 100 percent.
Shift +]:将硬度设置为100%。
D: Set the default brush colors.
D:设置默认画笔颜色。
What takes at least 30 seconds of clicking around with your mouse or trackpad takes just a few taps on your keyboard.
用鼠标或触控板至少需要30秒的点击时间,只需敲击一下键盘即可。
The only way to learn Photoshop’s keyboard shortcuts is by making an effort to use them whenever you can. Adobe has a full list on its website, so jot down those you’ll need most and keep them near your computer. The keyboard shortcuts are also shown in the menus in Photoshop.
学习Photoshop键盘快捷键的唯一方法是尽一切可能使用它们。 Adobe在其网站上提供了完整列表 ,因此请记下您最需要的内容,并将其放在计算机附近。 键盘快捷键也显示在Photoshop的菜单中。
You can also hover over any tool to see its keyboard shortcut.
您也可以将鼠标悬停在任何工具上以查看其键盘快捷键。
It takes a bit of work to memorize them, but it’s worth it.
记住它们需要一些工作,但这是值得的。
设置您的工作区 (Set Up Your Workspace)
A lot of people use Photoshop for different reasons. If you’re a photographer, there are probably hundreds of tools and features you haven’t even glanced at. If you’re a designer, you probably don’t use any of the tools a photographer relies on every day.
很多人出于不同的原因使用Photoshop。 如果您是摄影师,可能有数百种您甚至都不曾看过的工具和功能。 如果您是设计师,则可能不会使用摄影师每天所依赖的任何工具。
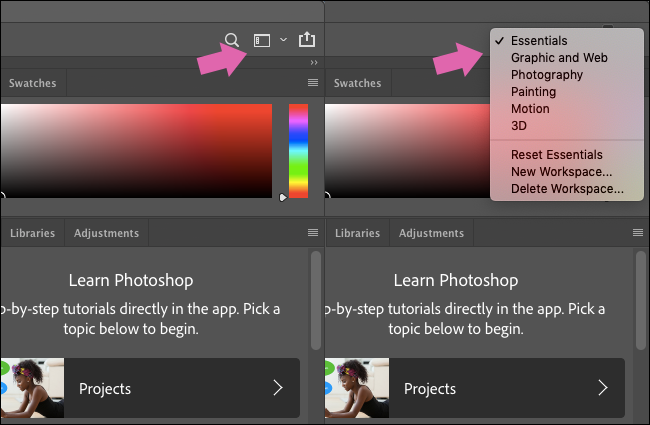
By default, Photoshop is set up so that the most popular tools are on display; this is the “Essentials” workspace.
默认情况下,会设置Photoshop,以便显示最受欢迎的工具。 这是“基本”工作区。
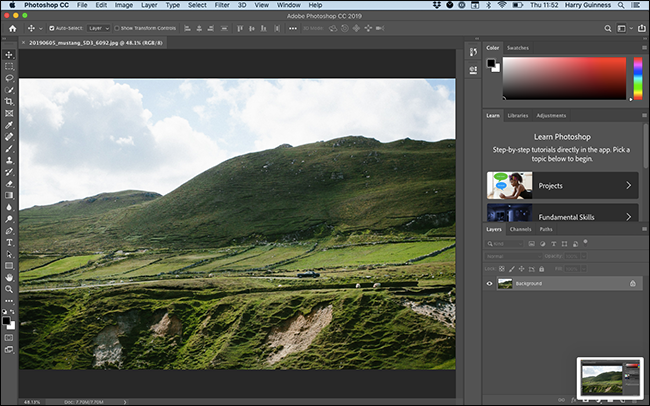
If you click on the Workspace icon in the top-right corner, you can select a “Graphic and Web,” “Photography,” “Painting,” “Motion,” or “3D” Workspace, as well. These configure the panels to better suit your needs.
如果单击右上角的工作区图标,则还可以选择“图形和Web”,“摄影”,“绘画”,“运动”或“ 3D”工作区。 这些配置面板以更好地满足您的需求。
While these are a good place to start, if you really want to take control, you need to create your own Workspace.
尽管这是一个不错的起点,但是如果您真的想控制住自己,则需要创建自己的工作区。
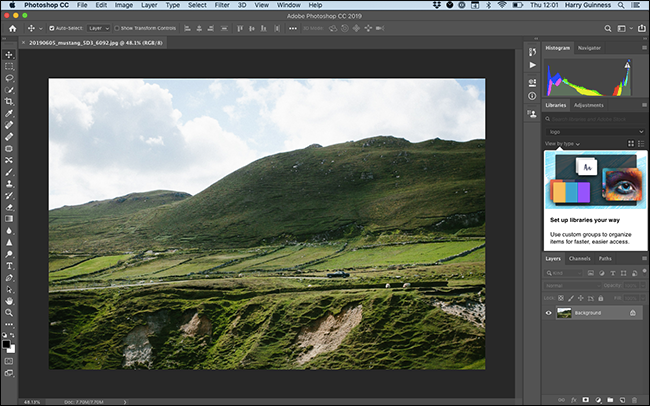
Start with the default option that best suits your work. You can then click and drag panels around.
从最适合您的工作的默认选项开始。 然后,您可以单击并拖动面板。
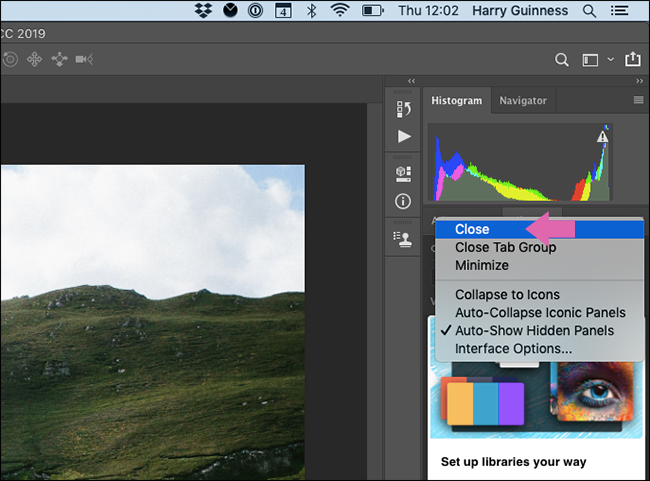
To remove a panel, right-click its name, and then select “Close” (“Close Tab Group” closes all the panels in that group.)
要删除面板,请右键单击其名称,然后选择“关闭”(““关闭选项卡组”关闭该组中的所有面板。)
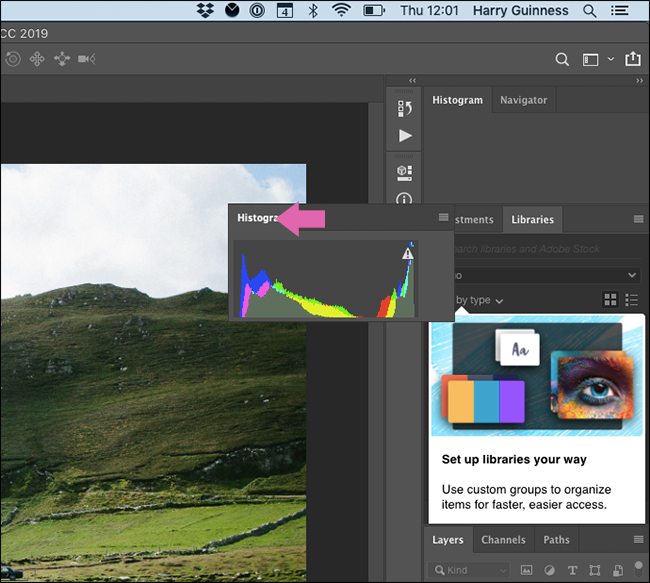
Panels can also be docked to the sidebar and only revealed when you click them, or left free-floating.
面板也可以停靠在侧边栏,并且仅在单击面板或保持自由浮动时才显示。
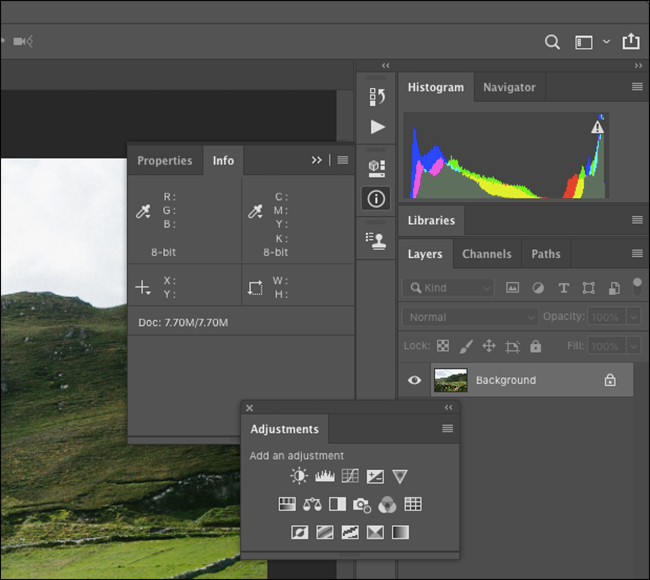
To add new panels, click “Window,” and then select the panel you want to add.
要添加新面板,请单击“窗口”,然后选择要添加的面板。

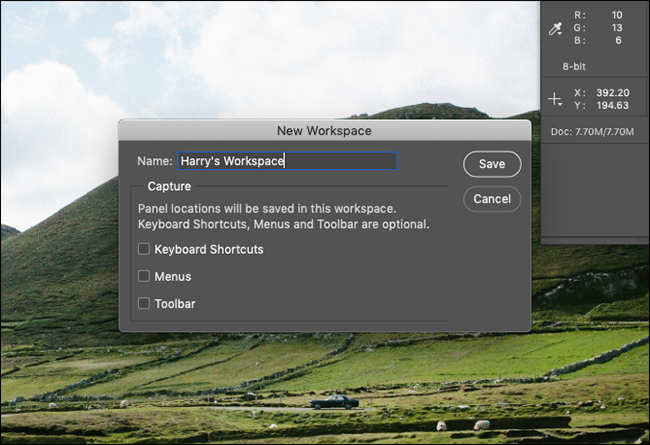
After you’re done setting things up, click the Workspace icon, and then select “New Workspace.”
完成设置后,单击“工作区”图标,然后选择“新建工作区”。
Name your workspace and click “Save.”
命名您的工作区,然后单击“保存”。
Now, you can set up all the panels any way you want for different tasks. We recommend creating your own Workspaces for the different tasks you have to do.
现在,您可以根据需要为所有任务设置所有面板。 我们建议您为必须执行的不同任务创建自己的工作区。
自己动手 (Make Your Own Actions)
Photoshop also has some powerful built-in automation tools that can make performing routine tasks really easy.
Photoshop还具有一些强大的内置自动化工具,这些工具可以使执行常规任务变得非常容易。
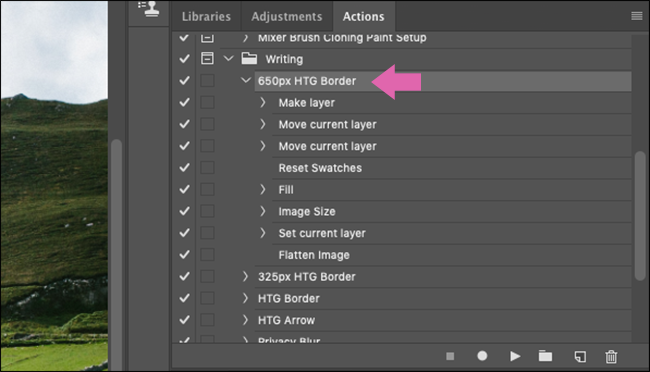
For example, almost every image on How-To Geek requires the same format: 650 pixels wide with a 1 pixel black border. Doing this for every single image would be time-consuming, so it’s a good thing you can build an Action for it.
例如,How-To Geek上的几乎所有图像都需要相同的格式:650像素宽,带有1像素黑色边框。 对每个图像执行此操作将非常耗时,因此您可以为其构建Action是一件好事。
We created one and called it “650px HTG Border.” It resizes an image to 650-pixels wide and adds a 1-pixel black border as a new layer on top of everything, so the file will then be ready to save. Something like this can save you tons of time!
我们创建了一个,并将其命名为“ 650px HTG Border”。 它将图像的大小调整为650像素宽,并在所有内容的顶部添加一个1像素的黑色边框作为新层,因此可以保存该文件。 这样的事情可以节省您大量的时间!
Of course, you won’t be able to automate every part of your workflow with Actions. They’re blunt tools with very limited contextual options. However, they’re great for speeding up groups of steps you always perform, like setting up the same layers before you begin an edit, or saving different sizes at the end.
当然,您将无法使用操作来自动化工作流程的每个部分。 它们是钝器,上下文选择非常有限。 但是,它们非常适合加快您经常执行的步骤组,例如在开始编辑之前设置相同的图层,或者最后保存不同的大小。
Here are some of the things you can do with Photoshop Actions:
您可以使用Photoshop Actions进行以下操作:
- Create new and adjustment layers. 创建新图层和调整图层。
- Resize, save, flatten, or crop images. 调整大小,保存,展平或裁剪图像。
- Add, reposition, or move different elements. 添加,重新定位或移动不同的元素。
- Combine multiple images into a collage. 将多个图像组合成一个拼贴画。
- Add specific effects, like a high-contrast, black-and-white look. 添加特定的效果,例如高对比度的黑白外观。
There’s a knack to creating Actions; you have to think carefully about how to break your workflow down into different steps that can be automated. Just like learning the keyboard shortcuts, creating Actions can save you a lot of time in the long run.
创建动作有一个技巧。 您必须仔细考虑如何将工作流程分解为可以自动化的不同步骤。 就像学习键盘快捷键一样, 创建Actions从长远来看可以节省大量时间。
获取图形输入板 (Get a Graphics Tablet)
If you have to paint, select, or otherwise directly interact with whatever you’re working on in Photoshop, you know how awkward it is to use a mouse (or even worse, a trackpad). A pointer is great for clicking different interface elements, but it’s horrific when you want to trace a smooth line around something.
如果您必须在Photoshop中进行绘画,选择或以其他方式直接与之交互,您就会知道使用鼠标(或者更糟的是触控板)会很尴尬。 指针非常适合单击不同的界面元素,但是当您要在某物周围绘制一条平滑线时,这是非常可怕的。
A graphics tablet is a peripheral that replaces your mouse with a pen and touch-sensitive tablet. They give you a lot more control when you’re painting or editing photos. It’s just a much more natural way to work on digital graphics.
图形输入板是一种外围设备,可以用笔和触敏输入板代替鼠标。 当您绘画或编辑照片时,它们为您提供了更多控制。 这是处理数字图形的一种自然得多的方式。
If your workflow is slowed down because it takes you forever to mask out or select something, pick up a good graphics tablet—it’ll change your life!
如果您的工作流程因需要永久遮盖或选择某些东西而减慢了速度,请选择一款优质的图形输入板-这将改变您的生活!
实践 (Practice)
Working faster in Photoshop is mostly a matter of optimizing your workflow. Clicking around the interface and diving into every submenu takes forever. Put some effort into learning the keyboard shortcuts, building Actions, and configuring a Workspace to save yourself tons of time!
在Photoshop中更快地工作主要是优化工作流程。 在界面上单击并跳入每个子菜单将花费很多时间。 努力学习键盘快捷键,构建动作和配置工作区,以节省大量时间!
翻译自: https://www.howtogeek.com/676431/how-to-work-faster-in-photoshop/


 1642
1642

 被折叠的 条评论
为什么被折叠?
被折叠的 条评论
为什么被折叠?
 到【灌水乐园】发言


