
出场映像还原
If a major disaster occurs and you find you’re no longer able to boot into Windows 7, you may need to do a recovery. Today we take a look at restoring your Windows 7 machine using a System Repair Disc and a backed up system image.
如果发生重大灾难,您发现无法再启动到Windows 7,则可能需要进行恢复。 今天,我们来看看使用系统修复光盘和备份的系统映像还原Windows 7计算机。
Note: This article assumes you have already created a System Repair Disc and have created a system image in Windows 7.
注意:本文假定您已经创建了 系统修复光盘, 并且已经 在Windows 7中创建了系统映像 。
If you can’t boot into Windows because of a hard drive failure or corrupt OS, you might want to restore your system using the most recent image versus a clean install. In this scenario we are assuming that we’ve exhausted every other option, and the only way to save our system is to restore it from an image.
如果由于硬盘驱动器故障或操作系统损坏而无法启动Windows ,则可能要使用最新映像而非全新安装来还原系统。 在这种情况下,我们假设我们用尽了所有其他选项,并且保存系统的唯一方法是从映像还原它。
Boot from System Repair Disc
从系统修复光盘启动
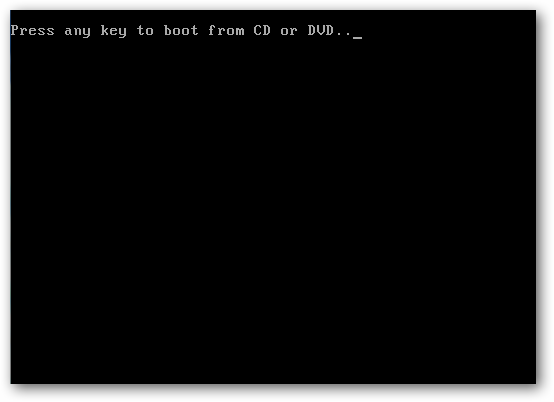
First we need to boot from the System Repair Disc. Pop it in your CD drive and if the BIOS is already set to boot from CD-ROM first, then you will see the following screen. If you don’t see the Press any key to boot from CD or DVD message, then you’ll need to hit the correct key when booting to pull up the boot options screen and choose your CD / DVD Drive. Usually it’s F12 but each system varies, for instance on my IBM Thinkpad it’s a separate Access IBM button.
首先,我们需要从系统修复光盘启动。 将其弹出到CD驱动器中,如果BIOS已设置为首先从CD-ROM引导,那么您将看到以下屏幕。 如果没有看到按任何键从CD或DVD引导消息,则在引导时需要按正确的键以拉起引导选项屏幕,然后选择CD / DVD驱动器。 通常是F12,但每个系统都不同,例如在我的IBM Thinkpad上,它是一个单独的Access IBM按钮。
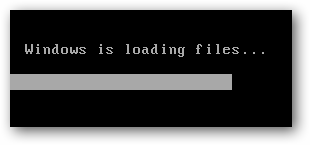
While the System Repair Disc starts up you will see the message Windows is loading files…
系统修复光盘启动时,您会看到消息Windows正在加载文件…
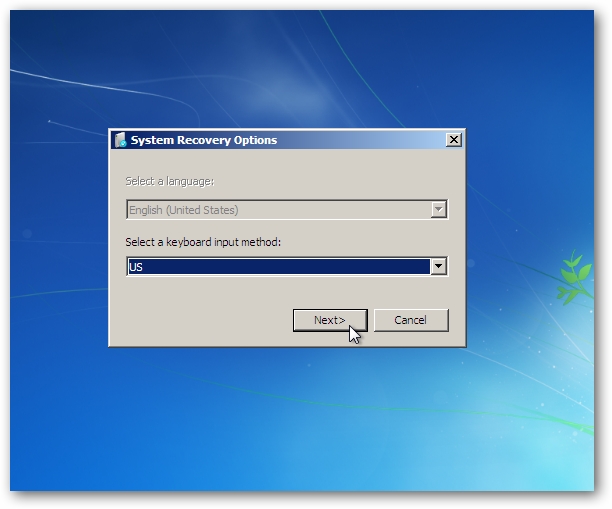
After that the System Recovery Options screen comes up. Here you want to choose the correct keyboard input and click Next.
之后,出现“系统恢复选项”屏幕。 在这里您要选择正确的键盘输入,然后单击“下一步”。
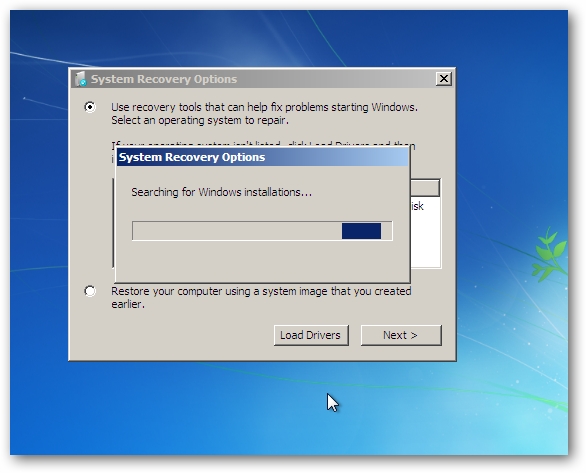
System Recovery searches for the Windows installation(s) you have on the hard drive.
System Recovery搜索硬盘驱动器上的Windows安装。
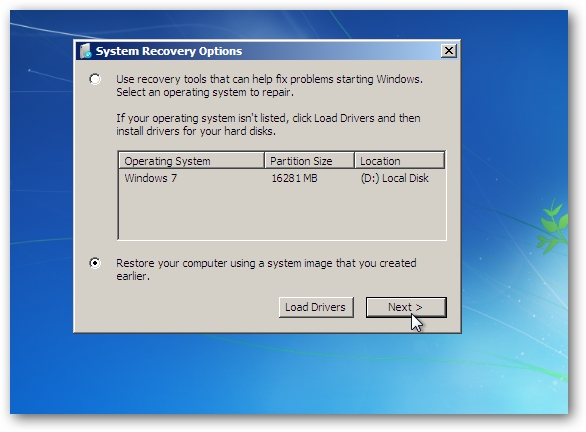
Assuming we’ve already tried all of the other recovery tools, we want to select Restore your computer using a system image you created earlier and click Next.
假设我们已经尝试了所有其他恢复工具,则希望选择“使用先前创建的系统映像还原计算机” ,然后单击“下一步”。
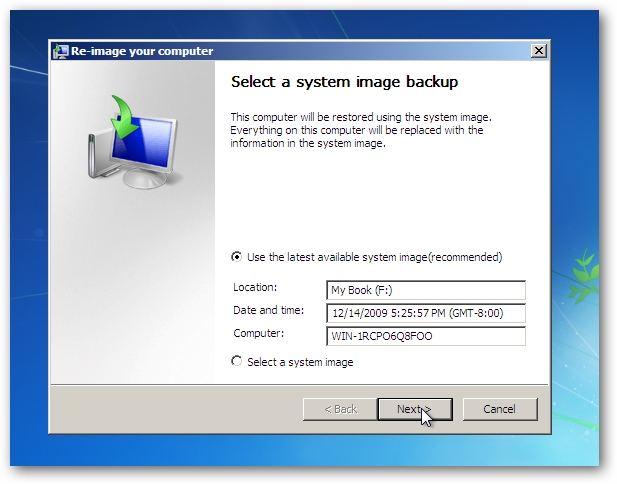
At this screen you can see that it found the last system image which is saved on an external hard drive. If you want to use an older system image, click Select a system image then browse through older images until you find the correct one. Because we want everything to be as close to how it was before it crashed, we select Use the latest available system image (recommended) then click Next.
在此屏幕上,您可以看到它找到了最后一个保存在外部硬盘驱动器上的系统映像。 如果要使用较旧的系统映像,请单击“ 选择一个系统映像”,然后浏览较旧的映像,直到找到正确的映像为止。 因为我们希望所有内容都与崩溃前的状态非常接近,所以我们选择“ 使用最新的可用系统映像(推荐)”,然后单击“下一步”。
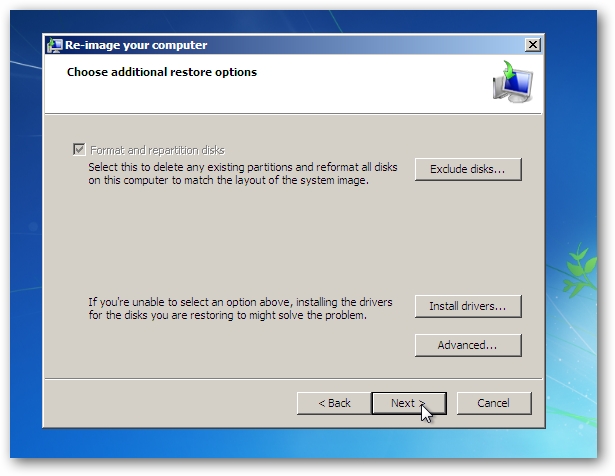
In the next screen just click on Next…there are no other partitions in this instance so we don’t need to worry about excluding disks.
在下一个屏幕中,只需单击Next(下一步)……此实例中没有其他分区,因此我们不必担心排除磁盘。
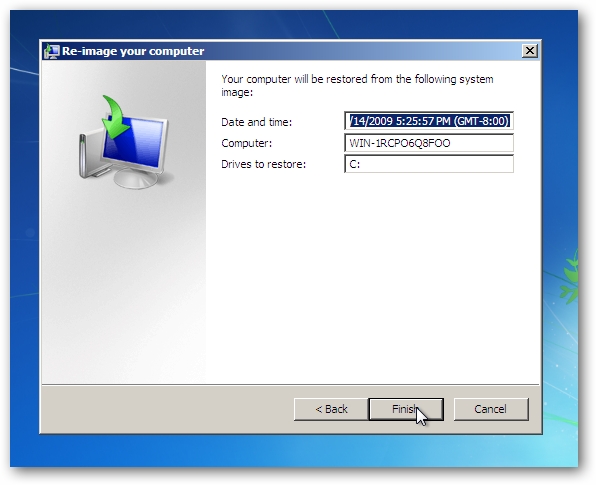
Finally you’re given an quick overview of the selected image and if everything looks right, click Finish.
最后,您将获得所选图像的快速概览,如果一切看起来正确,请单击“完成”。
Click Yes to the warning message that comes up making sure you want to restore the computer with the selected image.
单击“是”以显示警告消息,以确保您要还原带有所选图像的计算机。
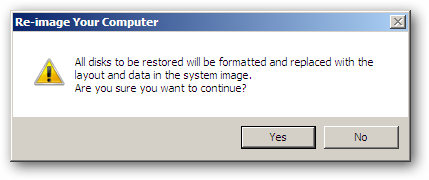
The restore process will begin. It might take a few hours to restore everything depending on the size of the image and how much data there is. Provided there are no errors and the process completes successfully, your system will restart and the system should be restored.
恢复过程将开始。 恢复所有内容可能需要几个小时,具体取决于图像的大小和有多少数据。 如果没有错误,并且该过程成功完成,则系统将重新启动,并且系统应还原。
![sshot-2009-12-15-[22-31-06] sshot-2009-12-15-[22-31-06]](https://i-blog.csdnimg.cn/blog_migrate/74686311a5eb942ce258275fda5babec.png)
Conclusion
结论
There are a few things to keep in mind when you restore using a system image. An image is an exact copy the hard drive when it was created, so if your last backup was 3 months ago…that will be the drive you’re getting back. All of your programs, system settings, and files are replaced to how they were on the latest system image. It doesn’t allow you to choose individual items to restore, it’s an all or nothing process. This is why it’s a good idea to have your important documents and files saved to a separate drive or network location. The system image will restore your programs, settings, and files as they were when the image was created, but everything else from that point on will be gone. Depending on the date of the system image, allow enough time to run Windows Update, update drivers, patch other software, and tweak everything as necessary. The option to create a system image is available in all versions of Windows 7, and is a great insurance policy to have in case disaster strikes.
使用系统映像还原时,需要牢记一些注意事项。 映像是创建时精确复制的硬盘驱动器,因此,如果您的上次备份是3个月前……那将是您要恢复的驱动器。 您的所有程序,系统设置和文件都将替换为它们在最新系统映像上的显示方式。 它不允许您选择要还原的单个项目,这是一个全有或全无的过程。 因此,将重要的文档和文件保存到单独的驱动器或网络位置是个好主意。 系统映像将恢复创建映像时的程序,设置和文件,但是从那时起的所有其他操作都将消失。 根据系统映像的日期,留出足够的时间来运行Windows Update,更新驱动程序,修补其他软件并根据需要调整所有内容。 Windows 7的所有版本中都提供了用于创建系统映像的选项,这是一个很好的保险单,以防灾难发生。
Make sure to read our other related articles:
请务必阅读其他相关文章:
How To Create a System Repair Disc in Windows 7
How To Create a System Image in Windows 7 and Vista
How To Use Backup and Restore in Windows 7
翻译自: https://www.howtogeek.com/howto/7702/restoring-windows-7-from-an-image-backup/
出场映像还原


 1万+
1万+

 被折叠的 条评论
为什么被折叠?


