


 本文介绍了在Windows 8、8.1、10、7及Vista中挂载ISO映像的方法。在Windows 8和10中,系统自带挂载功能,可以通过双击、右键菜单或文件资源管理器中的“安装”按钮实现。而在Windows 7或Vista中,推荐使用WinCDEmu这款免费开源工具来挂载ISO文件。

macos挂载磁盘映像
On Windows 8 and 10, Windows finally offers a built-in way to mount ISO disc image files. If you’re using Windows 7, you’ll need a third-party tool.
在Windows 8和10上,Windows最终提供了一种内置方式来挂载ISO光盘映像文件。 如果您使用的是Windows 7,则需要第三方工具。
在Windows 8、8.1或10中挂载ISO映像 (Mounting an ISO Image in Windows 8, 8.1 or 10)
On Windows 8 and 10, Windows has the built-in ability to mount both ISO disc image and VHD virtual hard drive image files. You have three options. You can:
在Windows 8和10上,Windows具有内置功能,可以挂载ISO光盘映像和VHD虚拟硬盘映像文件 。 您有三个选择。 您可以:
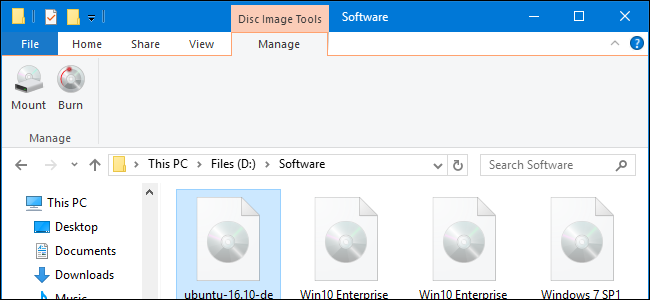
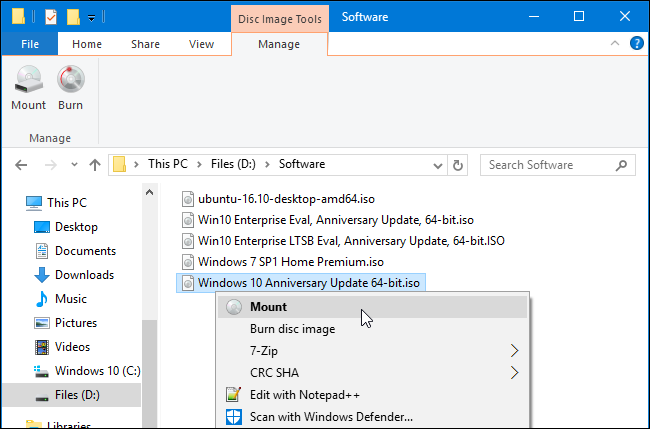
- Double-click an ISO file to mount it. This won’t work if you have ISO files associated with another program on your system. 双击ISO文件将其挂载。 如果您的ISO文件与系统上的另一个程序相关联,则此方法将无效。
- Right-click an ISO file and select the “Mount” option. 右键单击一个ISO文件,然后选择“挂载”选项。
- Select the file in File Explorer and and click the “Mount” button under the “Disk Image Tools” tab on the ribbon. 在“文件资源管理器”中选择文件,然后单击功能区“磁盘映像工具”选项卡下的“安装”按钮。
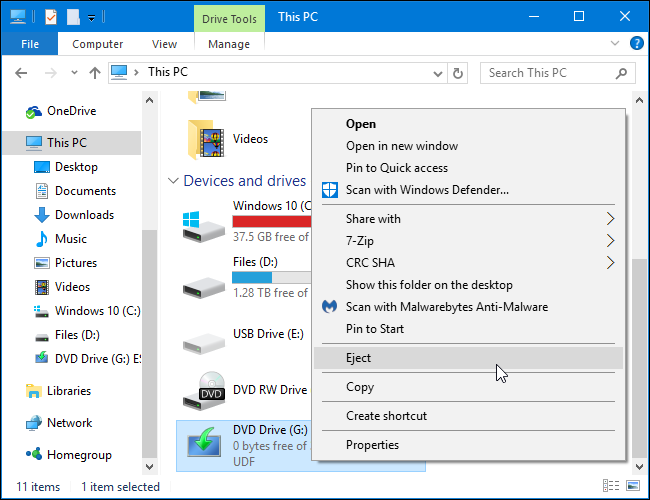
Once you’ve mounted the disc image, you’ll see it appear as a new drive under This PC. Right-click the drive and select “Eject” to unmount the ISO file when you’re done.
装入光盘映像后,您会看到它在此PC下显示为新驱动器。 完成后,右键单击驱动器并选择“弹出”以卸载ISO文件。
在Windows 7或Vista中挂载ISO映像 (Mounting an ISO Image in Windows 7 or Vista)
On older versions of Windows, you’ll need a third-party application to mount ISO image files. We like WinCDEmu, a simple and open-source disc mounting program. It supports ISO files and other disc image formats.
在Windows的旧版本上,您需要第三方应用程序来挂载ISO映像文件。 我们喜欢WinCDEmu ,这是一个简单的开源光盘安装程序。 它支持ISO文件和其他光盘映像格式。
WinCDEmu is even useful on Windows 8 and 10, where it will allow you to mount the BIN/CUE, NRG, MDS/MDF, CCD, and IMG image files that Windows still doesn’t offer built-in support for.
WinCDEmu甚至在Windows 8和10上都非常有用,它使您可以挂载Windows仍然不提供内置支持的BIN / CUE,NRG,MDS / MDF,CCD和IMG图像文件。
Install WinCDEmu and give it permission to install the hardware driver it requires. After you do, just double-click a disc image file to mount it. You can also right-click a disc image file and click “Select drive letter & mount” in the context menu.
安装WinCDEmu并授予其安装所需的硬件驱动程序的权限。 完成后,只需双击光盘映像文件将其装入。 您也可以右键单击光盘映像文件,然后在上下文菜单中单击“选择驱动器号和安装”。

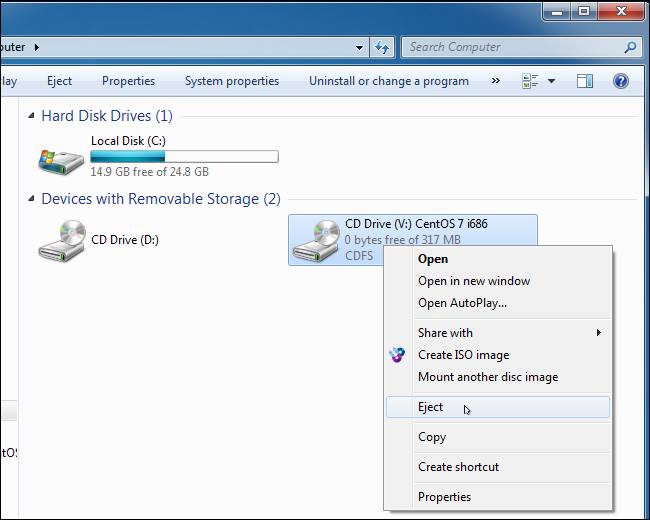
You’ll see a simple interface for choosing the drive letter and other basic options. Click “OK” and the mounted image will appear under Computer. To unmount the disc image when you’re done, right-click the virtual disc drive and select “Eject”.
您会看到一个简单的界面,用于选择驱动器号和其他基本选项。 单击“确定”,安装的图像将出现在“计算机”下。 要在完成后卸载光盘映像,请右键单击虚拟磁盘驱动器,然后选择“弹出”。
翻译自: https://www.howtogeek.com/howto/windows-vista/mount-an-iso-image-in-windows-vista/
macos挂载磁盘映像


 624
624

 被折叠的 条评论
为什么被折叠?
被折叠的 条评论
为什么被折叠?
 到【灌水乐园】发言


