


 本文介绍了Cody.js,一个小型库,用于前端开发者自定义嵌入式演示。Cody.js无依赖且可完全定制,适用于需要高度个性化演示但不依赖外部服务的情况。通过Cody.js,你可以轻松地从Codepen等平台嵌入演示,同时通过JavaScript和HTML自定义样式和行为。
If you are a front-end developer, you often find yourself embedding demos in a website to showcase something. Maybe you are using any of the most popular embedded systems out there, like Codepen or JSFiddle. If that is the case, you must have noticed that available options for customization often are not enough.
如果您是前端开发人员,通常会发现自己将演示嵌入网站中以展示某些内容。 也许您正在使用任何最流行的嵌入式系统,例如Codepen或JSFiddle 。 如果是这种情况,您必须已经注意到,用于定制的可用选项通常是不够的。
These systems offers only a few options to customize the embedded demos (mostly colors). Codepen also offers an option to use your own stylesheet, but you need a PRO account (paid) for that.
这些系统仅提供一些选项来定制嵌入式演示(主要是颜色)。 Codepen还提供了使用您自己的样式表的选项,但是您需要一个PRO帐户(付费)。
Sometimes we need a little more freedom in the styles, in order to match more accurately the look and feel of the entire page we are building. So, I would like to introduce a little library to solve exactly this problem. Meet Cody:
有时我们需要更多的样式自由度,以便更准确地匹配我们正在构建的整个页面的外观。 因此,我想介绍一个小图书馆来解决这个问题。 认识科迪 :
Cody is a small library to embed demos for front-end developers. It has no dependencies and it's fully customizable.
Cody是一个小型库,可为前端开发人员嵌入演示。 它没有依赖关系,并且是完全可定制的。

Along this tutorial we'll be exploring all the possible options that Cody offers. When we finish, you will be able to style your demos as much as you want :)
在本教程中,我们将探索Cody提供的所有可能的选项。 完成后,您将可以根据需要设置演示样式:)
If you are interested in how Cody works, I recommend you to start reading this article by Ben Frain. Of course, you can also check the full code on Github.
如果您对Cody的工作方式感兴趣,建议您开始阅读Ben Frain的这篇文章 。 当然,您也可以在Github上查看完整的代码 。
何时使用科迪 ( When to use Cody )
Before seeing some code, let's first look at when and when not to use Cody.
在看到一些代码之前,让我们先看看何时以及何时不使用Cody。
使用USE Cody的一些充分理由: (Some good reasons to USE Cody:)
- You need a fully customized embed. Something original, that does not look like all others. 您需要完全定制的嵌入。 原始的东西,看起来不像其他所有东西。
- You don't want to require external services, or host your code somewhere else. 您不想需要外部服务,也不想在其他地方托管代码。
不使用Cody的一些充分理由: (Some good reasons to NOT use Cody:)
- You don't need extra customization at all. 您根本不需要额外的自定义。
- Your demo it's made up using not only plain HTML, CSS or JavaScript, and you want to show the source code as well (maybe SCSS or TypeScript). 您的演示不仅使用纯HTML,CSS或JavaScript组成, 而且还希望显示源代码(可能是SCSS或TypeScript)。
Now that it's clear when we can get the most out of this tool, let's see how to use it to get a working demo styled like this:
既然很清楚何时可以充分利用该工具,下面让我们看看如何使用它来获得如下所示的工作演示:
设置标记 ( Setting up the markup )
First step is to include the Cody scripts and styles in the head of the HTML document.
第一步是将Cody scripts和styles包含在HTML文档的head 。
<link rel="stylesheet" href="css/cody.css">
<script src="js/cody.js"></script>
嵌入Codepen中的演示 (Embedding a demo from Codepen)
You can embed a demo from Codepen easily using Cody. Just like:
您可以使用Cody轻松地从Codepen嵌入演示。 就像:
<!-- Attribute [data-pen]: The URL of the desired pen. -->
<div class="cody" data-pen="http://codepen.io/lmgonzalves/pen/vLaXNR"></div>
Please note that in case the pen have external dependencies, you need to link them too as follows. That's because (for now) Codepen does not have an official API to get the pen settings, only the code in the editor.
请注意,如果笔具有外部依赖性,则也需要按以下方式链接它们。 这是因为(目前)Codepen没有官方的API来获取笔设置,只有编辑器中的代码。
<!-- Attribute [data-css-assets]: External CSS dependencies. -->
<!-- Attribute [data-js-assets]:  External JS dependencies. -->
<div class="cody"
     data-pen="http://codepen.io/lmgonzalves/pen/JbeQKG"
     data-css-assets="https://cdnjs.cloudflare.com/ajax/libs/normalize/3.0.3/normalize.min.css"
     data-js-assets="https://cdnjs.cloudflare.com/ajax/libs/segment-js/1.0.3/segment.min.js, https://d3js.org/d3-ease.v0.6.min.js"
></div>
从任何地方嵌入演示 (Embedding a demo from anywhere)
To showcase local demos, or demos hosted elsewhere we can setup the HTML like the following:
为了展示本地演示或在其他地方托管的演示,我们可以如下设置HTML:
<div class="cody">
    <code class="html"></code>
    <code class="css" data-assets="css/normalize.css" data-code="css/demo.css"></code>
    <code class="js" data-assets="js/segment.min.js, js/d3-ease.v0.6.min.js" data-code="js/demo.js"></code>
</div>
Let's explain what is happening here in detail for better understanding:
为了更好地理解,让我们详细解释这里发生的事情:
- We have a wrapper (
.cody), used later in JavaScript initialization. 我们有一个包装器(.cody),稍后在JavaScript初始化中使用。 - We have an HTML element for each language (
.html,.cssand.js). 我们为每种语言(.html,.css和.js)都有一个HTML元素。 - The attribute
[data-code]link to the code that you want to show. 属性[data-code]链接到要显示的代码。 - The attribute
[data-assets]link to code that you don't want to show, but needed in execution. Useful for external libraries and dependencies. 属性[data-assets]链接到您不想显示但在执行中需要的代码。 对于外部库和依赖项很有用。
Here we have defined all the code using external files, but you can put the code directly inside each element as well. For example, the HTML code could have been defined as:
在这里,我们使用外部文件定义了所有代码,但是您也可以将代码直接放在每个元素中。 例如,HTML代码可能已定义为:
<textarea class="html">
    <!-- HTML code of demo -->
    <button class="refresh-icon">
        <svg viewBox="0 0 90 90">
            <path class="circle-path" d="M 45 45 m 0 -30 a 30 30 0 1 1 0 60 a 30 30 0 1 1 0 -60"></path>
        </svg>
        <svg class="arrow-svg" viewBox="0 0 90 90">
            <path class="arrow-path" d="M 50 15 m -18 -18 l 18 18 l -18 18"></path>
        </svg>
    </button>
</textarea>
用JavaScript初始化Cody ( Initializing Cody in JavaScript )
With the HTML ready, we can initialize Cody as follows:
准备好HTML之后,我们可以按以下方式初始化Cody:
// We need to set a base URL as we are using relative URLs
var baseUrl = 'https://lmgonzalves.github.io/cody/';

// The `init` function receive an object with options
Cody.init({
    boxesHeight: 225,           // The boxes that will show the code and the result will have a `height = 225px`
    baseUrl: baseUrl,
    css: [
        'css/cody-basic.css',   // Basic styles
        'css/cody-classic.css', // Classic theme
        'css/prism-okaidia.css' // Highlight theme for Prism
    ],
    js: [
        'js/prism.js'           // Highlight library Prism
    ]
});
You can see all available options documented in the Github repository.
您可以查看Github存储库中记录的所有可用选项。
替代选项 (Overriding options)
Another way to define options is in the HTML (specifically in the wrapper). You can override any option you like setting it as data-*, and using "dash-case" format instead "camelCase". For example, if you want to override the resultTitle option, you need something like this:
定义选项的另一种方法是在HTML中(特别是在包装器中)。 您可以覆盖将其设置为data-*任何选项,并使用“破折号”格式代替“ camelCase”。 例如,如果要覆盖resultTitle选项,则需要类似以下内容:
<div class="cody" data-result-title="The new result title">
    <!-- CODE HERE -->
</div>
尽可能自定义 ( Customize as much as you like )
Now we know the basics about Cody, let's see how we can use it to achieve a little more tuned designs.
现在,我们了解了有关Cody的基础知识,让我们看看如何使用它来实现更多调整的设计。
应用不同的主题 (Applying a different theme)
This time we are going to see how to achieve this style for our demo:
这次,我们将看到如何为我们的演示实现这种风格:

As you can see, we are changing lots of things here. Let's see:
如您所见,我们正在这里进行很多更改。 让我们来看看:
- We are using a different highlight theme. 我们正在使用其他突出显示主题。
- We set line numbers in the code. 我们在代码中设置行号。
- We change the title for the tabs, to use SVG icons instead. 我们更改选项卡的标题,改为使用SVG图标。
- We are showing the demo (result) in a different box. 我们在另一个框中显示了演示(结果)。
Check the code that made it possible (only JavaScript was changed):
检查使之成为可能的代码(仅更改了JavaScript):
Cody.init({
    target: '.cody-custom',     // Our wrapper this time
    selected: 'html',           // HTML will be the selected tab at the beginning
    tabsSpace: false,           // We don't want space for tabs (because we are positioning it as `absolute` in CSS)
    lineNumbers: true,          // We want line numbers for the code
    // The following are SVG icons to replace the tab titles
    htmlTitle: '<svg xmlns="http://www.w3.org/2000/svg" viewBox="0 0 128 128" class="devicon"><path d="M9.032 2l10.005 112.093 44.896 12.401 45.02-12.387 10.015-112.107h-109.936zm89.126 26.539l-.627 7.172-.276 3.289h-52.665000000000006l1.257 14h50.156000000000006l-.336 3.471-3.233 36.119-.238 2.27-28.196 7.749v.002l-.034.018-28.177-7.423-1.913-21.206h13.815000000000001l.979 10.919 15.287 4.081h.043v-.546l15.355-3.875 1.604-17.579h-47.698l-3.383-38.117-.329-3.883h68.939l-.33 3.539z"/></svg>',
    cssTitle: '<svg xmlns="http://www.w3.org/2000/svg" viewBox="0 0 128 128" class="devicon"><path d="M8.76 1l10.055 112.883 45.118 12.58 45.244-12.626 10.063-112.837h-110.48zm89.591 25.862l-3.347 37.605.01.203-.014.467v-.004l-2.378 26.294-.262 2.336-28.36 7.844v.001l-.022.019-28.311-7.888-1.917-21.739h13.883l.985 11.054 15.386 4.17-.004.008v-.002l15.443-4.229 1.632-18.001h-32.282999999999994l-.277-3.043-.631-7.129-.331-3.828h34.748999999999995l1.264-14h-52.926l-.277-3.041-.63-7.131-.332-3.828h69.281l-.331 3.862z"/></svg>',
    jsTitle: '<svg xmlns="http://www.w3.org/2000/svg" viewBox="0 0 128 128" class="devicon"><path d="M2 1v125h125v-125h-125zm66.119 106.513c-1.845 3.749-5.367 6.212-9.448 7.401-6.271 1.44-12.269.619-16.731-2.059-2.986-1.832-5.318-4.652-6.901-7.901l9.52-5.83c.083.035.333.487.667 1.071 1.214 2.034 2.261 3.474 4.319 4.485 2.022.69 6.461 1.131 8.175-2.427 1.047-1.81.714-7.628.714-14.065-.001-10.115.046-20.188.046-30.188h11.709c0 11 .06 21.418 0 32.152.025 6.58.596 12.446-2.07 17.361zm48.574-3.308c-4.07 13.922-26.762 14.374-35.83 5.176-1.916-2.165-3.117-3.296-4.26-5.795 4.819-2.772 4.819-2.772 9.508-5.485 2.547 3.915 4.902 6.068 9.139 6.949 5.748.702 11.531-1.273 10.234-7.378-1.333-4.986-11.77-6.199-18.873-11.531-7.211-4.843-8.901-16.611-2.975-23.335 1.975-2.487 5.343-4.343 8.877-5.235l3.688-.477c7.081-.143 11.507 1.727 14.756 5.355.904.916 1.642 1.904 3.022 4.045-3.772 2.404-3.76 2.381-9.163 5.879-1.154-2.486-3.069-4.046-5.093-4.724-3.142-.952-7.104.083-7.926 3.403-.285 1.023-.226 1.975.227 3.665 1.273 2.903 5.545 4.165 9.377 5.926 11.031 4.474 14.756 9.271 15.672 14.981.882 4.916-.213 8.105-.38 8.581z"/></svg>',
    boxesHeight: 225,           // The boxes for code will have `height = 225px`
    resultAlwaysVisible: 200,   // The result will be showed in a different box, always visible and will have `height = 200px`
    baseUrl: baseUrl,
    css: [
        'css/cody-basic.css',           // Basic styles
        'css/cody-modern.css',          // Modern theme (tabs with position `absolute`, etc.)
        'css/prism.css',                // Default highlight theme for Prism
        'css/prism-line-numbers.css',   // Prism styles for plugin line numbers
        // Some additional styles for the SVG icons. Yes, you can put code here, not only links!
        '.devicon{height:21px;margin-top:7px}.devicon path{fill:rgba(255,255,255,0.9)}'
    ],
    js: [
        'js/prism.js',                  // Highlight library Prism
        'js/prism-line-numbers.min.js'  // Prism plugin to get line numbers
    ]
});
只显示结果 (Showing only the result)
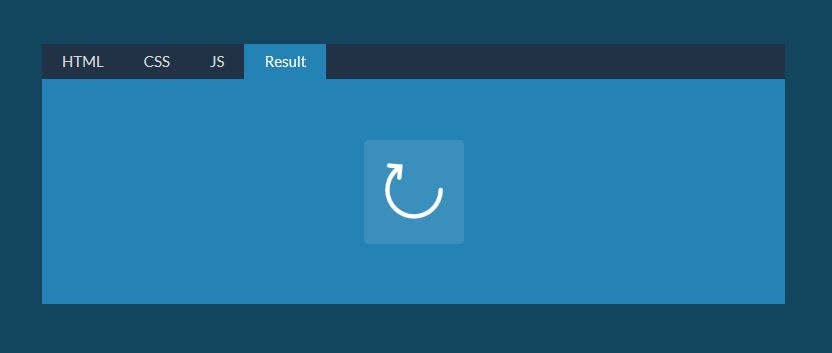
But, what if you want to show only the result (not the code) in a creative way like this?
但是,如果您想以这种创造性的方式仅显示结果(而不是代码)怎么办?

It's just a matter of removing everything we do not need in initialization, and adding some additional HTML and CSS for the background. The JavaScript part looks like this:
只需删除初始化中不需要的所有内容,并为背景添加一些其他HTML和CSS。 JavaScript部分如下所示:
Cody.init({
    target: '.cody-nexus',      // Our wrapper this time
    tabsVisible: false,         // We don't need tabs this time, we just want to show the selected one (HTML by default)
    boxesHeight: 400,           // The box will have `height = 400px`
    baseUrl: baseUrl,
    css: ['css/cody-basic.css'] // We just need the basic styles
});
使用其他高亮库 (Using a different highlight library)
In all of our examples we are using Prism to highlight the code. That not mean you can't use any other you like. For example, let's see how to use highlight.js:
在所有示例中,我们都使用Prism突出显示代码。 这并不意味着您不能使用任何其他您喜欢的东西。 例如,让我们看看如何使用highlight.js :
Cody.init({
    css: [
        '/path/to/styles/default.css'     // highlight.js theme
    ],
    js: [
        '/path/to/highlight.pack.js',     // highlight.js library
        'hljs.initHighlightingOnLoad();'  // highlight.js initialization
    ]
    // Additional options...
});
As you can see, inserting CSS and JavaScript as we need opens a lot of possibilities for customization.
如您所见,根据需要插入CSS和JavaScript为自定义打开了很多可能性。
结论 ( Conclusion )
And that's all! You can see the demo showing all the examples we made along the tutorial. The code and full documentation can be found on the Github repo.
就这样! 您可以看到演示了本教程中所有示例的演示 。 该代码和完整文档可以在Github仓库中找到。
Note that the development of this library is just starting out, and I'm sure there are lot of things to add and improve. Please do not hesitate to report any bug you find. And if you would like to contribute with the project you are more than welcome as well :)
请注意,该库的开发才刚刚开始,我敢肯定,有很多事情需要补充和改进。 请不要犹豫,报告您发现的任何错误。 如果您想为该项目做出贡献,也非常欢迎您:)
We really hope you have enjoyed the journey so far and found Cody useful!
我们真的希望您喜欢到目前为止的旅程,并发现Cody有用!
翻译自: https://scotch.io/tutorials/how-to-customize-embedded-demos-with-cody-js


 4894
4894

 被折叠的 条评论
为什么被折叠?
被折叠的 条评论
为什么被折叠?
 到【灌水乐园】发言


