


angular 渐进
Progressive web apps are web applications built with technologies that make them behave like native apps. A benefit of progressive web apps is the ability to work smoothly when network coverage is unreliable. Also, unlike native apps, no installation is required, but they are faster than typical web apps. This article is not about what progressive web apps are and what they are not, it is about how you can build progressive web apps with Angular. You can read more about progressive web apps, here.
渐进式Web应用程序是使用使它们的行为类似于本机应用程序的技术构建的Web应用程序。 渐进式Web应用程序的一个优点是能够在网络覆盖范围不可靠的情况下平稳运行。 此外,与本机应用程序不同,不需要安装,但是它们比典型的Web应用程序快。 本文不是关于什么是渐进式Web应用程序,不是什么,而是关于如何使用Angular构建渐进式Web应用程序。 您可以在此处阅读有关渐进式Web应用程序的更多信息。
##Getting started To show you how to build progressive web apps with Angular, we will build a very simple website. When we are done, we will use the Lighthouse Chrome extension to test if our app is really progressive. You can also clone this project from GitHub.
##入门为了向您展示如何使用Angular构建渐进式Web应用程序,我们将构建一个非常简单的网站。 完成后,我们将使用Lighthouse Chrome扩展程序来测试我们的应用程序是否真的是渐进式的。 您也可以从GitHub克隆此项目。
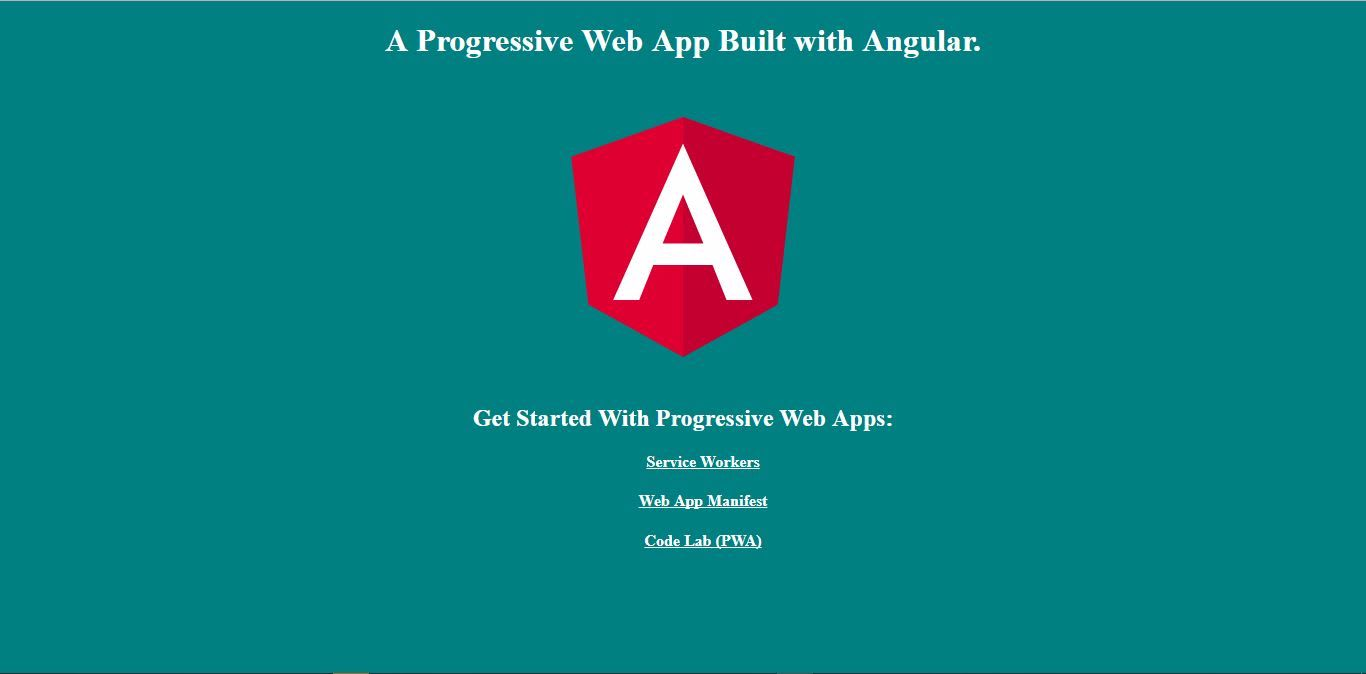
Click on this link to see our progressive web app in action.
单击此链接以查看我们的渐进式Web应用程序。
##Creating a new Angular Project To create a new Angular project via Angular CLI, you need to install Angular CLI on your machine, first. If Angular CLI is not installed on your machine yet, run the command below to install it globally.
##创建新的Angular项目要通过Angular CLI创建新的Angular项目,首先需要在计算机上安装Angular CLI。 如果您的计算机上尚未安装Angular CLI,请运行以下命令以全局安装它。
//install Angular CLInpm install -g @angular/cliOnce Angular CLI is globally installed, you can proceed to create a new project with it. By default Angular will generate test files which are of no use in our little project. In order to prevent this, we will add the --skip-tests flag to our command.
全局安装Angular CLI后,您可以继续使用它创建一个新项目。 默认情况下,Angular会生成测试文件,这些文件在我们的小项目中没有用。 为了防止这种情况,我们将--skip-tests标志添加到我们的命令中。
//create a new Angular project withouttest files.
ng new ng-pwa --skip-tests
##Web App Manifest A web app manifest is a simple JSON file which contains configurations that gives web applications the ability to be saved on user's home screen. While also defining its appearance and behaviour when launched from the home screen. Web app manifest is a basic requirement for progressive web apps but can be used on any website. You can read more about web app manifest here.
## Web App清单Web应用程序清单是一个简单的JSON文件,其中包含配置,这些配置使Web应用程序能够保存在用户的主屏幕上。 同时还定义了从主屏幕启动时的外观和行为。 Web应用程序清单是渐进式Web应用程序的基本要求,但可以在任何网站上使用。 您可以在此处阅读有关Web应用清单的更多信息。
To create a web app manifest for our app, navigate to the src/ folder and create a file named manifest.json in the root of the folder. Copy and paste the content below into the file.
要为我们的应用程序创建一个Web应用程序清单,请导航到src/文件夹,并在该文件夹的根目录中创建一个名为manifest.json的文件。 复制以下内容并将其粘贴到文件中。
// src/manifest.json
{
   "name": "Angular Progressive Web App",
   "short_name": "Ng-PWA",
   "start_url": "./",
   "theme_color": "#008080",
   "background_color": "#008B8B",
   "display": "standalone",
   "description": "A PWA that is built with Angular",
   "icons": [
       {
           "src": "/assets/images/icons/icon-16x16.png",
           "sizes": "16x16",
           "type": "image/png"
       },
       {
            "src": "/assets/images/icons/icon-32x32.png",
            "sizes": "32x32",
            "type": "image/png"
        },
        {
            "src": "/assets/images/icons/icon-150x150.png",
            "sizes": "150x150",
            "type": "image/png"
        },
        {
            "src": "/assets/images/icons/icon-180x180.png",
            "sizes": "180x180",
            "type": "image/png"
        },
        {
            "src": "/assets/images/icons/icon-192x192.png",
            "sizes": "192x192",
            "type": "image/png"
        },
        {
            "src": "/assets/images/icons/icon-512x512.png",
            "sizes": "512x512",
            "type": "image/png"
        }
   ]

}
In our web app manifest, we defined the name that will be attached to our app icon on users' home screen and a short_name that will replace it, in case it is too long. We also specified the landing page of the app, when launched from the home screen with start_url. The theme_color specifies the colour the browser UI will assume when users visit our site. The background_color property controls the colour of the background on which our app icon will be displayed when users launch our app from their home screen. With display, you specify if the browser UI should be hidden or not when users visit your site.
在Web应用清单中,我们定义了将附加到用户主屏幕上的应用图标的name ,以及一个short_name (如果名称太长的话)将替换它。 当从主屏幕启动时,我们还使用start_url指定了应用程序的登录页面。 theme_color指定用户访问我们的网站时浏览器用户界面将采用的颜色。 当用户从主屏幕启动我们的应用程序时, background_color属性控制将在其上显示我们的应用程序图标的背景颜色。 使用display ,您可以指定在用户访问您的网站时是否应该隐藏浏览器UI。
We expect users to visit our site with different types of devices with different screen sizes, so there is need to make duplicates of your app icons in multiple dimensions. realfavicongenerator.net can help automate the process.
我们希望用户使用具有不同屏幕尺寸的不同类型的设备访问我们的网站,因此需要在多个维度上复制您的应用程序图标。 realfavicongenerator.net可以帮助自动化该过程。

When you are done, go to the index.html file and add
完成后,转到index.html文件并添加
<!-- src/index.html -->
...
<link rel="manifest" href="/manifest.json">
<meta name="theme-color" content="#008080">
...
to the head section.
到头部。
The web app manifest will not be added to the build folder unless we instruct Angular to do so. We will do that by adding the manifest.json file to the assets array in apps section of .angular-cli.json file
除非我们指示Angular这样做,否则不会将Web应用程序清单添加到构建文件夹中。 我们将通过将manifest.json文件添加到.angular-cli.json文件的apps部分中的assets数组中.angular-cli.json操作
// .angular-cli.json
...
"apps": [
    {
     ...
      "assets": [
       ...
        "manifest.json"
      ],
...
##Service Workers Service workers are the backbone of progressive web apps. Written in Javascript, they help cache important assets and files, so as to keep the downosaur at bay and make our app functional when the network coverage is unavailable or unreliable. Service workers can also intercept requests and manage responses from the server amid other things. You can read more about service workers here.
## Service Workers服务工作者是渐进式Web应用程序的骨干。 它们使用Javascript编写,有助于缓存重要资产和文件,从而在网络覆盖不可用或不可靠的情况下,避免将downosaur拒之门外 ,并使我们的应用程序正常运行。 服务人员还可以拦截请求并管理服务器中的响应。 您可以在此处阅读有关服务人员的更多信息。

Creating a service worker in Angular is easy but not straightforward. This is because we need to build our app with webpack before pushing it to production and our service worker must be able to track and cache the build files. Thanks to sw-precache-webpack-plugin npm package, all we need to do is to install the package and configure it. We can then run a simple command that will auto-generate the service worker in the build folder.
在Angular中创建服务工作者很容易,但并不容易。 这是因为我们需要在将Webpack推入生产之前使用webpack构建应用程序,并且我们的服务工作者必须能够跟踪和缓存构建文件。 感谢sw-precache-webpack-plugin npm软件包,我们所需要做的就是安装该软件包并对其进行配置。 然后,我们可以运行一个简单的命令,该命令将自动生成build文件夹中的service worker。
Run the npm install command to install the package.
运行npm install命令以安装软件包。
//install sw-precache-webpack-plugin as a development dependencynpm install --save-dev sw-precache-webpack-pluginOnce the package is installed, go to the app root and create a file named precache-config.js . Copy and paste the code below into the file.
安装软件包后,转到应用程序根目录并创建一个名为precache-config.js的文件。 复制下面的代码并将其粘贴到文件中。
// pre-cache.config.js

var SWPrecacheWebpackPlugin = require('sw-precache-webpack-plugin');

module.exports = {
    navigateFallback: '/index.html',
    navigateFallbackWhitelist: [],
    stripePrefix: 'dist',
    root: 'dist/',
    plugins:[
        new SWPrecacheWebpackPlugin({
            cacheId: 'ng-pwa',
            filename: 'service-worker.js',
            staticFileGlobs: [
                'dist/index.html',
                'dist/**.js',
                'dist/**.css'
            ],

        })
    ],
    stripePrefix: 'dist/assets',
    mergeStaticsConfig: true
};
The precache-config.js file configures the sw-precache-webpack-plugin using literal objects key-value pairs.
precache-config.js文件使用文字对象键值对配置sw-precache-webpack-plugin。
Angular as a front-end framework for building single page applications uses client-side URL routing and can, therefore, generate arbitrary URLs that are not cached by the auto-generated service worker. In such situations we'll define an HTML entry the requested URL will be mapped to, and navigateFallback handles that. The HTML entry should be able to provide the desired resources (Our app is a SPA, and index.html is the entry point. It can handle arbitrary URLs) and must be among the files selected to be cached in the staticFileGlobs array. navigateFallbackWhitelist can be empty or contains a regex that defines the type/pattern of URL that navigateFallback will be used for.
Angular作为构建单页面应用程序的前端框架,使用客户端URL路由,因此可以生成自动生成的服务工作者未缓存的任意URL。 在这种情况下,我们将定义一个将请求的URL映射到HTML条目, navigateFallback处理。 HTML条目应能够提供所需的资源(我们的应用程序是SPA,而index.html是入口点。它可以处理任意URL),并且必须位于选择要缓存在staticFileGlobs数组中的文件之中。 navigateFallbackWhitelist可以为空或包含一个正则表达式,该正则表达式定义了navigateFallback将用于的URL的类型/模式。
To get a deeper understanding of how to configure sw-precache-webpack-plugin , read the documentation.
要更深入地了解如何配置sw-precache-webpack-plugin ,请阅读文档 。

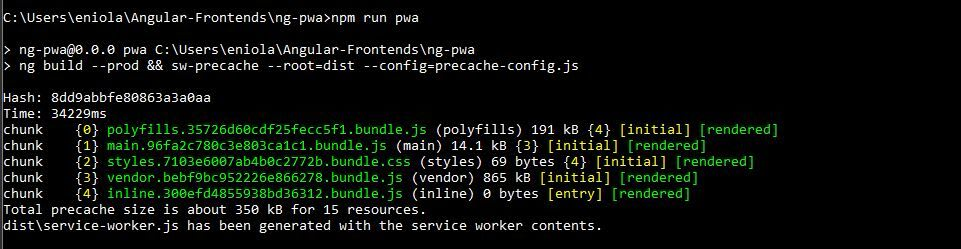
To finish the service worker setup, we will create a custom npm script/command that will be used to build our app and auto-generate the service worker file in the build folder. Go to the package.json file and add the following to scripts
要完成服务工作者的设置,我们将创建一个自定义的npm脚本/命令,该脚本/命令将用于构建我们的应用程序并自动生成build文件夹中的服务工作者文件。 转到package.json文件,并将以下内容添加到scripts
// package.json
 ...
 "scripts": {
    ...
    "pwa": "ng build --prod && sw-precache --root=dist --config=precache-config.js"
  },
 ...
##The View We only have a single view, since our primary focus is on the process of building progressive web apps with Angular.
##视图我们只有一个视图,因为我们的主要重点是使用Angular构建渐进式Web应用程序的过程。
<!-- src/app/app.component.html -->

<div class="container">
  <h1>
    A Progressive Web App Built with Angular.
  </h1>
  <img width="300" src="data:image/svg+xml;base64,PD94bWwgdmVyc2lvbj0iMS4wIiBlbmNvZGluZz0idXRmLTgiPz4NCjwhLS0gR2VuZXJhdG9yOiBBZG9iZSBJbGx1c3RyYXRvciAxOS4xLjAsIFNWRyBFeHBvcnQgUGx1Zy1JbiAuIFNWRyBWZXJzaW9uOiA2LjAwIEJ1aWxkIDApICAtLT4NCjxzdmcgdmVyc2lvbj0iMS4xIiBpZD0iTGF5ZXJfMSIgeG1sbnM9Imh0dHA6Ly93d3cudzMub3JnLzIwMDAvc3ZnIiB4bWxuczp4bGluaz0iaHR0cDovL3d3dy53My5vcmcvMTk5OS94bGluayIgeD0iMHB4IiB5PSIwcHgiDQoJIHZpZXdCb3g9IjAgMCAyNTAgMjUwIiBzdHlsZT0iZW5hYmxlLWJhY2tncm91bmQ6bmV3IDAgMCAyNTAgMjUwOyIgeG1sOnNwYWNlPSJwcmVzZXJ2ZSI+DQo8c3R5bGUgdHlwZT0idGV4dC9jc3MiPg0KCS5zdDB7ZmlsbDojREQwMDMxO30NCgkuc3Qxe2ZpbGw6I0MzMDAyRjt9DQoJLnN0MntmaWxsOiNGRkZGRkY7fQ0KPC9zdHlsZT4NCjxnPg0KCTxwb2x5Z29uIGNsYXNzPSJzdDAiIHBvaW50cz0iMTI1LDMwIDEyNSwzMCAxMjUsMzAgMzEuOSw2My4yIDQ2LjEsMTg2LjMgMTI1LDIzMCAxMjUsMjMwIDEyNSwyMzAgMjAzLjksMTg2LjMgMjE4LjEsNjMuMiAJIi8+DQoJPHBvbHlnb24gY2xhc3M9InN0MSIgcG9pbnRzPSIxMjUsMzAgMTI1LDUyLjIgMTI1LDUyLjEgMTI1LDE1My40IDEyNSwxNTMuNCAxMjUsMjMwIDEyNSwyMzAgMjAzLjksMTg2LjMgMjE4LjEsNjMuMiAxMjUsMzAgCSIvPg0KCTxwYXRoIGNsYXNzPSJzdDIiIGQ9Ik0xMjUsNTIuMUw2Ni44LDE4Mi42aDBoMjEuN2gwbDExLjctMjkuMmg0OS40bDExLjcsMjkuMmgwaDIxLjdoMEwxMjUsNTIuMUwxMjUsNTIuMUwxMjUsNTIuMUwxMjUsNTIuMQ0KCQlMMTI1LDUyLjF6IE0xNDIsMTM1LjRIMTA4bDE3LTQwLjlMMTQyLDEzNS40eiIvPg0KPC9nPg0KPC9zdmc+DQo=" alt="Angular logo">

  <h2>Get Started With Progressive Web Apps: </h2>
  <ul>
    <li>
      <h4><a target="_blank" rel="noopener" href="https://developers.google.com/web/fundamentals/primers/service-workers/">Service Workers</a></h4>
    </li>
    <li>
      <h4><a target="_blank" rel="noopener" href="https://developers.google.com/web/fundamentals/web-app-manifest/">Web App Manifest</a></h4>
    </li>
    <li>
      <h4><a target="_blank" rel="noopener" href="https://developers.google.com/web/fundamentals/codelabs/your-first-pwapp/">Code Lab (PWA)</a></h4>
    </li>
  </ul>

</div>
The rel="noopener attribute is essential in progressive web apps if the anchor element's target attribute is set to _blank for security and performance reasons. Read more.
在rel="noopener如果锚元素的属性是渐进的web应用程序必不可少 target属性设置为_blank安全和性能方面的原因。 了解更多 。
Below is the CSS code
下面是CSS代码
/* src/styles.css */

body{
    background-color: teal;
}

.container{
    text-align: center;
}

ul{
    list-style: none;
}

h1, h2, a {
    color: white;
}
##Hosting The service worker is the heart beat of any progressive web app. However for the service worker to work fine, our app must be served over a secure connection. Hence, we will be deploying our app to Firebase because, apps hosted on Firebase are served over a secure connection. You will be walked through the steps. However, if you want learn in details how to deploy Angular apps to Firebase, check out this article by Chris.
## Hosting服务工作者是任何渐进式Web应用程序的心脏。 但是,为了使服务人员能够正常工作,必须通过安全连接为我们的应用提供服务。 因此,我们将应用程序部署到Firebase,因为Firebase上托管的应用程序是通过安全连接提供的。 您将逐步完成这些步骤。 但是,如果您想详细了解如何将Angular应用程序部署到Firebase,请查看Chris的这篇文章 。

To get started, visit firebase.google.com. If you don't have an account already, create one to have access to the console. From the console, create a new Firebase project.
首先,请访问firebase.google.com 。 如果您还没有帐户,请创建一个帐户以访问控制台。 在控制台中,创建一个新的Firebase项目。

Once a new Firebase project has been created, go to the command terminal and navigate to your progressive web app folder. Run npm install -g firebase-tools to install firebase-tools globally. The firebase-tools package will allow us to test run and deploy apps to Firebase from the command terminal.
创建新的Firebase项目后,请转到命令终端,然后导航到您的渐进式Web应用程序文件夹。 运行npm install -g firebase-tools以全局安装firebase-tools。 firebase-tools软件包将使我们能够从命令终端测试运行并将应用程序部署到Firebase。
When the installation is complete, we need to build our app in preparation to deploy. To build our Angular app and auto-generate the service worker, run npm run pwa. This runs a custom script we created earlier, and makes our app production-ready.
安装完成后,我们需要构建我们的应用程序以准备部署。 要构建我们的Angular应用并自动生成服务工作者,请运行npm run pwa 。 这将运行我们之前创建的自定义脚本,并使我们的应用程序可以投入生产。
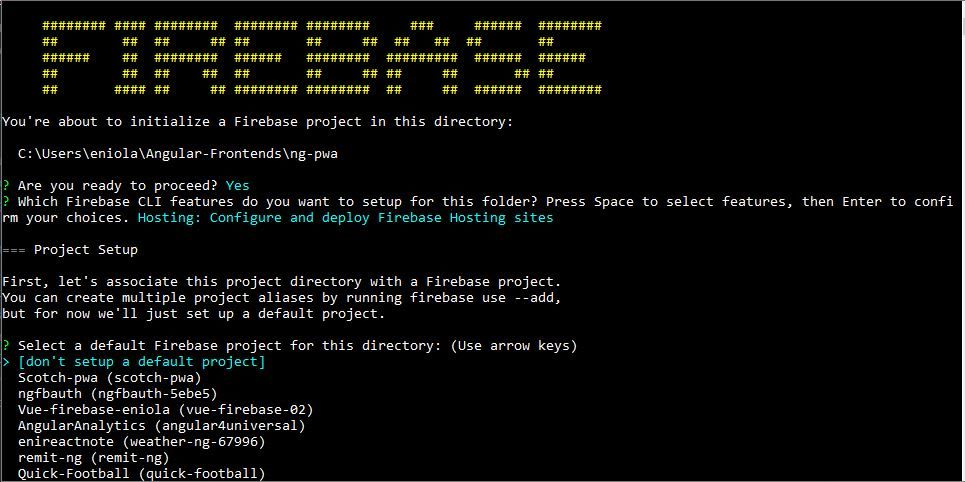
Time to introduce Firebase to our app. Run firebase login command to login to Firebase. Run firebase init command to initialize Firebase in the project. Then answer the questions as follows:
是时候将Firebase引入我们的应用程序了。 运行firebase login命令登录到Firebase。 运行firebase init命令以初始化项目中的Firebase。 然后回答以下问题:
- Are you ready to proceed? (Y/n) = Y 您准备好继续了吗? (Y / n)= Y
- Which Firebase CLI features do you want to setup for this folder? = Hosting 您要为此文件夹设置哪些Firebase CLI功能? = 托管
- Select a default Firebase project for this directory = Your-Firebase-Project-Name 选择此目录的默认Firebase项目= Your-Firebase-Project-Name
- What do you want to use as your public directory? = dist 您想使用什么作为公用目录? = 距离
- Configure as a single-page app (rewrite all urls to /index.html)? (y/N) = Y 配置为单页应用程序(将所有URL重写为/index.html)? (y / N)= Y
- File dist/index.html already exists. Overwrite? (y/N) = N 文件dist / index.html已经存在。 覆盖? (y / N)= N
Our app is ready to be deployed. Run firebase deploy to deploy the app to Firebase.
我们的应用程序已准备好进行部署。 运行firebase deploy将应用程序部署到Firebase。
Finally, run firebase open hosting: site to see our shiny new app in action.
最后,运行firebase open hosting: site以查看我们闪亮的新应用程序的运行情况。


##Lighthouse PWA Test Lighthouse is a Chrome extension made by Google. It can be used to test how compliant a progressive web app is to the progressive web app standard, in addition to other tests. The highest score is 100% and the PWA score for this app is 91% (There is room for improvement, obviously).
## Lighthouse PWA Test Lighthouse是Google的Chrome扩展程序。 除其他测试外,它还可用于测试渐进式Web应用程序与渐进式Web应用程序标准的兼容性。 最高分数是100%,此应用程序的PWA分数是91%(显然还有改进的余地)。

##Conclusion Progressive web apps are apps of the future because they provide users with an experience similar to that of native apps. However, PWAs are lighter and much more flexible. No doubt that Angular is one of the most popular front-end frameworks out there. Hopefully the relative ease of building progressive web apps with Angular as demonstrated in this article will encourage more Angular/front-end developers to make their apps progressive. Thank you.
##结论渐进式Web应用程序是未来的应用程序,因为它们为用户提供与本机应用程序相似的体验。 但是,PWA较轻且更加灵活。 毫无疑问,Angular是目前最流行的前端框架之一。 希望如本文所述,使用Angular构建渐进式Web应用程序相对容易,这将鼓励更多Angular /前端开发人员使他们的应用程序渐进。 谢谢。
翻译自: https://scotch.io/tutorials/how-to-build-progressive-web-apps-with-angular
angular 渐进


 1301
1301

 被折叠的 条评论
为什么被折叠?
被折叠的 条评论
为什么被折叠?
 到【灌水乐园】发言


