


Sometime ago I did a tutorial on How to Build a GraphQL Server with Apollo Server and AdonisJS.
前段时间,我做了一个有关如何使用Apollo Server和AdonisJS构建GraphQL Server的教程。

In this tutorial, I'll be showing how to build a blog that will make use of the GraphQL server built in that tutorial. We'll build the blog app using Apollo client and VueJS.
在本教程中,我将展示如何构建一个博客,该博客将使用该教程中内置的GraphQL服务器。 我们将使用Apollo客户端和VueJS构建博客应用。
You can grab the GraphQL server so you can follow along with the tutorial. If you followed along from the previous tutorial, you will also need to grab the code as I have made some few changes to suit this tutorial.
您可以使用GraphQL服务器,因此可以按照本教程进行操作。 如果您遵循上一教程,则还需要获取代码,因为我进行了一些更改以适合本教程。
启用CORS ( Enabling CORS )
The GraphQL server was built with AdonisJS. AdonisJS makes dealing with Cross-Origin Resource Sharing(CORS) a breeze, as it provide a package which we can use to handle CORS on our API. By default CORS is turned off on AdonisJS, so we need to enable it. To enable CORS on AdonisJS app, we simply set origin to true in config/cors.js as below:
GraphQL服务器是使用AdonisJS构建的。 AdonisJS使跨源资源共享(CORS)的处理变得轻而易举,因为它提供了一个可用于处理API上的CORS的程序包。 默认情况下,在AdonisJS上CORS是关闭的,因此我们需要启用它。 要在AdonisJS应用上启用CORS,我们只需在config/cors.js中将origin设置为true config/cors.js ,如下所示:
// config/cors.js

// allow current request origin
origin: true
Though the cloned GraphQL server has CORS already enabled, but it's worth mentioning it.
尽管克隆的GraphQL服务器已经启用了CORS,但是值得一提。
启动GraphQL服务器 ( Starting the GraphQL Server )
Since our blog app will be making use of the GraphQL server, we'll need to start the server and keep it running for the rest of the tutorial. To do start, we'll cd into the GraphQL server project (the one cloned from above) directory and run the command below:
由于我们的博客应用将使用GraphQL服务器,因此在本教程的其余部分中,我们将需要启动服务器并使它保持运行状态。 首先,我们将进入GraphQL服务器项目(从上面克隆的那个)目录,并运行以下命令:
adonis serve --devThis will start the GraphQL server and keep it running.
这将启动GraphQL服务器并保持其运行。

The rest of the tutorial assumes you already started the GraphQL server and it is running.
本教程的其余部分假定您已经启动了GraphQL服务器并正在运行。
With that taken care of, let's start building our blog app.
处理完之后,让我们开始构建我们的博客应用程序。
创建一个Vue应用 ( Create a Vue App )
We'll start by creating a new Vue app using the Vue CLI:
我们将从使用Vue CLI创建新的Vue应用开始:
vue init webpack graphql-blog-app
//select `Y` to use Vue router
This will create a new Vue app with the name graphql-blog-app and install it dependencies.
这将创建一个名为graphql-blog-app的新Vue graphql-blog-app并安装其依赖项。
安装必要的软件包 ( Installing Necessary Packages )
With the app created, we can move on to installing the necessary packages for building our GraphQL blog app:
创建应用程序后,我们可以继续安装必要的软件包以构建GraphQL博客应用程序:
cd graphql-blog-app
npm install --save vue-apollo@next graphql apollo-client apollo-link apollo-link-context apollo-link-http apollo-cache-inmemory graphql-tag
Let's quickly go over each package:
让我们快速浏览每个软件包:
- vue-apollo: An Apollo/GraphQL integration for VueJS. We install the latest version of the plugin which allows us to use all the great features that comes with Apollo client 2.0. VUE - 阿波罗:阿波罗/ GraphQL集成VueJS。 我们安装了该插件的最新版本,使我们能够使用Apollo client 2.0随附的所有出色功能。
- graphql: A reference implementation of GraphQL for JavaScript. graphql: GraphQL for JavaScript的参考实现。
- apollo-client: A fully-featured, production ready caching GraphQL client for every server or UI framework. 阿波罗 - 客户端:一个全功能的,生产就绪的缓存GraphQL客户为每个服务器或UI框架。
- apollo-link: A standard interface for modifying control flow of GraphQL requests and fetching GraphQL results. 阿波罗 - 链路:一个标准的接口,用于修改GraphQL请求的控制流和提取GraphQL结果。
- apollo-link-context: Used to easily set a context on your operation, which is used by other links further down the chain. apollo- 链接 - 上下文:用于轻松地在您的操作上设置一个上下文,供链中其他链接使用。
- apollo-link-http: Used to get GraphQL results over a network using HTTP fetch. 阿波罗 - 链接 - HTTP:用于使用HTTP获取在网络上得到GraphQL结果。
- apollo-cache-inmemory: Cache implementation for Apollo Client 2.0. apollo- 缓存 - 内存 : Apollo Client 2.0的缓存实现。
- graphql-tag: A JavaScript template literal tag that parses GraphQL queries. graphql- 标签:解析GraphQL查询JavaScript模板文字标签。
设置Vue Apollo ( Setting Up Vue Apollo )
Next, let's put the packages to use. We'll start by creating an ApolloClient instance and install the VueApollo plugin. Open src/main.js and add the code below to it:
接下来,让我们使用这些软件包。 我们将从创建ApolloClient实例开始,然后安装VueApollo插件。 打开src/main.js并将以下代码添加到其中:
// src/main.js

import { ApolloClient } from 'apollo-client'
import { HttpLink } from 'apollo-link-http'
import { InMemoryCache } from 'apollo-cache-inmemory'
import VueApollo from 'vue-apollo'

const httpLink = new HttpLink({
    // URL to graphql server, you should use an absolute URL here
    uri: 'http://localhost:3333/graphql'
})

// create the apollo client
const apolloClient = new ApolloClient({
    link: httpLink,
    cache: new InMemoryCache()
})

// install the vue plugin
Vue.use(VueApollo)
We create a new instance of httpLink with the URL (mine is http://localhost:3333/graphql) of our GraphQL server. Then we create an Apollo client using the httpLink created above and specify we want an in memory cache. Lastly, we install the Vue Apollo plugin.
我们用GraphQL服务器的URL(我的httpLink是http://localhost:3333/graphql )创建一个httpLink的新实例。 然后,我们使用httpLink创建的httpLink创建一个Apollo客户端,并指定我们想要一个内存缓存。 最后,我们安装Vue Apollo插件。
Next, let's create a apolloProvider object which we'll specify on our root component:
接下来,让我们创建一个apolloProvider对象,该对象将在根组件上指定:
// src/main.js

const apolloProvider = new VueApollo({
  defaultClient: apolloClient
})

// update Vue instance by adding `apolloProvider`
new Vue({
    el: '#app',
    router,
    apolloProvider,
    template: '<App/>',
    components: { App }
})
We create a new instance of the Vue Apollo plugin using the apolloClient created as our default client. Lastly, we make use of the apolloProvider object by adding it in our Vue instance, same way we would use Vue router.
我们使用作为默认客户端创建的apolloClient创建Vue Apollo插件的新实例。 最后,我们通过将apolloProvider对象添加到我们的Vue实例中来使用它,就像使用Vue路由器一样。
加布尔玛 ( Adding Bulma )
For the purpose of this tutorial, we'll be using Bulma CSS. So, let's add it in. Open index.html and update as below:
就本教程而言,我们将使用Bulma CSS。 因此,让我们添加它。打开index.html并按如下所示进行更新:
// index.html<!DOCTYPE html>
<html>
<head>
    <meta charset="utf-8">
    <meta name="viewport" content="width=device-width,initial-scale=1.0">
    <title>GraphQL Blog App</title>
    <link rel="stylesheet" href="https://cdnjs.cloudflare.com/ajax/libs/bulma/0.6.1/css/bulma.min.css">
</head>
<body>
    <div id="app"></div>
    <!-- built files will be auto injected -->
</body>
</html>
We reference Bulma on CDN.
我们在CDN上引用布尔玛。
删除未使用的代码 ( Removing Unused Code )
There are some files and code that came along when we created our Vue app which we won't be using in this tutorial. Let's remove them so they won't interfere with our app. Delete the Hello component and remove all it references from src/router/index.js.
创建Vue应用程序时会附带一些文件和代码,本教程中将不使用它们。 让我们删除它们,以免它们干扰我们的应用程序。 删除Hello组件,并从src/router/index.js删除其所有引用。
添加主版面 ( Adding Master Layout )
The blog will use a generic layout across it pages. In that case, let's define a layout that all pages will use. To do this, open src/App.vue and update as below:
该博客将在其各个页面上使用通用布局。 在这种情况下,让我们定义所有页面都将使用的布局。 为此,请打开src/App.vue并进行如下更新:
// src/App.vue<template>
    <div id="app">
        <nav class="navbar is-primary" role="navigation" aria-label="main navigation">
            <div class="container">
                <div class="navbar-brand">
                    <router-link class="navbar-item" to="/">Blog App</router-link>

                    <button class="button navbar-burger">
                        <span></span>
                        <span></span>
                        <span></span>
                    </button>
                </div>
            </div>
        </nav>
        <router-view/>
    </div>
</template>

<script>
export default {
    name: 'app'
}
</script>
We add a header that all pages will use.
我们添加所有页面都将使用的标题。
用户注册 ( User Signup )
Users should be able to signup to our blog app. We'll create a SignUp component that will handle that. So, within src/components create a new Admin folder. All admin related components will be created insider this folder.
用户应该能够注册到我们的博客应用程序。 我们将创建一个SignUp组件来处理这个问题。 因此,在src/components创建一个新的Admin文件夹。 所有与管理员相关的组件都将在此文件夹内创建。
Before we create the SignUp component, let's create a dedicated file that will hold all our GraphQL queries and mutations. We'll create this file directly inside src. Create a graphql.js file inside src and paste the code below into it:
在创建SignUp组件之前,让我们创建一个专用文件,该文件将保存我们所有的GraphQL查询和变异。 我们将直接在src内部创建此文件。 在src内创建一个graphql.js文件,并将以下代码粘贴到其中:
// src/graphql.js

import gql from 'graphql-tag'

export const SIGNUP_MUTATION = gql`mutation SignupMutation($username: String!, $email: String!, $password: String!) {
        createUser(
            username: $username,
            email: $email,
            password: $password
        ) {
            id
            username
            email
        }
    }`
This is the GraphQL mutation that will handle creating new user on our GraphQL server. It takes the username, email and password of a user. These variables will be passed from the SignUp component.
这是GraphQL突变,将处理在GraphQL服务器上创建新用户的过程。 它需要用户的用户名,电子邮件和密码。 这些变量将从SignUp组件传递。
Next, let's create the SignUp component. Within the Admin folder, create a SignUp.vue file and paste the code below into it:
接下来,让我们创建SignUp组件。 在Admin文件夹中,创建一个SignUp.vue文件,并将以下代码粘贴到其中:
// src/components/Admin/SignUp.vue

<template>
    <section class="section">
        <div class="columns">
            <div class="column is-4 is-offset-4">
                <h2 class="title has-text-centered">Signup</h2>

                <form method="POST" @submit.prevent="signup">
                    <div class="field">
                        <label class="label">Username</label>

                        <p class="control">
                            <input
                                type="text"
                                class="input"
                                v-model="username">
                        </p>
                    </div>

                    <div class="field">
                        <label class="label">E-Mail Address</label>

                        <p class="control">
                            <input
                                type="email"
                                class="input"
                                v-model="email">
                        </p>
                    </div>

                    <div class="field">
                        <label class="label">Password</label>

                        <p class="control">
                            <input
                                type="password"
                                class="input"
                                v-model="password">
                        </p>
                    </div>

                    <p class="control">
                        <button class="button is-primary is-fullwidth is-uppercase">SignUp</button>
                    </p>
                </form>
            </div>
        </div>
    </section>
</template>

<script>
import { SIGNUP_MUTATION } from '@/graphql'

export default {
    name: 'SignUp',
    data () {
        return {
            username: '',
            email: '',
            password: ''
        }
    },
    methods: {
        signup () {
            this.$apollo
                .mutate({
                    mutation: SIGNUP_MUTATION,
                    variables: {
                        username: this.username,
                        email: this.email,
                        password: this.password
                    }
                })
                .then(response => {
                    // redirect to login page
                    this.$router.replace('/login')
                })
            }
        }
    }
</script>
This component renders a simple form for users to signup. Once the form is submitted, a signup method is called. Within the signup method, we make use of mutate method avaiable on this.$apollo (from the Vue Apollo plugin). We use the SIGNUP_MUTATION mutation created earlier and pass along the necessary variables. Once the signup process is successful (that is, the user has been created), we redirect the user to login page (which we'll create shortly).
该组件为用户提供了一个简单的表单来进行注册。 提交表单后,将调用signup方法。 在signup方法中,我们利用了this.$apollo上可用的mutate方法(来自Vue Apollo插件)。 我们使用SIGNUP_MUTATION创建的SIGNUP_MUTATION突变,并传递必要的变量。 一旦注册过程成功(即,已经创建了用户),我们会将用户重定向到登录页面(稍后将创建)。
添加注册路线 ( Adding Signup Route )
Open src/router/index.js, and add the code below to it:
打开src/router/index.js ,并添加以下代码:
// src/router/index.js
import SignUp from '@/components/Admin/SignUp'
// add these inside the `routes` array
{
path: '/signup',
name: 'SignUp',
component: SignUp
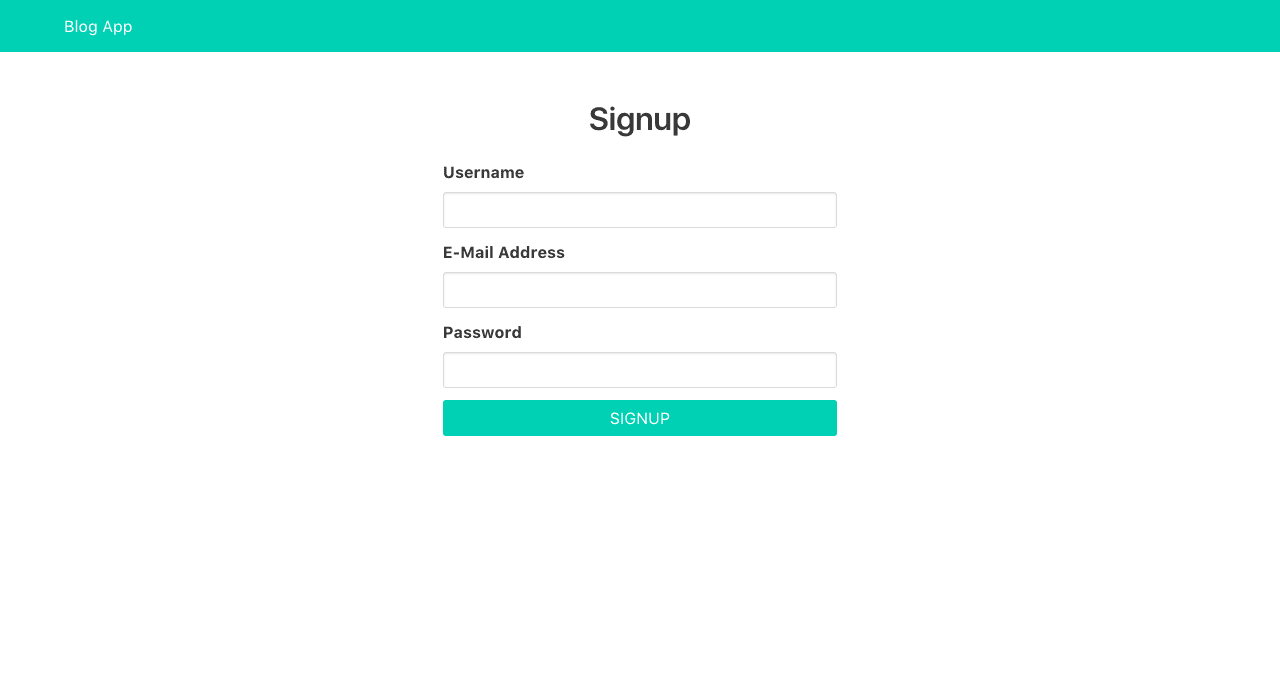
},Now when we visit the /signup route, we should see our signup form as in the image below:
现在,当我们访问/signup路线时,我们应该看到如下图所示的注册表单:
用户登录 ( User Login )
Let's add ability for users to login. Just as we did with user signup, let's first create the GraphQL mutation. Add the code below to src/graphql.js:
让我们为用户添加登录功能。 就像我们进行用户注册一样,我们首先创建GraphQL突变。 将以下代码添加到src/graphql.js :
// src/graphql.js

export const LOGIN_MUTATION = gql`mutation LoginMutation($email: String!, $password: String!) {
        login(
            email: $email,
            password: $password
        )
    }`
This is the GraphQL mutation handles user login to our GraphQL server. It takes the email and password of a user.
这是GraphQL突变处理用户登录到我们的GraphQL服务器的过程。 它需要用户的电子邮件和密码。
Next, within the Admin folder, create a LogIn.vue file and paste the code below into it:
接下来,在Admin文件夹中,创建一个LogIn.vue文件,并将以下代码粘贴到其中:
// src/components/Admin/LogIn.vue

<template>
    <section class="section">
        <div class="columns">
            <div class="column is-4 is-offset-4">
                <h2 class="title has-text-centered">Login</h2>

                <form method="POST" @submit.prevent="login">
                    <div class="field">
                        <label class="label">E-Mail Address</label>

                        <p class="control">
                            <input
                                type="email"
                                class="input"
                                v-model="email">
                        </p>
                    </div>

                    <div class="field">
                        <label class="label">Password</label>

                        <p class="control">
                            <input
                                type="password"
                                class="input"
                                v-model="password">
                        </p>
                    </div>

                    <p class="control">
                        <button class="button is-primary is-fullwidth is-uppercase">Login</button>
                    </p>
                </form>
            </div>
        </div>
    </section>
</template>

<script>
import { LOGIN_MUTATION } from '@/graphql'

export default {
    name: 'LogIn',
    data () {
        return {
            email: '',
            password: ''
        }
    },
    methods: {
        login () {
            this.$apollo
                .mutate({
                    mutation: LOGIN_MUTATION,
                    variables: {
                        email: this.email,
                        password: this.password
                    }
                })
                .then(response => {
                    // save user token to localstorage
                    localStorage.setItem('blog-app-token', response.data.login)

                    // redirect user
                    this.$router.replace('/admin/posts')
                })
        }
    }
}
</script>
This component renders a simple form for users to login. Once the form is submitted, a login method is called. Within the login method, we make use of mutate method. We use the LOGIN_MUTATION mutation created earlier and pass along the necessary variables. Once the login process is successful, we save the token gotten from our GraphQL server to localstorage and redirect the user.
该组件为用户提供了一个简单的表单来登录。 提交表单后,将调用login方法。 在login方法中,我们使用了mutate方法。 我们使用LOGIN_MUTATION创建的LOGIN_MUTATION突变,并传递必要的变量。 登录过程成功后,我们将从GraphQL服务器获取的令牌保存到本地存储并重定向用户。
添加登录路径 ( Adding Login Route )
Open src/router/index.js, and add the code below to it:
打开src/router/index.js ,并添加以下代码:
// src/router/index.js
import LogIn from '@/components/Admin/LogIn'
// add these inside the `routes` array
{
path: '/login',
name: 'LogIn',
component: LogIn
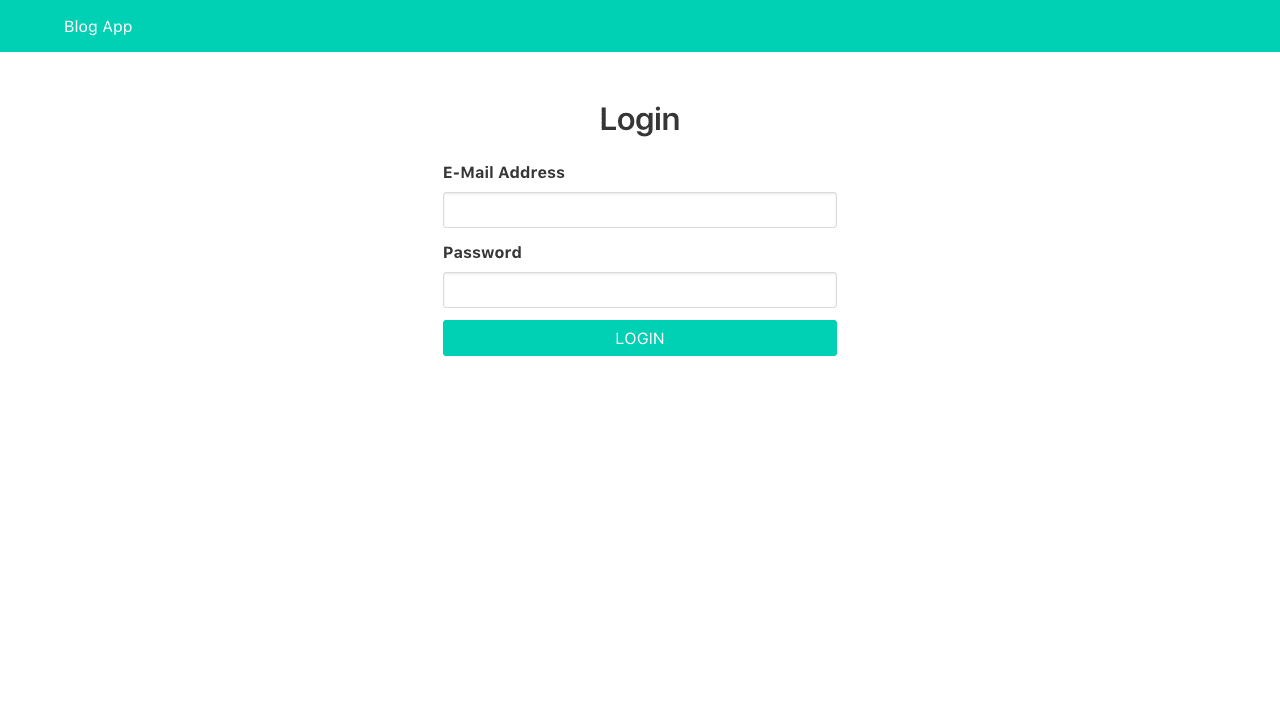
},Now when we visit the /login route, we should see our login form as in the image below:
现在,当我们访问/login路由时,我们应该看到如下图所示的登录表单:
创建菜单组件 ( Creating Menu Component )
Before we start fleshing out the admin-ish part of our blog, let's create a Menu component which will server as the sidebar navigational menu. Within the Admin folder, create a Menu.vue file and paste the code below into it:
在开始充实博客的管理部分之前,让我们创建一个Menu组件,它将作为边栏导航菜单用作服务器。 在Admin文件夹中,创建一个Menu.vue文件,并将以下代码粘贴到其中:
// src/components/Admin/Menu.vue<template>
    <aside class="menu">
        <p class="menu-label">Post</p>
        <ul class="menu-list">
            <li>
            <router-link to="/admin/posts/new">New Post</router-link>
            </li>
            <li>
            <router-link to="/admin/posts">Posts</router-link>
            </li>
        </ul>
        <p class="menu-label">User</p>
        <ul class="menu-list">
            <li>
                <router-link to="/admin/users">Users</router-link>
            </li>
        </ul>
    </aside>
</template>
This simply renders links to some admin sections of out blog app.
这只是呈现到博客应用程序某些管理部分的链接。
显示用户 ( Displaying Users )
On the admin section, we want to be able to see list users that has been created. For that, we'll created a Users component. But first, let's write the GraphQL query that will fetch all users created. Add the code below to src/graphql.js:
在管理部分,我们希望能够看到已创建的用户列表。 为此,我们将创建一个Users组件。 但是首先,让我们编写GraphQL查询,该查询将获取所有创建的用户。 将以下代码添加到src/graphql.js :
// src/graphql.js

export const ALL_USERS_QUERY = gql`query AllUsersQuery {
        allUsers {
            id
            username
            email
        }
    }`
This GraphQL query fetches all users from our GraphQL server.
此GraphQL查询从我们的GraphQL服务器获取所有用户。
Next, let's create the Users component. Within the Admin folder, create a Users.vue file and paste the code below into it:
接下来,让我们创建“ Users组件。 在Admin文件夹中,创建一个Users.vue文件并将以下代码粘贴到其中:
// src/components/Admin/Users.vue

<template>
    <section class="section">
        <div class="container">
            <div class="columns">
                <div class="column is-3">
                    <Menu/>
                </div>
                <div class="column is-9">
                    <h2 class="title">Users</h2>

                    <table class="table is-striped is-narrow is-hoverable is-fullwidth">
                        <thead>
                            <tr>
                                <th>Username</th>
                                <th>Email</th>
                                <th></th>
                            </tr>
                        </thead>
                        <tbody>
                            <tr
                                v-for="user in allUsers"
                                :key="user.id">
                                    <td>{{ user.username }}</td>
                                    <td>{{ user.email }}</td>
                                    <td>
                                        <router-link :to="`/admin/users/${user.id}`">View</router-link>
                                    </td>
                            </tr>
                        </tbody>
                    </table>
                </div>
            </div>
        </div>
    </section>
</template>

<script>
import Menu from '@/components/Admin/Menu'
import { ALL_USERS_QUERY } from '@/graphql'

export default {
    name: 'Users',
    components: {
        Menu
    },
    data () {
        return {
            allUsers: []
        }
    },
    apollo: {
        // fetch all users
        allUsers: {
            query: ALL_USERS_QUERY
        }
    }
}
</script>
We make use of the Menu component created earlier. Then we define our data which will be populated once the data is gotten from our GraphQL server. Within the apollo object, we add our GraphQL query to fetch all users. This makes use of the ALL_USERS_QUERY we created above. It is important to note that, the name of our data (allUsers in this case) must be the same name used in our GraphQL query (allUsers in this case). Once allUsers is populated with data from our GraphQL server, we display the users in a table by looping through the array of users. We also add a link to view each user details.
我们利用之前创建的Menu组件。 然后,我们定义我们的数据,一旦从GraphQL服务器获取数据,这些数据将被填充。 在apollo对象中,我们添加了GraphQL查询以获取所有用户。 这利用了我们在上面创建的ALL_USERS_QUERY 。 重要的是要注意,我们的数据名称(在这种情况下为allUsers )必须与在GraphQL查询中使用的名字(在本例中为allUsers )相同。 一旦allUsers会填充我们的GraphQL服务器的数据,我们通过用户的阵列循环在表中显示的用户。 我们还添加了一个链接,以查看每个用户的详细信息。
添加用户路线 ( Adding Users Route )
Open src/router/index.js, and add the code below to it:
打开src/router/index.js ,并添加以下代码:
// src/router/index.js
import Users from '@/components/Admin/Users'
// add these inside the `routes` array
{
path: '/admin/users',
name: 'Users',
component: Users
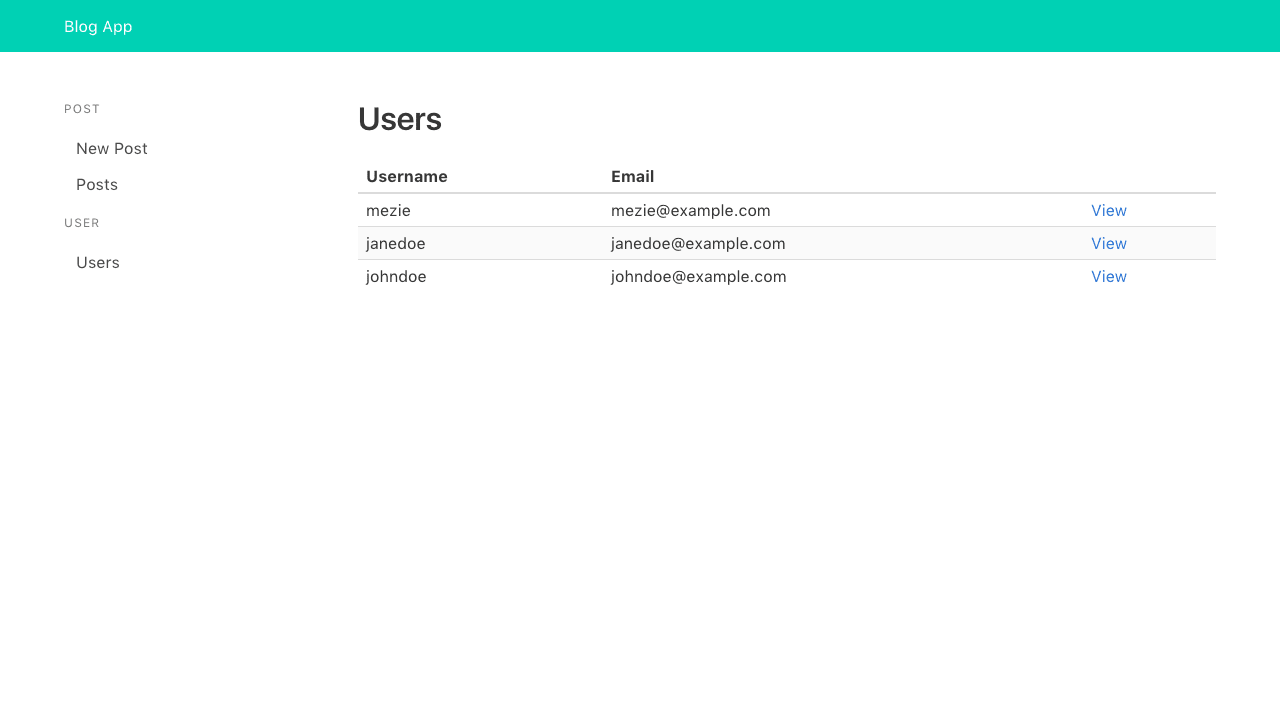
},Now when we visit the /admin/users route, we should see a list of users as in the image below:
现在,当我们访问/admin/users路由时,我们应该看到用户列表,如下图所示:
查看用户详细信息 ( Viewing User Details )
In the last section, we add a link to view user details. Now, let's implement it. Add the code below to src/graphql.js:
在上一节中,我们添加了一个链接以查看用户详细信息。 现在,让我们实现它。 将以下代码添加到src/graphql.js :
// src/graphql.js

export const USER_QUERY = gql`query UserQuery($id: Int!) {
        user(id: $id) {
            id
            username
            email
            posts {
                id
            }
        }
    }`
This GraphQL query fetches a user by it ID from our GraphQL server. It takes the ID of the user as an argument. The user ID will be passed from the UserDetails component.
此GraphQL查询通过其GraphQL服务器的ID获取用户。 它以用户的ID作为参数。 用户ID将通过UserDetails组件传递。
Next, let's create the UserDetails component. Within the Admin folder, create a UserDetails.vue file and paste the code below into it:
接下来,让我们创建UserDetails组件。 在Admin文件夹中,创建一个UserDetails.vue文件,并将以下代码粘贴到其中:
// src/components/Admin/UserDetails.vue

<template>
    <section class="section">
        <div class="container">
            <div class="columns">
                <div class="column is-3">
                    <Menu/>
                </div>
                <div class="column is-9">
                    <h2 class="title">User Details</h2>

                    <div class="field is-horizontal">
                        <div class="field-label is-normal">
                            <label class="label">Username</label>
                        </div>
                        <div class="field-body">
                            <div class="field">
                                <p class="control">
                                    <input class="input is-static" :value="user.username" readonly>
                                </p>
                            </div>
                        </div>
                    </div>

                    <div class="field is-horizontal">
                        <div class="field-label is-normal">
                            <label class="label">Email Address</label>
                        </div>
                        <div class="field-body">
                            <div class="field">
                                <p class="control">
                                    <input class="input is-static" :value="user.email" readonly>
                                </p>
                            </div>
                        </div>
                    </div>

                    <div class="field is-horizontal">
                        <div class="field-label is-normal">
                            <label class="label">Number of posts</label>
                        </div>
                        <div class="field-body">
                            <div class="field">
                                <p class="control">
                                    <input class="input is-static" :value="user.posts.length" readonly>
                                </p>
                            </div>
                        </div>
                    </div>
                </div>
            </div>
        </div>
    </section>
</template>

<script>
import Menu from '@/components/Admin/Menu'
import { USER_QUERY } from '@/graphql'

export default {
    name: 'UserDetails',
    components: {
        Menu
    },
    data () {
        return {
            user: '',
            id: this.$route.params.id
        }
    },
    apollo: {
        // fetch user by ID
        user: {
            query: USER_QUERY,
            variables () {
                return {
                    id: this.id
                }
            }
        }
    }
}
</script>
We display the specified user's username, email and number of posts created. The USER_QUERY accept the ID of the user we want to view his/her details. The user ID is gotten from the route params. That is, given /admin/users/12, 12 is the ID of a particular user. We need a way to pass this ID to our query. To do this, we make use of reactive parameter by defining a variables function that returns an object containing the user ID.
我们显示指定用户的用户名,电子邮件和创建的帖子数。 USER_QUERY接受我们要查看其详细信息的用户的ID。 用户ID是从路由参数中获取的。 也就是说,给定/admin/users/12 12,12是特定用户的ID。 我们需要一种将该ID传递给查询的方法。 为此,我们通过定义一个variables函数来使用React性参数 ,该函数返回一个包含用户ID的对象。
添加用户详细信息路由 ( Adding User Details Route )
Open src/router/index.js, and add the code below to it. This route should be below all the previous routes:
打开src/router/index.js ,并将下面的代码添加到其中。 此路由应位于所有先前的路由之下:
// src/router/index.js

import UserDetails from '@/components/Admin/UserDetails'

// add these inside the `routes` array
{
    path: '/admin/users/:id',
    name: 'UserDetails',
    component: UserDetails,
    props: true
},
We should be able to view a particular user detail now:
我们现在应该能够查看特定的用户详细信息:

授权用户 ( Authorizing User )
Only authenticated users can add new post. So, we need a way to pass an Authorization header with the user token along with the request to add new post which will signify the user can actually add new post. With apollo-link-context, we can easily do this. Open src/main.js and add the code below to it:
只有经过身份验证的用户才能添加新帖子。 因此,我们需要一种传递带有用户令牌的Authorization标头以及添加新帖子的请求的方法,这将表明用户实际上可以添加新帖子。 使用apollo-link-context ,我们可以轻松地做到这一点。 打开src/main.js并将以下代码添加到其中:
// src/main.js

import { setContext } from 'apollo-link-context'

const authLink = setContext((_, { headers }) => {
    // get the authentication token from localstorage if it exists
    const token = localStorage.getItem('blog-app-token')

    // return the headers to the context so httpLink can read them
    return {
        headers: {
            ...headers,
            authorization: token ? `Bearer ${token}` : null
        }
    }
})

// update apollo client as below
const apolloClient = new ApolloClient({
  link: authLink.concat(httpLink),
  cache: new InMemoryCache()
})
First, we import apollo-link-context. Then we make use of it to create an authLink that gets the user token from local storage and return the headers which contains the Authorization header. Lastly, we make use of the authLink in our Apollo client.
首先,我们导入apollo-link-context 。 然后,我们利用它来创建一个authLink ,该authLink从本地存储中获取用户令牌并返回包含Authorization标头的标头。 最后,我们在Apollo客户端中使用authLink 。
Now an Authorization header will be sent along with all requests made to our GraphQL server.
现在,授权标头将与对我们的GraphQL服务器的所有请求一起发送。
添加新帖子 ( Adding New Post )
Posts are the heart of any blog. Users should be able to add new post. Again, we'll first create the GraphQL mutation for add new post to our blog. Add the code below to src/graphql.js:
帖子是任何博客的核心。 用户应该可以添加新帖子。 同样,我们将首先创建GraphQL突变,以将新帖子添加到我们的博客中。 将以下代码添加到src/graphql.js :
// src/graphql.js

export const ADD_POST_MUTATION = gql`mutation AddPostMutation($title: String!, $content: String!) {
        addPost(
            title: $title,
            content: $content
        ) {
            id
            slug
            title
            content
            user {
                id
                username
                email
            }
        }
    }`
This mutation takes the title and content of a post we want to add to our GraphQL server.
这种变异采用了我们要添加到GraphQL服务器中的帖子的标题和内容。
Next, create a AddPost component within the Admin folder and paste the code below into it:
接下来,在Admin文件夹中创建一个AddPost组件,并将以下代码粘贴到其中:
// src/components/Admin/AddPost.vue

<template>
    <section class="section">
        <div class="container">
            <div class="columns">
                <div class="column is-3">
                    <Menu/>
                </div>
                <div class="column is-9">
                    <h2 class="title">Add Post</h2>

                    <form method="post" @submit.prevent="addPost">
                        <div class="field">
                            <label class="label">Title</label>

                            <p class="control">
                                <input
                                    class="input"
                                    v-model="title"
                                    placeholder="Post title">
                            </p>
                        </div>

                        <div class="field">
                            <label class="label">Content</label>

                            <p class="control">
                                <textarea
                                    class="textarea"
                                    rows="10"
                                    v-model="content"
                                    placeholder="Post content"
                                    ></textarea>
                            </p>
                        </div>

                        <p class="control">
                            <button class="button is-primary">Add Post</button>
                        </p>
                    </form>
                </div>
            </div>
        </div>
    </section>
</template>

<script>
import Menu from '@/components/Admin/Menu'
import { ADD_POST_MUTATION, ALL_POSTS_QUERY } from '@/graphql'

export default {
    name: 'AddPost',
    components: {
        Menu
    },
    data () {
        return {
            title: '',
            content: ''
        }
    },
    methods: {
        addPost () {
            this.$apollo
                .mutate({
                    mutation: ADD_POST_MUTATION,
                    variables: {
                        title: this.title,
                        content: this.content
                    },
                    update: (store, { data: { addPost } }) => {
                        // read data from cache for this query
                        const data = store.readQuery({ query: ALL_POSTS_QUERY })

                        // add new post from the mutation to existing posts
                        data.allPosts.push(addPost)

                        // write data back to the cache
                        store.writeQuery({ query: ALL_POSTS_QUERY, data })
                    }
                })
                .then(response => {
                    // redirect to all posts
                    this.$router.replace('/admin/posts')
                })
        }
    }
}
</script>
This component renders a form for adding new post. It uses the ADD_POST_MUTATION passing to it the necessary variables. Since Apollo client caches (in memory in our case) it queries, we need a way to update the cache whenever we perform mutation actions. Notice there is an update function which we use to update the store by adding the newly added post to cache. First, we fetch the data from cache matching our query (ALL_POSTS_QUERY), then we add the new post to the allPosts array. Lastly, we write the new data back to cache. Once the post is successfully added, we redirect to the list of posts (which we'll create shortly).
该组件呈现用于添加新帖子的表单。 它使用ADD_POST_MUTATION传递给它必要的变量。 由于Apollo客户端会查询缓存(在我们的示例中为内存),因此我们需要一种在执行变异操作时更新缓存的方法。 请注意,有一个update功能,我们通过将新添加的帖子添加到缓存来更新商店。 首先,我们从与查询( ALL_POSTS_QUERY )相匹配的缓存中获取数据,然后将新帖子添加到allPosts数组中。 最后,我们将新数据写回到缓存中。 成功添加帖子后,我们将重定向到帖子列表(稍后将创建)。
添加添加发布路线 ( Adding Add Post Route )
Open src/router/index.js, and add the code below to it:
打开src/router/index.js ,并添加以下代码:
// src/router/index.js
import AddPost from '@/components/Admin/AddPost'
// add these inside the `routes` array
{
path: '/admin/posts/new',
name: 'AddPost',
component: AddPost
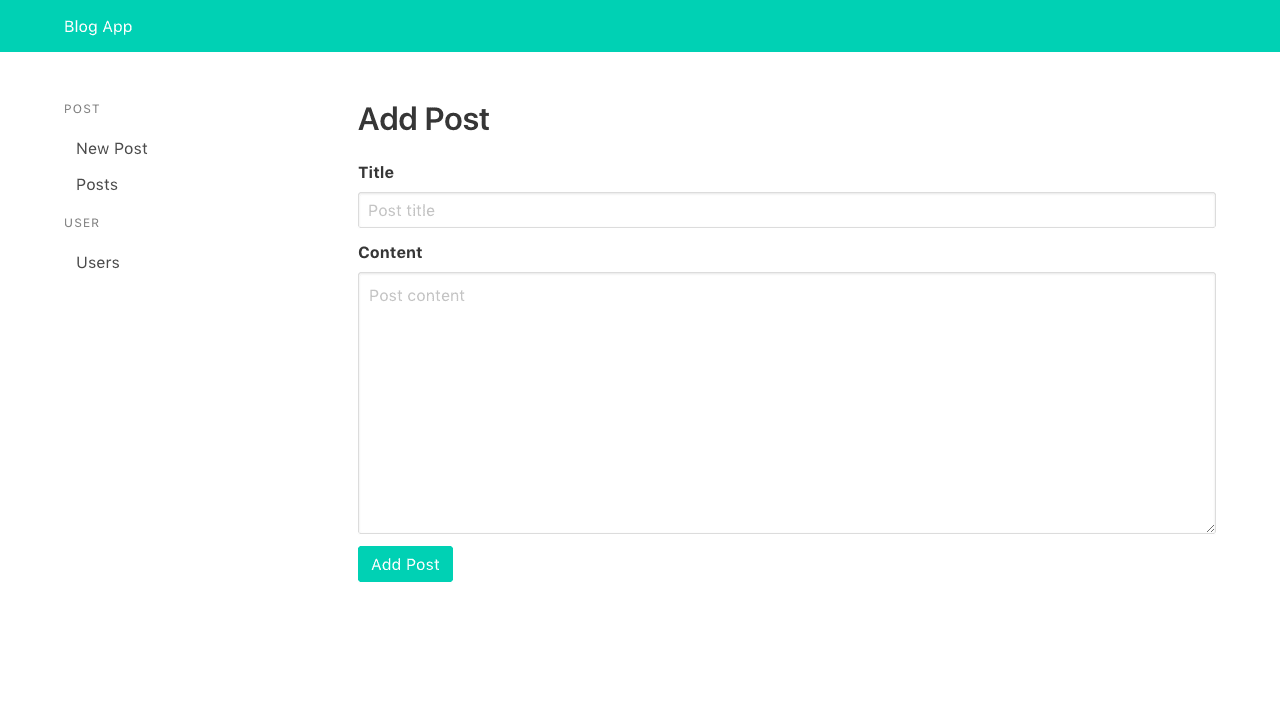
}Users should be able to add new post now:
用户应该现在可以添加新帖子:
显示帖子 ( Displaying Posts )
We'll first create the GraphQL query by adding the code below to src/graphql.js:
首先,通过将以下代码添加到src/graphql.js来创建GraphQL查询:
// src/graphql.js

export const ALL_POSTS_QUERY = gql`query AllPostsQuery {
        allPosts {
            id
            title
            slug
            user {
                username
            }
        }
    }`
This GraphQL query fetches all posts from our GraphQL server.
此GraphQL查询从我们的GraphQL服务器获取所有帖子。
Next, create a Posts component within the Admin folder and paste the code below into it:
接下来,在Admin文件夹中创建一个Posts组件,并将下面的代码粘贴到其中:
// src/components/Admin/Posts.vue

<template>
    <section class="section">
        <div class="container">
            <div class="columns">
                <div class="column is-3">
                    <Menu/>
                </div>
                <div class="column is-9">
                    <h2 class="title">Posts</h2>

                    <table class="table is-striped is-narrow is-hoverable is-fullwidth">
                        <thead>
                            <tr>
                                <th>title</th>
                                <th>User</th>
                                <th></th>
                                </tr>
                        </thead>
                        <tbody>
                            <tr
                                v-for="post in allPosts"
                                :key="post.id">
                                    <td>{{ post.title }}</td>
                                    <td>{{ post.user.username }}</td>
                            </tr>
                        </tbody>
                    </table>
                </div>
            </div>
        </div>
    </section>
</template>

<script>
import Menu from '@/components/Admin/Menu'
import { ALL_POSTS_QUERY } from '@/graphql'

export default {
    name: 'Posts',
    components: {
        Menu
    },
    data () {
        return {
            allPosts: []
        }
    },
    apollo: {
        // fetch all posts
        allPosts: {
            query: ALL_POSTS_QUERY
        }
    }
}
</script>
We make use of the Menu component created earlier. Then we define our data which will be populated once the data is gotten from our GraphQL server. Within the apollo object, we add our GraphQL query to fetch all users. This makes use of the ALL_USERS_QUERY we created above. It is important to note that, the name of our data (allUsers in this case) must be the same name used in our GraphQL query (allUsers in this case). Once allUsers is populated with data from our GraphQL server, we display the users in a table by looping through the array of users. We also add a link to view each user details.
我们利用之前创建的Menu组件。 然后,我们定义我们的数据,一旦从GraphQL服务器获取数据,这些数据将被填充。 在apollo对象中,我们添加了GraphQL查询以获取所有用户。 这利用了我们在上面创建的ALL_USERS_QUERY 。 重要的是要注意,我们的数据名称(在这种情况下为allUsers )必须与在GraphQL查询中使用的名字(在本例中为allUsers )相同。 一旦allUsers会填充我们的GraphQL服务器的数据,我们通过用户的阵列循环在表中显示的用户。 我们还添加了一个链接,以查看每个用户的详细信息。
添加帖子路线 ( Adding Posts Route )
Open src/router/index.js, and add the code below to it:
打开src/router/index.js ,并添加以下代码:
// src/router/index.js

import Posts from '@/components/Admin/Posts'

// add these inside the `routes` array
{
    path: '/admin/posts',
    name: 'Posts',
    component: Posts
}
Now when we visit the /admin/posts route, we should see a list of posts as in the image below:
现在,当我们访问/admin/posts路线时,我们应该看到如下所示的帖子列表:

创建博客主页 ( Creating Blog Homepage )
The blog homepage will display a list of all posts created just like in the displaying posts section. In fact, the hompage will use the exact same GraphQL used in displaying posts. It is only the markup of the homepage that will be different. Create a Home component inside src/components and add the code below to it:
博客首页将显示所有已创建帖子的列表,就像在“显示帖子”部分中一样。 实际上,该主页将使用与显示帖子相同的GraphQL。 只是首页的标记会有所不同。 在src/components components内创建一个Home组件,并向其添加以下代码:
// src/components/Home.vue

<template>
    <section class="section">
        <div class="columns">
            <div class="column is-6 is-offset-3">
                <h1 class="title">Latest Posts</h1>

                <h3
                    v-for="post in allPosts"
                    :key="post.id"
                    class="title is-5">
                        <router-link :to="post.slug">
                            {{ post.title }}
                        </router-link>
                </h3>
            </div>
        </div>
    </section>
</template>

<script>
import { ALL_POSTS_QUERY } from '@/graphql'

export default {
    name: 'Home',
    data () {
        return {
            allPosts: []
        }
    },
    apollo: {
        // fetch all posts
        allPosts: {
            query: ALL_POSTS_QUERY
        }
    }
}
</script>
As we can see the JavaScript section is identical to that of Posts component. Just different markup. We loop through the posts array and display the title of each post linked with their slug.
如我们所见,JavaScript部分与Posts组件的部分相同。 只是不同的标记。 我们遍历posts数组,并显示每个与它们的子句链接的帖子的标题。
添加本国路线 ( Adding Home Route )
Open src/router/index.js, and add the code below to it:
打开src/router/index.js ,并添加以下代码:
// src/router/index.js

import Home from '@/components/Home'

// add these inside the `routes` array
{
    path: '/',
    name: 'Home',
    component: Home
}
Visiting the / route, we should see our blog homepage as in the image below:
访问/路线,我们应该看到我们的博客主页,如下图所示:

查看帖子 ( Viewing A Post )
The last thing to add is ability to view a specific post. Add the code below to src/graphql.js:
最后要添加的功能是查看特定帖子的功能。 将以下代码添加到src/graphql.js :
// src/graphql.js

export const POST_QUERY = gql`query PostQuery($slug: String!) {
        post(slug: $slug) {
            id
            title
            slug
            content
            user {
                id
                username
                email
            }
        }
    }`
This query fetch a post by it slug. It takes the slug of the post to be fetched as an argument.
该查询通过它来获取帖子。 它需要将帖子的条作为参数获取。
Next, create a SinglePost component inside src/components and add the code below to it:
接下来,在src/components components内部创建一个SinglePost组件,并将以下代码添加到其中:
// src/components/SinglePost.vue

<template>
    <section class="section">
        <div class="columns">
            <div class="column is-6 is-offset-3">
                <router-link class="button is-link is-small" to="/">Back Home</router-link>

                <h1 class="title">
                    {{ post.title }}
                </h1>

                <div class="content">
                    {{ post.content }}
                </div>
            </div>
        </div>
    </section>
</template>

<script>
import { POST_QUERY } from '@/graphql'

export default {
    name: 'SinglePost',
    data () {
        return {
            post: '',
            slug: this.$route.params.slug
        }
    },
    apollo: {
        // fetch post by slug
        post: {
            query: POST_QUERY,
            variables () {
                return {
                    slug: this.slug
                }
            }
        }
    }
}
</script>
We simply display the post title and it content then a link to go back to the homepage. The JavaScript section follows the implementation used in displaying user details. In this case, we get the post slug from the route params.
我们只显示帖子标题及其内容,然后显示一个链接以返回首页。 JavaScript部分遵循用于显示用户详细信息的实现。 在这种情况下,我们从路线参数中获得了后段塞。
添加查看发布路线 ( Adding View Post Route )
Open src/router/index.js, and add the code below to it:
打开src/router/index.js ,并添加以下代码:
// src/router/index.js

import SinglePost from '@/components/SinglePost'

// add these inside the `routes` array
{
    path: '/:slug',
    name: 'SinglePost',
    component: SinglePost,
    props: true
}
Note: This route should be the last route in the routes array.
注意:此路由应该是路由数组中的最后一条路由。
We should be able to view a single post now:
我们现在应该可以查看单个帖子:
结论 ( Conclusion )
So, in this tutorial, we have seen how to build a blog app with GraphQL, Apollo client and VueJS. We also saw how to connect our frontend app to a GraphQL server. The complete code for this tutorial is available on GitHub.
因此,在本教程中,我们已经看到了如何使用GraphQL,Apollo客户端和VueJS构建博客应用。 我们还看到了如何将前端应用程序连接到GraphQL服务器。 本教程的完整代码可在GitHub上找到 。
翻译自: https://scotch.io/tutorials/build-a-blog-with-vue-graphql-and-apollo-client


 3846
3846

 被折叠的 条评论
为什么被折叠?
被折叠的 条评论
为什么被折叠?
 到【灌水乐园】发言


