


vue-task-node
Today we're going to build an application that showcases animals that are available for adoption! This will be a two part blog series, so in this portion we'll just learn how to setup our application and get some mock data flowing from the backend to the frontend. Let's get started!
今天,我们将构建一个应用程序,展示可以收养的动物! 这将是一个分为两部分的博客系列 ,因此在这一部分中,我们将仅学习如何设置应用程序并获取一些从后端流向前端的模拟数据。 让我们开始吧!

我们将如何做 ( How We'll Do It )
There will be a few moving parts in our animal adoption app, so let's first simplify it and lay out exactly what we're going to need:
我们的动物收养应用程序中将有几个移动的部分,因此让我们首先对其进行简化,并精确列出我们需要的内容 :
- PetFinder API to pull animals available for adoption PetFinder API提取可被采用的动物
- Node.js backend to make the API calls Node.js后端进行API调用
- Vue.js frontend to display the results Vue.js前端以显示结果
创建后端 ( Create the Backend )
We're going to be separating our frontend from our backend, so to make that easier to follow we'll just create two separate folders in the main project folder to hold the frontend code and backend code.
我们将把前端和后端分开,因此为了更容易理解,我们将在主项目文件夹中创建两个单独的文件夹来保存前端代码和后端代码。
First create a folder that's hold our entire project and then cd into that folder. Then create a vue-client folder and an express-server folder.
首先创建一个包含我们整个项目的文件夹,然后使用cd进入该文件夹。 然后创建一个vue-client文件夹和一个express-server文件夹。
mkdir animal-adoption-site
cd animal-adoption-site

mkdir express-server
mkdir vue-client
安装Node.js (Install Node.js)
We'll be using Node and npm for this tutorial, so let's just go ahead and get that setup now if it's not already on your machine. You can download Node.js here.
在本教程中,我们将使用Node和npm,因此,如果尚未在您的计算机上安装它,请立即进行设置。 您可以在此处下载Node.js。
Now let's enter into the express-server folder and initialize a Node project.
现在,我们进入express-server文件夹并初始化一个Node项目。
cd express-server
npm init
This will walk through the creation of your package.json file. The defaults are fine for our use, so just press enter when prompted.
这将package.json创建package.json文件。 默认值适合我们使用,因此在出现提示时只需按Enter。
Our package.json file will help manage our dependencies. Let's add some now.
我们的package.json文件将帮助管理我们的依赖关系。 让我们现在添加一些。
安装依赖项 (Install Dependencies)
Here's what we'll need for our project:
这是我们项目需要的:
- Express -- This is a lightweight framework for Node. It's not mandatory to use in a Node app, but it will make most tasks a lot easier. Express-这是Node的轻量级框架。 在Node应用程序中使用不是强制性的,但是它将使大多数任务变得容易得多。
- Nodemon -- Nodemon will keep our server running and automatically refresh the page when we make updates to our code. Nodemon -Nodemon将使我们的服务器保持运行,并在我们更新代码时自动刷新页面。
- CORS -- This CORS Express package will allow us to make requests from our frontend. Without it, we'll encounter the error message
The CORS policy for this site does not allow access from the specified Origin.CORS-此CORS Express软件包将使我们能够从前端发出请求。 没有它,我们将遇到错误消息The CORS policy for this site does not allow access from the specified Origin. - Request -- We'll be making some external HTTP calls to the PetFinder API, so we'll use the Request package to do that. We could just use the built in HTTP module, but it's not very user-friendly. 请求 -我们将对PetFinder API进行一些外部HTTP调用,因此我们将使用请求包来执行此操作。 我们可以只使用内置的HTTP模块,但是它不是非常用户友好的。
- body-parser -- This will allow us to extract the body (where the PetFinder data is) from our request so we can send it to the frontend body- parser-这将使我们能够从请求中提取主体(PetFinder数据所在的位置),以便将其发送到前端
We can install these together with one command. For Nodemon, we're going to install it globally using the -g flag. This will allow us to call it just using nodemon instead of specifying the whole path. Again, make sure you're in the express-server directory and then run the following:
我们可以使用一个命令将它们安装在一起。 对于Nodemon,我们将使用-g标志在全局范围内进行安装。 这将使我们仅使用nodemon即可调用它,而无需指定整个路径。 再次,确保您位于express-server目录中,然后运行以下命令:
npm install nodemon -g
npm install express cors request body-parser --save
创建一个API端点 (Create an API Endpoint)
So just to get things up and running, I usually like to start simple and then come back and refactor (fancy word for clean up and move stuff around).
因此,为了使一切正常运行,我通常喜欢从简单开始,然后返回并进行重构(花哨的单词表示清理和移动内容)。
Let's make our file that will serve as our entry point. When we ran npm init, it designated the application's entry point to a file called index.js, so let's create that now.
让我们创建一个文件作为我们的入口点。 当我们运行npm init ,它将应用程序的入口点指定到一个名为index.js的文件中,所以现在就创建它。
touch index.jsThis is our base file where we'll set the project up. First we need to import all those dependencies we installed and then we'll setup our first API endpoint for our client to read.
这是我们将在其中设置项目的基本文件。 首先,我们需要导入所有已安装的依赖项,然后设置第一个API端点供客户端读取。
const express = require('express');
const app = express();
const bodyParser = require('body-parser');
const cors = require('cors');
const request = require('request');

app.use(bodyParser.json());
app.use(cors());
app.use(express.urlencoded({ extended: true }));
Here we're just telling our Node application to use all those dependencies we installed.
在这里,我们只是告诉Node应用程序使用我们安装的所有依赖项。
Next we need to start up the server. We just need to specify the port we want to listen on and then use express to listen.
接下来,我们需要启动服务器。 我们只需要指定要监听的端口,然后使用express即可监听。
// set the port
const port = 8000;

// listen on the port
app.listen(port);
Just one more thing before we actually run the command to startup the server. We need to go back to our package.json file and edit the script used to to start it up. In the scripts object, add a start command that will run nodemon index.js. Nodemon is the package we installed earlier that watches our code and automatically refreshes when anything is changed.
在我们实际运行命令以启动服务器之前,还需要做另一件事。 我们需要返回到package.json文件,并编辑用于启动它的脚本。 在脚本对象中,添加一个将运行nodemon index.js的start命令。 Nodemon是我们之前安装的软件包,用于监视我们的代码并在发生任何更改时自动刷新。
// package.json
"scripts": {
  "start": "nodemon index.js"
},
Once you've added that, just run the following command to start the server:
添加完后,只需运行以下命令即可启动服务器:
npm startSo our server is now running, but it's not actually doing much just yet. Let's setup a route the will do something when we hit the homepage. Go back to our index.js file and add the following code:
因此我们的服务器现在正在运行,但实际上并没有做很多事情 。 让我们设置一条路由,当我们点击首页时它将执行某些操作。 返回我们的index.js文件,并添加以下代码:
// index.js
app.get('/', (req, res) => {
    res.send(`Hi! Server is listening on port ${port}.`)
});
Now just navigate to localhost:8000 and you should see Hi! Server is listening on port 8000.!
现在,只需导航到localhost:8000 ,您应该会看到Hi! Server is listening on port 8000. Hi! Server is listening on port 8000. 。
So what exactly is happening here? First, we're creating an Express GET call that is executed when we navigate to the home route of our server (denoted by /), which is just localhost:8000.
那么,这里到底发生了什么? 首先,我们创建一个Express GET调用,该调用在导航到服务器的本地路由(由/表示)时执行,该本地路由仅为localhost:8000 。
Then in our callback function, we have access to the request and the response objects. We're going to send back a string specifying the port in our response.
然后,在回调函数中,我们可以访问请求和响应对象。 我们将发送回一个字符串,在响应中指定端口。
Now before we get into the frontend code, let's just do ourselves a favor now and create some mock data in index.js to send over to the frontend. This will be essentially the same as above, except this time it will run when we hit localhost:8000/animals (you can test this out yourself) and we'll send back an array of objects. Each object will represent an animal available for adoption. Later on we'll come back and replace this with a real API call from PetFinder, but for now let's just keep it simple while we build out the base application. Onward to the frontend!
现在,在进入前端代码之前,让我们现在帮个忙,并在index.js 创建一些模拟数据以发送到前端。 这基本上与上面的相同,除了这次它将在我们按localhost:8000/animals (您可以自己测试)时运行,并且将发回对象数组。 每个对象都代表一个可供收养的动物。 稍后,我们将返回并用PetFinder的真实API调用代替它,但是现在,在构建基本应用程序时,让它保持简单。 前进到前端!
// index.js
app.get('/animals', (req, res) => {
  res.send([
    {
      id: 1,
      name: 'Lily',
      type: 'Dog',
      image: 'https://placedog.net/550/550',
      description: 'She loves to give kisses and bark at nothing.'
    },

    {
      id: 2,
      name: 'Lovely',
      type: 'Dog',
      image: 'https://placedog.net/500/500',
      description: `A little shy at first, but won't leave your side soon enough.` // note the backticks so we don't have to escape!
    },

    {
      id: 3,
      name: 'Sprinkles',
      type: 'Cat',
      image: 'https://placekitten.com/550/550',
      description: `Needs diabetes shot. Roll the insulin in your hand, don't shake it.`
    },

    {
      id: 4,
      name: 'Garbage',
      type: 'Cat',
      image: 'https://placekitten.com/500/500',
      description: 'A feral barn cat. He loves to eat garbage!'
    }
  ])
});
创建前端 ( Create the Frontend )
Now it's time to switch to our vue-client folder to setup the Vue.js frontend! First things first, we need to install it.
现在是时候切换到我们的vue-client文件夹来设置Vue.js前端了! 首先,我们需要安装它。
安装Vue.js (Install Vue.js)
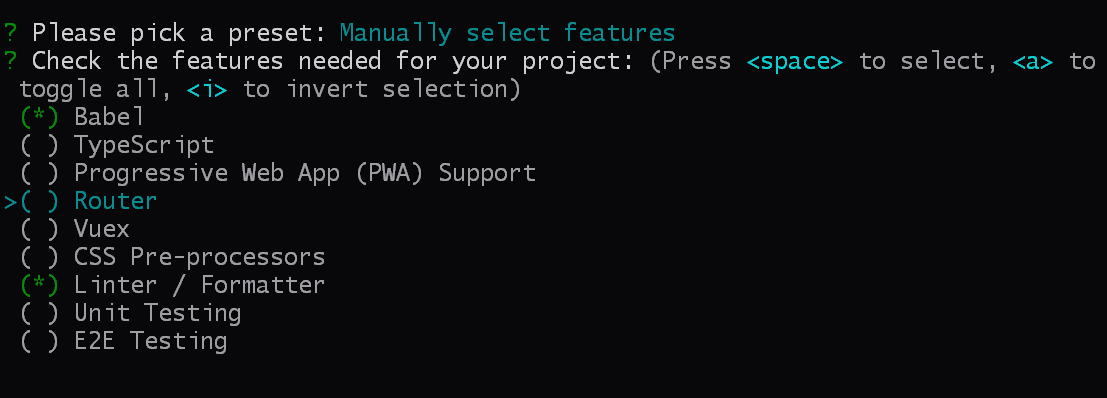
Since we already have npm installed, we can go ahead and use that to install Vue. This will install the Vue CLI, which will walk us through setting up our Vue app, similar to npm init. This time we'll use vue create .. The . just tells it to create the project in the current directory instead of making a new one. When it asks you if you want to install vue-router, select Yes. For everything else you can just select the default.
由于已经安装了npm ,因此我们可以继续使用它来安装Vue。 这将安装Vue CLI ,它将引导我们完成设置Vue应用的过程,类似于npm init 。 这次我们将使用vue create . 。 的. 只是告诉它在当前目录中创建项目,而不是创建一个新项目。 当它询问您是否要安装vue-router ,选择“是”。 对于其他所有内容,您都可以选择默认值。
npm install -g @vue/cli
cd vue-client
vue create .
npm run serve
Another cool way to create a Vue app is using the Vue UI tool. It's a great way to see a visual representation of how the project is setup. It also gives you analytics, different configuration options, and more. You can read more about it here.
创建Vue应用程序的另一种很酷的方法是使用Vue UI工具。 这是查看项目设置方式的直观表示的好方法。 它还为您提供分析,不同的配置选项等。 您可以在此处了解更多信息 。
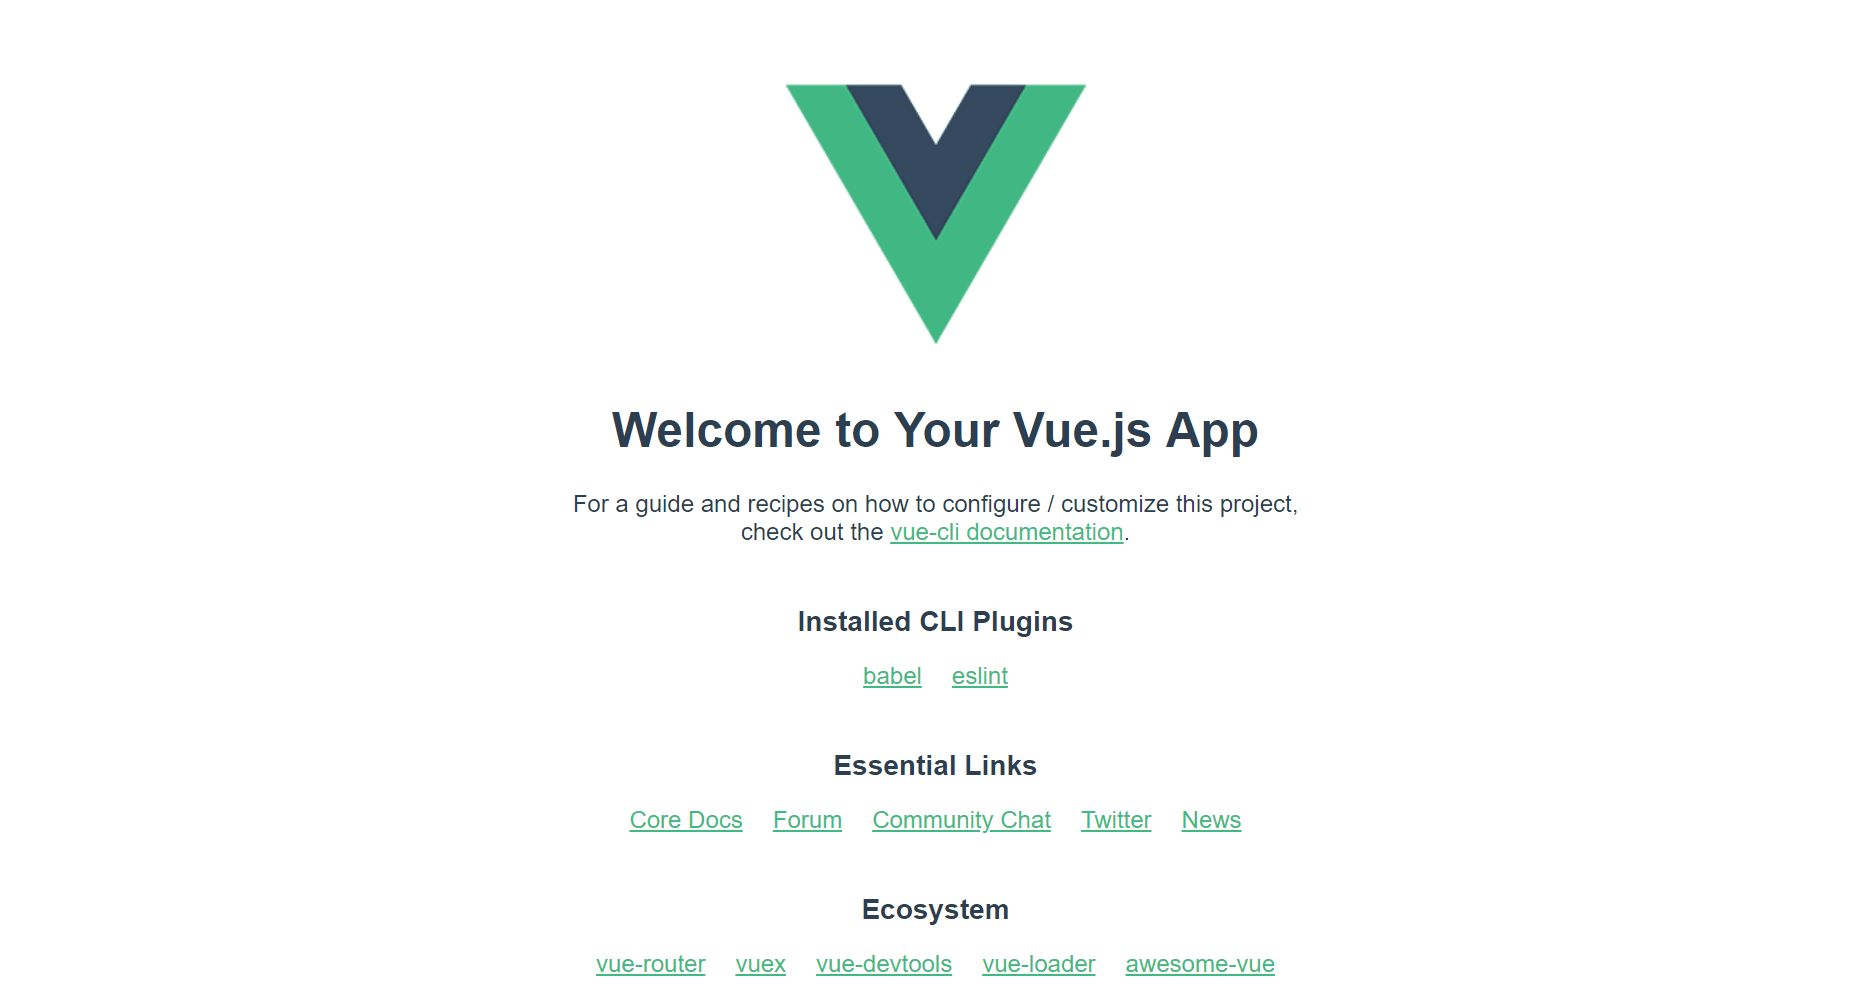
Now that our base project is created we can run npm run serve to boot it up! You should see a default Vue project.
现在我们的基础项目已经创建,我们可以运行npm run serve来启动它了! 您应该看到一个默认的Vue项目。
安装依赖项 (Install Dependencies)
Now that we have our Vue skeleton app, let's go ahead and add some dependencies now that we'll be using in our app.
现在我们有了Vue骨架应用程序,让我们继续并添加一些依赖关系,因为我们将在我们的应用程序中使用它。
Dependencies to install:
安装依赖项:
- Buefy -- Bulma Components for quick styling Buefy -Bulma组件,用于快速造型
- Axios -- To make our API calls to our server Axios-对我们的服务器进行API调用
Make sure you're still in the vue-client folder and then run:
确保您仍然在vue-client文件夹中,然后运行:
npm install buefy axios --save应用程式结构 (App Structure)
Whenever I start a new project, I like to first map out the basic structure so that I'm not just stumbling around in the dark. It will most likely change as we begin to refactor, but we don't have to worry about that right now.
每当我开始一个新项目时,我都喜欢先绘制出基本结构,以便我不只是在黑暗中绊倒。 随着我们开始重构,它很可能会发生变化,但是我们现在不必担心这一点。
First inside the src/components folder, change the default HelloWorld.vue to AnimalList.vue. We'll also need a folder called src/layouts and 3 files: MainLayout.Vue to hold our base layout plus a Header.vue and Footer.vue.
首先在src/components文件夹中,将默认的HelloWorld.vue更改为AnimalList.vue 。 我们还需要一个名为src/layouts的文件夹和3个文件: MainLayout.Vue来保存我们的基本布局,以及Header.vue和Footer.vue 。
cd src/components
mv HelloWorld.vue AnimalList.vue

cd ..
mkdir layouts

cd layouts

touch MainLayout.vue
touch Header.vue
touch Footer.vue
配置 (Setting Up)
Let's jump right into our main.js file in our vue-client/src folder. This is going to be the entry point for our Vue app where we import the dependencies we installed and mount our app. We'll import Buefy (our Bulma styles) here so that we can use them throughout the entire project. Our Axios dependency will only be used in the file that we make the API calls from, so we don't need to add it here.
让我们跳到vue-client/src文件夹中的main.js文件。 这将成为我们Vue应用程序的入口点,在这里我们导入我们安装的依赖项并挂载我们的应用程序。 我们将在此处导入Buefy (我们的布尔玛样式),以便我们可以在整个项目中使用它们。 我们的Axios依赖项仅会在我们进行API调用的文件中使用,因此我们无需在此处添加它。
Your main.js file should now look like this:
您的main.js文件现在应如下所示:
// main.js
import Vue from 'vue';
import App from './App.vue';
import router from './router';
import Buefy from 'buefy';
import 'buefy/dist/buefy.css';

Vue.use(Buefy);
Vue.config.productionTip = false

new Vue({
  router,
  render: h => h(App),
}).$mount('#app')
You may have noticed we're importing another component here called App.vue. When we initialized the Vue app with the CLI, it created this entry point file for us. Let's go in now and edit it.
您可能已经注意到我们在这里导入了另一个名为App.vue组件。 当我们使用CLI初始化Vue应用程序时,它为我们创建了此入口点文件。 现在开始编辑。
Open up App.vue and replace everything with the following:
打开App.vue并将所有内容替换为以下内容:
// App.vue
<template>
  <MainLayout id="app">
    <router-view />
  </MainLayout>
</template>

<script>

import MainLayout from "@/layouts/MainLayout";

export default {
  components: {
    MainLayout
  }
};
</script>
Inside the main template, we're going to call the MainLayout component we created and give it the id app, which is what we mounted the Vue instance to in main.js earlier. Inside of that is <router-view />, which will control what shows inside the main layout based on the current route.
在主模板中,我们将调用我们创建的MainLayout组件,并将其MainLayout为id app ,这是我们之前在main.js Vue实例安装到的main.js 。 其中的是<router-view /> ,它将根据当前路线控制在主布局内显示的内容。
Now let's open up that MainLayout.vue file in vue-client/src and add:
现在,让我们在vue-client/src打开MainLayout.vue文件并添加:
// MainLayout.vue
<template>
  <div>
    <Header />
    <section class="section">
      <div class="container">
        <slot />
      </div>
    </section>
    <Footer />
  </div>
</template>

<script>
import Header from './Header';
import Footer from './Footer';

export default {
  components: {
    Header,
    Footer
  }
};

</script>
Our main layout will have the structure: header, custom component(s), and footer. That slot component is sort of a placeholder that will display whatever component the current route uses.
我们的主要布局将具有以下结构:页眉,自定义组件和页脚。 该slot组件是一种占位符,它将显示当前路线使用的任何组件。
页眉,页脚和首页 (Header, Footer, and Homepage)
We've created the header and footer components, now let's quickly fill them in courtesy of Bulma, which is an awesome CSS framework that can help us quickly build a beautiful website without having to focus too much on custom CSS. You can learn more about Bulma here.
我们已经创建了页眉和页脚组件,现在让我们由Bulma来快速填充它们。Bulma是一个很棒CSS框架,可以帮助我们快速构建漂亮的网站,而不必过多地关注自定义CSS。 您可以在此处了解有关布尔玛的更多信息 。
We'll deal with the actual routes later, so just add "About" as a placeholder for now.
稍后我们将处理实际路线,因此现在只需添加“关于”作为占位符即可。
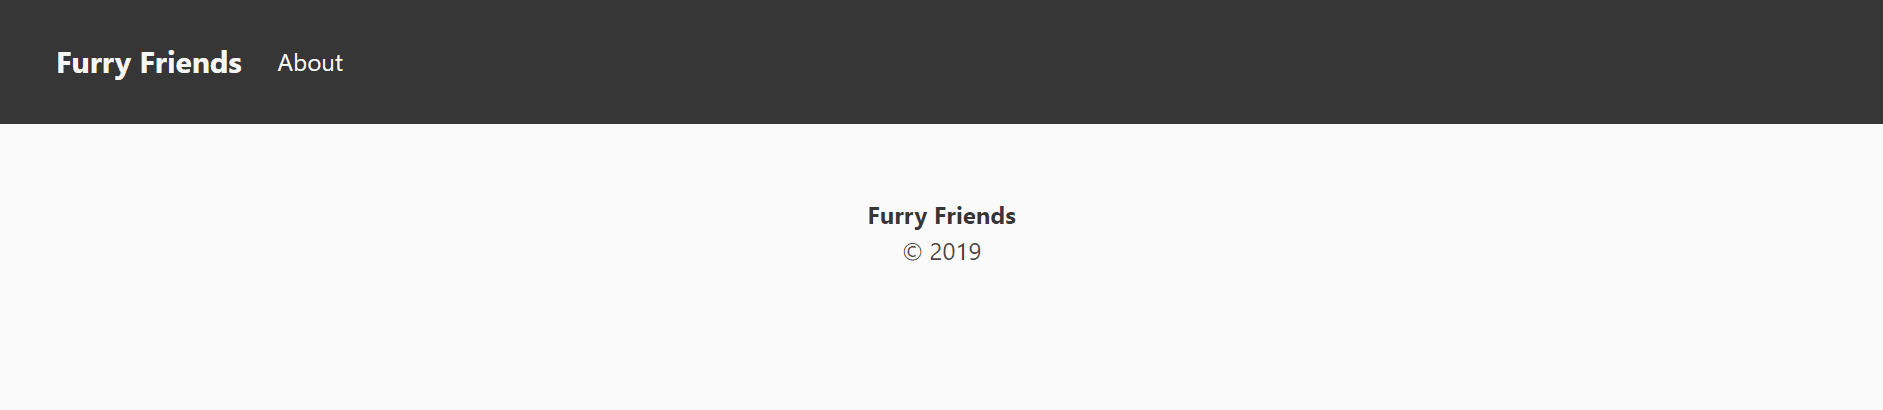
// src/layouts/Header.vue
<template>
  <nav class="navbar is-dark is-spaced" role="navigation">
    <div class="navbar-brand">
      <a class="navbar-item is-size-5 has-text-weight-bold" href="/">
        Furry Friends
      </a>
    </div>

    <div id="navbarMain" class="navbar-menu">
      <div class="navbar-start">
        <a class="navbar-item">
          About
        </a>
      </div>
    </div>
  </nav>
</template>

<script>
export default {
};

</script>
Now let's add a simple footer:
现在让我们添加一个简单的页脚:
// src/layouts/Footer.vue
<template>
<footer class="footer">
<div class="content has-text-centered">
<strong>Furry Friends</strong>
<p>© 2019</p>
</div>
</footer>
</template>
<script>
export default {
};
</script>I chose a dark nav, but you can swap the colors out here pretty easily with Bulma's color classes.
我选择了深色导航,但是您可以使用Bulma的颜色类别轻松地在此处交换颜色。
Now we can move onto the Home component and work on filling in the middle portion! In the Home.vue let's just swap out the HelloWorld component for the new AnimalList component.
现在我们可以进入Home组件并填充中间部分了! 在Home.vue让我们将HelloWorld组件替换为新的AnimalList组件。
// Home.vue
<template>
  <AnimalList />
</template>

<script>

import AnimalList from '@/components/AnimalList.vue'

export default {
  components: {
    AnimalList
  }
}
</script>
We'll add more to the homepage later, but for now let's just focus on this AnimalList component. This is where all the magic happens! Open up src/components/AnimalList.vue and let's get started on connecting the two portions of our app together!
稍后我们将在主页上添加更多内容,但现在让我们仅关注此AnimalList组件。 这就是所有魔术发生的地方! 打开src/components/AnimalList.vue ,让我们开始将应用程序的两个部分连接在一起!
连接后端和前端 ( Connect the Backend and Frontend )
So now that we have a frontend and a backend, both working separately, we need to figure out how to connect them. For the sake of clarity, we're first going to do this directly in the AnimalList component. Once it's clear what's going on, we'll come back and refactor.
因此,既然我们有一个前端和一个后端,它们分别工作,那么我们需要弄清楚如何连接它们。 为了清楚起见,我们首先直接在AnimalList组件中执行此AnimalList 。 清楚发生了什么之后,我们将返回并进行重构。
使用Axios (Working with Axios)
Replace everything in your AnimalList.vue file with this:
将此内容替换为AnimalList.vue文件中的所有内容:
// AnimalList.vue

<template>
</template>

<script>

import axios from 'axios';

export default {
  name: 'AnimalList',
  data() {
    return { animals: [] }
  },
  methods: {
    async getAllAnimals() {
        const response = await axios.get('http://localhost:8000/animals');
        this.animals = response.data;     }

  },
  mounted() {
    this.getAllAnimals();
  }
}

</script>
There's a lot to unpackage here. First, we're importing axios, which is what we'll use to send out our HTTP request. Next in the data function, we're returning an object which initializes our animals array.
这里有很多要解包的东西。 首先,我们要导入axios ,这将用于发送HTTP请求。 接下来,在data函数中,我们将返回一个初始化我们的animals数组的对象。
Next we have our methods object. In here we're create a function called getAllAnimals. Using axios, we'll send a GET request to hit the URL http://localhost:8000/animals. Remember back when we setup our server to listen on port 8000 and we created a route called /animals that would return some mock data to us? Well this is how we get it into our Vue app!
接下来,我们有methods对象。 在这里,我们创建一个名为getAllAnimals的函数。 使用axios,我们将发送GET请求以访问URL http://localhost:8000/animals 。 还记得我们将服务器设置为侦听端口8000创建的名为/animals的路由,该路由会向我们返回一些模拟数据吗? 好吧, 这就是我们将其输入到Vue应用程序中的方式 !
We'll save whatever response comes back into a variable called response. The response will contain information about our request such as headers, status code, and of course the data, which is what we're interested in.
我们会将所有返回的响应保存到一个名为response的变量中。 响应将包含有关我们请求的信息 ,例如标头 , 状态代码 ,当然还有data ,这正是我们感兴趣的信息。
To directly grab the data out, we'll set the animals object we created earlier to response.data. This will make it easier to work with when we start to loop through it for display. Remember to access the same animals variable from the data object, we have to add this before it.
为了直接获取数据,我们将之前创建的animals对象设置为response.data 。 当我们开始循环显示它时,这将使使用起来更加容易。 记住访问相同的animals从可变data对象,我们必须添加this之前它。
Now the final thing we need to do is actually call the method we just created.
现在,我们需要做的最后一件事实际上是调用刚刚创建的方法 。
We want to call the function right away so that we can display the results as soon as possible. We can do this by using Vue's mounted function, which runs right as the component is mounted. Again, to access the function, make sure you add this before it.
我们想立即调用该函数,以便我们尽快显示结果。 我们可以通过使用Vue的mounted函数来完成此任务,该函数会在组件安装后立即运行。 同样,要访问该功能,请确保在this之前添加它。
Just a reminder to potentially save you some headache: make sure your server is still running for this next part! If it's not, enter into the express-server folder and run the command npm start.
提醒您可能会麻烦一些:请确保您的服务器在下一部分中仍在运行! 如果不是,请进入express-server文件夹并运行命令npm start 。
显示数据 (Displaying the Data)
We're finally in the home stretch! We have our backend server listening and our frontend wired up and making a call to the server to get our animal data. Now the last thing we need to do is display the results!
我们终于可以回家了! 我们有后端服务器在侦听,前端已连接好,并致电服务器以获取动物数据。 现在,我们要做的最后一件事就是显示结果!
When working with a lot of data, especially external data that you didn't format yourself, it's sometimes helpful to first dump the results so we can see how we'll display it.
当处理大量数据时,尤其是您未格式化的外部数据时,首先转储结果有时会很有帮助,这样我们就可以看到如何显示它们。
// AnimalList.vue

<template>
  <div>
    {{ animals }}
  </div>
</template>
Of course we did create this data ourselves and it's not very complex, but once we start pulling from PetFinder that little trick will come in handy.
当然,我们确实可以自己创建此数据,并且它不是很复杂,但是一旦我们从PetFinder中获取数据,这个小技巧将派上用场。
So we have an animal array that contains 4 objects with properties name, image, type, description, and id.
因此,我们有一个动物数组,其中包含4个具有属性name , image , type , description和id 。
We can loop through each animal using Vue's v-for directive. Whenever we use v-for, we also have to make sure we add v-bind:key to bind each item to its own unique ID.
我们可以使用Vue的v-for指令遍历每只动物。 每当我们使用v-for ,我们还必须确保添加v-bind:key将每个项目绑定到其自己的唯一ID。
We're going to split the layout up into 4 columns using Bulma's columns class along with is-one-quarter. To display the image, we have to bind the image url to the src attribute with v-bind:src. Next we just display the animal's name, description, and type of animal and we're good to go!
我们将使用Bulma的columns类和is-one-quarter将布局分为4列。 要显示图像,我们必须使用v-bind:src将图像URL绑定到src属性。 接下来,我们只显示动物的名称,描述和动物类型,我们很好!

// AnimalList.vue
<template>
  <div>
    <div class="page-header">
      <h2 class="title">Animals available for adoption</h2>     </div>
    <div class="content columns is-multiline">
      <div v-for="animal in animals" v-bind:key="animal.id" class="column is-one-quarter">
        <div class="card">
          <div class="card-image">
            <img v-bind:src="animal.image">
          </div>
          <div class="card-content">
            <div class="media">
              <div class="media-content">
                <p class="title is-size-4">{{ animal.name }} <span class="is-size-6 has-text-grey"> {{ animal.type }}</span></p>
              </div>
            </div>
            <div class="content">
              {{ animal.description }}
            </div>
          </div>
        </div>
      </div>
    </div>
  </div>
</template>

<style scoped>
  .page-header {
    margin-bottom: 30px;
  }
</style>
总结和下一步 ( Wrap up and What's Next )
We've covered a lot in this tutorial! Let's back up a little and recap.
我们在本教程中介绍了很多内容! 让我们稍微备份一下。
First we created our Express server. We setup an API endpoint with some mock data. Then we created a Vue frontend that hits that endpoint, receives the data, and displays it.
首先,我们创建了Express服务器。 我们使用一些模拟数据来设置API端点。 然后,我们创建了一个Vue前端,该前端可以命中该端点,接收数据并显示它。
Now that we have the basic concept down, we can dive into getting real data from an external API.
现在我们已经掌握了基本概念,我们可以深入研究如何从外部API获取真实数据。
In the next post, we'll learn how to get an access token from PetFinder and automatically refresh it when it expires. We'll use the token to pull live data about animals that are available for adoption and then format and display that data. Finally we'll go through and refactor our app to make it a bit cleaner.
在下一篇文章中,我们将学习如何从PetFinder获取访问令牌并在其过期时自动刷新它 。 我们将使用令牌提取有关可用于收养的动物的实时数据 ,然后格式化并显示该数据 。 最后,我们将仔细分析并重构我们的应用程序,使其更加整洁。
Hope this was helpful and see you in the next one!
希望这对您有所帮助,下次再见!
翻译自: https://scotch.io/tutorials/building-an-animal-adoption-site-with-node-and-vue-part-1
vue-task-node


 2186
2186

 被折叠的 条评论
为什么被折叠?
被折叠的 条评论
为什么被折叠?
 到【灌水乐园】发言


