


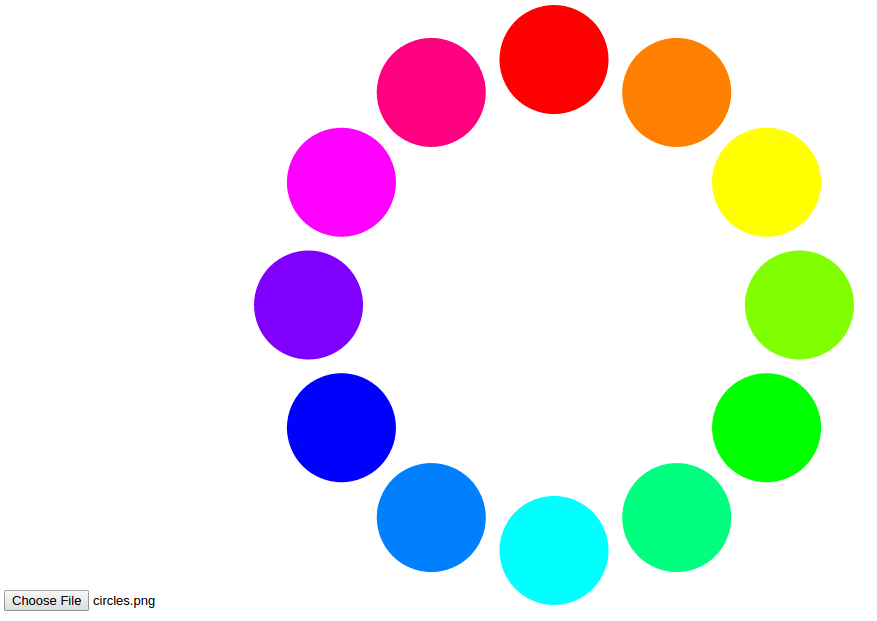
 本教程介绍了如何使用OpenCV.js在JavaScript中创建一个简单的网页,用户可以上传图片并检测其中的圆圈。通过OpenCV.js库,这个过程变得非常简单。检测到的圆圈将用黑色轮廓突出显示,用户可以下载修改后的图像。
opencv 计算机视觉
OpenCV is a powerful library used for image processing and image recognition. The library, Open-Source Computer Vision, has a massive community and has been used extensively in many fields, from face detection to interactive art. It was first built in C++ but bindings have since been created for different languages, such as Python and Java. It is even available in JavaScript (OpenCV.js), which is what we'll be using for this tutorial.
OpenCV是一个功能强大的库,用于图像处理和图像识别。 该库名为“开放源代码计算机视觉”,具有庞大的社区,并在从人脸检测到交互艺术的许多领域中得到广泛使用。 它最初是用C ++构建的,但是此后已经为不同的语言(例如Python和Java)创建了绑定。 它甚至可以在JavaScript(OpenCV.js)中使用,这就是本教程将使用的内容。
In this project, we will create a simple webpage where a user can upload an image in order to detect all the circles contained in it. We will highlight them with a black outline and the user will be able download the modified image. Thanks to OpenCV.js, this is a very easy task.
在这个项目中,我们将创建一个简单的网页,用户可以在其中上传图片以检测其中包含的所有圆圈。 我们将用黑色轮廓突出显示它们,用户将能够下载修改后的图像。 感谢OpenCV.js,这是一个非常简单的任务。
Throughout this tutorial, I won't discuss much about styling the page so feel free to add your own. Here is my Github repo with all the code in this post, plus my own styling using Bootstrap CSS.
在本教程中,我不会讨论太多有关样式页面的内容,因此可以随意添加自己的样式。 这是我的Github存储库,其中包含本文中的所有代码,以及我自己使用Bootstrap CSS的样式。
建立 ( Set up )
Create a folder opencvjs-project and add an index.html file with the following basic template.
创建一个文件夹opencvjs-project并使用以下基本模板添加index.html文件。
<!DOCTYPE html>
<html>
<head>
    <title>OpenCV.js</title>
</head>
<body>
    <!-- Our HTML will go here-->

<script type="text/javascript">
    // Our JavaScript code will go here
</script>

</body>
</html>
We will need to pull in the OpenCV.js library. The latest version can be built following the instructions found here, or you can copy the file for v3.3.1 from here (directly from the official OpenCV website) and save it locally as opencv.js. Add a script tag to the index.html file which references the local 'opencv.js' file. The script is quite large and takes a bit of time to load, so it is better load it asynchronously. This can be done by adding async to the script tag:
我们将需要引入OpenCV.js库。 可以按照此处的说明构建最新版本,也可以从此处 (直接从OpenCV官方网站直接)复制v3.3.1的文件,然后将其另存为opencv.js 。 在引用本地“ opencv.js”文件的index.html文件中添加脚本标签。 该脚本非常大,需要花费一些时间来加载,因此最好以异步方式加载它。 可以通过向script标签添加async来完成:
<script async src="opencv.js" type="text/javascript"></script>As OpenCV.js won't be ready immediately, we can provide a better user experience by showing that the content is being loaded. I decided to add a loading spinner to my page (credit to Sampson), though you may prefer something else. In brief, I added a div tag at the bottom of the body and the following CSS into a separate style tag at the top of the page. The spinner is invisible by default (thanks to display: none;):
由于OpenCV.js不会立即准备就绪,因此我们可以通过显示内容正在加载来提供更好的用户体验。 我决定在页面上添加一个加载微调器(归功于Sampson ),尽管您可能更喜欢其他东西。 简而言之,我在正文底部添加了div标签,并将以下CSS添加到了页面顶部的单独样式标签中。 默认情况下微调器是不可见的(感谢display: none; ):
<body>
...
<div class="modal"></div>
<body>
/* display loading gif and hide webpage */
.modal {
display: none;
position: fixed;
z-index: 1000;
top: 0;
left: 0;
height: 100%;
width: 100%;
background: rgba( 255, 255, 255, .8)
url('http://i.stack.imgur.com/FhHRx.gif')
50% 50%
no-repeat;
}
/* prevent scrollbar from display during load */
body.loading {
overflow: hidden;
}
/* display the modal when loading class is added to body */
body.loading .modal {
display: block;
}To show the loading gif, we can add "loading" class to the body. Add the following to the top of the empty script.
为了显示加载的gif,我们可以在正文中添加"loading"类。 将以下内容添加到空脚本的顶部。
document.body.classList.add("loading");When Opencv.js loads, we'll want to hide the gif. Modify the script tag to add an onload event listener:
加载Opencv.js时,我们将要隐藏gif。 修改脚本标记以添加onload事件侦听器:
<script async src="opencv.js" onload="onOpenCvReady();" type="text/javascript"></script>This allows us to remove the "loading" class:
这使我们可以删除"loading"类:
// previous code is here

function onOpenCvReady() {
  document.body.classList.remove("loading");
}
Open the HTML page in your browser and check that OpenCV.js loads as expected.
在浏览器中打开HTML页面,并检查OpenCV.js是否按预期加载。
上载图片 ( Uploading the Image )
Next step is to add an input tag so the user can upload an image:
下一步是添加输入标签,以便用户可以上传图片:
<input type="file" id="fileInput" name="file" />If we just want to display the source image, we'll also need to add an image tag and an event listener which responds to change on the input element. Copy the following element and place it under the input tag:
如果只想显示源图像,则还需要添加一个图像标签和一个事件侦听器,以响应输入元素上的更改。 复制以下元素并将其放在输入标签下:
<img id="imageSrc" alt="No Image" />Get both the image element and the input element using their IDs:
使用其ID来获取图像元素和输入元素:
// previous code is here

let imgElement = document.getElementById('imageSrc');
let inputElement = document.getElementById('fileInput');
Now add the event listener which triggers when the input changes (i.e. when a file is uploaded). From the change event, it's possible to access the uploaded file (event.target.files[0]), and convert it into a URL using URL.createObjectURL. The image's src attribute can be updated to this URL:
现在添加事件侦听器,该事件侦听器将在输入更改(即文件上传)时触发。 通过change事件,可以访问上载的文件( event.target.files[0] ),然后使用URL.createObjectURL将其转换为URL。 图像的src属性可以更新为以下URL:
// previous code is here

inputElement.onchange = function() {
  imgElement.src = URL.createObjectURL(event.target.files[0]);
};
Next to the original image, we can show a second image which we're going to modify. The image will be displayed with a canvas element which are used for drawing graphics with JavaScript:
在原始图像旁边,我们可以显示第二张要修改的图像。 图像将显示有canvas元素,用于使用JavaScript绘制图形:
<canvas id="imageCanvas" ></canvas>We can add another event listener which updates the canvas with the uploaded image:
我们可以添加另一个事件侦听器,该事件侦听器使用上传的图像更新画布:
// previous code is here

imgElement.onload = function() {
  let image = cv.imread(imgElement);
  cv.imshow('imageCanvas', image);
  image.delete();
};
检测曲线 ( Detecting Cirlces )
This is where the power of OpenCV is evident, as detecting circles becomes a very simple task. We want to find the circles when the user clicks a button, so we'll need to add the button and an event listener:
这是OpenCV强大的地方,因为检测圈子变得非常简单。 我们想在用户单击按钮时找到圆圈,因此我们需要添加按钮和事件监听器:
<button type="button" id="circlesButton" class="btn btn-primary">Circle Detection</button>// previous code is here
document.getElementById('circlesButton').onclick = function() {
// circle detection code
};Depending on the image, circle detection may take a while so it is a good idea to disable the button to prevent the user from spamming it. It could also be useful to show a loading spinner on the button. I have simply reused the loading gif from the initial script load:
根据图像的不同,圆圈检测可能需要一段时间,因此最好禁用该按钮以防止用户向其发送垃圾邮件。 在按钮上显示加载微调器也可能很有用。 我只是重用了初始脚本加载中的加载gif:
// previous code is here

document.getElementById('circlesButton').onclick = function() {
    this.disabled = true;
    document.body.classList.add("loading");

      // circle detection code

    this.disabled = false;
    document.body.classList.remove("loading");
};
The first step to detecting the circles is reading the image from the canvas.
检测圆圈的第一步是从画布读取图像。
In OpenCV, images are stored and manipulated as Mat objects. These are essentially matrices which hold values for each pixel in the image. For our circle detection, we're going to need three Mat objects. One to hold the source image (from which detect the circles) srcMat, one to store the circles we detect circlesMat and one to display to the user (on which we will draw our highlighted circles) displayMat. For the final Mat, we can make a copy of the first using the clone function:
在OpenCV中,图像作为Mat对象存储和操作。 这些本质上是保存图像中每个像素值的矩阵。 为了检测圆,我们将需要三个Mat对象。 一个用于保存源图像(从中检测圆)的srcMat ,一个用于存储我们检测到的circlesMat的圆,另一个用于显示给用户(我们将在其上绘制突出显示的圆) displayMat 。 对于最终的Mat,我们可以使用clone函数复制第一个:
let srcMat = cv.imread('imageCanvas');
let displayMat = srcMat.clone();
let circlesMat = new cv.Mat();
The srcMat needs to be converted to grayscale. This makes circle detection easier by simplifying the image. We can use cvtColor function to do this, which requires the source Mat (srcMat), the destination Mat (in this case the source and the destination Mat will be the same srcMat), and a value which refers to the colour conversion. cv.COLOR_RGBA2GRAY is the constant for grayscale:
srcMat需要转换为灰度。 通过简化图像,这使圆圈检测更加容易。 我们可以使用cvtColor函数来执行此操作,这需要源Mat( srcMat ),目标Mat(在这种情况下,源Mat和目标Mat将是相同的srcMat ),以及一个引用颜色转换的值。 cv.COLOR_RGBA2GRAY是灰度常数:
cv.cvtColor(srcMat, srcMat, cv.COLOR_RGBA2GRAY);The cvtColor function, like other OpenCV.js functions, accepts more parameters but these are not required and so will be set to the default. You can look at the documentation for better customisation.
该cvtColor功能,如其他OpenCV.js功能,接受更多的参数,但这些不是必需的,因此将被设置为默认值。 您可以查看文档以获得更好的自定义。
Once the image is converted to grayscale, it's possible to use the HoughCircles function to detect the circles. This function needs a source Mat, srcMat, from where it'll find the circles and a destination Mat, circlesMat, where it'll store the circles. The other parameters required for the HoughCircles function are the method to detect circles (cv.HOUGH_GRADIENT), the inverse ratio of the accumulator resolution (1), and the minimum distance between the center point of circles (45). There are more parameters, thresholds for the algorithm (75 and 40), which can be played with to improve accuracy for your images. It is also possible to limit the range of the circles you want to detect by setting a minimum (0) and maximum radius (0).
将图像转换为灰度后,可以使用HoughCircles函数检测圆。 此功能需要一个源Mat srcMat ,从中可以找到圆,并需要一个目标Mat circlesMat ,可以在其中存储圆。 HoughCircles函数所需的其他参数是检测圆的方法( cv.HOUGH_GRADIENT ),累加器分辨率的反比(1)以及圆心之间的最小距离(45)。 还有更多的参数,算法的阈值(75和40),可以使用这些参数来提高图像的准确性。 通过设置最小(0)和最大半径(0),也可以限制要检测的圆的范围。
cv.HoughCircles(srcMat, circlesMat, cv.HOUGH_GRADIENT, 1, 45, 75, 40, 0, 0);绘图曲线 ( Drawing Cirlces )
All the circles which were detected can now be highlighted. We want to make an outline around each circle to show to the user. To draw a circle with OpenCV.js, we need the center point and the radius. These values are stored inside circlesMat and so we can retrieve it by looping through the matrix's columns:
现在可以突出显示所有检测到的圆圈。 我们希望在每个圆圈周围绘制轮廓,以显示给用户。 要使用OpenCV.js画一个圆,我们需要中心点和半径。 这些值存储在circlesMat内部,因此我们可以通过遍历矩阵的列来检索它:
for (let i = 0; i < circlesMat.cols; ++i) {
    // draw circles
}
The circlesMat stores the x and y values for the center point and the radius sequentially. So for the first circle, it would be possible to retrieve the values as follows:
circlesMat存储中心点和半径的x和y值。 因此,对于第一个圆,可以按以下方式检索值:
let x = circlesMat.data32F[0];
let y = circlesMat.data32F[1];
let radius = circlesMat.data32F[2];
To get all the values for each circle, we can do the following:
要获取每个圆的所有值,我们可以执行以下操作:
for (let i = 0; i < circlesMat.cols; ++i) {
    let x = circlesMat.data32F[i * 3];
    let y = circlesMat.data32F[i * 3 + 1];
    let radius = circlesMat.data32F[i * 3 + 2];

    // draw circles
}
Finally, with all these values, we are able to draw outlines around the circles. We create a new Point for the center using the x and y values. To draw circles in OpenCV.js, we need a destination Mat (the image we're going to display to the user displayMat), the center Point, the radius value, and a scalar (an array of RBG values). There are also additional parameters which can be passed into circles, such as the line thickness which for this example is 3:
最后,使用所有这些值,我们可以在圆周围绘制轮廓。 我们使用x和y值为中心创建一个新的Point。 要在OpenCV.js中绘制圆,我们需要一个目标Mat(将要显示给用户displayMat ),中心点,半径值和一个标量(一组RBG值)。 还有一些其他参数可以传递到circles ,例如线粗,在本示例中为3:
let center = new cv.Point(x, y);
cv.circle(displayMat, center, radius, [0, 0, 0, 255], 3);
All the code for drawing circles is as follows:
绘制圆的所有代码如下:
for (let i = 0; i < circlesMat.cols; ++i) {
    let x = circlesMat.data32F[i * 3];
    let y = circlesMat.data32F[i * 3 + 1];
    let radius = circlesMat.data32F[i * 3 + 2];
    let center = new cv.Point(x, y);
    cv.circle(displayMat, center, radius, [0, 0, 0, 255], 3);
}
Once we're done drawing all the circles on displayMat, we can show it to the user:
在displayMat上绘制完所有圆之后,我们可以将其显示给用户:
cv.imshow('imageCanvas', displayMat);
Finally, it's good practice to clean up the Mat objects which we'll no longer be needing. This is done to prevent memory problems:
最后,优良作法是清理不再需要的Mat对象。 这样做是为了防止出现内存问题:
srcMat.delete();
displayMat.delete();
circlesMat.delete();
Altogether the circle detection and drawing code looks like this:
圆检测和绘制代码总共如下所示:
// previous code is here

document.getElementById('circlesButton').onclick = function() {
    this.disabled = true;
    document.body.classList.add("loading");

    let srcMat = cv.imread('imageCanvas');
    let displayMat = srcMat.clone();
    let circlesMat = new cv.Mat();

    cv.cvtColor(srcMat, srcMat, cv.COLOR_RGBA2GRAY);

    cv.HoughCircles(srcMat, circlesMat, cv.HOUGH_GRADIENT, 1, 45, 75, 40, 0, 0);

    for (let i = 0; i < circlesMat.cols; ++i) {
        let x = circlesMat.data32F[i * 3];
        let y = circlesMat.data32F[i * 3 + 1];
        let radius = circlesMat.data32F[i * 3 + 2];

        let center = new cv.Point(x, y);
        cv.circle(displayMat, center, radius, [0, 0, 0, 255], 3);
    }

    cv.imshow('imageCanvas', displayMat);

    srcMat.delete();
    displayMat.delete();
    circlesMat.delete();

    this.disabled = false;
    document.body.classList.remove("loading");
};
下载图像 ( Downloading the Image )
After the image has been modified, the user may want to download it. To do this, add a hyperlink to your index.html file:
修改图像后,用户可能要下载它。 为此,将超链接添加到index.html文件:
<a href="#" id="downloadButton">Download Image</a>We set the href to the image URL and the download attribute to the image file name. Setting the download attribute indicates to the browser that the resource should be downloaded rather than navigating to it. We can create the image URL from the canvas using the function toDataURL(). Add the following JavaScript to the bottom of the script:
我们将href设置为图像URL,将download属性设置为图像文件名。 设置下载属性会向浏览器指示应该下载资源,而不是导航至该资源。 我们可以使用toDataURL()函数从画布创建图像URL。 在脚本底部添加以下JavaScript:
// previous code is here

document.getElementById('downloadButton').onclick = function() {
    this.href = document.getElementById("imageCanvas").toDataURL();
    this.download = "image.png";
};
结论 ( Conclusion )
Detecting circles is a very simple task with OpenCV. Once you get accustomed to manipulating images as Mat objects, there is so much more you can do. The HoughCircles algorithm is one of many provided by OpenCV to make image processing and image recognition that much easier. You can find more tutorials, including face recognition and template matching, on the OpenCV website. OpenCV has a lot of support in the different languages and I hope this tutorial shows just how easy it is to use in JavaScript.
使用OpenCV,检测圈子是一项非常简单的任务。 一旦习惯了将图像作为Mat对象进行操作,您可以做更多的事情。 HoughCircles算法是OpenCV提供的众多算法之一,它使图像处理和图像识别变得更加容易。 您可以在OpenCV网站上找到更多教程,包括人脸识别和模板匹配。 OpenCV在不同的语言中有很多支持,我希望本教程展示在JavaScript中使用它是多么容易。
翻译自: https://scotch.io/tutorials/introduction-to-computer-vision-in-javascript-using-opencvjs
opencv 计算机视觉


 2万+
2万+

 被折叠的 条评论
为什么被折叠?
被折叠的 条评论
为什么被折叠?
 到【灌水乐园】发言


