


Check out Learn Visual Studio Code to learn everything you need to know about about the hottest editor in Web Development for only $10!
查看“ 学习Visual Studio Code” ,仅需10美元,即可了解有关Web开发中最热的编辑器所需的所有知识!
If you pay attention in the developer community, you probably know that Microsoft bought Github over the summer in 2018. With a massive company like Microsoft buying the world's most popular open source software developer platform, many people had questions and concerns regarding the impact this would have.
如果您在开发人员社区中关注,您可能知道Microsoft在2018年夏天购买了Github。随着像Microsoft这样的大型公司购买了全球最受欢迎的开源软件开发人员平台,许多人对这可能产生的影响有疑问和担忧。有。
Just recently, a piece of that puzzle became clearer... there will be tighter integration between Microsoft products and Github. Microsoft/Github released a new extension for Visual Studio Code called Github Pull Requests.
就在最近,这个难题的一部分变得更加清晰了……Microsoft产品与Github之间的集成将更加紧密。 Microsoft / Github发布了Visual Studio Code的新扩展,称为Github Pull Requests 。
The name of the extension pretty clearly explains what it does, but to be clear, this extensions allows developers to handle pull requests right in Visual Studio Code without having to navigate to Github's website. That said, let's take a look at the extension and how it works!
扩展名很清楚地说明了它的作用,但是要明确一点,该扩展允许开发人员直接在Visual Studio Code中处理拉取请求,而不必导航到Github的网站。 也就是说,让我们看一下扩展及其工作方式!
TL:DR (TL:DR)
- Install the extension 安装扩展
- Login and refresh pull requests 登录并刷新请求请求
- Open pull request details and respond appropriately (comment, approve, etc.) 打开拉取请求的详细信息并做出适当的响应(评论,批准等)
创建一个Github项目 ( Create a Github Project )
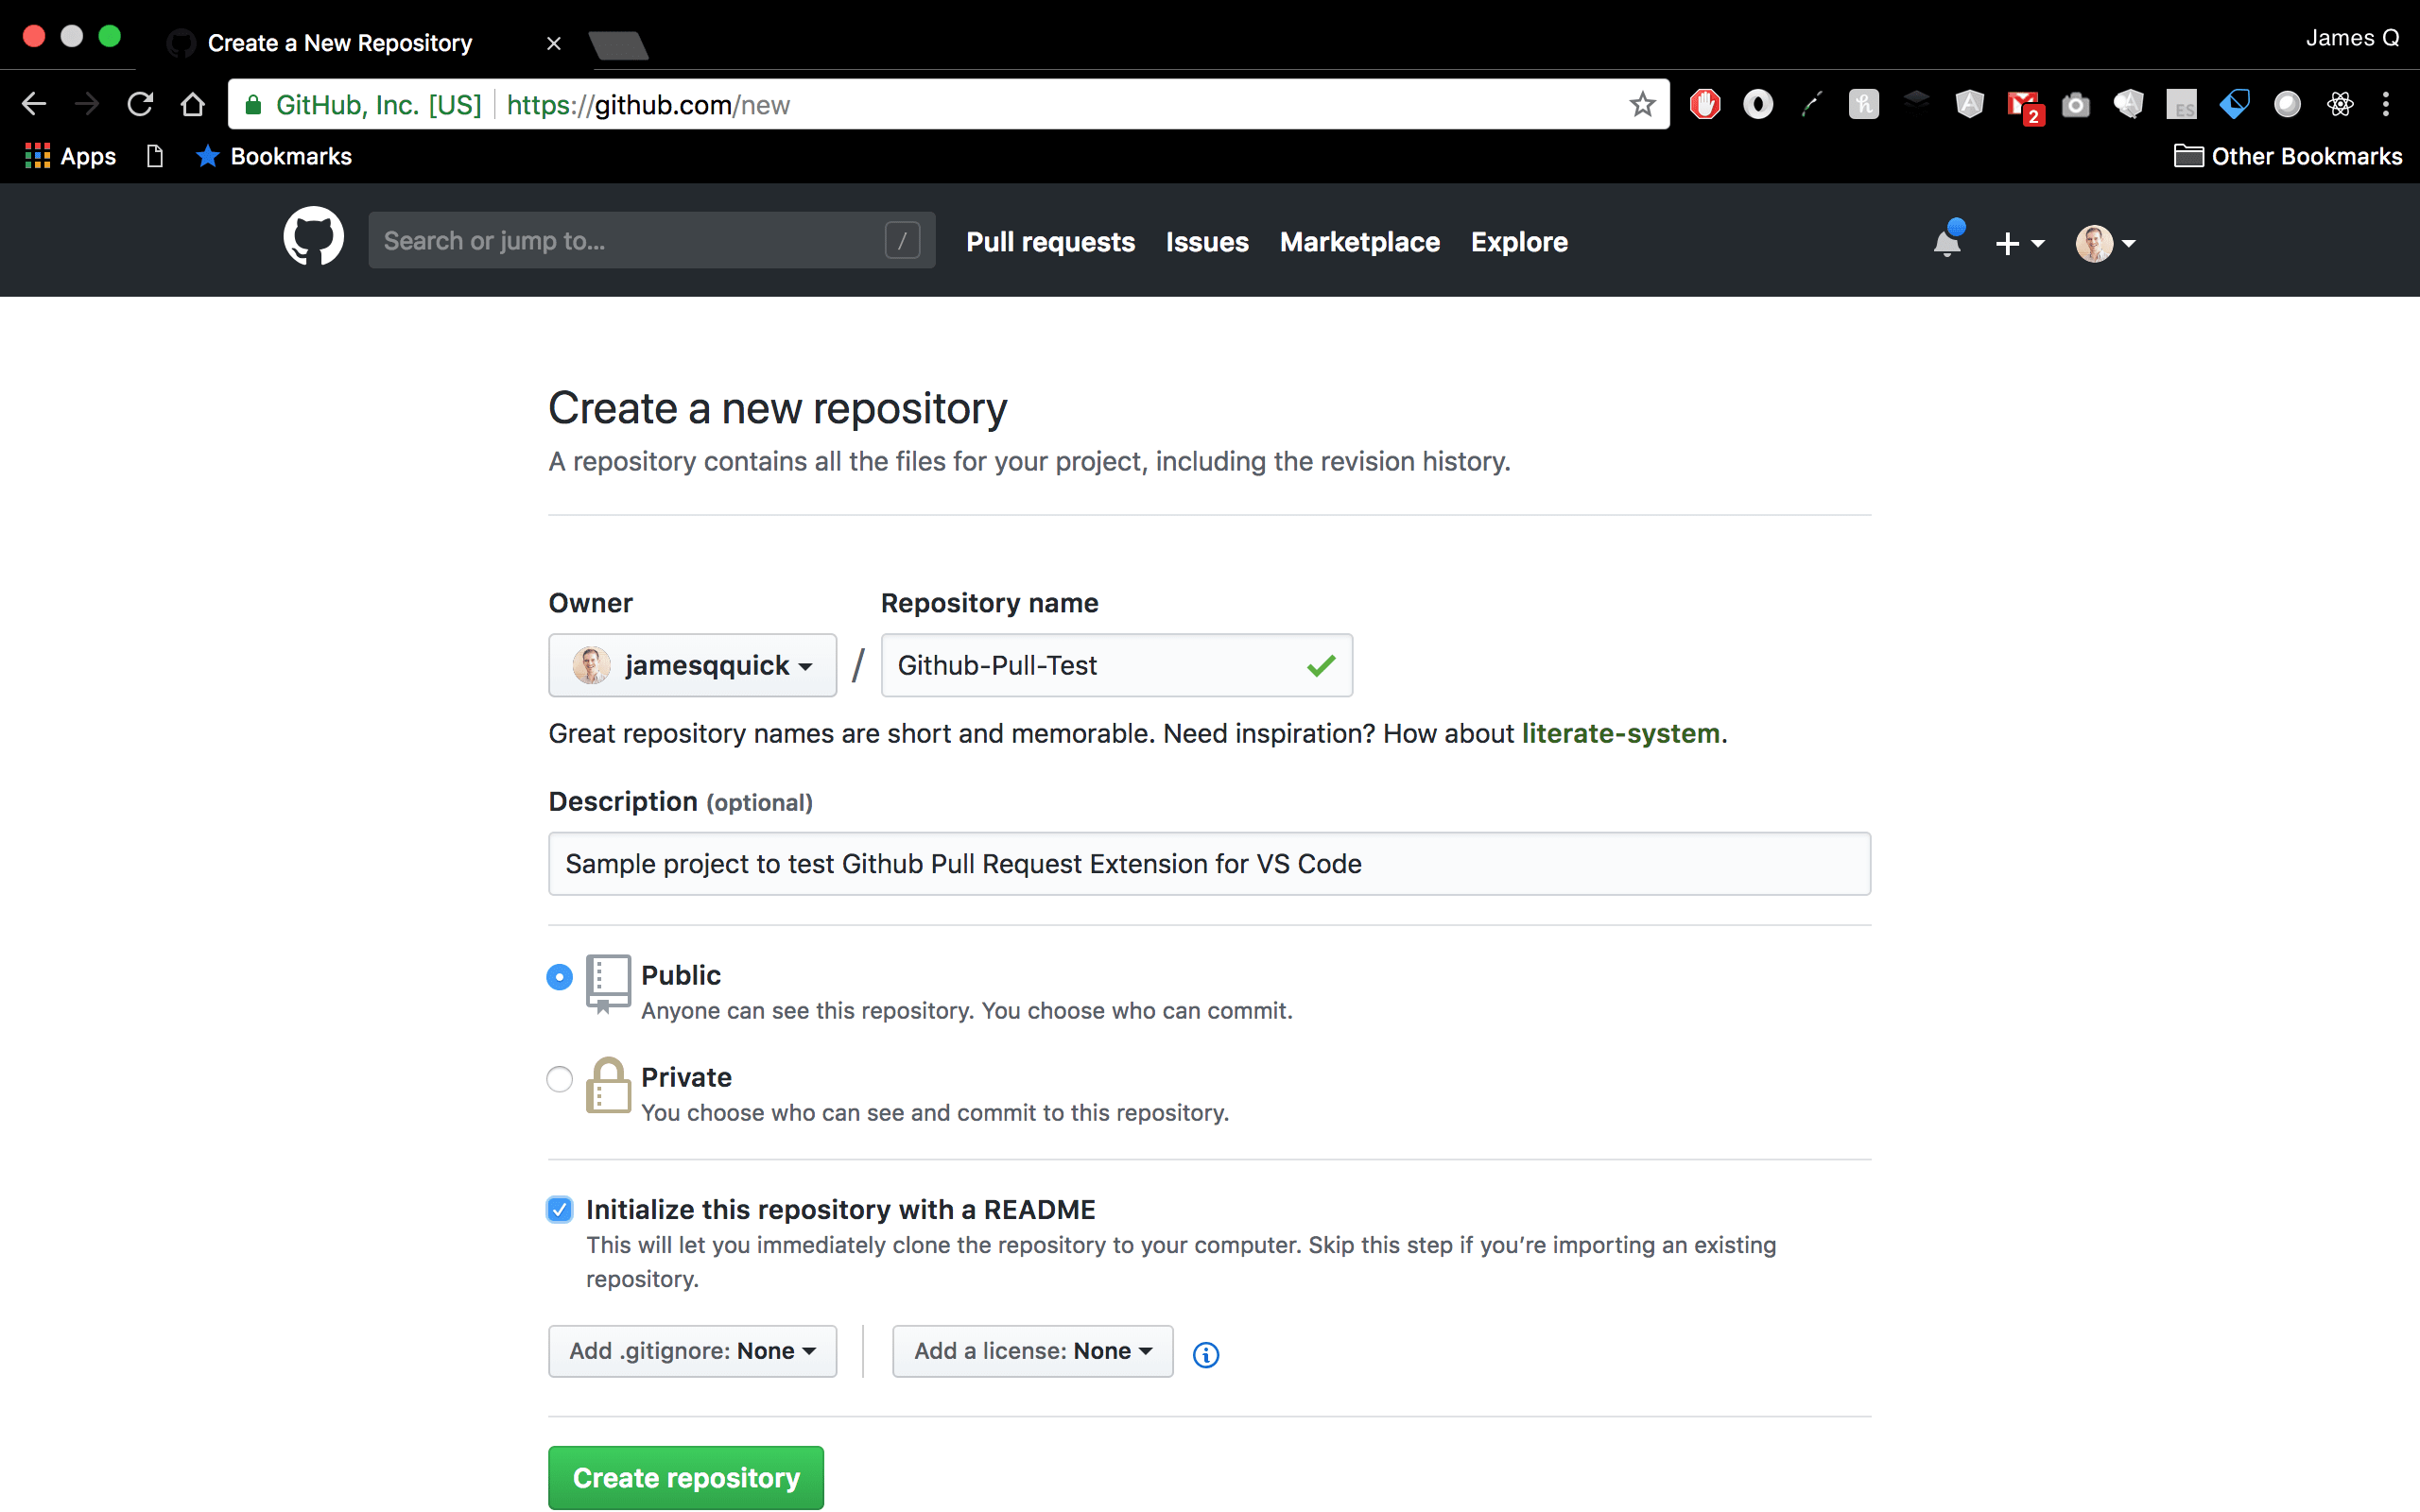
To be able to demo handling pull requests, I'll be using two different Github accounts that I own. I'll refer to these as Primary and Secondary Github accounts. To get started, I'm going to create a dummy project called Github Pull Test on one account.
为了演示如何处理请求请求,我将使用我拥有的两个不同的Github帐户。 我将这些称为主要和辅助Github帐户。 首先,我将在一个帐户上创建一个名为Github Pull Test的虚拟项目。
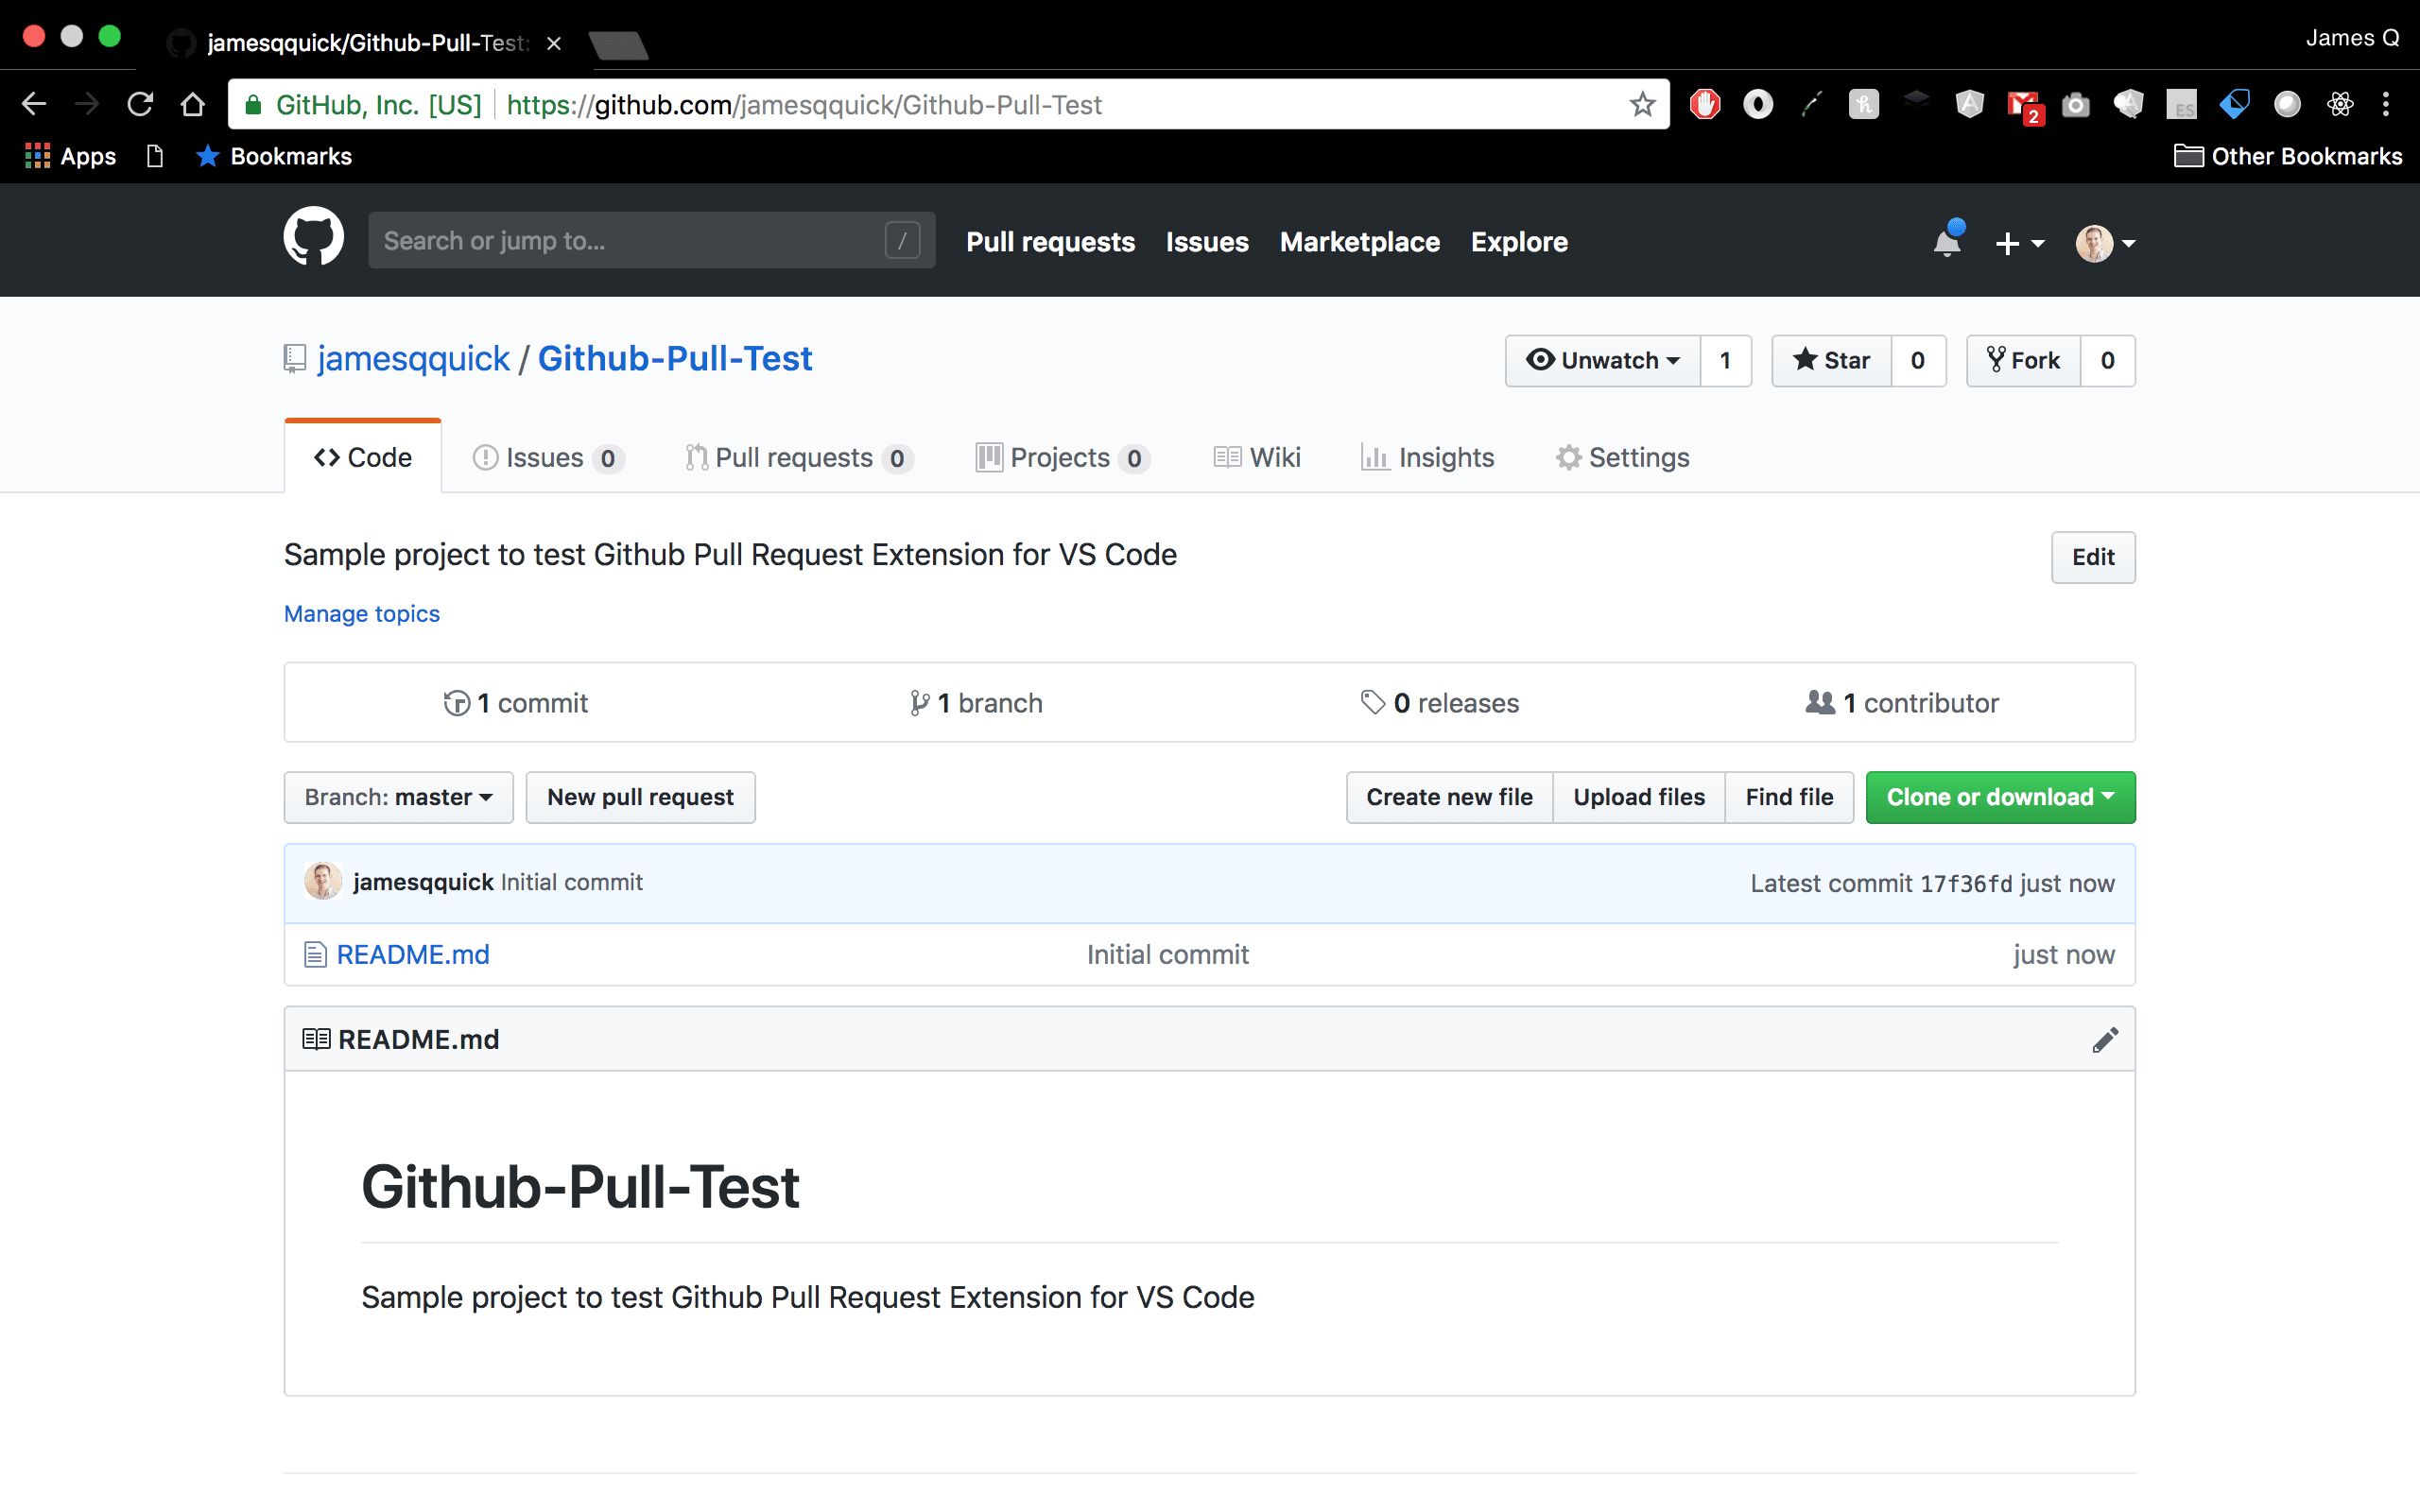
Here's the created project.
这是创建的项目。
From here, I'm going to switch over to my other Github account to create a pull request.
从这里,我将切换到我的其他Github帐户来创建提取请求。
创建请求请求 ( Create a Pull Request )
If you're new to the idea of creating pull requests and forking, you can use Github documentation on pull requests or forking for reference. Basically, what I'll do is fork the project first. This will create a repository in my secondary Github account that is a copy of the project from the first. I'll make a change, then I'll create a Pull Request to try and get my changes merged into the primary Github user's repository.
如果您不熟悉创建拉取请求和派生的想法,可以在拉取请求或派生上使用Github文档作为参考。 基本上,我要做的是先将项目分叉。 这将在我的辅助Github帐户中创建一个存储库,该存储库是第一个项目的副本。 我将进行更改,然后创建一个“拉取请求”以尝试将我的更改合并到主要Github用户的存储库中。
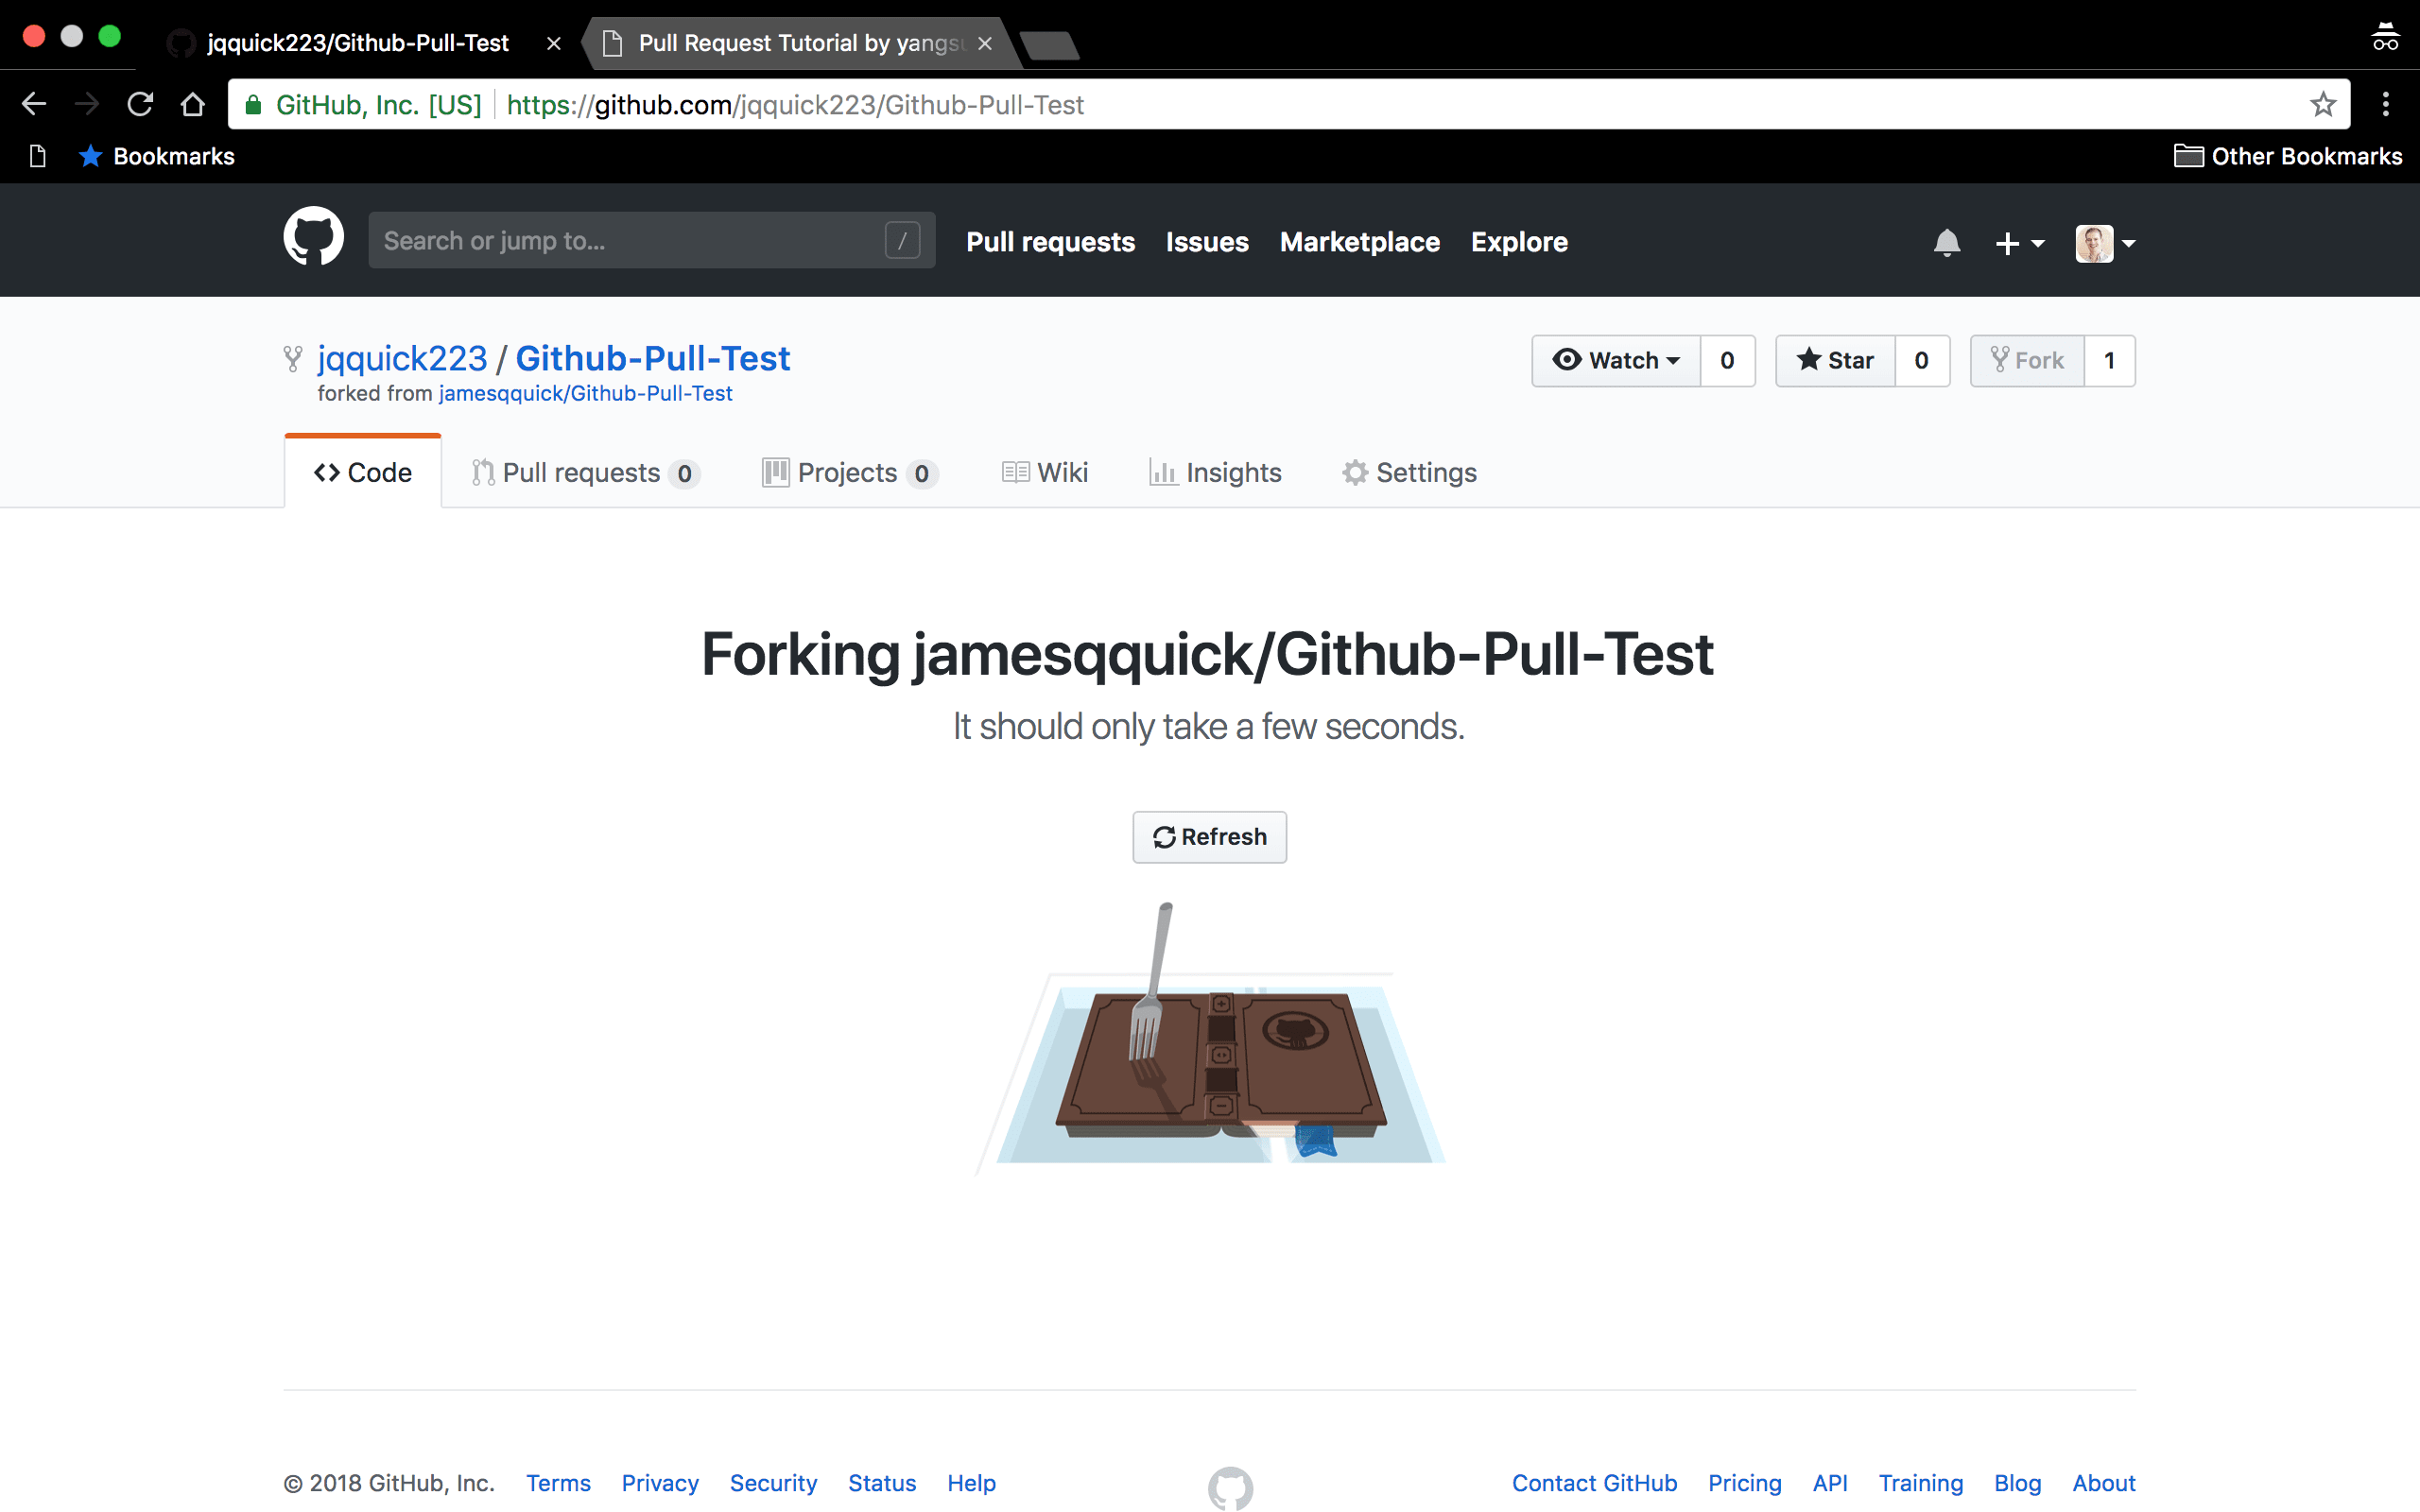
I'll start by forking the project.
我将从分叉该项目开始。
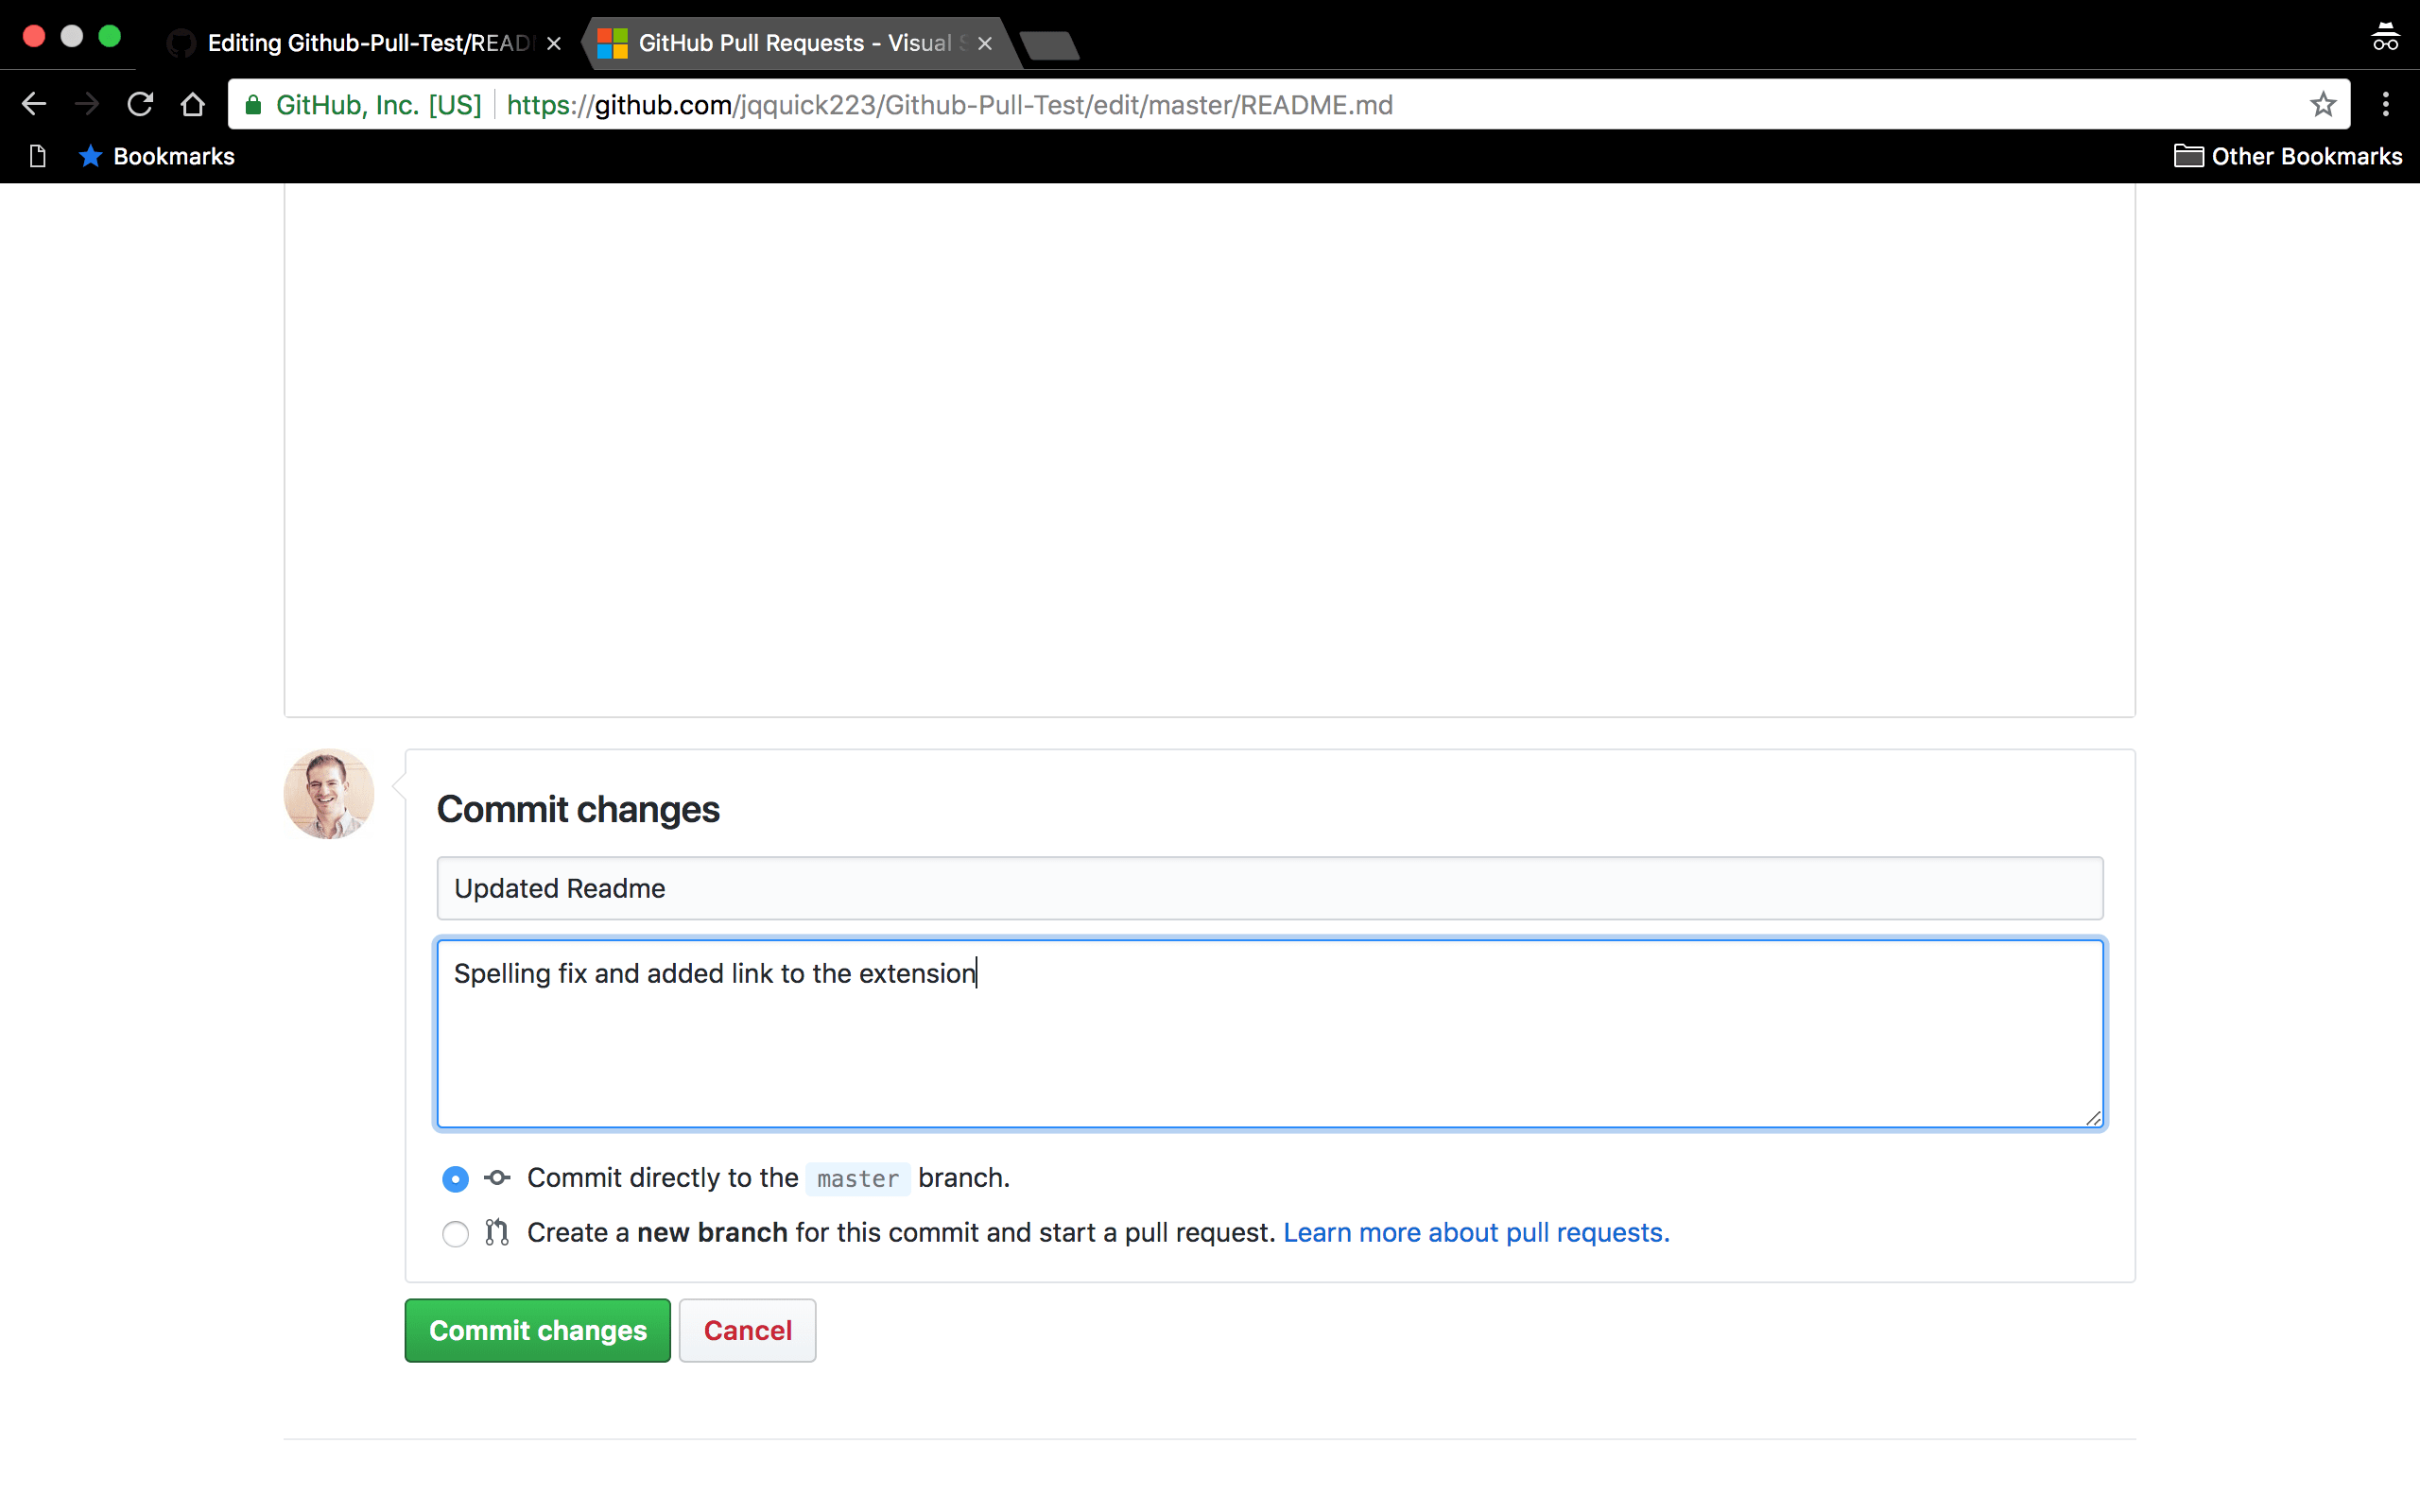
Now I need to make a change. I'm simply going to make a change to the ReadMe file. For something this simple, I'm going to make the change directly in Github for the secondary Github user.
现在,我需要进行更改。 我只是要对自述文件进行更改。 对于一些简单的事情,我将直接在Github中为辅助的Github用户进行更改。
Here, I've just updated the ReadMe to fix one spelling issue and add a link to the Github Pull Request extension.
在这里,我刚刚更新了自述文件以解决一个拼写问题,并添加了指向Github Pull Request扩展的链接。

Then, I'll commit those changes directly to master branch for the secondary user.
然后,我将那些更改直接提交给辅助用户的master分支。
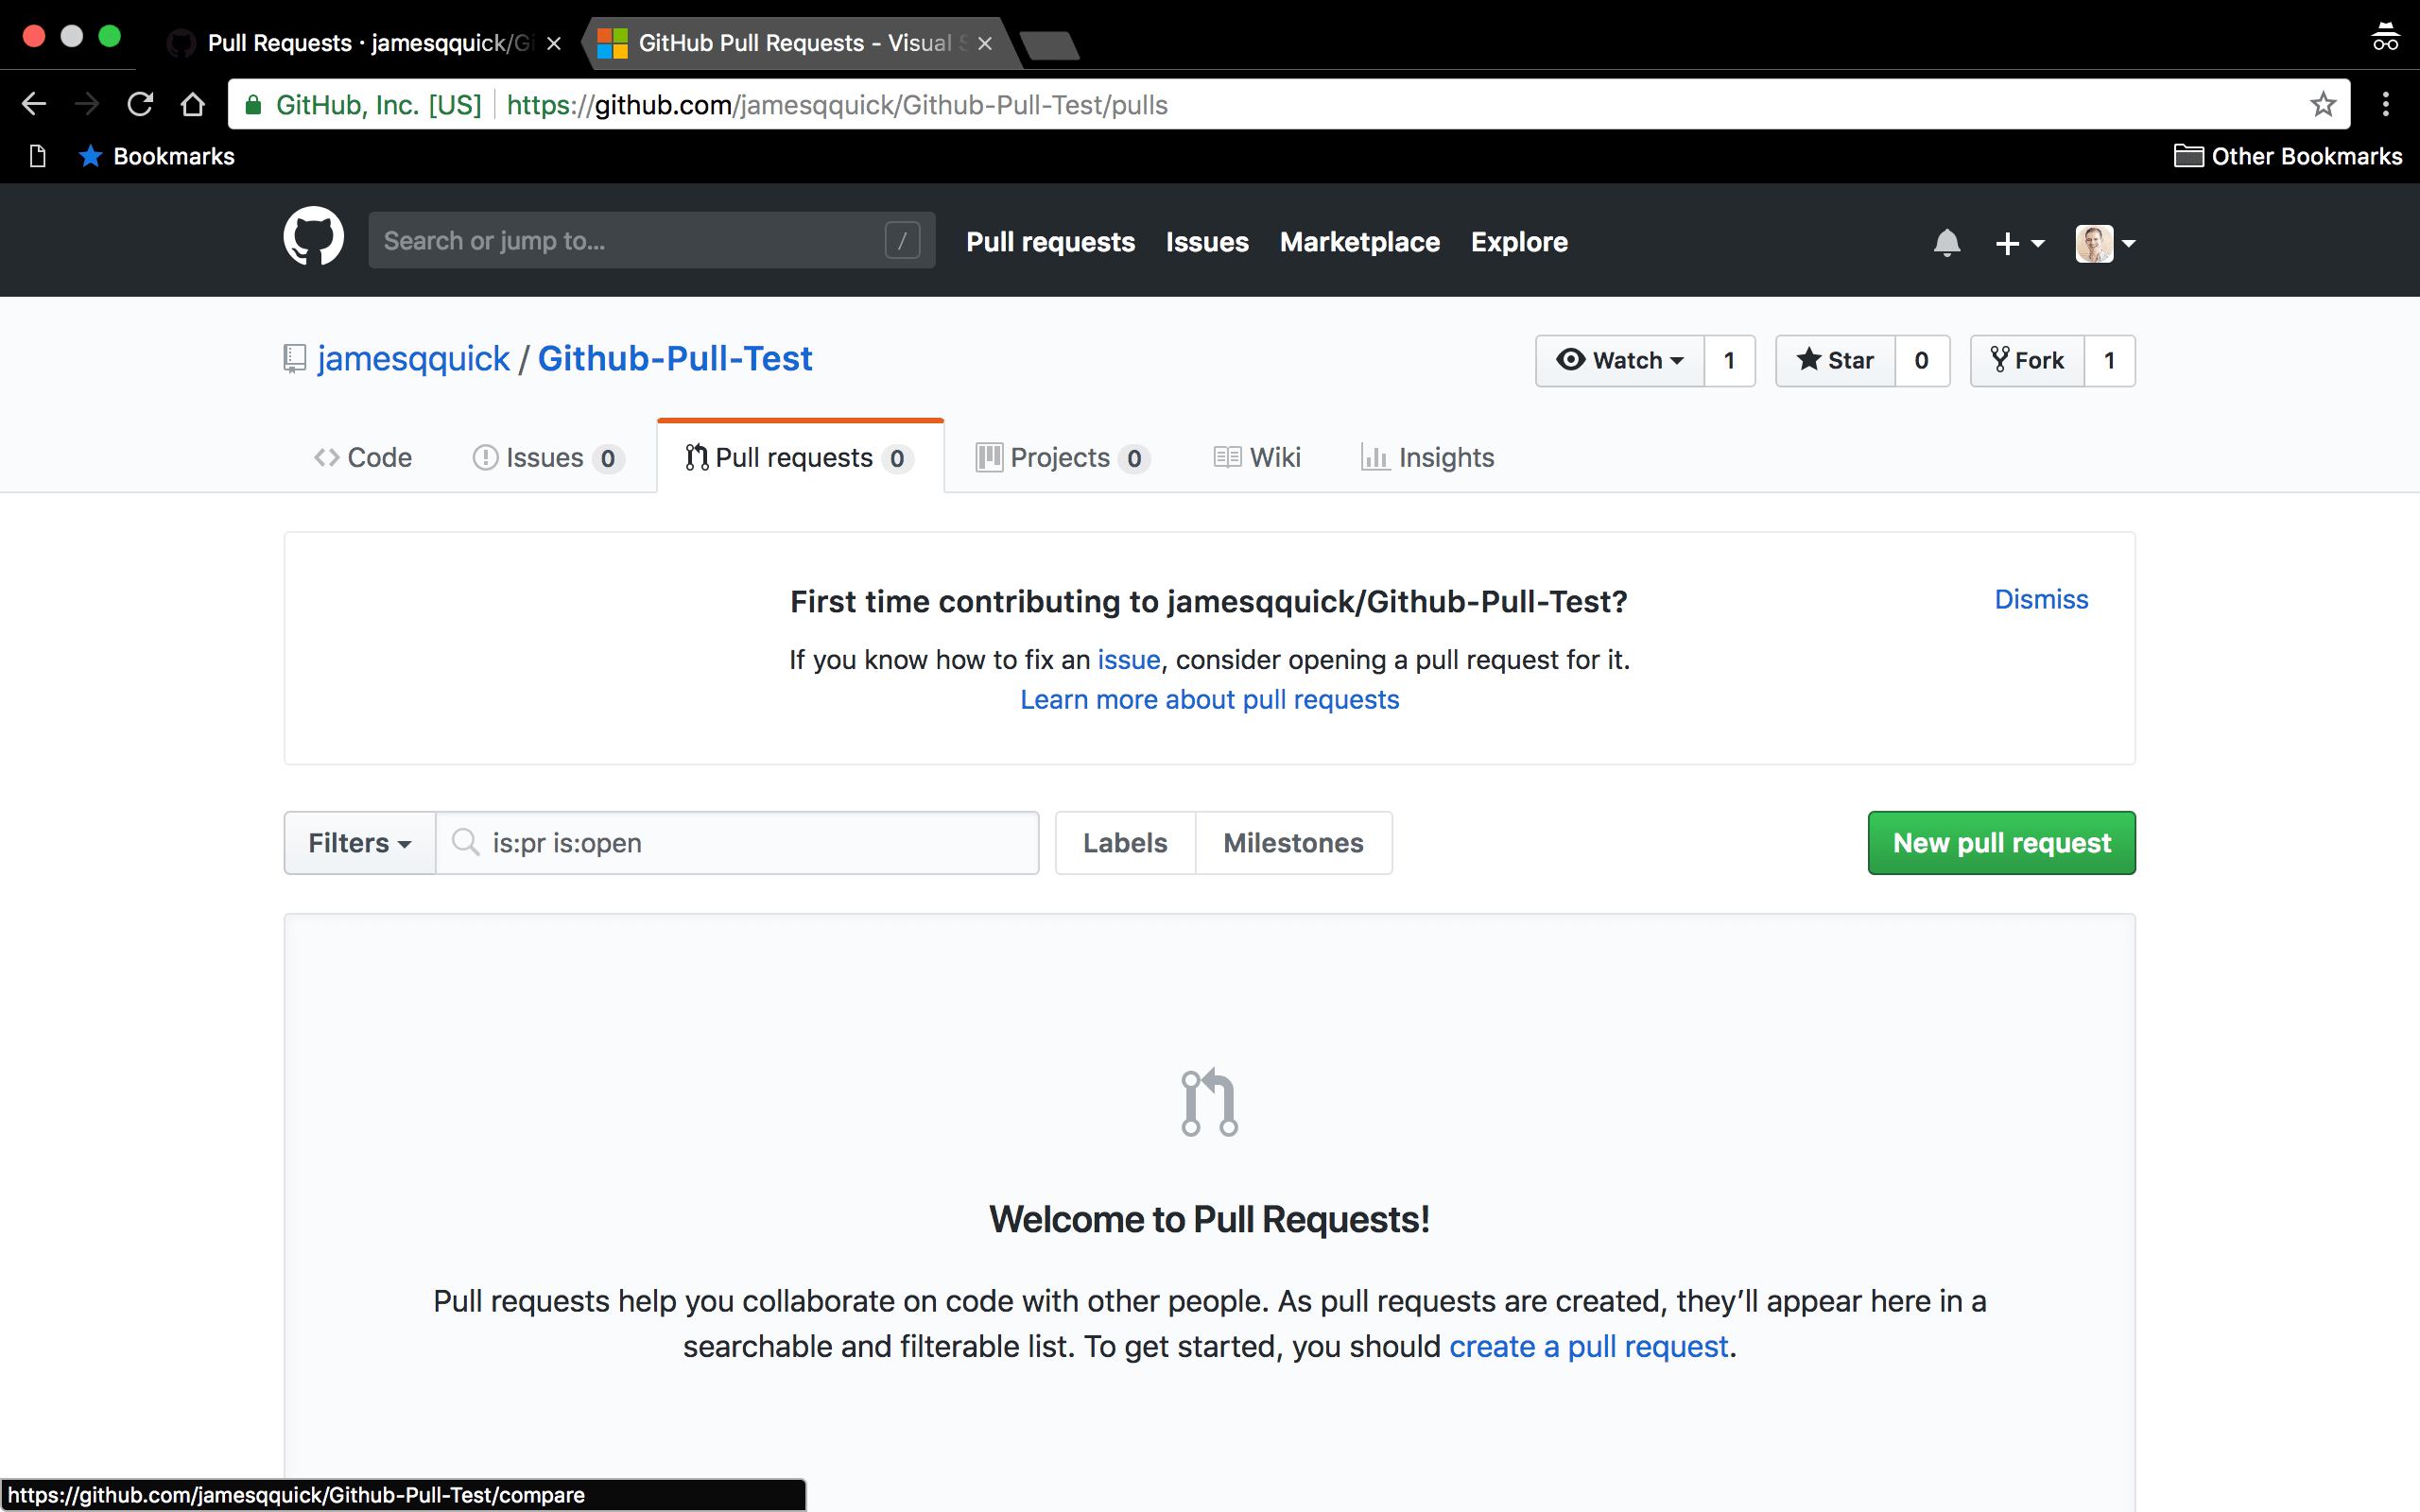
Now, to actually create the Pull Request. I navigate back to the repository under the primary account and click on the Pull Requests tab. Here, I'll click on "New Pull Request".
现在,实际创建拉取请求。 我导航回到主帐户下的存储库,然后单击“拉取请求”选项卡。 在这里,我将点击“新请求请求”。
It now asks me which branches I want to compare and use in my Pull Requests. I actually want to compare from a forked repository so I'll click "compare across forks".
现在,它询问我要比较哪些分支并在“拉取请求”中使用。 我实际上是想从一个分叉的存储库中进行比较,因此我将单击“跨叉比较”。

Now, I can compare the master branch of the primary and secondary accounts.
现在,我可以比较主要帐户和辅助帐户的主分支。
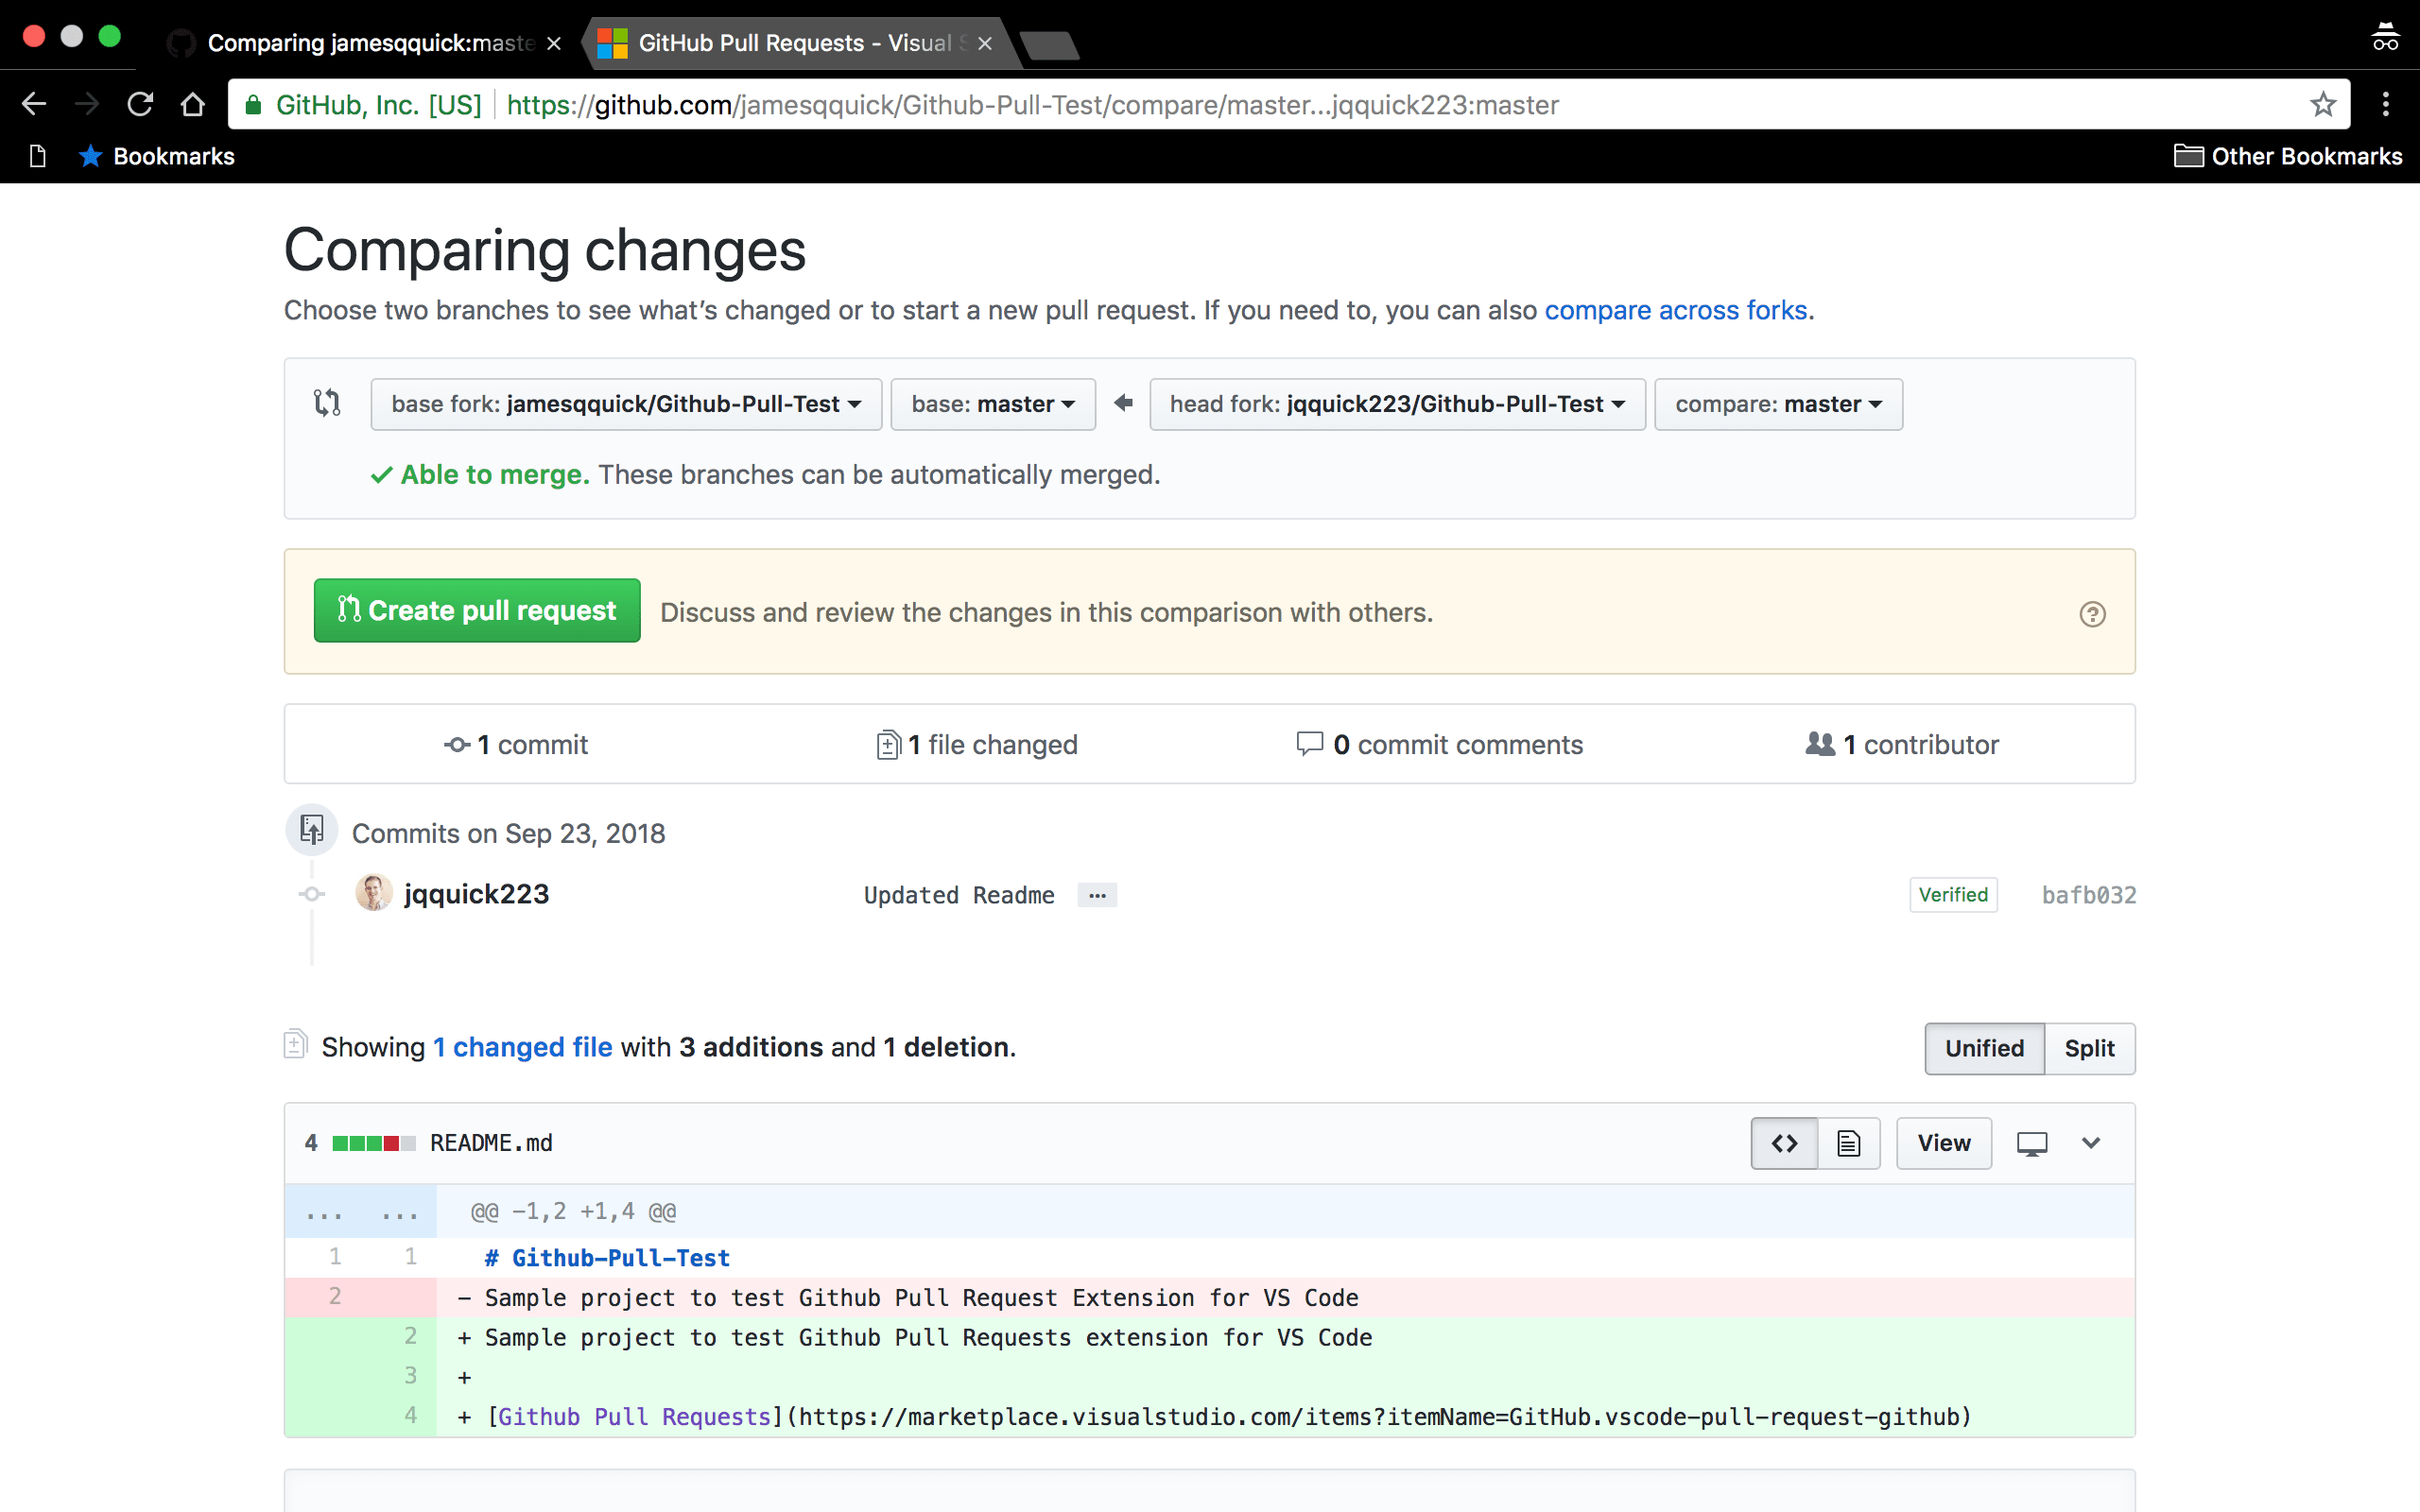
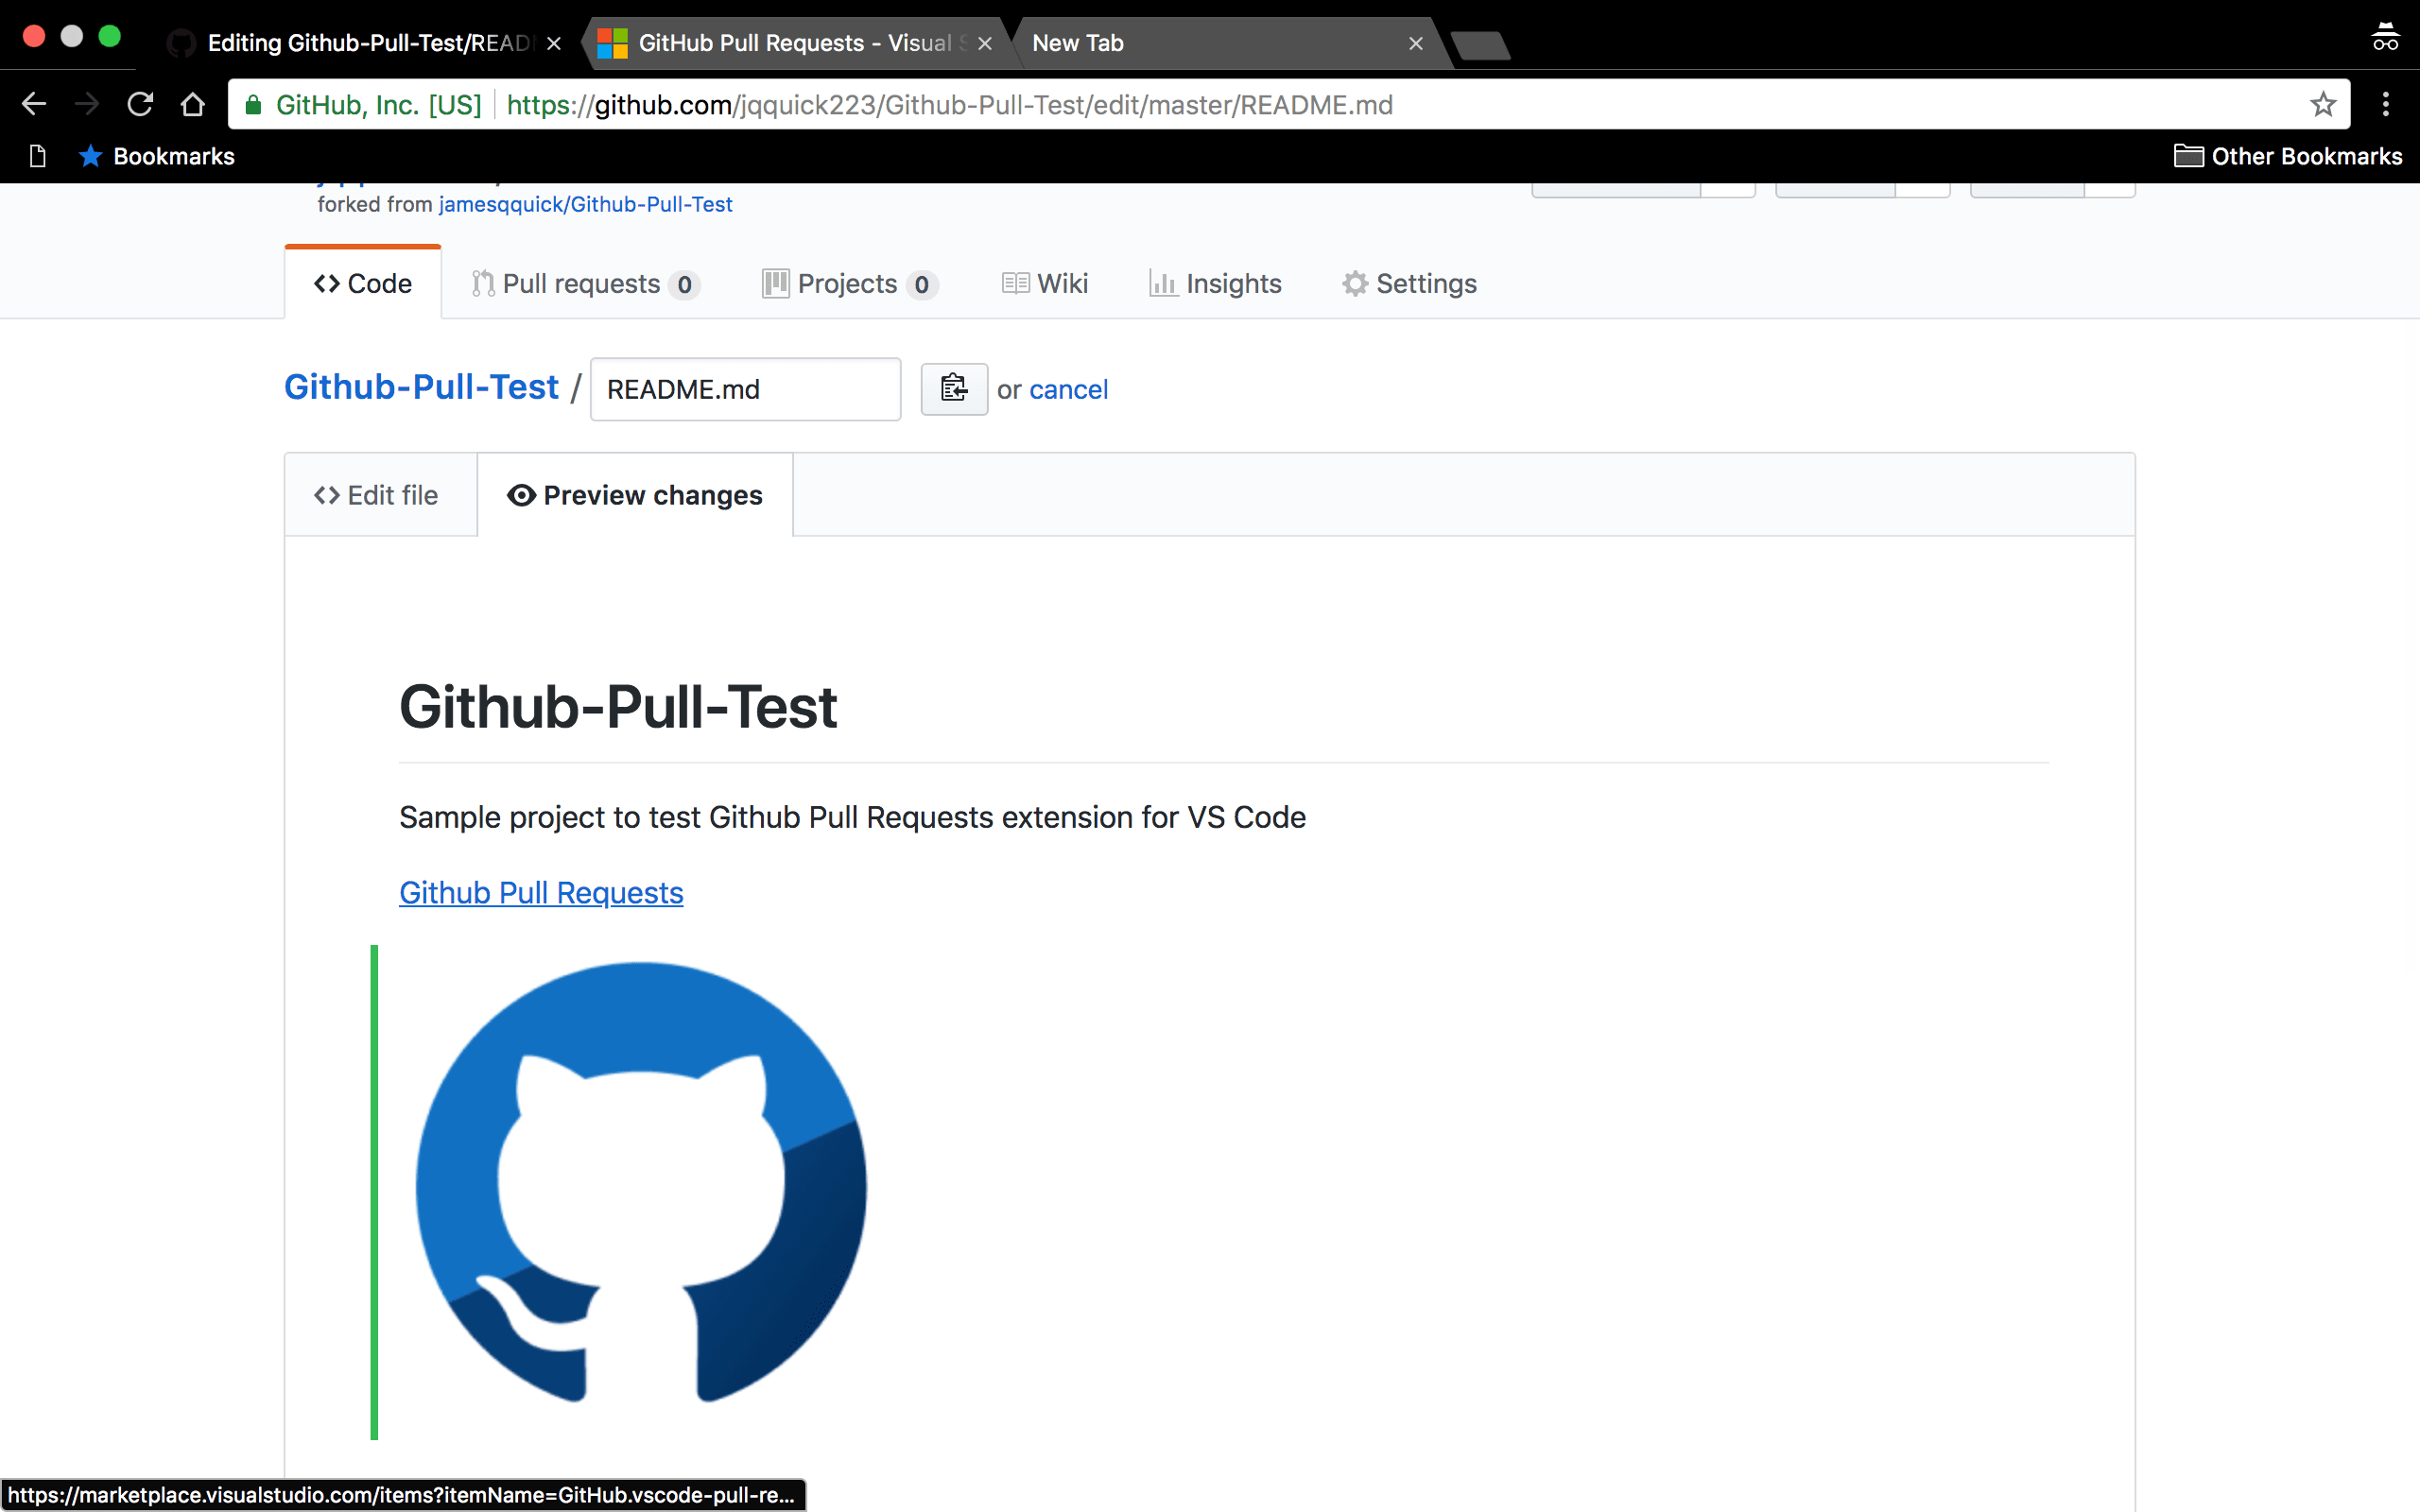
Notice that it shows me a diff of what has changed in the README.md file. Everything looks good, so I'll scroll down and click "Create Pull Request".
请注意,它向我显示了README.md文件中已更改内容的差异。 一切看起来都不错,所以我将向下滚动并单击“创建请求请求”。
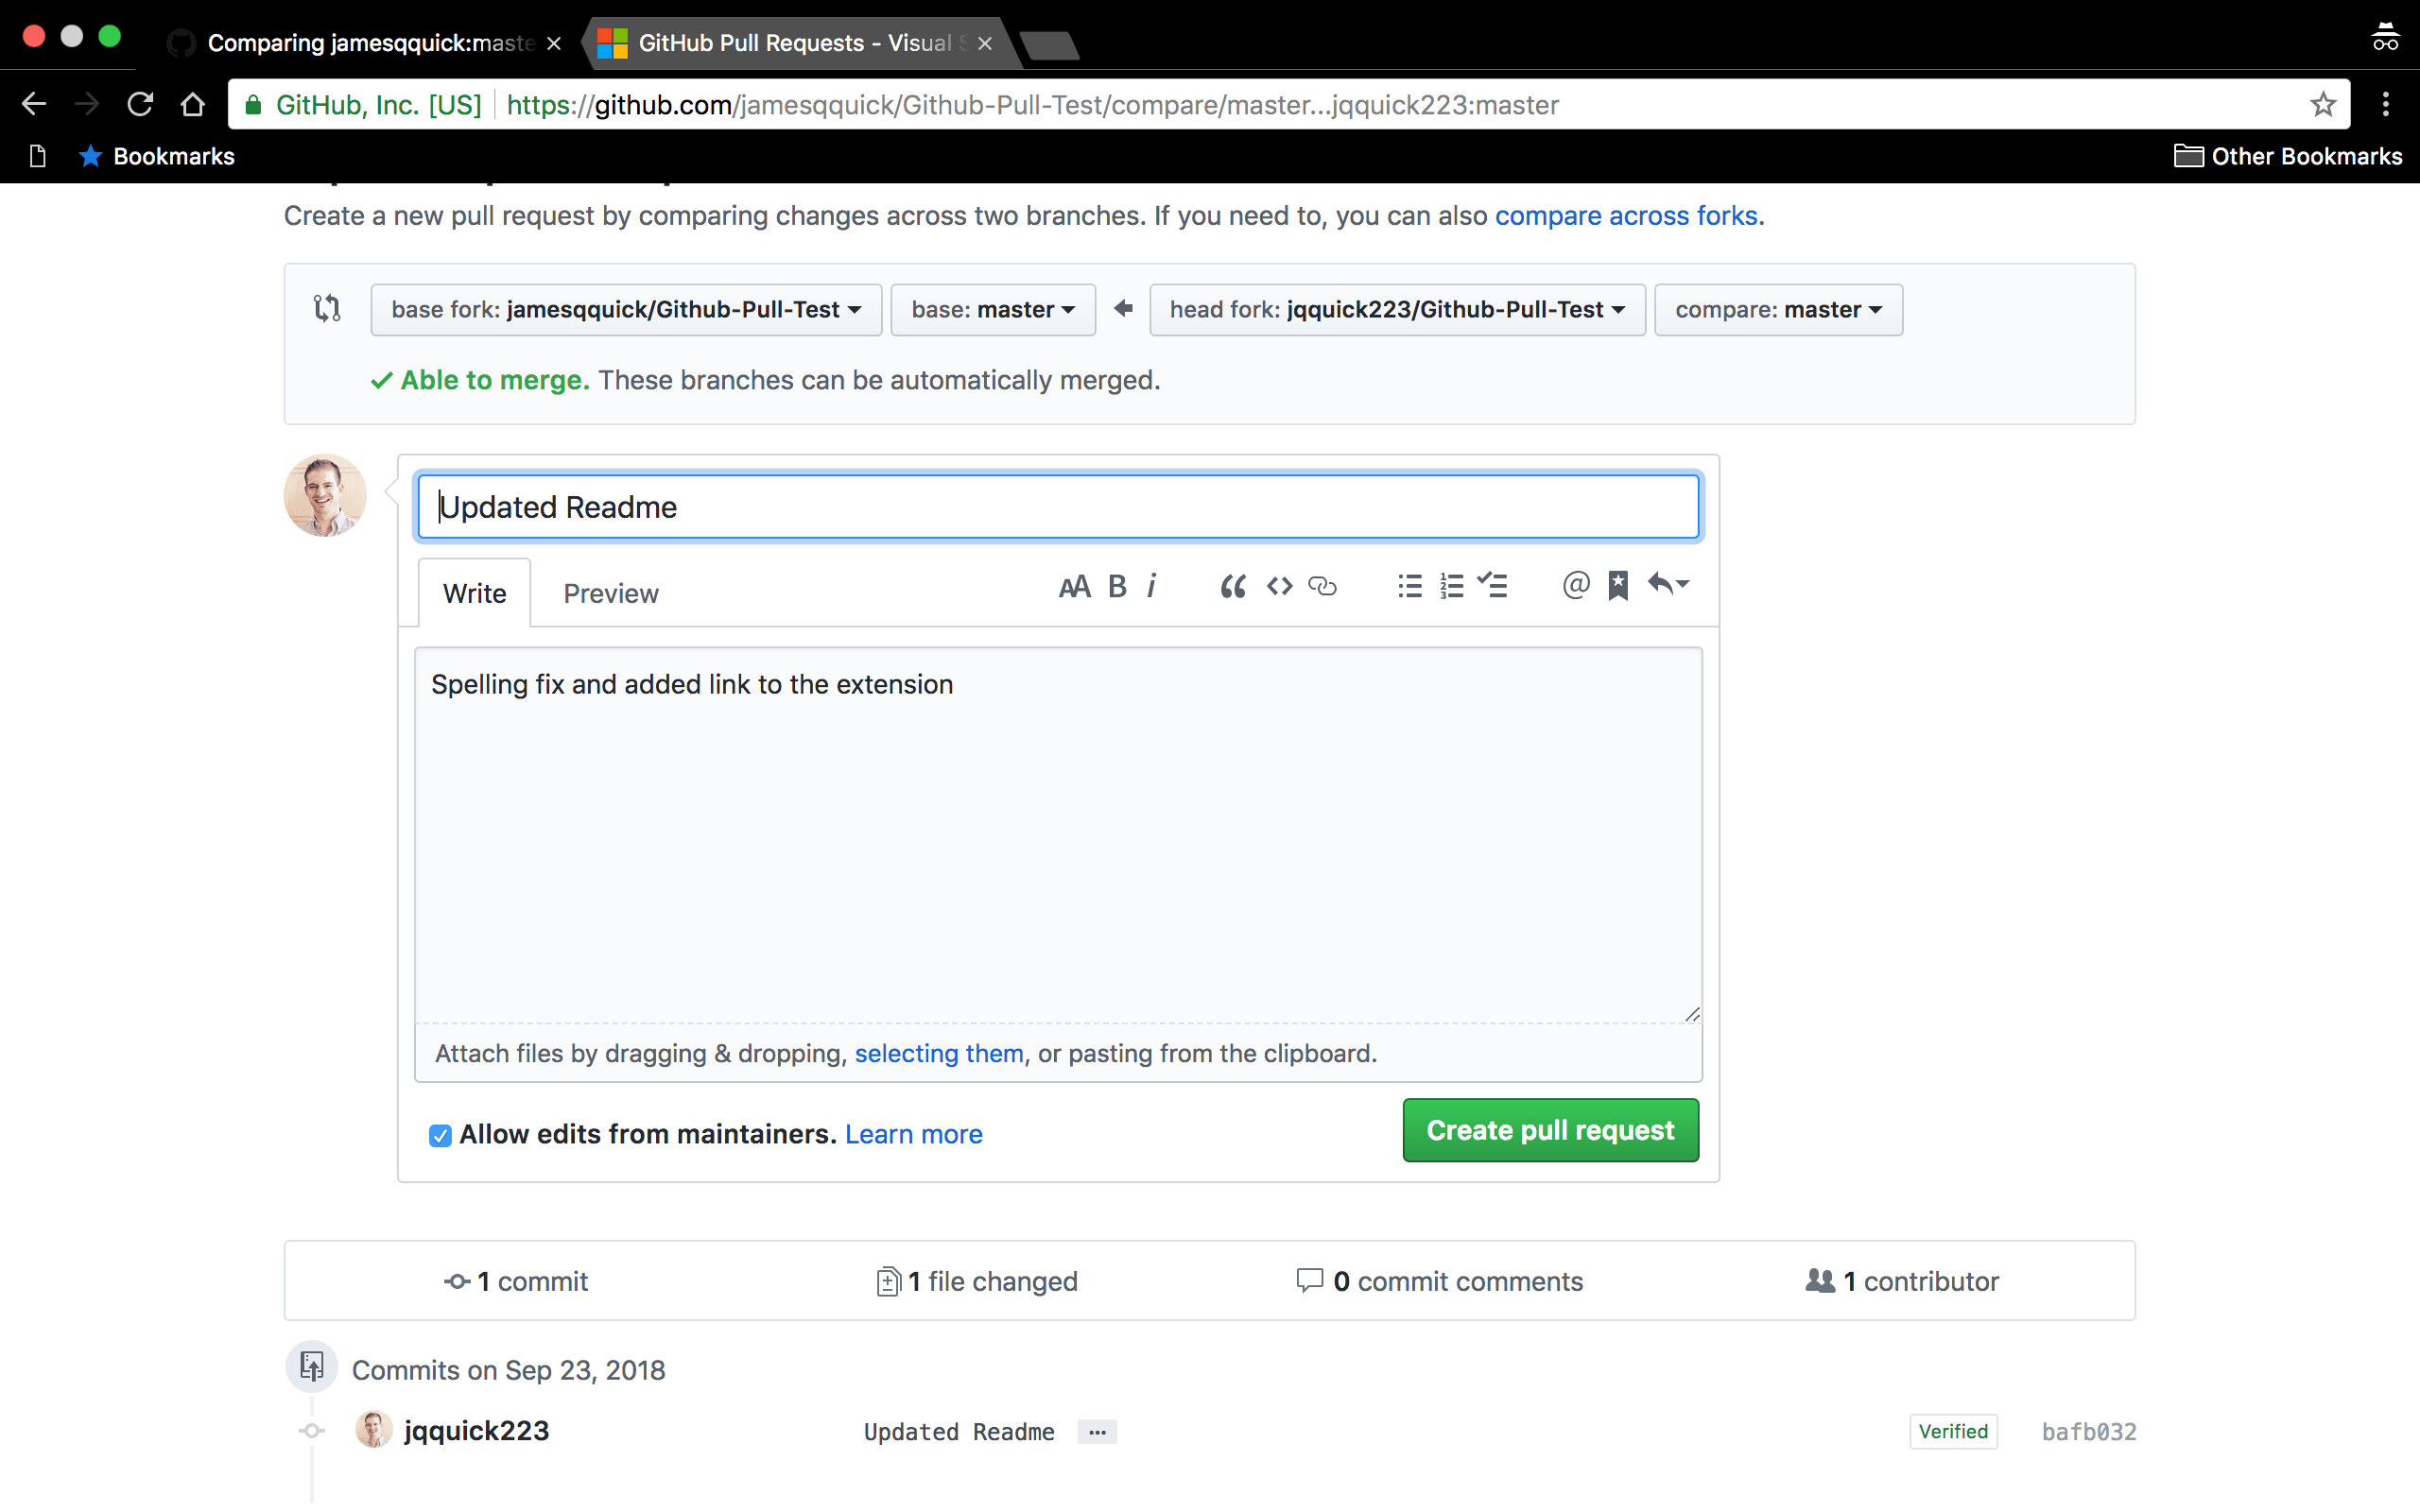
To recap, I created to the initial project for the primary account. Then, I forked that project with my secondary account which created a copy of the repository. I then made changes to the secondary repository and commited those changes. Lastly, I created a pull request from the secondary fork.
回顾一下,我为主要帐户创建了初始项目。 然后,我用辅助帐户分叉了该项目,该帐户创建了存储库的副本。 然后,我对辅助存储库进行了更改,并提交了这些更改。 最后,我从辅助分支创建了一个拉取请求。
安装Github拉取请求扩展 ( Install Github Pull Requests Extension )
Now for the good stuff. To use the Github Requests Extension, you'll first need to install it!
现在换好东西了。 要使用Github Requests Extension ,您首先需要安装它!
Inside of the extensions pane in VS Code, search for the extension and install it.
在VS Code的扩展窗格内,搜索扩展并安装。

With the extension installed, I can now login to my Github account. To do this, open the Command Palette (control/command + shift + p) and type "Github Pull Requests: Sign in to Github". Then, follow the login flow.
安装扩展程序后,我现在可以登录我的Github帐户。 为此,请打开命令面板(控制/命令+ shift + p),然后键入“ Github拉取请求:登录Github”。 然后,按照登录流程进行操作。

For the demo, I also need to clone the original repository. In most scenarios, this is probably something you already have a copy of locally. I'll open the Command Palette and find "Git: Clone" and enter the clone URL of the repository. This will bring down the repository locally in VS Code.
对于演示,我还需要克隆原始存储库。 在大多数情况下,这可能是您已经拥有本地副本的东西。 我将打开“命令面板”,找到“ Git:克隆”,然后输入存储库的克隆URL。 这将以VS Code在本地关闭存储库。

Here it is.
这里是。

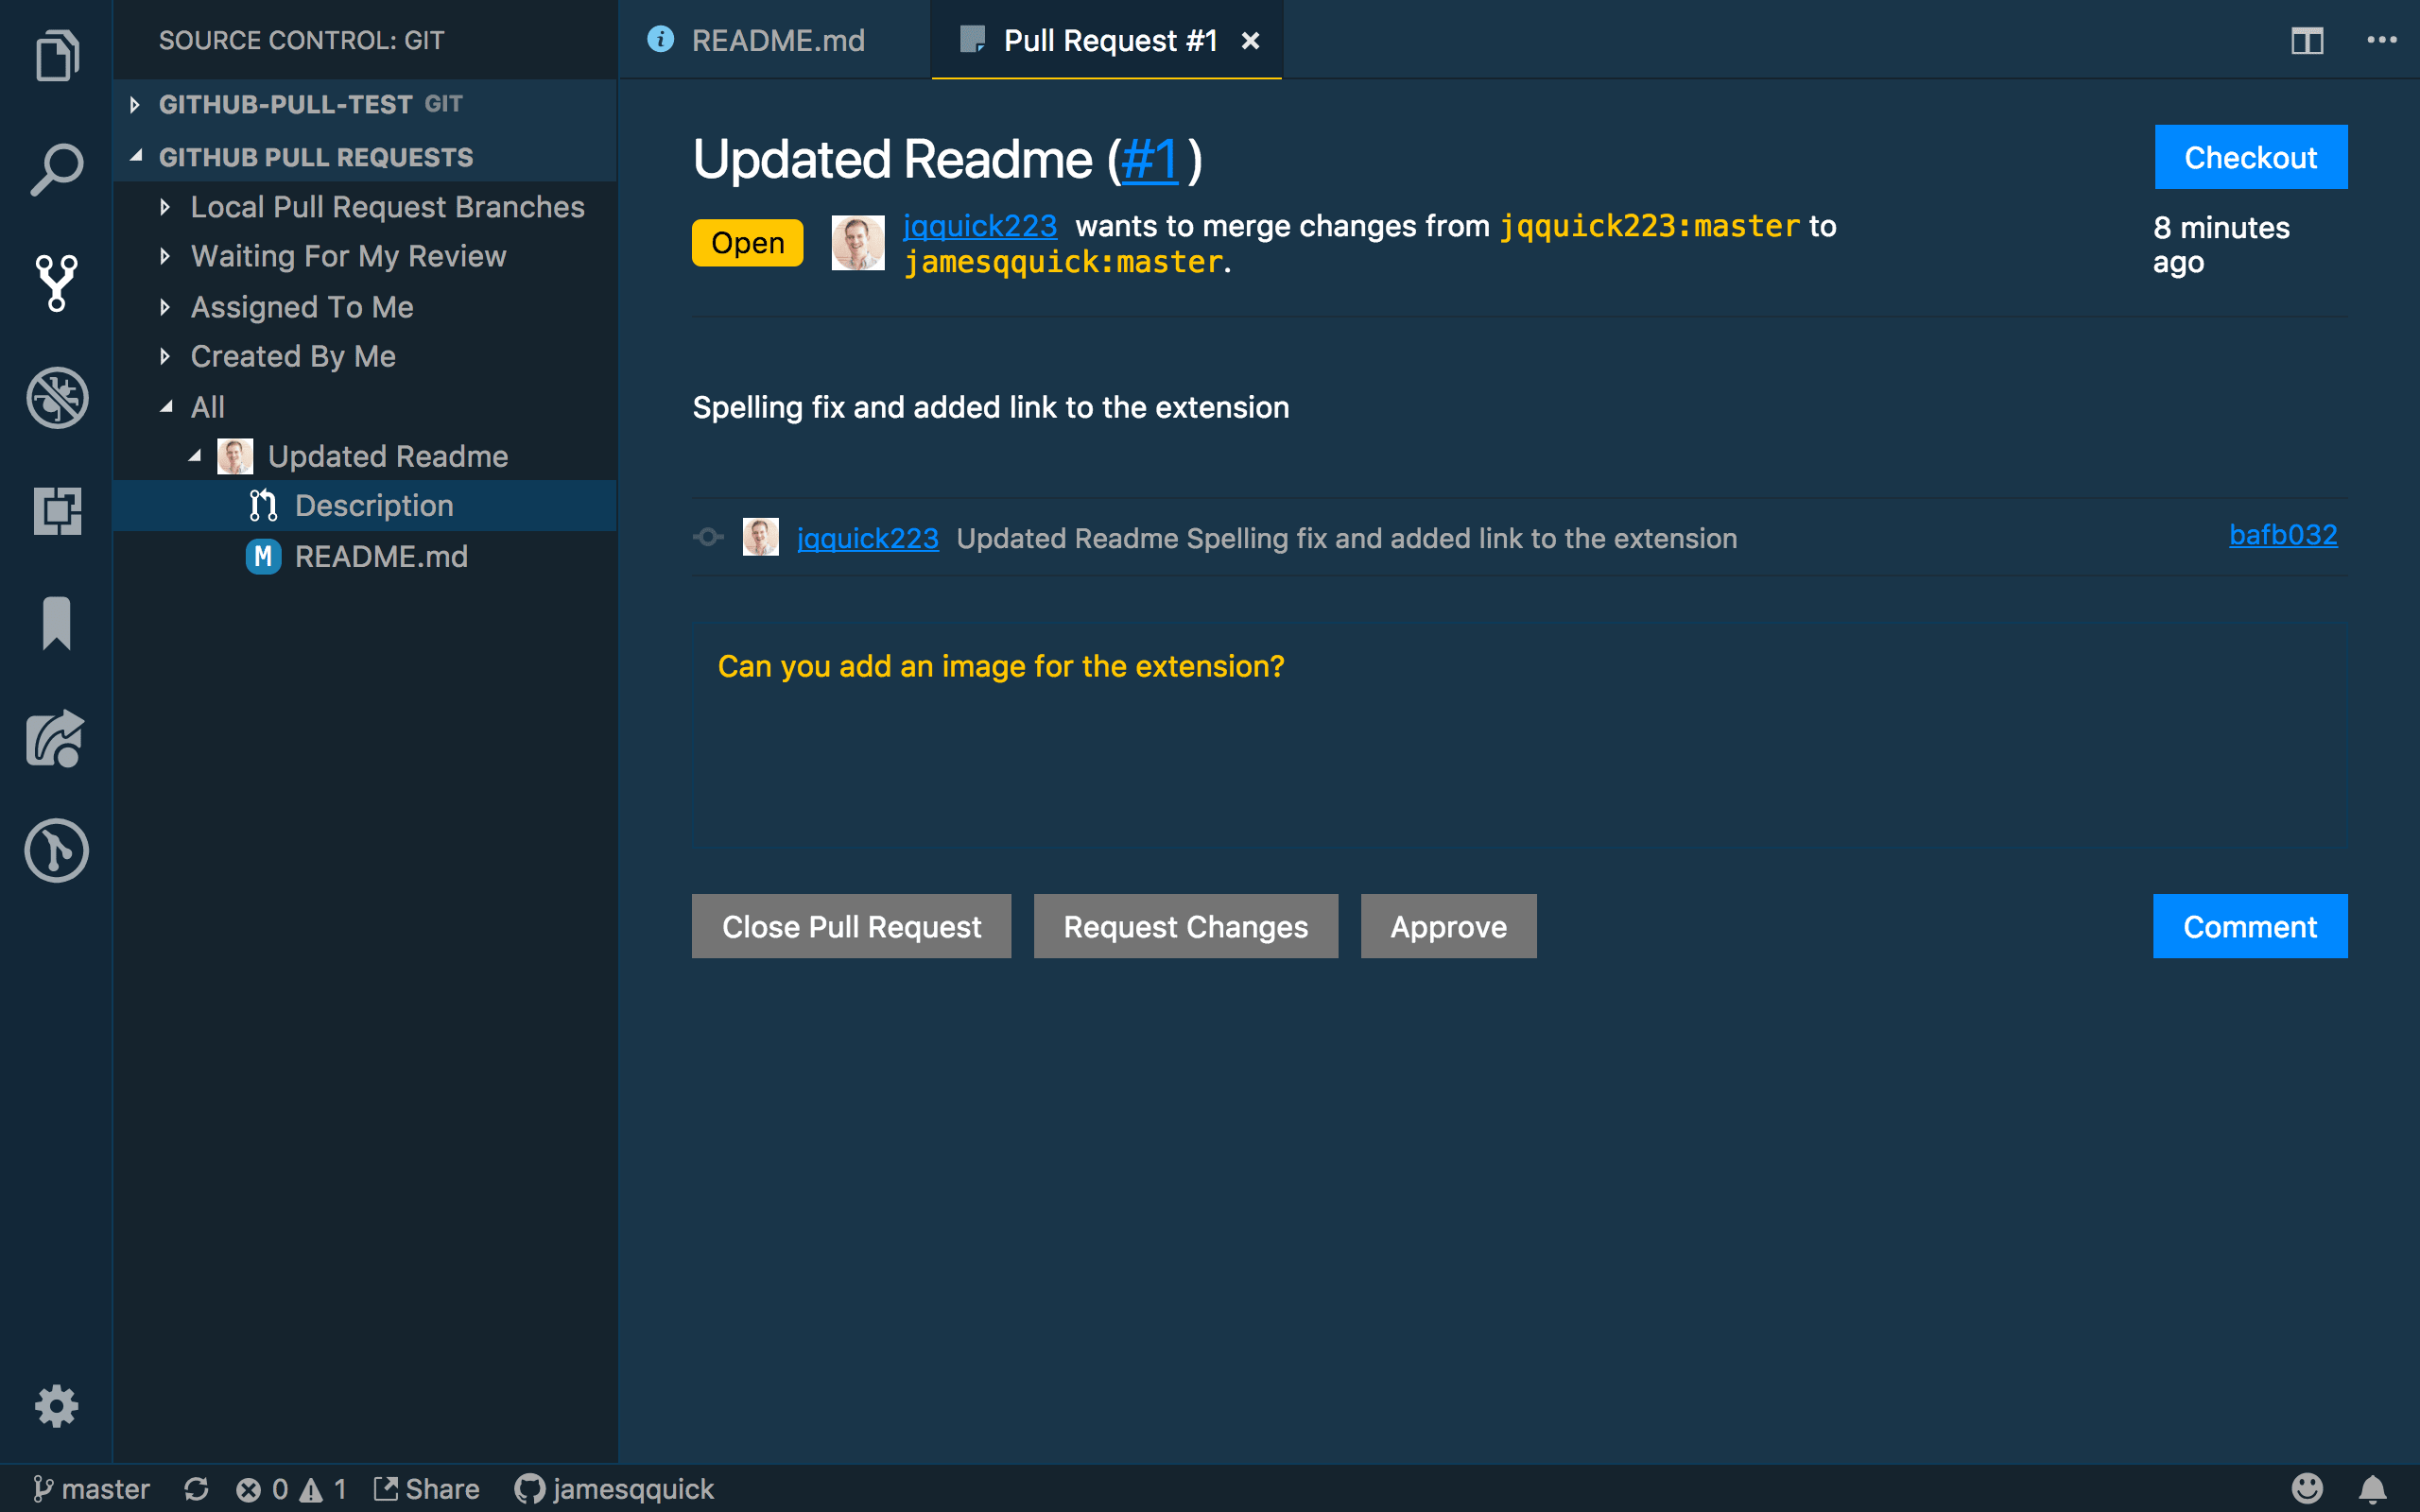
With the project open and the extension installed, if you navigate to the Source Control pane, you should notice a new section called "Github Pull Requests". This provides a list of...yep, you guessed... the pending Pull Requests that are open on the repository. If I look under the "all" category, I see the one that was created by the secondary user. Clicking on the "description" line will open up the details of the Pull Request.
在打开项目并安装扩展的情况下,如果您导航到“源代码控制”窗格,则应该注意到一个名为“ Github Pull Requests”的新部分。 这提供了...的清单,是的,您猜想...正在存储库中打开的挂起的请求。 如果我在“所有”类别下查看,则会看到由辅助用户创建的类别。 单击“描述”行将打开“拉取请求”的详细信息。

In this view, you get most of the details that you could need. You can see who issues the Pull Request, what the commits were, etc. Also, in the top right, you see a "Checkout" button which allows us to check out the code from the Pull Request locally to inspect it...pretty cool! We'll come back to this shortly.
在此视图中,您可以获得所需的大多数详细信息。 您可以看到谁发出了Pull Request,提交的内容是什么,等等。此外,在右上角,您可以看到一个“ Checkout”按钮,该按钮使我们可以从本地的Pull Request中检出代码以进行检查...漂亮凉! 我们将稍后再讨论。
For now, I'm going to leave a comment asking the other user to add an image for the extension. Adding comments is as easy as typing it in and pressing the "Comment" button.
现在,我要发表评论,要求其他用户为扩展添加图像。 添加评论就像输入然后按“评论”按钮一样简单。
So, with the secondary account, I'll go add an image.
因此,使用辅助帐户,我将添加一个图像。
And then commit the change. If I return to the Pull Request, I can see the new commit shows up, "Updated readme with image".
然后提交更改。 如果返回到“拉取请求”,则可以看到新的提交显示为“带有映像的自述文件已更新”。

And I can leave a comment for the primary account letting them know I made the requested change.
我可以为主要帐户留下评论,让他们知道我进行了请求的更改。
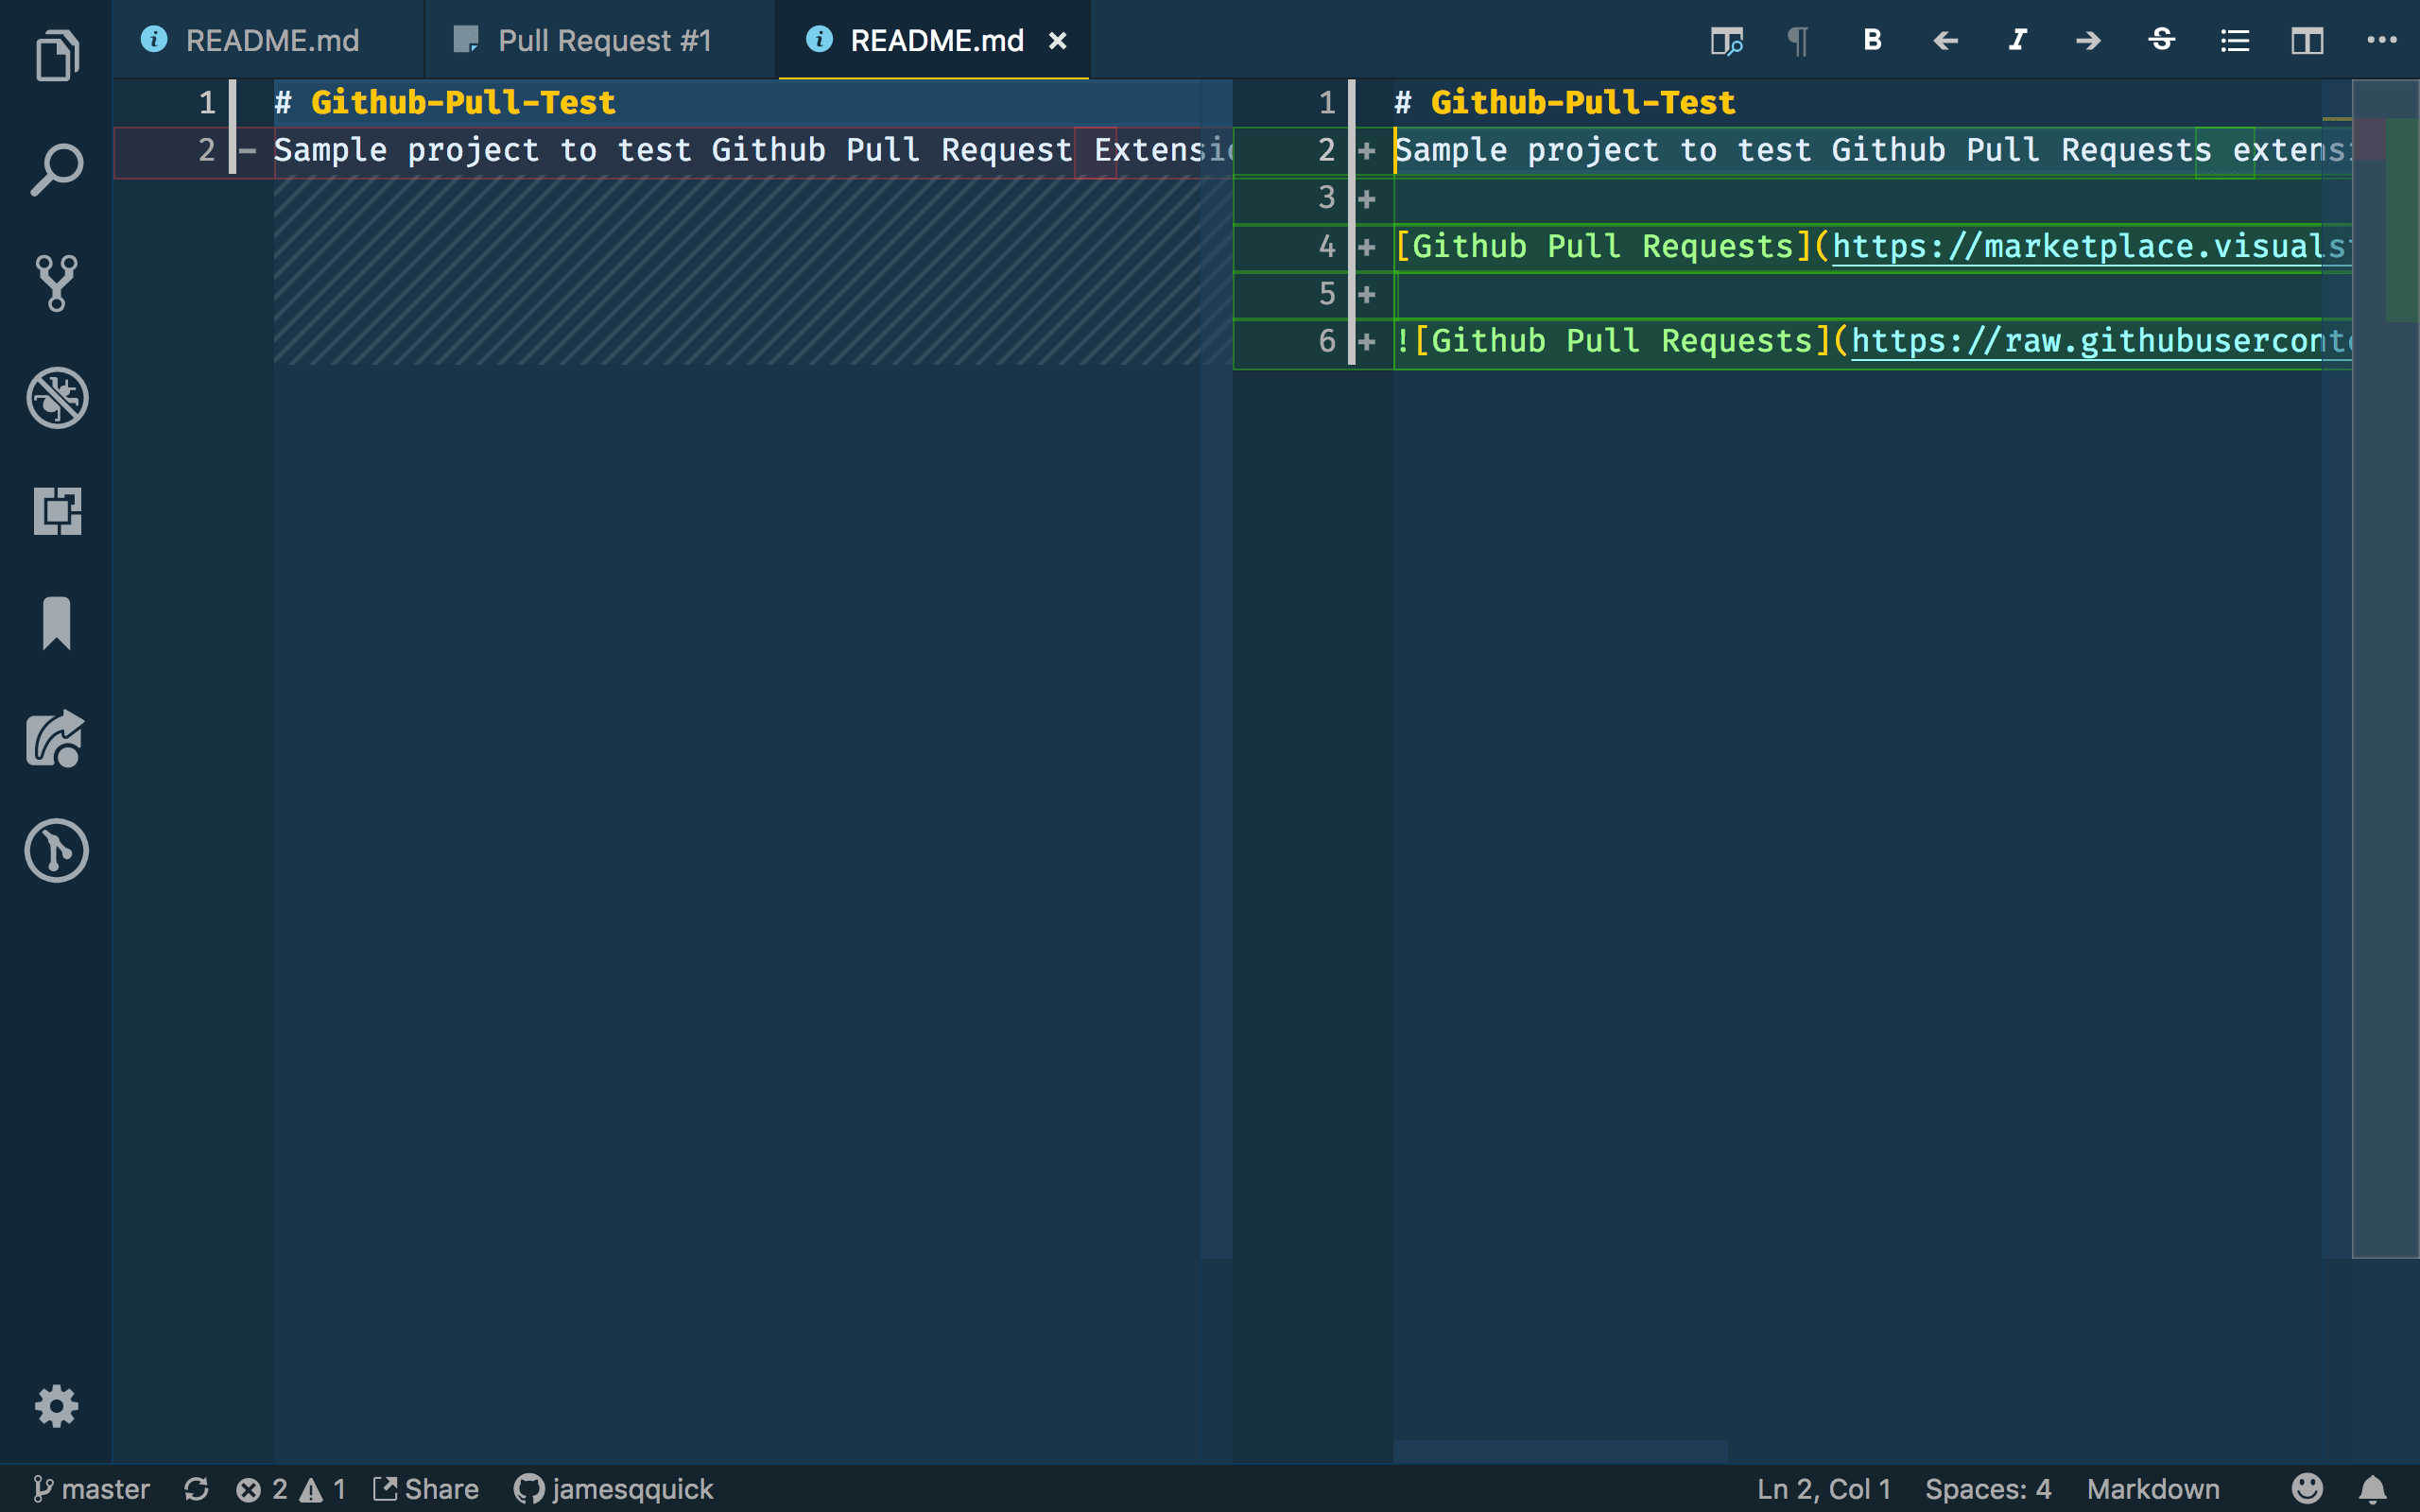
 回到VS Code中,如果我刷新拉取请求,则可以看到新的提交已被拾取。 作为Pull Request的审阅者,我现在可以单击Pull Request下拉列表中随Pull Request列出的READMe.md文件,以查看更改的差异。
Alternatively, I could use the "Checkout" button mentioned above to view the code coming in from the Pull Request. After clicking "Checkout" button, the code I have in VS Code is updated to the branch that is attempting to be merged.
另外,我可以使用上面提到的“签出”按钮来查看来自“拉取请求”的代码。 单击“签出”按钮后,我在VS Code中拥有的代码将更新为尝试合并的分支。
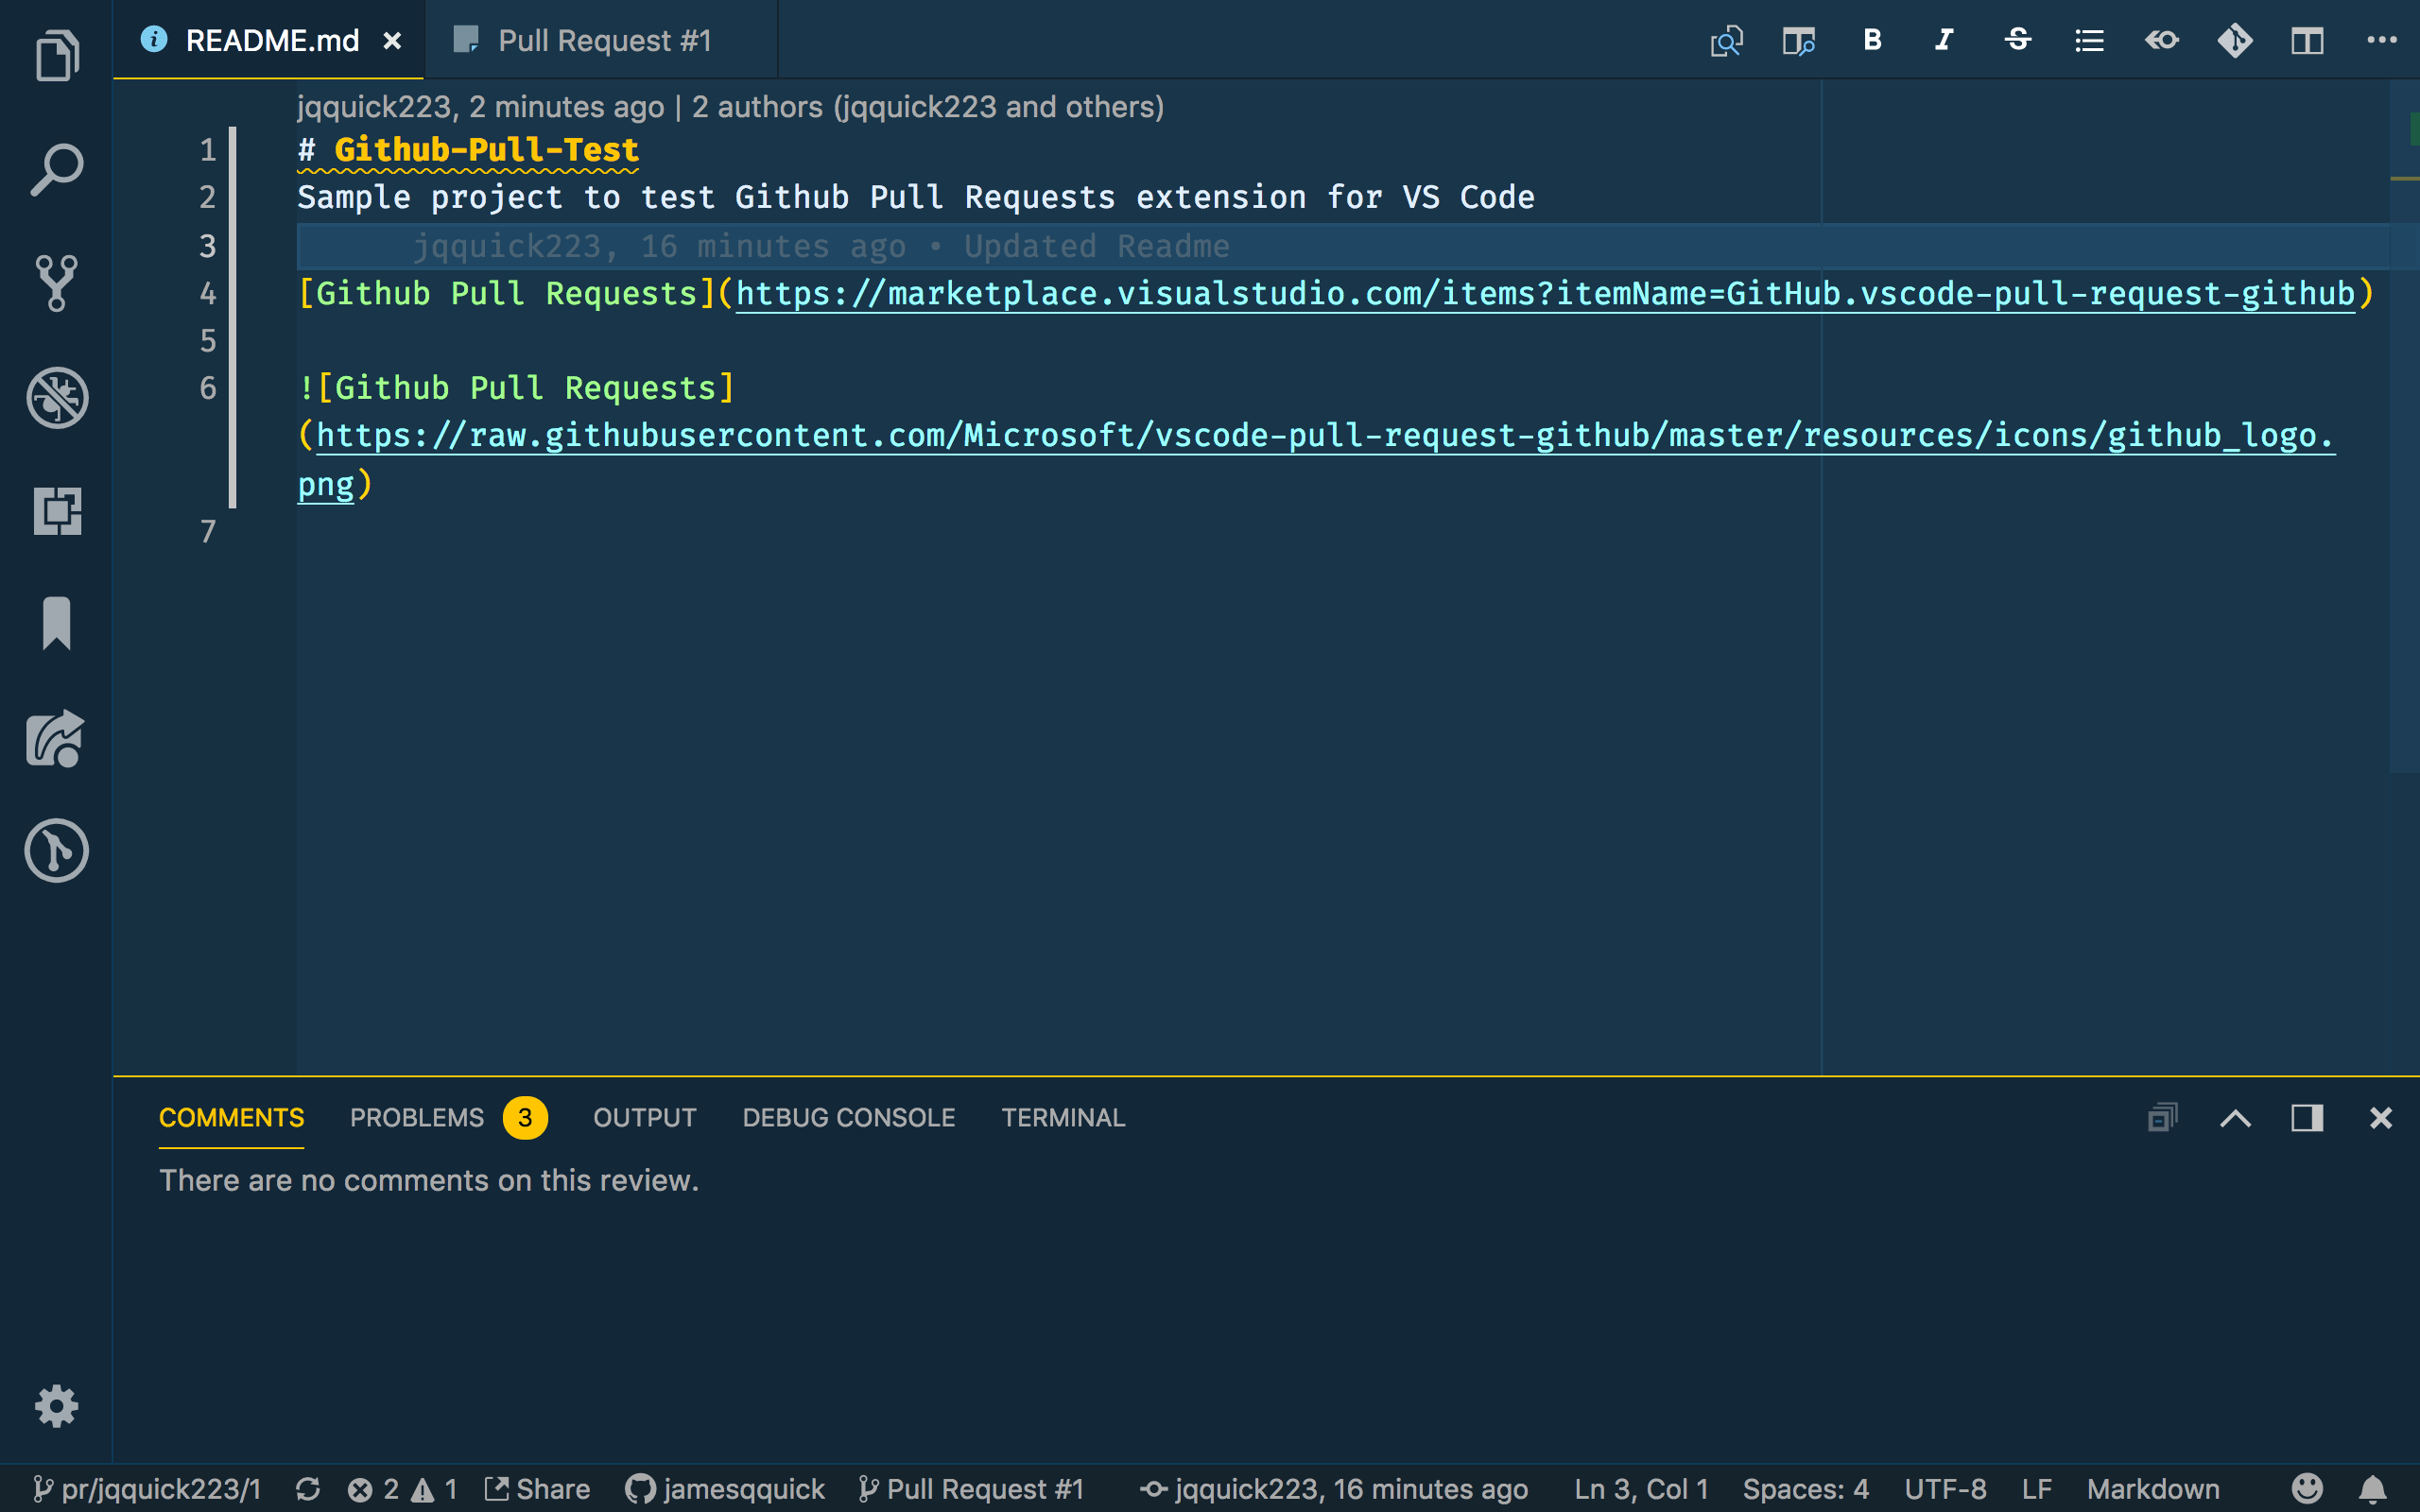
When I'm done reviewing, I can click the "Exit Review Mode" button in the Pull Request tab to revert back to my local code. I'll leave a comment saying everything looks good.
完成审核后,我可以单击“拉取请求”选项卡中的“退出审核模式”按钮以恢复到本地代码。 我会发表评论说一切看起来都不错。

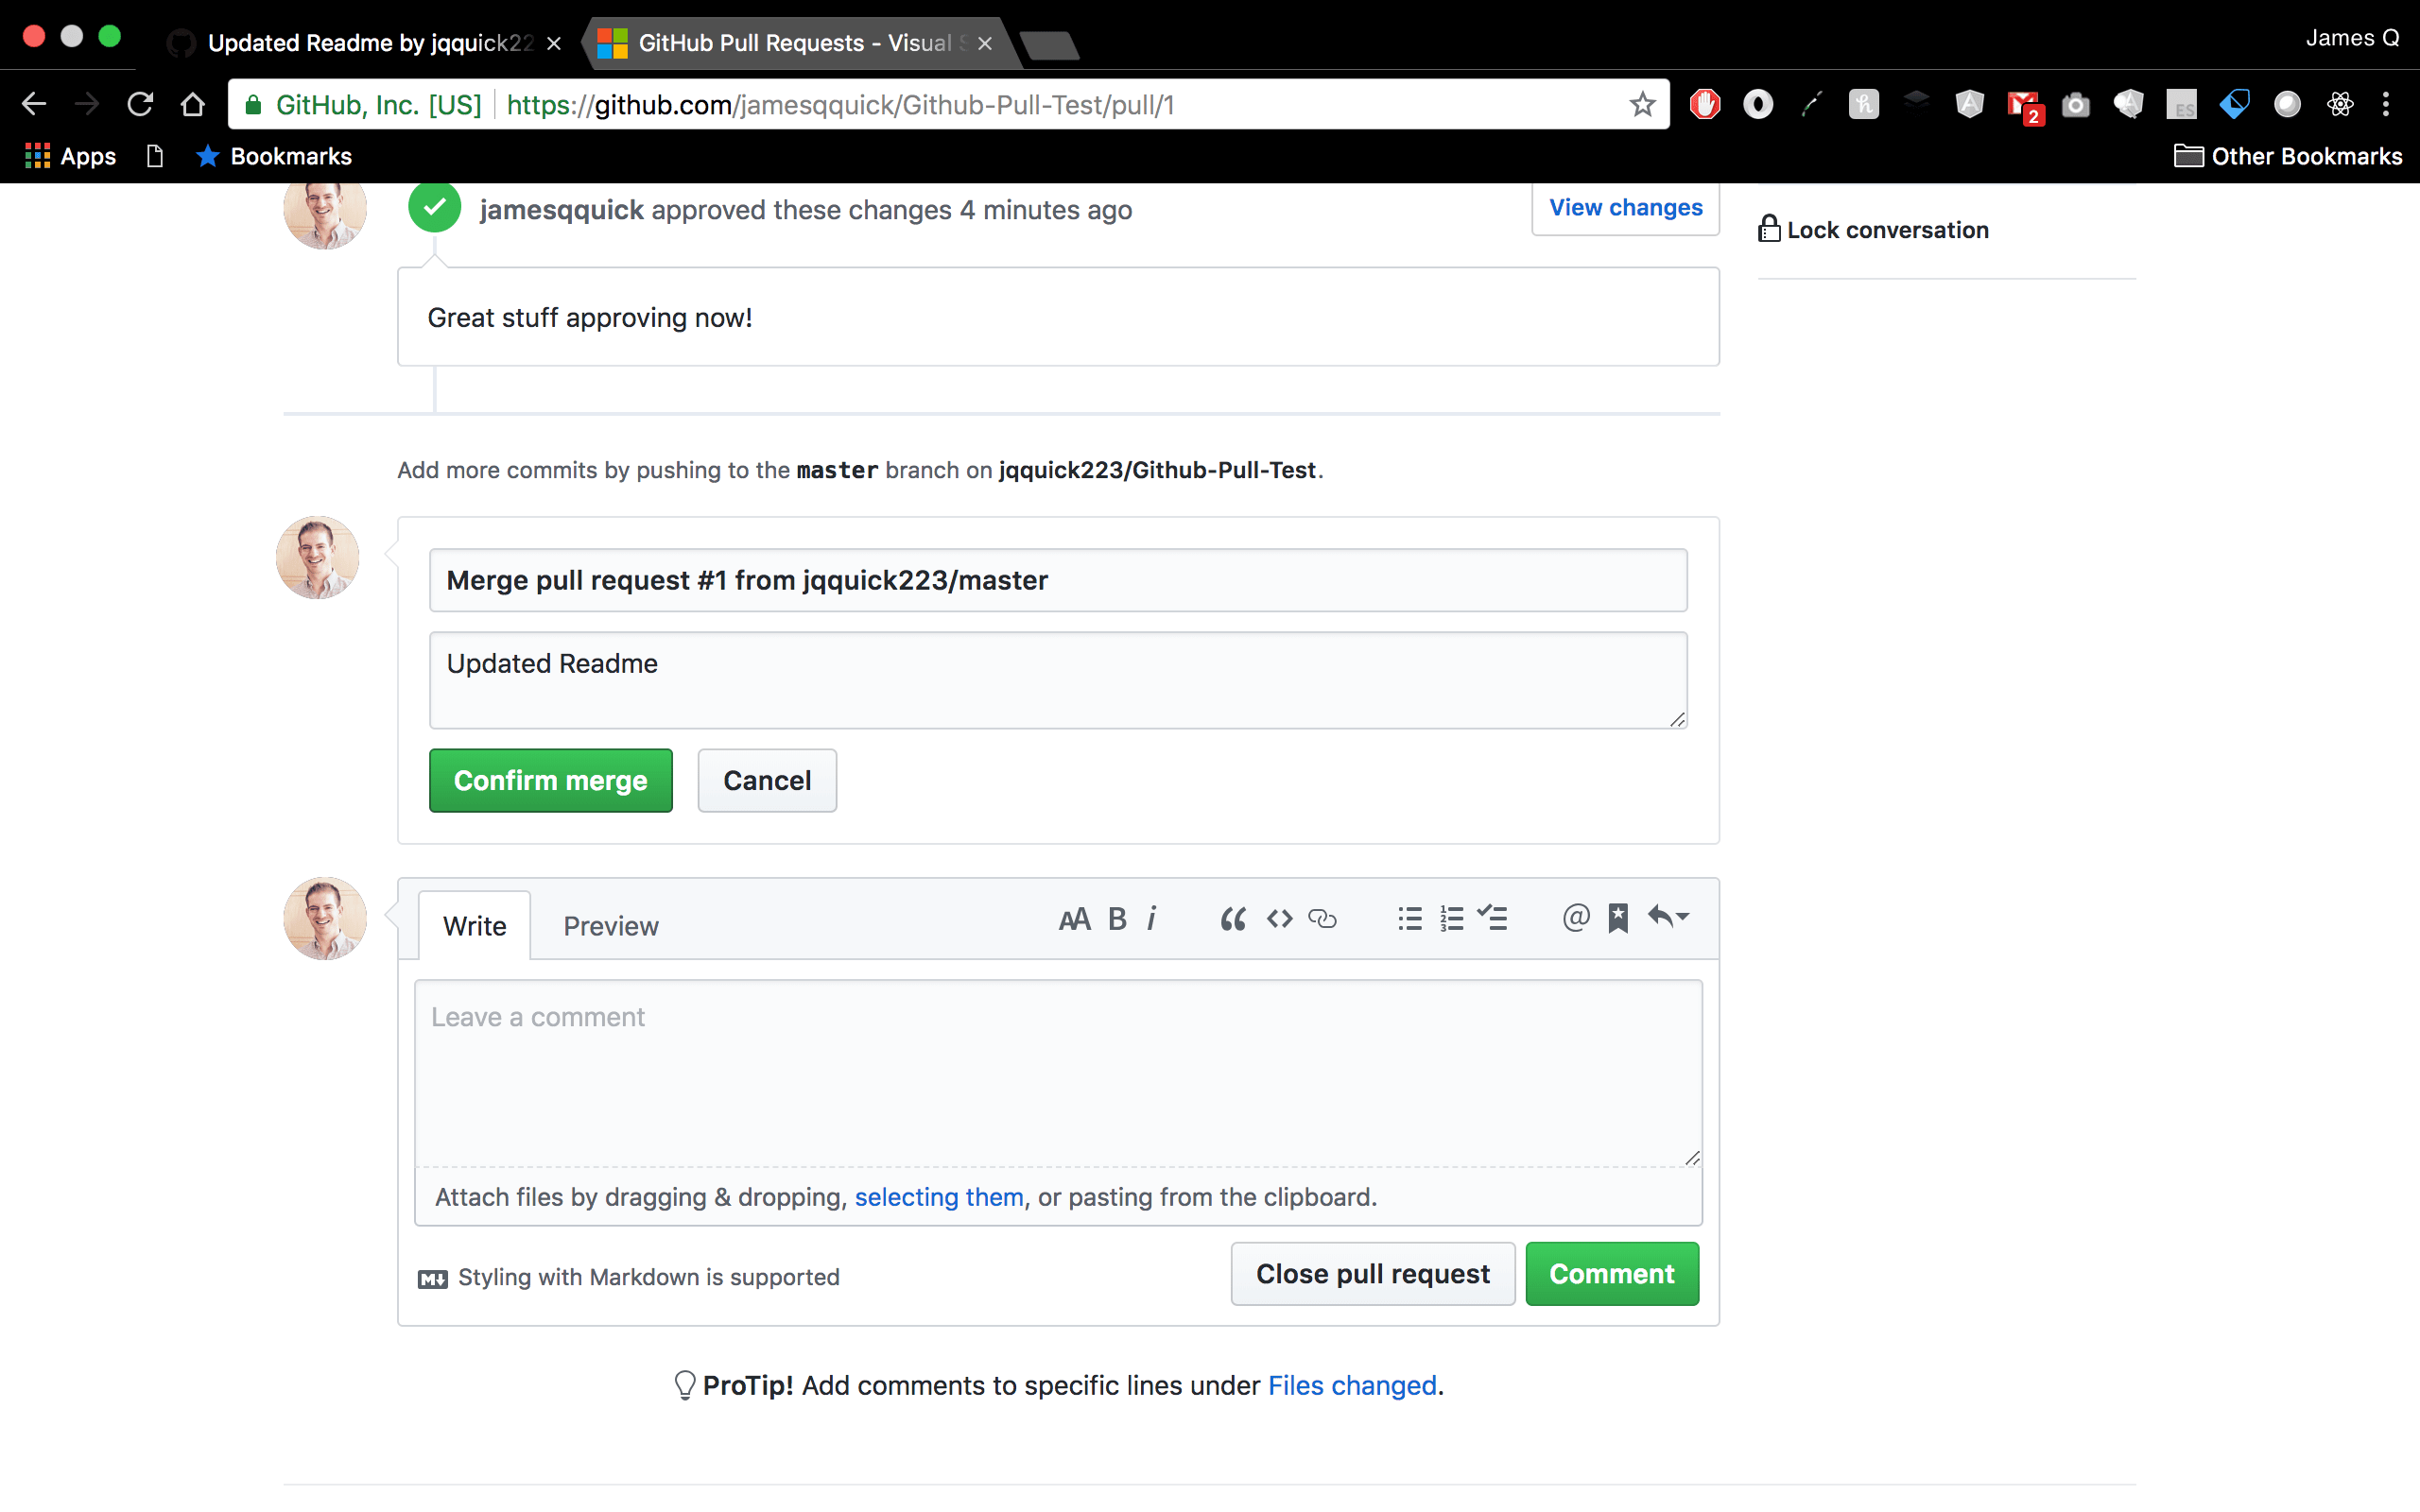
Then, I'll click the "Approve" button. To prove this worked, I'll open the Pull Request in Github.
然后,我将点击“批准”按钮。 为了证明这是可行的,我将在Github中打开Pull Request。

and... it says approved!
而且...说批准了!
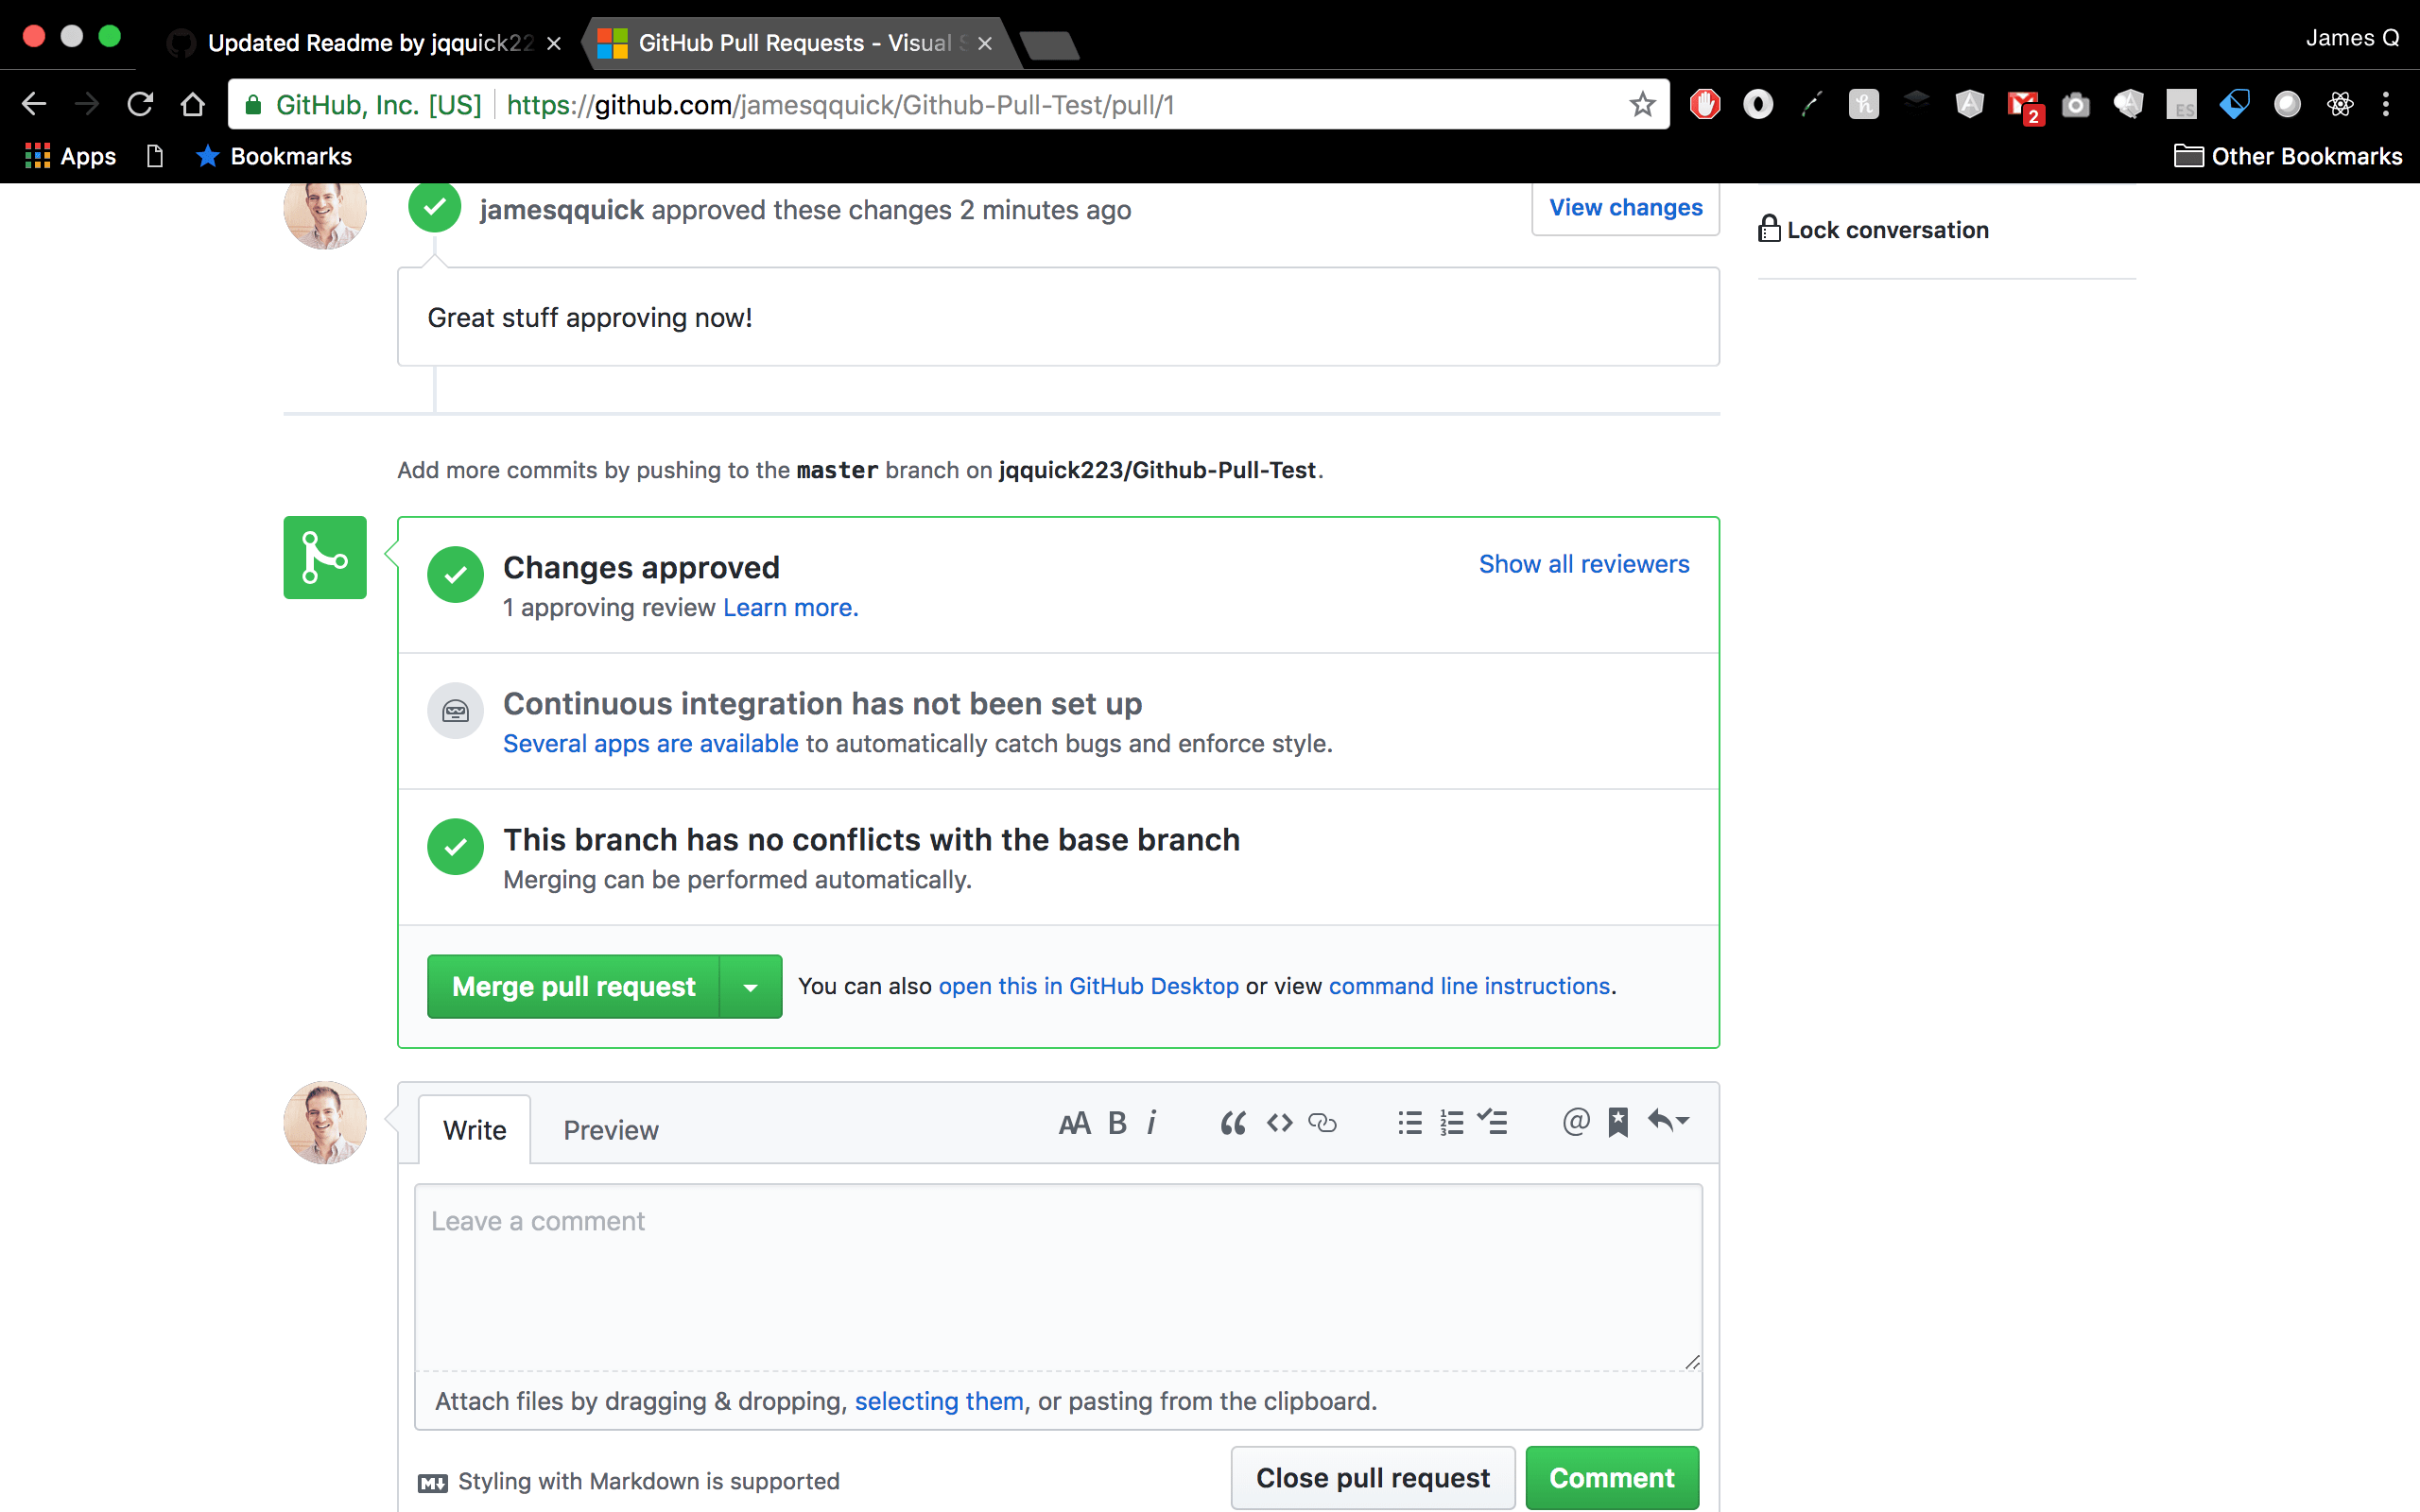
Lastly, I can merge those changes into my repository!
最后,我可以将这些更改合并到我的存储库中!
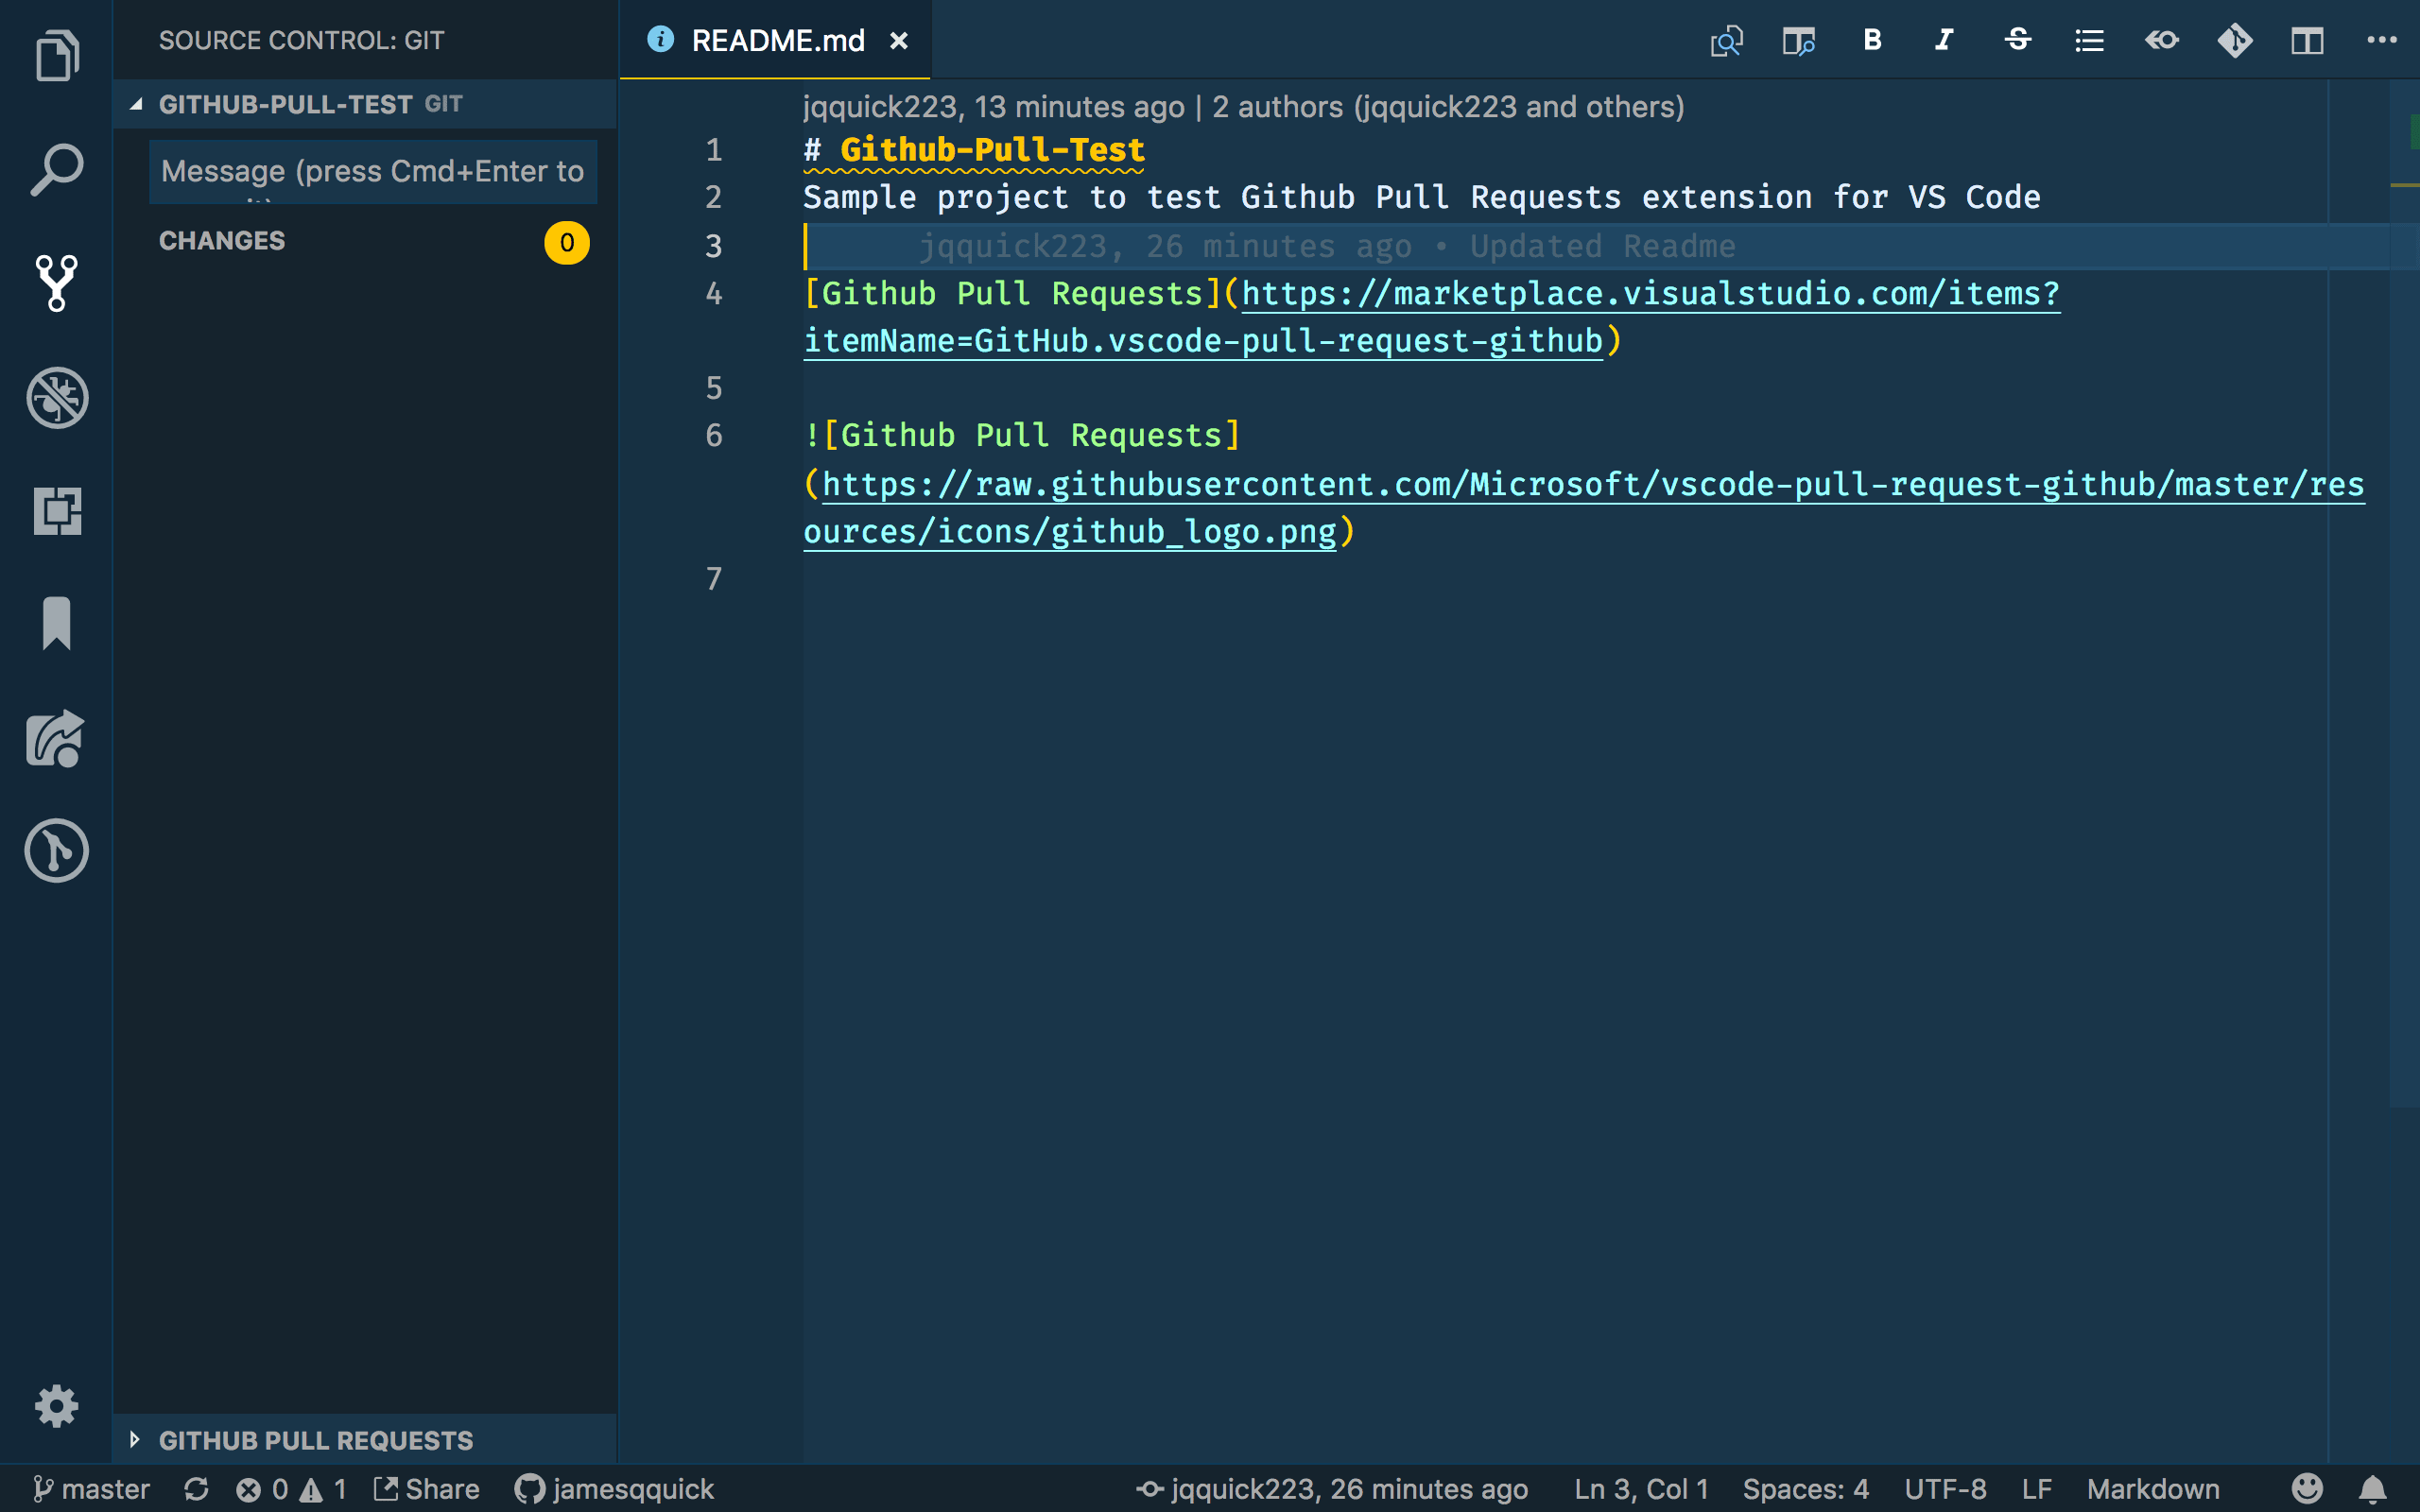
To verify the merge took successfully, I can do a pull in VS Code to get the latest code.
为了验证合并是否成功,我可以添加VS Code以获取最新的代码。

and it looks GREAT!
看起来很棒!
回顾 ( Recap )
Whew, with this new extension, we are able to inspect, request changes, and approve Pull Requests right inside of Visual Studio Code. With Microsoft and Github now becoming one, I think we are going to see more and more integration like this. Expect more to come in the future, but for now, download the extension, give it a try, and let me know what you think!
借助此新扩展,我们可以在Visual Studio Code内部检查,请求更改并批准“拉取请求”。 随着Microsoft和Github成为一体,我认为我们将看到越来越多的此类集成。 期望将来会有更多,但是现在,下载扩展,尝试一下,让我知道您的想法!
As always, if you have any questions, comments, or concerns, feel free to reach out on twitter at @jamesqquick!
与往常一样,如果您有任何问题,意见或疑虑,请随时通过@jamesqquick与Twitter联络!
资源资源 ( Resources )
翻译自: https://scotch.io/tutorials/github-pull-requests-extension-for-visual-studio-code


 728
728

 被折叠的 条评论
为什么被折叠?
被折叠的 条评论
为什么被折叠?
 到【灌水乐园】发言


