


rails 返回json
In part one of this tutorial, we managed to generate an API-only Rails application, set up a testing framework, and use TDD to implement the todo API.
在本教程的第一部分中,我们设法生成了仅API的Rails应用程序,建立了测试框架,并使用TDD实现了todo API。
In this part of the tutorial, we'll implement token-based authentication with JWT (JSON Web Tokens). In this implementation, we'll proceed with our approach of using TDD principles to add the authentication features.
在本部分的教程中,我们将使用JWT (JSON Web令牌)实现基于令牌的身份验证。 在此实现中,我们将继续使用TDD原理添加身份验证功能的方法。
认证方式 (Authentication)
Our API should be able to support user accounts with each user having the ability managing their own resources. We'll adapt Hristo's approach with notable alterations.
我们的API应该能够支持用户帐户,并且每个用户都有能力管理自己的资源。 我们将对Hristo的方法进行重大改动。
First, generate a user model.
首先,生成用户模型。
$ rails g model User name:string email:string password_digest:string# run the migrations
$ rails db:migrate
# make sure the test environment is ready
$ rails db:test:prepare
If you're wondering why we have password_digest field instead of a normal password field, hang tight, we'll go over this soon enough. :)
如果您想知道为什么我们有password_digest字段而不是普通的password字段,请耐心等待,我们将尽快对此进行讨论。 :)
Let's define the user model spec.
让我们定义用户模型规范。
# spec/models/user_spec.rb
require 'rails_helper'

# Test suite for User model
RSpec.describe User, type: :model do
  # Association test
  # ensure User model has a 1:m relationship with the Todo model
  it { should have_many(:todos) }
  # Validation tests
  # ensure name, email and password_digest are present before save
  it { should validate_presence_of(:name) }
  it { should validate_presence_of(:email) }
  it { should validate_presence_of(:password_digest) }
end
Users should be able to manage their own todo lists. Thus, the user model should have a one to many relationship with the todo model. We also want to make sure that on every user account creation we have all the required credentials.
用户应该能够管理自己的待办事项列表。 因此,用户模型应该与待办事项模型具有一对多的关系。 我们还希望确保在每次创建用户帐户时,我们都具有所有必需的凭据。
Let's add a user factory. This will be used by our test suite to create test users.
让我们添加一个用户工厂。 我们的测试套件将使用它来创建测试用户。
# spec/factories/users.rb
FactoryBot.define do
  factory :user do
    name { Faker::Name.name }
    email 'foo@bar.com'
    password 'foobar'
  end
end
Run the tests and...
运行测试并...
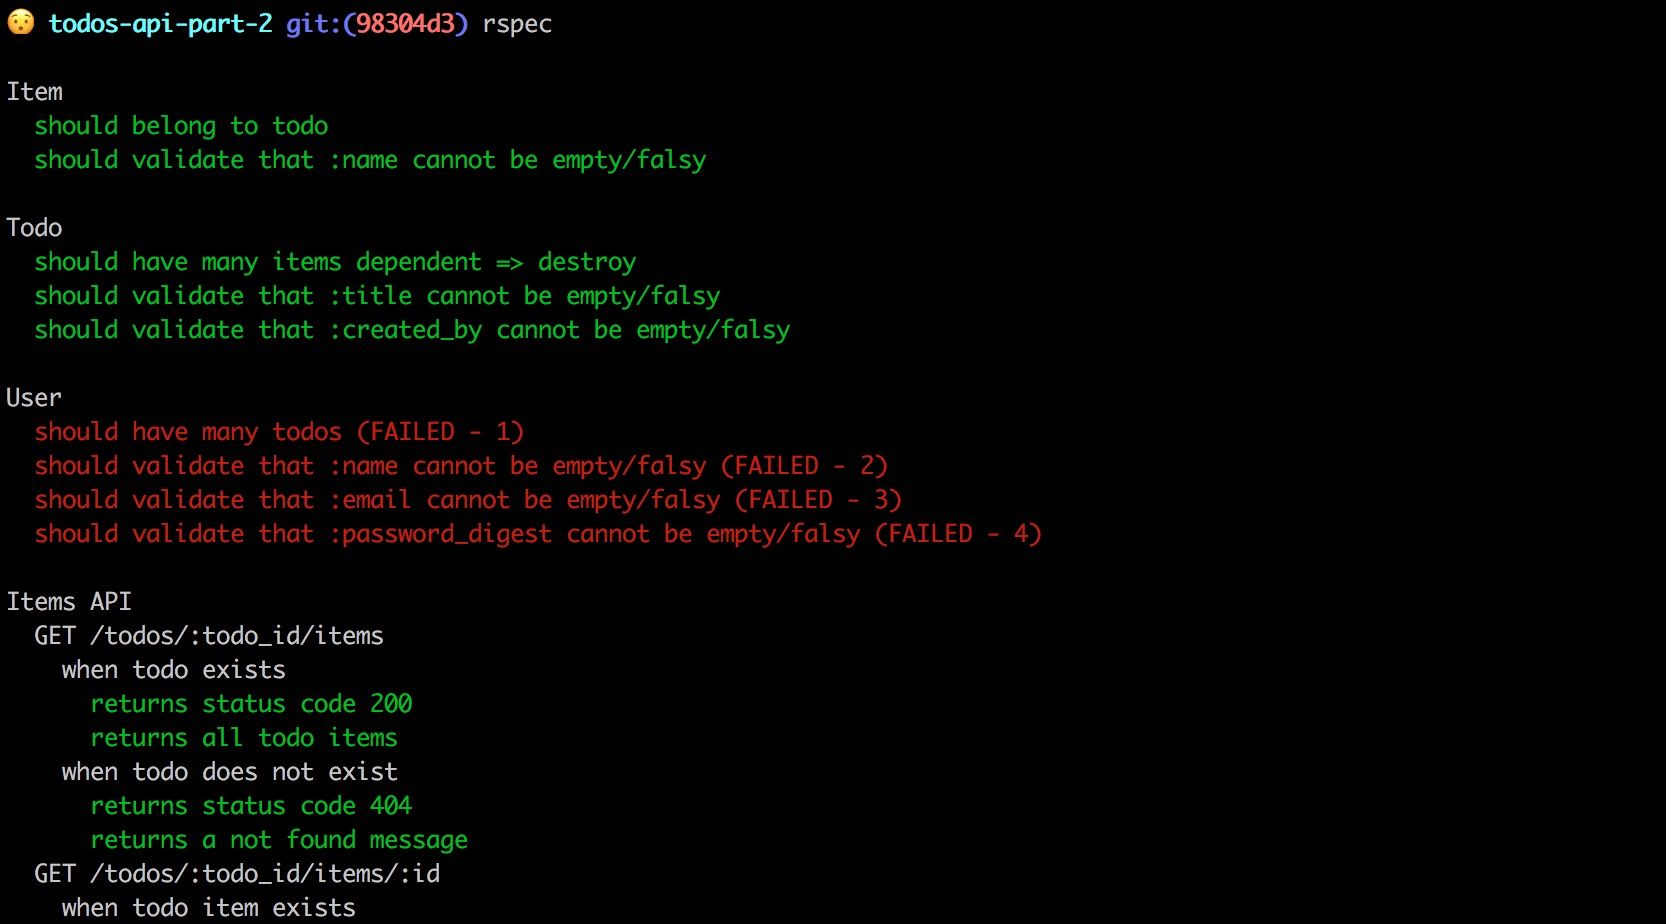
User specs are failing as expected. Let's fix that by implementing the user model.
用户规范失败。 让我们通过实现用户模型来解决此问题。
# app/models/user.rb
class User < ApplicationRecord
  # encrypt password
  has_secure_password

  # Model associations
  has_many :todos, foreign_key: :created_by
  # Validations
  validates_presence_of :name, :email, :password_digest
end
Our user model defines a 1:m relationship with the todo model also adds field validations. Note that user model calls the method has_secure_password, this adds methods to authenticate against a bcrypt password. It's this mechanism that requires us to have a password_digest attribute. Thus, we need to have the bcrypt gem as a dependency.
我们的用户模型与todo模型定义了1:m关系,还添加了字段验证。 请注意,用户模型调用方法has_secure_password ,这将添加用于针对bcrypt密码进行身份验证的方法。 正是这种机制要求我们具有password_digest属性。 因此,我们需要将bcrypt gem作为依赖项。
# Gemfile
# [...]
# Use ActiveModel has_secure_password
gem 'bcrypt', '~> 3.1.7'
# [...]
Install the gem and run the tests.
安装gem并运行测试。
$ bundleinstall
$ bundle exec rspec
All green!
全绿色!
Model's all set up to save the users. We're going to wire up the rest of the authentication system by adding the following service classes:
模型的全部设置都是为了保存用户。 我们将通过添加以下服务类来连接身份验证系统的其余部分:
- JsonWebToken - Encode and decode
jwttokens JsonWebToken-编码和解码jwt令牌 - AuthorizeApiRequest - Authorize each API request AuthorizeApiRequest-授权每个API请求
- AuthenticateUser - Authenticate users AuthenticateUser-验证用户
- AuthenticationController - Orchestrate authentication process AuthenticationController-协调身份验证过程
Json Web令牌 ( Json Web Token )
We're going to implement token based authentication. We'll make use of the jwt gem to manage JSON web tokens(jwt). Let's add this to the Gemfile and install it.
我们将实现基于令牌的身份验证 。 我们将使用jwt gem来管理JSON Web令牌(jwt)。 让我们将其添加到Gemfile并安装。
# Gemfile
# [...]
gem 'jwt'
# [...]
$ bundleinstallOur class will live in the lib directory since it's not domain specific; if we were to move it to a different application it should work with minimal configuration. There's a small caveat, though...
我们的课程将存在于lib目录中,因为它不是特定于域的; 如果我们要将其移至其他应用程序,则应使用最少的配置。 不过要注意一点……
As of Rails 5, autoloading is disabled in production because of thread safety.
从Rails 5开始,由于线程安全, 在生产中禁用了自动加载 。
This is a huge concern for us since lib is part of auto-load paths. To counter this change, we'll add our lib in app since all code in app is auto-loaded in development and eager-loaded in production. Here's a long discussion on the above.
这对我们来说是一个巨大的问题,因为lib是自动加载路径的一部分。 为了应对这一变化,我们将在app添加我们的lib ,因为app所有代码都会在开发中自动加载,并在生产中急于加载。 关于上述内容,这里有很长的讨论 。
Great, let's do this! Add the lib directory and the jwt class file.
太好了,让我们做吧! 添加lib目录和jwt类文件。
# create custom lib
$ mkdir app/lib
$ touch app/lib/json_web_token.rb
Define jwt singleton.
定义jwt单例。
# app/lib/json_web_token.rb
class JsonWebToken
  # secret to encode and decode token
  HMAC_SECRET = Rails.application.secrets.secret_key_base

  def self.encode(payload, exp = 24.hours.from_now)
    # set expiry to 24 hours from creation time
    payload[:exp] = exp.to_i
    # sign token with application secret
    JWT.encode(payload, HMAC_SECRET)
  end

  def self.decode(token)
    # get payload; first index in decoded Array
    body = JWT.decode(token, HMAC_SECRET)[0]
    HashWithIndifferentAccess.new body
    # rescue from all decode errors
  rescue JWT::DecodeError => e
    # raise custom error to be handled by custom handler
    raise ExceptionHandler::InvalidToken, e.message
  end
end
This singleton wraps JWT to provide token encoding and decoding methods. The encode method will be responsible for creating tokens based on a payload (user id) and expiration period. Since every Rails application has a unique secret key, we'll use that as our secret to sign tokens. The decode method, on the other hand, accepts a token and attempts to decode it using the same secret used in encoding. In the event decoding fails, be it due to expiration or validation, JWT will raise respective exceptions which will be caught and handled by the Exception Handler module.
此单例包装JWT以提供令牌编码和解码方法。 编码方法将负责根据有效负载(用户ID)和有效期限创建令牌。 由于每个Rails应用程序都有唯一的密钥,因此我们将其用作签名令牌的密钥。 另一方面,解码方法接受令牌,并尝试使用编码中使用的相同机密对令牌进行解码。 如果由于过期或验证而导致解码失败, JWT将引发相应的异常,这些Exception Handler将由Exception Handler模块捕获并处理。
module ExceptionHandler
  extend ActiveSupport::Concern

  # Define custom error subclasses - rescue catches `StandardErrors`
  class AuthenticationError < StandardError; end
  class MissingToken < StandardError; end
  class InvalidToken < StandardError; end

  included do
    # Define custom handlers
    rescue_from ActiveRecord::RecordInvalid, with: :four_twenty_two
    rescue_from ExceptionHandler::AuthenticationError, with: :unauthorized_request
    rescue_from ExceptionHandler::MissingToken, with: :four_twenty_two
    rescue_from ExceptionHandler::InvalidToken, with: :four_twenty_two

    rescue_from ActiveRecord::RecordNotFound do |e|
      json_response({ message: e.message }, :not_found)
    end
  end

  private

  # JSON response with message; Status code 422 - unprocessable entity
  def four_twenty_two(e)
    json_response({ message: e.message }, :unprocessable_entity)
  end

  # JSON response with message; Status code 401 - Unauthorized
  def unauthorized_request(e)
    json_response({ message: e.message }, :unauthorized)
  end
end
We've defined custom Standard Error sub-classes to help handle exceptions raised. By defining error classes as sub-classes of standard error, we're able to rescue_from them once raised.
我们定义了自定义的Standard Error子类,以帮助处理引发的异常。 通过将错误类定义为标准错误的子类,一旦出现错误,我们就可以从中rescue_from 。
授权Api请求 ( Authorize Api Request )
This class will be responsible for authorizing all API requests making sure that all requests have a valid token and user payload.
此类将负责授权所有API请求,以确保所有请求都具有有效的令牌和用户有效负载。
Since this is an authentication service class, it'll live in app/auth.
由于这是身份验证服务类,因此它将位于app/auth 。
# create auth folder to house auth services
$ mkdir app/auth
$ touch app/auth/authorize_api_request.rb
# Create corresponding spec files
$ mkdir spec/auth
$ touch spec/auth/authorize_api_request_spec.rb
Let's define its specifications
让我们定义它的规格
# spec/auth/authorize_api_request_spec.rb
require 'rails_helper'

RSpec.describe AuthorizeApiRequest do
  # Create test user
  let(:user) { create(:user) }
  # Mock `Authorization` header
  let(:header) { { 'Authorization' => token_generator(user.id) } }
  # Invalid request subject
  subject(:invalid_request_obj) { described_class.new({}) }
  # Valid request subject
  subject(:request_obj) { described_class.new(header) }

  # Test Suite for AuthorizeApiRequest#call
  # This is our entry point into the service class
  describe '#call' do
    # returns user object when request is valid
    context 'when valid request' do
      it 'returns user object' do
        result = request_obj.call
        expect(result[:user]).to eq(user)
      end
    end

    # returns error message when invalid request
    context 'when invalid request' do
      context 'when missing token' do
        it 'raises a MissingToken error' do
          expect { invalid_request_obj.call }
            .to raise_error(ExceptionHandler::MissingToken, 'Missing token')
        end
      end

      context 'when invalid token' do
        subject(:invalid_request_obj) do
          # custom helper method `token_generator`
          described_class.new('Authorization' => token_generator(5))
        end

        it 'raises an InvalidToken error' do
          expect { invalid_request_obj.call }
            .to raise_error(ExceptionHandler::InvalidToken, /Invalid token/)
        end
      end

      context 'when token is expired' do
        let(:header) { { 'Authorization' => expired_token_generator(user.id) } }
        subject(:request_obj) { described_class.new(header) }

        it 'raises ExceptionHandler::ExpiredSignature error' do
          expect { request_obj.call }
            .to raise_error(
              ExceptionHandler::InvalidToken,
              /Signature has expired/
            )
        end
      end

      context 'fake token' do
        let(:header) { { 'Authorization' => 'foobar' } }
        subject(:invalid_request_obj) { described_class.new(header) }

        it 'handles JWT::DecodeError' do
          expect { invalid_request_obj.call }
            .to raise_error(
              ExceptionHandler::InvalidToken,
              /Not enough or too many segments/
            )
        end
      end
    end
  end
end
The AuthorizeApiRequest service should have an entry method call that returns a valid user object when the request is valid and raises an error when invalid. Note that we also have a couple of test helper methods;
AuthorizeApiRequest服务应该具有一个入口方法call ,该请求方法将在请求有效时返回有效的用户对象,并在无效时引发错误。 注意,我们还有两种测试助手方法。
token_generator- generate test tokentoken_generator生成测试令牌expired_token_generator- generate expired tokenexpired_token_generator生成过期的令牌
We'll define these helpers in spec/support.
我们将在spec/support定义这些帮助器。
# create module file
$ touch spec/support/controller_spec_helper.rb
# spec/support/controller_spec_helper.rb
module ControllerSpecHelper
# generate tokens from user id
def token_generator(user_id)
JsonWebToken.encode(user_id: user_id)
end
# generate expired tokens from user id
def expired_token_generator(user_id)
JsonWebToken.encode({ user_id: user_id }, (Time.now.to_i - 10))
end
# return valid headers
def valid_headers
{
"Authorization" => token_generator(user.id),
"Content-Type" => "application/json"
}
end
# return invalid headers
def invalid_headers
{
"Authorization" => nil,
"Content-Type" => "application/json"
}
end
endWe also have additional test helpers to generate headers. In order to make use of these helper methods, we have to include the module in rails helper. While we're here let's also include RequestSpecHelper to all types (not just requests); remove type: :request. This way, we'll be able to reuse our handy json helper.
我们还具有其他测试助手来生成标头。 为了利用这些辅助方法,我们必须将模块包含在rails helper 。 在这里,我们还将RequestSpecHelper包括在所有类型中(不仅仅是请求); 删除type: :request 。 这样,我们将能够重用我们方便的json帮助器。
RSpec.configure do |config|
  # [...]
  # previously `config.include RequestSpecHelper, type: :request`
  config.include RequestSpecHelper
  config.include ControllerSpecHelper
  # [...]
end
At this point, if you attempt to run the tests, You should get a load error. You guessed it, this is because we haven't defined the class. Let's do just that!
此时,如果尝试运行测试,则应该得到加载错误。 您猜对了,这是因为我们尚未定义类。 让我们做到这一点!

# app/auth/authorize_api_request.rb
class AuthorizeApiRequest
  def initialize(headers = {})
    @headers = headers
  end

  # Service entry point - return valid user object
  def call
    {
      user: user
    }
  end

  private

  attr_reader :headers

  def user
    # check if user is in the database
    # memoize user object
    @user ||= User.find(decoded_auth_token[:user_id]) if decoded_auth_token
    # handle user not found
  rescue ActiveRecord::RecordNotFound => e
    # raise custom error
    raise(
      ExceptionHandler::InvalidToken,
      ("#{Message.invalid_token} #{e.message}")
    )
  end

  # decode authentication token
  def decoded_auth_token
    @decoded_auth_token ||= JsonWebToken.decode(http_auth_header)
  end

  # check for token in `Authorization` header
  def http_auth_header
    if headers['Authorization'].present?
      return headers['Authorization'].split(' ').last
    end
      raise(ExceptionHandler::MissingToken, Message.missing_token)
  end
end
The AuthorizeApiRequest service gets the token from the authorization headers, attempts to decode it to return a valid user object. We also have a singleton Message to house all our messages; this an easier way to manage our application messages. We'll define it in app/lib since it's non-domain-specific.
AuthorizeApiRequest服务从授权标头获取令牌,尝试对其进行解码以返回有效的用户对象。 我们还有一个单例Message来容纳我们所有的消息; 这是管理我们的应用程序消息的简便方法。 我们将在app/lib定义它,因为它不是特定于域的。
# app/lib/message.rb
class Message
  def self.not_found(record = 'record')
    "Sorry, #{record} not found."
  end

  def self.invalid_credentials
    'Invalid credentials'
  end

  def self.invalid_token
    'Invalid token'
  end

  def self.missing_token
    'Missing token'
  end

  def self.unauthorized
    'Unauthorized request'
  end

  def self.account_created
    'Account created successfully'
  end

  def self.account_not_created
    'Account could not be created'
  end

  def self.expired_token
    'Sorry, your token has expired. Please login to continue.'
  end
end
Run the auth specs and everything should be green.
运行身份验证规范,所有内容应为绿色。
$ bundleexec rspec spec/auth -fd
验证用户 ( Authenticate User )
This class will be responsible for authenticating users via email and password.
此类将负责通过电子邮件和密码对用户进行身份验证。
Since this is also an authentication service class, it'll live in app/auth.
由于这也是身份验证服务类,因此它将存在于app/auth 。
$touch app/auth/authenticate_user.rb
# Create corresponding spec file
$ touch spec/auth/authenticate_user_spec.rb
Let's define its specifications.
让我们定义其规格。
# spec/auth/authenticate_user_spec.rb
require 'rails_helper'

RSpec.describe AuthenticateUser do
  # create test user
  let(:user) { create(:user) }
  # valid request subject
  subject(:valid_auth_obj) { described_class.new(user.email, user.password) }
  # invalid request subject
  subject(:invalid_auth_obj) { described_class.new('foo', 'bar') }

  # Test suite for AuthenticateUser#call
  describe '#call' do
    # return token when valid request
    context 'when valid credentials' do
      it 'returns an auth token' do
        token = valid_auth_obj.call
        expect(token).not_to be_nil
      end
    end

    # raise Authentication Error when invalid request
    context 'when invalid credentials' do
      it 'raises an authentication error' do
        expect { invalid_auth_obj.call }
          .to raise_error(
            ExceptionHandler::AuthenticationError,
            /Invalid credentials/
          )
      end
    end
  end
end
The AuthenticateUser service also has an entry point #call. It should return a token when user credentials are valid and raise an error when they're not. Running the auth specs and they should fail with a load error. Let's go ahead and implement the class.
AuthenticateUser服务还具有一个入口#call 。 当用户凭证有效时,它应该返回一个令牌,而当用户凭证无效时,它将引发一个错误。 运行身份验证规范,它们会因加载错误而失败。 让我们继续实施该类。
# app/auth/authenticate_user.rb
class AuthenticateUser
  def initialize(email, password)
    @email = email
    @password = password
  end

  # Service entry point
  def call
    JsonWebToken.encode(user_id: user.id) if user
  end

  private

  attr_reader :email, :password

  # verify user credentials
  def user
    user = User.find_by(email: email)
    return user if user && user.authenticate(password)
    # raise Authentication error if credentials are invalid
    raise(ExceptionHandler::AuthenticationError, Message.invalid_credentials)
  end
end
The AuthenticateUser service accepts a user email and password, checks if they are valid and then creates a token with the user id as the payload.
AuthenticateUser服务接受用户的电子邮件和密码,检查它们是否有效,然后创建带有用户ID的令牌作为有效负载。
$ bundleexec rspec spec/auth -fd认证控制器 ( Authentication Controller )
This controller will be responsible for orchestrating the authentication process making use of the auth service we have just created.
该控制器将负责利用我们刚刚创建的auth服务来编排认证过程。
# generate the Authentication Controller
$ rails g controller Authentication
First thing's first. Tests!
首先是第一。 测试!
# spec/requests/authentication_spec.rb
require 'rails_helper'

RSpec.describe 'Authentication', type: :request do
  # Authentication test suite
  describe 'POST /auth/login' do
    # create test user
    let!(:user) { create(:user) }
    # set headers for authorization
    let(:headers) { valid_headers.except('Authorization') }
    # set test valid and invalid credentials
    let(:valid_credentials) do
      {
        email: user.email,
        password: user.password
      }.to_json
    end
    let(:invalid_credentials) do
      {
        email: Faker::Internet.email,
        password: Faker::Internet.password
      }.to_json
    end

    # set request.headers to our custon headers
    # before { allow(request).to receive(:headers).and_return(headers) }

    # returns auth token when request is valid
    context 'When request is valid' do
      before { post '/auth/login', params: valid_credentials, headers: headers }

      it 'returns an authentication token' do
        expect(json['auth_token']).not_to be_nil
      end
    end

    # returns failure message when request is invalid
    context 'When request is invalid' do
      before { post '/auth/login', params: invalid_credentials, headers: headers }

      it 'returns a failure message' do
        expect(json['message']).to match(/Invalid credentials/)
      end
    end
  end
end
The authentication controller should expose an /auth/login endpoint that accepts user credentials and returns a JSON response with the result.
身份验证控制器应公开一个/auth/login终结点,该终结点接受用户凭据并返回带有结果的JSON响应。
# app/controllers/authentication_controller.rb
class AuthenticationController < ApplicationController
  # return auth token once user is authenticated
  def authenticate
    auth_token =
      AuthenticateUser.new(auth_params[:email], auth_params[:password]).call
    json_response(auth_token: auth_token)
  end

  private

  def auth_params
    params.permit(:email, :password)
  end
end
Notice how slim the authentication controller is, we have our service architecture to thank for that. Instead, we make use of the authentication controller to piece everything together... to control authentication. We also need to add routing for authentication action.
请注意,身份验证控制器的厚度很薄,为此我们要感谢我们的服务体系结构。 相反,我们使用身份验证控制器将所有内容拼凑在一起...以控制身份验证。 我们还需要为身份验证操作添加路由。
# config/routes.rb
Rails.application.routes.draw do
  # [...]
  post 'auth/login', to: 'authentication#authenticate'
end
In order to have users to authenticate in the first place, we need to have them signup first. This will be handled by the users controller.
为了让用户首先进行身份验证,我们需要首先让他们注册。 这将由用户控制器处理。
# generate users controller
$ rails g controller Users
# generate users request spec
$ touch spec/requests/users_spec.rb
User signup spec.
用户注册规范。
# spec/requests/users_spec.rb
require 'rails_helper'

RSpec.describe 'Users API', type: :request do
  let(:user) { build(:user) }
  let(:headers) { valid_headers.except('Authorization') }
  let(:valid_attributes) do
    attributes_for(:user, password_confirmation: user.password)
  end

  # User signup test suite
  describe 'POST /signup' do
    context 'when valid request' do
      before { post '/signup', params: valid_attributes.to_json, headers: headers }

      it 'creates a new user' do
        expect(response).to have_http_status(201)
      end

      it 'returns success message' do
        expect(json['message']).to match(/Account created successfully/)
      end

      it 'returns an authentication token' do
        expect(json['auth_token']).not_to be_nil
      end
    end

    context 'when invalid request' do
      before { post '/signup', params: {}, headers: headers }

      it 'does not create a new user' do
        expect(response).to have_http_status(422)
      end

      it 'returns failure message' do
        expect(json['message'])
          .to match(/Validation failed: Password can't be blank, Name can't be blank, Email can't be blank, Password digest can't be blank/)
      end
    end
  end
end
The user controller should expose a /signup endpoint that accepts user information and returns a JSON response with the result. Add the signup route.
用户控制器应公开一个/signup端点,该端点接受用户信息并返回带有结果的JSON响应。 添加注册路线。
# config/routes.rb
Rails.application.routes.draw do
  # [...]
  post 'signup', to: 'users#create'
end
And then implement the controller.
然后实现控制器。
# app/controllers/users_controller.rb
class UsersController < ApplicationController
  # POST /signup
  # return authenticated token upon signup
  def create
    user = User.create!(user_params)
    auth_token = AuthenticateUser.new(user.email, user.password).call
    response = { message: Message.account_created, auth_token: auth_token }
    json_response(response, :created)
  end

  private

  def user_params
    params.permit(
      :name,
      :email,
      :password,
      :password_confirmation
    )
  end
end
The users controller attempts to create a user and returns a JSON response with the result. We use Active Record's create! method so that in the event there's an error, an exception will be raised and handled in the exception handler.
用户控制器尝试创建用户并返回带有结果的JSON响应。 我们使用Active Record的create! 方法,以便在发生错误的情况下,将引发异常并在异常处理程序中进行处理。
One more thing, we've wired up the user authentication bit but our API is still open; it does not authorize requests with a token.
还有一件事,我们已经连接了用户身份验证位,但是我们的API仍然处于打开状态; 它不使用令牌授权请求。

To fix this, we have to make sure that on every request (except authentication) our API checks for a valid token. To achieve this, we'll implement a callback in the application controller that authenticates every request. Since all controllers inherit from application controller, it will be propagated to all controllers.
要解决此问题,我们必须确保在每个请求(身份验证除外)上,我们的API都会检查有效令牌。 为了实现这一点,我们将在应用程序控制器中实现对每个请求进行身份验证的回调。 由于所有控制器都继承自应用程序控制器,因此它将传播到所有控制器。
# spec/controllers/application_controller_spec.rb
require "rails_helper"

RSpec.describe ApplicationController, type: :controller do
  # create test user
  let!(:user) { create(:user) }
   # set headers for authorization
  let(:headers) { { 'Authorization' => token_generator(user.id) } }
  let(:invalid_headers) { { 'Authorization' => nil } }

  describe "#authorize_request" do
    context "when auth token is passed" do
      before { allow(request).to receive(:headers).and_return(headers) }

      # private method authorize_request returns current user
      it "sets the current user" do
        expect(subject.instance_eval { authorize_request }).to eq(user)
      end
    end

    context "when auth token is not passed" do
      before do
        allow(request).to receive(:headers).and_return(invalid_headers)
      end

      it "raises MissingToken error" do
        expect { subject.instance_eval { authorize_request } }.
          to raise_error(ExceptionHandler::MissingToken, /Missing token/)
      end
    end
  end
end
Cool, now that we have the tests, let's implement the authorization.
太酷了,既然我们已经有了测试,那么让我们实现授权。
# app/controllers/application_controller.rb
class ApplicationController < ActionController::API
  include Response
  include ExceptionHandler

  # called before every action on controllers
  before_action :authorize_request
  attr_reader :current_user

  private

  # Check for valid request token and return user
  def authorize_request
    @current_user = (AuthorizeApiRequest.new(request.headers).call)[:user]
  end
end
On every request, the application will verify the request by calling the request authorization service. If the request is authorized, it will set the current user object to be used in the other controllers.
对于每个请求,应用程序将通过调用请求授权服务来验证请求。 如果请求被授权,它将设置要在其他控制器中使用的current user对象。
Notice how we don't have lots of guard clauses and conditionals in our controllers, this is because of our error handling implementation.
注意,由于我们的错误处理实现,我们的控制器中没有很多保护子句和条件。
Let's remember that when signing up and authenticating a user we won't need a token. We'll only require user credentials. Thus, let's skip request authentication for these two actions.
请记住,在注册和验证用户时,我们不需要令牌。 我们只需要用户凭证。 因此,让我们跳过这两个操作的请求身份验证。
First, the authetication action.
首先,认证动作。
# app/controllers/authentication_controller.rb
class AuthenticationController < ApplicationController
  skip_before_action :authorize_request, only: :authenticate
  # [...]
end
Then the user signup action.
然后,用户注册操作。
# app/controllers/users_controller.rb
class UsersController < ApplicationController
  skip_before_action :authorize_request, only: :create
  # [...]
end
Run the tests and you'll notice, our Todo and TodoItems API is failing. Don't fret, this is exactly what we want; means our request authorization is working as intended. Let's update the API to cater for this.
运行测试,您会发现我们的Todo和TodoItems API失败了。 不要担心,这正是我们想要的。 表示我们的请求授权正在按预期进行。 让我们更新API来满足此要求。
In the Todos request spec, we'll make partial update all our requests to have authorization headers and a JSON payload.
在Todos请求规范中,我们将部分更新所有请求以具有授权标头和JSON负载。
# spec/requests/todos_spec.rb
require 'rails_helper'

RSpec.describe 'Todos API', type: :request do
  # add todos owner
  let(:user) { create(:user) }
  let!(:todos) { create_list(:todo, 10, created_by: user.id) }
  let(:todo_id) { todos.first.id }
  # authorize request
  let(:headers) { valid_headers }

  describe 'GET /todos' do
    # update request with headers
    before { get '/todos', params: {}, headers: headers }

    # [...]
  end

  describe 'GET /todos/:id' do
    before { get "/todos/#{todo_id}", params: {}, headers: headers }
    # [...]
    end
    # [...]
  end

  describe 'POST /todos' do
    let(:valid_attributes) do
      # send json payload
      { title: 'Learn Elm', created_by: user.id.to_s }.to_json
    end

    context 'when request is valid' do
      before { post '/todos', params: valid_attributes, headers: headers }
      # [...]
    end

    context 'when the request is invalid' do
      let(:invalid_attributes) { { title: nil }.to_json }
      before { post '/todos', params: invalid_attributes, headers: headers }

      it 'returns status code 422' do
        expect(response).to have_http_status(422)
      end

      it 'returns a validation failure message' do
        expect(json['message'])
          .to match(/Validation failed: Title can't be blank/)
      end
  end

  describe 'PUT /todos/:id' do
    let(:valid_attributes) { { title: 'Shopping' }.to_json }

    context 'when the record exists' do
      before { put "/todos/#{todo_id}", params: valid_attributes, headers: headers }
      # [...]
    end
  end

  describe 'DELETE /todos/:id' do
    before { delete "/todos/#{todo_id}", params: {}, headers: headers }
    # [...]
  end
end
Our todos controller doesn't know about users yet.Let's fix that.
我们的todos控制器尚不了解用户,请修复此问题。
# app/controllers/todos_controller.rb
class TodosController < ApplicationController
  # [...]
  # GET /todos
  def index
    # get current user todos
    @todos = current_user.todos
    json_response(@todos)
  end
  # [...]
  # POST /todos
  def create
    # create todos belonging to current user
    @todo = current_user.todos.create!(todo_params)
    json_response(@todo, :created)
  end
  # [...]
  private

  # remove `created_by` from list of permitted parameters
  def todo_params
    params.permit(:title)
  end
  # [...]
end
Let's update the Items API with the same.
让我们用相同的内容更新Items API。
# spec/requests/items_spec.rb
require 'rails_helper'

RSpec.describe 'Items API' do
  let(:user) { create(:user) }
  let!(:todo) { create(:todo, created_by: user.id) }
  let!(:items) { create_list(:item, 20, todo_id: todo.id) }
  let(:todo_id) { todo.id }
  let(:id) { items.first.id }
  let(:headers) { valid_headers }

  describe 'GET /todos/:todo_id/items' do
    before { get "/todos/#{todo_id}/items", params: {}, headers: headers }

    # [...]
  end

  describe 'GET /todos/:todo_id/items/:id' do
    before { get "/todos/#{todo_id}/items/#{id}", params: {}, headers: headers }

    # [...]
  end

  describe 'POST /todos/:todo_id/items' do
    let(:valid_attributes) { { name: 'Visit Narnia', done: false }.to_json }

    context 'when request attributes are valid' do
      before do
        post "/todos/#{todo_id}/items", params: valid_attributes, headers: headers
      end

      # [...]
    end

    context 'when an invalid request' do
      before { post "/todos/#{todo_id}/items", params: {}, headers: headers }

      # [...]
    end
  end

  describe 'PUT /todos/:todo_id/items/:id' do
    let(:valid_attributes) { { name: 'Mozart' }.to_json }

    before do
      put "/todos/#{todo_id}/items/#{id}", params: valid_attributes, headers: headers
    end

    # [...]
    # [...]
  end

  describe 'DELETE /todos/:id' do
    before { delete "/todos/#{todo_id}/items/#{id}", params: {}, headers: headers }

    # [...]
  end
end
Awesome, our specs are now up to date! Phew!
太棒了,我们的规格现已更新! !

Let's fire up the server for some manual testing.
让我们启动服务器进行一些手动测试。
# Attempt to access API without a token
$ http :3000/todos
# Signup a new user - get token from here
$ http :3000/signup name=ash email=ash@email.com password=foobar password_confirmation=foobar
# Get new user todos
$ http :3000/todos \
> Authorization:'eyJ0eXAiOiJKV1QiLCJhbGciOiJIUzI1NiJ9.eyJ1c2VyX2lkIjozLCJleHAiOjE0ODg5MDEyNjR9.7txvLgDzFdX5NIUGYb3W45oNIXinwB_ITu3jdlG5Dds'
# create todo for new user
$ http POST :3000/todos title=Beethoven \
> Authorization:'eyJ0eXAiOiJKV1QiLCJhbGciOiJIUzI1NiJ9.eyJ1c2VyX2lkIjozLCJleHAiOjE0ODg5MDEyNjR9.7txvLgDzFdX5NIUGYb3W45oNIXinwB_ITu3jdlG5Dds'
# Get create todos
$ http :3000/todos \
Authorization:'eyJ0eXAiOiJKV1QiLCJhbGciOiJIUzI1NiJ9.eyJ1c2VyX2lkIjozLCJleHAiOjE0ODg5MDEyNjR9.7txvLgDzFdX5NIUGYb3W45oNIXinwB_ITu3jdlG5Dds'
结论 ( Conclusion )
That's it for part two! At this point, you should have learned how to implement token based authentication with JWT.
第二部分就是这样! 在这一点上,您应该已经学会了如何使用JWT实现基于令牌的身份验证。
In the next part of this tutorial, we'll wrap up with API versioning, pagination and serialization. As always, hope to see you there. Cheers!
在本教程的下一部分中,我们将介绍API versioning , pagination和serialization 。 和往常一样,希望在那里见到你。 干杯!
翻译自: https://scotch.io/tutorials/build-a-restful-json-api-with-rails-5-part-two
rails 返回json


 被折叠的 条评论
为什么被折叠?
被折叠的 条评论
为什么被折叠?
 到【灌水乐园】发言


