


代码打字速度
VueJS is commonly being adopted as a Javascript framework, and many developers are trying it out to see what it can actually do.
VueJS通常被用作Javascript框架,许多开发人员正在尝试使用它来查看其实际功能。
In this article, we are going to build a Typing Speed Effect, which is a tiny application small enough to wet your apetite for writing applications with VueJS.
在本文中,我们将构建一个Typing Speed Effect,它是一个很小的应用程序,足够小,可以用VueJS编写应用程序来润湿您的apetite。
The complete application can be found in this jsfiddle.
完整的应用程序可以在jsfiddle中找到。

项目设置 ( Project Setup )
Since this project is mainly for getting started with Vue, we will not complicate things by using the Vue CLI. If you are however familiar with the Vue CLI, an equivalent setup will involve typing the the following command.
由于该项目主要用于Vue入门,因此我们不会使用Vue CLI使事情复杂化。 但是,如果您熟悉Vue CLI,则等效的设置将涉及键入以下命令。
vue init simple simple-vue
`
But for those of us who want to keep it simple, let's create a directory called vue-typer, and inside it add 2 files (index.html, script.js) with the following content.
但是对于那些想要简化它的人,让我们创建一个名为vue-typer的目录,并在其中添加2个文件,其中包含以下内容( index.html , script.js )。
vue-typer/index.html
vue-typer / index.html
<!DOCTYPE html>
<html lang="en">
<head>
  <meta charset="UTF-8">
  <meta name="viewport" content="width=device-width, initial-scale=1.0">
  <meta http-equiv="X-UA-Compatible" content="ie=edge">
  <link rel="stylesheet"
        href="https://maxcdn.bootstrapcdn.com/bootstrap/4.0.0/css/bootstrap.min.css"
        integrity="sha384-Gn5384xqQ1aoWXA+058RXPxPg6fy4IWvTNh0E263XmFcJlSAwiGgFAW/dAiS6JXm"
        crossorigin="anonymous">
  <title>Document</title>
</head>
<body>
  <script src="https://cdn.jsdelivr.net/npm/vue@2.5.16/dist/vue.js"></script>
  <script src="script.js"></script>
</body>
</html>
This is html file with Bootstrap and VueJS linked through CDNs. Next, we'll modify this file a bit, to include a div where Vue will render a template.
这是HTML文件,其中Bootstrap和VueJS通过CDN链接。 接下来,我们将对该文件进行一些修改,以包括div,Vue将在该div上渲染模板。
<body>
  <div id="app">
    {{ title }}
  </div>
  /_ ... _/
The {{ title }} syntax is where Vue will evaluate it's title state variable. We then go ahead and instantiate the VueJS application in the vue-typer/script.js.
{{ title }}语法是Vue评估其title状态变量的地方。 然后,我们继续在vue-typer / script.js中实例化VueJS应用程序。
vue-typer/script.js
vue-typer / script.js
new Vue({
  el: '#app',
  data: {
    title: 'Vue Typer'
  }
})
This is how a basic Vue instance is created. It takes in an object with a some properties, but we'll cover them as we go. In this instance, we define the el property, which represent the dom element the vue instance will affect, and a data property which represents state variables for the vue instance.
这是创建基本Vue实例的方式。 它接受具有一些属性的对象,但是我们将逐步介绍它们。 在这种情况下,我们定义el属性,该属性表示vue实例将影响的dom元素,以及一个data属性,该data属性表示vue实例的状态变量。
You can open the index.html file directly in your browser, and this is what will be displayed.
您可以直接在浏览器中打开index.html文件,这将显示。
The title property of the data was evaluated by the {{ title }} template in the html.
数据的title属性由html中的{{ title }}模板评估。
键入速度效果逻辑 ( Typing Speed Effect Logic )
We need to make sure we can do the following:-
我们需要确保我们可以执行以下操作:
- Provide a random Paragraph. 提供一个随机的段落。
- Enable a user to type in the paragraph. 允许用户键入该段落。
- Have a UI indicator when the user is typing. 用户键入时有一个UI指示器。
随机段落 (Random Paragraph)
This is the simplest part of the application. We will provide one paragraph as a constant, but these can ideally be pulled from an API. You can find the paragraph in this pastebin
这是应用程序中最简单的部分。 我们将提供一个段落作为常量,但是理想情况下可以从API中提取这些段落。 您可以在此pastebin中找到该段落
new Vue({
  el: '#app',
  data: {
    title: 'Vue Typer',
    originalParagrapgh: PARAGRAPH
  }
});

const PARAGRAPH = `NIH (Not Invented Here) isn’t a 4-letter word. We’re all presumably programmers because we like programming....`
Make sure you paste in the whole paragraph from the pastebin, oh, and read it too.
确保您从pastebin中粘贴了整个段落,哦,并且也阅读了它。
Let's update the html to reflect the new paragraph
让我们更新html以反映新段落
<!--  -->
<div id="app" class="container mt-2">
    <h1>{{ title }}</h1>
    <div class="row">
      <div class="col-8">
        <div class="paragraph">
          {{ originalText }}
        </div>
        <div class="typer"></div>
      </div>
    </div>
</div>
<!--  -->
Above is standard html and bootstrap. The mt-2 class is Bootstrap 4's spacing feature, and refers to the following class.
以上是标准的html和bootstrap。 mt-2类是Bootstrap 4的间距功能,指的是以下类。
.mt-1 {
  margin-top: 1 !important;
}
You can read more about this here: bootstrap spacing.
您可以在这里阅读更多有关此内容: 引导程序间距 。
Refreshing the browser should give this:
刷新浏览器应该给出以下信息:
打字速度逻辑 (Typing Speed Logic)
This is the quite not so straight forward part of this article.
这不是本文的直接部分。
We first of all need a TextArea so that we can type. Edit the html
我们首先需要一个TextArea以便我们键入。 编辑HTML
<div id="app" class="container mt-2">
  <h1>{{ title }}</h1>
    <div class="row">
      <div class="col-8">
        <div class="paragraph">
          {{ originalText }}
        </div>
        <div class="typer mt-3">
          <textarea class="form-control"
                    rows="10"
                    placeholder="start typing here"></textarea>
        </div>
      </div>
  </div>
 </div>
We've added a textarea. Refreshing the browser

我们添加了一个textarea 。 刷新浏览器
Now, we can focus on the Logic. Here's the approach we'll take.
现在,我们可以专注于逻辑。 这是我们将采用的方法。
- The HTML within the paragraph div needs to be dynamic. We therefore need to find a way for vue to keep editing the actual html whenever we type. div段落中HTML必须是动态的。 因此,我们需要找到一种方法,以便在键入时继续编辑实际的html。
- When we type in, we compare the text we've typed in with the original text. If we have a mismatch, we capture the index, and add in html that represents a typo, or an error in the typing. 键入时,我们会将输入的文本与原始文本进行比较。 如果不匹配,我们将捕获索引,并添加表示错字或键入错误的html。
- These errors and valid UI will are best represented by
span. When the user types in correctly, the original text turns green, and when the user types in a typo, it turns red. This can be achieved with css classes. 这些错误和有效的UI将最好用span表示。 当用户正确键入时,原始文本变为绿色,而当用户键入错误时,其变为红色。 这可以通过css类来实现。
Add the following CSS within the head tag of our html file
在我们的html文件的head标签中添加以下CSS
<!-- -->
<style>
    .correct {
      color: rgb(63,81,181);
      font-size: 22px;
    }

    .typo {
      color: #f00;
      font-size: 22px;
    }
  </style>
  <title>Vue Typer</title>
 <!-- -->
We will apply these two classes when typing whenever we have either a correct input or a typo.
只要我们有正确的输入或错字,我们将在输入时应用这两个类。
Next, we will render the original text as HTML instead of accessing it via the syntax {{ originalText }}. We are doing this since we have to edit the html directly when typing.
接下来,我们将原始文本呈现为HTML,而不是通过语法{{ originalText }}访问它。 我们这样做是因为键入时必须直接编辑html。
Vue uses v-html attribute to render html. Since this particular html will involve a lot of logic, it would make sense for it to be a Computed Property.
Vue使用v-html属性呈现html。 由于此特定的html涉及很多逻辑,因此将其作为Compute属性是有意义的。
Update the VueJS instance
更新VueJS实例
// ...
new Vue({
  el: '#app',
  data: {
    title: 'Vue Typer',
    originalText: PARAGRAPH
  },
  computed: {
    outputHTML: function() {
      let html = `<span class="correct">This is correct</span>`;
      html += `<span class="typo">This is wrong </span>`;

      return html;
    }
  }
});
Above we've added a ComputedProperty called outputHTML, which generates a html. We then add the two CSS classes we added earlier, so that we can see them in the browser. The last change is made on paragraph div in the index.html
上面我们添加了一个名为outputHTML的ComputedProperty,它生成一个html。 然后,我们添加之前添加的两个CSS类,以便我们可以在浏览器中看到它们。 最后一个更改是在index.html div段落上进行的
<!-- -->
<div class="paragraph" v-html="outputHTML">
</div>
<!-- -->
This is what is displayed in the browser.
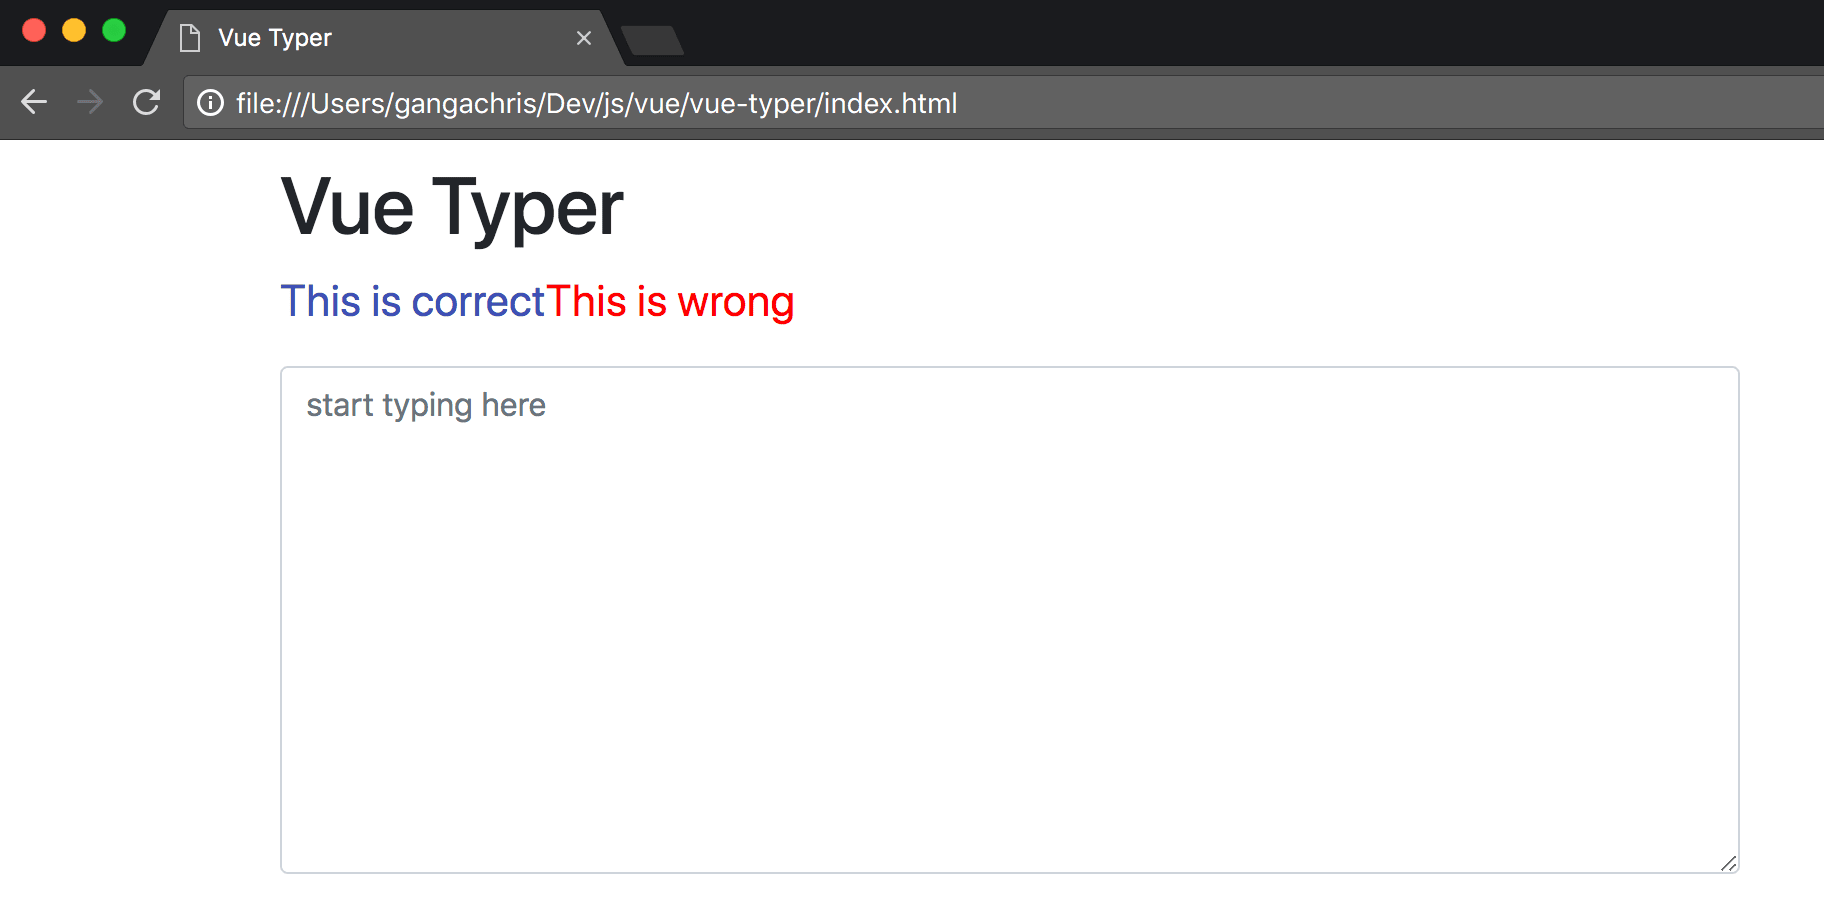
这就是浏览器中显示的内容。
The idea now, is to change the HTML here to reflect what we are typing.
现在的想法是在此处更改HTML以反映我们正在键入的内容。
The logic for comparing what is typed and the original involves comapring the values at each index. For instance.
比较输入的内容和原始内容的逻辑涉及将每个索引处的值共同映射。 例如。
If originalText is Scotch on the Rocks, and the user starts typing, every time they type in a letter, we check the length of what is typed, and use that as an index to identify if what was typed is correct.
如果originalText是Scotch on the Rocks ,并且用户开始键入,则每次键入字母时,我们都会检查键入内容的长度,并将其用作索引以识别键入内容是否正确。
So, typing Sc which has a length of 2, will compare what is typed to Scotch on the Rocks[1], which is the second index(length of what is typed), and if they don't match, will mark that index as the starting point of the error.
因此,输入长度为2的Sc会将输入的内容Scotch on the Rocks[1]进行比较,后者是第二个索引(输入内容的长度),如果它们不匹配,则会标记该索引作为错误的起点。
To start us of, we will add two data properties:
首先,我们将添加两个数据属性:
- **typedText**: which will hold the typed in value. This will be a two way binding.
- **typoIndex**: which will represent the index which the typo began.
const PARAGRAPH = `NIH (Not Invented Here) isn’t a 4-letter word. ....`;
// ...
new Vue({
el: '#app',
data: {
// ...
typedText: '',
typoIndex: -1
},
computed: {
// ...
}
}
});Of course, when we start, the typoIndex is -1 since we do not have a type. We then need to bind the typedText to <text-area> so that we have the real time value within the vue instance as we type.
当然,当我们开始时,typoIndex为-1,因为我们没有类型。 然后,我们需要将typedText绑定到<text-area>以便在键入时在vue实例中具有实时值。
<!-- -->
<div class="typer mt-3">
  <textarea class="form-control"
            id="exampleFormControlTextarea1"
            rows="10"
            placeholder="start typing here"
            v-model="typedText"></textarea>
</div>
<!-- -->
We've added v-model property that enables two way binding for VueJS applications. v-model="typedText".
我们添加了v-model属性,该属性为VueJS应用程序启用了双向绑定。 v-model="typedText" 。
Next, since we need to know the value that has been typed, we will add a Watch Property to the Vue instance so that we get the value as it changes. We will add the logic we discussed earlier to the watch function,
接下来,由于我们需要知道已键入的值,因此将监视属性添加到Vue实例,以便在更改时获取该值。 我们将前面讨论的逻辑添加到watch函数中,
// const PARAGRAPH
new Vue({
  el: '#app',
  // ....
  computed: {
     outputHTML: function() {}
  },
  watch: {
    typedText: function(value) {
      for (let i = 0; i < value.length; i++) {
        if (value[i] !== this.originalText[i]) {
          this.typoIndex = i;
          break;
        }
        this.typoIndex = -1;
      }
    }
  }
});
The watcher takes in a key property which is the data property (state variable) we are watching. It's value is function which takes in one parameter, representing the current value of the variable.
watcher接受一个关键属性,它是我们正在观察的数据属性(状态变量)。 它的值是一个函数,它接受一个参数,代表变量的当前值。
We then loop through each value of the typed in text, and when we get that the value at any index is not equal to the value at the originalText, we mark it as a typo index. This typoIndex is where we will start the error span.
然后,我们遍历文本中键入的每个值,当发现任何索引处的值不等于originalText处的值时,我们将其标记为错字索引。 这个typoIndex是我们开始误差范围的地方。
The next logic is the outputHTML computed property. Update the outputHTML computed code to this.
下一个逻辑是outputHTML计算属性。 将outputHTML计算的代码更新为此。
// ....

computed: {
    outputHTML: function() {
      let newHTML = '<span class="correct">'
      if (this.typoIndex === -1) {
        // we do not have a typo index
        newHTML += this.originalText.substr(0, this.typedText.length)
        newHTML += '</span>'
        newHTML += this.originalText.substr(this.typedText.length)

        return newHTML
      }

      // else we have a typo index
      newHTML += this.originalText.substr(0, this.typoIndex)
      newHTML += '</span>'
      newHTML += '<span class="typo">'
      newHTML += this.originalText.substring(this.typoIndex, this.typedText.length)
      newHTML += '</span>'
      newHTML += this.originalText.substr(this.typedText.length)

      return newHTML
    }
  },

/// ...
Let's walk through the logic:
让我们看一下逻辑:
- A starting HTML would look something like this:
<span class="correct"></span>NIH(Not Invented....". We haven't typed in anything yet, so the "correct" class is just on an empty span. 起始HTML看起来像这样:<span class="correct"></span>NIH(Not Invented...."。我们还没有输入任何内容,因此” correct“类只在空跨度。 - If the typoIndex is
-1, it's original value, it means we do not have a typo, so we our html needs to be<span class="correct">NIH(Not Invented</span> Here....where here... is the rest of the Original Text. We use Strings.substr, which usually takes in the start index, and the length to get a substring. If the last parameter is not provided, it returns the rest of the original string. 如果typoIndex为-1,它是原始值,则意味着我们没有错字,因此我们的html需要为<span class="correct">NIH(Not Invented</span> Here....here here ...是原始文本的其余部分,我们使用Strings.substr ,它通常使用起始索引和获取子字符串的长度,如果未提供最后一个参数,则返回原始字符串的其余部分。 - If typoIndex is not equal to
-1, it means we have a typo somewhere, and the html needs to be.<span class="correct>NIH</span><span class="typo">(Not Invented)</span> the rest of the html"如果typoIndex不等于-1,则意味着我们某处有一个错字,而html必须是。<span class="correct>NIH</span><span class="typo">(Not Invented)</span> the rest of the html"
Notice that when computing the typo span content, we use String.substring, which takes in an endIndex instead of length, since we have the index based on what we are typing.
请注意,在计算拼写跨度内容时,我们使用String.substring ,它使用endIndex而不是length,因为我们拥有基于输入内容的索引。
You can refresh the browser and start typing.
您可以刷新浏览器并开始输入。
结论 ( Conclusion )
While this article did not cover the usual getting started side of VueJS, like methods, it enables you quickly get your hands dirty and see how simple Vue can be used within your application.
尽管本文没有介绍VueJS的常规入门方法(如方法),但它使您能够快速掌握实际情况,并了解如何在应用程序中使用Vue。
I hope you enjoyed reading. As a bonus, you could add a Timer, and disable everything when the timer ends.
希望您喜欢阅读。 另外,您可以添加一个计时器,并在计时器结束时禁用所有功能。
Happy Coding
快乐编码
翻译自: https://scotch.io/tutorials/create-a-typing-speed-effect-with-vuejs456
代码打字速度


 1022
1022

 被折叠的 条评论
为什么被折叠?
被折叠的 条评论
为什么被折叠?
 到【灌水乐园】发言


