


介绍 ( Introduction )
If you have solid experience with AngularJS 1.x, you're well aware of the framework's features and intricacies. Many of us have plenty of AngularJS projects in development and production. Angular was officially released in mid-September 2016. Maybe you've dabbled with the Angular Tour of Heroes tutorial, but if you haven't had the opportunity to build a real-world Angular app, let's face it: the prospect can be daunting.
如果您对AngularJS 1.x有扎实的经验,那么您会清楚该框架的功能和复杂性。 我们中的许多人在开发和生产中都有大量的AngularJS项目。 Angular已于2016年9月中旬正式发布 。 也许您已经精通Angular Tour of Heroes教程 ,但是如果您没有机会构建现实世界中的Angular应用,那就面对吧:前景可能令人生畏。
The entire Angular framework has been rewritten into a brand new platform. Change detection is better. New dependencies and understanding are required for development (TypeScript, RxJS, ES6, a new style guide, etc.). Many of the old standbys are gone (no more $scope, no $rootScope.broadcast, no filter or orderBy pipes, etc.).
整个Angular框架已被重写为一个全新的平台。 变更检测 更好 。 开发需要新的依赖关系和理解( TypeScript , RxJS , ES6 ,新样式指南等)。 许多旧的备用数据库都消失了(不再有$scope ,没有$rootScope.broadcast , 没有filter或orderBy管道等)。
There aren't many shortcuts for an AngularJS developer looking to learn Angular quickly. You may have heard about the difficulties of upgrading an existing codebase from AngularJS 1.x to Angular. Many developers have better luck migrating to a clean Angular build. This is a great way to learn a new platform, though it requires a certain climate with ample time, budget, and stability testing.
想要快速学习Angular的AngularJS开发人员没有太多捷径。 您可能已经听说过将现有代码库从AngularJS 1.x 升级到Angular的困难。 许多开发人员最好迁移到干净的Angular版本 。 这是学习新平台的好方法,尽管它需要一定的环境,并且要有充足的时间,预算和稳定性测试。
So how can we decrease the learning curve when transitioning from AngularJS to Angular?
那么从AngularJS过渡到Angular时如何减少学习曲线?
关于本指南 ( About This Guide )
The purpose of this tutorial is to provide guidance for implementing common features of AngularJS in Angular. Some things have been removed or replaced. Some require a mental model shift. We'll cover the basics and hopefully you'll be able to get up and running more quickly with your own Angular apps.
本教程的目的是为在Angular中实现AngularJS的常用功能提供指导。 有些东西已被删除或替换。 有些需要思维模式的转变。 我们将介绍基础知识,并希望您能够使用自己的Angular应用程序更快地启动并运行。
我们将涵盖的内容 (What We'll Cover)
We'll address several features that many real-world Angular apps require:
我们将解决许多实际的Angular应用程序需要的几个功能:
- Parent-to-child component communication 亲子互动
- Child-to-parent component communication 儿童与父母之间的沟通
- Global communication with services 全球服务沟通
- Bonus: Services with multiple instances 奖励:具有多个实例的服务
- Using native events and DOM properties 使用本机事件和DOM属性
- Router events 路由器事件
- Calling an API 调用API
- Filtering by search query 按搜索查询过滤
- Aside: Authenticate an Angular App and Node API with Auth0 旁白:使用Auth0对Angular应用程序和Node API进行身份验证
Note: The AngularJS code samples use AngularJS version 1.5.x.
注意: AngularJS代码示例使用AngularJS版本1.5.x。
我们不会涵盖的内容 (What We Won't Cover)
We aren't going to go indepth explaining Angular project setup, Angular CLI, TypeScript, ES6, RxJS, functional reactive programming (FRP), or testing.
我们将不深入解释Angular项目设置,Angular CLI,TypeScript,ES6,RxJS,函数式React性编程(FRP)或测试。
However, this tutorial does assume a basic understanding of Angular prerequisites. This includes Angular project architecture, TypeScript, ES6, and RxJS. To familiarize yourself, check out some of these resources:
但是,本教程确实假定您对Angular的先决条件有基本的了解。 这包括Angular项目体系结构,TypeScript,ES6和RxJS。 为了使自己熟悉,请查看以下资源:
- Angular CLI 角度CLI
- TypeScript 打字稿
- A Rundown of JavaScript 2015 Features JavaScript 2015功能概要
- Understanding Reactive Programming and RxJS 了解React式编程和RxJS
- Functional Reactive Programming for Angular Developers - RxJs and Observables Angular开发人员的功能性React式编程-RxJ和Observable
For a full migration tutorial including all setup steps, check out Migrating an AngularJS App to Angular - Part 1, Part 2, and Part 3.
有关包括所有设置步骤的完整迁移教程,请查看将AngularJS应用迁移到Angular-第1 部分 , 第2 部分和第3部分 。
代码库 (Code Repository)
Sample Angular code is available for each section in the migrating-angular-features-to-angular2 GitHub repo.
在migrating-angular-features-to-angular2 GitHub存储库中的每个部分均可使用示例Angular代码。
依存关系 ( Dependencies )
To use the code samples in your own project, you'll need to set up an Angular project. You can generate a boilerplate app using the Angular CLI. There are also various seed projects available, such as AngularClass/angular2-webpack-starter and mgechev/angular-seed.
要在自己的项目中使用代码示例,您需要设置一个Angular项目。 您可以使用Angular CLI生成样板应用程序。 也有各种种子项目可用,例如AngularClass / angular2-webpack-starter和mgechev / angular-seed 。
Samples in this tutorial are simplified so that templates are included in the component TypeScript. In a real-world project, you would likely want to separate the TS, HTML, and CSS into their own files.
本教程中的示例已经简化,因此模板包含在组件TypeScript中。 在现实世界的项目中,您可能希望将TS,HTML和CSS分离到各自的文件中。
The Angular CLI can set this up quickly and easily for you. To create your own starter project and take advantage of automatic component generation, check out the Angular CLI GitHub README. The Ultimate Angular CLI Reference Guide is also a great resource.
Angular CLI可以为您快速轻松地进行设置。 要创建自己的入门项目并利用自动组件生成的优势,请查看Angular CLI GitHub README 。 《 Ultimate Angular CLI参考指南》也是一个很好的资源。
将数据从父母传递给孩子 ( Passing Data from Parent to Child )
Download Angular code samples: parent-to-child-component-communication
下载Angular代码示例: 父子组件通信
One of the most basic features of any app is communication. AngularJS leverages the concept of componetization but not nearly to the extent of Angular. In AngularJS, it's simple to allow hierarchical controllers and directives access to the $scope of other app components. In Angular, some component communication is very similar to AngularJS and some is different.
通信是任何应用程序的最基本功能之一。 AngularJS利用了组合化的概念,但没有达到Angular的程度。 在AngularJS中,允许分层控制器和指令访问其他应用程序组件的$scope很简单。 在Angular中,某些组件通信与AngularJS非常相似,而另一些则有所不同。
First let's examine parent-to-child component communication.
首先,让我们研究一下父子组件之间的通信。
Scenario: In our parent component, we want to use a repeater to iterate over an array of objects and pass each object to a child component. The child should then display the data.
场景:在我们的父组件中,我们想使用一个转发器来遍历对象数组,并将每个对象传递给子组件。 然后孩子应该显示数据。
AngularJS中的亲子交流 (Parent to Child Communication in AngularJS)
In AngularJS, our approach probably involves setting up (or fetching) data in a parent controller and assigning the collection to a bindable member (ie., parent.items). We would use ng-repeat to loop over a child directive and pass the item to it as an attribute. The child directive's template would then display the data.
在AngularJS中,我们的方法可能涉及在父控制器中设置(或获取)数据,并将集合分配给可绑定的成员(即parent.items )。 我们将使用ng-repeat遍历子指令并将其作为属性传递给它。 然后,子指令的模板将显示数据。
In AngularJS 1.5, our child directive might resemble the following:
在AngularJS 1.5中,我们的child指令可能类似于以下内容:
// AngularJS - child.directive.js

angular.module('ng1-app').directive('child', child);

function child() {
  return {
    restrict: 'EA',
    replace: true,
    template: '<div>{{child.data.name}}</div>',
    controller: childCtrl,
    controllerAs: 'child',
    bindToController: true,
    scope: {
      data: '<'
    }
  };
}
function childCtrl() {
  var child = this;
  console.log('Data for child:', child.data);
}
The markup containing the parent might look something like this:
包含父项的标记可能看起来像这样:
<!-- AngularJS - parent-to-child markup -->
<div ng-controller="ParentCtrl as parent">
  <child ng-repeat="item in parent.items" data="item"></child>
</div>
父母与子女之间的交流 (Parent to Child Communication in Angular)
The implementation for this is similar in Angular, but we need to use input binding with the @Input decorator.
Angular中的实现与此类似,但是我们需要将输入绑定与@Input装饰器一起使用 。
In the parent component, we'll set up our items data and then use the NgFor directive to repeat the child component and pass items to it:
在父组件中,我们将设置items数据,然后使用NgFor指令重复child组件并将项目传递给它:
// Angular - parent.component.ts

import { Component } from '@angular/core';

@Component({
  selector: 'app-parent',
  template: `
    <app-child *ngFor="let item of items" [data]="item"></app-child>
  `
})
export class ParentComponent {
  items = [
    { name: 'Allosaurus' },
    { name: 'Brachiosaurus' },
    { name: 'Dionychus' },
    { name: 'Elasmosaurus' },
    { name: 'Parasaurolophus' }
  ];
}
The selector for this component is app-parent because we need custom elements to be hyphenated as per the W3C spec for custom elements and Angular Style Guide. Not doing so will result in errors; this is to prevent conflicts when W3C implements new tags in the future.
该组件的选择器是app-parent因为我们需要按照W3C规范中的自定义元素和Angular样式指南 来对自定义元素进行连字。 不这样做会导致错误; 这是为了防止W3C将来实现新标签时发生冲突。
The square brackets in [data] are one-way data binding punctuation. You can read more about binding syntax in the Angular docs.
[data]中的方括号是单向数据绑定标点。 您可以在Angular文档中阅读有关绑定语法的更多信息。
Our child component might then look like this:
我们的child组件可能如下所示:
// Angular - child.component.ts

import { Component, OnInit, Input } from '@angular/core';

@Component({
  selector: 'app-child',
  template: `<div>{{data.name}}</div>`
})
export class ChildComponent implements OnInit {
  @Input() data: {[key: string]: any};

  ngOnInit() {
    console.log('Data for child:', this.data);
  }

}
We'll import the Input class from @angular/core. Then we'll give the @Input() decorator a name (data) and an object {[key: string]: any} type annotation.
我们将从@angular/core导入Input类。 然后,给@Input()装饰器一个名称( data )和一个对象{[key: string]: any}类型注释。
The AngularJS and Angular examples are now functionally equivalent. At a glance, we can see how the lack of $scope makes the Angular example refreshingly simple.
AngularJS和Angular示例现在在功能上等效。 一目了然,我们可以看到缺少$scope如何使Angular示例变得令人耳目一新。
将数据从孩子传递给父母 ( Passing Data from Child to Parent )
Download Angular code samples: child-to-parent-component-communication
下载Angular代码示例: 子组件到父组件的通信
We often need to pass data from a child to a parent. Consider this hypothetical scenario:
我们经常需要将数据从孩子传递给父母。 考虑以下假设情况:
Scenario: We have a property that adds or removes an element in a component. We have a button in a child component that must be able to toggle the parent's element.
场景:我们有一个属性,可以添加或删除组件中的元素。 我们在子组件中有一个按钮,该按钮必须能够切换父元素。
AngularJS中的儿童与父母沟通 (Child to Parent Communication in AngularJS)
In AngularJS, there are several ways to tackle this scenario. We can allow children to inherit the parent scope. We can broadcast and emit events. We can two-way data bind to a directive's scope. AngularJS's automagic two-way data binding was one of the most oft-demoed features when Angular first appeared in the JavaScript framework landscape. If you're experienced with AngularJS, you should be familiar with how the digest cycle / dirty-checking works.
在AngularJS中,有几种方法可以解决这种情况。 我们可以允许孩子继承父范围 。 我们可以广播和发出事件 。 我们可以将双向数据绑定到指令的作用域 。 当Angular首次出现在JavaScript框架领域时,AngularJS的自动双向数据绑定是最经常使用的功能之一。 如果您有使用AngularJS的经验,则应该熟悉摘要循环/脏检查的工作原理。
儿童与父母之间的交流 (Child to Parent Communication in Angular)
In Angular, two-way data binding is no longer built in. Angular components are modular and encapsulated. After AngularJS's emphasis on two-way binding, its absence from Angular can seem challenging. The key is understanding component communication and the greater control we have when binding doesn't happen automagically.
在Angular中,不再内置双向数据绑定。Angular组件是模块化和封装的。 在AngularJS强调双向绑定之后,AngularJS的缺失似乎具有挑战性。 关键是要了解组件通信,以及在绑定不是自动发生时我们拥有的更大控制权 。
If we want a child component to notify a parent of changes, we can use the EventEmitter API and @Output decorator. The parent can then bind to the event outputted by the child to update its data.
如果我们希望子组件将更改通知给父组件,则可以使用EventEmitter API和@Output装饰器 。 然后,父级可以绑定到子级输出的事件以更新其数据。
Note: This method should be used for component-to-component communication but not service-to-component interactions. We'll cover communication with services shortly.
注意:此方法应用于组件到组件的通信,而不是服务到组件的交互 。 我们将在短期内介绍与服务的通信。
Our parent might look like this:
我们的父母可能看起来像这样:
// Angular - parent.component.ts

import { Component } from '@angular/core';

@Component({
  selector: 'app-parent',
  template: `
    <div *ngIf="elementShow">Show this conditionally in parent template!</div>
    <app-child (elementToggled)="elementToggleHandler($event)"></app-child>
  `
})
export class ParentComponent {
  elementShow: boolean;

  elementToggleHandler(e: boolean) {
    this.elementShow = e;
  }
}
We have an element that is being conditionally stamped with the NgIf directive if the elementShow property is truthy. Then we have a child component with an (elementToggled) event listener. When this event is detected in the parent component, it executes a handler that updates the elementShow property with the value of the event parameter. But where does this elementToggled event come from?
如果elementShow属性为true,我们将使用NgIf指令有条件地标记一个元素。 然后我们有一个带有(elementToggled)事件监听器的子组件。 当在父组件中检测到此事件时,它将执行一个处理程序,该处理程序使用event参数的值更新elementShow属性。 但是这个elementToggled事件从何而来?
Note: The parentheses in (elementToggled) are data binding punctuation for listening for events. You can read more about binding syntax in the Angular docs.
注意: (elementToggled)中的括号是用于侦听事件的数据绑定标点。 您可以在Angular文档中阅读有关绑定语法的更多信息。
Our child component emits the elementToggled event that the parent is listening for. In this case, the child might look like this:
我们的子组件会发出父组件正在监听的elementToggled事件。 在这种情况下,孩子可能看起来像这样:
// Angular - child.component.ts

import { Component, Output, EventEmitter } from '@angular/core';

@Component({
  selector: 'app-child',
  template: `
    <button (click)="toggleElement()">Toggle Parent from Child</button>
  `
})
export class ChildComponent {
  @Output() elementToggled = new EventEmitter();
  elementShow: boolean = false;

  toggleElement() {
    this.elementShow = !this.elementShow;
    this.elementToggled.emit(this.elementShow);
  }
}
We need to import the Output and EventEmitter APIs. In our template, we'll listen for a (click) event and execute a toggleElement() method when the user interacts with the button. We'll use the @Output() decorator to create a new event emitter. We also need a boolean elementShow property to track the state of the toggle.
我们需要导入Output和EventEmitter API。 在我们的模板中,我们将侦听(click)事件,并在用户与按钮进行交互时执行toggleElement()方法。 我们将使用@Output()装饰器创建一个新的事件发射器。 我们还需要一个布尔elementShow属性来跟踪切换状态。
Finally, we'll define the click event handler toggleElement(). This method should toggle the elementShow property and emit the elementToggled event with the current state of elementShow.
最后,我们将定义点击事件处理程序toggleElement() 。 此方法应切换elementShow属性,并发射elementToggled与当前状态的事件elementShow 。
We can now toggle the parent from the child:
现在,我们可以从子级切换父级:

Note: To see a practical, real-world use case, please check out Migrating an AngularJS App to Angular - Part 1. You can also read Two-way Binding in Angular for more on this topic.
注意:要查看实际的实际用例,请查看将AngularJS应用迁移到Angular-第1部分 。 您也可以阅读Angular中的双向绑定以获取有关此主题的更多信息。
Hopefully you can see the benefits of this approach. What's happening is more transparent and less magical when things like $scope and $watch aren't in the picture.
希望您能看到这种方法的好处。 当诸如$scope和$watch类的图片不在图中时,发生的事情更加透明,而且没有那么神奇。
更多组件通信技术 ( More Component Communication Techniques )
These are not the only approaches to component communication. Please check out Component Interaction in the Angular docs for more information.
这些不是组件通信的唯一方法。 请查看Angular文档中的Component Interaction了解更多信息。
In addition, parent components can be injected into child components to provide access to their methods. This tightly couples the components, so loose coupling is advised. However, injection may be preferred in some cases. You can read more about this here: Find a parent component by injection.
另外,可以将父组件注入子组件中以提供对其方法的访问。 这会紧密耦合组件,因此建议松散耦合。 但是,在某些情况下可能需要注射。 您可以在此处了解更多信息: 通过注入找到父组件 。
全球服务沟通 ( Global Communication with Services )
Download Angular code samples: global-communication-with-service
下载Angular代码示例:服务 全球通信
Most apps that grow to a certain scale require some kind of global communication. Scope (and root scope) are gone in Angular, but we can still implement app-wide communication with services.
增长到一定规模的大多数应用程序都需要某种全球通信。 范围(和根范围)在Angular中已经消失了,但是我们仍然可以实现与服务的应用程序范围内的通信。
Scenario: We have some data and associated methods for setting and getting it. We want to be able to display and manipulate that same data from anywhere in our app. We also want to react to data changes in script.
场景:我们有一些数据以及相关的设置和获取方法。 我们希望能够在我们的应用程序中的任何位置显示和处理相同的数据。 我们还想对脚本中的数据更改做出React。
AngularJS中的全球交流 (Global Communication in AngularJS)
With AngularJS, there are several options for managing app-wide data. We can use service (and factory) singletons to get and set global data and provide methods. We can also use $rootScope to store data and emit and broadcast events.
使用AngularJS,可以使用多种选项来管理应用程序范围内的数据。 我们可以使用服务(和工厂)单例来获取和设置全局数据并提供方法。 我们还可以使用$rootScope来存储数据以及发出和广播事件 。
Angular中的服务全球沟通 (Global Communication with Services in Angular)
One of the interesting things about Angular is that services can be singletons or they can create multiple instances depending on how we provide them. For globals, let's assume that a singleton is exactly what we want.
Angular有趣的事情之一是服务可以是单例,也可以根据我们提供它们的方式创建多个实例。 对于全局变量 ,我们假设单例正是我们想要的。
Let's create a trusty standby, the good old counter example:
让我们创建一个值得信赖的备用数据库,一个很好的旧计数器示例:
// Angular - counter.service.ts

import { Injectable } from '@angular/core';
import { BehaviorSubject } from 'rxjs/BehaviorSubject';

@Injectable()
export class CounterService {
  count = 0;
  count$ = new BehaviorSubject<number>(this.count);

  inc() {
    this.count++;
    this.updateCountSbj(this.count);
  }

  dec() {
    this.count--;
    this.updateCountSbj(this.count);
  }

  get getCount(): number {
    return this.count;
  }

  private updateCountSbj(value) {
    this.count$.next(value);
  }

}
The simple part: our service is Injectable and has methods to increment, decrement, and return an integer. There's nothing fancy there.
简单的部分:我们的服务是可Injectable并且具有递增,递减和返回整数的方法。 那里没有幻想。
However, we've also imported BehaviorSubject. We want to be able to subscribe to count changes in our components. We need to be able to do this if we want to execute script logic in response to changes in global data. In AngularJS, we might do this by emitting an event or by $watch()ing in a directive/controller. In Angular, services should not use EventEmitter, and $scope.$watch is gone. An RxJS BehaviorSubject extends an observable and allows us to create subscriptions in our components.
但是,我们还导入了BehaviorSubject 。 我们希望能够订阅 count组件中的更改。 如果要执行脚本逻辑以响应全局数据的更改,则需要能够执行此操作。 在AngularJS中,我们可以通过发出事件或在指令/控制器中通过$watch()来实现。 在棱角分明,服务不应使用EventEmitter ,和$scope.$watch不见了。 RxJS BehaviorSubject扩展了一个可观察对象,并允许我们在组件中创建订阅。
Note: Subjects are both observers and observables. You can learn more about subjects here.
注意:主题既是观察者又是可观察对象 。 您可以在此处了解有关主题的更多信息 。
Now let's say we have two components, Cmpt1Component and Cmpt2Component. Each of these components should have buttons to increment, decrement, and display the counter. They can subscribe to the count$ subject to execute logic. They both need access to a single instance of CounterService.
现在,我们有两个组件, Cmpt1Component和Cmpt2Component 。 这些组件中的每一个都应具有用于递增,递减和显示计数器的按钮。 他们可以订阅count$以执行逻辑。 他们俩都需要访问CounterService的单个实例 。
To do this, we need to provide our counter service globally in our app.module.ts:
为此,我们需要在app.module.ts全局提供计数器服务:
// Angular - app.module.ts
...
import { CounterService } from './counter.service';

@NgModule({
  ...,
  providers: [CounterService],
  ...
})
export class AppModule { }
We import CounterService and then provide it in the providers array of our app's @NgModule. Now we can use it in any component belonging to this module and trust that they'll share the same instance.
我们导入CounterService ,然后在应用程序的@NgModule的providers数组中提供它。 现在,我们可以在属于该模块的任何组件中使用它,并相信它们将共享同一实例。
For the sake of example, say both of our components are essentially the same. They might look like this:
为了举例说明,假设我们的两个组件基本相同。 他们可能看起来像这样:
// Angular - cmpt1.component.ts / cmpt2.component.ts

import { Component, OnInit, OnDestroy } from '@angular/core';
import { Subscription } from 'rxjs/Subscription';
import { CounterService } from './counter.service';

@Component({
  selector: 'app-[cmpt1/cmpt2]',
  template: `
    <div>
      <h2>Counter</h2>
      <button (click)="counter.dec()">-</button>
      {{counter.getCount}}
      <button (click)="counter.inc()">+</button>
    <div>
  `
})
export class [Cmpt1/Cmpt2]Component implements OnInit, OnDestroy {
  countSub: Subscription;

  constructor(private counter: CounterService) { }

  ngOnInit() {
    this.countSub = this.counter.count$.subscribe(
      value => {
        console.log('global counter value changed:', value);
      }
    );
  }

  ngOnDestroy() {
    this.countSub.unsubscribe();
  }
}
Because we provided the service in the app module, we only need to import it to use it in our components. We'll make it available in our constructor() function. Now we can use its methods in the component templates.
因为我们在app模块中提供了服务,所以我们只需要将其导入即可在组件中使用它。 我们将使其在我们的constructor()函数中可用。 现在我们可以在组件模板中使用其方法。
We can also create a Subscription to the count$ subject to execute component-level logic. We then need to unsubscribe when the component is destroyed to prevent memory leaks.
我们还可以为count$创建一个Subscription来执行组件级逻辑。 然后,我们需要在组件被销毁时取消订阅 ,以防止内存泄漏。
If we display both components, they'll look and behave like this:
如果我们同时显示两个组件,它们的外观和行为将如下所示:

Incrementing or decrementing either component's counter will affect the other. We now have globally shared data!
增加或减少任何一个组件的计数器都会影响另一个组件。 我们现在拥有全球共享的数据!
Angular:具有多个实例的服务 ( Angular: Services with Multiple Instances )
Download Angular code samples: service-with-multiple-instances
下载Angular代码示例: 具有多个实例的服务
We mentioned above that services can be provided in a way that creates multiple instances. Doing this was a hassle in AngularJS and thankfully, Angular easily solves this with its use of classes.
上面我们提到,可以通过创建多个实例的方式来提供服务。 这样做在AngularJS中很麻烦,而且值得庆幸的是,Angular通过使用类轻松解决了这一问题。
Scenario: We have a service that provides properties and methods for a counter. We want more than one counter in our app. Manipulating one counter should not affect the others.
场景:我们有一项提供计数器属性和方法的服务。 我们的应用程序中需要多个计数器。 操作一个计数器不应影响其他计数器。
We'll use our Angular CounterService from the previous example. Instead of providing it in the app module @NgModule, we'll add it to each @Component in a providers array like this:
我们将使用上一个示例中的Angular CounterService 。 而不是在应用程序模块@NgModule中提供它,我们将其添加到providers数组中的每个@Component中,如下所示:
// Angular - cmpt1.component.ts / cmpt2.component.ts
...
@Component({
  ...,
  providers: [CounterService]
})
...
The result is unique counter instances in Cmpt1Component and Cmpt2Component:
结果是Cmpt1Component和Cmpt2Component唯一计数器实例:

To do this in AngularJS, we have to use factories as APIs that return collections with getters and setters. Doing so isn't simple or elegant. Angular solves this nicely!
为了在AngularJS中做到这一点,我们必须使用工厂作为API,该API返回带有getter和setter的集合 。 这样做并非简单或优雅。 Angular很好地解决了这个问题!
使用本机事件和DOM属性 ( Using Native Events and DOM Properties )
Download Angular code samples: using-native-events-and-dom-properties
下载Angular代码示例: 使用本机事件和dom属性
In Angular, it's easier to hook into native events and DOM properties. In AngularJS, doing this is often fraught with $scope hazards and the danger of bad practices. We'll use the window.resize event as an example. Consider this common scenario:
在Angular中,更容易陷入本机事件和DOM属性。 在AngularJS中,这样做常常充满$scope危险和不良做法的危险。 我们以window.resize事件为例。 考虑以下常见情况:
Scenario: When a user resizes the browser, we want to dynamically set the minimum height of a DOM element.
场景:当用户调整浏览器大小时,我们要动态设置DOM元素的最小高度。
AngularJS中的窗口调整大小事件 (Window Resize Event in AngularJS)
In AngularJS, we can bind directly to an AngularJS $window resize event in a directive or we can use a factory API such as angular-resize. We have to manage $scope and carefully clean up our listeners on $destroy. Then we either have to use JS to set the DOM property (min-height in this case) or we have to add watchers by binding in the template. None of this is ideal.
在AngularJS中,我们可以直接在指令中绑定到AngularJS $ window resize事件,也可以使用工厂API(例如angular-resize) 。 我们必须管理$scope并仔细清理$destroy上的侦听器。 然后,我们要么使用JS设置DOM属性(在本例中为min-height ),要么必须通过绑定模板来添加观察者 。 这些都不是理想的。
Angular中的窗口调整大小事件 (Window Resize Event in Angular)
We'll demonstrate using an event observable in Angular:
我们将演示如何使用Angular中可观察到的事件:
// Angular - app.component.ts

import { Component, OnInit } from '@angular/core';
import { Observable } from 'rxjs/Rx';

@Component({
  selector: 'app-root',
  template: `
    <div class="fullHeight" [style.min-height]="minHeight"></div>
  `,
  styles: [`
    .fullHeight { background: red; }
  `]
})
export class AppComponent implements OnInit {
  minHeight: string;
  private _initWinHeight: number = 0;

  ngOnInit() {
    Observable.fromEvent(window, 'resize')
      .debounceTime(200)
      .subscribe(event => this._resizeFn(event)
    );

    this._initWinHeight = window.innerHeight;
    this._resizeFn(null);
  }

  private _resizeFn(e) {
    let winHeight: number = e ? e.target.innerHeight : this._initWinHeight;
    this.minHeight = `${winHeight}px`;
  }

}
First we'll import dependencies. We're going to use the OnInit lifecycle hook from @angular/core to manage the observable and implement initial height. Then we need Observable from the RxJS library which is packaged with Angular.
首先,我们将导入依赖关系。 我们将使用@angular/core的OnInit 生命周期挂钩来管理可观察对象并实现初始高度。 然后,我们需要Angular打包的RxJS库中的 Observable 。
Important Note: Angular binds to DOM properties, not HTML attributes. This may seem counter-intuitive because we declaratively add things like [style.min-height] or [disabled] to our markup, but these refer to properties, not attributes. Please read Binding syntax: An overview to learn more.
重要说明: Angular绑定到DOM属性 ,而不是HTML属性。 这似乎违反直觉,因为我们在标记中声明性地添加了[style.min-height]或[disabled]类的东西,但这些都是针对属性而不是属性。 请阅读绑定语法:概述以了解更多信息。
We can bind our minHeight member to the [style.min-height] DOM property on the <div class="fullHeight"> element. (For the sake of example, we're assuming that a global CSS reset has removed default margins and padding on the body.)
我们可以将minHeight成员绑定到<div class="fullHeight">元素上的[style.min-height] DOM属性。 (为示例起见,我们假设全局CSS重置已删除了默认边距和body上的填充。)
We're using an RxJS observable to subscribe to the window.resize event and execute a debounced function that sets a min-height. The window.resize event doesn't fire on page load, so we then need to trigger the handler in ngOnInit().
我们正在使用可观察到的RxJS来订阅window.resize事件,并执行设置min-height的去反跳功能。 window.resize事件不会在页面加载时触发 ,因此我们需要在ngOnInit() 触发处理程序。
Note: You've already seen native (click) event bindings in earlier examples. We could do the same with (window.resize), but we're subscribing to an observable instead because we want to debounce the handler.
注意:在较早的示例中,您已经看到了本机(click)事件绑定。 我们可以使用(window.resize)进行相同的操作,但是我们订阅了一个observable,因为我们想对处理程序进行去抖动 。
路由器事件 ( Router Events )
Download Angular code samples: router-events
下载Angular代码示例: 路由器事件
Angular routing is thoroughly covered in the Angular docs and the Tour of Heroes tutorial. There are also real-world examples in Migrating an AngularJS App to Angular - Part 2 and Part 3. Therefore, we'll only cover router events here.
Angular 文档和《 Tour of Heroes》教程全面介绍了Angular路由。 在将AngularJS应用迁移到Angular中也有一些实际示例-第2 部分和第3部分 。 因此,我们仅在此处介绍路由器事件 。
Scenario: Whenever a navigation change is initiated, we want to execute some functionality (for example, closing a navigation menu).
场景:无论何时启动导航更改,我们都希望执行某些功能(例如,关闭导航菜单)。
AngularJS中的导航事件 (Navigation Events in AngularJS)
In AngularJS, we can listen for navigation events such as $locationChangeStart or $locationChangeSuccess like so:
在AngularJS中,我们可以监听导航事件,例如$ locationChangeStart或$ locationChangeSuccess,如下所示:
// AngularJS - on location change

$scope.$on('$locationChangeStart', function(event, newUrl, oldUrl) {
  // do something every time a location change is initiated
});
Angular中的导航事件 (Navigation Events in Angular)
We can do something similar in Angular, but now router events are observables. We need to subscribe to them:
我们可以在Angular中执行类似的操作,但是现在可以观察到路由器事件。 我们需要订阅它们:
// Angular - app.component.ts

import { Component, OnInit } from '@angular/core';
import { Router, NavigationStart } from '@angular/router';

@Component({
  selector: 'app-root',
  template: ``
})
export class AppComponent implements OnInit {

  constructor(private router: Router) { }

  ngOnInit() {
    this.router.events
      .filter(event => event instanceof NavigationStart)
      .subscribe(event => {
        // do something every time a location change is initiated
      });
  }
}
We need to import Router and NavigationStart from @angular/router. Next we need to make private router: Router available in our constructor() function.
我们需要从@angular/router导入Router和NavigationStart 。 接下来,我们需要创建private router: Router在我们的constructor()函数中可用的private router: Router 。
Router.events is an observable of route events. We'll filter for when the event is an instance of NavigationStart. Then we can subscribe and execute our desired functionality. Other navigation events can be found in the Angular router event documentation.
Router.events是路由事件的可观察对象。 当事件是NavigationStart的实例时,我们将进行过滤。 然后,我们可以订阅并执行所需的功能。 其他导航事件可以在Angular路由器事件文档中找到 。
Note: To learn about a great use-case, check out Dynamic page titles in Angular with router events.
注意:要了解一个很好的用例,请查看Angular中带有路由器事件的动态页面标题 。
调用API ( Calling an API )
Download Angular code samples: calling-an-api
下载Angular代码示例: calling-an-api
Many Angular applications utilize external APIs. Calling an API is not significantly different between AngularJS and Angular. AngularJS uses promises whereas Angular uses observables.
许多Angular应用程序都使用外部API。 AngularJS和Angular之间的API调用没有明显区别。 AngularJS使用promise,而Angular使用observables 。
Scenario: We want to use the reddit API to display the titles and links of posts from the reddit front page.
场景:我们想使用reddit API来显示reddit主页上的帖子的标题和链接。
You can check out the data we'll be using here: https://www.reddit.com/.json.
您可以在此处查看我们将使用的数据: https : //www.reddit.com/.json 。
在AngularJS中调用API (Calling an API in AngularJS)
Most AngularJS apps use a factory or service to make API calls. The controllers or directives then inject and use that service to fetch or send data. We react to successes or failures using promises.
大多数AngularJS应用程序使用工厂或服务来进行API调用。 然后,控制器或指令将注入并使用该服务来获取或发送数据。 我们使用承诺对成功或失败做出React。
在Angular中调用API (Calling an API in Angular)
We'll do something very similar in Angular. First we'll create the API service:
我们将在Angular中做一些非常相似的事情。 首先,我们将创建API服务:
// Angular - api.service.ts

import { Injectable } from '@angular/core';
import { HttpClient, HttpResponse, HttpErrorResponse } from '@angular/common/http';
import { Observable } from 'rxjs/Rx';
import 'rxjs/add/operator/catch';

@Injectable()
export class ApiService {
  private baseUrl = 'https://www.reddit.com/';

  constructor(private http: HttpClient) { }

  getFrontPage$(): Observable<{[key: string]: any}[]> {
    return this.http
      .get(`${this.baseUrl}.json`)
      .map(this.handleSuccess)
      .catch(this.handleError);
  }

  private handleSuccess(res: HttpResponse<any>) {
    return res.data.children;
  }

  private handleError(err: HttpErrorResponse | any) {
    let errorMsg = err.message || 'Unable to retrieve data';
    return Observable.throw(errorMsg);
  }

}
This is pretty straightforward and isn't much different from our AngularJS implementation. Starting from the top: we import our dependencies. Services are injectable. We also need HttpClient, and HttpResponse, and HttpErrorResponse from @angular/common/http, Observable from RxJS, and map and catch operators.
这非常简单,并且与我们的AngularJS实现没有太大不同。 从顶部开始:我们导入依赖项。 服务是可注射的 。 我们还需要来自@angular/common/http HttpClient和HttpResponse和HttpErrorResponse ,从RxJS可以观察到,以及map和catch运算符。
Note: RxJS observables are preferable over promises. Angular's http.get returns an observable but we could convert it to a promise with .toPromise() if we had to (but we won't in this tutorial).
注意: RxJS observables比promises更可取 。 Angular的http.get返回一个可观察的对象,但如果需要的话,我们可以使用.toPromise()将其转换为一个.toPromise() (但在本教程中不会)。
We set our private API baseUrl property and make private http: HttpClient available in the constructor.
我们设置私有API baseUrl属性,并在构造函数中提供private http: HttpClient 。
Then we define our getFrontPage$() function. The $ at the end of the function name indicates that an observable is returned and we can subscribe to it.
然后定义getFrontPage$()函数。 函数名称末尾的$表示返回了一个observable,我们可以订阅它。
Finally we manage successes and errors. The map operator processes the result from the observable. The HttpClient returns the response body as JSON by default. The reddit API returns a data property and inside that, we want the value of children, which is an array of the posts. We'll use the catch operator to handle failed API responses and generate an observable that terminates with an error.
最后,我们管理成功和错误。 map操作员处理可观察结果。 HttpClient默认将响应主体作为JSON返回。 reddit API返回一个data属性,在其中,我们需要child的值,即children的数组。 我们将使用catch运算符来处理失败的API响应,并生成一个以错误终止的observable。
The API service should be a singleton so we'll provide it in the app module:
API服务应该是单例,因此我们将在app模块中提供它:
// Angular - app.module.ts
...
import { ApiService } from './api.service';

@NgModule({
  ...,
  providers: [ApiService],
  ...
})
export class AppModule { }
Now we can use the service in a component to display reddit post titles:
现在我们可以在组件中使用该服务来显示reddit帖子标题:
// Angular - reddit.component.ts

import { Component, OnInit } from '@angular/core';
import { ApiService } from './api.service';

@Component({
  selector: 'app-reddit',
  template: `
    <ul>
      <li *ngFor="let post of redditFP">
        <a href="http://reddit.com{{post.data.permalink}}">{{post.data.title}}</a>
      </li>
    </ul>
  `
})
export class RedditComponent implements OnInit {
  redditFP: {[key: string]: any}[];

  constructor(private redditApi: ApiService) { }

  ngOnInit() {
    this.getRedditFront();
  }
  getRedditFront() {
    this.redditApi
      .getFrontPage$()
      .subscribe(
        res => this.redditFP = res,
        err => console.log('An error occurred', err)
      );
  }
}
First we import our new ApiService. Then we’ll declare that the redditFP property should be an array of objects. We’ll add the private redditApi: ApiService to the constructor parameters.
首先,我们导入新的ApiService 。 然后,我们将声明redditFP属性应为对象数组。 我们将private redditApi: ApiService添加到构造函数参数中。
The template should display an unordered list with the title of each post linked to its location on reddit.
模板应显示无序列表,每个帖子的标题均链接到其在reddit上的位置。
We can then write the getRedditFront() method to subscribe to the redditApi.getFrontPage$() observable and assign the response to the redditFP property. We’ll call the getRedditFront() method in our ngOnInit() lifecycle hook.
然后,我们可以编写getRedditFront()方法以订阅可观察的redditApi.getFrontPage$()并将响应分配给redditFP属性。 我们将在ngOnInit()生命周期挂钩中调用getRedditFront()方法。
Note: We're using a third party API for this example. However, when we have tighter control over our own APIs, we can use TypeScript to set defined models for the data we expect. To learn more about using models, please check the "Calling an API in Angular" section of Migrating an AngularJS App to Angular - Part 2.
注意:在此示例中,我们使用了第三方API。 但是,当我们对自己的API进行更严格的控制时,可以使用TypeScript为期望的数据设置定义的模型 。 要了解有关使用模型的更多信息,请检查将AngularJS应用迁移到Angular-Part 2的“在Angular中调用API”部分。
When this component is displayed, we should see a list of links to the current posts on reddit's front page.
当显示此组件时,我们应该在reddit的首页上看到到当前帖子的链接列表。
按搜索查询过滤 ( Filtering by Search Query )
Download Angular code samples: filtering
下载Angular代码示例: 过滤
You may have heard about Angular pipes. Pipes transform displayed values within a template. In AngularJS, we use the pipe character (|) to do similar things with filters. However, filters are gone in Angular.
您可能听说过Angular管道 。 管道在模板内转换显示的值。 在AngularJS中,我们使用竖线字符( | )对filter进行类似的操作。 但是, Angular中没有过滤器 。
Let's address the following scenario:
让我们解决以下情况:
Scenario: We have an array of objects and want the user to be able to filter the array using a search query.
场景:我们有一个对象数组,希望用户能够使用搜索查询来过滤该数组。
在AngularJS中过滤 (Filtering in AngularJS)
In AngularJS, we can give an input an ng-model and then use a filter on the repeater:
在AngularJS中,我们可以给输入一个ng-model ,然后在转发filter上使用filter器:
<label for="search">Search:</label>
<input id="search" type="text" ng-model="query">

<div ng-repeat="item in array | filter:query">
  {{item.name}}
</div>
Simple, right?
简单吧?
Well, yes and no. AngularJS apps can take a huge performance hit if care isn't taken when filtering. If you've ever filtered hundreds or thousands of items (or implemented faceted search), you're probably familiar with the pitfalls of AngularJS's built-in filter.
好吧,是的,不是。 如果过滤时不注意,AngularJS应用程序可能会对性能造成巨大影响。 如果您曾经过滤过数百或数千个项目(或实施了分面搜索),则可能对AngularJS内置filter的陷阱很熟悉。
In such cases, you may have used a service to implement filtering or added your filtering logic right in your controller. We can regain some performance by exerting tighter control over how and when filtering is executed.
在这种情况下,您可能使用了服务来实现过滤或在控制器中添加了过滤逻辑。 通过对执行过滤的方式和时间进行更严格的控制,我们可以恢复某些性能。
角度过滤 (Filtering in Angular)
The Angular team recommends against replicating AngularJS filter functionality with a custom pipe due to concerns over performance and minification. Instead, we'll create a service that performs filtering.
出于对性能和最小化的考虑,Angular团队建议不要使用自定义管道来复制AngularJS过滤器功能。 相反,我们将创建一个执行过滤的服务 。
Note: You can read more about why the filter pipe was removed in the "No FilterPipe or OrderByPipe" section of the Pipes docs.
注意:您可以在Pipes文档的“无FilterPipe或OrderByPipe ”部分中了解有关为何删除过滤器管道的更多信息。
Let's create a FilterService. The first step is establishing some rules regarding implementation. Let's say we want to ensure the following:
让我们创建一个FilterService 。 第一步是建立一些有关实施的规则。 假设我们要确保以下几点:
- We expect to filter an array of objects. 我们期望过滤对象数组。
- Search function should accept the array and a
querypredicate (filter criteria) and return an array with all objects that contain a match. 搜索功能应接受该数组和一个query谓词(过滤条件),并返回包含所有包含匹配项的对象的数组。 - Search should be case-insensitive. 搜索应该不区分大小写。
- We'll only search string values for matches. 我们只会在字符串值中搜索匹配项。
With these simple guidelines, our FilterService might look like this:
通过这些简单的准则,我们的FilterService可能如下所示:
// Angular - filter.service.ts

import { Injectable } from '@angular/core';

@Injectable()
export class FilterService {
  search(array: Object[], query: string) {
    let lQuery = query.toLowerCase();

    if (!query) {
      return array;
    } else if (array) {
      let filteredArray = array.filter(item => {
        for (let key in item) {
          if ((typeof item[key] === 'string') && (item[key].toLowerCase().indexOf(lQuery) !== -1)) {
            return true;
          }
        }
      });
      return filteredArray;
    }
  }

}
This is very straightforward and we have direct control over how filtering works. If we want to include other value types in the future (such as numbers or dates), we'd modify search() or create new methods.
这非常简单,我们可以直接控制过滤的工作方式。 如果我们希望将来包含其他值类型(例如数字或日期),则可以修改search()或创建新方法。
We typically would want a singleton FilterService, so we should provide it in our app.module.ts file:
通常,我们需要一个Singleton FilterService ,因此我们应该在app.module.ts文件中提供它:
// Angular - app.module.ts
...
import { FilterService } from './filter.service';

@NgModule({
  ...,
  providers: [FilterService],
  ...
})
export class AppModule { }
We can then use it in our components like this:
然后,我们可以在我们的组件中使用它,如下所示:
// Angular - list.component.ts

import { Component } from '@angular/core';
import { FilterService } from './filter.service';

@Component({
  selector: 'app-list',
  template: `
    <label for="search">Search:</label>
    <input id="search" type="text" [(ngModel)]="query" />
    <button (click)="search()" [disabled]="!query">Go</button>
    <button (click)="reset()" [disabled]="!query">Reset</button>

    <ul>
      <li *ngFor="let item of filteredArray">{{item.name}}</li>
    </ul>
  `
})
export class ListComponent {
  array = [
    { id: 1, name: 'Jon Snow' },
    { id: 2, name: 'Sansa Stark' },
    { id: 3, name: 'Arya Stark' },
    { id: 4, name: 'Bran Stark' },
    { id: 5, name: 'Petyr Baelish' },
    { id: 6, name: 'Danaerys Targaryen' },
    { id: 7, name: 'Jaime Lannister ' },
    { id: 8, name: 'Cersei Lannister' },
    { id: 9, name: 'Samwell Tarly' },
    { id: 10, name: 'Sandor Clegane' }
  ];
  filteredArray = this.array;
  query: string;

  constructor(private filter: FilterService) { }

  search() {
    this.filteredArray = this.filter.search(this.array, this.query);
  }

  reset() {
    this.query = '';
    this.filteredArray = this.array;
  }

}
We now have working filtering:
现在,我们可以进行过滤了:

This example uses a button to trigger filtering. If we wanted to mimic AngularJS's native filter, we could run the search on (keyup) on the input and remove the "Go" button, like so:
本示例使用按钮触发过滤。 如果我们想模仿AngularJS的本机filter ,我们可以在输入上的(keyup)上运行搜索,然后删除“ Go”按钮,如下所示:
<input
  id="search"
  type="text"
  [(ngModel)]="query"
  (keyup)="search()" />
This is less performant, but may be a desirable user experience in some cases.
这性能较差,但在某些情况下可能是理想的用户体验。

Note: You'd never want to use (keyup) if each search query involved expensive processing, huge amounts of data, or API calls. These situations cause problems with the built-in filter in AngularJS and we don't want to recreate them in Angular.
注意:如果每个搜索查询都涉及昂贵的处理,大量数据或API调用,则您永远都不想使用(keyup) 。 这些情况会导致AngularJS中的内置filter出现问题,我们不想在Angular中重新创建它们。
旁白:使用Auth0对Angular应用程序和Node API进行身份验证 ( Aside: Authenticate an Angular App and Node API with Auth0 )
We can protect our applications and APIs so that only authenticated users can access them. Let's explore how to do this with an Angular application and a Node API using Auth0. You can clone this sample app and API from the angular-auth0-aside repo on GitHub.
我们可以保护我们的应用程序和API,以便只有经过身份验证的用户才能访问它们。 让我们探究如何使用Ang0应用程序和使用Auth0的Node API来执行此操作 。 您可以从GitHub上的angular-auth0-aside存储库中克隆此示例应用程序和API。
特征 (Features)
The sample Angular application and API has the following features:
样例Angular应用程序和API具有以下功能:
- Angular application generated with Angular CLI and served at http://localhost:4200 使用Angular CLI生成并在http:// localhost:4200提供服务的Angular应用程序
- Authentication with auth0.js using a hosted Lock instance 使用托管的Lock实例通过auth0.js进行身份验证
- Node server protected API route
http://localhost:3001/api/dragonsreturns JSON data for authenticatedGETrequests 节点服务器保护的API路由http://localhost:3001/api/dragons返回经过身份验证的GET请求的JSON数据 - Angular app fetches data from API once user is authenticated with Auth0 用户通过Auth0身份验证后,Angular应用将从API提取数据
- Profile page requires authentication for access using route guards 配置文件页面需要使用路由防护进行身份验证才能访问
- Authentication service uses a subject to propagate authentication status events to the entire app 身份验证服务使用主题将身份验证状态事件传播到整个应用程序
- User profile is fetched on authentication and stored in authentication service 用户配置文件在身份验证时获取,并存储在身份验证服务中
- Access token, ID token, profile, and token expiration are stored in local storage and removed upon logout 访问令牌,ID令牌,配置文件和令牌到期都存储在本地存储中,并在注销时删除
注册Auth0 (Sign Up for Auth0)
You'll need an Auth0 account to manage authentication. You can sign up for a free account here. Next, set up an Auth0 client app and API so Auth0 can interface with an Angular app and Node API.
您需要一个Auth0帐户来管理身份验证。 您可以在此处注册一个免费帐户 。 接下来,设置Auth0客户端应用程序和API,以便Auth0可以与Angular应用程序和Node API交互。
设置客户端应用 (Set Up a Client App)
- Go to your Auth0 Dashboard and click the "create a new client" button. 转到您的Auth0信息中心 ,然后点击“ 创建新客户端 ”按钮。
- Name your new app and select "Single Page Web Applications". 为您的新应用命名,然后选择“单页Web应用”。
- In the Settings for your new Auth0 client app, add
http://localhost:4200/callbackto the Allowed Callback URLs andhttp://localhost:4200to the Allowed Origins (CORS). 在新的Auth0客户端应用程序的“设置”中,将http://localhost:4200/callback到允许的回调URL,并将http://localhost:4200到Allowed Origins(CORS) 。 - Scroll down to the bottom of the Settings section and click "Show Advanced Settings". Choose the OAuth tab and verify that the JsonWebToken Signature Algorithm is set to
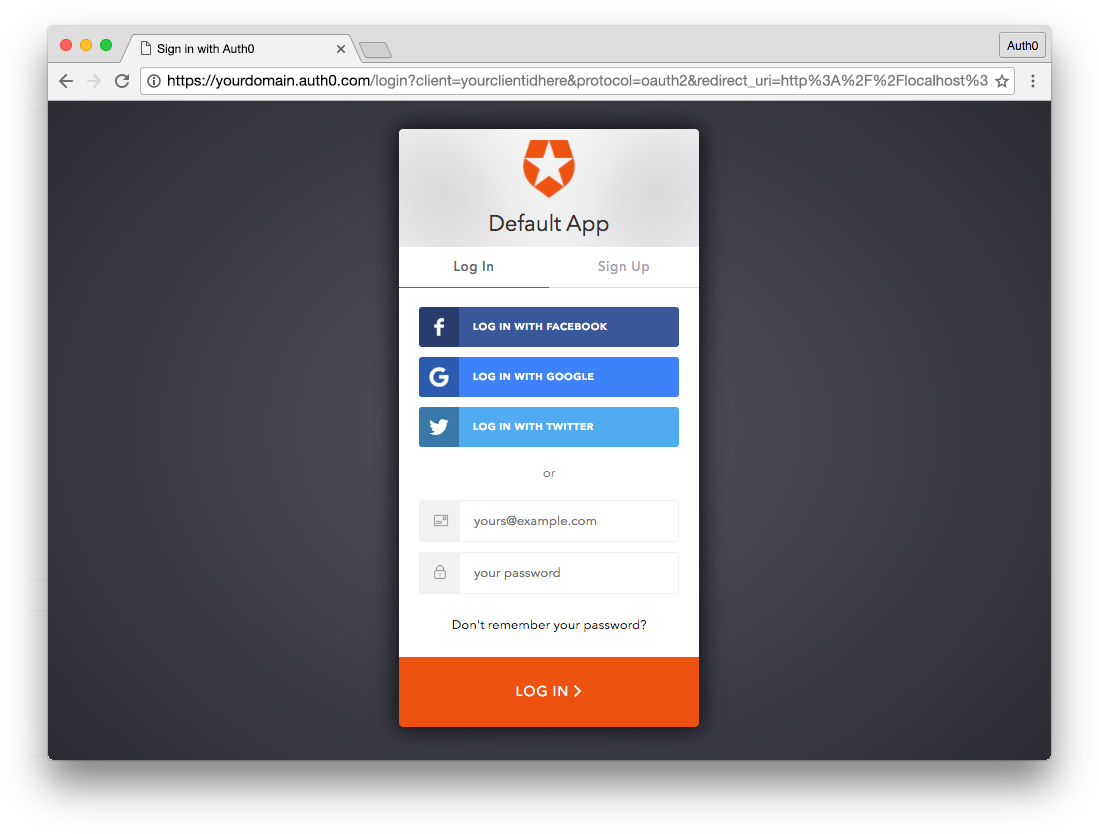
RS256. 向下滚动到“ 设置”部分的底部,然后单击“显示高级设置”。 选择OAuth选项卡,并验证JsonWebToken签名算法是否设置为RS256。 - If you'd like, you can set up some social connections. You can then enable them for your app in the Client options under the Connections tab. The example shown in the screenshot above utilizes username/password database, Facebook, Google, and Twitter. For production, make sure you set up your own social keys and do not leave social connections set to use Auth0 dev keys. 如果需要,您可以建立一些社交关系 。 然后,可以在“ 连接”选项卡下的“ 客户端”选项中为您的应用启用它们。 上面的屏幕快照中显示的示例使用用户名/密码数据库,Facebook,Google和Twitter。 对于生产,请确保您设置了自己的社交密钥,并且不要将社交连接设置为使用Auth0开发密钥。
设置API (Set Up an API)
- Go to APIs in your Auth0 dashboard and click on the "Create API" button. Enter a name for the API. Set the Identifier to your API endpoint URL. In this example, this is
http://localhost:3001/api/. The Signing Algorithm should beRS256. 转到Auth0信息中心中的API ,然后单击“创建API”按钮。 输入API的名称。 将标识符设置为您的API端点URL。 在此示例中,这是http://localhost:3001/api/。 签名算法应为RS256。 - You can consult the Node.js example under the Quick Start tab in your new API's settings. We'll implement our Node API in this fashion, using Express, express-jwt, and jwks-rsa. 您可以在新API设置的“ 快速入门”选项卡下查阅Node.js示例。 我们将使用Express , express-jwt和jwks-rsa以此方式实现Node API。
We're now ready to implement Auth0 authentication on both our Angular client and Node backend API.
现在,我们准备在Angular客户端和Node后端API上实现Auth0身份验证。
依赖关系和设置 (Dependencies and Setup)
The Angular app utilizes the Angular CLI. Make sure you have the CLI installed globally:
Angular应用程序利用Angular CLI 。 确保已全局安装CLI:
$npm install -g @angular/cliOnce you've cloned the project, install the Node dependencies for both the Angular app and the Node server by running the following commands in the root of your project folder:
克隆项目后 ,通过在项目文件夹的根目录中运行以下命令,为Angular应用程序和Node服务器安装Node依赖项:
$npm install
$ cd server
$ npm install
The Node API is located in the /server folder at the root of our sample application.
Node API位于示例应用程序根目录的/server文件夹中。
Open the server.js file:
打开server.js文件 :
// server/server.js
...
// @TODO: change [CLIENT_DOMAIN] to your Auth0 domain name.
// @TODO: change [AUTH0_API_AUDIENCE] to your Auth0 API audience.
var CLIENT_DOMAIN = '[CLIENT_DOMAIN]'; // e.g., youraccount.auth0.com
var AUTH0_AUDIENCE = '[AUTH0_API_AUDIENCE]'; // http://localhost:3001/api in this example

var jwtCheck = jwt({
    secret: jwks.expressJwtSecret({
      cache: true,
      rateLimit: true,
      jwksRequestsPerMinute: 5,
      jwksUri: `https://${CLIENT_DOMAIN}/.well-known/jwks.json`
    }),
    audience: AUTH0_AUDIENCE,
    issuer: `https://${CLIENT_DOMAIN}/`,
    algorithm: 'RS256'
});
...
//--- GET protected dragons route
app.get('/api/dragons', jwtCheck, function (req, res) {
  res.json(dragonsJson);
});
...
Change the CLIENT_DOMAIN variable to your Auth0 client domain. The /api/dragons route will be protected with express-jwt and jwks-rsa.
将CLIENT_DOMAIN变量更改为您的Auth0客户端域。 /api/dragons路由将受express-jwt和jwks-rsa保护 。
Note: To learn more about RS256 and JSON Web Key Set, read Navigating RS256 and JWKS.
注意:要了解有关RS256和JSON Web密钥集的更多信息,请阅读导航RS256和JWKS 。
Our API is now protected, so let's make sure that our Angular application can also interface with Auth0. To do this, we'll activate the src/app/auth/auth0-variables.ts.example file by deleting the .example from the file extension. Then open the file and change the [CLIENT_ID] and [CLIENT_DOMAIN] strings to your Auth0 information:
我们的API现在受到保护,因此,请确保我们的Angular应用程序也可以与Auth0接口。 为此,我们将通过从文件扩展名中删除.example来激活src/app/auth/auth0-variables.ts.example文件 。 然后打开文件,并将[CLIENT_ID]和[CLIENT_DOMAIN]字符串更改为您的Auth0信息:
// src/app/auth/auth0-variables.ts
...
export const AUTH_CONFIG: AuthConfig = {
  CLIENT_ID: '[CLIENT_ID]',
  CLIENT_DOMAIN: '[CLIENT_DOMAIN]',
  ...
Our app and API are now set up. They can be served by running ng serve from the root folder and node server.js from the /server folder.
现在,我们的应用程序和API已设置完毕。 可以通过从根文件夹运行ng serve并从/server文件夹运行node server.js来提供/server 。
With the Node API and Angular app running, let's take a look at how authentication is implemented.
在运行Node API和Angular应用程序的情况下,让我们看一下如何实现身份验证。
认证服务 (Authentication Service)
Authentication logic on the front end is handled with an AuthService authentication service: src/app/auth/auth.service.ts file.
前端的身份验证逻辑由AuthService身份验证服务处理: src/app/auth/auth.service.ts文件 。
import { Injectable } from '@angular/core';
import { Router } from '@angular/router';
import { BehaviorSubject } from 'rxjs/BehaviorSubject';
import * as auth0 from 'auth0-js';
import { AUTH_CONFIG } from './auth0-variables';
import { UserProfile } from './profile.model';

@Injectable()
export class AuthService {
  // Create Auth0 web auth instance
  // @TODO: Update AUTH_CONFIG and remove .example extension in src/app/auth/auth0-variables.ts.example
  auth0 = new auth0.WebAuth({
    clientID: AUTH_CONFIG.CLIENT_ID,
    domain: AUTH_CONFIG.CLIENT_DOMAIN,
    responseType: 'token id_token',
    redirectUri: AUTH_CONFIG.REDIRECT,
    audience: AUTH_CONFIG.AUDIENCE,
    scope: AUTH_CONFIG.SCOPE
  });
  userProfile: UserProfile;

  // Create a stream of logged in status to communicate throughout app
  loggedIn: boolean;
  loggedIn$ = new BehaviorSubject<boolean>(this.loggedIn);

  constructor(private router: Router) {
    // If authenticated, set local profile property and update login status subject
    if (this.authenticated) {
      this.userProfile = JSON.parse(localStorage.getItem('profile'));
      this.setLoggedIn(true);
    }
  }

  setLoggedIn(value: boolean) {
    // Update login status subject
    this.loggedIn$.next(value);
    this.loggedIn = value;
  }

  login() {
    // Auth0 authorize request
    this.auth0.authorize();
  }

  handleAuth() {
    // When Auth0 hash parsed, get profile
    this.auth0.parseHash((err, authResult) => {
      if (authResult && authResult.accessToken && authResult.idToken) {
        window.location.hash = '';
        this._getProfile(authResult);
        this.router.navigate(['/']);
      } else if (err) {
        this.router.navigate(['/']);
        console.error(`Error: ${err.error}`);
      }
    });
  }

  private _getProfile(authResult) {
    // Use access token to retrieve user's profile and set session
    this.auth0.client.userInfo(authResult.accessToken, (err, profile) => {
      this._setSession(authResult, profile);
    });
  }

  private _setSession(authResult, profile) {
    const expTime = authResult.expiresIn * 1000 + Date.now();
    // Save session data and update login status subject
    localStorage.setItem('access_token', authResult.accessToken);
    localStorage.setItem('id_token', authResult.idToken);
    localStorage.setItem('profile', JSON.stringify(profile));
    localStorage.setItem('expires_at', JSON.stringify(expTime));
    this.userProfile = profile;
    this.setLoggedIn(true);
  }

  logout() {
    // Remove tokens and profile and update login status subject
    localStorage.removeItem('access_token');
    localStorage.removeItem('id_token');
    localStorage.removeItem('profile');
    localStorage.removeItem('expires_at');
    this.userProfile = undefined;
    this.setLoggedIn(false);
  }

  get authenticated(): boolean {
    // Check if current date is greater than expiration
    const expiresAt = JSON.parse(localStorage.getItem('expires_at'));
    return Date.now() < expiresAt;
  }

}
This service uses the config variables from auth0-variables.ts to instantiate an auth0.js WebAuth instance.
该服务使用auth0-variables.ts的配置变量来实例化auth0.js WebAuth实例。
An RxJS BehaviorSubject is used to provide a stream of authentication status events that you can subscribe to anywhere in the app.
RxJS BehaviorSubject用于提供身份验证状态事件流,您可以在应用程序中的任何位置订阅这些事件。
The login() method authorizes the authentication request with Auth0 using your config variables. An Auth0 hosted Lock instance will be shown to the user and they can then log in.
login()方法使用您的配置变量使用Auth0授权认证请求。 Auth0托管的Lock实例将显示给用户,然后他们可以登录。
Note: If it's the user's first visit to our app and our callback is on
localhost, they'll also be presented with a consent screen where they can grant access to our API. A first party client on a non-localhost domain would be highly trusted, so the consent dialog would not be presented in this case. You can modify this by editing your Auth0 Dashboard API Settings. Look for the "Allow Skipping User Consent" toggle.注意:如果这是用户第一次访问我们的应用程序,并且回调是在
localhost,则还会向他们显示一个同意屏幕,在其中可以授予对我们API的访问权限。 非本地主机域上的第一方客户端将受到高度信任,因此在这种情况下将不会显示同意对话框。 您可以通过编辑Auth0仪表板API 设置进行修改。 查找“允许跳过用户同意”切换。
We'll receive an id_token, access_token, and expires_at in the hash from Auth0 when returning to our app. The handleAuth() method uses Auth0's parseHash() method callback to get the user's profile (_getProfile()) and set the session (_setSession()) by saving the tokens, profile, and token expiration to local storage and updating the loggedIn$ subject so that any subscribed components in the app are informed that the user is now authenticated.
当返回到我们的应用程序时,我们将从Auth0的哈希中接收到id_token , access_token和expires_at 。 handleAuth()方法使用Auth0的parseHash()方法回调来获取用户的配置文件( _getProfile() )并通过将令牌,配置文件和令牌过期保存到本地存储并更新loggedIn$主题来设置会话( _setSession() )。以便通知应用中所有已订阅的组件用户已通过身份验证。
Note: The profile takes the shape of
profile.model.tsfrom the OpenID standard claims.注意:该配置文件采用OpenID标准声明中的
profile.model.ts的形状。
The handleAuth() method can then be called in the app.component.ts constructor like so:
然后可以在app.component.ts构造函数中调用handleAuth()方法,如下app.component.ts :
// src/app/app.component.ts
import { AuthService } from './auth/auth.service';
...
  constructor(private auth: AuthService) {
    // Check for authentication and handle if hash present
    auth.handleAuth();
  }
...
Finally, we have a logout() method that clears data from local storage and updates the loggedIn$ subject. We also have an authenticated accessor to return current authentication status.
最后,我们有一个logout()方法,该方法从本地存储中清除数据并更新loggedIn$主题。 我们还有一个经过authenticated访问器,以返回当前的身份验证状态。
Once AuthService is provided in app.module.ts, its methods and properties can be used anywhere in our app, such as the home component.
一旦在AuthService中提供了app.module.ts ,它的方法和属性就可以在我们应用的任何位置使用,例如home组件 。
The callback component is where the app is redirected after authentication. This component simply shows a loading message until hash parsing is completed and the Angular app redirects back to the home page.
回调组件是认证后重定向到的应用程序。 该组件仅显示一条加载消息,直到哈希解析完成并且Angular应用重定向到主页为止。
发出经过身份验证的API请求 (Making Authenticated API Requests)
In order to make authenticated HTTP requests, we need to add a Authorization header with the access token in our api.service.ts file.
为了发出经过身份验证的HTTP请求,我们需要在api.service.ts文件中添加带有访问令牌的Authorization标头。
// src/app/api.service.ts
...
  getDragons$(): Observable<any[]> {
    return this.http
      .get(`${this.baseUrl}dragons`, {
        headers: new HttpHeaders().set(
          'Authorization', `Bearer ${localStorage.getItem('access_token')}`
        )
      })
      .catch(this._handleError);
  }
...
最后一点:Route Guard和个人资料页面 (Final Touches: Route Guard and Profile Page)
A profile page component can show an authenticated user's profile information. However, we only want this component to be accessible if the user is logged in.
配置文件页面组件可以显示经过身份验证的用户的配置文件信息。 但是,我们仅希望用户登录后才能访问此组件。
With an authenticated API request and login/logout implemented, the final touch is to protect our profile route from unauthorized access. The auth.guard.ts route guard can check authentication and activate routes conditionally. The guard is implemented on specific routes of our choosing in the app-routing.module.ts file like so:
借助经过身份验证的API请求和登录/注销 ,最终的目的是防止我们的个人资料路由遭到未经授权的访问。 auth.guard.ts路由防护器可以检查身份验证并有条件地激活路由。 该防护是在app-routing.module.ts文件中我们选择的特定路由上实现的,如下所示:
// src/app/app-routing.module.ts
...
import { AuthGuard } from './auth/auth.guard';
...
      {
        path: 'profile',
        component: ProfileComponent,
        canActivate: [
          AuthGuard
        ]
      },
...
更多资源 (More Resources)
That's it! We have an authenticated Node API and Angular application with login, logout, profile information, and protected routes. To learn more, check out the following resources:
而已! 我们有一个经过身份验证的Node API和Angular应用程序,具有登录,注销,配置文件信息和受保护的路由。 要了解更多信息,请查看以下资源:
- Why You Should Always Use Access Tokens to Secure an API 为什么您应该始终使用访问令牌来保护API
- Navigating RS256 and JWKS 导航RS256和JWKS
- Access Token 访问令牌
- Verify Access Tokens 验证访问令牌
- Call APIs from Client-side Web Apps 从客户端Web应用程序调用API
- How to implement the Implicit Grant 如何执行隐性补助金
- Auth0.js v8 Documentation Auth0.js v8文档
- OpenID Standard Claims OpenID标准声明
结论 ( Conclusion )
We've now discussed several common features of AngularJS apps and how to implement them in Angular. This guide focused on features that:
现在,我们已经讨论了AngularJS应用程序的几个常见功能以及如何在Angular中实现它们。 本指南重点介绍以下功能:
- are needed the soonest when building an app, 建立应用程式时最快需要
- are used very frequently, 经常使用
- differ significantly from AngularJS implementation, OR 与AngularJS实现有显着差异,或者
- may not be documented as well as others. 可能没有其他文件记录。
Hopefully this guide has helped you feel more comfortable in the Angular space. For the whole picture, the docs are an excellent source of information. Now let's go build!
希望本指南可以帮助您在Angular空间中感到更舒适。 对于整个图片, 文档是一个很好的信息来源 。 现在开始构建!
翻译自: https://scotch.io/tutorials/get-angular-1-features-in-angular-2


 335
335

 被折叠的 条评论
为什么被折叠?
被折叠的 条评论
为什么被折叠?
 到【灌水乐园】发言


