vue单页应用和多页应用
In this tutorial we'll create a very simple "todo" application. When finished we will be able to create tasks with a title, display the newly created tasks and delete them.
在本教程中,我们将创建一个非常简单的“ todo”应用程序。 完成后,我们将能够创建带有标题的任务,显示新创建的任务并将其删除。
The application backend will be written using the Go programming language. Go was created by Google and though it isn't the most popular language in the world, it is steadily gaining traction. Go is very lightweight, easy to learn and fast. This tutorial assumes that you have at least a simple understanding of the language and that you have Go installed and configured on your machine.
应用程序后端将使用Go编程语言编写。 Go是由Google创建的,尽管它不是世界上最受欢迎的语言,但它一直在逐渐受到关注。 Go非常轻巧,易学且快速。 本教程假定您至少对语言有简单的了解,并且已在计算机上安装并配置了Go。
To help keep boilerplate to a minimum we will use a web application framework called Echo. Echo is micro framework for Go similar to something like Slim PHP or Lumen. You should be somewhat familiar with using a micro framework and the concept of using routes to handle HTTP requests.
为了尽量减少样板,我们将使用一个称为Echo的Web应用程序框架。 Echo是Go的微框架,类似于Slim PHP或Lumen 。 您应该对使用微框架和使用路由来处理HTTP请求的概念有所了解。
All of our tasks will be stored in a SQLite database. SQLite is a lightweight alternative to something like MySQL or PostgreSQL. The data is stored in a single file usually kept in the same directory as the application rather than on a server.
我们所有的任务都将存储在SQLite数据库中。 SQLite是MySQL或PostgreSQL之类的轻量级替代品。 数据存储在单个文件中,该文件通常与应用程序位于同一目录中,而不是服务器上。
Finally the frontend will be written using HTML5 and the popular VueJS Javascript framwork. A basic understanding of VueJS is required.
最后,前端将使用HTML5和流行的VueJS Javascript框架编写。 需要对VueJS有基本的了解。
Our app will be broken out into four basic pieces. We'll have our main package which will have the basic setup for our routes and database. Next we'll have a few handlers connected to our routes. Of course we'll have a Task model as well which will use SQLite for persistence. Finally the app will have a simple index.html file containing our HTML5 and VueJS client code. Let's dig in!
我们的应用程序将分为四个基本部分。 我们将拥有主程序包,该程序包将具有我们的路线和数据库的基本设置。 接下来,我们将有一些处理程序连接到我们的路线。 当然,我们还将有一个Task模型,该模型将使用SQLite进行持久化。 最终,该应用程序将具有一个简单的index.html文件,其中包含我们HTML5和VueJS客户端代码。 让我们开始吧!
路线和数据库 (Routes and Database)
In our main file we'll start by importing a few useful packages. "database/sql" is included in the Go standard library but Echo and the go SQLite library need to be fetched from Github.
在我们的主文件中,我们将首先导入一些有用的软件包。 Go标准库中包含“数据库/ sql”,但需要从Github中获取Echo和go SQLite库。
$ go get github.com/labstack/echo
$ go get github.com/mattn/go-sqlite3
Let's also create a directory for our project.
让我们还为我们的项目创建一个目录。
$cd $GOPATH/src
$ mkdir go-echo-vue && cd go-echo-vue
Now lets start by creating a few routes. Create a file caled "todo.go" in the top level of our app directory. At the top let's import the Echo framework packages.
现在让我们开始创建一些路线。 在我们的应用目录的顶层创建一个名为“ todo.go”的文件。 在顶部,让我们导入Echo框架包。
// todo.go
package main

import (
    "github.com/labstack/echo"
    "github.com/labstack/echo/engine/standard"
)
The next step is to create a "main" function which is a required function for any Go application.
下一步是创建“主要”功能,这是任何Go应用程序所必需的功能。
// todo.go
func main() { }
In order for our VueJS frontend to talk to the backend and start creating tasks, we need to setup some basic routes. The first thing we need to do is create a new instance of Echo. Then we simply define some routes using the built-in functions. If you've used any other web framework this should look somewhat familiar.
为了让我们的VueJS前端与后端对话并开始创建任务,我们需要设置一些基本路线。 我们需要做的第一件事是创建一个新的Echo实例。 然后,我们仅使用内置函数定义一些路由。 如果您使用过任何其他Web框架,则应该看起来有些熟悉。
A route takes a pattern to match as its first argument and then a handler function. In this case the function must implement the Echo.HandlerFunc interface.
路由将要匹配的模式作为其第一个参数,然后将其作为处理函数。 在这种情况下,该函数必须实现Echo.HandlerFunc接口。
Inside our "main" function we can now create some basic routes for our frontend to talk to.
现在,在我们的“主要”功能中,我们可以为前端创建一些基本的路由。
// todo.go
func main() {
    // Create a new instance of Echo
    e := echo.New()

    e.GET("/tasks", func(c echo.Context) error { return c.JSON(200, "GET Tasks") })
    e.PUT("/tasks", func(c echo.Context) error { return c.JSON(200, "PUT Tasks") })
    e.DELETE("/tasks/:id", func(c echo.Context) error { return c.JSON(200, "DELETE Task "+c.Param("id")) })

    // Start as a web server
    e.Run(standard.New(":8000"))
}
These routes don't do much but echo out some static text. We will improve upon these later.
这些路由的作用不大,但会回显一些静态文本。 我们稍后将对此进行改进。
The final line starts the Echo application using the "Run" function and tells it to use Go's standard HTTP server.
最后一行使用“运行”功能启动Echo应用程序,并告诉它使用Go的标准HTTP服务器。
To test the routes we need to first compile our application and run it then we can test the routes using a popular Chrome extension called Postman.
要测试路线,我们需要首先编译我们的应用程序并运行它,然后我们可以使用流行的Chrome扩展程序Postman来测试路线。
$ go build todo.go
$ ./todo
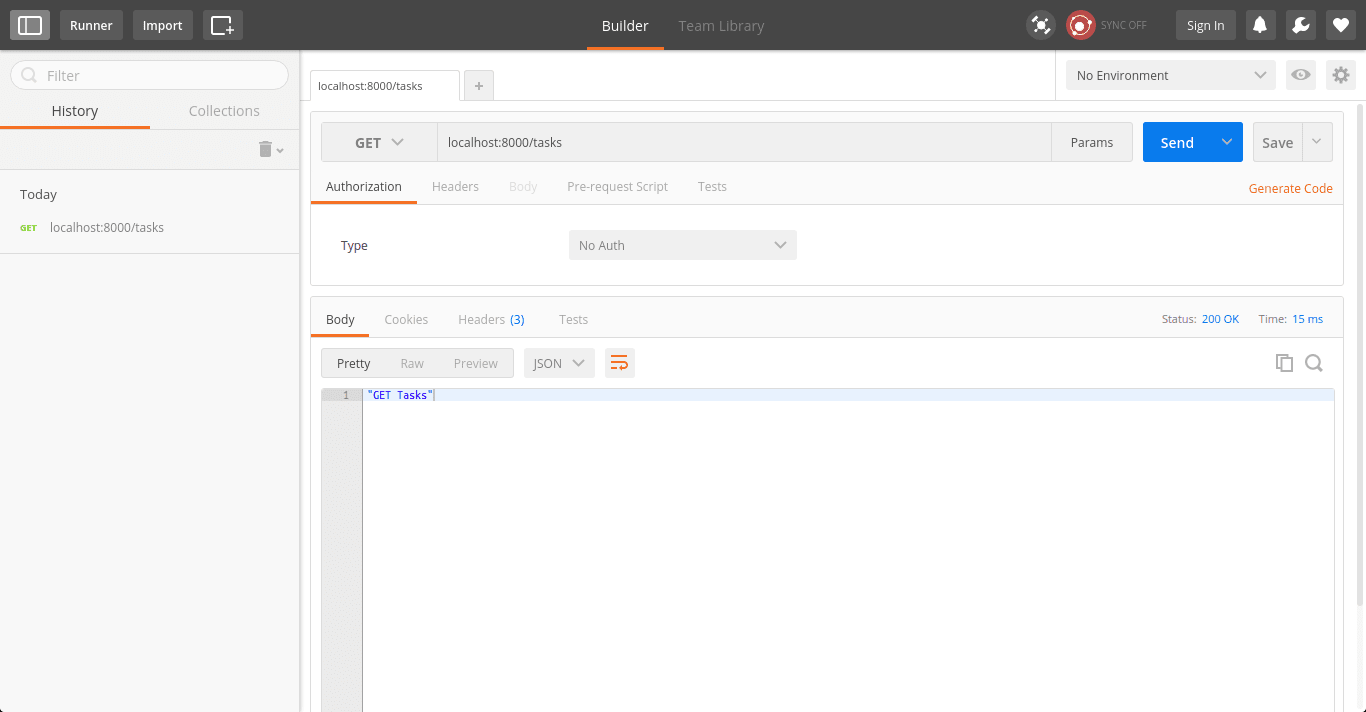
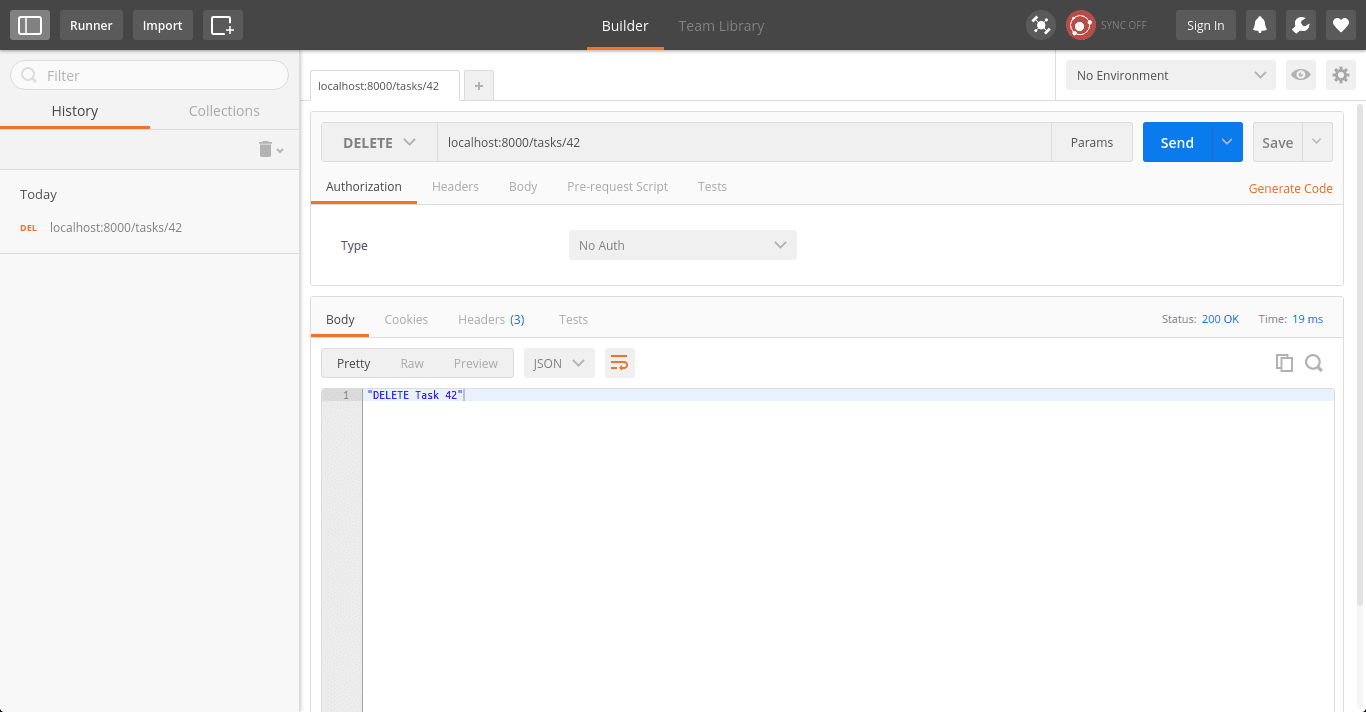
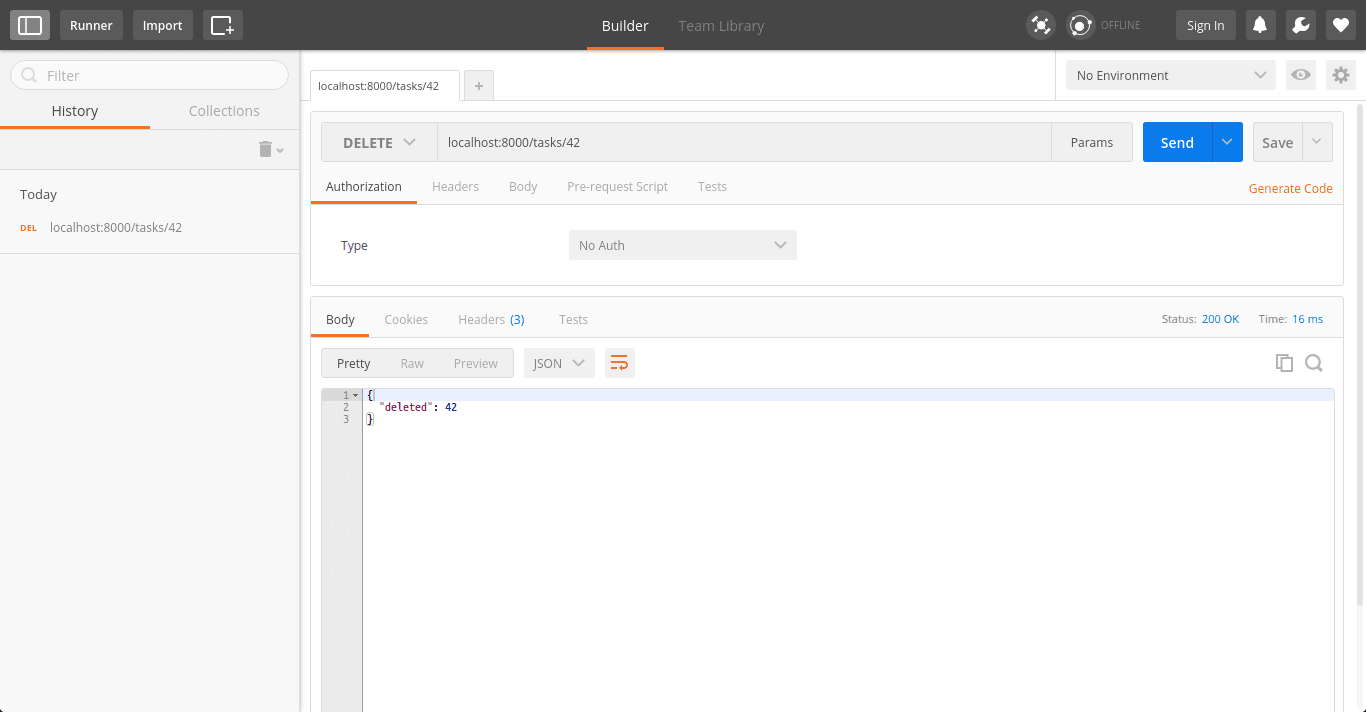
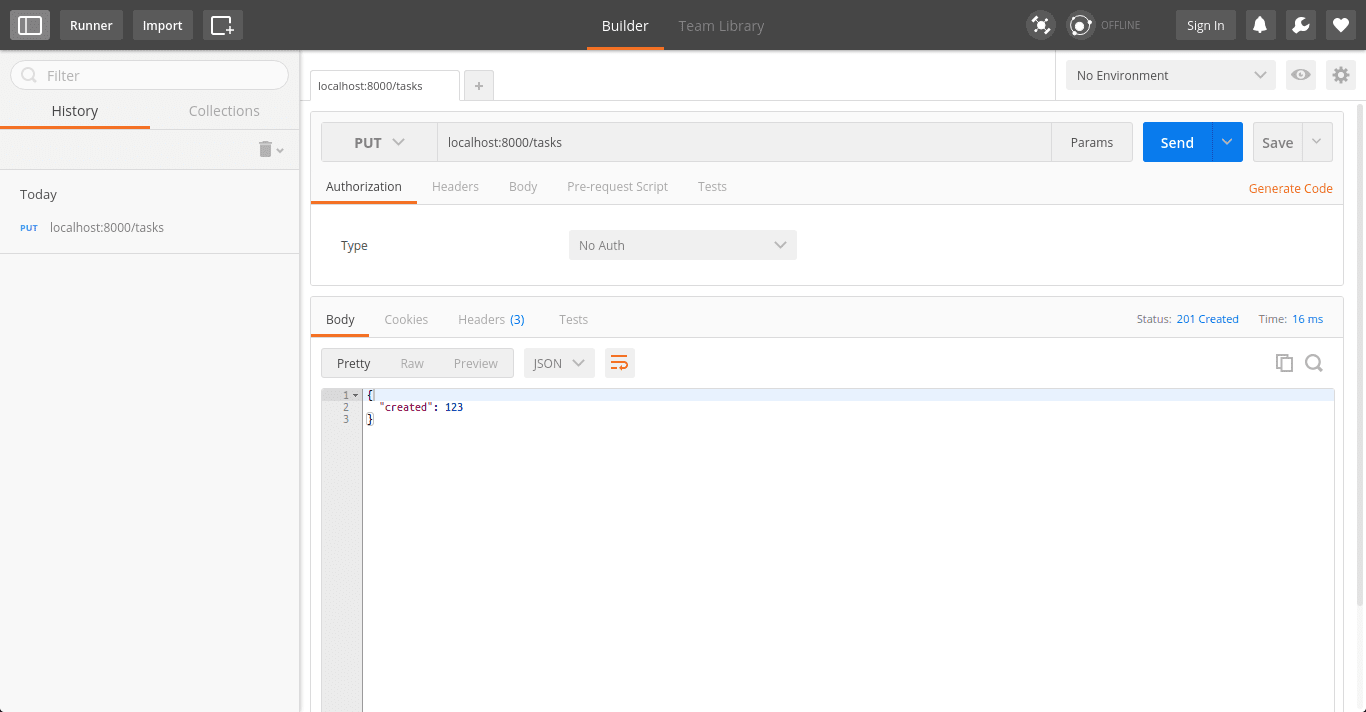
After building and starting the app, open Postman and point it to localhost:8000 and test the "/tasks" routes using the various HTTP verbs we defined (GET, PUT, DELETE). If everything worked you should see the following results.
构建并启动应用程序后,打开Postman并将其指向localhost:8000并使用我们定义的各种HTTP动词(GET,PUT,DELETE)测试“ / tasks”路由。 如果一切正常,您应该看到以下结果。

Next we'll initialize the database and specify a filename of "storage.db". If this file doesn't already exist, the driver will go ahead and create it for us. Once the database is create we need to run our migrations. In this case we just create a migrate function which I'll explain in a bit.
接下来,我们将初始化数据库并指定文件名“ storage.db”。 如果该文件尚不存在,驱动程序将继续为我们创建它。 创建数据库后,我们需要运行迁移。 在这种情况下,我们只创建一个迁移函数,我将在后面进行解释。
// todo.go
package main
import (
    "database/sql"

    "github.com/labstack/echo"
    "github.com/labstack/echo/engine/standard"
    _ "github.com/mattn/go-sqlite3"
)
At the top of our "main" function add these two lines.
在我们的“主要”功能的顶部,添加这两行。
// todo.go
func main() {

    db := initDB("storage.db")
    migrate(db)
After our main function we need to define the initDB and migrate functions.
在我们的主要功能之后,我们需要定义initDB并迁移功能。
// todo.go
func initDB(filepath string) *sql.DB {
    db, err := sql.Open("sqlite3", filepath)

    // Here we check for any db errors then exit
    if err != nil {
        panic(err)
    }

    // If we don't get any errors but somehow still don't get a db connection
    // we exit as well
    if db == nil {
        panic("db nil")
    }
    return db
}

func migrate(db *sql.DB) {
    sql := `
    CREATE TABLE IF NOT EXISTS tasks(
        id INTEGER NOT NULL PRIMARY KEY AUTOINCREMENT,
        name VARCHAR NOT NULL
    );
    `

    _, err := db.Exec(sql)
    // Exit if something goes wrong with our SQL statement above
    if err != nil {
        panic(err)
    }
}
These two functions are for creating the database and then migrating the schema. "initDB" will try and open a db file or create it if it doesn't exist. If those fail, the program will exit because we really can't do anything without a db.
这两个功能用于创建数据库,然后迁移架构。 “ initDB”将尝试打开一个db文件或创建一个不存在的数据库文件。 如果这些操作失败,则该程序将退出,因为如果没有数据库,我们真的无法做任何事情。
"migrate" just runs some SQL against the database and is pretty self explanatory. If the tasks table doesn't exist, create it. If that fails the program exits.
“迁移”仅对数据库运行一些SQL,这很容易解释。 如果任务表不存在,请创建它。 如果失败,则程序退出。
To test if this works we need to build the app again and run it.
要测试是否可行,我们需要再次构建应用程序并运行它。
$ go build todo.go
$ ./todo
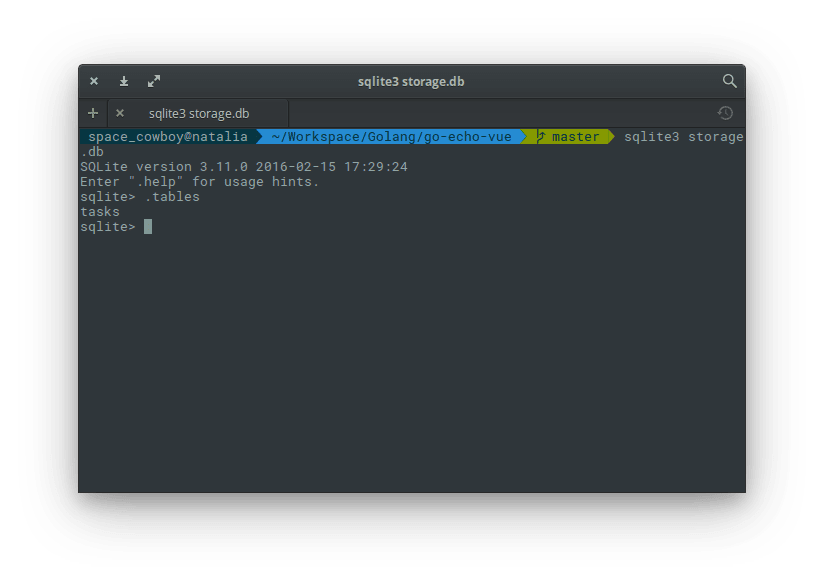
If you open another terminal window and list the contents of our app directory you should now see a file called "storage.db". Run the following to make sure the file is a valid SQLite file.
如果您打开另一个终端窗口并列出我们的应用程序目录的内容,现在应该看到一个名为“ storage.db”的文件。 运行以下命令以确保该文件是有效SQLite文件。
$ sqlite3 storage.dbIf you don't have this command installed, grab a copy of SQLite from the official site for your specific OS.
如果您没有安装此命令,请从官方站点获取特定操作系统SQLite副本。
This command should bring up a prompt. At the prompt type ".tables" and then hit "Enter". You should see the "tasks" table listed. To exit the prompt type ".quit".
该命令将提示您。 在提示符下键入“ .tables”,然后单击“ Enter”。 您应该看到列出的“任务”表。 要退出提示,请键入“ .quit”。
处理程序 (Handlers)
We've already created some endpoints for our frontend to interact with. Now we need to create or delete a task then return a result to the client. This is accomplished by a few handler functions.
我们已经为前端创建了一些与之交互的端点。 现在我们需要创建或删除任务,然后将结果返回给客户端。 这是通过一些处理程序函数来完成的。
In our "todo.go" file we need to import a new package. This is a handlers package that we will create ourselves.
在我们的“ todo.go”文件中,我们需要导入一个新包。 这是一个我们自己创建的处理程序包。
package main
import (
    "database/sql"
    "go-echo-vue/handlers"

    "github.com/labstack/echo"
    "github.com/labstack/echo/engine/standard"
    _ "github.com/mattn/go-sqlite3"
)
Next we need to set our routes to use the new handlers we are about to create.
接下来,我们需要设置路由以使用我们将要创建的新处理程序。
// todo.go
    e := echo.New()

    e.File("/", "public/index.html")
    e.GET("/tasks", handlers.GetTasks(db))
    e.PUT("/tasks", handlers.PutTask(db))
    e.DELETE("/tasks/:id", handlers.DeleteTask(db))

    e.Run(standard.New(":8000"))
}
Looking at this code, you may notice that the handlers listed don't actually follow the function signature required by Echo. Instead these are functions that return a function that satisfy that interface. This is a trick I used so we can pass around the db instance from handler to handler without having to create a new one each time we want to use the database. It'll be come more clear later.
查看此代码,您可能会注意到列出的处理程序实际上并未遵循Echo要求的功能签名。 而是这些函数返回满足该接口的函数。 这是我使用的一种技巧,因此我们可以在处理程序之间传递数据库实例,而不必每次想要使用数据库时都创建一个新的实例。 稍后会更清楚。
We've also added an extra route. This is a static html file that will contain our VueJS client code. We can serve up static files using the 'File' function. In this case we'll use it to serve up our client code at the "/" endpoint.
我们还添加了一条额外的路线。 这是一个静态html文件,将包含我们的VueJS客户端代码。 我们可以使用“文件”功能提供静态文件。 在这种情况下,我们将使用它在“ /”端点上提供客户代码。
Now lets create a directory called 'handlers' and inside that directory we'll create a file called "tasks.go". Next we need to import a few packages that we'll need.
现在,我们创建一个名为“ handlers”的目录,并在该目录内创建一个名为“ tasks.go”的文件。 接下来,我们需要导入一些我们需要的软件包。
// handlers/tasks.go
package handlers

import (
    "database/sql"
    "net/http"
    "strconv"

    "github.com/labstack/echo"
)
This next line is just a small trick which allows us to return arbitary JSON in our response as you'll see later. It's just a map with strings as keys and anything as values. In Go, the "interface" keyword represents anything from a primitive datatype to a user defined type or struct.
下一行只是一个小技巧,它使我们能够在响应中返回任意的JSON,您将在稍后看到。 它只是一个以字符串为键,任何值作为值的映射。 在Go中,“ interface”关键字表示从原始数据类型到用户定义类型或结构的任何内容。
// handlers/tasks.go
type H map[string]interface{}
The meat of this file are the handler functions. They all take a db connection as an argument, but remember to be a proper handler used by the Echo router, the function needs to implement the Echo.HandlerFunc interface. We accomplish this by returning an anonymous function that matches the interface signature. That function is now able to use the db connection and pass it to our models.
该文件的内容是处理程序函数。 它们都以db连接作为参数,但是请记住,它是Echo路由器使用的适当处理程序,该函数需要实现Echo.HandlerFunc接口。 我们通过返回与接口签名匹配的匿名函数来实现此目的。 该函数现在可以使用db连接并将其传递给我们的模型。
Just to get things working however, we won't deal with the database. We'll just return some fake data.
但是,为了使事情正常进行,我们将不处理数据库。 我们只返回一些假数据。
// handlers/tasks.go

// GetTasks endpoint
func GetTasks(db *sql.DB) echo.HandlerFunc {
    return func(c echo.Context) error {
        return c.JSON(http.StatusOK, "tasks")
    }
}

// PutTask endpoint
func PutTask(db *sql.DB) echo.HandlerFunc {
    return func(c echo.Context) error {
        return c.JSON(http.StatusCreated, H{
            "created": 123,
    }
}

// DeleteTask endpoint
func DeleteTask(db *sql.DB) echo.HandlerFunc {
    return func(c echo.Context) error {
        id, _ := strconv.Atoi(c.Param("id"))
        return c.JSON(http.StatusOK, H{
            "deleted": id,
        })
    }
}
The Go http package gives us some handy constants to use for HTTP status codes. For example we use http.StatusCreated for our PUT response. Each of these handlers now return JSON formatted responses. The last function "DeleteTask" takes an id parameter. We us the strconv package and the Atoi (alpha to integer) function to make sure the id is cast to an integer. This will allow us to use it correctly when querying tasks by id in the database.
Go http包为我们提供了一些方便的常量,可用于HTTP状态代码。 例如,我们将http.StatusCreated用于我们的PUT响应。 这些处理程序现在都将返回JSON格式的响应。 最后一个函数“ DeleteTask”带有一个id参数。 我们使用strconv软件包和Atoi(从alpha到整数)函数来确保将id强制转换为整数。 在数据库中按ID查询任务时,这将使我们能够正确使用它。
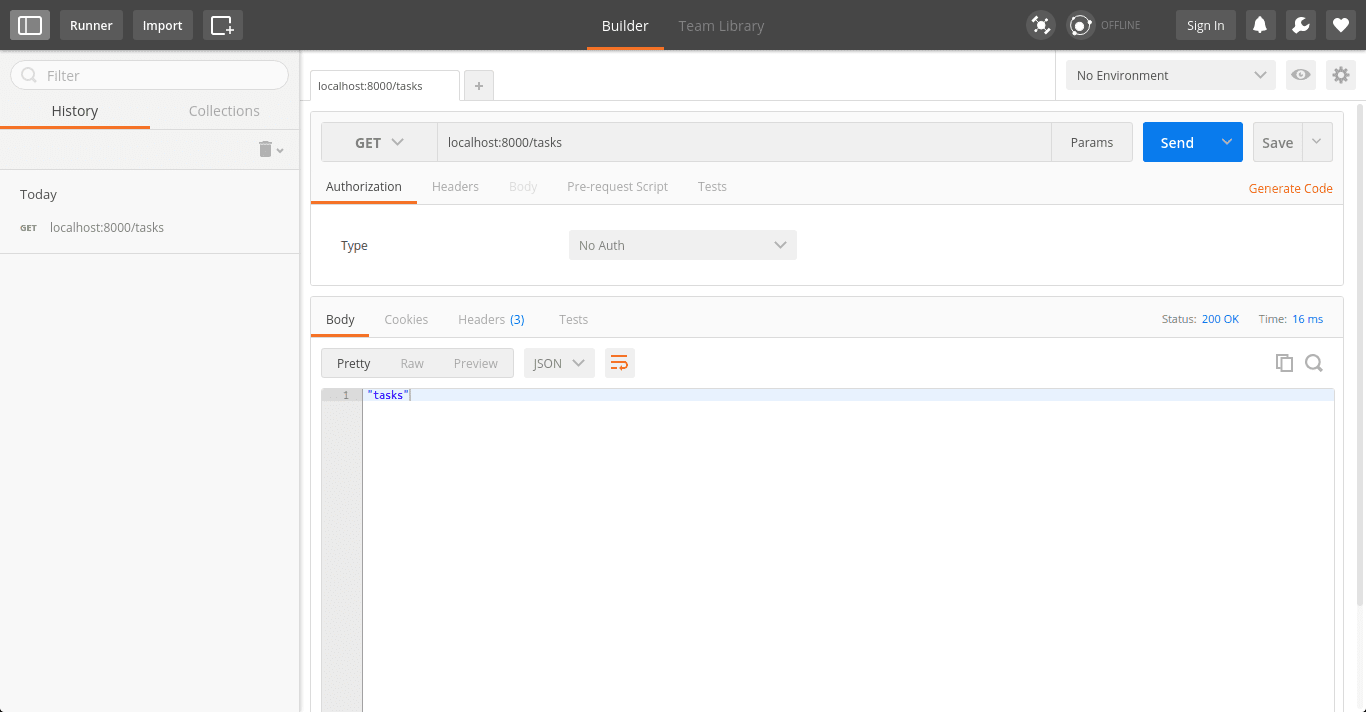
To test these handlers rebuild and run the app. We can test again by using Postman.
要测试这些处理程序,请重新构建并运行该应用程序。 我们可以使用邮递员再次进行测试。
模型 (Model)
Now that we have some handlers we need to actually wire our application up to use the database. Instead of just making direct database calls from our handlers, we will keep our code nice and tidy by abstracting the database logic out into a model.
现在我们有了一些处理程序,我们需要实际连接应用程序以使用数据库。 通过将数据库逻辑抽象到模型中,我们不仅可以使处理程序直接进行数据库调用,还可以使代码保持整洁。
First lets incorporate the references to our new model in our recently created handlers file.
首先,让我们将对新模型的引用合并到我们最近创建的处理程序文件中。
Lets import the models package that we are about to create.
让我们导入我们将要创建的模型包。
// handlers/tasks.go
package handlers

import (
    "database/sql"
    "net/http"
    "strconv"

    "go-echo-vue/models"

    "github.com/labstack/echo"
)
Then add the calls into our handler functions.
然后将调用添加到我们的处理函数中。
// handlers/tasks.go

// GetTasks endpoint
func GetTasks(db *sql.DB) echo.HandlerFunc {
    return func(c echo.Context) error {
        // Fetch tasks using our new model
        return c.JSON(http.StatusOK, models.GetTasks(db))
    }
}

// PutTask endpoint
func PutTask(db *sql.DB) echo.HandlerFunc {
    return func(c echo.Context) error {
        // Instantiate a new task
        var task models.Task
        // Map imcoming JSON body to the new Task
        c.Bind(&task)
        // Add a task using our new model
        id, err := models.PutTask(db, task.Name)
        // Return a JSON response if successful
        if err == nil {
            return c.JSON(http.StatusCreated, H{
                "created": id,
            })
        // Handle any errors
        } else {
            return err
        }
    }
}

// DeleteTask endpoint
func DeleteTask(db *sql.DB) echo.HandlerFunc {
    return func(c echo.Context) error {
        id, _ := strconv.Atoi(c.Param("id"))
        // Use our new model to delete a task
        _, err := models.DeleteTask(db, id)
        // Return a JSON response on success
        if err == nil {
            return c.JSON(http.StatusOK, H{
                "deleted": id,
            })
        // Handle errors
        } else {
            return err
        }
    }
}
Now in the "PutTask" function you'll see "c.Bind". This will take a JSON formatted body sent in a PUT request and map it to a Task struct. The Task struct will be defined in our models package.
现在,在“ PutTask”功能中,您将看到“ c.Bind”。 这将采用在PUT请求中发送的JSON格式的主体并将其映射到Task结构。 Task结构将在我们的模型包中定义。
You'll also notice some error checking. The Tasks model will have functions that will return data or error depending on whether or not the actions were successful. Our handlers need to respond accordingly.
您还会注意到一些错误检查。 Tasks模型将具有根据操作是否成功返回数据或错误的函数。 我们的处理人员需要做出相应的回应。
Now we can create our model. This is what will actually talk to the database. Create a directory called "models" and in that directory create a file called "tasks.go".
现在我们可以创建模型了。 这实际上是与数据库对话的内容。 创建一个名为“ models”的目录,并在该目录中创建一个名为“ tasks.go”的文件。
Again we import the packages we need.
再次,我们导入所需的包。
// models/tasks.go
package models

import (
    "database/sql"

    _ "github.com/mattn/go-sqlite3"
)
Next we need to create a Task type which is a struct with two fields, ID and Name. Go lets you add meta data to variables using backticks. In this case we're just defining what we want each field to look like once it is converted to JSON. This also allows the "c.Bind" function from earlier in our handlers to know where to map JSON data when populating a new Task.
接下来,我们需要创建一个Task类型,它是具有两个字段ID和Name的结构。 Go使您可以使用反引号将元数据添加到变量。 在这种情况下,我们只是定义我们希望每个字段在转换为JSON后的外观。 这也使我们处理程序中较早版本的“ c.Bind”函数可以知道在填充新Task时将JSON数据映射到何处。
The second type is just a collection of Task items. We'll use this when we return all the tasks that are in the database.
第二种类型只是Task项目的集合。 当我们返回数据库中的所有任务时,将使用它。
// models/tasks.go

// Task is a struct containing Task data
type Task struct {
    ID   int    `json:"id"`
    Name string `json:"name"`
}

// TaskCollection is collection of Tasks
type TaskCollection struct {
    Tasks []Task `json:"items"`
}
Get Tasks simply selects all tasks from the database, shoves them into a new collection and returns them.
“获取任务”只需从数据库中选择所有任务,将它们推入新集合中并返回即可。
// models/tasks.go

func GetTasks(db *sql.DB) TaskCollection {
    sql := "SELECT * FROM tasks"
    rows, err := db.Query(sql)
    // Exit if the SQL doesn't work for some reason
    if err != nil {
        panic(err)
    }
    // make sure to cleanup when the program exits
    defer rows.Close()

    result := TaskCollection{}
    for rows.Next() {
        task := Task{}
        err2 := rows.Scan(&task.ID, &task.Name)
        // Exit if we get an error
        if err2 != nil {
            panic(err2)
        }
        result.Tasks = append(result.Tasks, task)
    }
    return result
}
PutTask inserts a new task into the database and returns the new id on success and panics on failure.
PutTask将新任务插入数据库,并在成功时返回新的ID,并在失败时返回紧急信息。
// models/tasks.go

func PutTask(db *sql.DB, name string) (int64, error) {
    sql := "INSERT INTO tasks(name) VALUES(?)"

    // Create a prepared SQL statement
    stmt, err := db.Prepare(sql)
    // Exit if we get an error
    if err != nil {
        panic(err)
    }
    // Make sure to cleanup after the program exits
    defer stmt.Close()

    // Replace the '?' in our prepared statement with 'name'
    result, err2 := stmt.Exec(name)
    // Exit if we get an error
    if err2 != nil {
        panic(err2)
    }

    return result.LastInsertId()
}
DeleteTask does what you expect. Deletes a task.
DeleteTask做您所期望的。 删除任务。
// models/tasks.go

func DeleteTask(db *sql.DB, id int) (int64, error) {
    sql := "DELETE FROM tasks WHERE id = ?"

    // Create a prepared SQL statement
    stmt, err := db.Prepare(sql)
    // Exit if we get an error
    if err != nil {
        panic(err)
    }

    // Replace the '?' in our prepared statement with 'id'
    result, err2 := stmt.Exec(id)
    // Exit if we get an error
    if err2 != nil {
        panic(err2)
    }

    return result.RowsAffected()
}
Notice that we are using prepared SQL statements in our model functions by way of "db.Prepare". There are two reasons for this. First, a prepared statement can be compiled and cached so executing multiple times is faster. Second and most importantly is that prepared statements prevent against SQL injection attacks.
请注意,我们通过“ db.Prepare”在模型函数中使用了准备好SQL语句 。 有两个原因。 首先,可以编译和缓存一条准备好的语句,因此执行多次的速度更快。 其次,也是最重要的是,准备好的语句可以防止SQL注入攻击。
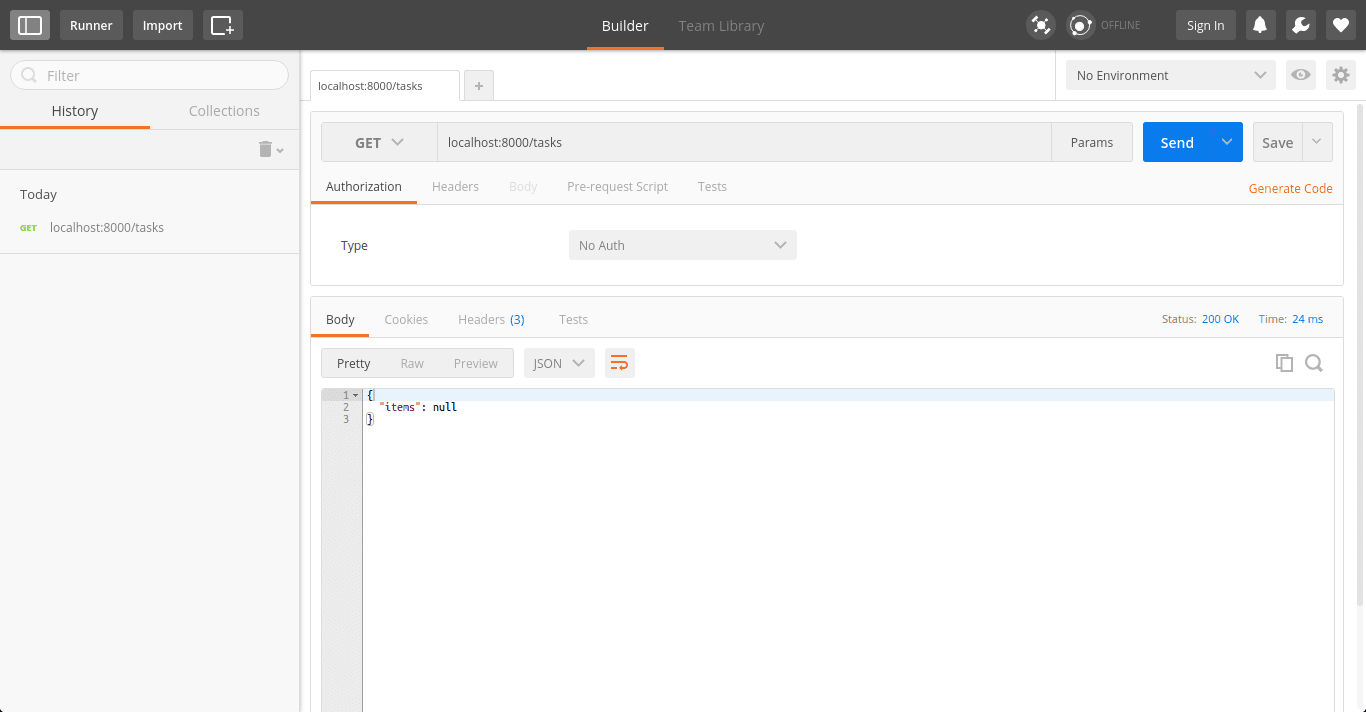
We can once again test using Postman. First we'll check the "GET /tasks" route. You should see JSON formatted response with "tasks" set to null.
我们可以再次使用Postman进行测试。 首先,我们将检查“ GET / tasks”路由。 您应该看到JSON格式的响应,其中“任务”设置为null。
Now let's add a task. In Postman, switch the method to "PUT" then click the "Body" tab. Check "raw" and select JSON (application/json) as the type. In the text box enter the following.
现在让我们添加一个任务。 在Postman中,将方法切换为“ PUT”,然后单击“正文”选项卡。 选中“原始”,然后选择JSON(application / json)作为类型。 在文本框中输入以下内容。
{
    "name": "Foobar"
}
You should get a 'created' response back similar to this.
您应该得到类似于此的“创建的”响应。
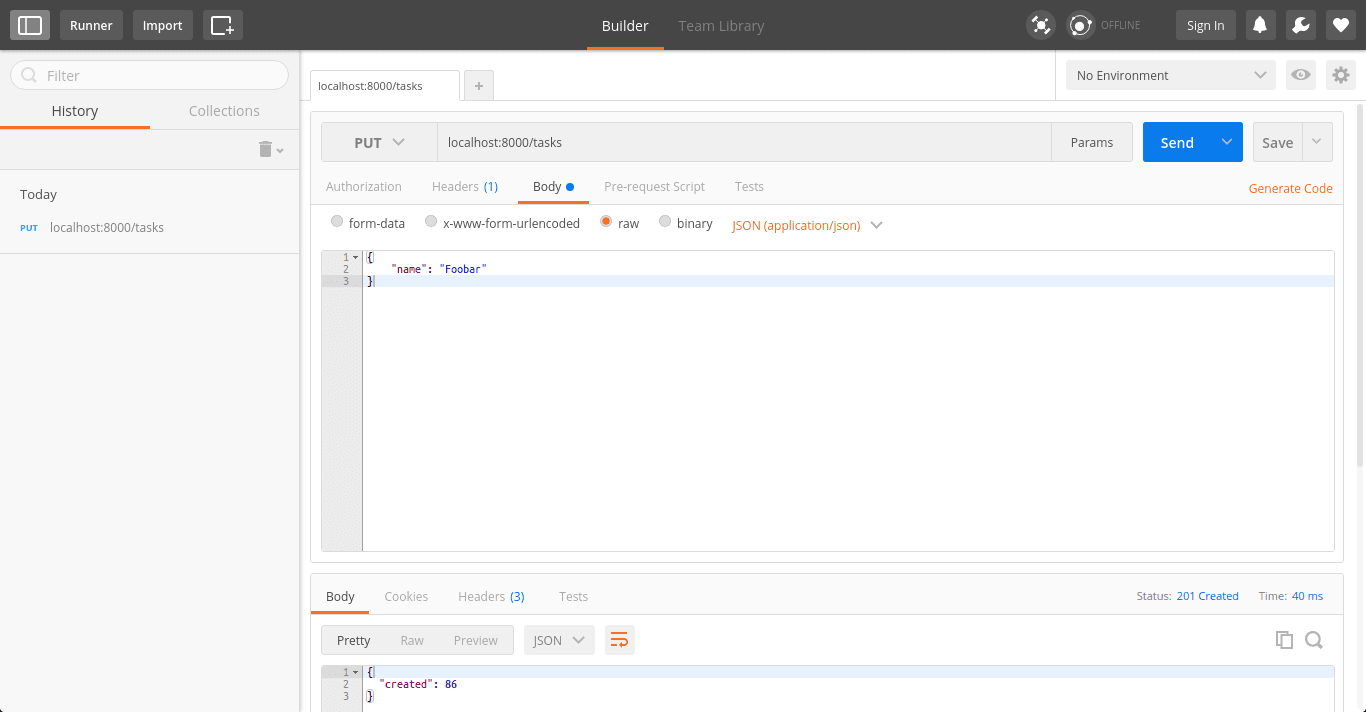
Take note of the id that is returned because we need it to test the "DELETE /tasks" route. Just like in the previous examples set the method to "DELETE" and point Postman to "/tasks/:id". Replace ":id" with the id return in our previous test. You should get a successful "deleted" message.
记下返回的ID,因为我们需要它来测试“ DELETE / tasks”路由。 就像前面的示例一样,将方法设置为“ DELETE”,并将Postman指向“ / tasks /:id”。 在我们之前的测试中,将“:id”替换为id返回。 您应该会收到成功的“已删除”消息。
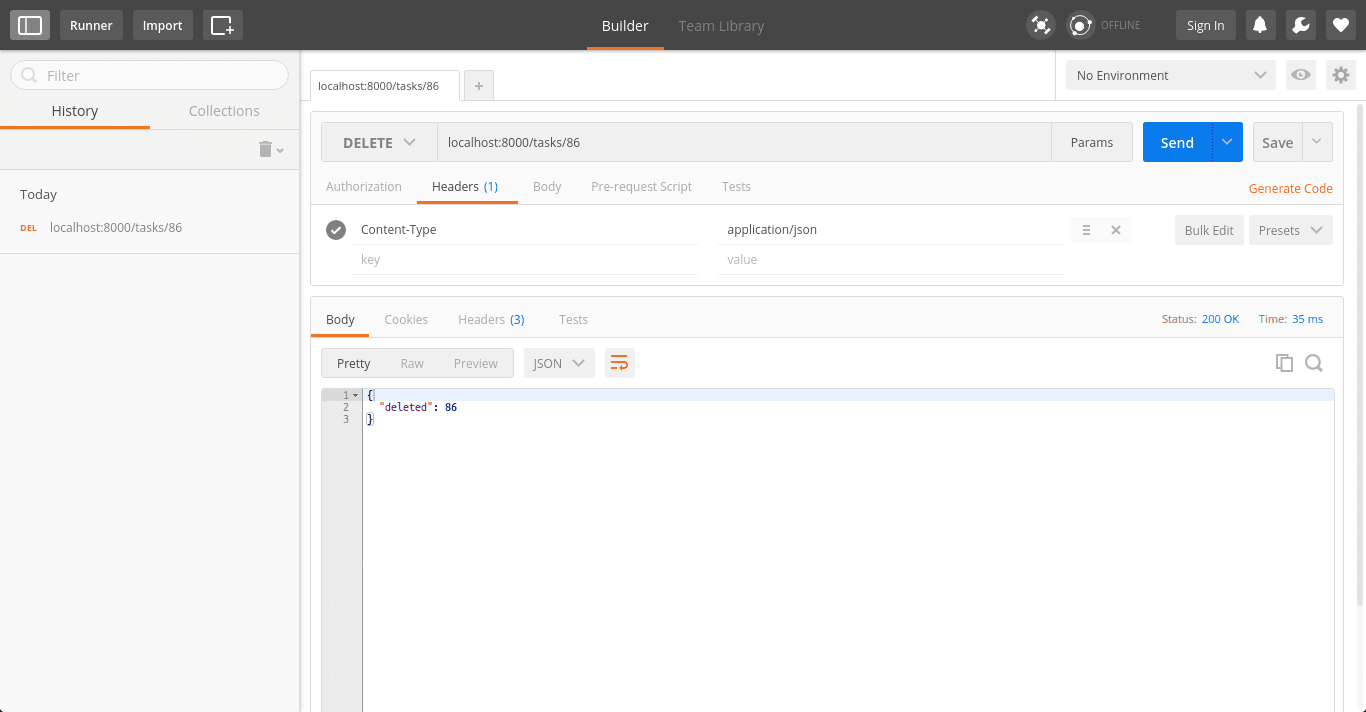
If all went well, now you can check out "GET /tasks" once again and you should see "null".
如果一切顺利,现在您可以再次签出“ GET / tasks”,并且应该看到“ null”。
前端 (Frontend)
Finally we have our frontend. For simplicity's sake we include our Javascript code in the same file as our HTML markup. The markup is simple. We include a few libraries like Bootstrap, JQuery and of course VueJS. The UI is just a input field, some buttons and an unordered list for our tasks. Create a directory called 'public' and inside that directory create a file called "index.html"
最后,我们有了前端。 为简单起见,我们将Javascript代码与HTML标记包含在同一文件中。 标记很简单。 我们包含一些库,例如Bootstrap,JQuery,当然还有VueJS。 UI只是一个输入字段,一些按钮和我们任务的无序列表。 创建一个名为“ public”的目录,并在该目录内创建一个名为“ index.html”的文件
<!-- public/index.html -->

<html>
    <head>
        <meta http-equiv="content-type" content="text/html; charset=utf-8">

        <title>TODO App</title>

        <!-- Latest compiled and minified CSS -->
        <link rel="stylesheet" href="https://maxcdn.bootstrapcdn.com/bootstrap/3.3.6/css/bootstrap.min.css">

        <!-- Font Awesome -->
        <link rel="stylesheet"  href="https://maxcdn.bootstrapcdn.com/font-awesome/4.6.3/css/font-awesome.min.css">

        <!-- JQuery -->
        <script src="https://cdnjs.cloudflare.com/ajax/libs/jquery/2.2.4/jquery.min.js"></script>

        <!-- Latest compiled and minified JavaScript -->
        <script src="https://maxcdn.bootstrapcdn.com/bootstrap/3.3.6/js/bootstrap.min.js"></script>

        <!-- Vue.js -->
        <script src="http://cdnjs.cloudflare.com/ajax/libs/vue/1.0.24/vue.min.js"></script>
        <script src="https://cdnjs.cloudflare.com/ajax/libs/vue-resource/0.7.0/vue-resource.min.js"></script>
    </head>
    <body>
        <div class="container">
            <div class="row">
                <div class="col-md-4">
                    <h2>My Tasks</h2>
                    <ul class="list-group">
                        <li class="list-group-item" v-for="task in tasks">
                            {{ task.name }}
                            <span class="pull-right">
                                <button class="btn btn-xs btn-danger" v-on:click="deleteTask($index)">
                                    <i class="fa fa-trash-o" aria-hidden="true"></i>
                                </button>
                            </span>
                        </li>
                    </ul>
                    <div class="input-group">
                        <input type="text"
                            class="form-control"
                            placeholder="New Task"
                            v-on:keyup.enter="createTask"
                            v-model="newTask.name">
                        <span class="input-group-btn">
                            <button class="btn btn-primary" type="button" v-on:click="createTask">Create</button>
                        </span>
                    </div><!-- /input-group -->
                </div>
            </div>
        </div>
    </body>
</html>
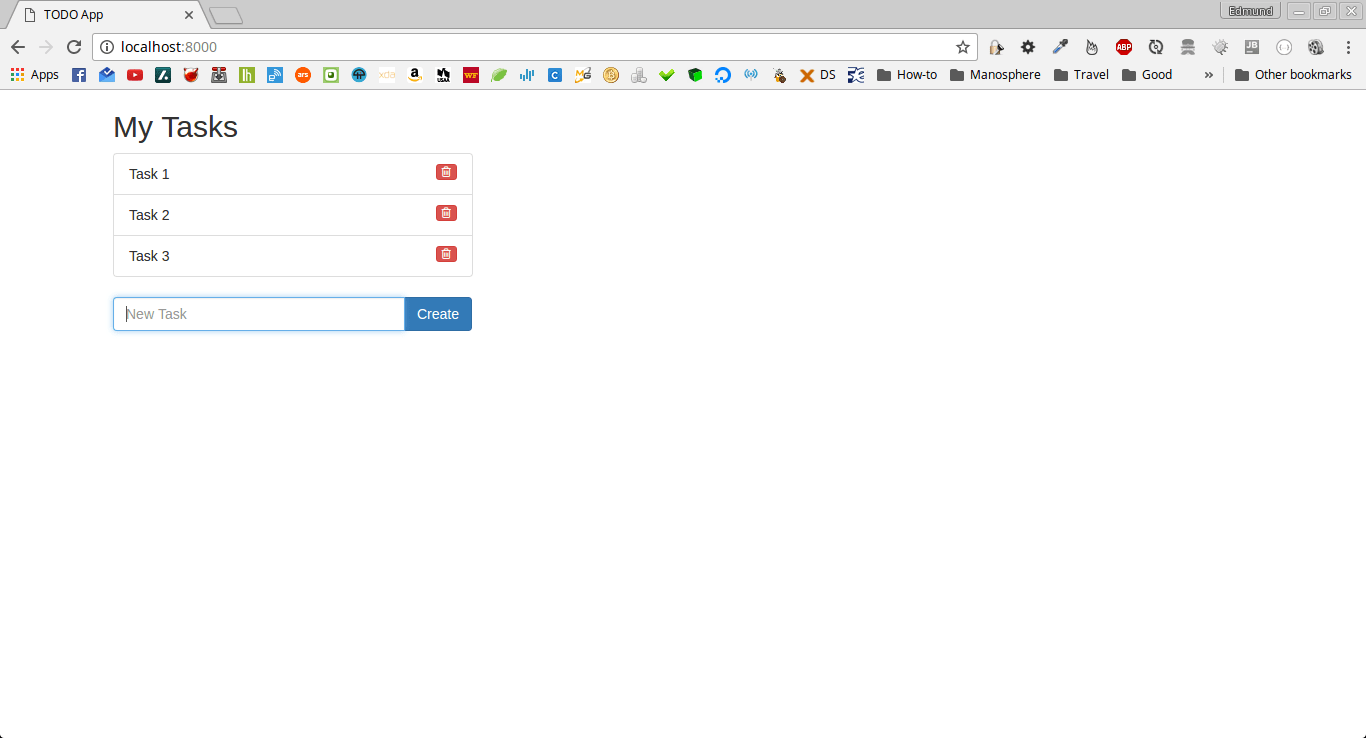
If you rebuild and run the application you should be able to see the new UI in your browser at http://localhost:8000.
如果您重建并运行该应用程序,则应该可以在浏览器中的http:// localhost:8000上看到新的UI。

Right under the final "div" tag we can place our VueJS code in a "script" tag. The VueJS code is slightly more complicated but pretty self explanatory as well. We have a few methods for creating and deleting tasks as well as a method that is run on initialization (created). This fetches all the tasks currently stored in the database.
在最后的“ div”标签下,我们可以将VueJS代码放在“ script”标签中。 VueJS代码稍微复杂一些,但也很容易说明。 我们提供了几种创建和删除任务的方法,以及在初始化(创建)时运行的方法。 这将获取当前存储在数据库中的所有任务。
In order to communicate with our backend we need to use an HTTP client. In this case we'll use vue-resource. Once that is included we can use it by referencing "this.$http" and then whatever HTTP verb (get, put, etc...) we want to use.
为了与后端通信,我们需要使用HTTP客户端。 在这种情况下,我们将使用vue-resource。 一旦包含了它,我们就可以通过引用“ this。$ http”然后使用我们想要使用的任何HTTP动词(get,put等)来使用它。
<!-- public/index.html -->

        <script>
            new Vue({
                el: 'body',

                data: {
                    tasks: [],
                    newTask: {}
                },

          // This is run whenever the page is loaded to make sure we have a current task list
                created: function() {
        // Use the vue-resource $http client to fetch data from the /tasks route
                    this.$http.get('/tasks').then(function(response) {
                        this.tasks = response.data.items ? response.data.items : []
                    })
                },

                methods: {
                    createTask: function() {
                        if (!$.trim(this.newTask.name)) {
                            this.newTask = {}
                            return
                        }

             // Post the new task to the /tasks route using the $http client
                        this.$http.put('/tasks', this.newTask).success(function(response) {
                            this.newTask.id = response.created
                            this.tasks.push(this.newTask)
                            console.log("Task created!")
                            console.log(this.newTask)
                            this.newTask = {}
                        }).error(function(error) {
                            console.log(error)
                        });
                    },

                    deleteTask: function(index) {
             // Use the $http client to delete a task by its id
                        this.$http.delete('/tasks/' + this.tasks[index].id).success(function(response) {
                            this.tasks.splice(index, 1)
                            console.log("Task deleted!")
                        }).error(function(error) {
                            console.log(error)
                        })
                    }
                }
            })
        </script>
跑 (Run)
Now that our application is complete, we need to compile it and run it.
现在我们的应用程序已经完成,我们需要对其进行编译并运行。
$ go build todo.go
$ ./todo
Once the application is running, we can point our browser to http://localhost:8000.
应用程序运行后,我们可以将浏览器指向http:// localhost:8000 。
结论 (Conclusion)
In this tutorial we learned how to create a simple Go backend using the Echo framework and a simple frontend using VueJS. Hopefully this has piqued your curiosity of the Go language and will inspire you to build even more complex web applications.
在本教程中,我们学习了如何使用Echo框架创建简单的Go后端,以及使用VueJS创建简单的前端。 希望这激发了您对Go语言的好奇心,并将激发您构建更复杂的Web应用程序。
翻译自: https://scotch.io/tutorials/create-a-single-page-app-with-go-echo-and-vue
vue单页应用和多页应用


 794
794

 被折叠的 条评论
为什么被折叠?


