


VMware normally creates “growable” disks, which start small and grow over time as you add data. However, you can also create “preallocated” disks that start at their maximum size. If you want to compact a disk later, you’ll need to convert it from preallocated to growable. Or, you may want to convert a disk from growable to preallocated for maximum performance.
VMware通常会创建“可增长”磁盘,这些磁盘从很小开始就随着添加数据的增长而增长。 但是,您也可以创建以最大大小开始的“预分配”磁盘。 如果以后要压缩磁盘,则需要将其从预分配的磁盘转换为可增长的磁盘。 或者,您可能希望将磁盘从可增长磁盘转换为预分配磁盘,以实现最佳性能。
You can only do this in VMware Fusion or VMware Workstation. VMware Player does not include the necessary command. VMware Player always creates growable disks that expand over time, and there’s no way to convert to preallocated without using another VMware product.
您只能在VMware Fusion或VMware Workstation中执行此操作。 VMware Player不包括必要的命令。 VMware Player始终会创建可扩展的磁盘,这些磁盘会随着时间的推移而扩展,如果不使用其他VMware产品,则无法转换为预分配的磁盘。
VMware融合 (VMware Fusion)
This is very simple in VMware Fusion on a Mac. VMware Fusion always creates new virtual disks as growable disks. You can convert them to preallocated disks afterwards, or convert disks back to growable disks if you’ve previously converted them to preallocated disks.
在Mac上的VMware Fusion中,这非常简单。 VMware Fusion始终将新的虚拟磁盘创建为可增长磁盘。 之后,您可以将它们转换为预分配的磁盘,或者如果先前已将它们转换为预分配的磁盘,则可以将磁盘转换回可增长的磁盘。
To do this, first shut down the virtual machine. You can’t convert its disks if it’s powered on or suspended.
为此,请先关闭虚拟机。 如果电源打开或挂起,则无法转换其磁盘。
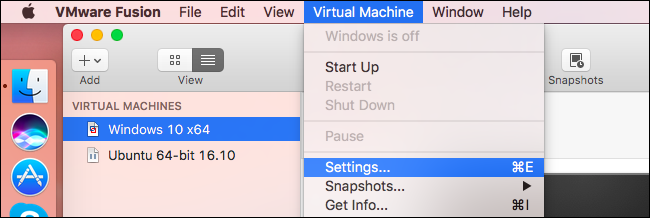
Select the virtual machine in the main VMware Fusion window and click Virtual Machine > Settings.
在“ VMware Fusion”主窗口中选择虚拟机,然后单击“虚拟机”>“设置”。
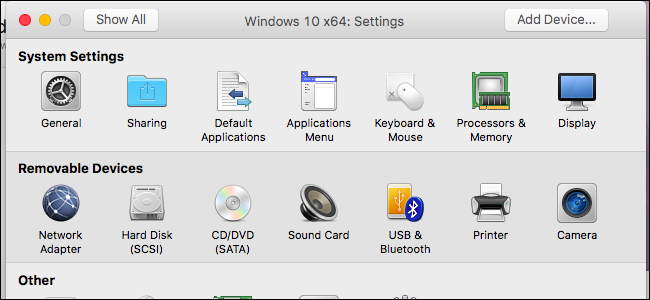
Click the “Hard Disk” option under Removable Devices in the Settings window.
单击“设置”窗口中“可移动设备”下的“硬盘”选项。
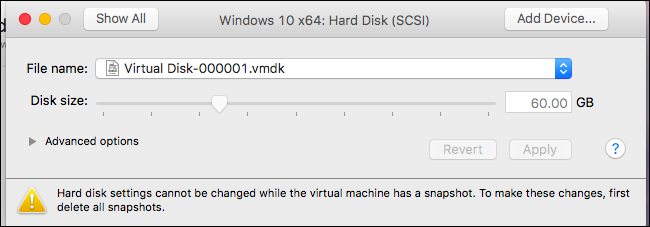
If you see a message saying you can’t make these changes while your virtual machine has a snapshot, you’ll first need to delete any snapshots you’ve created for your virtual machine. Of course, you won’t be able to restore your virtual machine to its previous state at those points in time later.
如果您看到一条消息,说您的虚拟机具有快照时无法进行这些更改,则首先需要删除为虚拟机创建的所有快照。 当然,您将无法在稍后的这些时间点将虚拟机还原到以前的状态。
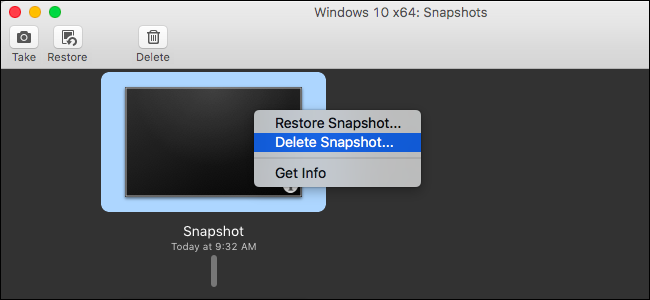
To delete snapshots, click Virtual Machine > Snapshots > Snapshots. Select each snapshot in the window and click the “Delete” button on the toolbar to delete each.
要删除快照,请单击虚拟机>快照>快照。 选择窗口中的每个快照,然后单击工具栏上的“删除”按钮以删除每个快照。
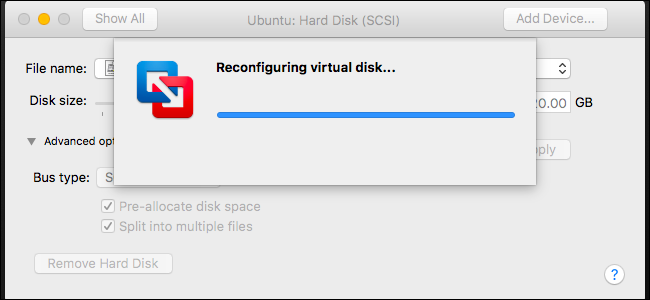
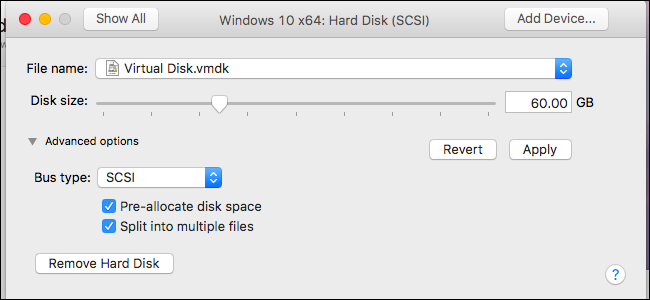
In the Hard Disk settings window, expand the “Advanced options” section. Check “Pre-allocate disk space” to convert the growable disk to a preallocated disk, or uncheck “Pre-allocate disk space” to convert a preallocated disk back to a growable disk. Click “Apply” to apply your changes afterwards.
在“硬盘设置”窗口中,展开“高级选项”部分。 选中“预分配磁盘空间”以将可增长的磁盘转换为预分配的磁盘,或者取消选中“预分配磁盘空间”以将预分配的磁盘转换回可增长的磁盘。 单击“应用”以随后应用更改。
VMware工作站 (VMware Workstation)
The process is a bit more complicated in VMWare workstation, and you’ll need to use the Command Prompt—this option isn’t exposed in the graphical interface on VMware Workstation, so you’ll have to use the built-in vmware-vdiskmanager command.
在VMWare工作站中,此过程要复杂一些,您需要使用命令提示符-VMware Workstation的图形界面中不会显示此选项,因此您必须使用内置的vmware-vdiskmanager命令。
第一步:删除所有快照 (Step One: Delete Any Snapshots)
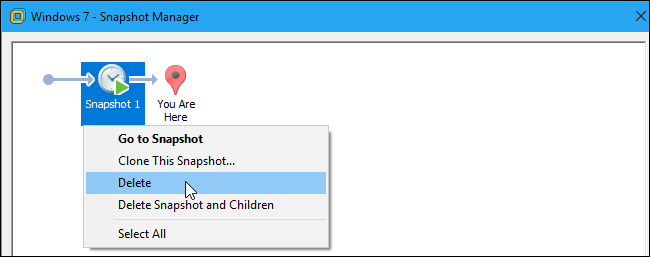
First, power the virtual machine down in VMware Workstation. Delete any snapshots associated with the virtual machine by clicking VM > Snapshot > Snapshot, right-clicking each snapshot, and selecting “Delete”. Of course, you won’t be able to restore your virtual machine to these previous points in time after deleting the snapshots.
首先,在VMware Workstation中关闭虚拟机。 通过单击VM>快照>快照,右键单击每个快照,然后选择“删除”,删除与虚拟机关联的所有快照。 当然,删除快照后,您将无法将虚拟机还原到以前的这些时间点。
第二步:查找vmware-vdiskmanagere.exe命令 (Step Two: Find the vmware-vdiskmanagere.exe Command)
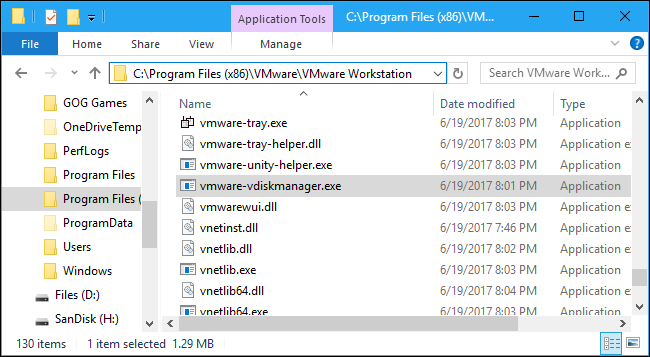
Next, find the vmware-vdiskmanager.exe command. If you have VMware Workstation installed in the default directory on Windows, you’ll find it at C:\Program Files (x86)\VMware\VMware Workstation or C:\Program Files\VMware\VMware Workstation.
接下来,找到vmware-vdiskmanager.exe命令。 如果在Windows的默认目录中安装了VMware Workstation,则可以在C:\Program Files (x86)\VMware\VMware Workstation或C:\Program Files\VMware\VMware Workstation 。
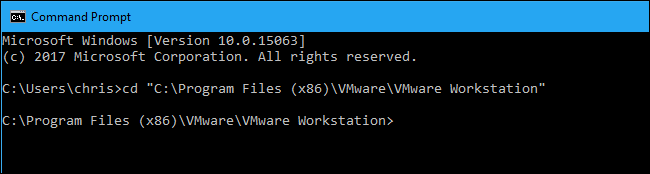
Open a Command Prompt window from the Start menu and change to the VMware directory. To do this, use the following command. Replace the folder path with the correct path to the VMware Workstation folder that contains the vmware-vdiskmanager.exe file if it’s different on your system.
从“开始”菜单打开“命令提示符”窗口,然后切换到VMware目录。 为此,请使用以下命令。 如果系统上的文件夹路径不同,则用包含vmware-vdiskmanager.exe文件的VMware Workstation文件夹的正确路径替换文件夹路径。
cd "C:\Program Files (x86)\VMware\VMware Workstation"
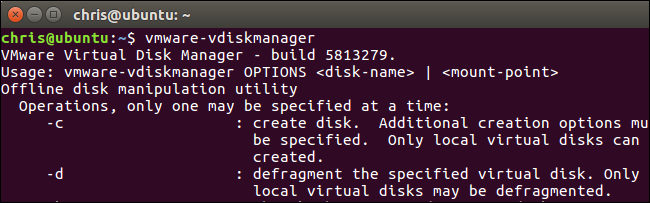
NOTE: The instructions here assume you’re using Windows as your host operating system. On Linux, you can simply open a Terminal window and run the vmware-vdiskmanager command like you’d run any other command.
注意:此处的说明假定您使用Windows作为主机操作系统。 在Linux上,您只需打开“终端”窗口并运行vmware-vdiskmanager命令,就像运行其他命令一样。
第三步:查找虚拟磁盘文件 (Step Three: Find Your Virtual Disk File)
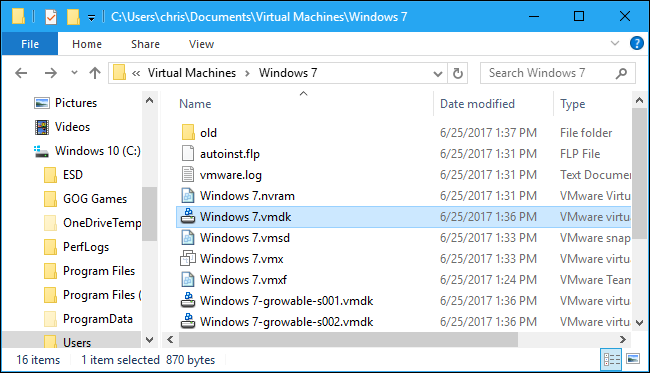
Locate the virtual machine’s folder on your disk and identify its .vmdk file, which is the virtual machine’s virtual disk. By default, VMware creates virtual machine folders inside the directory at C:\Users\NAME\Documents\Virtual Machines\ , where NAME is the name of your Windows user account.
在磁盘上找到虚拟机的文件夹,并确定其.vmdk文件,该文件是虚拟机的虚拟磁盘。 默认情况下,VMware在目录C:\Users\NAME\Documents\Virtual Machines\创建虚拟机文件夹,其中NAME是Windows用户帐户的名称。
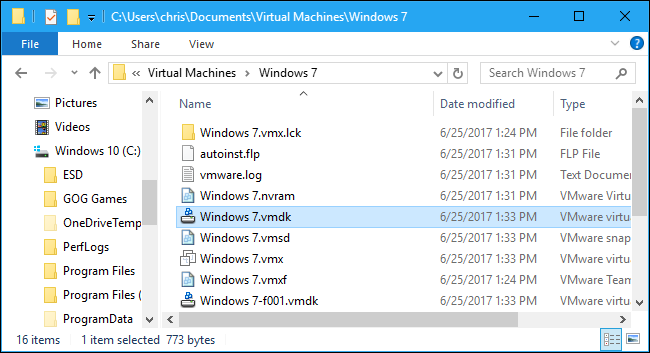
You may see multiple .vmdk files. That’s normal. Look for the main .vmdk file, not any of the .vmdk files that ends with -f and then a number. In the screenshot below, it’s named Windows 7.vmdk.
您可能会看到多个.vmdk文件。 那很正常 查找主.vmdk文件,而不要查找任何以-f结尾并带有数字的.vmdk文件。 在下面的屏幕截图中,其名为Windows 7.vmdk。
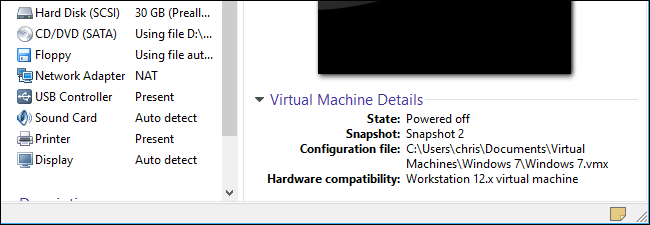
If you’re not sure where it is, you can view a virtual machine’s folder path at the bottom of the VMware Workstation window.
如果不确定它在哪里,可以在VMware Workstation窗口底部查看虚拟机的文件夹路径。
第四步:转换虚拟磁盘 (Step Four: Convert the Virtual Disk)
To convert a virtual machine from preallocated to a growable virtual disk split into 2 GB files, run the following command. It’s easiest to create the new, target .vmdk file in the same folder as the original virtual disk file.
要将虚拟机从预先分配的虚拟磁盘转换为可拆分为2 GB文件的可增长虚拟磁盘,请运行以下命令。 在与原始虚拟磁盘文件相同的文件夹中创建新的目标.vmdk文件是最容易的。
vmware-vdiskmanager.exe -r "c:\path\to\source.vmdk" -t 1 "c:\path\to\target.vmdk"
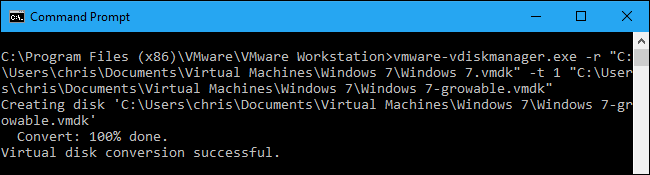
For example, if the path to your original .vmdk file is C:\Users\chris\Documents\Virtual Machines\Windows 7\Windows 7.vmdk , you could run the following command:
例如,如果原始.vmdk文件的路径为C:\Users\chris\Documents\Virtual Machines\Windows 7\Windows 7.vmdk ,则可以运行以下命令:
vmware-vdiskmanager.exe -r "C:\Users\chris\Documents\Virtual Machines\Windows 7\Windows 7.vmdk" -t 1 "C:\Users\chris\Documents\Virtual Machines\Windows 7\Windows 7-growable.vmdk"
To convert a virtual machine from growable to a preallocated disk split into 2 GB files, run the following command:
要将虚拟机从可增长磁盘转换为分割为2 GB文件的预分配磁盘,请运行以下命令:
vmware-vdiskmanager.exe -r "c:\path\to\source.vmdk" -t 3 "c:\path\to\target.vmdk"
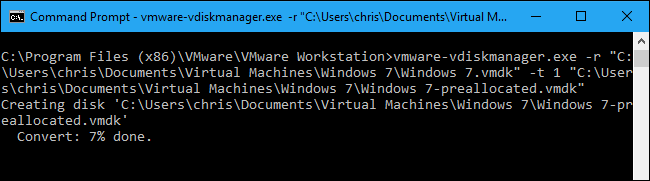
For example, if the path to your original .vmdk file is C:\Users\chris\Documents\Virtual Machines\Windows 7\Windows 7.vmdk , you could run the following command:
例如,如果原始.vmdk文件的路径为C:\Users\chris\Documents\Virtual Machines\Windows 7\Windows 7.vmdk ,则可以运行以下命令:
vmware-vdiskmanager.exe -r "C:\Users\chris\Documents\Virtual Machines\Windows 7\Windows 7.vmdk" -t 1 "C:\Users\chris\Documents\Virtual Machines\Windows 7\Windows 7-preallocated.vmdk"
第五步:删除(或移动)原始磁盘文件 (Step Five: Delete (or Move) the Original Disk Files)
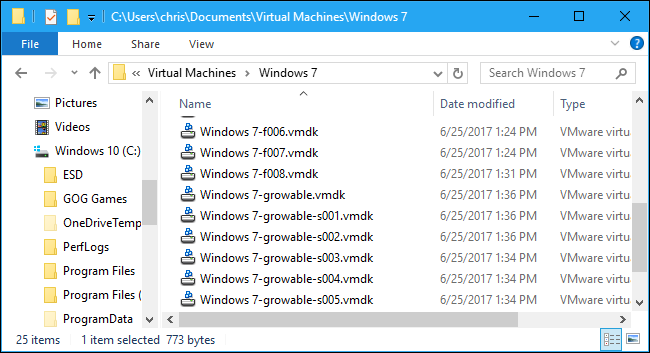
The above command just creates a new copy of the virtual disk at the target path. if you open your virtual machine’s folder, you’ll see that you have both the original disk and the new disk. In this example, we have both Windows 7[something].vmdk files and Windows 7-growable[something].vmdk files
上面的命令只是在目标路径上创建虚拟磁盘的新副本。 如果打开虚拟机的文件夹,则会看到既有原始磁盘又有新磁盘。 在此示例中,我们同时具有Windows 7[something].vmdk文件和Windows 7-growable[something].vmdk文件
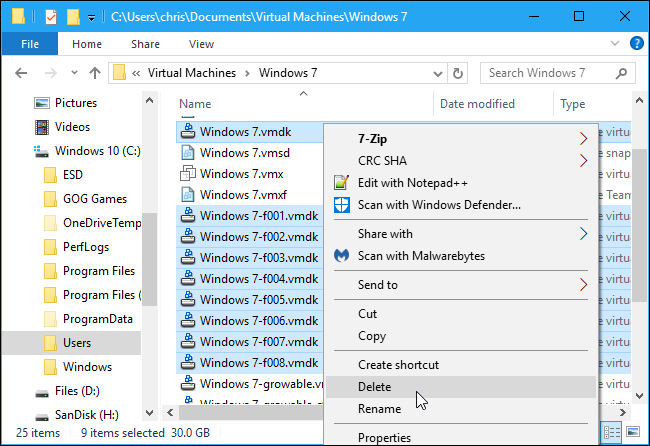
You can now get rid of the original disk by deleting its files. In this example, we’d delete all the Windows 7[something].vmdk files including the main Windows 7.vmdk file. However, you should only delete or move files that end in .vmdk. Leave the other files here alone.
现在,您可以通过删除原始文件来摆脱原始磁盘。 在此示例中,我们将删除所有Windows 7[something].vmdk文件,包括主Windows 7.vmdk文件。 但是,您只应删除或移动以.vmdk结尾的文件。 将其他文件放在此处。
Instead of deleting these files, you may want to copy them to another folder. This will give you a backup copy you can restore in case something went wrong.
与其删除这些文件,不如将它们复制到另一个文件夹。 这将为您提供备份副本,以防万一出现问题。
第六步:将新虚拟磁盘移动到原始磁盘的位置 (Step Six: Move the New Virtual Disk to the Original Disk’s Location)
Rename the new main .vmdk file to have the same name as the original virtual disk. In this example, we’d rename Windows 7-growable.vmdk to Windows 7.vmdk and leave the Windows 7-growable-s001.vmdk, Windows 7-growable-s002.vmdk, and other files alone.
重命名新的主.vmdk文件,使其具有与原始虚拟磁盘相同的名称。 在此示例中,我们将Windows 7-growable.vmdk重命名为Windows 7.vmdk ,仅保留Windows 7-growable-s001.vmdk,Windows 7-growable-s002.vmdk和其他文件。
You can now boot the virtual machine normally. It will be automatically use the new growable or preallocated disk, as it’s at the same location as the previous disk it was using. That new main .vmdk disk file points to the smaller .vmdk files even though they have a different name, so everything will “just work”.
现在,您可以正常启动虚拟机了。 它会自动使用新的可增长或预先分配的磁盘,因为它与使用的先前磁盘位于同一位置。 即使名称不同,该新的主.vmdk磁盘文件也会指向较小的.vmdk文件,因此所有操作都将“正常工作”。
翻译自: https://www.howtogeek.com/313125/how-to-convert-between-preallocated-and-growable-disks-in-vmware/


 2176
2176


 被折叠的 条评论
为什么被折叠?
被折叠的 条评论
为什么被折叠?
 到【灌水乐园】发言


