


raspberry pi
Google Cloud Print is a fantastic way to link your printers to the cloud and enjoy print-from-anywhere access, but there’s a catch. If you don’t have one of the recent Cloud-Print-Ready printers, you need to leave your computer on to enable remote access. Read on as we configure a tiny, energy-sipping Raspberry Pi for the task.
Google云打印是一种将打印机链接到云并享受从任何位置进行打印的绝佳方法,但是有一个陷阱。 如果您没有最新的支持Cloud-Print的打印机之一,则需要打开计算机以启用远程访问。 在我们为任务配置一个纤巧,耗能的Raspberry Pi时,请继续阅读。
我为什么要这样做? (Why Do I Want to Do This?)
The first situation is ideal, as the printer itself connects directly to the cloud and there is no need for an intermediary. Barring that, however, it should be your goal to make sure the intermediary is wasting as few resources as possible. Leaving a desktop computer on 24/7 for the sole purpose of functioning as a Cloud Print server is a whole lot of resources for a job that requires very little horsepower.
第一种情况是理想的,因为打印机本身直接连接到云,并且不需要中介。 但是,除非如此,否则确保中间人浪费尽可能少的资源是您的目标。 仅将一台台式计算机留在24/7上仅是为了充当Cloud Print服务器,这是一项工作的全部资源,需要很少的功能。
In order to cut back on the resources wasted, we’ve opted to turn a tiny, low-power Raspberry Pi device into an ultra lightweight Cloud Print Server. The best part about this setup is that the Raspberry Pi can continue to perform other roles. For example, our Raspberry Pi Cloud Print Server is also the same device functioning as our Raspberry Pi Weather Indicator. It takes so few resources to do both jobs (spool up the occasional print job and run a simple script to check the weather and toggle an LED) that there’s no reason to not stack the tasks and get more out of our Raspberry Pi purchase. Here are some of the projects that you could easily stack with a Raspberry Pi Cloud Print Server:
为了减少浪费的资源,我们选择将微型,低功耗的Raspberry Pi设备变成超轻量级的Cloud Print Server。 关于此设置的最佳部分是Raspberry Pi可以继续执行其他角色。 例如,我们的Raspberry Pi云打印服务器也是与Raspberry Pi天气指示器相同的设备。 只需花费很少的资源即可完成这两项工作(缓存偶尔的打印工作并运行一个简单的脚本以检查天气并切换LED),因此没有理由不堆叠任务并从我们的Raspberry Pi购买中获得更多收益。 以下是一些您可以与Raspberry Pi Cloud Print Server轻松堆叠的项目:
Build an LED Indicator with a Raspberry Pi (for Email, Weather, or Anything)
How to Turn a Raspberry Pi into a Low-Power Network Storage Device
How to Install NZBGet for Lightweight Usenet Downloading on Your Raspberry Pi
我需要什么? (What Do I Need?)
For this tutorial, we are going to assume that you already have the following:
对于本教程,我们将假定您已经具备以下条件:
- A Google Account Google帐号
In addition, you’ll likely find it helpful to check out our guide to Google Cloud Print to familiarize yourself with the ins and outs of the system.
此外,查看我们的Google Cloud Print指南可能有助于您熟悉系统的来龙去脉。
安装Chrome (Installing Chromium)
The secret sauce in our Raspberry Pi as Cloud Print Server model is the open source browser Chromium. One of the official ways to add Cloud Print capability to a PC is to use Google’s Chrome web browser as a print server. Unfortunately, even though there is an official Chrome release for quite a few distributions of Linux, it only supports x86/x64 architecture and not the ARM-based architecture that powers the Raspberry Pi and Rasbian. This is where Chromium comes in, as we can still access the relevant features in Chromium that we need to link our Raspberry Pi to Google’s Cloud Printer system.
Raspberry Pi作为Cloud Print Server模型的秘密之处在于开源浏览器Chromium。 向PC添加云打印功能的官方方法之一是使用Google的Chrome网络浏览器作为打印服务器。 不幸的是,即使有相当数量Linux发行版的Chrome正式发布,它也仅支持x86 / x64架构,而不支持为Raspberry Pi和Rasbian供电的基于ARM的架构。 这就是Chromium的用武之地,因为我们仍然可以访问Chromium中的相关功能,我们需要将Raspberry Pi链接到Google的Cloud Printer系统。
To get started, open up the terminal on your Raspberry Pi and enter the following command:
首先,请打开Raspberry Pi上的终端并输入以下命令:
s
udo apt-get install chromium-browser
udo apt-get install chromium-browser
When prompted, type Y and hit enter to continue the installation. The installation isn’t enormous, but it’s big enough; a ten minute trip to the break room to grab a cup of coffee is certainly a reasonable way to kill the installation time.
出现提示时,键入Y并按Enter键以继续安装。 安装量不大,但足够大。 十分钟的行程去休息室喝杯咖啡,肯定是减少安装时间的合理方法。
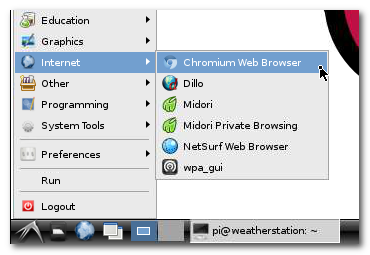
Once Chromium is installed, we need to launch it from the desktop environment. You can find it in Raspbian’s start menu under Internet -> Chromium Web Browser:
安装Chromium后,我们需要从桌面环境启动它。 您可以在Raspbian的开始菜单中的Internet-> Chromium Web Browser下找到它:
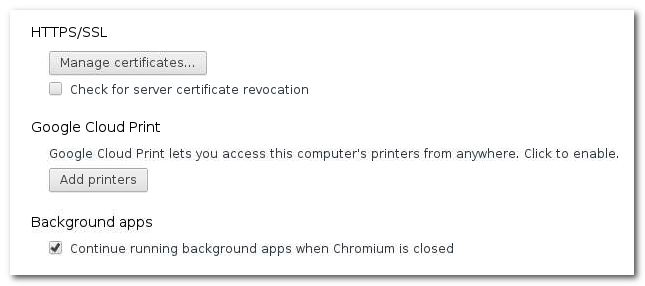
After launching Chromium, navigate to the menu icon in the upper right corner, click it, and then select “Settings”. Scroll down in the Settings window until you see “Advanced Settings” and, after clicking that, continue scrolling down through the expanded settings options until you see the entry for Google Cloud Print:
启动Chromium后,导航到右上角的菜单图标,单击它,然后选择“设置”。 在“设置”窗口中向下滚动,直到看到“高级设置”,然后单击它,继续向下滚动浏览扩展的设置选项,直到看到Google Cloud Print的条目:
Click “Add Printers”. You’ll be kicked over to an authorization page like so:
点击“添加打印机”。 您将被踢到授权页面,如下所示:
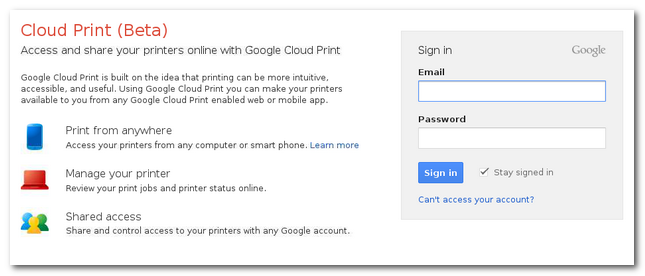
Fill in the Google account credentials of the account you use to manage your Cloud Printers. Make sure “Stay signed in” is checked, since this is going to be a stand alone print server we don’t regularly interact with.
填写用于管理云打印机的帐户的Google帐户凭据。 确保选中“保持登录状态”,因为这将是我们不经常与之交互的独立打印服务器。

After authorizing your account, you’ll see the “Add printer(s)” button. Whichever printers the Raspberry Pi has access to (be they local or networked) will be added to your Google Cloud Print account. If those printers were previously added by some other means, you’ll want to visit your Cloud Print management page to remove the older entries.
授权帐户后,您会看到“添加打印机”按钮。 Raspberry Pi可以访问的任何打印机(本地或联网)都将被添加到您的Google云打印帐户中。 如果以前通过其他方式添加了这些打印机,则需要访问“ 云打印”管理页面以删除较旧的条目。
After clicking the Add button, you’ll see a confirmation page indicating that the printers were added and you’re ready to start printing. Now is a perfect time to fire off a test print:
单击“添加”按钮后,您将看到一个确认页面,指示已添加打印机并准备开始打印。 现在是启动测试打印的绝佳时机:
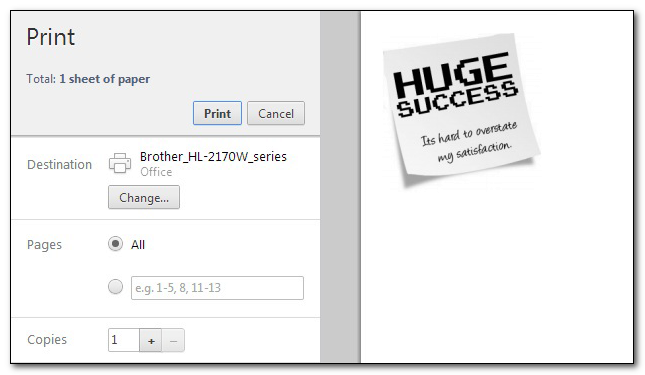
Roughly 10 seconds or so after we fired off the print job, it spooled up on the networked printer:
在我们取消打印作业后大约10秒钟左右,它在网络打印机上被卷起:

While we initially had concerns that the Cloud-to-Pi-to-Printer workflow would be slow (not that blistering speed is really that critical in most printing situations), those concerns have never been validated. Even with larger PDF files, the process is only marginally longer than your typically lengthy printing-a-big-PDF wait.
尽管我们最初担心云到Pi到打印机的工作流程会很慢(并不是说起泡速度在大多数打印情况下并不那么重要),但这些担忧从未得到验证。 即使使用较大的PDF文件,该过程也仅比通常漫长的“打印大PDF”等待时间更长。
After running your test print, you can close Chromium on the Pi as the print server will continue to run in the background. Now you can enjoy print-from-anywhere convenience for around a quarter a month (the Raspberry Pi consumes so little energy that the average annual operating cost is around $3).
运行测试打印后,您可以在Pi上关闭Chromium,因为打印服务器将继续在后台运行。 现在,您可以在大约一个月的时间里从任何地方享受“从任何位置打印”的便利(Raspberry Pi消耗的能量很少,平均每年的运营成本约为3美元)。
翻译自: https://www.howtogeek.com/169566/how-to-turn-a-raspberry-pi-into-a-google-cloud-print-server/
raspberry pi


 被折叠的 条评论
为什么被折叠?
被折叠的 条评论
为什么被折叠?
 到【灌水乐园】发言


