


 本文介绍了如何在macOS上创建一个仅共享用户帐户,以实现网络文件共享而不泄露主要用户名和密码。通过设置共享用户,启用文件共享并设定特定共享文件夹,可以在确保安全的同时方便地从其他Mac或Windows设备访问共享内容。

macos添加网络共享文件
Sharing files over the network is convenient, but not without risks. If you leave permissions open, anyone on the network can see all of your files, which isn’t ideal on large networks. But if you lock things down you’ll have to share your Mac’s user account with anyone who needs access to the files. That’s not ideal for all sorts of reasons.
通过网络共享文件很方便,但并非没有风险。 如果您打开权限,网络上的任何人都可以看到您的所有文件,这在大型网络上并不理想。 但是,如果您锁定所有内容,则必须与需要访问文件的任何人共享Mac的用户帐户。 由于种种原因,这并不理想。
This is why you should set up a Sharing Only user account in macOS. This is an account that exists entirely for accessing files on your Mac over the network. You cannot use this account to log into the Mac locally and run software, but you can use it to browse and grab shared folders. It’s the perfect way to share files securely over at network, without sharing your primary username and password.
这就是为什么您应该在macOS中设置“仅共享”用户帐户的原因。 这是一个完全用于通过网络访问Mac上的文件的帐户。 您不能使用此帐户在本地登录Mac并运行软件,但可以使用它浏览和获取共享文件夹。 这是在网络上安全共享文件的完美方法,而无需共享您的主要用户名和密码。
第一步:创建一个仅共享用户帐户 (Step One: Create a Sharing Only User Account)
To get started, we’re going to create a Sharing Only user account. We’ve shown you how to set up multiple user accounts, and that’s basically what we’re doing here. Keep in mind that only Administrator accounts can create new user accounts: if you’re not an administrator, you’ll need to get on an account that is.
首先,我们将创建一个“仅共享”用户帐户。 我们已经向您展示了如何设置多个用户帐户 ,这基本上就是我们在这里所做的。 请记住,只有管理员帐户才能创建新的用户帐户:如果您不是管理员,则需要使用一个新帐户。
First, open System Preferences, then head to “Users.”
首先,打开系统偏好设置,然后转到“用户”。

Click the lock at bottom-left to unlock the seeings.
单击左下角的锁以解锁观察物。

You’ll be asked for your password, or fingerprints if you have Touch ID. After that the “+” and “-” buttons above the lock will stop being greyed out; click “+” to create a new account.
系统会要求您输入密码或指纹(如果您具有Touch ID)。 之后,锁上方的“ +”和“-”按钮将停止显示为灰色; 点击“ +”创建一个新帐户。
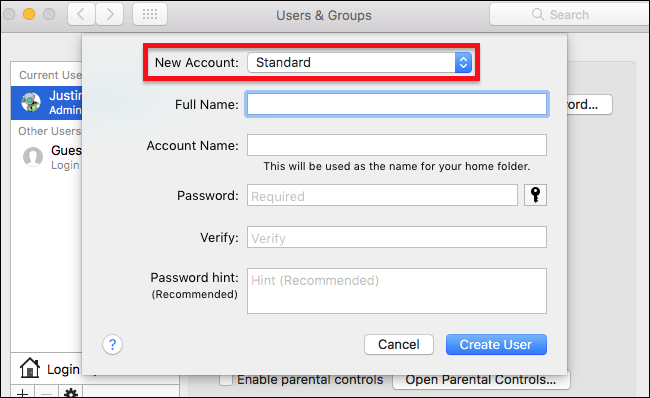
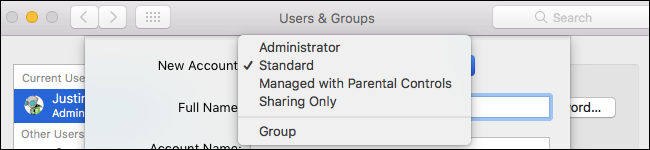
The top field is the most important one for our purposes: you need to create a “Sharing Only” account, so click that drop-down menu and click “Sharing Only.”
对于我们而言,最上面的字段是最重要的字段:您需要创建一个“仅共享”帐户,因此请单击该下拉菜单,然后单击“仅共享”。
Once you do that, pick a username and password, then click “Create User.”
完成后,选择用户名和密码,然后单击“创建用户”。
Unlike other accounts, Sharing Only accounts don’t really have any settings in the Users & Groups panel.
与其他帐户不同,“仅共享”帐户在“用户和组”面板中实际上没有任何设置。

So long as it says “Sharing Only,” you’ve properly set up an account.
只要显示“仅共享”,您就已经正确设置了一个帐户。
第二步:启用文件共享 (Step Two: Enable File Sharing)
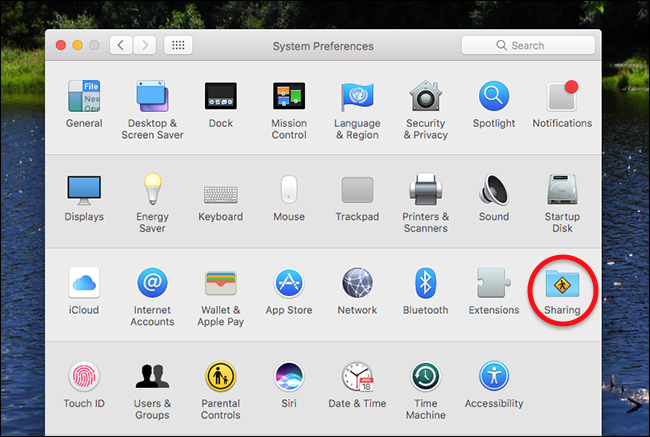
Next we’re going to enable file sharing over the network. Head back to the main page of System Preferences, then click “Sharing.”
接下来,我们将启用网络上的文件共享。 返回系统偏好设置的主页,然后单击“共享”。
In the left panel, ensure that “File Sharing” is enabled by checking it.
在左面板中,通过选中“文件共享”来确保已启用。
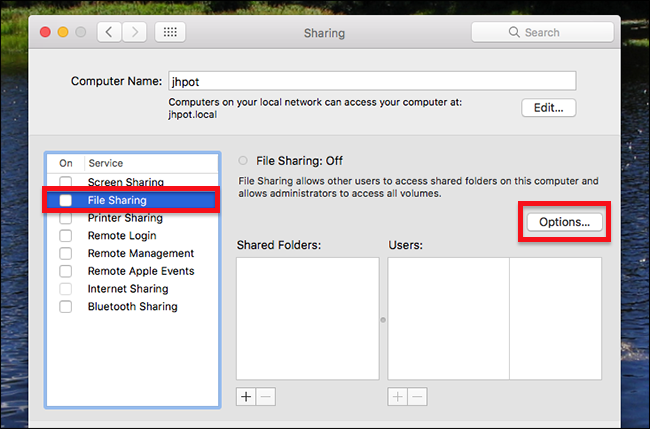
File sharing is now enabled! If you plan on sharing files with Windows computers, make sure you also click “Options” to bring up a few advanced settings.
文件共享现已启用! 如果计划与Windows计算机共享文件,请确保还单击“选项”以显示一些高级设置。
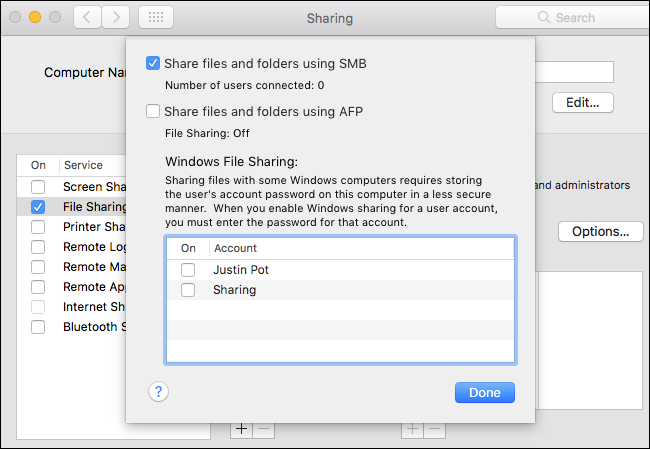
Recent versions of macOS default to SMB, which is the file sharing format used by Windows. In order to log in from Windows machines, however, you need to enable Windows Files Sharing for the sharing only account you made in step one. Click the checkbox beside its name and you’ll be asked for your password.
macOS的最新版本默认为SMB,这是Windows使用的文件共享格式。 但是,为了从Windows计算机登录,您需要为在第一步中创建的仅共享帐户启用Windows文件共享。 点击名称旁边的复选框,系统将要求您输入密码。
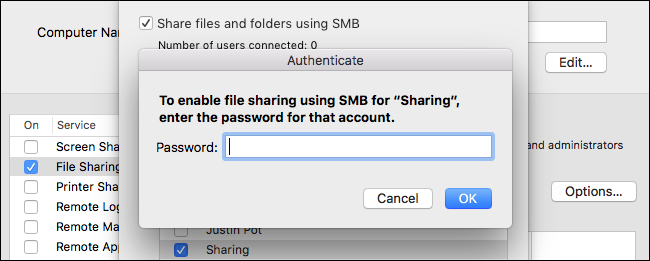
Not that this is not asking for your administrator password; instead, type the password you gave your sharing only account.
并不是说这不是在询问您的管理员密码; 而是输入您为共享帐户指定的密码。
第三步:设置用于共享的特定文件夹 (Step Three: Set Up Specific Folders For Sharing)
File sharing is turned on, now it’s time to share some files. Click the “+” button below the list of shared folders.
文件共享已打开,现在该共享一些文件了。 单击共享文件夹列表下方的“ +”按钮。
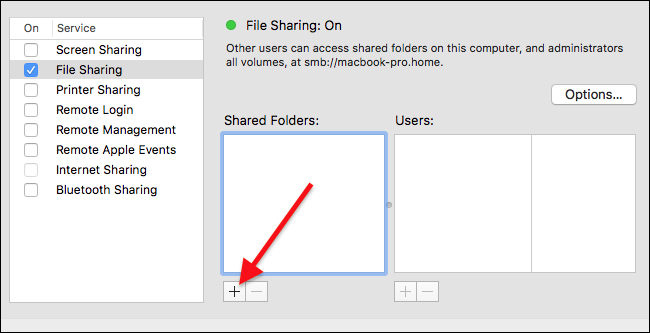
You will be asked which folder you want to share. Browse to your chosen directory, then click “Add”
系统将询问您要共享哪个文件夹。 浏览到您选择的目录,然后单击“添加”
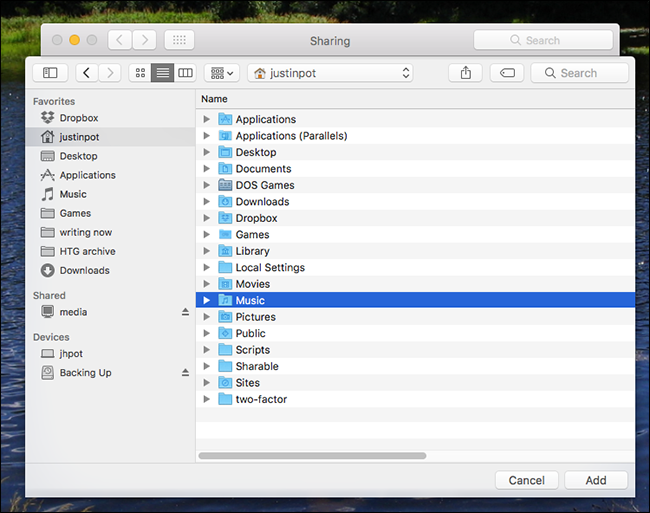
Your folder will now be in the “Shared Folders” panel.
您的文件夹现在将位于“共享文件夹”面板中。
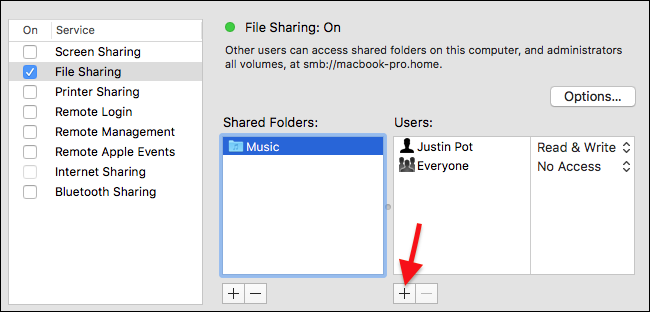
Click it, then click the “+” button below the “Users” panel.
单击它,然后单击“用户”面板下面的“ +”按钮。

Choose your sharing only account from the list, then click “Select.”
从列表中选择仅共享帐户,然后单击“选择”。
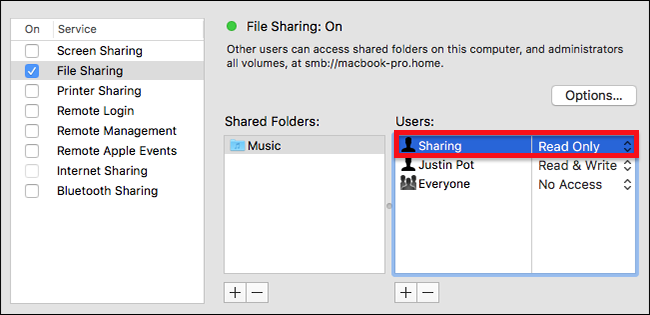
By default the account can read, by not modify, files. It’s probably best to leave it this way if you’re just sharing files, though you do have the option to change things up.
默认情况下,该帐户可以读取文件,而不能修改文件。 如果您只是共享文件,最好保留这种方式,尽管您确实可以选择进行更改。
Congratulations: you’ve now set up a sharing account, and shared a folder with it! Repeat Step Three for any other folders you’d like to share.
恭喜:您现在已经设置了一个共享帐户,并与它共享了一个文件夹! 对您要共享的任何其他文件夹重复步骤3。
从另一台Mac访问共享文件夹 (Access Your Shared Folder From Another Mac)
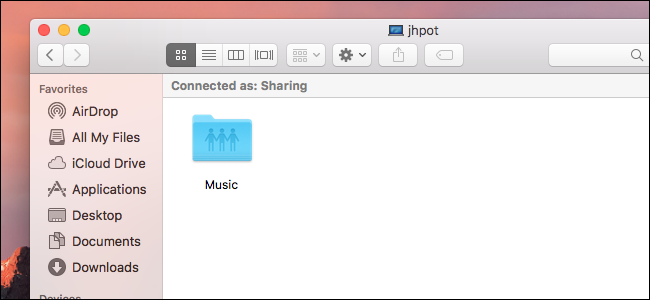
Accessing your shared folder from another Mac isn’t hard. Open the Finder, then head to “Network.” You should see your computer listed.
从另一台Mac访问共享文件夹并不难。 打开Finder,然后转到“网络”。 您应该看到列出了您的计算机。
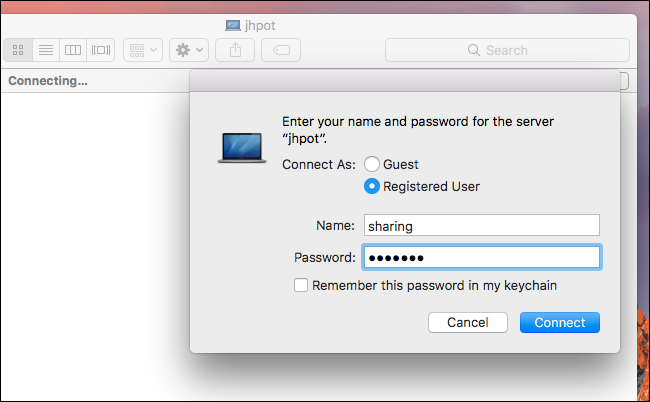
Click it, then log in with the Sharing Only account you made earlier.
单击它,然后使用之前创建的“仅共享”帐户登录。
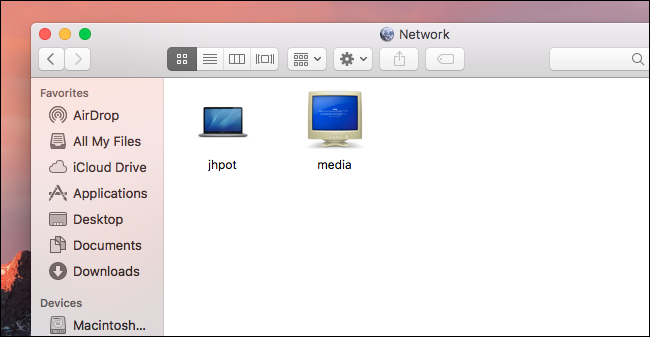
If everything worked, you should see your shared folders.
如果一切正常,您应该会看到共享文件夹。
You can now grab files from this Mac.
现在,您可以从此Mac上抓取文件。
从Windows访问您的共享文件夹 (Access Your Shared Folder From Windows)
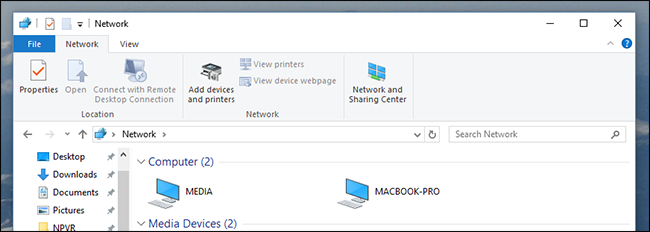
We’ve shown you how to share files from macOS to Windows, and the steps above should basically work. On a Windows computer, open Windows Explorer, then head to the Network section. You should see your Mac listed.
我们已经向您展示了如何从macOS到Windows共享文件 ,以上步骤基本上应该可以执行。 在Windows计算机上,打开Windows资源管理器,然后转到“网络”部分。 您应该看到列出了Mac。
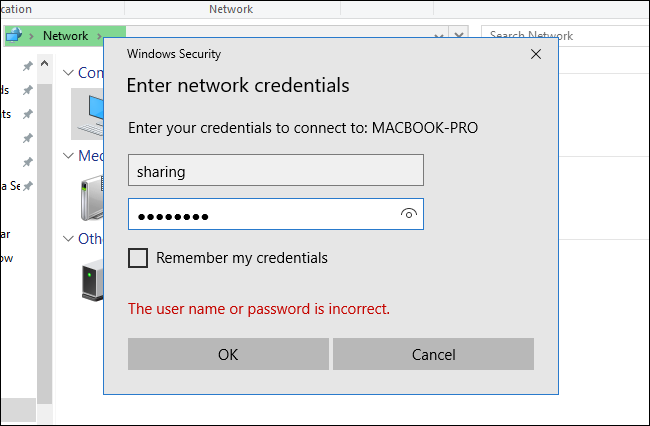
Double-click your Mac, then enter the Sharing Only password you created.
双击Mac,然后输入您创建的“仅共享”密码。
You should then see your shared folders listed.
然后,您应该会看到列出的共享文件夹。
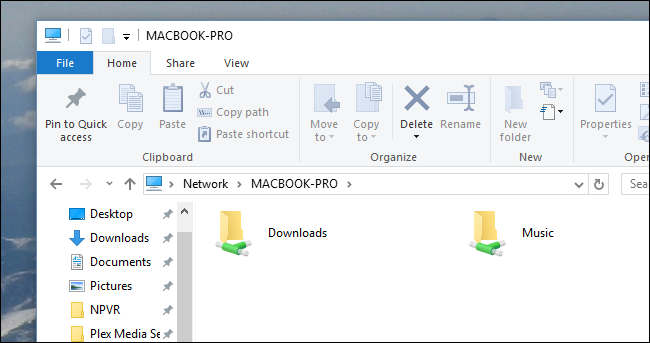
You’re in! Grab whatever files you need.
你在! 获取所需的任何文件。
macos添加网络共享文件


 1635
1635

 被折叠的 条评论
为什么被折叠?
被折叠的 条评论
为什么被折叠?
 到【灌水乐园】发言


