


apple pencil
As an avid iPad user, you might be taking screenshots and annotating them quite often using the Apple Pencil. A new shortcut introduced in iPadOS 13 makes this process even easier. Here’s how it works.
作为iPad的狂热用户,您可能会使用Apple Pencil拍摄屏幕截图并经常对其进行注释。 iPadOS 13中引入的新快捷方式使此过程更加容易。 运作方式如下。
As long as you have an iPad or an iPad Pro with a compatible Apple Pencil (first or second generation), you’ll be able to use a shortcut to take a screenshot directly using your Apple Pencil. And you won’t have to press the Power and Volume button combination.
只要您拥有配备兼容Apple Pencil (第一代或第二代)的iPad或iPad Pro ,您就可以使用快捷方式直接使用Apple Pencil截屏。 而且您不必按下电源和音量按钮组合 。
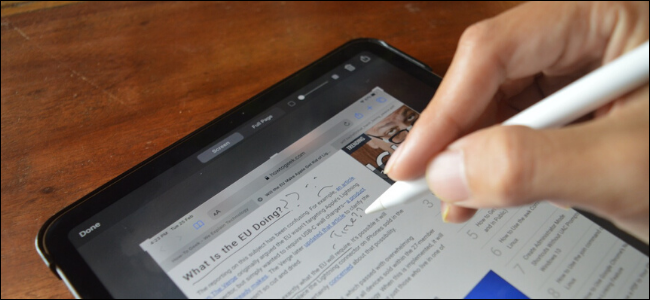
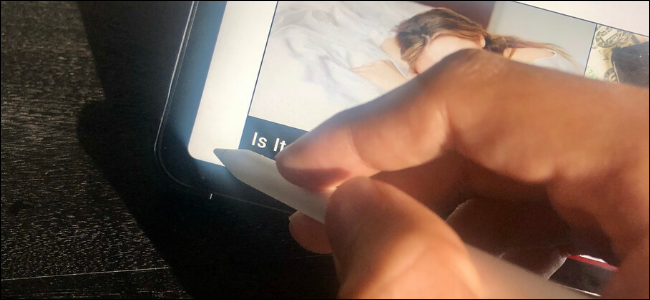
On your iPad, go to the page you want to take a screenshot of. From there, take your Apple Pencil and swipe in from the bottom-left corner of the screen. The feature works in both portrait and landscape mode.
在iPad上,转到您要为其截屏的页面。 从那里拿起Apple Pencil并从屏幕的左下角向内轻扫。 该功能在纵向和横向模式下均可使用。
Instantly, you’ll be in the screenshot annotation screen (the Mark Up feature you can usually access by tapping the screenshot preview).
即时,您将进入屏幕截图注释屏幕(通常可以通过点击屏幕截图预览来访问“标记”功能)。
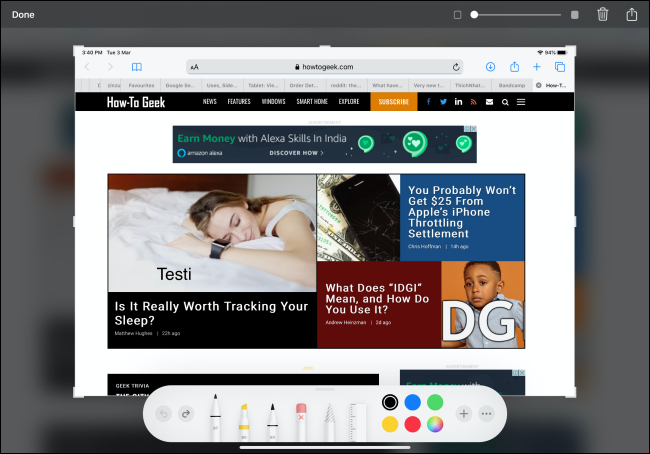
Here, you’ll find the familiar Pencil annotation section at the bottom of the window. You can tap on a Marker tool to draw on top of the screenshot.
在这里,您会在窗口底部找到熟悉的Pencil注释部分。 您可以点击标记工具以在屏幕截图上方绘制。

To crop the screenshot, swipe in from the edges of the screenshot. This works on all sides of the screenshot and the corners.
要裁剪屏幕截图,请从屏幕截图的边缘向内轻扫。 这适用于屏幕截图的各个角落和角落。
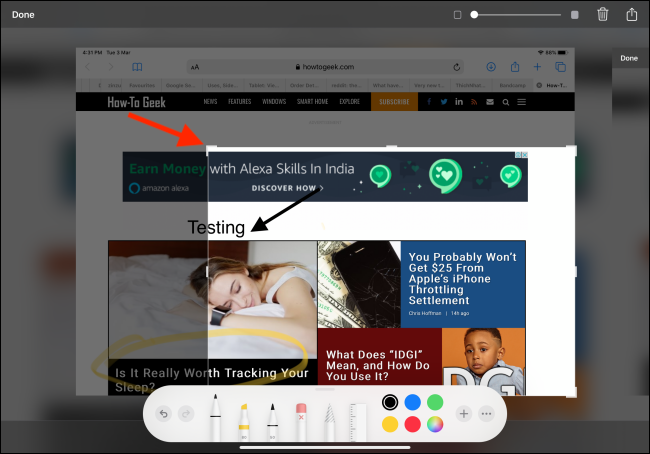
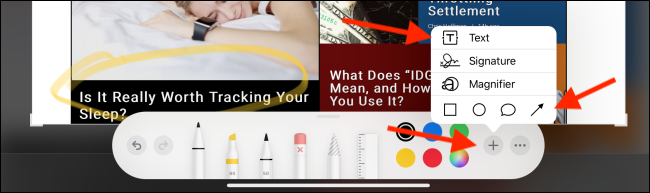
Tap the “+” icon to see more annotation options like Text, Signature, Magnifier, and tools like Rectangle, Circle, and Arrow.
点按“ +”图标以查看更多注释选项,例如“文本”,“签名”,“放大镜”以及工具,例如“矩形”,“圆形”和“箭头”。
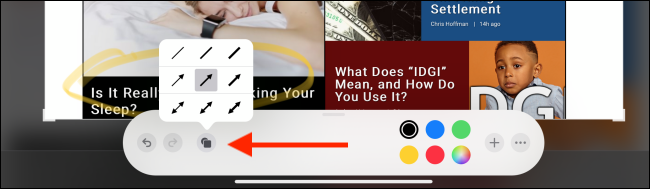
For example, tap the “Arrow” button to add it to the screenshot. Then you can move it to where you want it.
例如,点击“箭头”按钮将其添加到屏幕截图中。 然后,您可以将其移动到所需位置。

From the annotation area, tap the “Options” button to change to a different type of arrow.
在注释区域中,点击“选项”按钮以更改为其他类型的箭头。
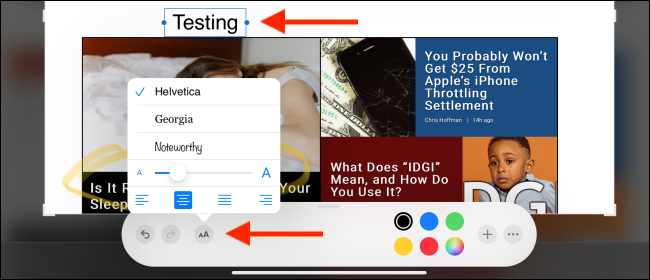
To add text, choose the Text option from the menu and then tap the text box to see text editing options. Here, you can change the font, font size, and more.
要添加文本,请从菜单中选择“文本”选项,然后点击文本框以查看文本编辑选项。 在这里,您可以更改字体,字体大小等。
There’s also an option to add a translucent layer between the screenshot and the annotations. Locate the Slider in the top-right corner and then move the slider to increase the intensity of the translucent layer.
还有一个选项可以在屏幕截图和注释之间添加半透明层。 在右上角找到滑块,然后移动滑块以增加半透明层的强度。
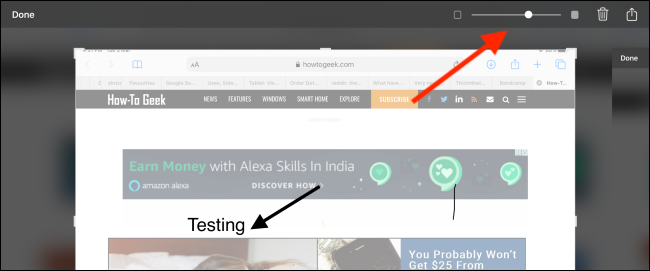
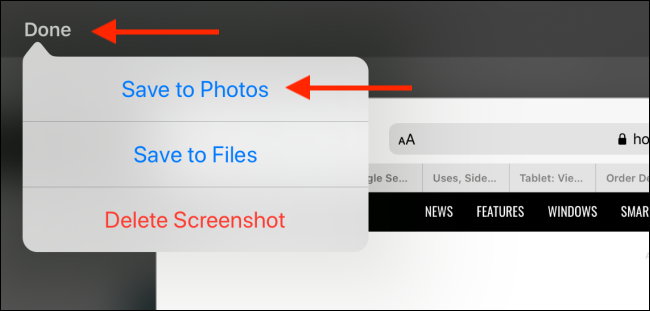
Once you’re done annotating the screenshot, you can tap the “Done” button in the top-left corner. Now, choose the “Save to Photos” option. You can also save the screenshot to the Files app if you want.
注释完屏幕截图后,可以点击左上角的“完成”按钮。 现在,选择“保存到照片”选项。 如果需要,还可以将屏幕截图保存到“文件”应用程序。
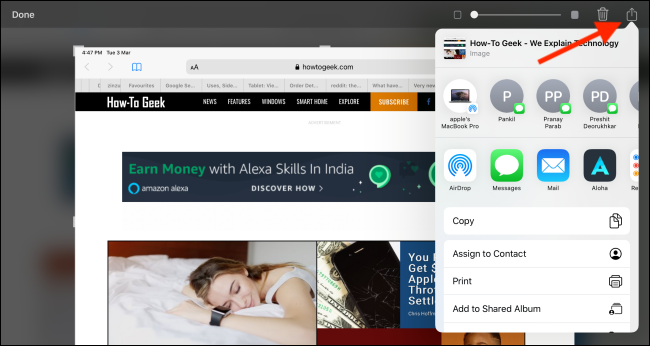
Alternatively, you can tap the “Share” button in the top-right corner to open the iPadOS Share sheet. From here, you can share the screenshot to any app or contact.
或者,您可以点击右上角的“共享”按钮以打开iPadOS共享页面 。 您可以在此处将屏幕截图分享给任何应用程序或联系人。
This is just one of the new interesting features in iPadOS. Take a look at our article on how iPadOS 13 will almost turn your iPad into a real computer.
这只是iPadOS中新的有趣功能之一。 看看我们有关iPadOS 13如何几乎将iPad变成真实计算机的文章。
翻译自: https://www.howtogeek.com/660285/how-to-take-and-annotate-screenshots-on-ipad-using-apple-pencil/
apple pencil


 被折叠的 条评论
为什么被折叠?
被折叠的 条评论
为什么被折叠?
 到【灌水乐园】发言


