
pc机箱 图纸
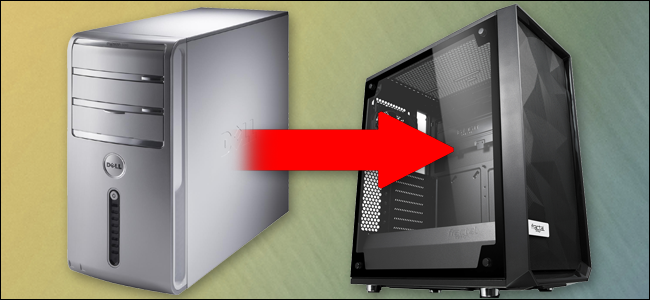
So you’ve found a sweet new case for your PC, brimming with LEDs and fan cutouts and acrylic windows all over. Now you’ve just got to get all the guts from your current PC inside of it. Here’s how.
因此,您为PC找到了一个不错的新机壳,到处都是LED和风扇切口以及丙烯酸玻璃窗。 现在,您只需从当前PC中获取所有胆量。 这是如何做。
Be warned, this is an involved process: you have to go through more or less all of the steps of building a new PC from the ground up, with the added inconvenience of having to disassemble another one first. It’s time-consuming and boring, but not particularly difficult. Also, we’re not covering liquid-cooled computers here. The setup on those is very specific to the components your computer uses, and also can be pretty finicky. If you have a liquid-cooled PC, you’ll need to find instructions specific to your setup or, better yet, get some help from someone who’s done it before.
请注意,这是一个复杂的过程:您必须从头开始或多或少地完成构建新PC的所有步骤,而且还带来了不便之处,即必须先拆卸另一台PC。 这既费时又无聊,但并不是特别困难。 另外,我们不在这里介绍液冷计算机。 这些设置非常特定于您的计算机使用的组件,并且可能非常复杂。 如果您使用的是液冷式PC,则需要查找特定于您的设置的说明,或者更好的是,从曾经做过此事的人那里获得一些帮助。
And as always, if you’ve never done this before, we recommend taking pictures of how things are set up as you disassemble your PC—where cables are plugged in, where components go, and so on.
而且与往常一样,如果您以前从未这样做过,我们建议您对拆卸PC时的设置方式进行拍照-插入电缆,放置组件的位置,等等。
你需要什么 (What You’ll Need)
All you really need to work on a modern PC is a Philips-head screwdriver. I recommend using two, a big one for leverage and a small one for the hard-to-reach crannies in your case. If you’re working in a particularly static-prone environment, you might also want an anti-static bracelet. Finally, a few cups or bowls can be really helpful to keep your various screws from rolling away.
在现代PC上,您真正需要的只是飞利浦螺丝刀。 我建议您使用两种,其中一种用于杠杆作用,另一种用于难以达到的缝隙。 如果您在特别容易产生静电的环境中工作,则可能还需要防静电手镯 。 最后,几个杯子或碗对防止各种螺钉滚落非常有用。
I’ll be using my personal desktop for this demonstration. It’s built into a Fractal Design R4 case, a fairly typical ATX Mid Tower size. If you’re using a gaming PC, it will probably look pretty similar, unless you’re specifically building something much smaller (like a Mini-ITX build) or more elaborate. Even so, the rough steps will be broadly the same even if your build is very different.
我将使用我的个人桌面进行此演示。 它内置于Fractal Design R4机壳(相当典型的ATX中塔尺寸)中。 如果您使用的是游戏PC,除非您专门构建更小(例如Mini-ITX构建)或更复杂的东西,否则它看起来可能非常相似。 即使这样,即使您的构建非常不同,粗糙的步骤也将大致相同。
配置 (Setting Up)
First, and obviously, remove all the various power and data cables from your PC, and then set it on a table or desk in a bright space. Use some place without carpet if you can, to avoid static electricity.
首先,显然,先从PC上拔下所有各种电源线和数据线,然后将其放在明亮的空间中的桌子或桌上。 如果可以的话,请在没有地毯的地方使用,以避免静电。
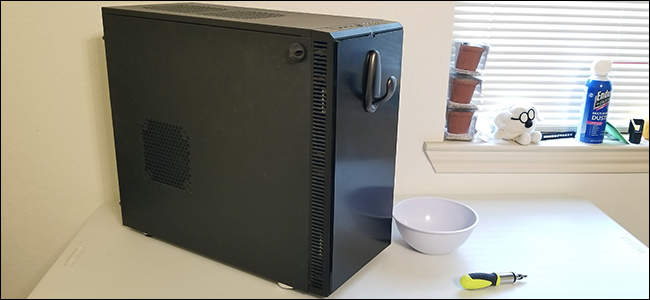
The first thing you’ll need to do to begin tearing apart your machine is to maximize your access to all the components. On an ATX tower, this means removing the access panels from both sides of the case (some cases might have a single cover that pulls off as one unit rather than separate access panels). They’re held in place with screws (sometimes, thumbscrews) on the rear panel. There are generally two or three on each side. Take these out and set them aside.
开始拆解计算机所需要做的第一件事就是最大限度地利用所有组件。 在ATX塔架上,这意味着从机箱的两侧卸下检修面板(某些情况下,可能只有一个可作为一个整体拉下的盖,而不是分开的检修面板)。 它们通过后面板上的螺钉(有时是指旋螺钉)固定在适当的位置。 通常每侧有两个或三个。 把它们拿出来放在一边。

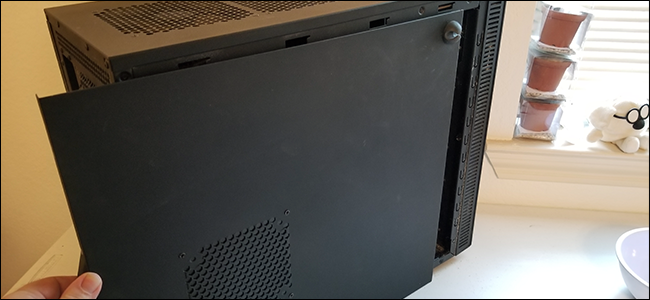
Then simply slide the access panels towards the back of the machine and pull them off. Set them aside.
然后只需将检修面板向机器背面滑动并将其拉出即可。 放在一边。
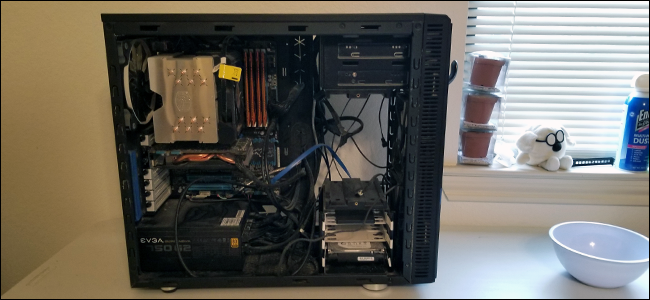
With these major access barriers removed, you’ll have easy entry to every component.
消除了这些主要的访问障碍,您将可以轻松进入每个组件。
If your case has any more externally-removable parts, like dust filters, go ahead and pull these out as well.
如果您的箱子还有其他可从外部拆卸的部件,例如灰尘过滤器,请继续将其拉出。
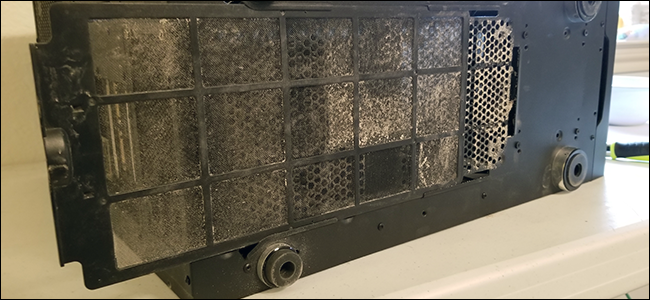
Before you begin to actually remove components, it’s best to decide on a general order. This depends on your exact setup and your proclivities, but I prefer to remove the power supply first, since it’s connected to almost everything else. Getting it (and particularly it’s many cables) out of the way will make the rest of the job go easier. In some cases, you might not be able to pull the power supply out without first removing other components—like a CPU cooler. That’s fine. Do things in whatever order feels best to you.
在开始实际删除组件之前,最好确定一个一般的顺序。 这取决于您的确切设置和偏好,但是我更喜欢先移除电源,因为它几乎连接了所有其他电源。 摆脱它(尤其是许多电缆)将使其余工作变得更加容易。 在某些情况下,如果不先卸下其他组件(例如CPU散热器),就可能无法拔出电源。 没关系。 以最适合您的顺序进行操作。
卸下电源 (Removing the Power Supply)
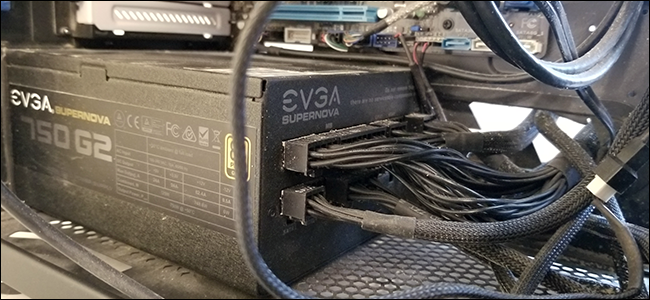
To begin removing the PSU, you’ll need to unplug it from all the components that are using it. On my machine, this includes all of the following:
要开始卸下PSU,您需要将其从使用它的所有组件中拔出。 在我的机器上,这包括以下所有内容:
- Motherboard (24-pin primary rail) 主板(24针主导轨)
- Motherboard (8-pin processor rail—yours may be bigger or smaller) 主板(8针处理器导轨—您可能会更大或更小)
- Graphics card (8-pin—yours may be bigger or smaller) 图形卡(8针,您可能会更大或更小)
- Hard drive and SSD (SATA power cables) 硬盘和SSD(SATA电源线)
- DVD drive (SATA power cable) DVD驱动器(SATA电源线)
- Case fans (various) 机箱风扇(各种)
It’s probably easiest to keep your case vertical for this and most of the rest of the steps (except the motherboard).
对于此步骤以及其余大多数步骤(主板除外),保持机箱垂直可能是最容易的。

If you have a modular power supply, which allows you to remove cables from both the components and the power supply itself, this is even easier. You can tug on either end of the cable to free it. (Note: most pre-built desktops do not use a modular power supply.)
如果您使用模块化电源,则可以从组件和电源本身上拔下电缆,这甚至更加容易。 您可以拖拽电缆的任意一端以释放它。 (注意:大多数预建台式机不使用模块化电源。)
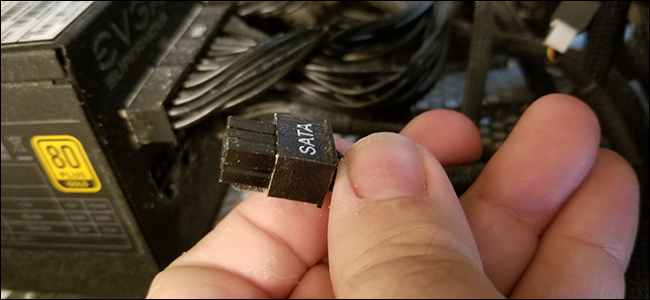
Now your power supply should be mostly clear. If it’s not modular, position all the cables as out of the way as you can in preparation for removing the unit itself.
现在,您的电源应该基本清晰了。 如果不是模块化的,则将所有电缆尽可能地移开,以准备卸下设备本身。
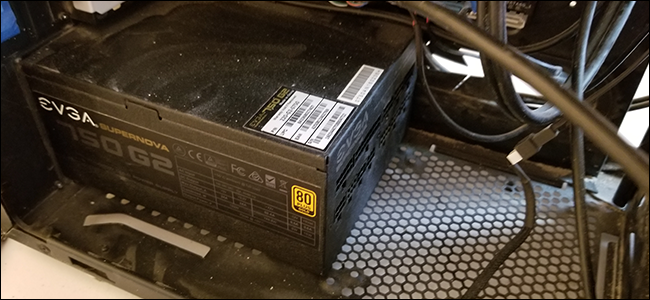
Now move to the back of the case. There are a few screws affixing the power supply to the back of the frame. (On some case designs, these retention screws might be on the top or bottom.) Remove them and set them aside.
现在移至案尾。 有一些螺钉将电源固定在框架的背面。 (在某些情况下,这些固定螺钉可能在顶部或底部。)将它们卸下并放在一旁。
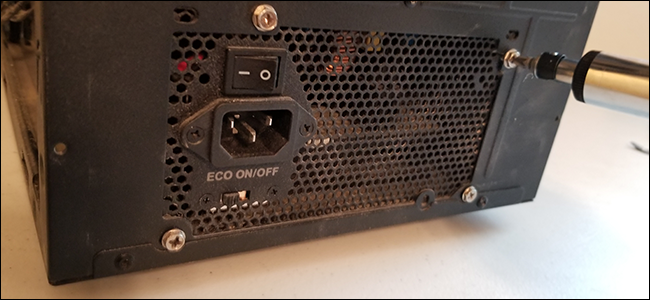
With the retention screws released, the power supply is loose, and you can pull it out of the case.
松开固定螺钉后,电源松动,可以将其从机箱中拉出。

Set it aside and move on to the next components.
将其放在一边,然后继续下一个组件。
卸下硬盘驱动器和光盘驱动器 (Removing Hard Drives and Disc Drives)
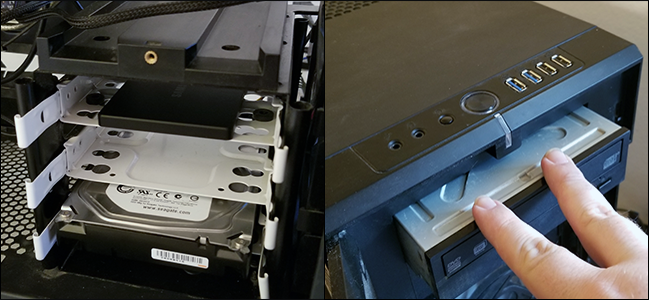
Older case designs retain their hard drives, SSDs, and disc drives with only screws in the frame. Newer and more advanced ones use “sleds” or “caddies,” screwing the drives into these easy in-out gadgets and then sliding them into place for easy swaps. The hard drive and SSD in my PC use this method, while the DVD drive is screwed down tight. We’ll start with the former.
旧机箱设计只用框架中的螺钉即可保留其硬盘驱动器,SSD和磁盘驱动器。 较新的和更高级的驱动器使用“滑橇”或“球童”,将驱动器拧入这些简单的进出小工具,然后将它们滑入到位以方便更换。 我的PC中的硬盘驱动器和SSD使用此方法,而DVD驱动器拧紧了。 我们将从前者开始。
First, unplug the SATA data cables from your hard drive and from the motherboard on the other end.
首先,从硬盘驱动器和另一端的主板上拔下SATA数据电缆。
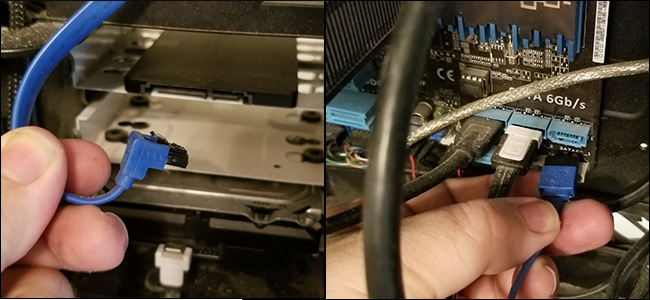
With both the power and data cables removed from my drives, I can pull the caddies out of the case’s frame.
从驱动器上拔下电源线和数据线后,我就可以将球童从机箱的框架中拉出。

Now for the DVD drive. Start by removing the SATA data cable. Since the drive itself is screwed into the frame, I’ll have to remove the screws from both sides before it comes out.
现在用于DVD驱动器。 首先卸下SATA数据电缆。 由于驱动器本身已拧入框架中,因此,在卸下驱动器之前,我必须从两侧卸下螺钉。
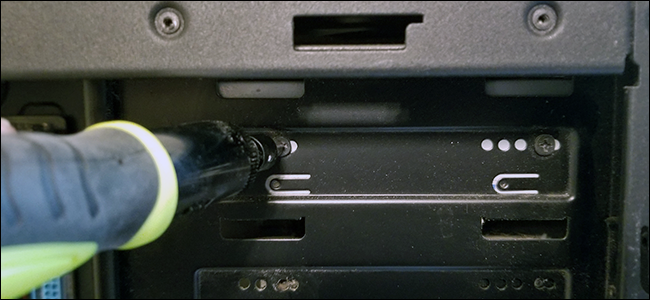
With the power cable, data cable, and retention screws removed, I can pull the drive out of the front of the case. You might want to nudge it a bit from the back, but pull it out from the front, since you’ll have limited space in the opposite direction.
卸下电源线,数据线和固定螺钉后,我可以将驱动器从机箱正面拉出。 您可能需要从后面稍微推动一下,但要从前面将其拉出,因为相反方向的空间有限。
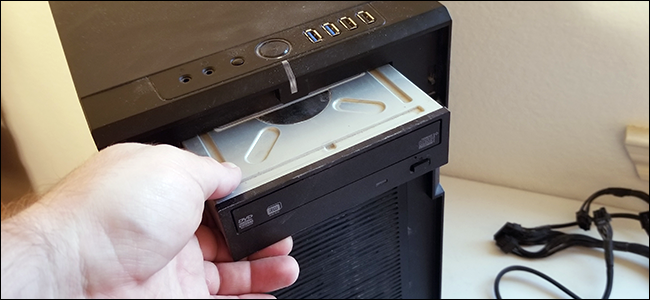
Set your drives aside. If they’re screwed into sliders or caddies, unscrew them to prepare them for re-installation later.
将驱动器放在一旁。 如果将它们拧入滑杆或球童中,请旋开它们以备后用。

Move on to the next component.
移至下一个组件。
卸下图形卡 (Removing the Graphics Card)
Obviously, this part of the guide doesn’t really apply if you don’t have a discrete graphics card in your computer. I do, so let’s get it off of the motherboard to make the final steps of disassembly easier.
显然,如果您的计算机中没有独立的图形卡,则本指南的这一部分实际上并不适用。 我愿意,所以让我们从主板上卸下它,使拆卸的最后步骤更加容易。
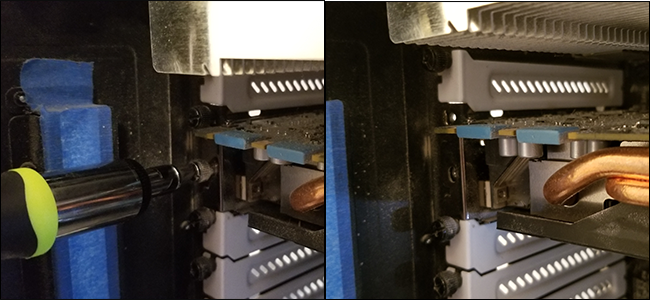
First, remove the power cable that went to the power supply if you haven’t already done so. Then take out the screw retaining the GPU to the back of the case, where the adapter plugs stick out. It’s probably a thumbscrew. If your card is a double-width, you’ll need to remove both screws.
首先,请卸下尚未连接到电源的电源电缆。 然后,拧下将GPU固定在机箱背面的螺钉,其中适配器插头会伸出。 可能是指旋螺丝。 如果您的卡是双倍宽度,则需要卸下两个螺钉。
Now, press the plastic tab at the end of the PCI Express card slot that the graphics card is plugged into. It should “snap” down into place on the motherboard, releasing the graphics card.
现在,按下图形卡所插入的PCI Express卡插槽末端的塑料卡舌。 它应该“卡”到主板上的适当位置,释放显卡。
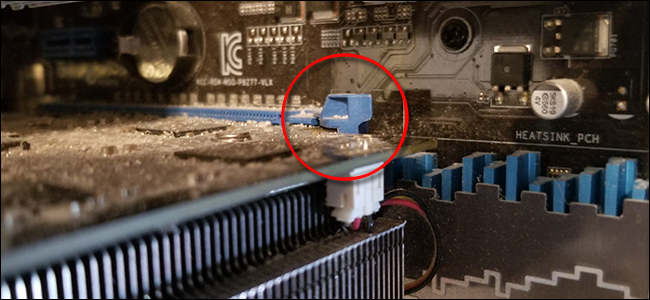
With the retention screws removed and the plastic tab pressed down, grip the card firmly and pull. It should come free of the motherboard.
拧下固定螺钉并向下压塑料卡舌,然后紧紧握住卡并拉出。 它应该没有主板。

Set the graphics card aside and move to the next part. If you have any other hardware that’s occupying your PCI-Express slots, like a Wi-Fi or sound card, take them out in the same way.
将图形卡放在一边,然后移至下一部分。 如果您有其他占用PCI-Express插槽的硬件(例如Wi-Fi或声卡),请以相同的方式取出它们。
卸下机箱风扇 (Remove The Case Fans)
The fans attached to your case are there to suck in cool air and blow out hot air. You’ll want to get them out before the motherboard and remaining components. Luckily this is one of the easier processes. And honestly, you might not need to remove the fans themselves from the case if your new case already has fans attached.
连接到您的机箱的风扇在那里吸入冷空气并吹出热空气。 您需要在主板和其余组件之前将它们取出。 幸运的是,这是较容易的过程之一。 老实说,如果您的新机箱已经装有风扇,则可能无需从机箱中取出风扇本身。
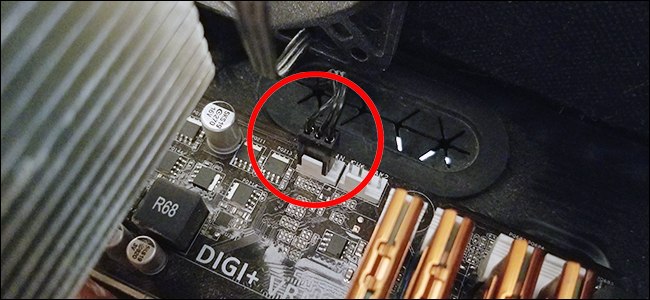
First, if any of your case fans were plugged into ports on the motherboard (instead of the power supply), unplug them now. Those 3- or 4-pin connections look like this:
首先,如果将任何机箱风扇插入主板上的端口(而不是电源),请立即将其拔出。 这些3针或4针连接如下所示:
Now, switch to the outside of the case and simply remove the screws holding the fans in place. Make sure to hang on to the fan from the other side as you remove the last screw, to keep it from falling in.
现在,切换到外壳的外部,只需卸下将风扇固定到位的螺钉即可。 确保在卸下最后一个螺钉时从另一侧挂在风扇上,以防止其掉入。
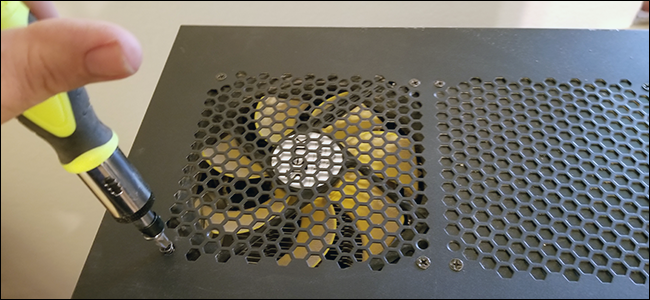
Repeat this step for all your case fans. If your case has removable brackets for fans, just take them out in the same way.
对所有案例迷重复此步骤。 如果您的机箱有可拆卸的风扇支架,则以相同的方式将其取出。
卸下主板 (Removing the Motherboard)
We’re going to keep the RAM, CPU, and CPU cooler attached to the motherboard, because they’re generally light enough to come with it (and an extra step you don’t need for most cases). If you have a more elaborate CPU cooler or a water-based cooler, you may need to take it out to access some of the screws holding the motherboard in place.
我们将使RAM,CPU和CPU散热器与主板保持连接,因为它们通常足够轻便(与大多数情况相比,这是不需要的)。 如果您使用更精致的CPU散热器或水基散热器,则可能需要将其取出来卸下将主板固定到位的一些螺钉。
First, set your case on its side, with the motherboard facing up. Then remove any other cables plugged into your motherboard. At this point, these should mostly be control, audio, and USB cables running directly from your case.
首先,将机箱侧放,主板朝上。 然后卸下插入主板的其他所有电缆。 在这一点上,这些应该主要是直接从您的机箱中引出的控制电缆,音频电缆和USB电缆。
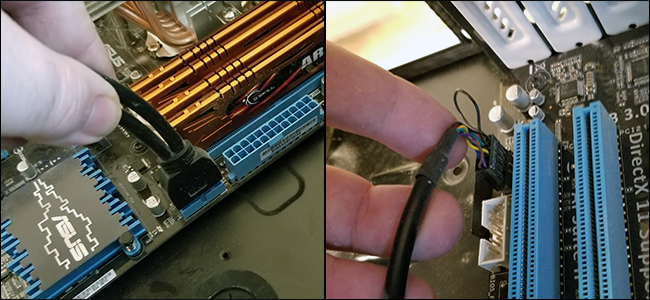
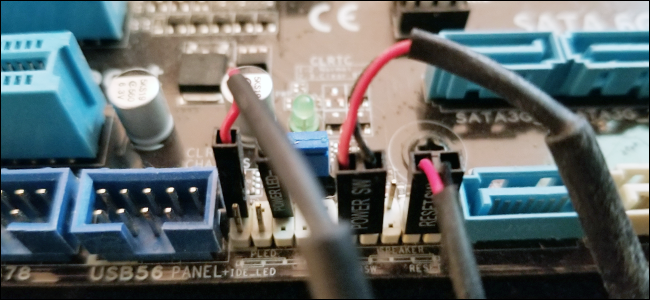
Keep an eye on the I/O pins at the bottom-right corner of the motherboard. These are very tricky, and have to be connected in a particular order for your case’s power button, reset button, hard drive indicator, and power indicator to work. Unless you really like staring at tiny type or tracking down your motherboard’s user manual, it’s a good idea to take a photo of where everything is before taking it out, so it’ll be that much easier when you move everything to the new case.
留意主板右下角的I / O引脚。 这些操作非常棘手,必须按特定顺序连接,才能使机箱的电源按钮,重置按钮,硬盘驱动器指示灯和电源指示灯正常工作。 除非您真的很喜欢盯着小巧的型号或者不了解主板的用户手册,否则在取出之前,最好先对所有部件的位置拍照,这样一来,将所有部件移到新机壳上时,操作会容易得多。
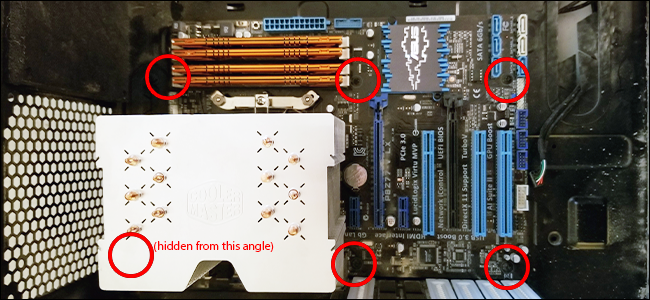
Now, remove the screws that are attaching the motherboard to the case’s risers. These can be hard to spot, especially if you have dark screws on a dark PCB, like mine. Generally there are four positioned near the corners, with two to four more somewhere in the middle for stability.
现在,卸下将主板固定在机箱提升板上的螺钉。 这些可能很难发现,特别是如果您在深色印刷电路板上有深色螺钉(例如,我的)。 通常,在拐角附近有四个,为了稳定起见,在中间的某个地方还有两个到四个。
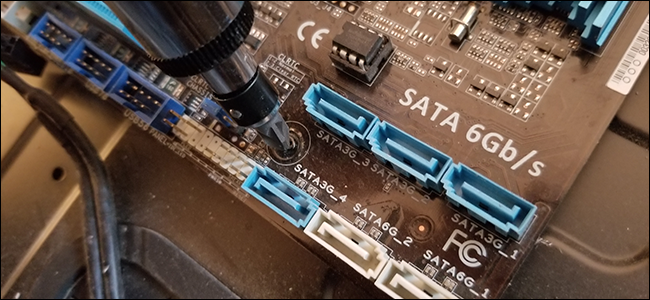
With all the motherboard screws removed, grasp the motherboard carefully and pull it forward slightly, to get it clear of the I/O plate (the little steel rectangle with cutouts for the ports on the back of the case). Then lift it clear of the case and set it aside. If the motherboard does not lift away easily, it likely means you missed a screw. Go back and check again.
卸下所有母板螺钉后,小心地握住母板,并将其稍微向前拉,以使其脱离I / O板(机箱背面端口上带有切口的小矩形矩形)。 然后将其从机箱中取出并放在一旁。 如果主板不能轻易抬起,则可能意味着您错过了一颗螺丝。 返回并再次检查。
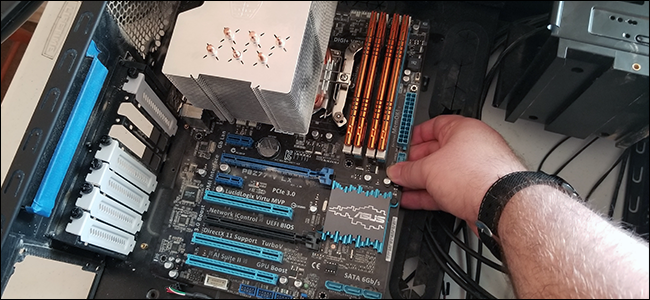
Then the final step is to push the I/O plate itself into the case slightly and pull it out.
然后,最后一步是将I / O板本身轻轻推入机箱并将其拉出。

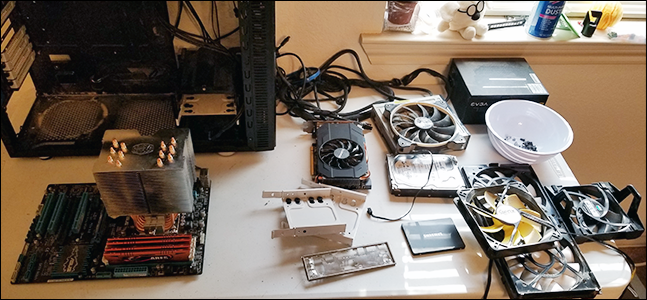
Now you should have all your components free of the old case, and ready to install into the new one. For this article, we’ll just be re-using the original case, since I don’t have a spare handy. And besides, once I blow five years’ worth of dust out of it and clean all the components, it’ll be practically new anyway.
现在,您应该使所有组件都脱离旧外壳,并准备安装到新外壳中。 对于本文,我们将仅重用原始案例,因为我没有多余的方便。 而且,一旦我用它吹走了五年的灰尘并清洁了所有组件,无论如何它实际上将是新的。
在新包装中安装组件 (Installing Components in Your New Case)
For the new case, we’re essentially going to go in reverse. You’ll be working with all the same components, just putting them in instead of taking them out. Remove both the access panels of the new case, and get started.
对于新情况,我们实质上将相反。 您将使用所有相同的组件,只是将它们放入而不是取出它们。 卸下新机箱的两个检修面板,然后开始使用。
安装主板 (Installing the Motherboard)
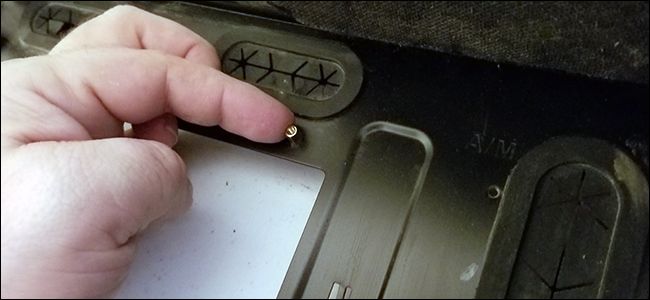
If they’re not already installed, screw down the motherboard risers that came with your new case. These allow you to screw down the motherboard and keep its electrical contacts from shorting out on the metal of the case itself. Note that some cases may have different positions available for these risers, but they should still match up to available holes in the motherboard.
如果尚未安装,请拧紧新机箱随附的主板提升板。 这些使您可以拧紧主板,并防止其电触点短路到机箱本身的金属上。 请注意,某些情况下这些提升板可能具有不同的位置,但它们仍应与主板上的可用Kong匹配。
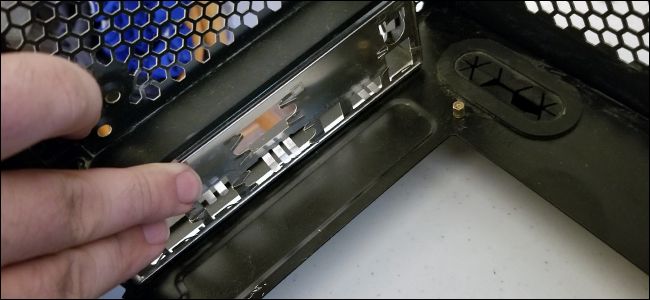
Now install the I/O plate. This is the same one that you took from your previous case. Just check that it’s aligned properly with you motherboard’s rear-facing ports, and push it into place from inside the case towards the outside, on the back. It’s possible the new case already has one in place. If so, you may need to remove it to insert the one that matches the ports on your motherboard.
现在安装I / O板。 这与您先前案例中的案例相同。 只需检查它是否与主板的背面端口正确对齐,然后将其从机箱内部推向外部,背面就位。 新案件可能已经到位。 如果是这样,您可能需要将其删除以插入与主板上端口匹配的端口。
Move the motherboard onto the risers, aligned with the screw holes. It may take a little gentle wiggling get the ports on the back of the board pushed into their respective holes in the I/O plate—just go gently and make sure you have clean access to all the ports on the rear of the computer.
将主板移到提升板上,并与螺丝Kong对齐。 可能需要轻轻晃动一下,才能将板背面的端口推入I / O板上各自的Kong中-轻轻地走,确保可以完全接触到计算机背面的所有端口。

Now screw down the motherboard screws in the same spots you placed the risers. Make sure they’re firmly in place, but don’t screw down too far once you feel resistance—you might crack the circuit board.
现在,在放置提升板的相同位置拧紧主板螺钉。 确保它们牢固就位,但是一旦感觉到阻力就不要拧得太紧,否则可能会使电路板破裂。
安装外壳连接 (Installing Case Connections)
Now re-connect all the case connections to your motherboard. On a modern case, these are cables for the power switch, reset switch, power lights, and hard drive indicator light. Consult your motherboard manual, or the photo you took previously to get these connections right.
现在,将所有机箱连接重新连接到主板。 在现代情况下,这些是用于电源开关,重置开关,电源指示灯和硬盘驱动器指示灯的电缆。 请查阅您的主板手册或您之前拍摄的照片以使这些连接正确。

Your case also probably has an HD Audio cable and a USB 3.0 cable, and may have other USB cables as well going to the motherboard. These are usually marked clearly on the motherboard’s PCB.
您的保护套可能还具有HD音频电缆和USB 3.0电缆,并且可能还有其他USB电缆也要连接到主板。 这些通常在主板的PCB上清晰地标出。

As you’re routing the cables around, here and all throughout the reassembly, try to leave as few loose as you can. The rear of the case is a good place to “hide” excess cable length, as long as it’s not too thick to allow the rear access panel back on.
在进行电缆布线时,在这里以及整个重组过程中,请尽量少松动。 机箱的后部是“隐藏”多余的电缆长度的好地方,只要它的厚度不太小以至于无法打开后部检修面板即可。
安装机箱风扇 (Installing the Case Fans)
Your new case may have come with some fans pre-installed. If it did, plug them into the three- or four-pin plugs on the motherboard (marked “fan” or something similar). If not, install the ones you removed from your previous case. Simply screw them down from the outside.
您的新机箱可能已经预装了一些风扇。 如果是这样,请将其插入主板上的三针或四针插头(标为“风扇”或类似名称)。 如果不是,请安装从以前的机箱中卸下的机箱。 只需将它们从外面拧下来即可。
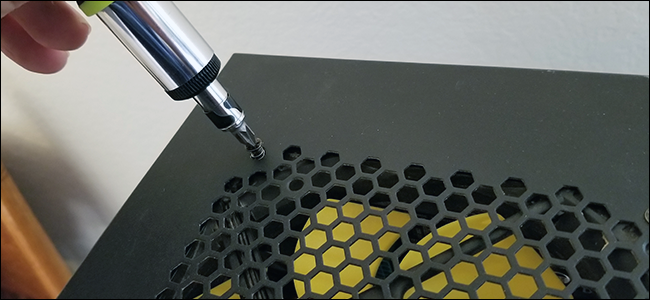
The side of the fan with the plastic blocking the blades is the output—air flows in the direction of the plastic. Intake fans (with the plastic facing in) go on the front, output generally go on the rear, top, or bottom. Check out this guide if you’re confused about proper airflow management inside your case.
出风口的一侧是塑料,塑料挡住了叶片,空气沿塑料方向流动。 进气风扇(塑料面向内)位于前部,输出通常位于后部,顶部或底部。 如果您对机箱内部的正确气流管理感到困惑, 请查阅本指南 。
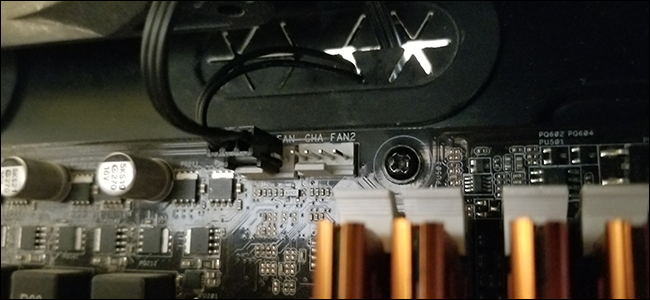
If your fans can connect to your motherboard, connect them now. Ditto if they can connect to your case and it has an on-board controller.
如果风扇可以连接到主板,请立即连接它们。 同上,如果他们可以连接到您的情况,并且它具有板载控制器。
安装图形卡 (Installing the Graphics Card)
Again, if you don’t have a discrete graphics card, skip this section. If you do, begin by removing the PCI-E spacers for the PCI-Express slot you’re going to use, but hang onto the screws. To decide which one is right if you don’t know, check out this guide—it’s generally the one closest to the processor area.
同样,如果您没有独立显卡,请跳过本节。 如果这样做,请先卸下要使用的PCI-Express插槽的PCI-E垫片,然后将其挂在螺钉上。 要确定哪一个是对的(如果您不知道的话), 请查看本指南,它通常是最靠近处理器区域的指南。
Then slide the card down into the slot, putting pressure on the side nearest the rear of the case first. Make sure it aligns with the exterior so that you can plug in the monitor cables.
然后将卡向下滑动到插槽中,首先在最靠近外壳背面的一侧施压。 确保它与外部对齐,以便可以插入显示器电缆。
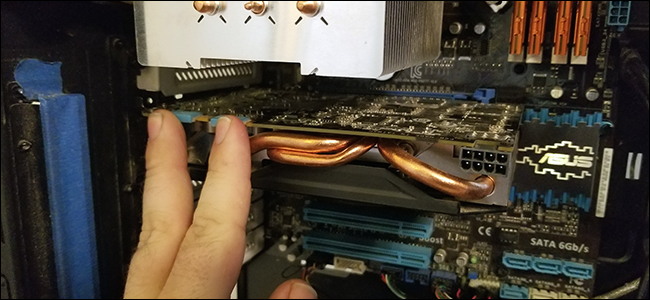
Push down firmly. When you see this plastic tab wiggle, you’re just about there. Pull the tab on the slot up until it “locks” down onto the card. Note that some motherboards include different types of tabs. Some automatically lock when you insert the card, some push in from the side.
用力向下推。 当您看到此塑料标签摆动时,就在附近。 向上拉插槽上的卡舌,直至其“锁定”到卡上。 请注意,某些主板包含不同类型的选项卡。 插入卡时,有些会自动锁定,有些则从侧面推入。

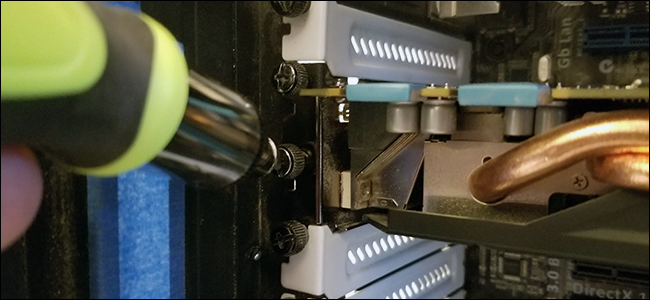
Now re-install the screws to permanently affix the card in place.
现在,重新安装螺钉以将卡永久固定到位。
安装存储驱动器和光盘驱动器 (Installing the Storage Drives and Disc Drives)
Again, you’re just going in reverse here. Place your drives into their appropriate bays, either screwed in directly or attached to their caddies. (You’ll need the caddies that came with your new case, not the ones you removed from the old case.)
同样,您只是在这里相反。 将驱动器放入相应的托架中,或者直接拧入或连接到其小盒。 (您将需要新案件随附的球童,而不是从旧案件中删除的球童。)
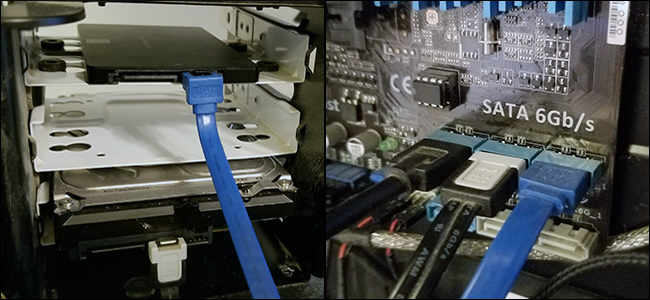
Then plug the SATA data cables into the rear of the drives and attach them to the motherboard’s SATA drives. You want to install them in the same order on the board (port 1, 2, 3, et cetera) to avoid boot issues.
然后将SATA数据电缆插入驱动器的背面,并将其连接到主板的SATA驱动器。 您希望以相同的顺序将它们安装在板上(端口1、2、3等),以避免启动问题。
安装电源 (Installing the Power Supply)
Now for the most complex part: installing the power supply. Start by inserting it into the PSU bay in the new case, then screwing it into the back with the power cord facing outward.
现在最复杂的部分:安装电源。 首先将其插入新盒的PSU托架中,然后将其电源线朝外拧入背面。
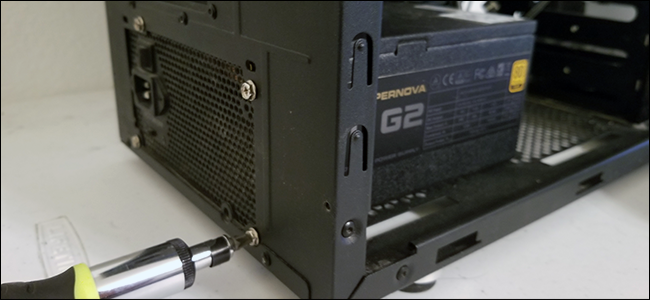
You generally want to direct the power supply’s built-in fan directly out of the case, away from the internal components, since it will be blowing hot air constantly.
通常,您需要直接将电源的内置风扇从机箱中引出,使其远离内部组件,因为它会不断吹送热空气。
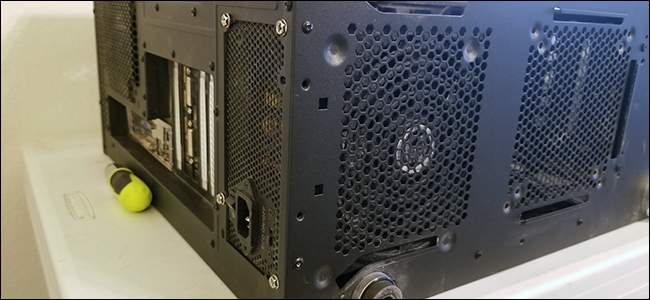
Now route all the power cables to your necessary components.
现在将所有电源线布线到必要的组件。
- 24-pin main power rail for the motherboard 主板的24针主电源轨
- 4/6/8-pin power rail for the motherboard’s CPU socket 4/6/8针电源轨,用于主板的CPU插槽
- SATA power rail to the hard drive and any other drives 硬盘驱动器和任何其他驱动器的SATA电源导轨
- 6/8/12-pin power rail to the graphics card (if you have one) 图形卡的6/8/12针电源轨(如果有)
- Additional power for more case fans and other accessories if necessary 如有需要,可为更多的机箱风扇和其他配件提供额外的电源
If you’re not sure where some go, take a look at the pictures you took, or consult your motherboard’s manual.
如果不确定要去哪里,请查看所拍摄的照片,或查阅主板的手册。
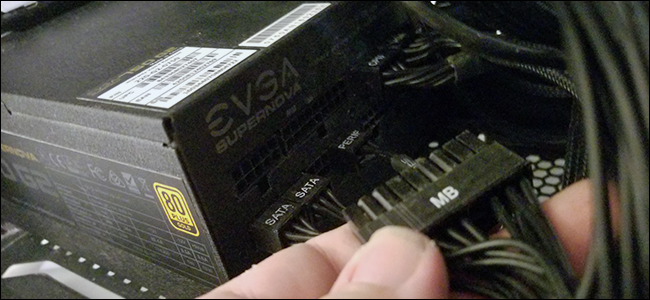
Make sure the connections are tight, and try to route as much of the cabling as you can behind the motherboard tray to keep everything tidy. Much tidier than my example, if you can, which shouldn’t be all that difficult.
确保连接牢固,并尝试在主板托盘后方尽可能多地布线,以使所有内容保持整洁。 如果可以的话,比我的例子要整洁得多,这不应该那么困难。
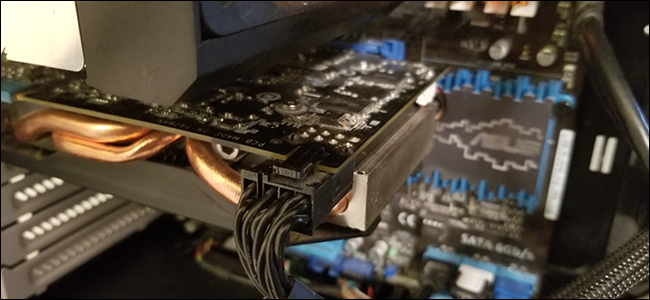
Cable management is about more than just keeping things looking pretty inside your case. Getting cables out of the way ensures that air flow in the case is not impeded, and also that you can more easily get to components when you need to.
电缆管理的意义不仅仅在于使机箱内部看起来漂亮。 将电缆移开可以确保不阻碍外壳中的空气流通,并且还可以在需要时更轻松地接触部件。
关闭并启动 (Closing Up and Booting)
You’re nearly done. Give everything another once-over, paying particular attention to your fans—it’s easy for a loose cable to drag on one, and if it does, you’ll need to open the PC up again and find the error.
您快完成了。 再次分配所有内容,尤其要注意您的风扇-松散的电缆很容易拖到一根电缆上,如果确实如此,则需要再次打开PC并查找错误。
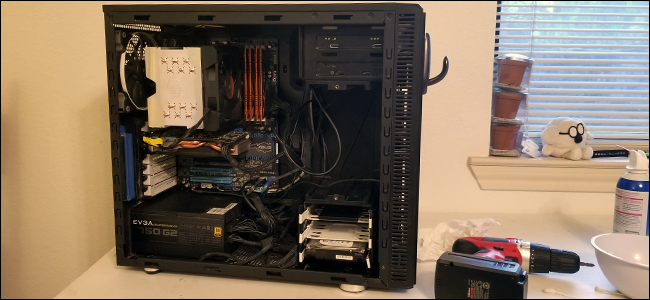
If you’re sure you’ve covered everything, place the access panels back on the left and right sides, and then place the thumb screws in and batten down the hatches. Install any accessories for the case, like dust filters.
如果确定已覆盖所有内容,则将检修面板放回左侧和右侧,然后将指旋螺钉放入并压紧舱口。 安装机箱的所有附件,例如防尘网。

Move your shiny new case and your dusty old parts back to your computer desk. Plug everything in and start up. If it doesn’t boot directly into Windows, don’t panic—you might just need to go into the UEFI (also known as the BIOS) and set the correct boot order for your drives.
将闪亮的新机壳和多灰尘的旧部件移回计算机桌。 插入所有电源并启动。 如果它不能直接引导到Windows,请不要惊慌-您可能只需要进入UEFI(也称为BIOS)并为驱动器设置正确的引导顺序即可。
If you’re still having problems, open up the PC again and check your connections. Common problems are mixed-up SATA cables, forgetting to connect the CPU power rail, and (yes, really) forgetting to switch the power supply on.
如果仍然有问题,请再次打开PC并检查连接。 常见的问题是SATA电缆混在一起,忘记了连接CPU电源导轨,以及(是的,确实)忘记了打开电源。
Image credit: Fractal Design, Dell
图片来源: Fractal Design , Dell
翻译自: https://www.howtogeek.com/347582/how-to-upgrade-to-a-new-pc-case/
pc机箱 图纸


 1667
1667

 被折叠的 条评论
为什么被折叠?


