


在mac homebrew
You can use your Mac’s Terminal to download files, test your internet speed, convert images, or even listen to Pandora. All this and more is just a couple of Homebrew installations away.
您可以使用Mac的终端下载文件,测试网速,转换图像,甚至收听Pandora。 所有这一切以及更多的只是几个Homebrew装置。
We’ve shown you a bunch of terminal tricks in macOS, all based on software that comes with the operating system itself. But you can do even more with the right free software, and thankfully, there’s a great package manager called Homebrew that lets you install loads of useful command line utilities. Check out our guide to installing Homebrew, if you haven’t already, then come back here to check out some of the best tools it offers.
我们已经向您展示了macOS中的许多终端技巧 ,这些技巧都基于操作系统本身随附的软件。 但是,有了合适的免费软件,您甚至可以做更多的事情,而且值得庆幸的是,有一个很棒的软件包管理器叫做Homebrew ,它可以让您安装有用的命令行实用程序。 查看我们的Homebrew安装指南 (如果您尚未安装的话),然后返回此处以查看它提供的一些最佳工具。
用wget下载任何东西 (Download Anything With wget)
The ultimate download tool, wget, is great for downloading individual files or even downloading an entire website. And it’s easy to install with Homebrew. Just run:
最终的下载工具wget非常适合下载单个文件,甚至下载整个网站 。 而且使用Homebrew易于安装。 赶紧跑:
brew install wget
brew install wget
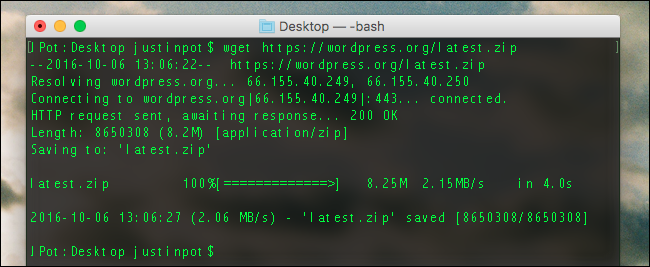
Then you can use wget to download whatever youwant. If you wanted to download the latest version of WordPress, for example, you’d run this command:
然后,您可以使用wget下载任何您想要的文件。 例如,如果您想下载最新版本的WordPress,则可以运行以下命令:
wget https://wordpress.org/latest.zip
wget https://wordpress.org/latest.zip
But this doesn’t stop at individual files. You can download entire directories, using a command like this:
但这并不仅限于单个文件。 您可以使用以下命令下载整个目录:
wget ‐‐level=1 ‐‐recursive ‐‐no-parent http://www.examplesite.egg/neatfiles/
wget ‐‐level=1 ‐‐recursive ‐‐no-parent http://www.examplesite.egg/neatfiles/
We’re really just scratching the surface here, but if you type wget --help you’ll learn a lot more.
我们实际上只是在这里wget --help ,但是,如果您键入wget --help您将学到更多。
使用speedtest_cli测试您的互联网速度 (Test Your Internet Speed With speedtest_cli)
We’ve shown you how to test your internet connection speed using your browser, but wouldn’t it be faster just to open the Terminal and type a command? Yes, and installing this capability is simple:
我们已经向您展示了如何使用浏览器测试Internet连接速度 ,但是打开终端并输入命令会更快吗? 是的,安装此功能很简单:
brew install speedtest_cli
brew install speedtest_cli
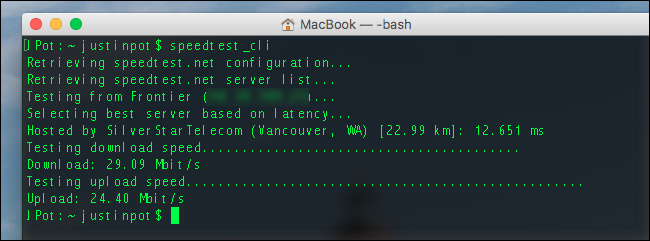
You can run the test by typing speedtest-cli or speedtest_cli in the Terminal. You’ll get the same results as the web version, just with a lot less visual clutter.
您可以通过在终端中键入speedtest-cli或speedtest_cli来运行测试。 您将获得与Web版本相同的结果,并且视觉混乱程度大大降低。
使用ansiweather检查天气 (Check The Weather With ansiweather)
Get a weather forecast from the Terminal? Why not! Again, it’s easy to install.
从航站楼获得天气预报? 为什么不! 同样,它很容易安装。
brew install ansiweather
brew install ansiweather
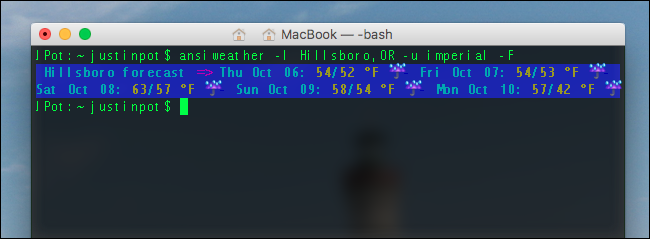
Using this one is a little tricky, because you have to specify your location. Here’s what that looked like for me:
使用此选项有点棘手,因为您必须指定位置。 这就是我的样子:
ansiweather -l Hillsboro,OR -u imperial
ansiweather -l Hillsboro,OR -u imperial
ansiweatheris the name of the programansiweather是程序的名称-llets me set the location, andHillsboro,ORis where I live.-l让我设置位置,而Hillsboro,OR是我的住所。-ulets me set which units to use, and I opted forimperialbecause I live in the USA and that’s how they do things here.-u让我设置要使用的单位,我选择了imperial因为我住在美国,这就是他们在这里做事的方式。
You can read more details on the ansiweather GitHub page, if you’re interested. This application probably isn’t one you’ll use every day, but could be awesome if you’ve set up GeekTool to customize your desktop.
如果您有兴趣,可以在ansiweather GitHub页面上阅读更多详细信息。 这个应用程序可能不是您每天都会使用的应用程序,但是如果您设置了GeekTool来自定义桌面 ,那么它可能会很棒。
Calc紧缩数字 (Crunch Numbers With calc)

Turn your Terminal into a complete calculator by installing:
通过安装以下设备,将您的终端变成一个完整的计算器:
brew install calc
brew install calc
Launch calc and you can start typing equations, as shown in the screenshot. If you need some help learning what characters to use, just type help intro and read the resulting tutorial. The program is quite powerful once you learn it, so dive in.
启动calc ,您可以开始输入方程式,如屏幕截图所示。 如果您需要一些帮助来学习使用哪些字符,只需键入help intro并阅读生成的教程。 一旦您学习了该程序,它就会非常强大,因此请深入研究。
使用dockutil自定义您的Dock (Customize Your Dock With dockutil)
We’ve shown you ways to customize your dock, but dockutil goes just a little bit further, and is quick to install.
我们已经向您展示了自定义码头的方法 ,但是dockutil稍微更进了一步,并且可以快速安装。
brew install dockutil
brew install dockutil
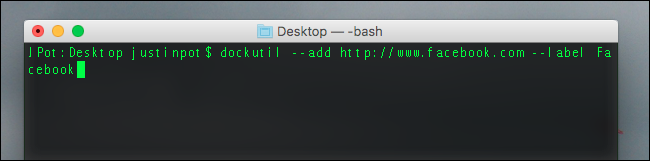
The tool can do many things, including add a dock icon for any website. Here’s how that command looks for Facebook:
该工具可以做很多事情,包括为任何网站添加停靠图标。 这是该命令在Facebook中的外观:
dockutil --add http://www.facebook.com --label Facebook
dockutil --add http://www.facebook.com --label Facebook
A quick breakdown for you:
为您快速分解:
dockutilis the name of the programdockutil是程序的名称--addtells the program to add an icon. The URL following this tells the program which website I’d like to point to; you can also point to applications or folders.--add告诉程序添加图标。 此后的URL告诉程序我要指向哪个网站; 您也可以指向应用程序或文件夹。--labellets me name the dock icon, which I’ve opted to call Facebook.--label让我命名停靠--label图标,我选择将其命名为Facebook。
You’ll need to reset your dock for the new icon to show up:
您需要重置码头,以显示新图标:
killall Dock
killall Dock
Just like that, you’ll see a Dock icon for launching Facebook.
这样,您将看到用于启动Facebook的Dock图标。

You can also add applications, folders, and blank spaces. For information on all this and more, check out the dockutil page on Github.
您还可以添加应用程序,文件夹和空格。 有关所有这些以及更多信息,请查看Github上的dockutil页面 。
使用ImageMagick转换图像 (Convert Images With ImageMagick)
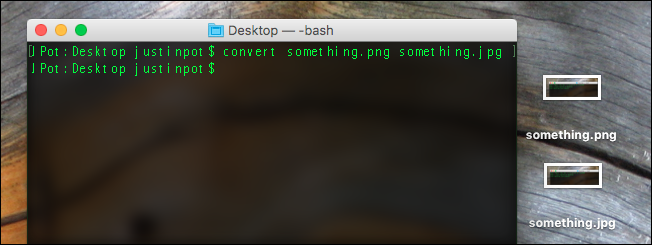
We’ve already explained how to convert and resize images with imagemagick in Linux, and everything works the same way for Mac users. First, install imagemagick using Homebrew:
我们已经说明了如何在Linux中使用imagemagick转换图像和调整图像大小 ,并且Mac用户的工作方式相同。 首先,使用Homebrew安装imagemagick:
brew install imagemagick
brew install imagemagick
Now you can start using the application to do all sorts of things. For example, if you wanted to convert a file from a PNG to a JPG, you’d run:
现在,您可以开始使用该应用程序执行各种操作。 例如,如果要将文件从PNG转换为JPG,则可以运行:
convert example.png example.jpg
convert example.png example.jpg
You can do a lot more than just convert files, too. Here at How-To Geek, for example, put a 1 pixel black border on our images, and I do it with this command:
您不仅可以转换文件,还可以做更多的事情。 例如,在“ How-To Geek”中,在我们的图像上放置一个1像素的黑色边框,我使用以下命令进行操作:
convert -border 1x1 -bordercolor black testing.png result.png
convert -border 1x1 -bordercolor black testing.png result.png
There’s a lot of power to unpack here, so feel free to dive in–check out our original guide for tons of useful info.
这里有很多强大的功能可解压,所以请随时潜入- 查看我们的原始指南以获取大量有用信息。
用Pianobar收听Pandora (Listen To Pandora With pianobar)
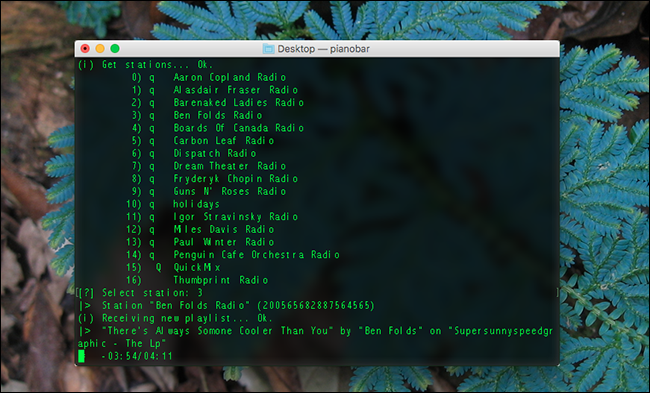
Using the terminal to listen to music may seem like a gimmick, but it’s actually awesome. Pianobar streams Pandora to your computer with great keyboard shortcuts, without the big Flash-y site, and without commercials. Again, you can install with one command.
使用终端听音乐可能看起来很花哨,但实际上很棒。 Pianobar通过出色的键盘快捷键将Pandora流式传输到您的计算机,而没有大型Flash-y网站,也没有广告。 同样,您可以使用一个命令进行安装。
brew install pianobar
brew install pianobar
Launch pianobar and you’ll be asked for your Pandora account info, then you’re ready to rock. You can pick from among your stations using numbers, and keyboard shortcuts let you do things like skip tracks and love songs. Press “?” to see a full list of shortcuts.
启动pianobar ,将要求您提供Pandora帐户信息,然后就可以pianobar 。 您可以使用数字从电台中进行选择,键盘快捷键可让您执行诸如跳过曲目和爱情歌曲之类的操作。 按 ”?” 查看快捷方式的完整列表。
使用darkmode切换Dark Mode (Toggle Dark Mode With darkmode)
Mac users have been able to turn their menu bar black for a while now, a feature called “Dark Mode”. This Terminal application lets you toggle that mode one and off quickly from the Terminal. Installation, again, is easy:
Mac用户现在已经能够将其菜单栏变黑一段时间了,该功能称为“黑暗模式”。 该终端应用程序使您可以在终端上快速切换一种模式或关闭该模式。 再次,安装很容易:
brew install darkmode
brew install darkmode
Once installed, you can toggle your menu bar between dark mode and light mode with a simple command: dark-mode. Run that, and your menu bar will switch color schemes. It’s a quick thing, sure, but someone with some scripting experience could put it to good use.
安装完成后,您可以使用简单的命令: dark-mode在黑暗模式和明亮模式之间切换菜单栏。 运行该命令,菜单栏将切换配色方案。 当然,这是一件快速的事情,但是具有一定脚本经验的人可以很好地利用它。
玩强制性的cowsay (Play With cowsay, Which Is Mandatory)
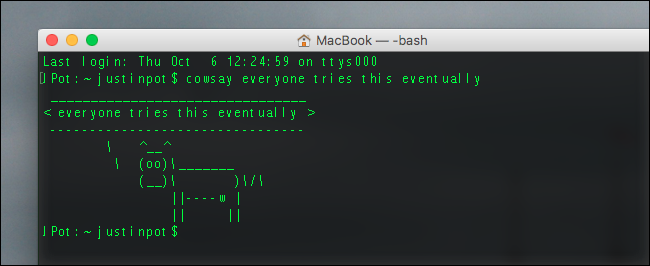
For some reason, no roundup of command prompt tools for beginners is complete without mention of cowsay. Type cowsay, followed by any sentence, and an ascii cow will say it back to you. Magical. Installing, once again, is easy with Homebrew.
出于某种原因,不提Cowsay,就没有完整的针对初学者的命令提示符工具综述。 输入Cowsay,然后加上任何句子,然后ascii cow会说出来。 神奇。 再次使用Homebrew轻松安装。
brew install cowsay
brew install cowsay
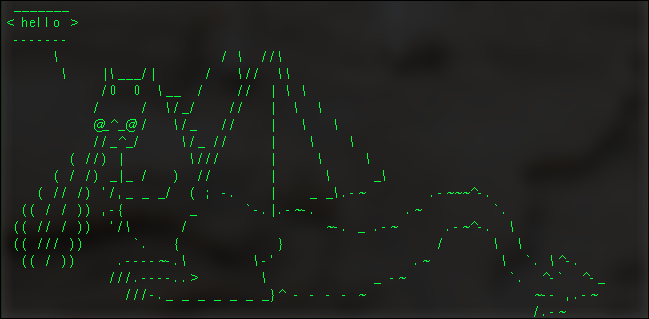
You can actually get so much more than cows from this. Here’s how to get a list of all supported creatures:
从中您实际上可以获得比母牛更多的东西。 以下是获取所有受支持生物的列表的方法:
cowsay -l
cowsay -l
You can make any of these creatures say your words by using the -f variable. For example, if you want a dragon to say “hello”, you can do that:
您可以使用-f变量使这些生物中的任何一个说出您的话。 例如,如果您想让一条龙说“你好”,您可以这样做:
cowsay -f dragon hello
cowsay -f dragon hello
You know what? That’s actually a fairly decent tutorial for learning the command line. No wonder every list like this seems to include this otherwise useless tool. Enjoy!
你知道吗? 这实际上是学习命令行的相当不错的教程。 难怪像这样的每个列表似乎都包含了这个原本无用的工具。 请享用!
翻译自: https://www.howtogeek.com/275381/the-best-command-line-tools-you-can-get-on-your-mac-with-homebrew/
在mac homebrew


 1580
1580

 被折叠的 条评论
为什么被折叠?
被折叠的 条评论
为什么被折叠?
 到【灌水乐园】发言


