


 本文介绍了如何通过Azure门户创建和验证Azure Function应用。首先,文章列出了创建Function App所需的先决条件,包括Azure订阅、服务计划和存储账户。然后,详细说明了如何在Azure门户中创建Function App,包括选择订阅、资源组、命名、运行时堆栈和区域等步骤。文章还简要提及了验证功能的方法和编写代码的注意事项。
azure 入门
In this article, I am going to explain how to get started with Azure Function Apps. In my previous article, An introduction to Serverless Applications, I have mentioned the serverless architecture and the various cloud offerings to develop serverless applications. As we know, in serverless architecture, the users only write the business logic code, and all other worries are taken care of by the cloud provider. This helps businesses to quickly implement solutions and ship it to customers with more quality. Also, another important point about serverless applications is that they are scalable on-demand, which means as a developer, we no longer need to monitor or manually pull up the resources when the executions are more.
在本文中,我将解释如何开始使用Azure Function应用程序。 在上一篇文章《 无服务器应用程序简介》中 ,我提到了无服务器体系结构以及开发无服务器应用程序的各种云产品。 众所周知,在无服务器架构中,用户仅编写业务逻辑代码,而其他所有烦恼都由云提供商解决。 这有助于企业快速实施解决方案,并将其以更高的质量交付给客户。 同样,无服务器应用程序的另一个重要点是它们可以按需扩展,这意味着作为开发人员,当执行更多任务时,我们不再需要监视或手动拉动资源。
Let’s go ahead and understand the serverless application framework provided by Microsoft Azure, known as Azure Function App.
让我们继续了解由Microsoft Azure提供的无服务器应用程序框架,称为Azure Function App。
先决条件 (Prerequisites)
There are a few prerequisites that we must be aware of before creating an Azure Function App. These are as follows:
在创建Azure Function应用之前,我们必须了解一些先决条件。 这些如下:
- Azure account with a subscription Azure帐户
- Service Plan within which the function is to be created and executed. Usually, there are two types of service plans, App Service Plan and Consumer Service Plan. App Service Plan allows the user to continuously run the code on a virtual machine that is defined by the user, whereas the Consumer Service Plan bills only for the duration of which the function runs. There is also a timeout set, which is, by default, set to 5 minutes for these functions 服务计划 。 通常,服务计划有两种类型,即应用服务计划和消费者服务计划。 App Service Plan允许用户在用户定义的虚拟机上连续运行代码,而Consumer Service Plan仅在功能运行期间计费。 还有一个超时设置,默认情况下,这些功能设置为5分钟
- A Storage Account in Azure, which will be linked to the Function App and can be used to store information such as logging and managing triggers, etc. We can also use this storage account to store the configuration files for this function
- Azure中的存储帐户 ,该帐户将链接到Function App,可用于存储日志记录和管理触发器等信息。我们也可以使用此存储帐户来存储此功能的配置文件
创建Azure Function应用 (Creating the Azure Function App)
There are three ways in which we can create a Function app:
我们可以通过三种方式创建功能应用程序:
- https://portal.azure.com https://portal.azure.com
- Using the Azure CLI (Command Line Interface) 使用Azure CLI(命令行界面)
- Using a code editor, like Visual Studio Code 使用代码编辑器,例如Visual Studio Code
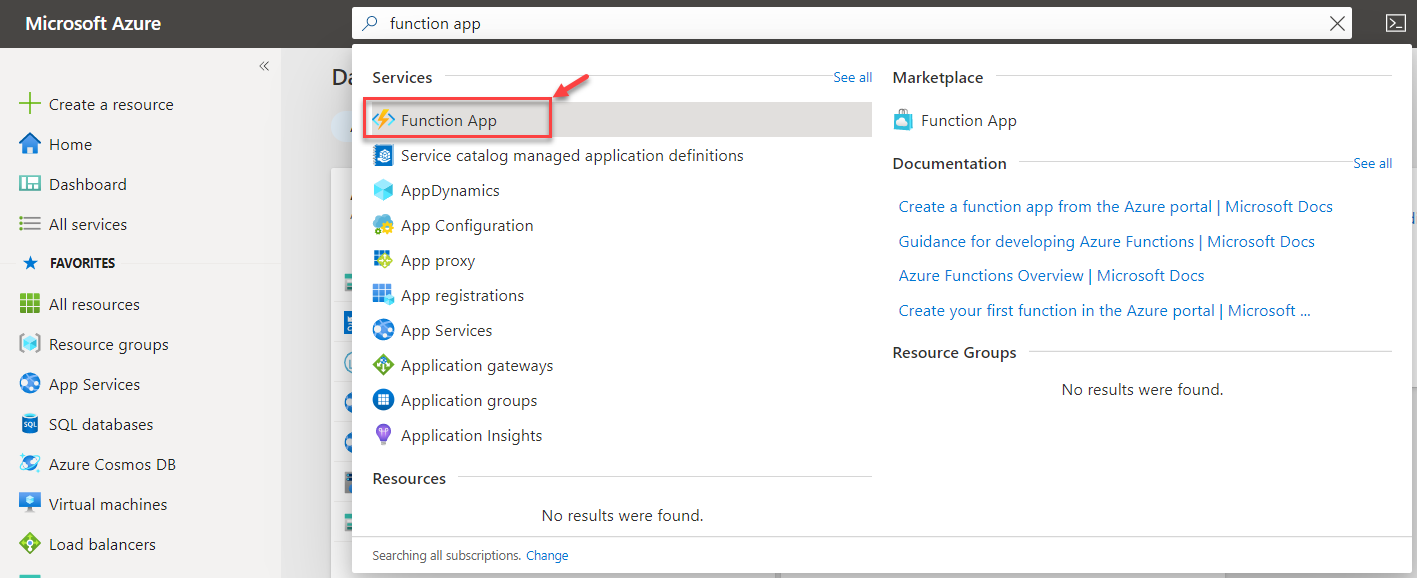
In this article, we will explore the first option, that is, using the Azure portal. Let us sign in to the Azure portal by visiting https://portal.azure.com and search for Function App.
在本文中,我们将探讨第一个选项,即使用Azure门户。 让我们通过访问https://portal.azure.com登录到Azure门户并搜索Function App。
The Function App dashboard opens up, which is as below. Since I do not have any function already created, therefore the dashboard is empty. Otherwise, it will display a list of all the available functions that are created in this account.
Function App仪表板打开,如下所示。 由于我尚未创建任何功能,因此仪表板为空。 否则,它将显示此帐户中创建的所有可用功能的列表。
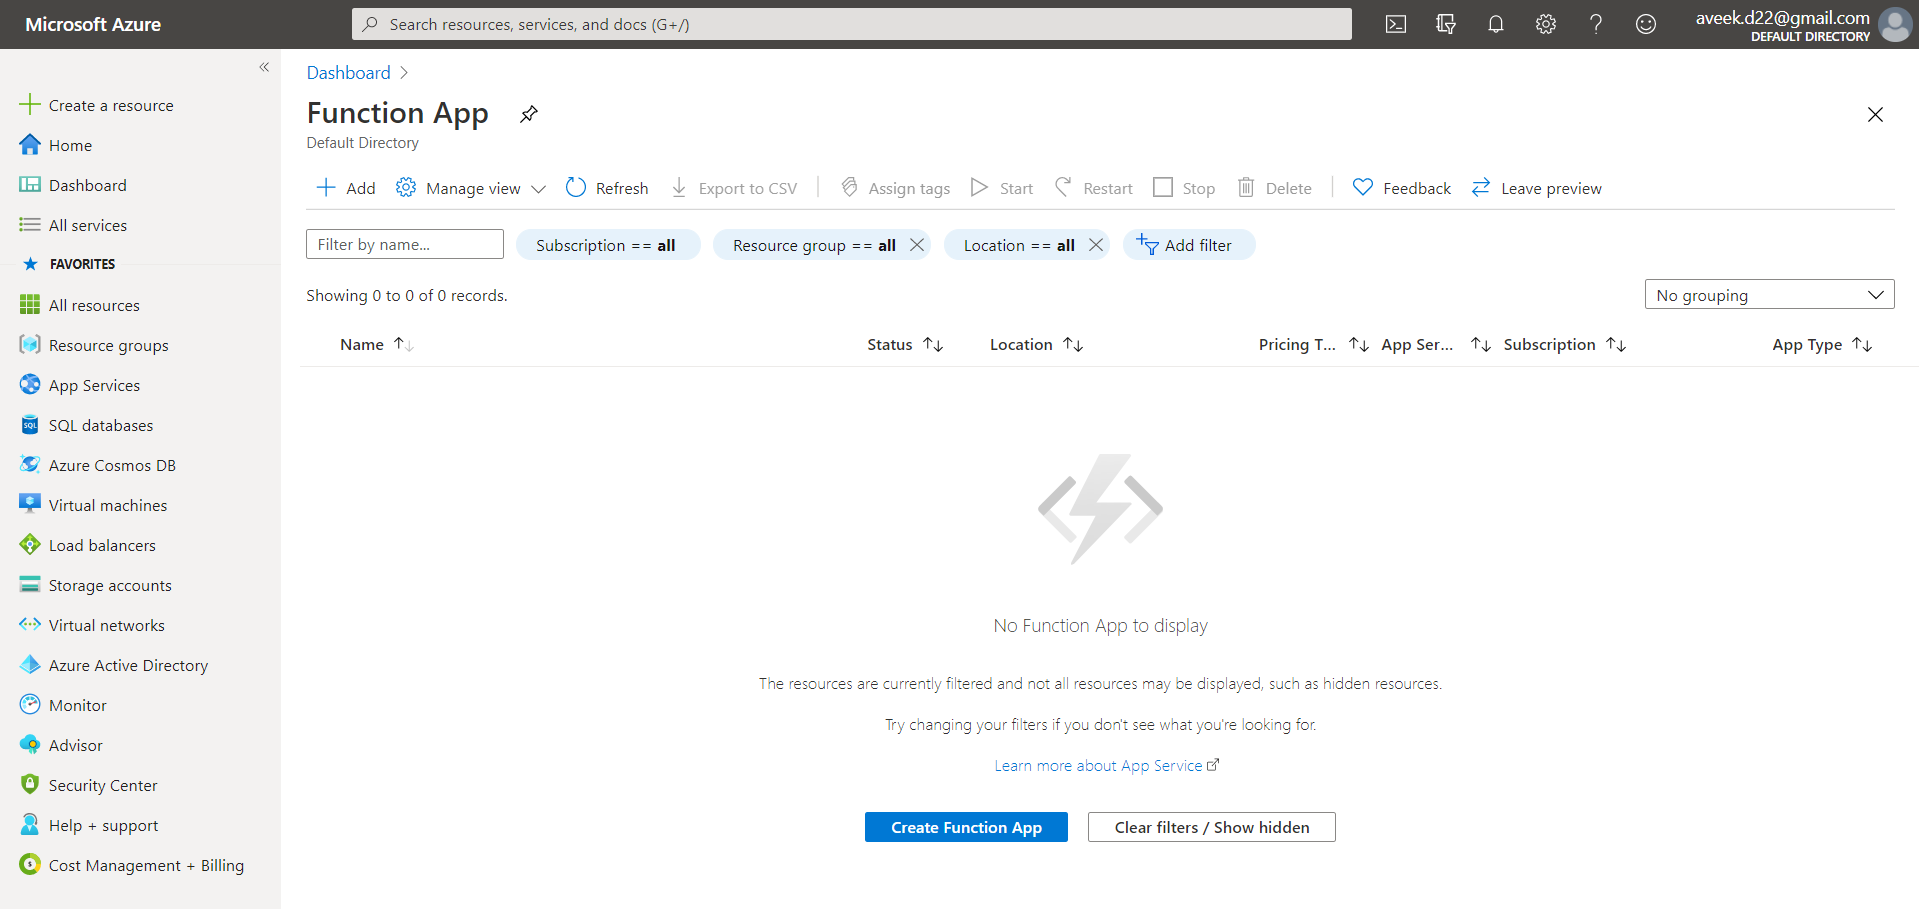
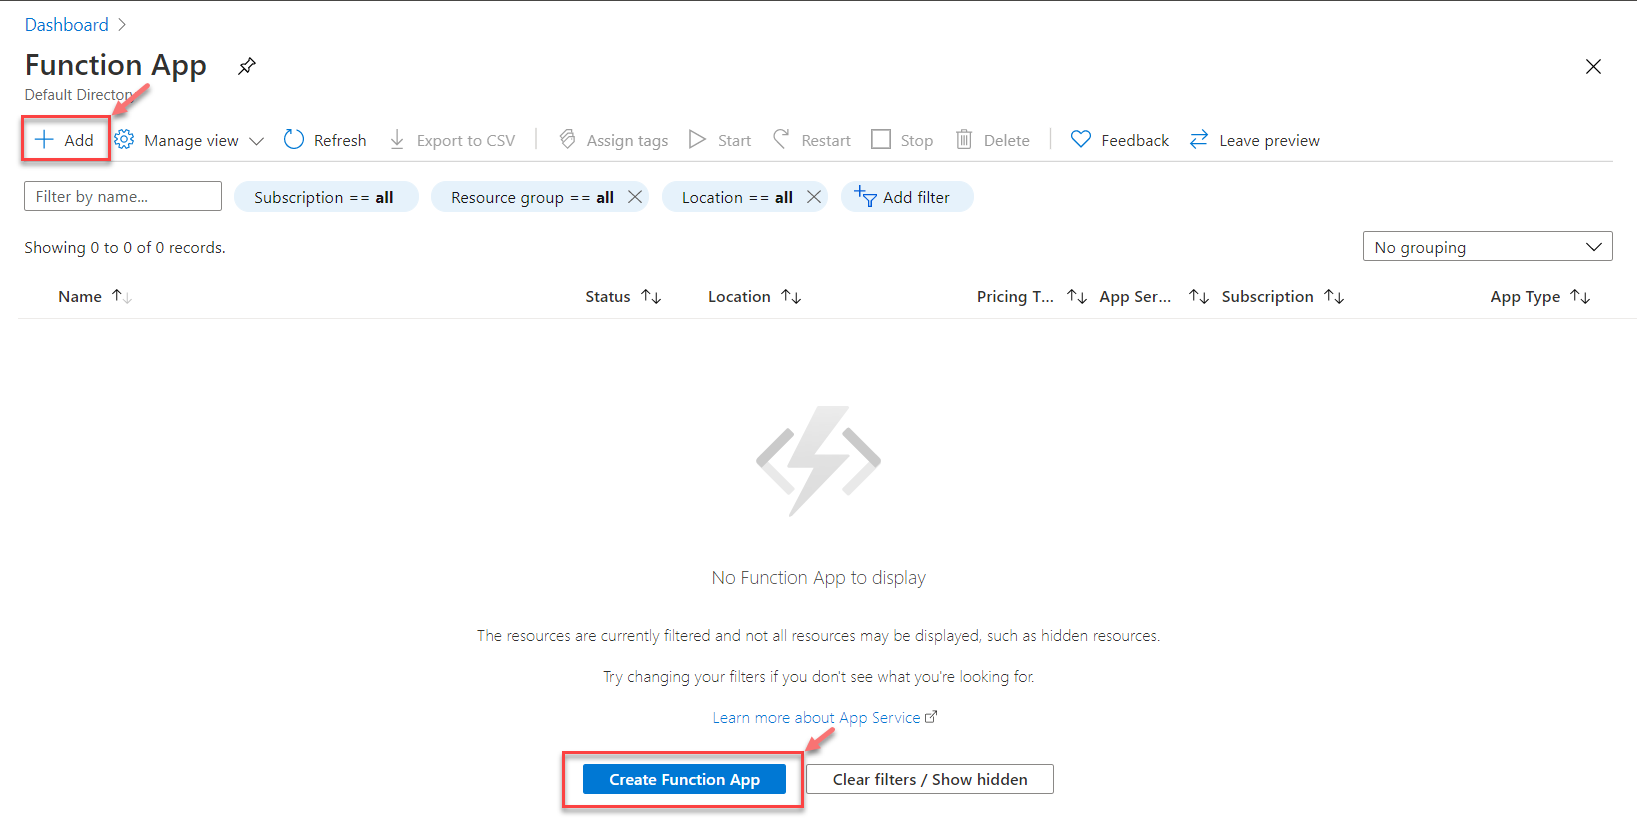
Click on Add on the top, or you can also click on the Create Function App button to start creating the application.
单击顶部的“ 添加 ”,或者也可以单击“ 创建功能应用程序”按钮以开始创建应用程序。
On the next page, you will need to provide a few configuration details about how you would like to create the function and its name along with a few other parameters. The first option here is to select the subscription account under which the function is to be created. You may consider this as a logical grouping for your billing management. I have a default subscription, which I am going to select and proceed forward.
在下一页上,您将需要提供一些有关如何创建函数及其名称的配置详细信息,以及一些其他参数。 这里的第一个选项是选择要在其下创建功能的订阅帐户 。 您可以将其视为计费管理的逻辑分组。 我有一个默认订阅,我将选择它并继续进行。
The next parameter here is to select the resource group. The resource group is also a logical group and can be used to group various resources that belong to the same solution. You can select a pre-existing resource group or proceed by creating a new one as follows.
此处的下一个参数是选择资源组。 资源组也是逻辑组,可用于对属于同一解决方案的各种资源进行分组。 您可以选择一个预先存在的资源组,也可以按照以下步骤创建一个新的资源组。
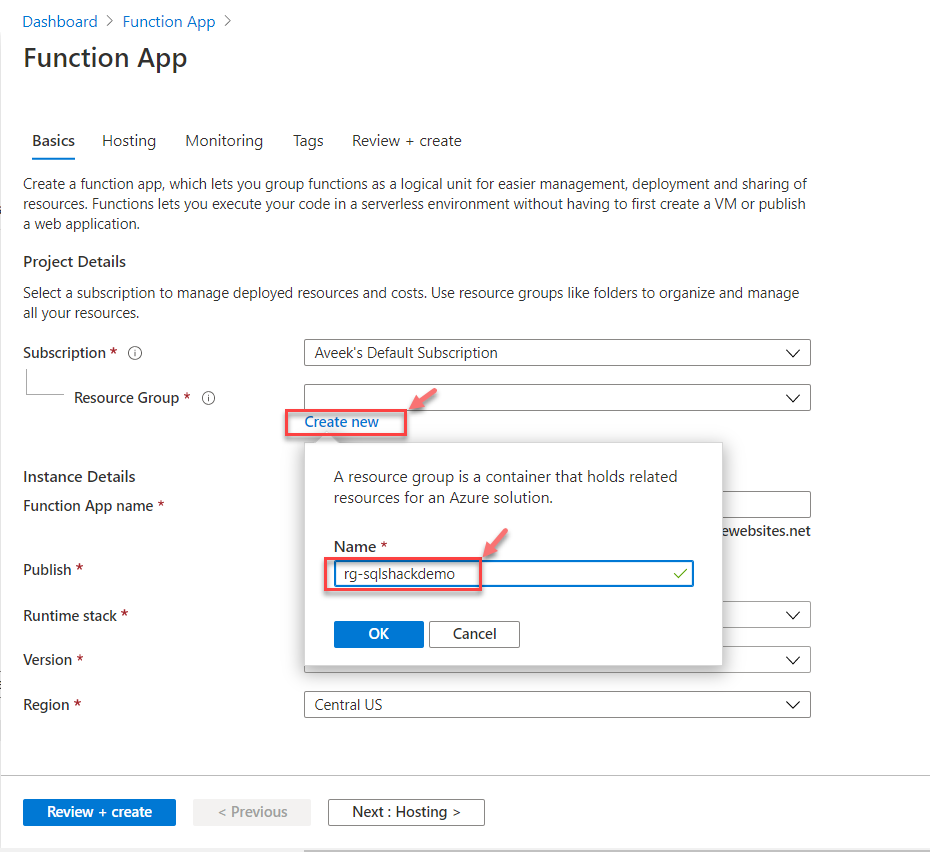
Once the resource group is created, we can move ahead with the other parameters. The next important point here is to provide a valid name for the function. Remember that this name has to be globally unique as it is going to be used as a part of the base URL.
创建资源组后,我们可以继续其他参数。 这里的下一个重点是为函数提供一个有效的名称 。 请记住,此名称必须是全局唯一的,因为它将用作基本URL的一部分。
Select the Publish option as Code and Runtime Stack as .NET Core. You can choose any other runtime stack based on your preference. Finally, you must select the region in which you want to deploy your function. As a best practice, the function should be deployed to a region nearer to where your customer is based upon. In my example, I am going to select the region as West Europe.
选择“ 发布”选项作为“代码” ,选择“ 运行时堆栈”作为.NET Core 。 您可以根据自己的喜好选择其他任何运行时堆栈。 最后,你必须选择你要部署功能的区域 。 最佳做法是,应将功能部署到客户所基于的区域附近。 在我的示例中,我将选择该地区作为西欧 。
Once all this information is filled up, click on Next: Hosting and set up the hosting related parameters there.
填写完所有信息后,单击“ 下一步:托管” ,然后在此处设置与托管相关的参数。
Here we need to define the storage account details, which will be used by our function. If you already have a storage account, you can use that or create a new one.
在这里,我们需要定义存储帐户详细信息,我们的功能将使用这些详细信息。 如果您已经有一个存储帐户,则可以使用该帐户或创建一个新帐户。
Once the storage account is created, you can select the Operating System and the Plan for the function. The operating system for .NET Core, by default, is Windows. For the plan, we are going to select the Consumption Service Plan, which will be scaled based on when the function is triggered and priced based on the execution time.
创建存储帐户后,可以选择该功能的操作系统和计划 。 默认情况下,.NET Core的操作系统是Windows 。 对于该计划,我们将选择“ 消费服务计划” ,该计划将根据触发功能的时间进行缩放,并根据执行时间进行定价。
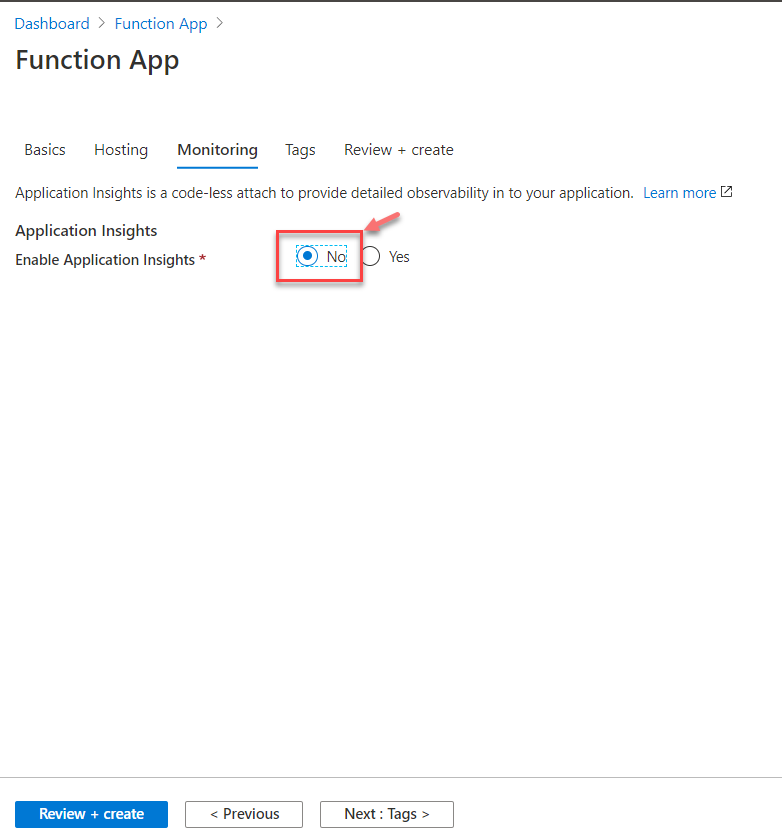
Click on Next: Monitoring to set up the monitoring parameters. Here, you will be asked if you want to enable Application Insights or not. For this tutorial, I am going to disable it as it is out of scope. Click on No and proceed forward.
单击下一步:监视以设置监视参数。 在这里,将询问您是否要启用Application Insights。 对于本教程,我将禁用它,因为它超出了范围。 单击否,然后继续。
In this stage, you can click on Review + Create to create the function as specified. It will verify all the details and then display the details for your review. Once you have finally reviewed the details on this page, go ahead and click on Create.
在此阶段,您可以单击Review + Create创建指定的功能。 它将验证所有详细信息,然后显示详细信息以供您查看。 在您最终查看了该页面上的详细信息之后,继续并点击创建 。
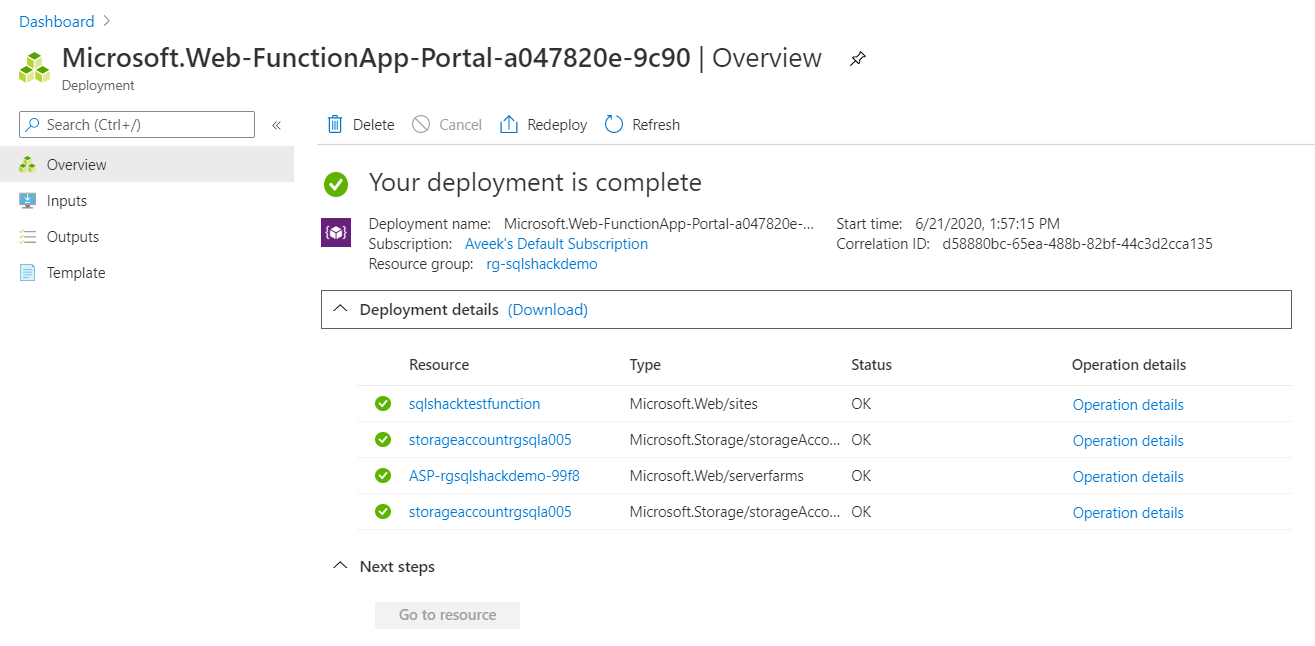
The deployment of the function might take some time, depending on the resources available. Once the deployment is completed, you will see the following information appear on the dashboard.
该功能的部署可能需要一些时间,具体取决于可用的资源。 部署完成后,您将在仪表板上看到以下信息。
验证功能 (Verify the function )
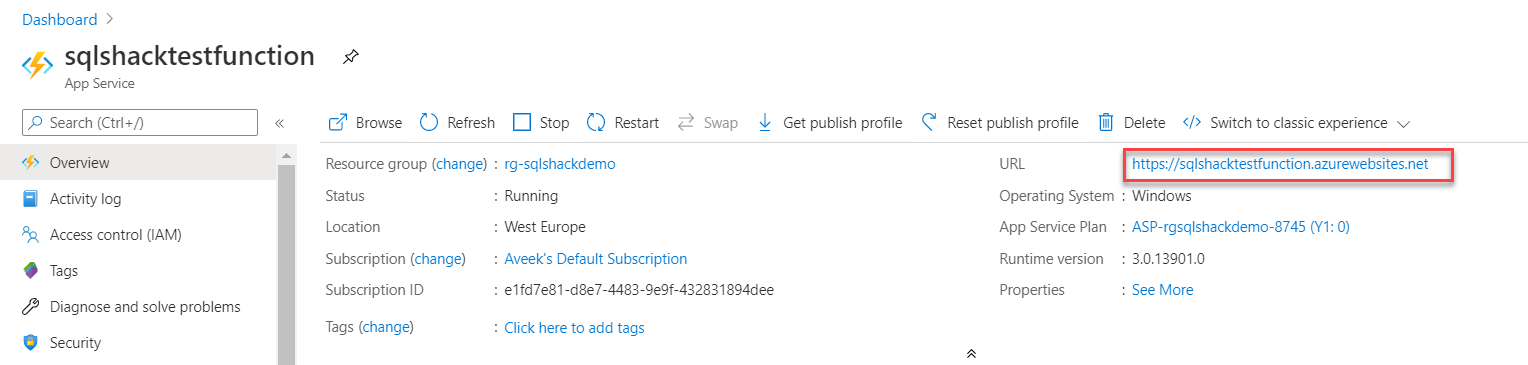
Once the app function has been created, the next step is to verify the function URL and confirm if the app is up and running. Click on the URL, and you will be navigated to the homepage for your app function.
创建应用程序功能后,下一步是验证功能URL并确认该应用程序是否已启动并正在运行。 单击URL,您将导航到应用程序功能的主页。
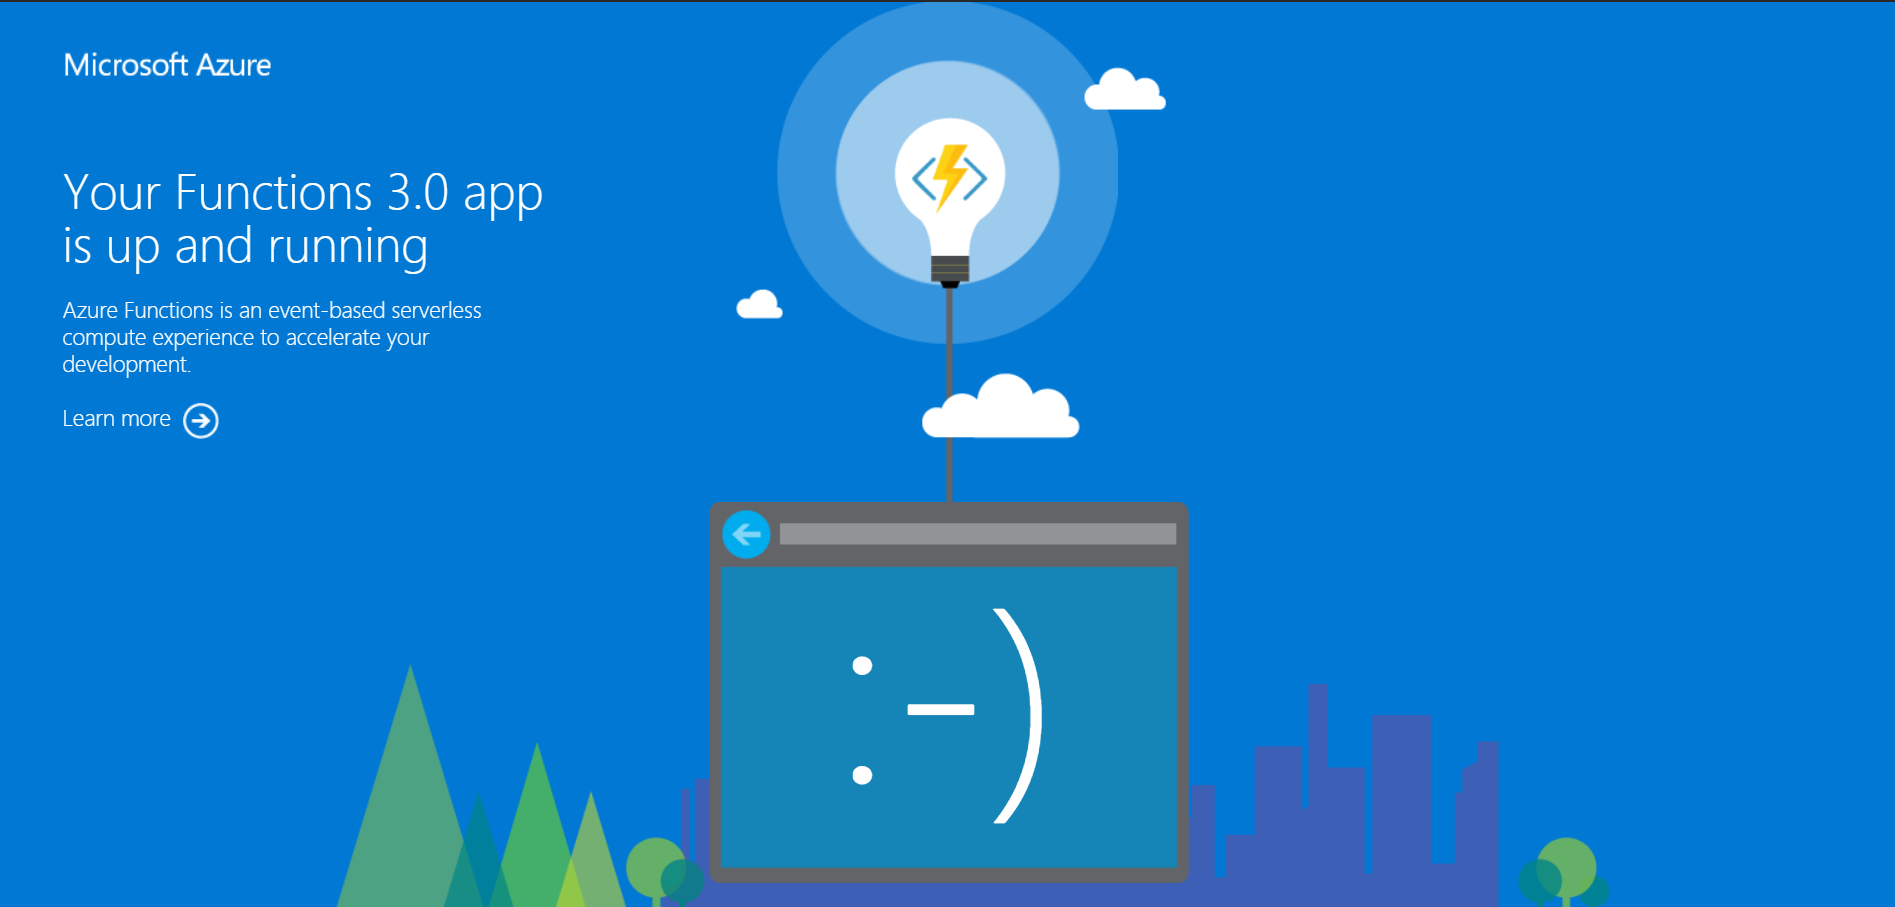
You will be redirected to a new page, which looks something like the figure below. It means that the Azure Function App is now up and running.
您将被重定向到一个新页面,该页面类似于下图。 这意味着Azure Function App现在已启动并正在运行。
编写Azure Function应用的代码 (Write code for the Azure Function App)
Now that we know that our function is up and running, its time we write the code that we need to deploy to this function. While creating the new function, the following two points should be kept in mind before proceeding forward.
既然我们知道我们的功能已启动并正在运行,那么现在该编写适用于该功能的代码了。 创建新功能时,在继续操作之前,请牢记以下两点。
- Trigger Type – Defines how the function is to be called, it can be an HTTP call or a change in a database table or anything other which can trigger a function 触发类型 –定义函数的调用方式,它可以是HTTP调用,数据库表中的更改或任何其他可以触发函数的内容
- Authoring Options – Users can choose how they would prefer to write the code for this function. They can either write code using the built-in code editor in Azure, or they can choose from a preferred desktop code editor, like Visual Studio Code or Sublime Text 创作选项 –用户可以选择他们希望为该功能编写代码的方式。 他们可以使用Azure中的内置代码编辑器编写代码,也可以从首选的桌面代码编辑器中进行选择,例如Visual Studio Code或Sublime Text
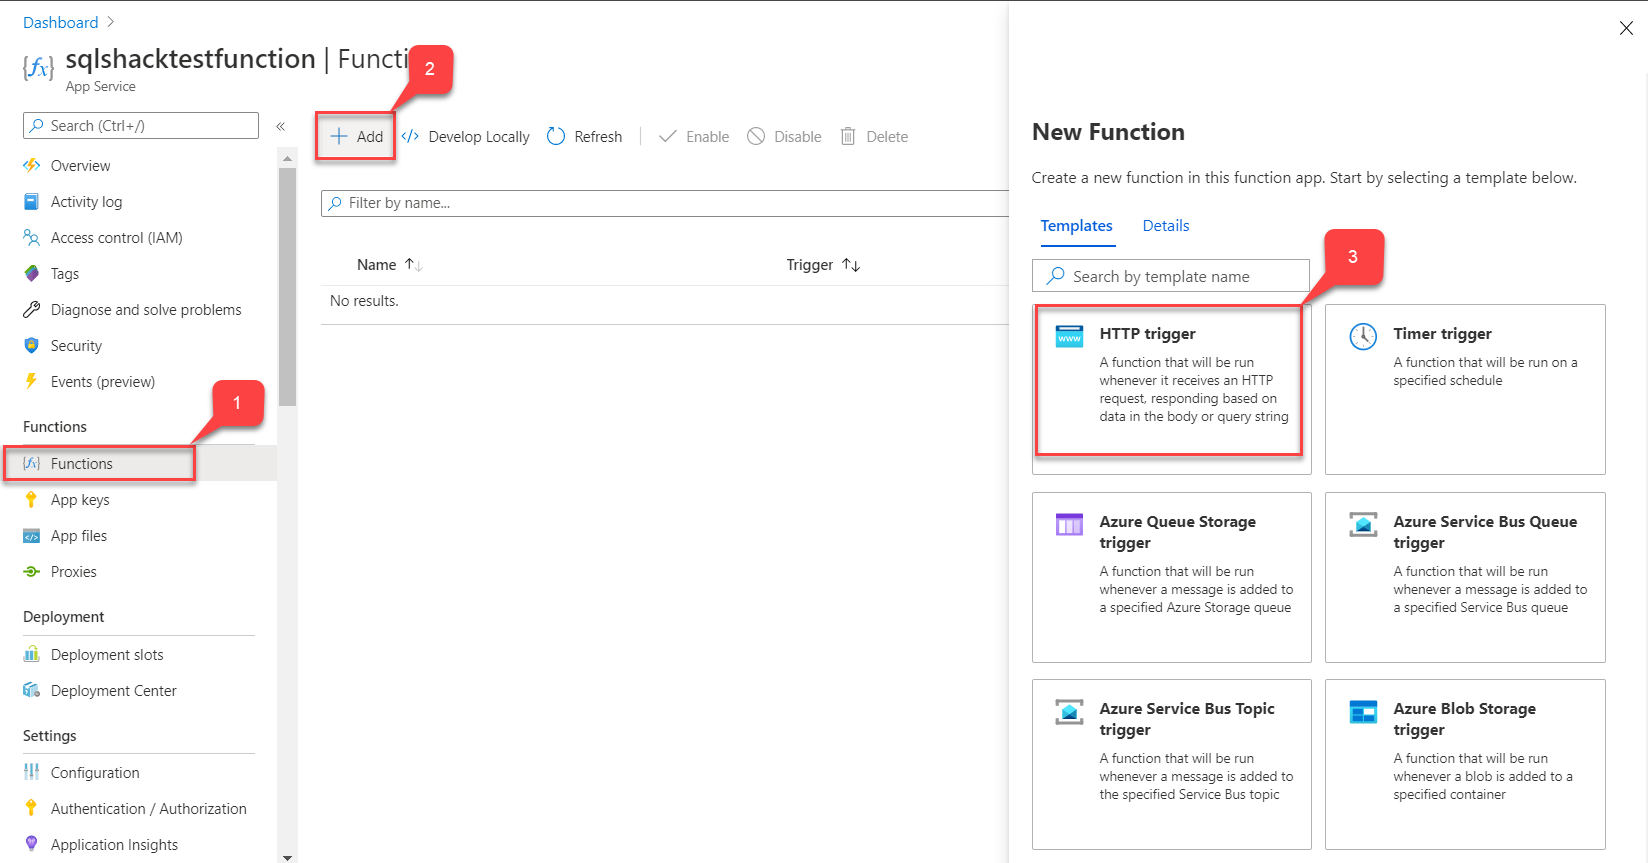
Click on Functions and then select Add. A list of templates will appear on the right, from which select HTTP Trigger.
单击函数 ,然后选择添加 。 模板列表将出现在右侧,从中选择HTTP Trigger 。
Once the trigger type has been selected, please provide details about the function. Provide a name for the function and the authentication level. Select Anonymous as the authentication level and click on Create Function.
选择触发类型后,请提供有关该功能的详细信息。 提供功能名称和身份验证级别 。 选择Anonymous作为身份验证级别,然后单击Create Function 。
The function will be created and deployed within minutes, and you can verify the details as follows.
该功能将在几分钟之内创建并部署,您可以按以下步骤验证详细信息。
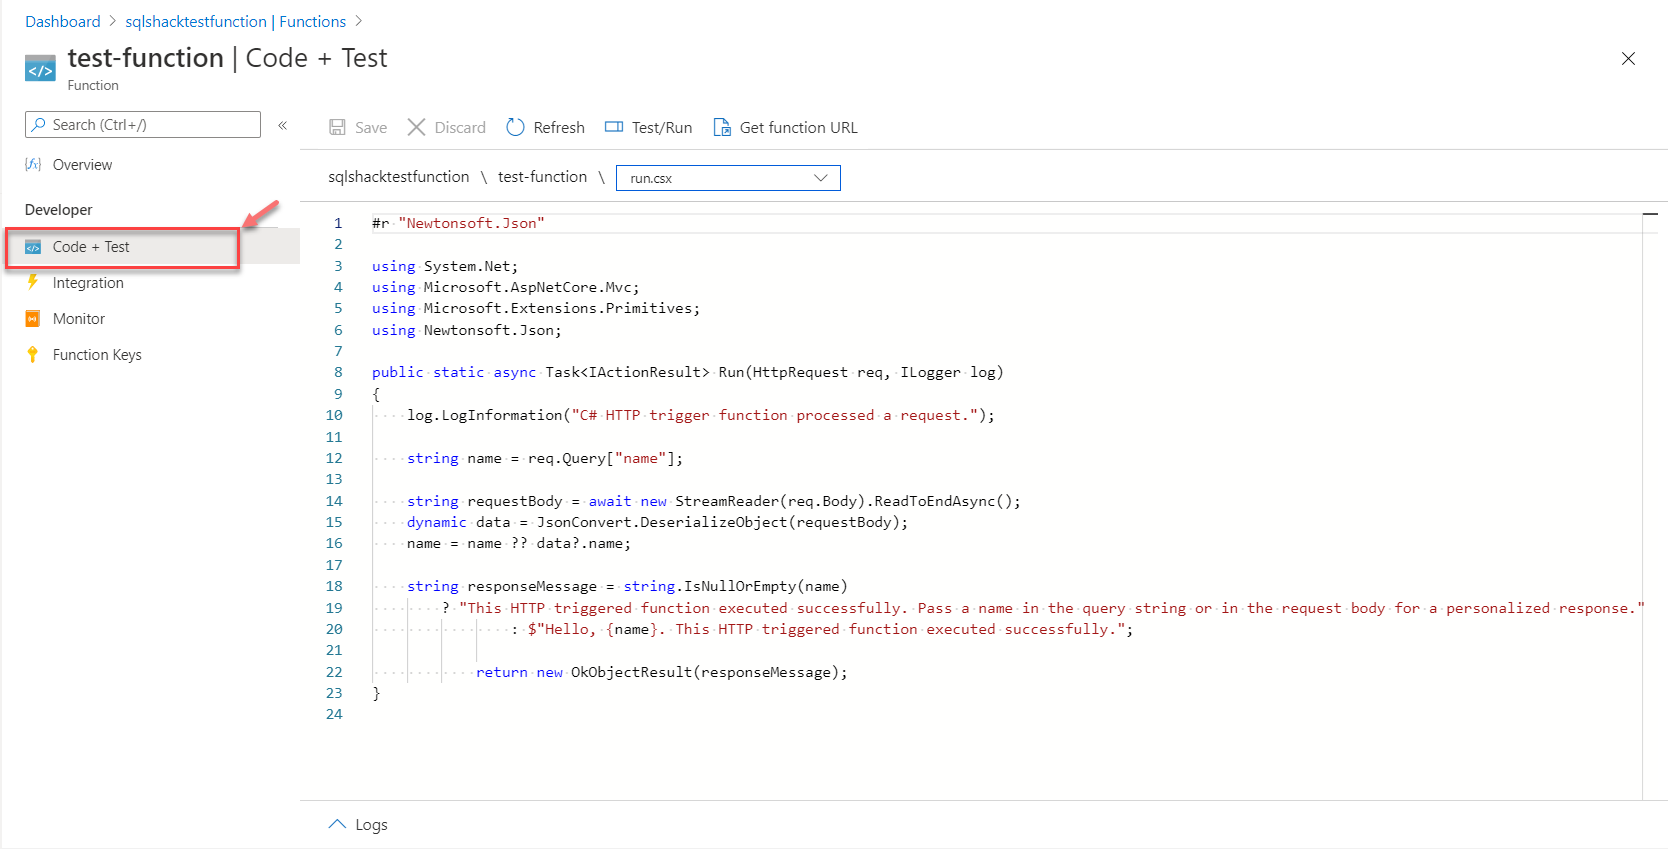
Click on Code + Test to view the code, which is provided by default.
单击“ 代码+测试”以查看默认提供的代码。
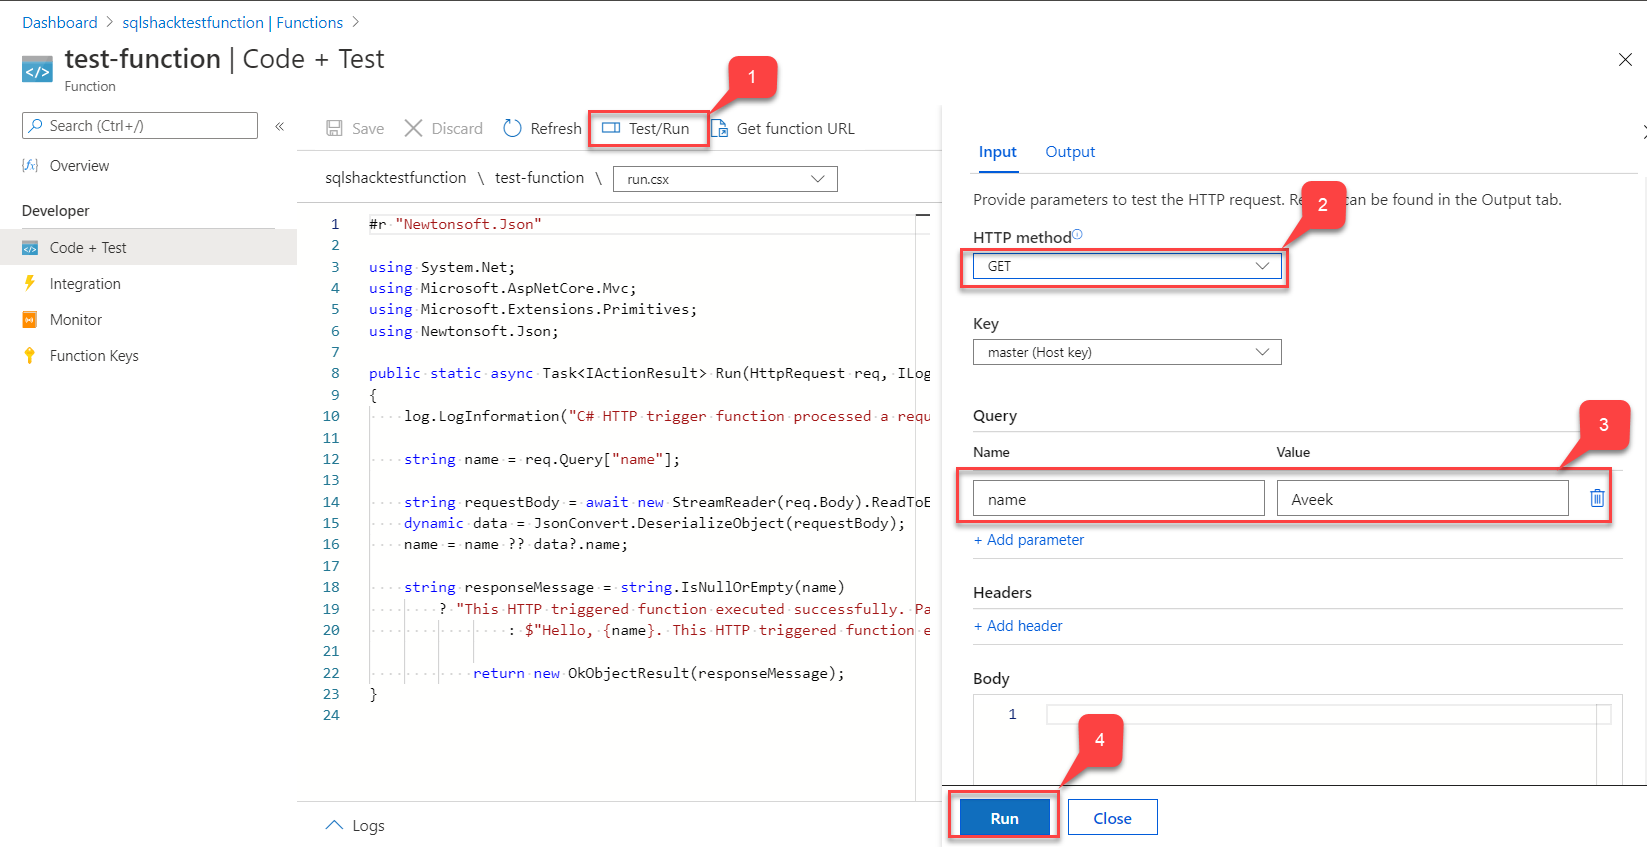
In order to test this function, click on Test/Run. A blade appears on the right in which you need to set the HTTP Method as GET. Also, add a “name” to the list of queries with any value to it. In my example, I am adding my name here. Hit Run once completed.
为了测试此功能,请单击“ 测试/运行” 。 右侧显示一个刀片,您需要在其中将HTTP方法设置为GET 。 另外,在查询列表中添加一个“ 名称 ”,并为其添加任何值。 在我的示例中,我在这里添加我的名字。 完成后,点击“运行” 。
In the Output section, you can verify that the function has a response of 200 along with the name printed in the body of the response. Thus, the function is executed successfully.
在“输出”部分中,您可以验证函数的响应为200,并在响应的正文中打印名称。 因此,该功能成功执行。
结论 (Conclusion)
In this article, I have explained how to start with writing code for Azure Function Apps and explained the steps in detail. For this tutorial, I have explained how to create the app function using the Azure Portal. In my next article, I will describe how to do the same using Visual Studio Code.
在本文中,我已经说明了如何开始为Azure Function应用程序编写代码,并详细说明了步骤。 在本教程中,我已经说明了如何使用Azure门户创建应用程序功能。 在我的下一篇文章中,我将描述如何使用Visual Studio Code进行相同的操作。
翻译自: https://www.sqlshack.com/getting-started-with-azure-function-apps/
azure 入门


 1261
1261

 被折叠的 条评论
为什么被折叠?
被折叠的 条评论
为什么被折叠?
 到【灌水乐园】发言


