


 本文详细介绍了如何使用Python脚本在Microsoft Excel中进行数据格式化,包括创建和读取Excel文件、设置数据格式、创建图表、调整列宽、修改字体颜色和大小、添加下划线等,展示了Python在数据处理方面的强大能力。
In this article, we will use Python scripts for data formatting in Microsoft Excel sheet with various examples.
在本文中,我们将通过各种示例使用Python脚本在Microsoft Excel工作表中进行数据格式化。
介绍 (Introduction)
Python is an object-oriented, high-level programming language popular among the data scientists. SQL Server also supports executing Python code from Azure data studio and SQL Server Management Studio. We have many useful publications on SQLShack for the Python, along with its use-cases, especially for DBAs and developers.
Python是一种面向对象的高级编程语言,深受数据科学家欢迎。 SQL Server还支持从Azure数据工作室和SQL Server Management Studio执行Python代码。 我们有许多关于Python的 SQLShack以及其用例的有用出版物,特别是对于DBA和开发人员。
Before you go further, I would recommend you to go through the following articles for the basic understanding of it:
在继续之前,我建议您阅读以下文章以对其进行基本了解:
- Python in SQL Server: The Basics SQL Server中的Python:基础知识
- The importance of Python in SQL Server Administration Python在SQL Server管理中的重要性
- Why would a SQL Server DBA be interested in Python? 为什么SQL Server DBA对Python感兴趣?
- Using Python SQL scripts for Importing Data from Compressed files 使用Python SQL脚本从压缩文件中导入数据
Usually, DBAs share export required data in an Excel sheet, do the formatting, and share it with the concerned authorities. It is a regular practice. Python integrates with Microsoft Excel very well.
通常,DBA在Excel工作表中共享导出所需的数据,进行格式化,并与有关当局共享。 这是常规做法。 Python与Microsoft Excel很好地集成。
This article covers the following topics:
本文涵盖以下主题:
- Create a sample excel file using the Python 使用Python创建示例Excel文件
- Import data from an excel file using Python 使用Python从Excel文件导入数据
- Format data in excel sheet using Python 使用Python在Excel工作表中设置数据格式
- Prepare excel charts using Python 使用Python准备Excel图表
先决条件 (Pre-requisites)
- SQL Notebooks introduction and overview for detailed information on it SQL Notebook简介和概述 。
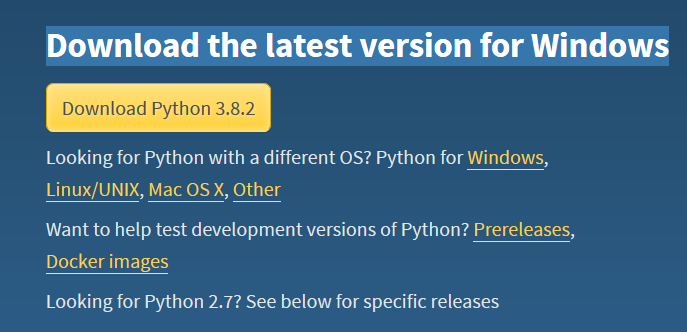
Download the Python latest version 3.8.2 for Windows from this URL
从此URL下载适用于Windows的Python最新版本3.8.2
- Use Python SQL scripts in SQL Notebooks of Azure Data Studio for it 在Azure Data StudioSQL Notebook中使用Python SQL脚本
Install XlsxWriter and xlrd Python module using pip utility
使用pip实用程序安装XlsxWriter和xlrd Python模块
XlsxWriter: We use the XlsxWriter Python module to write the Microsoft Excel files in XLSX format. It provides various formatting options, charts, textboxes, Rich multi-format strings, Macros for excel files
XlsxWriter : 我们使用XlsxWriter Python模块以XLSX格式编写Microsoft Excel文件。 它提供了各种格式设置选项,图表,文本框,丰富的多格式字符串,Excel文件宏
For the installation of XlsxWrite, use the following command in Python3 kernel of the SQL Notebook:
对于XlsxWrite的安装,请在SQL Notebook的Python3内核中使用以下命令:
pip install XlsxWriterIt downloads the package and installs it as shown in the following screenshot:
它下载软件包并按照以下屏幕截图所示安装它:

Xlrd: It is also a Python library and useful to read data from the excel files. It supports both XLS and XLSX extension for reading data and formatting information from Excel files. It gives many formatting features as well for excel files
Xlrd :它也是一个Python库,从excel文件读取数据很有用。 它同时支持XLS和XLSX扩展名,以从Excel文件读取数据和格式化信息。 它为Excel文件提供了许多格式化功能
Use the following command for installing the xlrd Python module:
使用以下命令安装xlrd Python模块:
pip install xlrd
使用Python脚本和库处理Excel文件 (Work with excel files using Python scripts and libraries)
In the previous step, we installed the Python libraries XlsxWriter and xlrd using SQL Notebooks of Azure Data Studio.
在上一步中,我们使用Azure Data StudioSQL Notebooks安装了Python库XlsxWriter和xlrd。
创建一个基本的Excel文件 (Create a basic excel file)
Let’s create a sample excel file without any formatting. Run the following code in Python:
让我们创建一个没有任何格式的示例excel文件。 在Python中运行以下代码:
import xlsxwriter workbook = xlsxwriter.Workbook('c:\\temp\\Welocme.xlsx') worksheet = workbook.add_worksheet() worksheet.write('A1', 'Welcome to Python') workbook.close()- Import Xlsxwrite module 导入Xlsxwrite模块
- Creates a workbook Welcome.xlsx in the C:\temp folder 在C:\ temp文件夹中创建一个工作簿Welcome.xlsx
- Add a new worksheet in this workbook 在此工作簿中添加一个新的工作表
- Welcome to Python’ in the A1 column Welcome to Python ”
- Closes the workbook 关闭工作簿
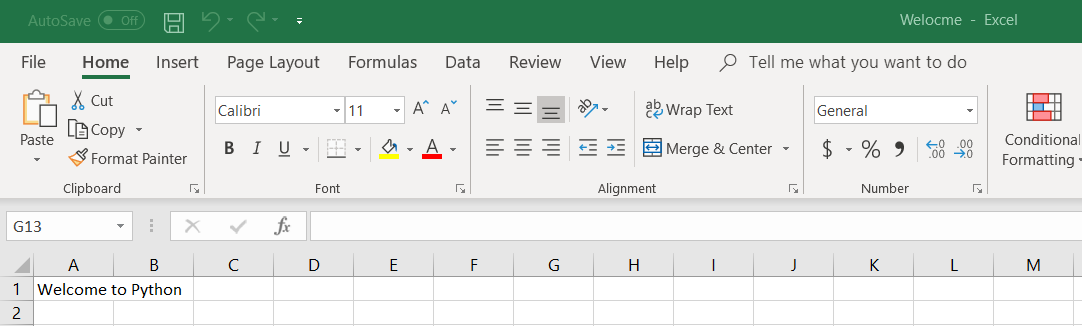
You can browse the directory and open the Welcome.xlsx excel workbook. It shows the data entered by the Python code:
您可以浏览目录并打开Welcome.xlsx excel工作簿。 它显示了Python代码输入的数据:
将单词分成多列 (Split the words into multiple columns)
Let’s modify the above code and split the words into different columns A1, B1, and C1:
让我们修改上面的代码,并将单词分成不同的列A1,B1和C1:
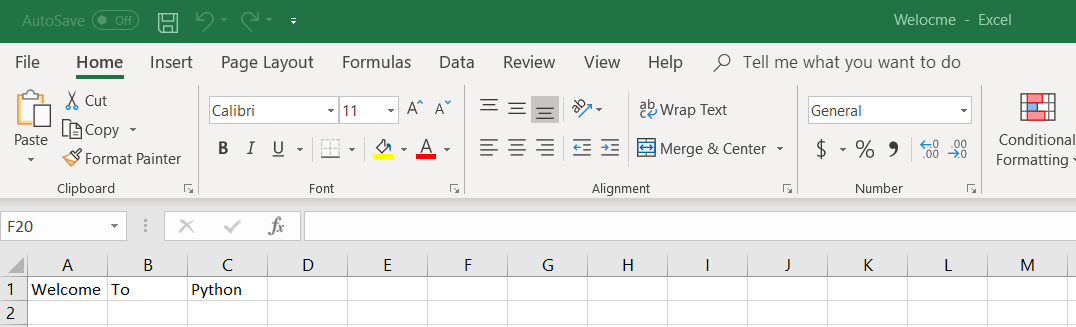
import xlsxwriter
workbook = xlsxwriter.Workbook('c:\\temp\\Welocme.xlsx')
worksheet = workbook.add_worksheet()
worksheet.write('A1', 'Welcome')
worksheet.write('B1', 'To')
worksheet.write('C1', 'Python')
workbook.close()
Once we execute the above code, it overwrites the existing Welcome.xlsx file. Open it, and you see words in different columns A1, B1, and C1:
一旦执行了以上代码,它将覆盖现有的Welcome.xlsx文件。 打开它,您会在A1,B1和C1不同栏中看到单词:
多个行和列中的数据以及列标题 (Data in multiple rows and columns along with column headers)
Suppose we want to create an excel sheet with the following data using Python scripts. It includes multiple columns and rows:
假设我们要使用Python脚本使用以下数据创建一个excel工作表。 它包括多个列和行:
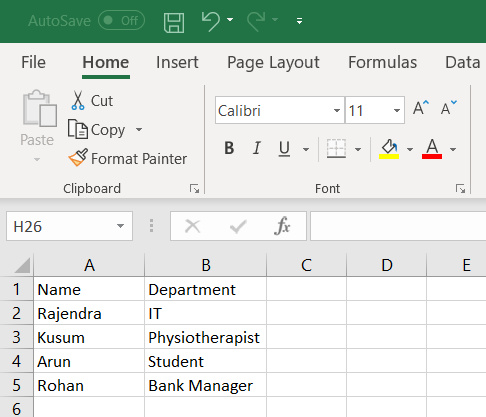
We use the following Python scripts for preparing this kind of excel sheet:
我们使用以下Python脚本来准备这种Excel工作表:
We defined column names using worksheet.write()
我们使用worksheet.write()定义了列名
worksheet.write('A1', 'Name') worksheet.write('B1', 'Department')- We start index for rows and columns. For the first row and first column, it uses a zero indexing counter. We specified column names in the previous step, so my counter starts from row=1 and col=0 我们开始为行和列建立索引。 对于第一行和第一列,它使用零索引计数器。 我们在上一步中指定了列名,所以我的计数器从row = 1和col = 0开始
We write the required data in an array format in the data variable. It contains the data that we wish to display in the excel:
我们将所需的数据以数组格式写入data变量中。 它包含我们希望在excel中显示的数据:
  data = (
    ['Rajendra', 'IT'],
    ['Kashish','Physiotherapist'],
    ['Arun', 'Student'],
    ['Rohan','Bank Manager'],
)
The code contains a FOR interaction loop to go through each row and column. It writes in the respective row and column for the worksheet:
该代码包含一个FOR交互循环,以遍历每一行和每一列。 它在工作表的相应行和列中写入:
for name, score in (data):
        worksheet.write(row, col, name)
        worksheet.write(row, col + 1, score)
        row += 1
The complete Python scripts for preparing this excel is as follows:
准备此excel的完整Python脚本如下:
import xlsxwriter
workbook = xlsxwriter.Workbook('c:\\temp\\Welocme.xlsx')
worksheet = workbook.add_worksheet()
worksheet.write('A1', 'Name')
worksheet.write('B1', 'Department')

row = 1
col = 0

data = (
    ['Rajendra', 'IT'],
    ['Kashish','Physiotherapist'],
    ['Arun', 'Student'],
    ['Rohan','Bank Manager'],
)

for name, score in (data):
    worksheet.write(row, col, name)
    worksheet.write(row, col + 1, score)
    row += 1
workbook.close()
使用Python脚本的粗体字符 (Bold characters using Python Scripts)
In many cases, we make column names in bold characters so that users can differentiate column with the actual data. In Python, we enable the bold property, as shown below:
在许多情况下,我们以粗体字符显示列名称,以便用户可以将列与实际数据区分开。 在Python中,我们启用了bold属性,如下所示:
bold = workbook.add_format({'bold': True})</p>
<p>
  Later, we use this variable in the worksheet.write() function. It changes the respective column font in the bold color.
</p>
<p>
  Execute the following code to create an excel sheet similar to the previous one except columns are in bold font:
</p>
<pre lang="python">import xlsxwriter
workbook = xlsxwriter.Workbook('c:\\temp\\Welocme1.xlsx')
worksheet = workbook.add_worksheet()

bold = workbook.add_format({'bold': True})

worksheet.write('A1', 'Name', bold)
worksheet.write('B1', 'Department', bold)
row = 1
col = 0

data = (
    ['Rajendra', 'IT'],
    ['Kashish','Physiotherapist'],
    ['Arun', 'Student'],
    ['Rohan','Bank Manager'],
)

for name, score in (data):
    worksheet.write(row, col, name)
    worksheet.write(row, col + 1, score)
    row += 1
workbook.close()
In the excel, you can view columns Name and Department in bold letters:
在excel中,您可以使用粗体字母查看“名称”和“部门”列:
修改Microsoft Excel列的列宽 (Modify a column width of Microsoft Excel columns)
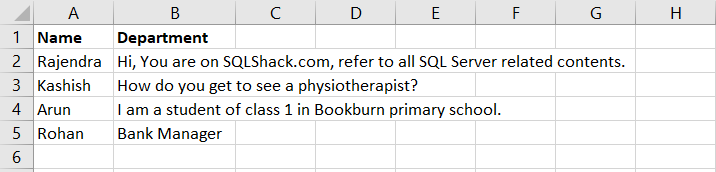
Look at the following excel sheet. In this, text written in column B is span across multiple columns. Usually, in excel, we change the column width to display it appropriately. It does not conflict with text written in other columns:
看下面的Excel表格。 在这种情况下,写在B列中的文本跨多个列。 通常,在excel中,我们更改列宽以适当显示它。 它与其他列中编写的文本不冲突:
We can define the row and column width for excel cells in Python as well. For this we use worksheet.set_column function along with column width. We specify column in format of [column:column].
我们也可以在Python中为Excel单元格定义行和列的宽度。 为此,我们使用worksheet.set_column函数以及列宽。 我们以[column:column]的格式指定列。
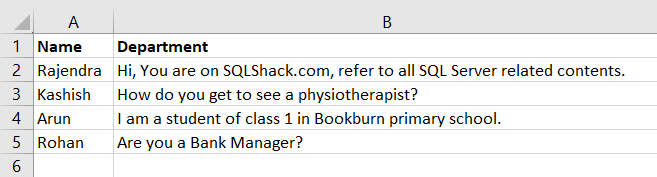
worksheet.set_column('B:B', 60)</p>
<p>
  In the code above, we added the column width 60 so that it does not conflict with text in column C:
</p>
<pre lang="python">import xlsxwriter
workbook = xlsxwriter.Workbook('c:\\temp\\Welocme1.xlsx')
worksheet = workbook.add_worksheet()

bold = workbook.add_format({'bold': True})

worksheet.write('A1', 'Name', bold)
worksheet.write('B1', 'Department', bold)
row = 1
col = 0

data = (
    ['Rajendra', 'Hi, You are on SQLShack.com, refer to all SQL Server related contents.'],
    ['Kashish','How do you get to see a physiotherapist?'],
    ['Arun', 'I am a student of class 1 in Bookburn primary school.'],
    ['Rohan','Are you a Bank Manager?'],
)

worksheet.set_column('B:B', 60)

for name, score in (data):
    worksheet.write(row, col, name)
    worksheet.write(row, col + 1, score)
    row += 1
workbook.close()
Look at the difference in the output. It changed the column width to the appropriate size.
查看输出的差异。 它将列宽更改为适当的大小。
更改字体颜色和大小 (Change font color and size)
Now, let’s look at changing font color and size for the column headers.
现在,让我们看一下更改列标题的字体颜色和大小。
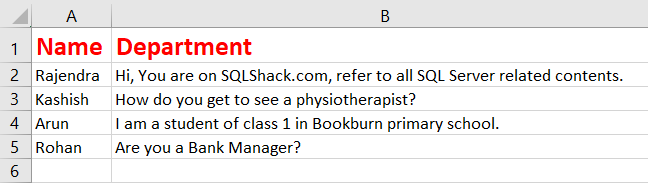
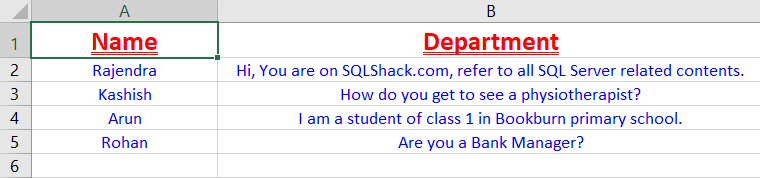
We define font color using font_color and font size using set_font_size variables in Python scripts. For this demonstration, let’s add red color for the column header with font size 16:
我们在Python脚本中使用font_color定义字体颜色,并使用set_font_size变量定义字体大小。 在此演示中,让我们为字体大小为16的列标题添加红色:
import xlsxwriter
workbook = xlsxwriter.Workbook('c:\\temp\\Welocme1.xlsx')
worksheet = workbook.add_worksheet()

cell_format = workbook.add_format({'bold': True, 'font_color': 'red'})
cell_format.set_font_size(16)

worksheet.write('A1', 'Name', cell_format)
worksheet.write('B1', 'Department', cell_format)
row = 1
col = 0

data = (
    ['Rajendra', 'Hi, You are on SQLShack.com, refer to all SQL Server related contents.'],
    ['Kashish','How do you get to see a physiotherapist?'],
    ['Arun', 'I am a student of class 1 in Bookburn primary school.'],
    ['Rohan','Are you a Bank Manager?'],
)

worksheet.set_column('B:B', 60)
worksheet.set_column('B:B', 60)

for name, score in (data):
    worksheet.write(row, col, name)
    worksheet.write(row, col + 1, score)
    row += 1
workbook.close()
Executing the code gives the following output:
执行代码将产生以下输出:
为列标题添加下划线 (Add an underline for the column header)
We can add a column header using the cell format function set_underline(). Add the following line in the code, and it generates column headers with an underline:
我们可以使用单元格格式函数set_underline()添加列标题。 在代码中添加以下行,它将生成带下划线的列标题:
cell_format.set_underline()Let’s execute the following code for the column header underline:
让我们为列标题下划线执行以下代码:
import xlsxwriter
workbook = xlsxwriter.Workbook('c:\\temp\\Welocme1.xlsx')
worksheet = workbook.add_worksheet()

cell_format = workbook.add_format({'bold': True, 'font_color': 'red'})
cell_format.set_font_size(16)
cell_format.set_underline()
worksheet.write('A1', 'Name', cell_format)
worksheet.write('B1', 'Department', cell_format)
row = 1
col = 0

data = (
    ['Rajendra', 'Hi, You are on SQLShack.com, refer to all SQL Server related contents.'],
    ['Kashish','How do you get to see a physiotherapist?'],
    ['Arun', 'I am a student of class 1 in Bookburn primary school.'],
    ['Rohan','Are you a Bank Manager?'],
)

worksheet.set_column('B:B', 60)
worksheet.set_column('B:B', 60)

for name, score in (data):
    worksheet.write(row, col, name)
    worksheet.write(row, col + 1, score)
    row += 1
workbook.close()
It gives the following output:
它给出以下输出:
We have few underline options available as below:
我们提供以下划线选项:
- 1 = Default format 1 =默认格式
- 2 = Double underline 2 =双下划线
- 33 = Single accounting underline 33 =单个会计下划线
- 34 = Double accounting underline 34 =双会计下划线
We can format data for double accounting underline using the below code:
我们可以使用以下代码为双重记账下划线格式化数据:
cell_format.set_underline(34)If we change the format to double underline, you get the following output:
如果将格式更改为双下划线,您将获得以下输出:
cell_format.set_underline(2)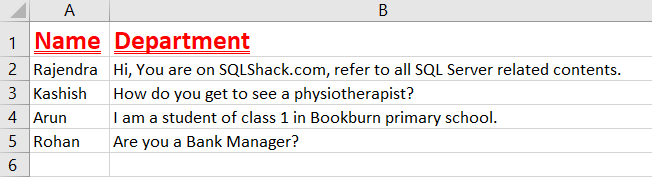
文字对齐 (Text Alignments)
In a Microsoft Excel worksheet, we can arrange a text in the left, right, center in respective columns. In the following screenshot, we applied formatting options:
在Microsoft Excel工作表中,我们可以在相应列的左,右,中心排列文本。 在以下屏幕截图中,我们应用了格式选项:
- The header should be center-aligned 标头应居中对齐
- Other rows of data color should be in blue and center-aligned 数据颜色的其他行应为蓝色且居中对齐
In this case, we have two formats – one for the column header and another for the rest of the columns. In the following Python scripts, we defined cell_format and cell_format1:
在这种情况下,我们有两种格式-一种用于列标题,另一种用于其余列。 在以下Python脚本中,我们定义了cell_format和cell_format1:
In the Cell_format, we add another line for font alignment.
在Cell_format中,我们添加了另一行用于字体对齐。
cell_format.set_align('center')In another format, we defined font color using property font_color and set the alignment to center.
在另一种格式中,我们使用属性font_color定义了字体颜色,并将对齐方式设置为居中。
cell_format1 = workbook.add_format({'font_color': 'blue'})

cell_format1.set_align('center')
We have two kinds of text format now. We need to apply them to appropriate columns only. For example, column headers look the same as in the previous example with a difference that it is aligned center. We use cell_format for the column headers:
现在我们有两种文本格式。 我们只需要将它们应用于适当的列。 例如,列标题看起来与前面的示例相同,只是中心对齐。 我们使用cell_format作为列标题:
cell_format = workbook.add_format({'bold': True, 'font_color': 'red'})
cell_format.set_font_size(16)
cell_format.set_underline(2)
cell_format.set_align('center')
For the rest of the data, we require center alignment and font in blue color. We define another cell format for this:
对于其余数据,我们需要中心对齐和蓝色字体。 为此,我们定义了另一种单元格格式:
cell_format1 = workbook.add_format({'font_color': 'blue'})

cell_format1.set_align('center')
Later, we apply this new cell format for data from B2 to B5 and A1 to A5 using the worksheet.set_column function:
稍后,我们使用worksheet.set_column函数将这种新的单元格格式应用于从B2到B5以及从A1到A5的数据:
worksheet.set_column('B2:B5',60,cell_format1)
worksheet.set_column('A1:A5', 20,cell_format1)
We can view the complete code below and execute it to get the required results:
我们可以在下面查看完整的代码并执行以获得所需的结果:
import xlsxwriter
 workbook = xlsxwriter.Workbook('c:\\temp\\Welocme1.xlsx')
 worksheet = workbook.add_worksheet()

 cell_format = workbook.add_format({'bold': True, 'font_color': 'red'})
 cell_format.set_font_size(16)
 cell_format.set_underline(2)
 cell_format.set_align('center')

 cell_format1 = workbook.add_format({'font_color': 'blue'})

 cell_format1.set_align('center')
 worksheet.write('A1', 'Name', cell_format)
 worksheet.write('B1', 'Department', cell_format)
 row = 1
 col = 0

 data = (
     ['Rajendra', 'Hi, You are on SQLShack.com, refer to all SQL Server related contents.'],
     ['Kashish','How do you get to see a physiotherapist?'],
     ['Arun', 'I am a student of class 1 in Bookburn primary school.'],
     ['Rohan','Are you a Bank Manager?'],
 )

 worksheet.set_column('B1:B1', 60)
 worksheet.set_column('B2:B5',60,cell_format1)
 worksheet.set_column('A1:A5', 20,cell_format1)

 for name, score in (data):
     worksheet.write(row, col, name)
     worksheet.write(row, col + 1, score)
     row += 1
 workbook.close()
结论 (Conclusion)
In this article, we explored Python scripts for data formatting in Microsoft Excel. Python is a powerful language, and we can do much work with a few lines of code. SQL Server 2017 onwards, we can execute Python code inside SQL Server. This article will help you in working with data in Python itself without doing formatting in Excel.
在本文中,我们探索了用于在Microsoft Excel中进行数据格式化的Python脚本。 Python是一种功能强大的语言,我们可以用几行代码来完成很多工作。 从SQL Server 2017起,我们可以在SQL Server中执行Python代码。 本文将帮助您使用Python本身中的数据,而无需在Excel中进行格式化。
翻译自: https://www.sqlshack.com/python-scripts-to-format-data-in-microsoft-excel/


 5121
5121

 被折叠的 条评论
为什么被折叠?
被折叠的 条评论
为什么被折叠?
 到【灌水乐园】发言


