


azure web应用部署
In this article, we are going to build a small python application and deploy it to Azure Functions. The development and the deployment will be done using the Visual Studio (VS) Code. As you might be aware, VS Code is one of the most widely used and preferred code editors for programmers. It is a cross-platform tool, which means you can install this tool on any operating system of your choice, starting from Windows, Linux, or Mac OS.
在本文中,我们将构建一个小型python应用程序并将其部署到Azure Functions。 开发和部署将使用Visual Studio(VS)代码完成。 您可能已经知道,VS Code是程序员使用最广泛且首选的代码编辑器之一。 它是一个跨平台的工具,这意味着您可以从Windows,Linux或Mac OS开始在您选择的任何操作系统上安装此工具。
What makes the VS Code so unique and popular is that there are tons of custom extensions that are developed by the community. These extensions are leveraged and can be extended the default behavior of the code editor as you want.
使得VS Code如此独特和流行的原因在于,社区开发了大量的自定义扩展。 利用这些扩展,可以根据需要扩展代码编辑器的默认行为。
应用程序开发的先决条件
(Pre-requisites for app development
)
Assuming that this article is for a beginner, I will start by listing out all the possible pre-requisites that you need to have in order to deploy your code to Azure Functions from Visual Studio Code.
假定本文是针对初学者的,我将首先列出将代码从Visual Studio Code部署到Azure Functions所需的所有可能的先决条件。
- Python executable – First things first, since in this article, we are going to learn how to deploy python apps, we need to have the python executable installed in our system. You can head over to Python可执行文件 –首先,由于在本文中,我们将学习如何部署python应用程序,因此我们需要在系统中安装python可执行文件。 您可以转到https://www.python.org/ and download Python for your operating system https://www.python.org/并下载适用于您的操作系统的Python
- Visual Studio Code – Yes, as we are going to use Visual Studio Code as the code editor and build our app using the same, you need to get this installed and running on your machine as well. Visual Studio Code is a cross-platform tool, and you can get it installed on any operating system. Download Visual Studio Code by visiting Visual Studio Code –是的,因为我们要使用Visual Studio Code作为代码编辑器并使用该应用程序构建我们的应用程序,因此您还需要在计算机上安装并运行它。 Visual Studio Code是一个跨平台工具,您可以将其安装在任何操作系统上。 通过访问http://code.visualstudio.com/ http://code.visualstudio.com/下载Visual Studio Code。
- Python Extension for Visual Studio Code – By default, when you install Visual Studio Code, you do not have the option to execute python files directly. You need to install an additional extension provided by Microsoft to support working with python files. Download this extension from the marketplace by visiting 适用于Visual Studio Code的Python扩展 –默认情况下,安装Visual Studio Code时,您没有选择直接执行python文件的选项。 您需要安装Microsoft提供的其他扩展程序,以支持使用python文件。 通过访问https://marketplace.visualstudio.com/items?itemName=ms-python.python https://marketplace.visualstudio.com/items?itemName=ms-python.python从市场上下载此扩展程序。
- Azure Functions Extension for Visual Studio Code – In order to be able to deploy your code to Azure Functions, you need to install the extension as well. You can install the same by visiting 用于Visual Studio Code的Azure Functions扩展 –为了能够将代码部署到Azure Functions,还需要安装扩展。 您可以通过访问https://marketplace.visualstudio.com/items?itemName=ms-azuretools.vscode-azurefunctions https://marketplace.visualstudio.com/items?itemName=ms-azuretools.vscode-azurefunctions安装相同的文件
- Azure Functions Core Tools – In order to debug and run your functions locally, you need to set up Azure Functions Core Tools as well. You can follow how to install this tool from the Azure Functions核心工具 –为了在本地调试和运行函数,您还需要设置Azure Functions核心工具。 您可以从official documentation 官方文档中了解如何安装此工具
- A valid Azure Account – You also need to have an Azure account up and running for this. Visit 有效的Azure帐户 –为此,您还需要启动并运行一个Azure帐户。 访问https://portal.azure.com to create your account https://portal.azure.com创建您的帐户
Once you are done with installing all the pre-requisites as mentioned above, you should be good to start with it. Now, the Visual Studio Code looks something like this.
一旦完成了上述所有前提条件的安装,就应该从头开始。 现在,Visual Studio代码看起来像这样。
As you can see, an icon for using the Azure Services appears on the left-hand pane. Use this panel to sign-in to your Azure account to proceed forward.
如您所见,用于使用Azure服务的图标出现在左侧窗格中。 使用此面板登录到您的Azure帐户以继续进行操作。
在本地创建项目 (Creating the project locally)
Now that we are able to set up our environment for development let us go ahead and create a new project. Start by clicking on the New Project icon under Azure Functions in the panel and browse a directory to start with.
现在我们已经能够建立我们的开发环境,让我们继续进行并创建一个新项目。 首先,单击面板中“ Azure功能”下的“新建项目”图标,然后浏览要开始的目录。
Once you have specified the folder for the project, the next step is to choose the programming language that you want to start with. For the sake of this tutorial, I am going to go ahead and choose Python.
为项目指定文件夹后,下一步就是选择您要开始使用的编程语言。 为了本教程的缘故,我将继续选择Python 。
In the next step, you need to tell the Visual Studio Code, wherein the binary file for the Python. In this step, the VS Code will create a virtual environment for the project and run the python file inside it.
在下一步中,您需要告诉Visual Studio Code,其中Python的二进制文件。 在此步骤中,VS Code将为项目创建一个虚拟环境,并在其中运行python文件。
In the next step, you will be prompted with a choice to select a template to begin with. Templates help you to do the heavy lifting in your application, and you just need to focus on your code. It is absolutely fine if you want to write your own code from scratch, but to keep things simpler and sweet, I am going to select the HTTP Trigger template.
在下一步中,系统将提示您选择开始的模板。 模板可以帮助您完成应用程序中的繁重工作,而您只需要关注代码即可。 如果您想从头开始编写自己的代码,那绝对没问题,但是为了使事情变得简单而甜美,我将选择HTTP触发器模板。
Now, we have selected our environment and also defined a template that we would like to use. The next step is to add a name to our function. Please note that your Azure Function on the Azure portal will also be created using this name.
现在,我们选择了环境并定义了我们要使用的模板。 下一步是为我们的功能添加名称。 请注意,您还将在Azure门户上使用此名称创建Azure功能。
The penultimate step here is to select the authorization level for your Azure function. Although in a production application, there will be securities and authentication involved, for our tutorial, we will go with the Anonymous authentication.
倒数第二步是选择Azure功能的授权级别。 尽管在生产应用程序中会涉及证券和身份验证,但对于我们的教程,我们将使用匿名身份验证。
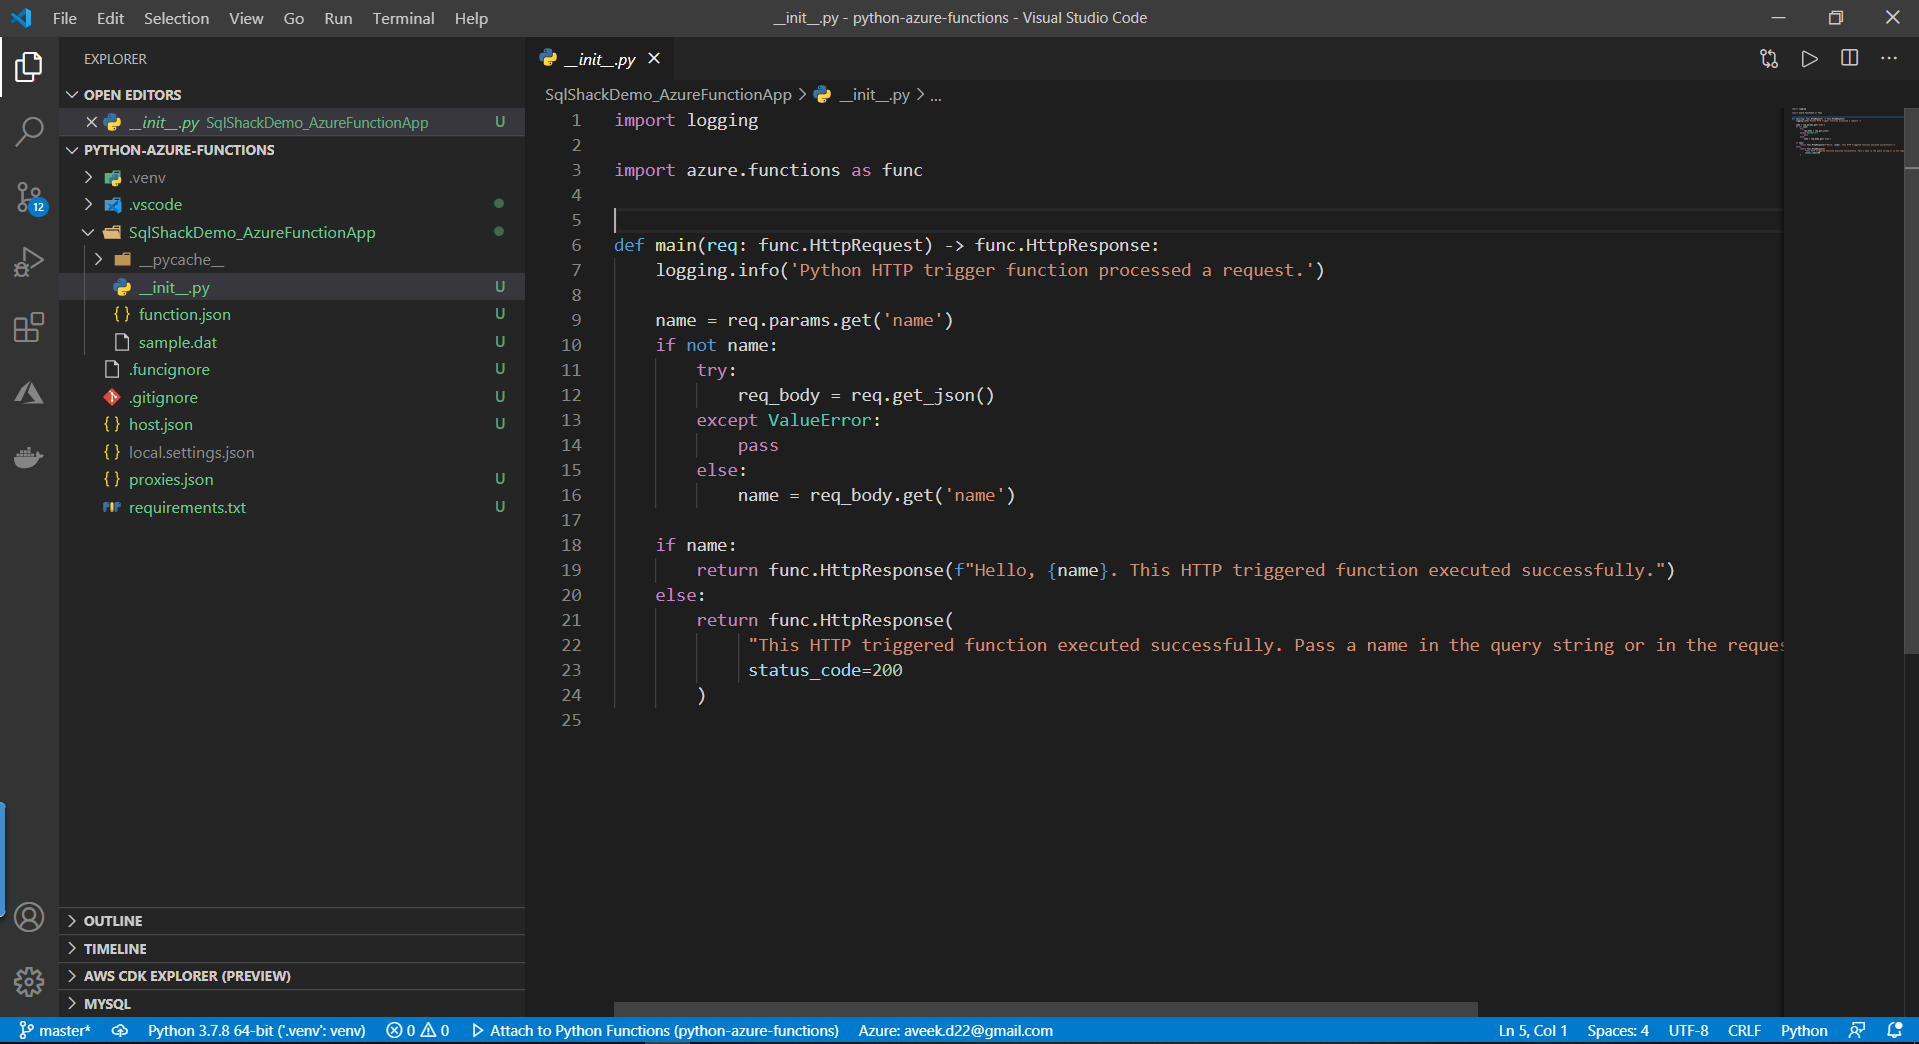
Once the app is created, you can see something like this on your screen.
创建应用程序后,您可以在屏幕上看到类似的内容。
在本地调试功能 (Debugging the function locally)
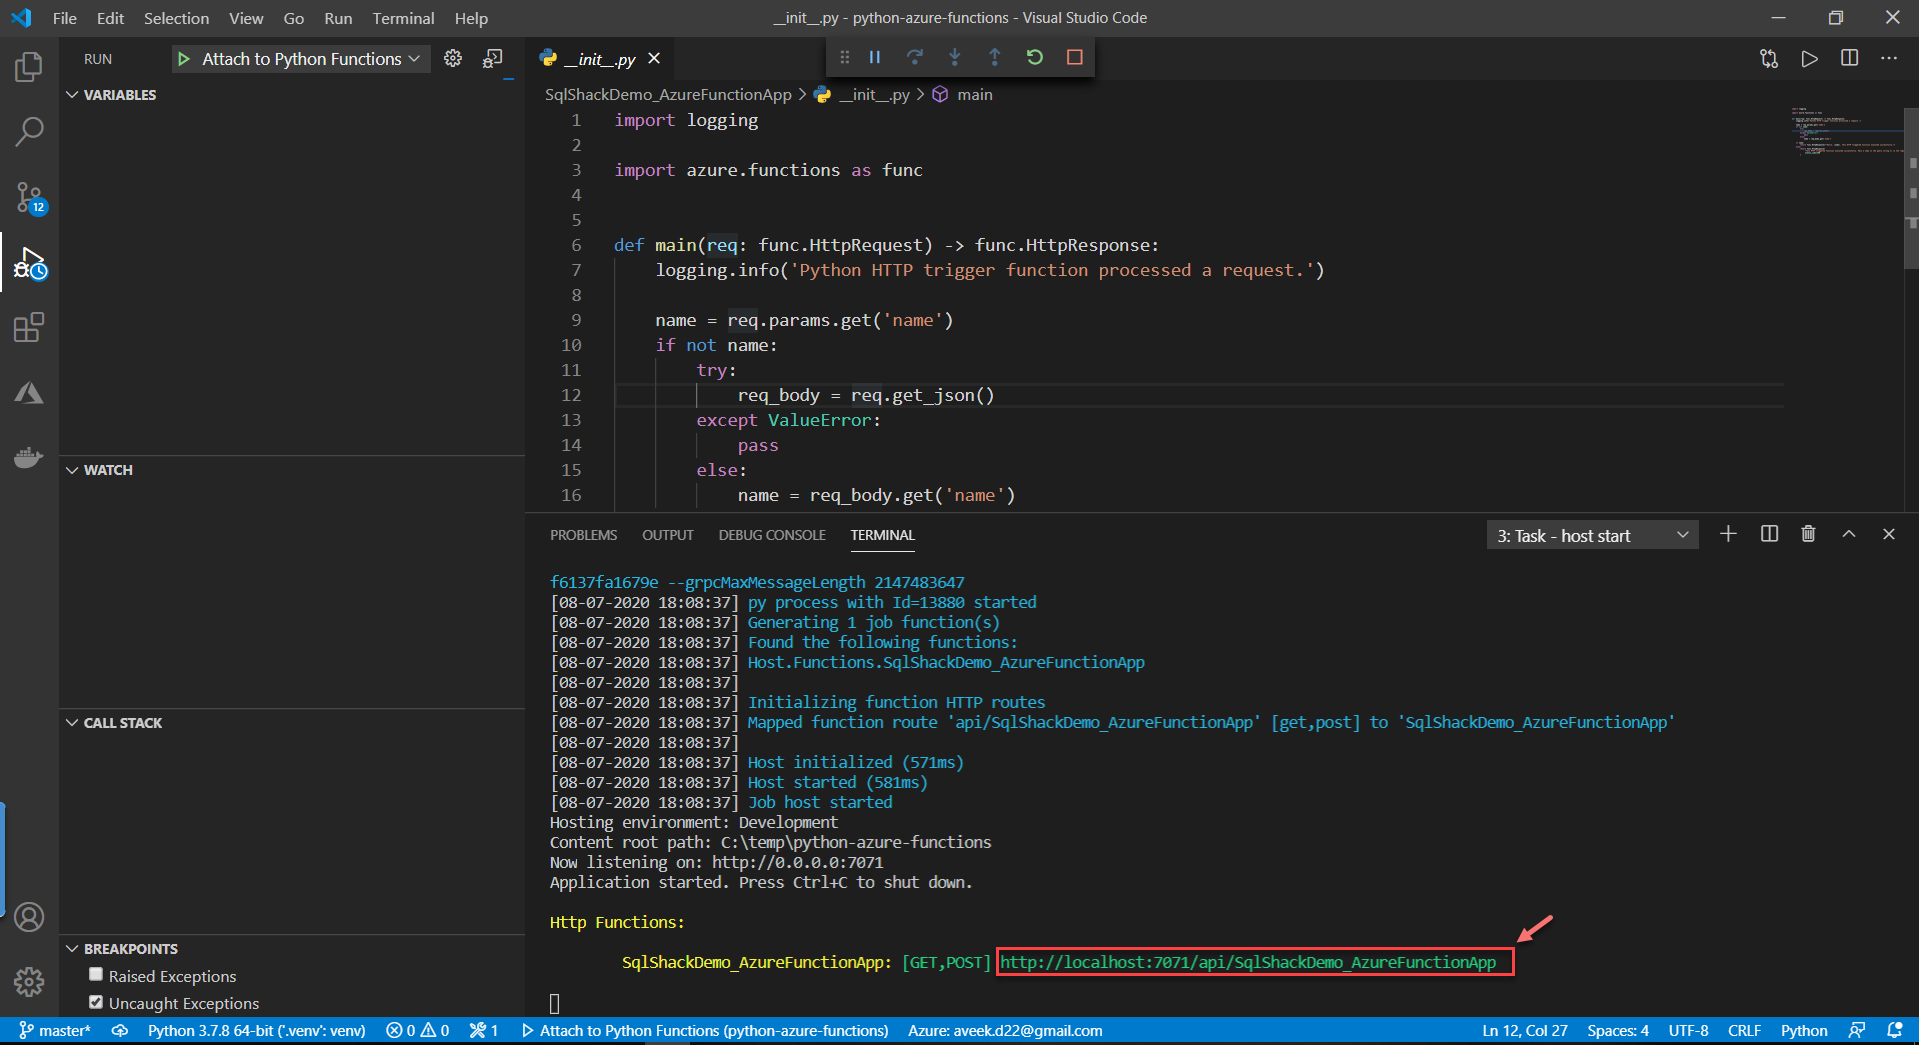
Now that our function is ready, we can debug it locally to test if it is working as expected. To debug, click on the debug icon, and select Debug (Attach to Python Functions) or press F5 on your keyboard.
现在我们的功能已经准备就绪,我们可以在本地调试它以测试它是否按预期工作。 要进行调试,请单击调试图标,然后选择“调试”(“ 附加到Python函数” )或按键盘上的F5。
As soon as you start debugging, you can see the terminal window is displayed, and the function is hosted locally on a URL. You can open this URL on a browser window. Click to open this URL on the browser.
一旦开始调试,就可以看到显示了终端窗口,并且该函数在本地托管在URL上。 您可以在浏览器窗口中打开此URL。 单击以在浏览器中打开此URL。
In the browser, you can see something like this.
在浏览器中,您可以看到类似这样的内容。

You can modify the URL and append “?name=aveek” at the end of the query to test if it is working fine.
您可以修改URL并在查询末尾附加“ ?name = aveek ”,以测试其是否正常运行。
Now that the function is running as expected on our local, we can go ahead and deploy it on Azure Functions.
现在,该功能已在我们的本地上按预期运行,我们可以继续将其部署在Azure Functions上。
将该功能部署到Azure (Deploying the function to Azure)
To deploy your code to the Function App, click on the Deploy icon, as shown in the figure below.
要将代码部署到Function App,请单击Deploy图标,如下图所示。
You will be prompted with the following two options. I am going to choose the first option with basic settings.
系统将提示您以下两个选项。 我将选择具有基本设置的第一个选项。
In the following steps, provide a unique name of the Function App that you want and specify the version of Python. You might also need to provide the name of the region under which you would like the resources to be created in Azure. It might take some time to build up the resources on the cloud, and you can grab some coffee while the function is being deployed.
在以下步骤中,提供所需的Function App的唯一名称并指定Python的版本。 您可能还需要提供要在Azure中创建资源的区域的名称。 在云上建立资源可能需要一些时间,并且在部署功能时可以喝点咖啡。
You can see that the function has been deployed successfully and up for our use. Head over and click the URL that you can see and open it on the browser.
您可以看到该功能已成功部署并且可以使用。 转到并单击您可以看到的URL,然后在浏览器中将其打开。
As you might have guessed, the function is now deployed to Azure and works as expected.
您可能已经猜到了,该功能现在已部署到Azure并按预期工作。
结论 (Conclusion)
In this article, we have seen how to develop python applications using Visual Studio Code locally. I have also explained how we can deploy the same applications to Azure Functions directly from VS Code editor. This is a great way to quickly deploy your app to the cloud without having to leave the code editor. You can easily build your apps locally and verify them. Once these apps are verified in local, you can quickly publish it to the cloud with the help of just a few clicks. This really helps to save a lot of time for the developers and help them focus on the code rather than deploying the changes.
在本文中,我们已经看到了如何使用Visual Studio Code在本地开发python应用程序。 我还解释了如何直接从VS Code编辑器将相同的应用程序部署到Azure Functions。 这是一种无需离开代码编辑器即可将应用程序快速部署到云的好方法。 您可以轻松地在本地构建应用并进行验证。 这些应用在本地验证后,只需单击几下即可将其快速发布到云中。 这确实有助于为开发人员节省大量时间,并帮助他们专注于代码而不是部署更改。
翻译自: https://www.sqlshack.com/deploy-python-apps-to-azure-functions-using-visual-studio-code/
azure web应用部署


 132
132


 被折叠的 条评论
为什么被折叠?
被折叠的 条评论
为什么被折叠?
 到【灌水乐园】发言


