


sql server 群集
This article is divided in three parts, if you started here, check the first part to find the previous steps.
本文分为三个部分,如果您从这里开始, 请检查第一部分以找到前面的步骤。
We already opened the “SQL Server Installation Center”, so we now need to go to the “Installation” option, in the menu on the left side, and click on “New SQL Server failover cluster installation” option (the second one).
我们已经打开了“ SQL Server安装中心”,因此现在我们需要转到左侧菜单中的“安装”选项,然后单击“新建SQL Server故障转移群集安装”选项(第二个)。

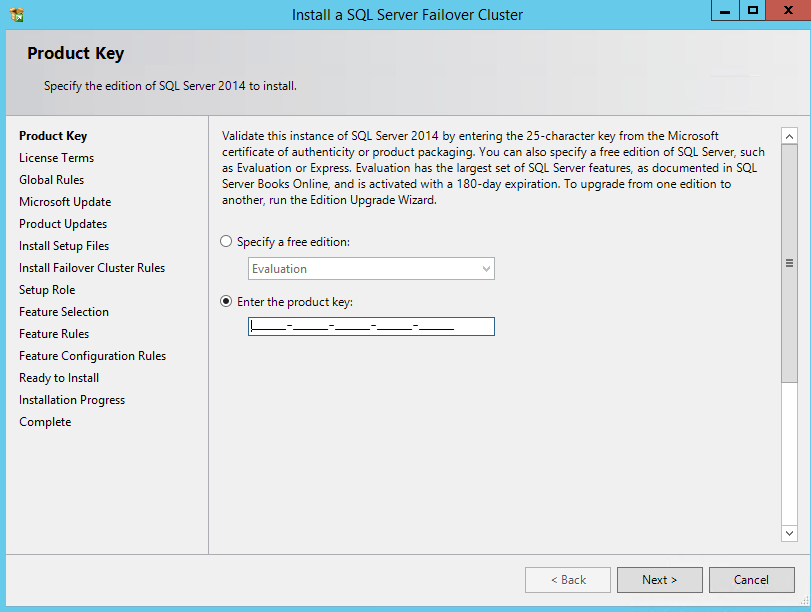
The installation wizard will start-up. The first step is insert the product key (normally it comes automatically) and click next.
安装向导将启动。 第一步是插入产品密钥(通常会自动提供),然后单击下一步。
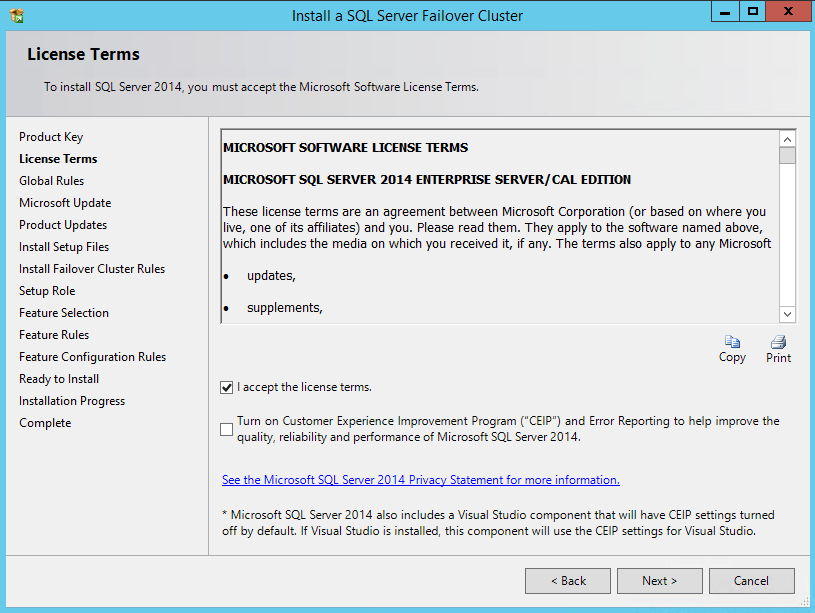
Now read the agreement 🙂 and check the box right to “I accept the license terms”, click “Next”.
现在,阅读协议🙂,然后选中“我接受许可条款”右侧的框,然后单击“下一步”。
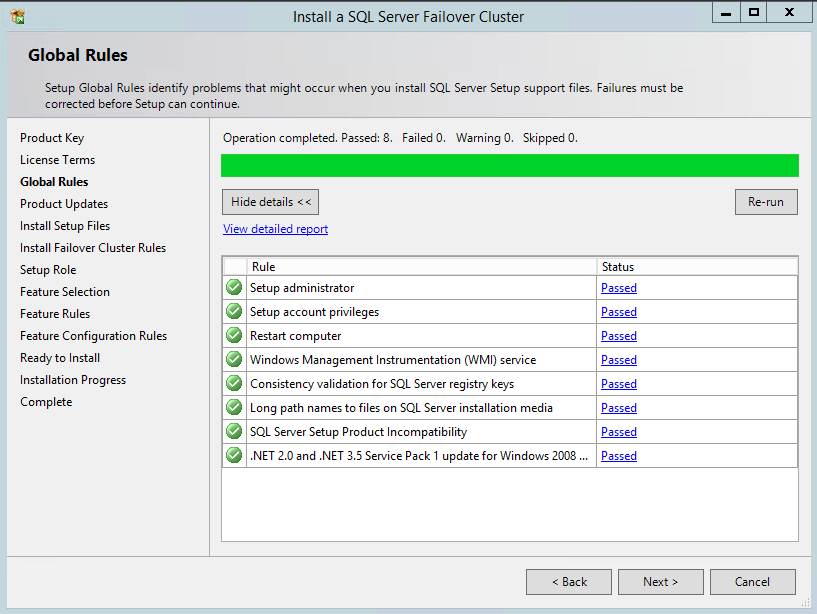
Now the wizard will check if the server where you are installing the instance has guaranties the Global Rules prerequisites. If you pass on all the tests, SQL Server will just proceed to the next step automatically.
现在,向导将检查您要在其中安装实例的服务器是否具有“全局规则”先决条件。 如果您通过所有测试,则SQL Server会自动继续进行下一步。
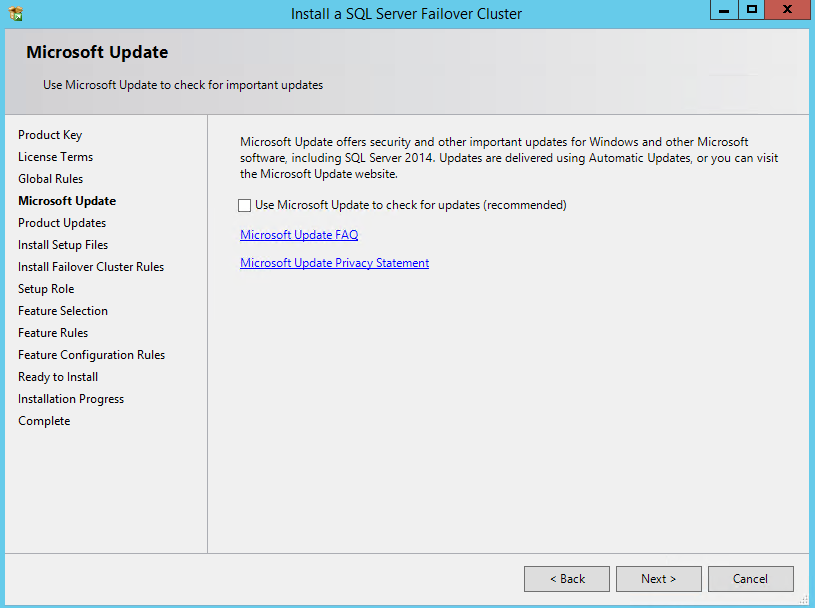
At this stage, you have the option to download the updates for a most updated installation. I prefer to not select this option and apply the patches manually after the successful installation. Just click Next.
在此阶段,您可以选择下载更新以进行最新安装。 我不想选择此选项,而是在成功安装后手动应用补丁程序。 只需单击下一步。
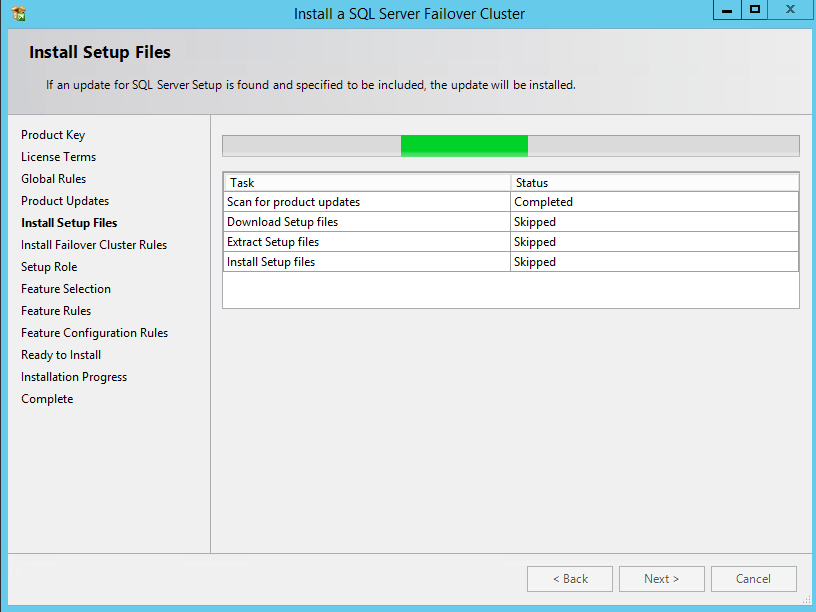
If you opted to include the updates, at this step the existence of updates will be checked, the files will be downloaded, extracted and installed. Just click Next (if the wizard don’t do this automatically).
如果您选择包括更新,则在此步骤中将检查更新是否存在,将下载,提取和安装文件。 只需单击“下一步”(如果向导不会自动执行此操作)。
Now the setup wizard will check for the Setup Rules, in order to identify potential problems that might occur while running the setup. Try to resolve all the failed checks. The one with warning can be ignored at this stage and resolved after the instance installation, if you prefer.
现在,安装向导将检查安装规则,以识别运行安装程序时可能发生的潜在问题。 尝试解决所有失败的检查。 如果愿意,可以在此阶段忽略带有警告的提示,并在实例安装后解决。

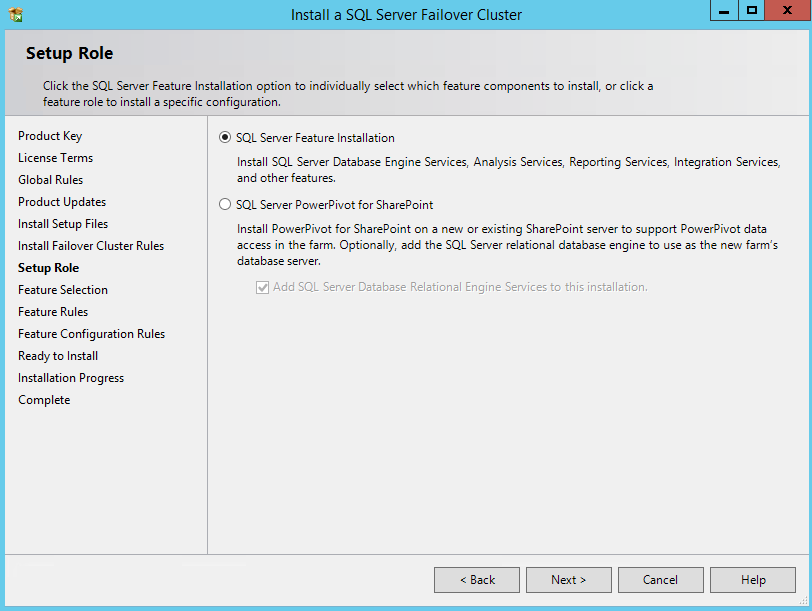
For this step, just keep the first option (SQL Server Feature Installation) selected and proceed to the next step.
对于此步骤,只需保持选择第一个选项(SQL Server功能安装),然后继续进行下一步。
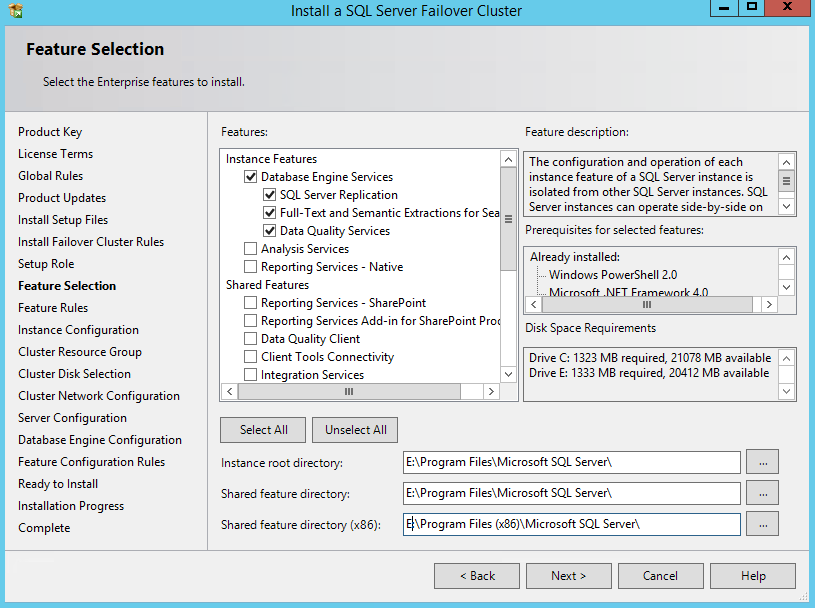
This step is the most important so far! Here we need to pick all the instance and/or shared features that we want to install. In my case, I just selected the “Database Engine Services” and the “Management Tools – Complete”. This will guaranty that I have the SQL Server Engine, Agent, SQL Server Management Studio, SQL Server Configuration manager… If you need services like the Integration Services or Analysis Services, you have to select the respective options. Just make sure to select only what you need! Please, do not select all if you will not use the feature, as this will use server resources that could be used by the SQL Server.
到目前为止,这是最重要的步骤! 在这里,我们需要选择所有要安装的实例和/或共享功能。 就我而言,我只是选择了“数据库引擎服务”和“管理工具-完整”。 这将确保我拥有SQL Server引擎,代理,SQL Server Management Studio,SQL Server配置管理器……如果您需要诸如Integration Services或Analysis Services之类的服务,则必须选择相应的选项。 只要确保只选择您需要的东西即可! 请不要选择全部(如果您不使用该功能),因为这将使用SQL Server可能使用的服务器资源。
Another important step here is the instance directory, basically where the binaries will be placed. You can notice that I indicated the drive “E”, the one I reserved for binaries.
这里的另一个重要步骤是实例目录,基本上是将放置二进制文件的位置。 您会注意到,我将驱动器指示为“ E”,这是我为二进制文件保留的驱动器。
Click Next to proceed.
单击下一步继续。
Once again, SQL Server will check for rules, this time for the features tha we selected. In my case you can notice that I was missing the “Microsoft .Net Framework 3.5 Service Pack 1”, as shown:
SQL Server将再次检查规则,这次将检查我们选择的功能。 以我为例,您会注意到我缺少“ Microsoft .Net Framework 3.5 Service Pack 1”,如下所示:
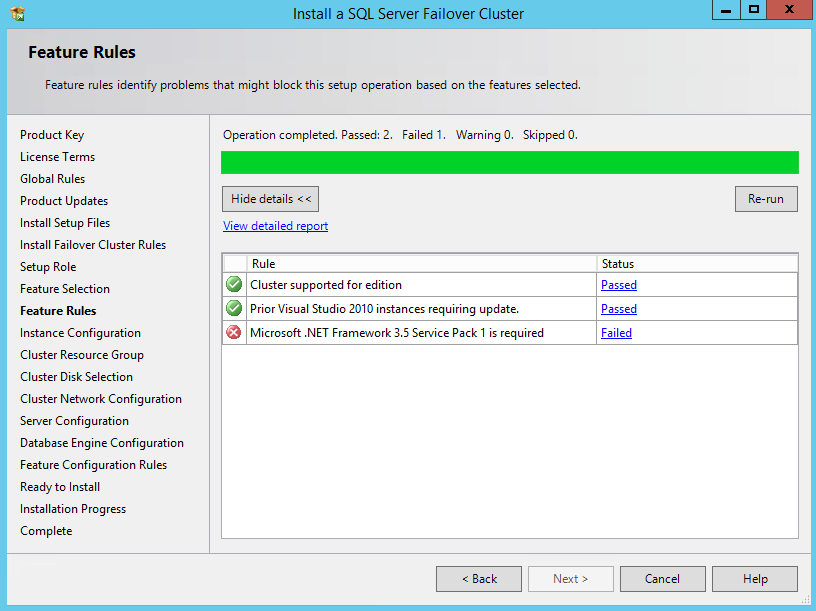
The .Net framework is required, so I need to install this in order to proceed with the installation. So, open the “Server Manager” and go to “Manage”, followed by “Add roles and features”:
.Net框架是必需的,因此我需要安装它才能继续进行安装。 因此,打开“服务器管理器”并转到“管理”,然后单击“添加角色和功能”:
Now select the server where you are going to install, and jump to the “Features” page (select the option in the left menu). Now Select the first option “.NET Framework 3.5 features” and proceed with the installation.
现在,选择要安装的服务器,然后跳到“功能”页面(在左侧菜单中选择选项)。 现在,选择第一个选项“ .NET Framework 3.5功能”并继续安装。

This feature should be installed on all the nodes of the cluster where you are going to install the clustered instance.
此功能应安装在要安装群集实例的群集的所有节点上。
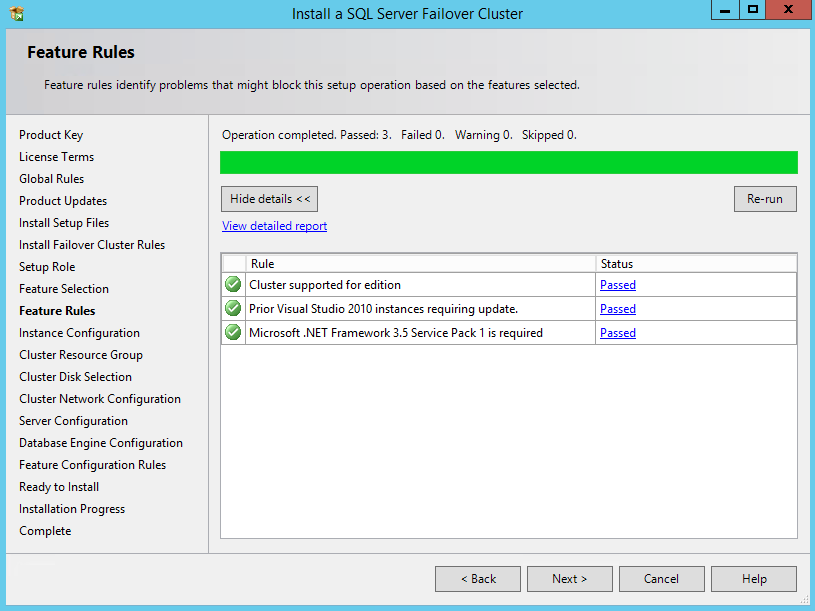
After the successful .Net Framework 3.5 installation we can go back to the SL Server Setup Wizard and click in the “Re-Run” button. This time no problems were found. Click Next (if SQL Server Setup don’t do this for you – that thing is becoming smarter 🙂
成功安装.Net Framework 3.5之后,我们可以返回到SL Server安装向导,然后单击“重新运行”按钮。 这次没有发现问题。 单击“下一步”(如果SQL Server安装程序没有为您执行此操作-事情将变得越来越聪明🙂
Now we need to fill the SQL Server Network Name. Do you remember that computer name that I referred in the beginning of this article? I’m talking about “SQLSRVCLT01”. It’s time to use it! Fill the network name and proceed to the next step.
现在我们需要填写SQL Server网络名称。 您还记得我在本文开头提到的计算机名称吗? 我说的是“ SQLSRVCLT01”。 现在该使用它了! 填写网络名称,然后继续下一步。
Note: If you have other instances installed, you might need to change the “Instance ID” value.
注意:如果安装了其他实例,则可能需要更改“实例ID”值。

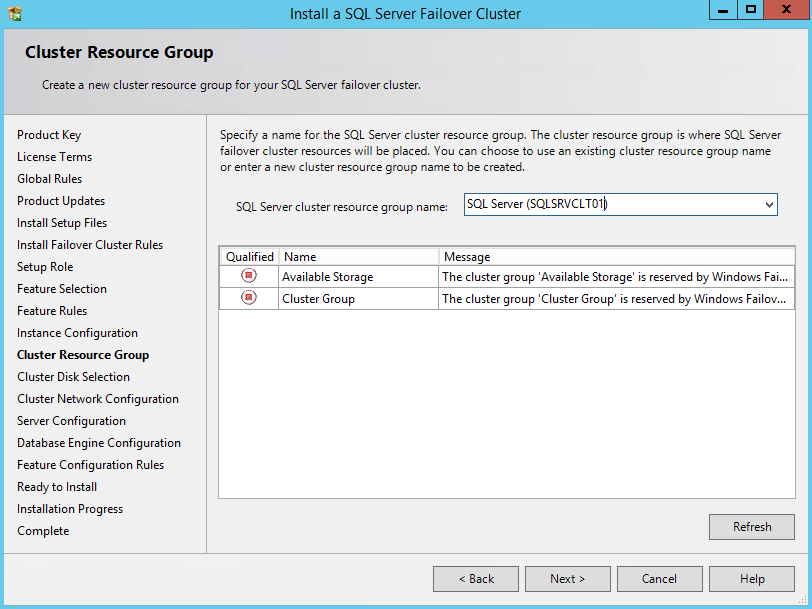
Now we need to set the cluster resource group name related to this instance. I usually change it by reflect the instance computer name, instead of the ID. Click Next.
现在,我们需要设置与此实例相关的集群资源组名称。 我通常通过反映实例计算机名称而不是ID来更改它。 点击下一步。
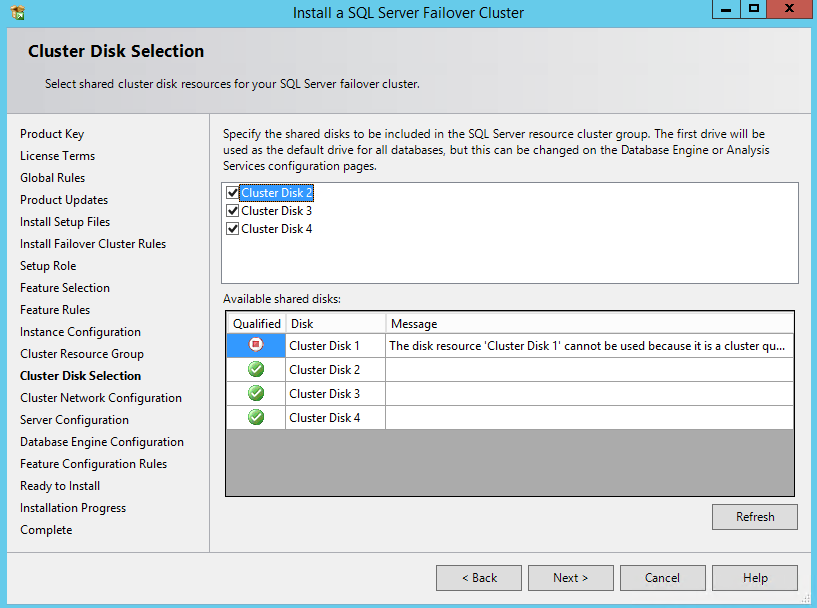
At this step, you have a list of all the available disks. If you compare this list with the Failover Cluster Manager, you will notice that this is the same. Only the available storage will be available here. Sometime you have more storage in the available storage list, so you won’t need to select everything, so pay attention here. In my case, I had only the storage that I need to install my clustered instance, so I’m good to select all and proceed.
在此步骤中,您具有所有可用磁盘的列表。 如果将此列表与故障转移群集管理器进行比较,您会注意到这是相同的。 这里只有可用的存储空间。 有时您会在可用存储列表中拥有更多存储空间,因此无需选择所有内容,因此请在此处注意。 就我而言,我只有安装集群实例所需的存储,因此最好选择全部并继续。
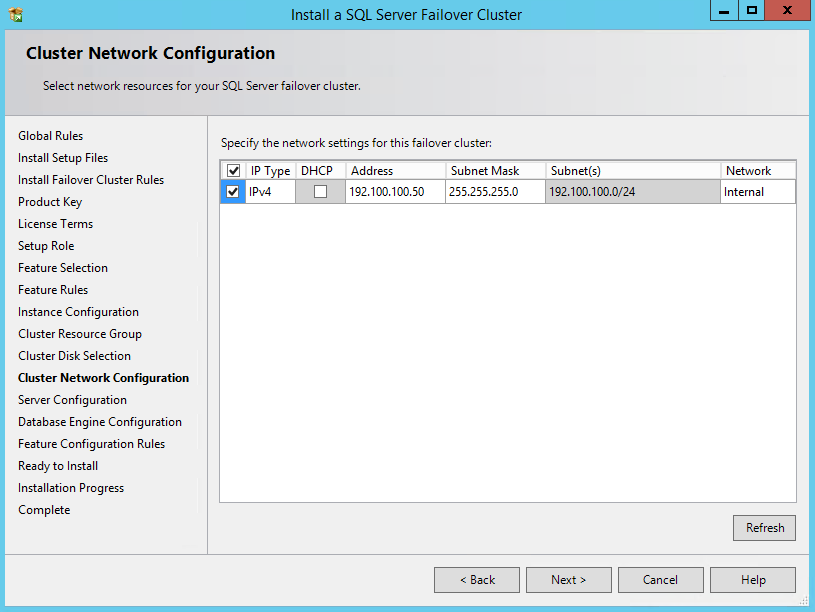
Here is another very important step. Do you remember the Virtual IP (VIP) that we defined in the beginning of this article? Now is the time to use it. Select the checkbox in the first column, make sure that the DHCP box is unchecked and insert the IP in the Address field. Notice that depending of the number of networks that you have available, you may need to have more than one IP!
这是另一个非常重要的步骤。 您还记得我们在本文开头定义的虚拟IP(VIP)吗? 现在是时候使用它了。 选中第一列中的复选框,确保未选中DHCP框,然后在“地址”字段中插入IP。 请注意,根据可用网络的数量,您可能需要多个IP!
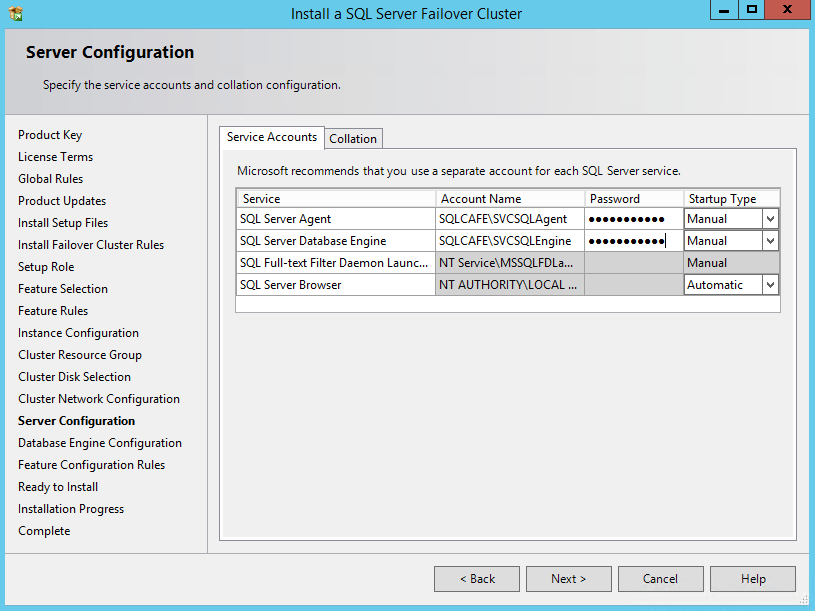
Another prerequisite will be used. Now the service accounts. On this page you need to insert the respective domain accounts and passwords for the SQL Server Engine and SQL Server agent. Make sure to type the correct password, is common to lock out accounts at this step, and not always easy to ask to the domain admin to unlock it 🙂 Another important point, do not change the “Startup Type” to automatic, as a clustered instance, the cluster manages where the instance will be active and all the operations need to be centralized to the Failover Cluster Manager.
将使用另一个前提条件。 现在该服务帐户。 在此页面上,您需要为SQL Server Engine和SQL Server代理插入相应的域帐户和密码。 确保输入正确的密码,此步骤通常是锁定帐户的密码,并且并非总是很容易要求域管理员将其解锁important另一个要点,不要将“启动类型”更改为自动,因为群集实例,群集管理实例将在何处处于活动状态,并且所有操作都需要集中到故障转移群集管理器中。
It’s also important to choose the proper Collation, on most of the cases the preselected one is ok, but make sure about the requirements. Change the instance collation after the installation is not an easy task…
选择适当的排序规则也很重要,在大多数情况下,预先选择的排序规则是可以的,但要确保要求。 安装后更改实例排序规则并非易事……
Check the third, and last, part to find the next steps.
检查第三部分,也是最后一部分,以查找后续步骤。
翻译自: https://www.sqlshack.com/sql-server-2014-install-clustered-instance-step-step-23/
sql server 群集


 1242
1242

 被折叠的 条评论
为什么被折叠?
被折叠的 条评论
为什么被折叠?
 到【灌水乐园】发言


