


介绍 (Introduction)
With Christmas just around the corner, in today’s “get together” I thought that we would have some fun by cataloging a collection of ‘your favorite items’. Whether it be a coin collection, a china plate collection or a stamp collection, the process is the same and certainly something that you will enjoy creating and maintaining. For today’s example, we are going to construct a “Postage Stamp” cataloging system. We are going to see how we are able to get from this…
圣诞节快到了,在今天的“聚在一起”中,我想我们可以通过编目“您最喜欢的物品”的集合来获得一些乐趣。 无论是硬币收藏,瓷器收藏还是邮票收藏,其过程都是相同的,当然您会喜欢创建和维护它们。 对于今天的示例,我们将构建一个“邮票”编目系统。 我们将看到如何从中获得收益……
to this..
对此。
Let’s get started.
让我们开始吧。
初步准备 (Initial Preparation)
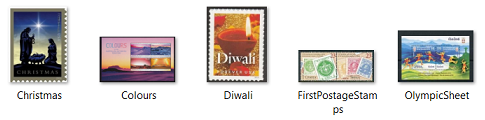
Before we commence, we really need a few images of the stamps that we wish to catalog. These images are readily available on the internet. Obviously, it would be nice to give credit to the source.
在开始之前,我们确实需要一些想要分类邮票的图像。 这些图像可以在互联网上轻松获得。 显然,最好将消息来源归功于此。
入门 (Getting Started)
There is an old adage that “what one extracts is dependent upon what went in”.
有句古老的格言:“提取的内容取决于所输入的内容”。
Our first task is to insert our data into our SQLShack database.
我们的首要任务是将数据插入我们SQLShack数据库。
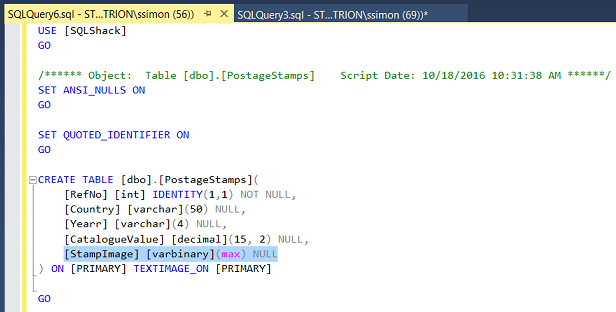
We begin by creating a table called “PostageStamps”. The astute reader will note that the image field has been defined as varbinary(max). Other fields include the country of issue (Country), the year that the stamp was issued (Yearr), the current catalog value (CatalogueValue) and last but not least, an identity field (RefNo), which we shall use as a grouping and sorting field within our reporting.
我们首先创建一个名为“ PostageStamps”的表。 精明的读者会注意到,图像字段已定义为varbinary(max)。 其他字段包括发行国家(国家),邮票发行年份(年份),当前目录值(CatalogueValue)以及最后但并非最不重要的身份字段(RefNo),我们将其用作分组和报告中的排序字段。
插入原始数据 (Inserting our raw data)
For the sake of simplicity, I created a few lines of T-SQL code which will be utilized to insert our raw data (see below).
为了简单起见,我创建了几行T-SQL代码,这些代码将用于插入原始数据(请参见下文)。
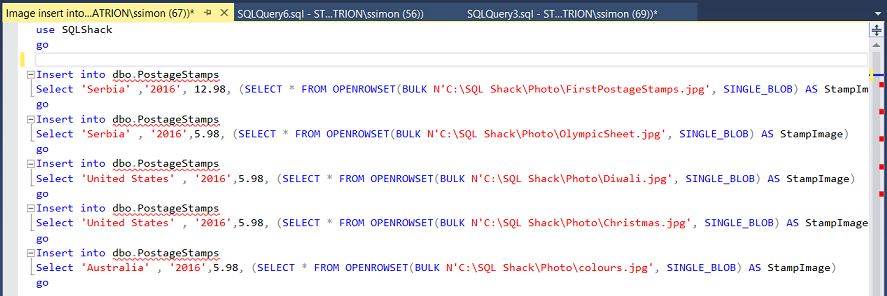
The code snippet may be found in Addenda 1.
该代码段可在附录1中找到。
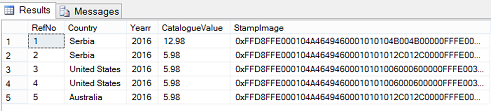
Having executed this code snippet, let us now have a look at the inserted data.
执行完此代码段后,现在让我们看一下插入的数据。
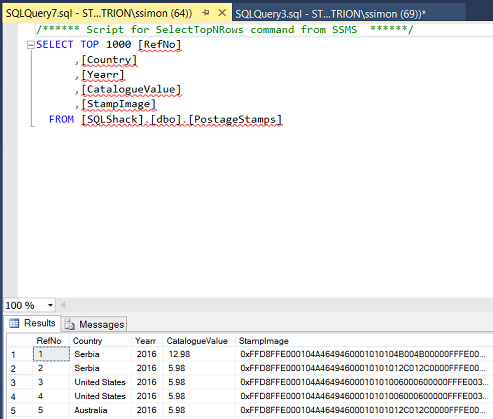
The screen shot above shows the data that we have just inserted. The reader will note that the BLOB related data is not really that “understandable”. This is to be expected due to the nature of the data type.
上面的屏幕快照显示了我们刚刚插入的数据。 读者会注意到,与BLOB相关的数据并不是那么“可理解”。 由于数据类型的性质,这是可以预期的。
创建我们的报告查询 (Creating our report query)
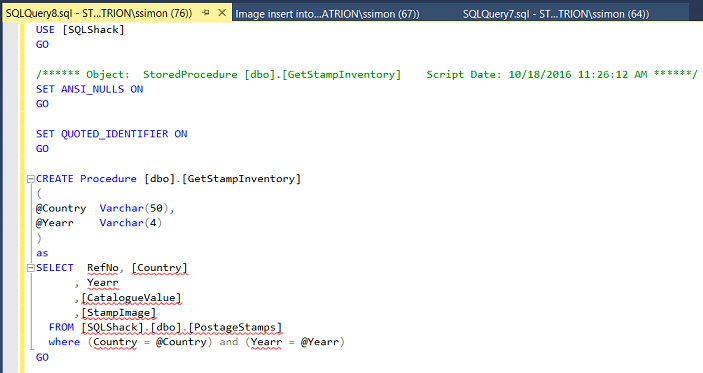
Now that our raw data is present within the “PostageStamps” table, we really must create a stored procedure that will be utilized to extract the necessary data for our reporting. Further, we want to add a simple predicate to the code that will permit the end user to pass the year and the country name of the stamps that he or she wishes to view (see above). The code snippet may be seen in Addenda 2
现在,我们的原始数据已存在于“邮资邮票”表中,我们确实必须创建一个存储过程,该过程将用于提取必要的数据以进行报告。 此外,我们希望在代码中添加一个简单的谓词,以允许最终用户传递他或她希望查看的邮票的年份和国家/地区名称(请参见上文)。 该代码段可以在附录2中看到
Now that we have the necessary data (within the SQL Shack database) and now that we have an extract query for our reporting, let us construct a report that we may use on a daily basis to view the contents of our collection.
现在我们有了必要的数据(在SQL Shack数据库中),并且现在有了报表的提取查询,让我们构造一个报表,我们可以每天使用该报表来查看集合的内容。
创建我们的报告 (Creating our report )
We begin by bringing up Visual Studio 2015 or SQL Server Data Tools 2010 or greater.
我们首先介绍Visual Studio 2015或SQL Server Data Tools 2010或更高版本。
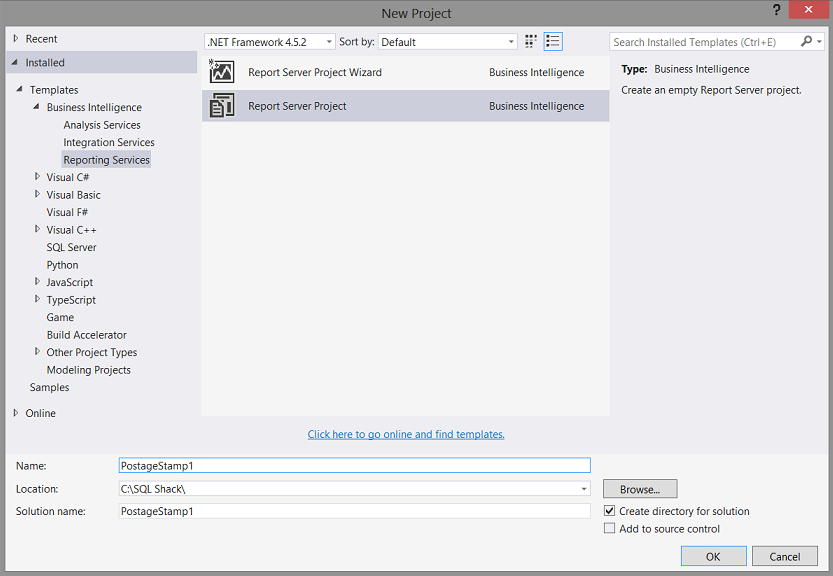
We create a new “New Report Server” project and give it the name “PostageStamp1”. We click “OK” to create the project (see above).
我们创建一个新的“ New Report Server”项目,并将其命名为“ PostageStamp1”。 我们单击“确定”创建项目(请参见上文)。
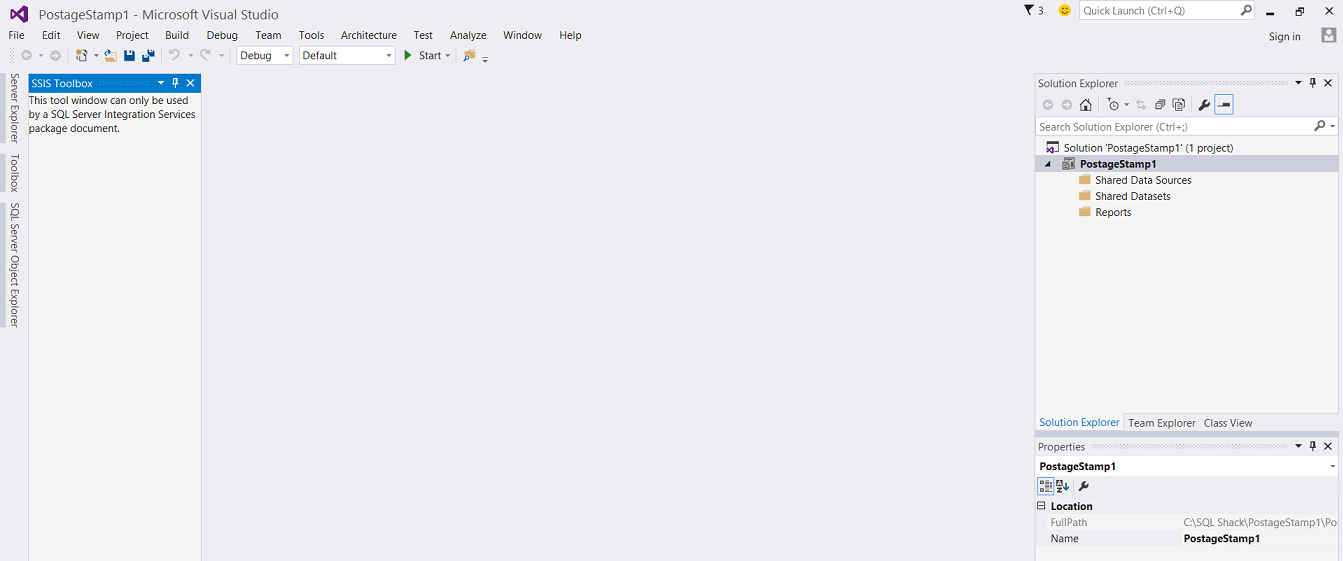
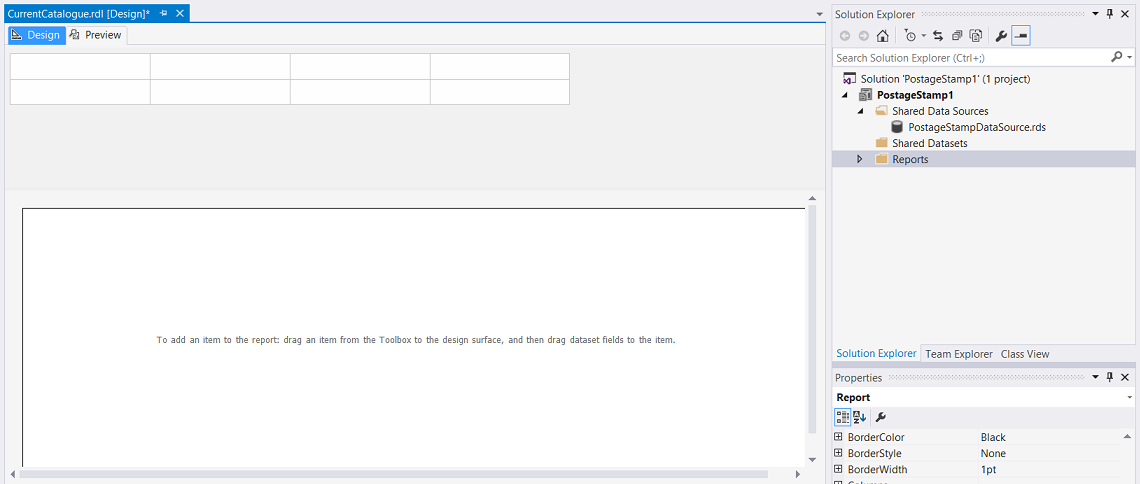
We find ourselves on our design surface.
我们发现自己在设计图面上。
Creating a connection to the SQL Shack database
创建与SQL Shack数据库的连接
Should you be unfamiliar with the process of connecting to a database via SQL Server Reporting Services, please do a look at a SQL Shack article entitled “Now you see it, Now you don’t” where the process is described in detail. The link to this article may be seen here.
如果您不熟悉通过SQL Server Reporting Services连接数据库的过程,请查看SQL Shack文章,标题为“现在就看到,现在就不知道”,其中详细描述了该过程。 可以在此处看到本文的链接。
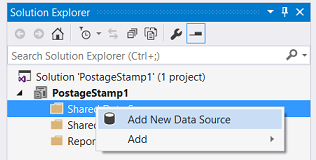
To create a connection to the SQLShack database, we right click on the “Shared Data Sources” tab and select “Add New Data Source” (see above).
要创建与SQLShack数据库的连接,我们右键单击“共享数据源”选项卡,然后选择“添加新数据源”(请参见上文)。
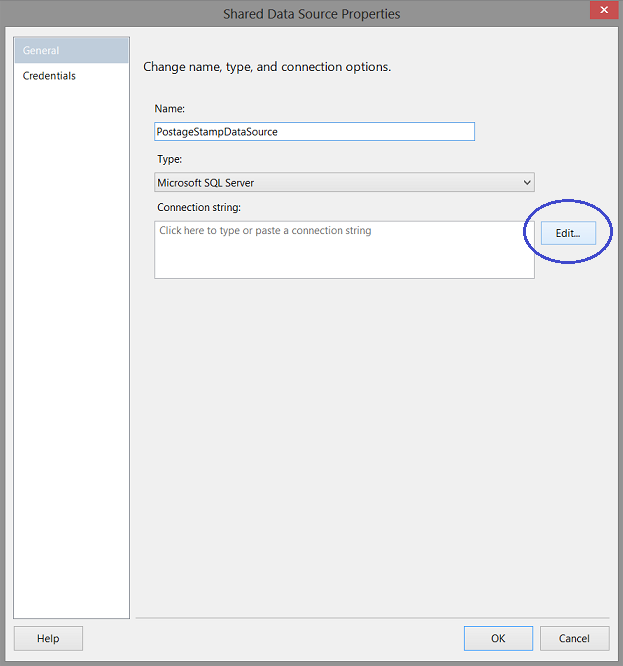
We give our proposed data source a name and click the “Edit” button to create the connection string (see above).
我们给建议的数据源命名,然后单击“编辑”按钮以创建连接字符串(请参见上文)。
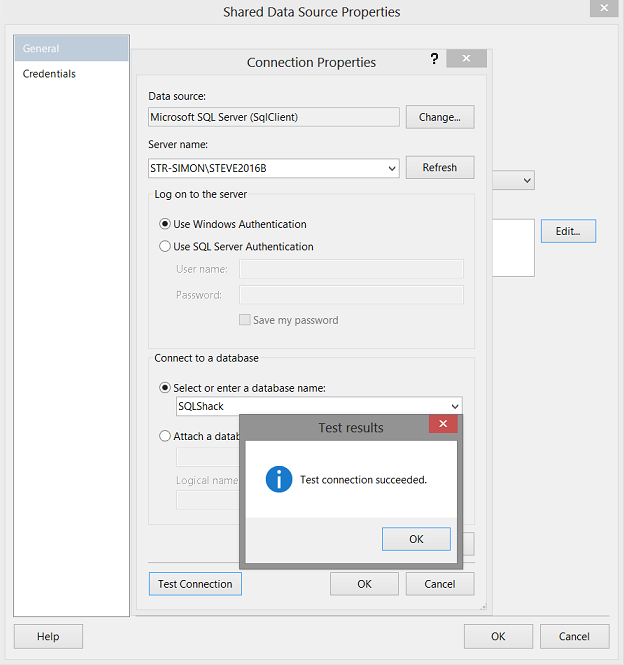
The “Connection Properties” dialogue box opens. We set the server name and select the “SQLShack” database. Next we test our connection (see above). We click “OK” and “OK” to leave the “Shared Data Source Properties” dialogue box.
“连接属性”对话框打开。 我们设置服务器名称并选择“ SQLShack”数据库。 接下来,我们测试连接(请参见上文)。 我们单击“确定”和“确定”离开“共享数据源属性”对话框。
创建一个新报告 (Creating a new report)
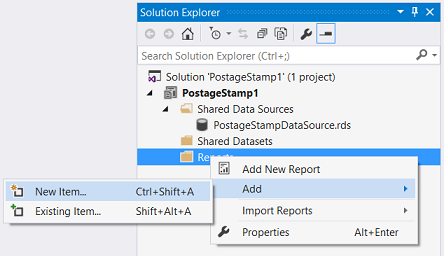
In order to correctly view and evaluate the data within our postage stamp table, we must create a new report. We right click on the “Reports” folder. The “Reports” context menu is brought into view (see above). We select “Add” and “New Item”.
为了正确查看和评估我们的邮票表中的数据,我们必须创建一个新的报告。 我们右键单击“报告”文件夹。 进入“报告”上下文菜单(见上文)。 我们选择“添加”和“新项目”。
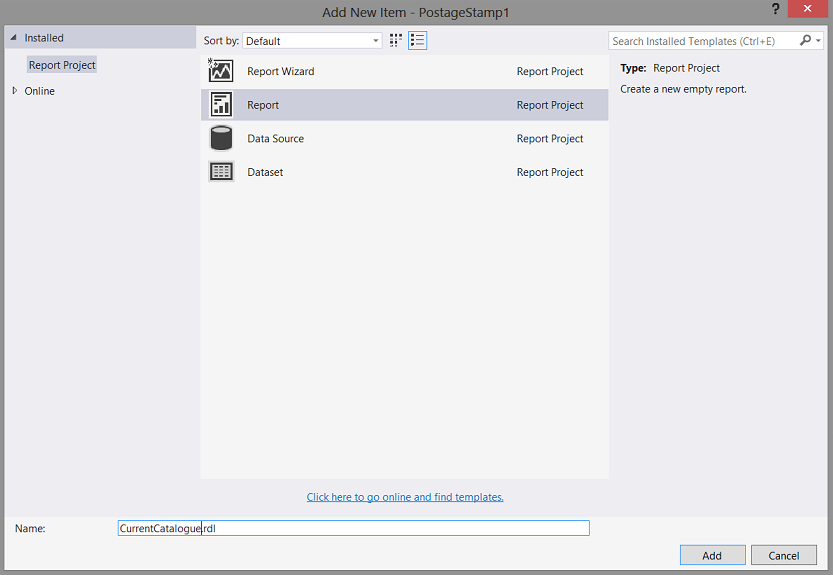
We select the “Report” option and give our proposed report the name “CurrentCatalogue” (see above). We click the “Add” button and we are returned to our design surface (see below).
我们选择“报告”选项,并将建议的报告命名为“ CurrentCatalogue”(请参见上文)。 我们单击“添加”按钮,然后返回到设计图面(见下文)。
As the report query expects the end user to pass through a country name and a year, we must create two dataset. The first will contain a complete list of the distinct countries within the “PostageStamps” table and the other, a complete list of distinct “years” that currently exist within the same table. The arguments selected by the user will then be passed to the query / stored procedure.
由于报表查询期望最终用户输入国家名称和年份,因此我们必须创建两个数据集。 第一个将包含“邮资邮票”表中不同国家的完整列表,另一个将包含同一表中当前存在的不同“年”的完整列表。 然后,用户选择的参数将传递给查询/存储过程。
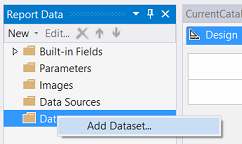
We right click on the “Datasets” folder. The “DataSets” context menu is brought into view. We select “Add Dataset” (see above).
我们右键单击“ Datasets”文件夹。 进入“数据集”上下文菜单。 我们选择“添加数据集”(见上文)。
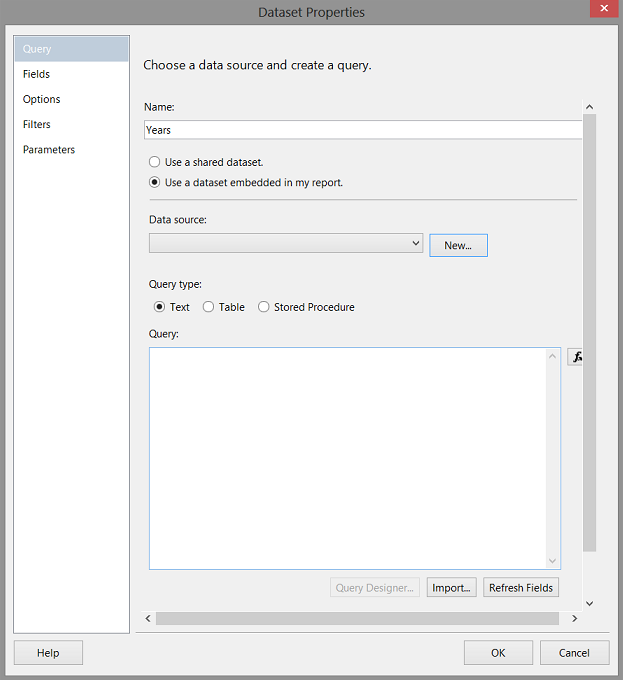
The “Dataset Properties” dialogue box opens. We give our dataset the name “Years”. The values with in this new dataset “Years” will be utilized to provide to the user when he or she selects the “stamp year” to view. We click the “New” button to create a new local data source. This local data source will utilize the shared data source that we recently created. As I have mentioned in past “get togethers”, having a local dataset source is advantageous as it permits report specific customization.
“数据集属性”对话框打开。 我们将数据集命名为“年份”。 当用户选择“盖章年”进行查看时,将使用该新数据集中的“年”中的值提供给用户。 我们单击“新建”按钮以创建新的本地数据源。 此本地数据源将利用我们最近创建的共享数据源。 正如我过去提到的“聚在一起”一样,拥有本地数据集源是有利的,因为它允许特定于报表的自定义。
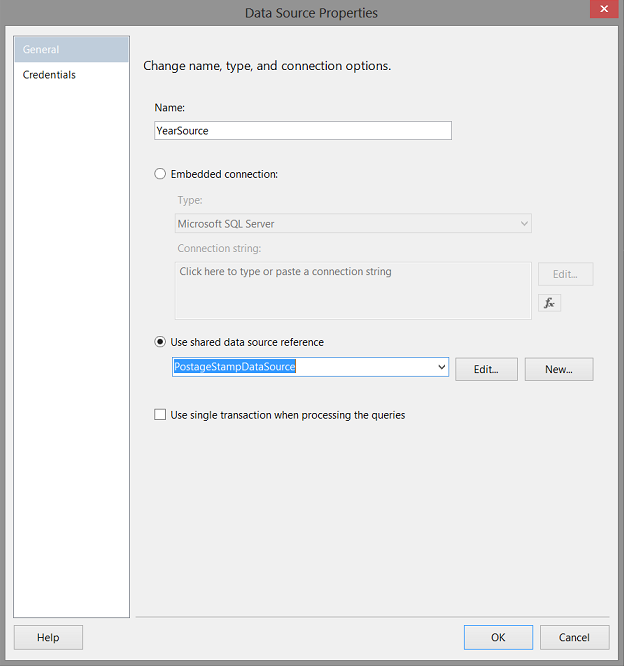
The “Data Source Properties” dialogue box opens. We give our local data source the name “YearSource” and point it to the shared data source “PostageStampDataSource” (see above). We click “OK” to continue.
“数据源属性”对话框打开。 我们将本地数据源命名为“ YearSource”,并将其指向共享数据源“ PostageStampDataSource”(请参见上文)。 我们单击“确定”继续。
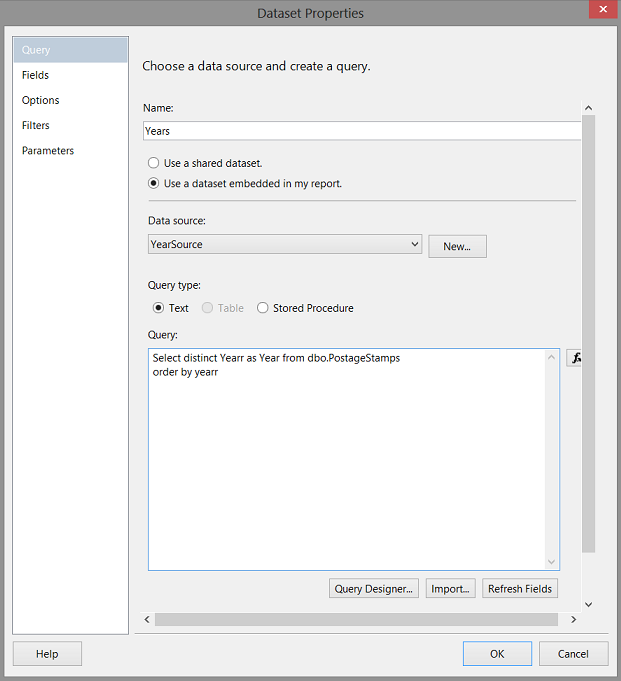
We opt for “Text” as the “Query type” and enter our T-SQL query (see above). Having done this we click the “Refresh Fields” Option to inform the system which database table fields will be returned by the query (see below).
我们选择“文本”作为“查询类型”,然后输入我们的T-SQL查询(请参见上文)。 完成此操作后,我们单击“刷新字段”选项以通知系统查询将返回哪些数据库表字段(请参见下文)。
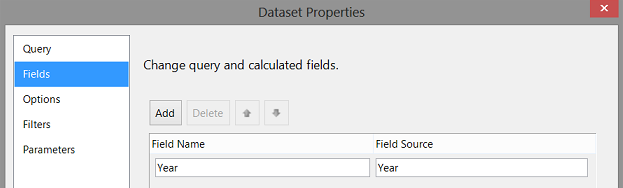
We click “OK” to leave the “Dataset Properties” dialogue box.
我们单击“确定”离开“数据集属性”对话框。
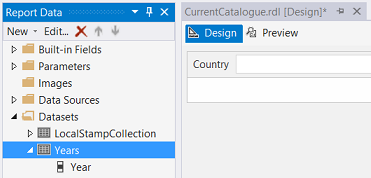
We note that our “Years” dataset has been created. In a similar fashion, we create a local dataset for the unique countries that we have within our database table.
我们注意到,我们的“年份”数据集已创建。 以类似的方式,我们为数据库表中拥有的唯一国家/地区创建本地数据集。
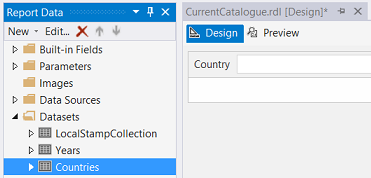
Both datasets may be seen above.
这两个数据集都可以在上方看到。
创建必要的参数 (Creating the necessary parameters)
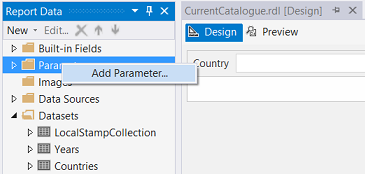
At this point, we must create two parameters which will permit the user a choice of years and countries with which to work. We right click on the “Parameters” folder and select “Add Parameter” (see above).
在这一点上,我们必须创建两个参数,这些参数将允许用户选择要使用的年份和国家/地区。 我们右键单击“ Parameters”文件夹,然后选择“ Add Parameter”(见上文)。
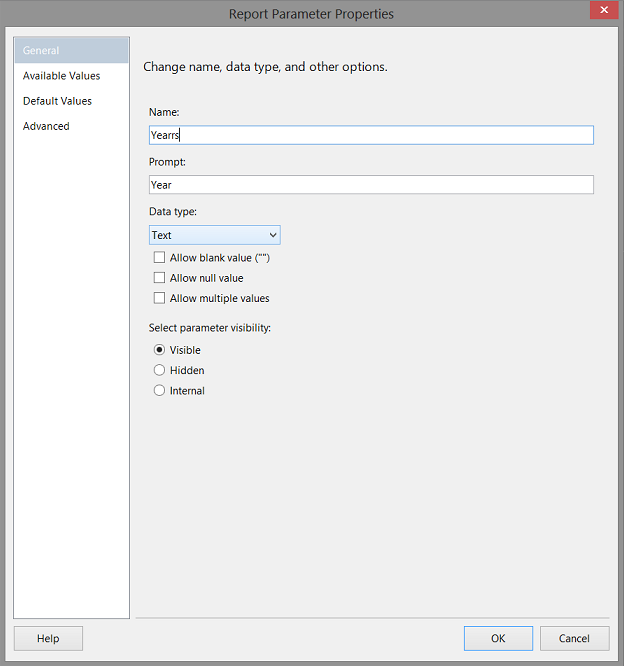
The “Report Parameter Properties” dialogue box is brought into view. We give our new property a name and title (see above).
出现“报告参数属性”对话框。 我们给新属性起一个名称和标题(见上文)。
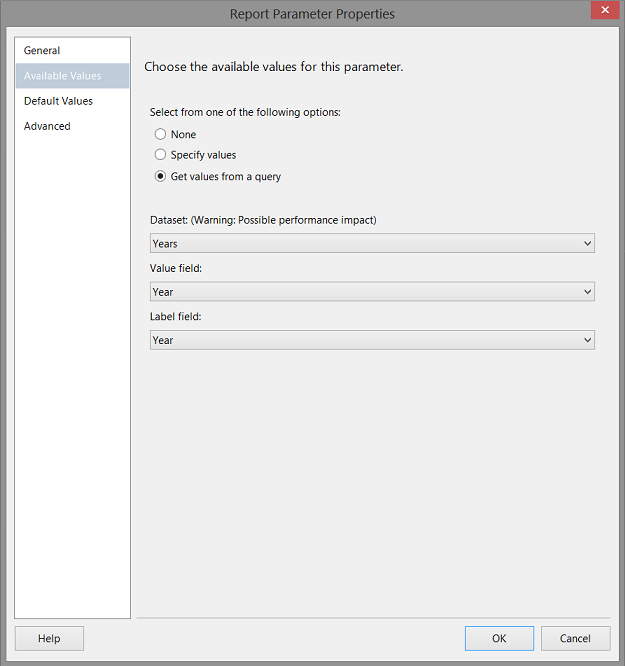
Clicking on the “Available Values” tab, we select “Get values from a query” and set the dataset to “Years” (this is the dataset that we just created). We click “OK” to continue (see above).
单击“可用值”选项卡,我们选择“从查询中获取值”,并将数据集设置为“年”(这是我们刚刚创建的数据集)。 我们单击“确定”继续(见上文)。
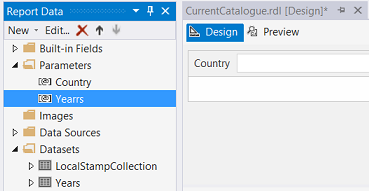
We note our completed “Yearrs” parameter above. In a similar fashion we create the “Country” parameter and connect it to the “Countries” dataset (see above).
我们注意到上面完成的“年”参数。 我们以类似的方式创建“ Country”参数,并将其连接到“ Countries”数据集(请参见上文)。
创建MAIN数据集 (Creating the MAIN dataset )
Our last dataset related task is to create the main dataset which will contain all of the necessary stamp related data.
我们与数据集相关的最后一项任务是创建主要数据集,其中将包含所有必要的邮票相关数据。
Once again we right click upon the “Datasets” folder.
我们再次右键单击“ Datasets”文件夹。
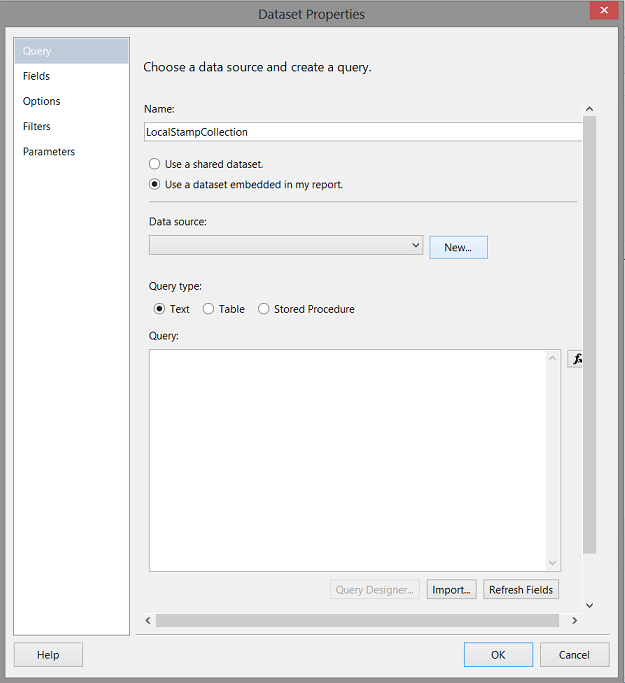
The “Dataset Properties” dialogue box opens. We give our dataset a name and click the “New” button to create a local data source. This local data source will utilize the shared data source that we recently created. As mentioned above, having a local dataset source is advantageous as it permits report specific customization.
“数据集属性”对话框打开。 我们给数据集命名,然后单击“新建”按钮以创建本地数据源。 此本地数据源将利用我们最近创建的共享数据源。 如上所述,具有本地数据集源是有利的,因为它允许报告特定的自定义。

The “Data Source Properties” dialogue box is brought into view. We give our local data source the name “LocalStampDataSource” and indicate to the system that we wish to utilize and connect to the database via the Shared Data Source “PostageStampDataSource” (see above). We click “OK” to continue.
出现“数据源属性”对话框。 我们将本地数据源命名为“ LocalStampDataSource”,并通过共享数据源“ PostageStampDataSource”向系统指示我们希望利用并连接到数据库(请参见上文)。 我们单击“确定”继续。
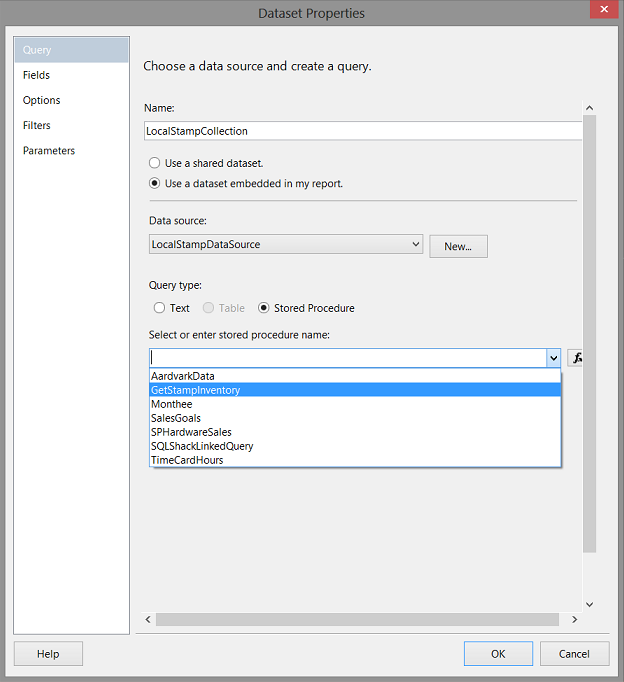
We are returned to the “Dataset Properties” dialogue box. We select “Stored Procedure” for the “Query type” and we select the Stored Procedure “GetStampInventory” (which we created above). We click “OK” to continue (see above).
我们返回到“数据集属性”对话框。 我们为“查询类型”选择“存储过程”,并选择存储过程“ GetStampInventory”(我们在上面创建)。 我们单击“确定”继续(见上文)。
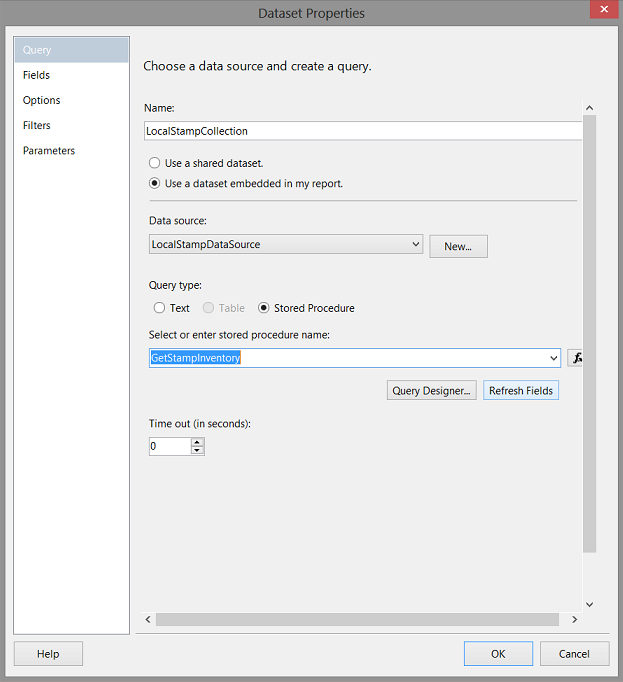
Our next task is to inform the system which fields will be contained within the query data. We click “Refresh Fields” (see above).
我们的下一个任务是通知系统哪些字段将包含在查询数据中。 我们单击“刷新字段”(请参见上文)。
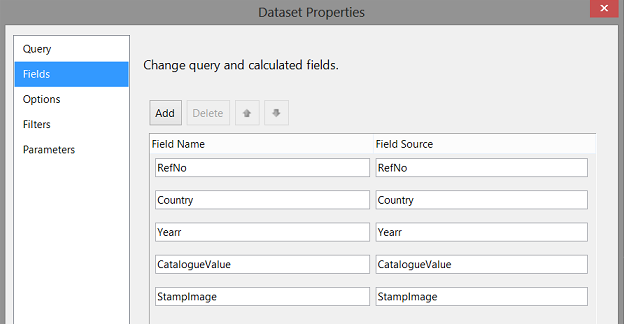
The fields within the dataset may be seen above.
数据集内的字段可以在上方看到。
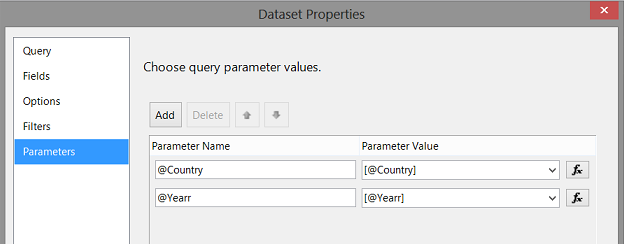
Our last task is to link the dataset to the parameters “year” and “country”. We click on the “Parameters” tab and we note that both parameters appear (see above). The “Parameter Name” refers to the actual parameters that we just created and the “Parameter Value” will be set at the run time when the user selects a year and country. It is these argument values that will be passed to our stored procedure.
我们的最后一个任务是将数据集链接到参数“ year”和“ country”。 我们单击“参数”选项卡,我们注意到两个参数都出现了(见上文)。 “参数名称”指的是我们刚刚创建的实际参数,当用户选择年份和国家时,“参数值”将在运行时设置。 这些参数值将传递给我们的存储过程。
We click “OK” to close the “Dataset Properties” dialogue box.
我们单击“确定”以关闭“数据集属性”对话框。
添加我们的报告控件 (Adding our report controls)
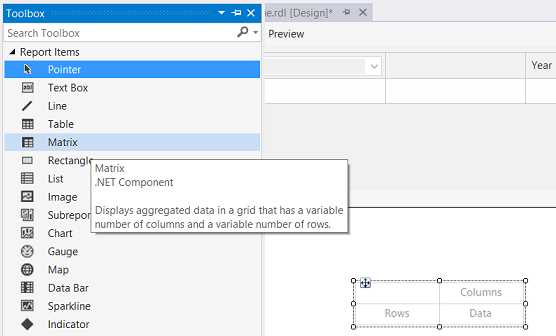
Having constructed the data extract apparatus, we are now in the position to add report controls to our drawing surface. We drag a “Matrix” from the tool box on to our drawing surface (see above)
构造了数据提取设备后,我们现在可以向我们的绘图表面添加报告控件了。 我们将“矩阵”从工具箱拖到绘图表面上(见上文)
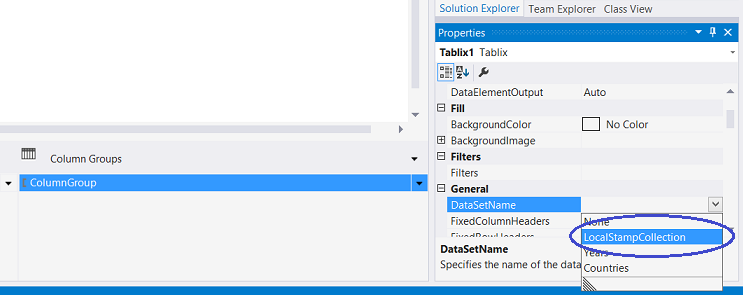
Highlighting the “Matrix” (see above) we open the “Matrix / Tablix” properties box. We set the “DataSetName” Property to the “LocalStampCollection” dataset that we just created (see above).
突出显示“ Matrix”(见上文),我们打开“ Matrix / Tablix”属性框。 我们将“ DataSetName”属性设置为刚刚创建的“ LocalStampCollection”数据集(请参见上文)。
调整列分组 (Adjusting the Column Grouping)
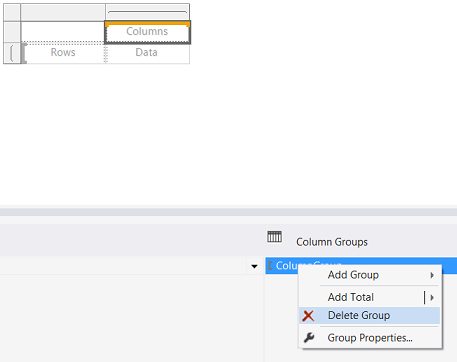
This completed, our next task is to remove the matrix column grouping as we shall NOT be utilizing it. We right click on the “ColumnGroup” tab (see above) and select “Delete Group”.
完成后,我们的下一个任务是删除矩阵列分组,因为我们将不使用它。 我们右键单击“ ColumnGroup”选项卡(见上文),然后选择“ Delete Group”。

We are asked if we wish to delete the group AND the data or just the “grouping”. We select “Delete group only” (see above). We click “OK” to continue.
询问我们是否要删除组和数据,或仅删除“分组”。 我们选择“仅删除组”(请参见上文)。 我们单击“确定”继续。
调整行分组 (Adjusting the Row Grouping)
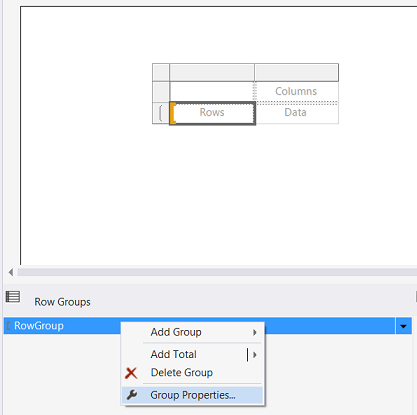
We must now set our row grouping. We right click upon the “RowGroup” and select “Group Properties” (see below).
现在,我们必须设置行分组。 我们右键单击“ RowGroup”,然后选择“ Group Properties”(见下文)。
The “Group Properties” dialogue box opens.
“组属性”对话框打开。
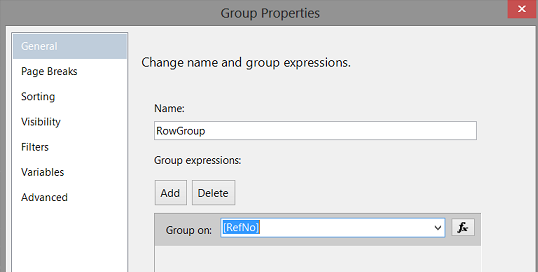
We set the “grouping” at an individual record level as we really wish to see each and every stamp entry that satisfies our selection criteria and NOT a summary figure. By doing it this way, the identity field may be utilized for “grouping” in addition to “sorting”. The grouping may be seen above.
我们将“分组”设置为单个记录级别,因为我们确实希望看到满足我们选择标准的每个邮票条目,而不是一个汇总图。 通过这种方式,除了“排序”之外,身份字段还可以用于“分组”。 可以在上面看到分组。
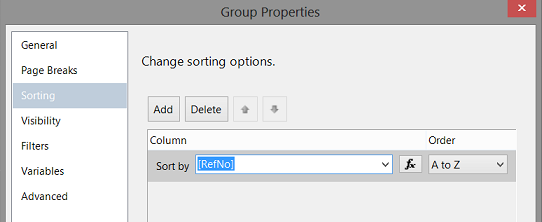
The sorting may be seen above.
排序可以在上面看到。
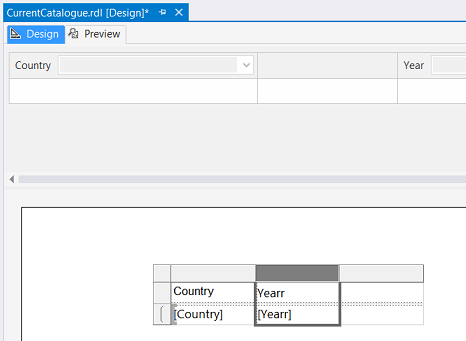
Our final task is to populate the matrix. We first add the country and then the Year (see above).
我们的最后任务是填充矩阵。 我们首先添加国家,然后添加年份(参见上文)。
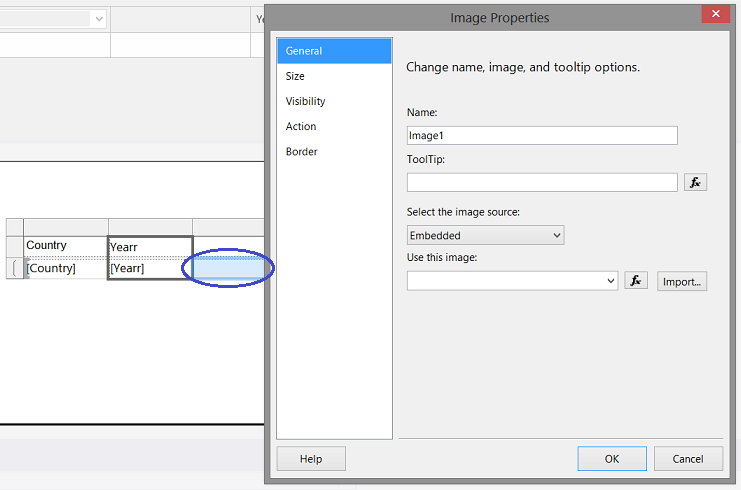
We must now perform a bit of “magic”, to ensure that the images of the stamps are displayed correctly.
现在,我们必须执行一些“魔术”操作,以确保正确显示邮票的图像。
We add an image control to the cell in blue (see above).
我们将图像控件添加到蓝色的单元格中(见上文)。

We set the “Select the image source” property to “Database” (see above).
我们将“选择图像源”属性设置为“数据库”(请参见上文)。
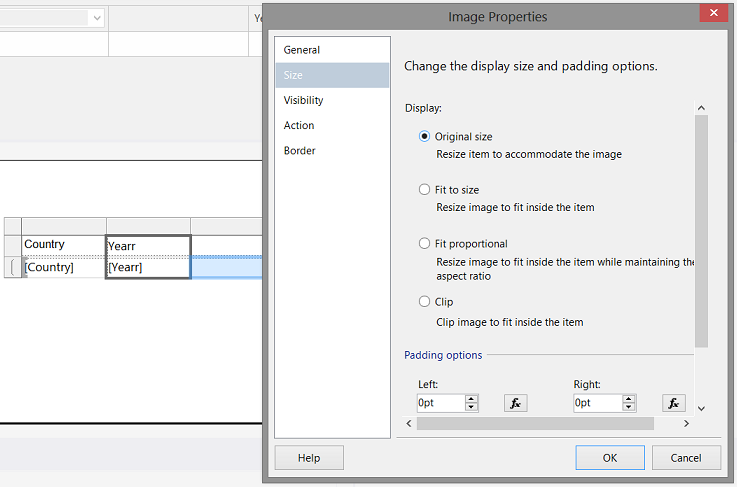
Clicking upon the “Size” tab, we set the display to “Original size” (see above).
单击“大小”选项卡,我们将显示设置为“原始大小”(请参见上文)。

Back in the “General” tab, we set the “Use this field” to “StampImage” and the “Use this MIME type to “Image/jpeg” (see above).
回到“常规”选项卡,我们将“使用此字段”设置为“ StampImage”,并将“使用此MIME类型设置为” Image / jpeg”(参见上文)。
We have one last task and that is to add the “CatalogueValue” field.
我们还有最后一个任务,那就是添加“ CatalogueValue”字段。
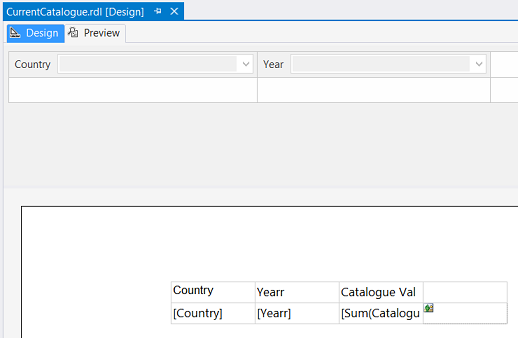
The completed matrix may be seen above.
完整的矩阵可以在上面看到。
Believe it or not, we are now done!!!
信不信由你,我们现在完成了!!!
Let us give have a look at our report!!
让我们看看我们的报告!!
运行我们的报告 (Running our report)
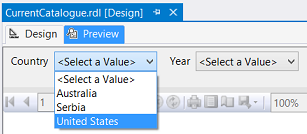
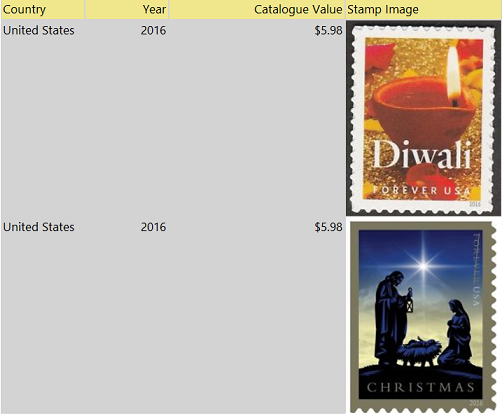
Clicking upon the “Preview” tab, our report now appears. We select a country (see above) and
单击“预览”选项卡,现在将显示我们的报告。 我们选择一个国家(见上文),然后
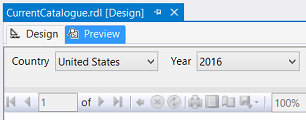
and we select a “Year” (see above).
然后选择“年份”(请参见上文)。
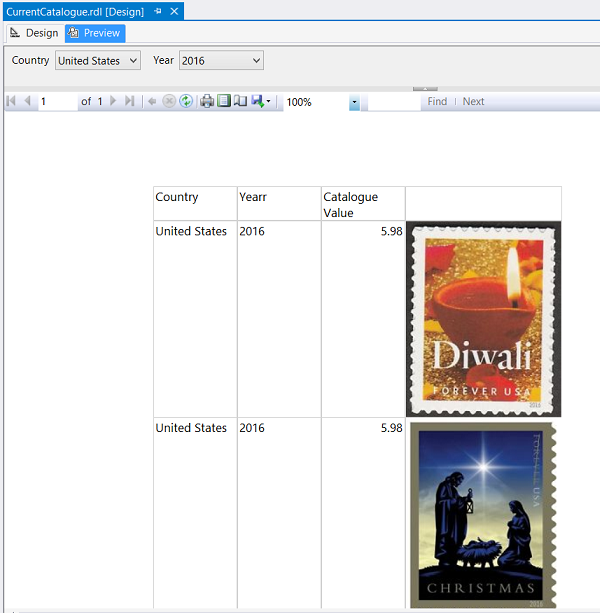
Clicking the “View Report” button our report appears.
单击“查看报告”按钮,将显示我们的报告。

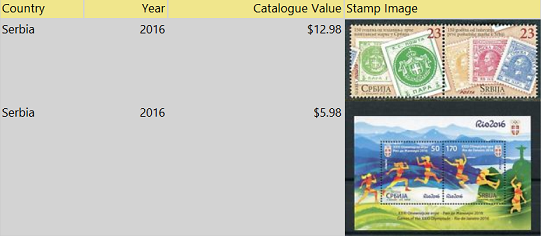
Should we choose “Serbia” and the same year, the following data is displayed.
如果我们选择“塞尔维亚”和同一年,则会显示以下数据。
结论 (Conclusions)
Images form a vital part in reporting; be it for business purposes or for recreational purposes. Images help describe what we sell and why people should purchase from us. While we attacked this “fire side chat” from a stamp collection point of view, the same techniques may be applied to a corporate product catalog. I sincerely hope that you will try this nifty technique and construct a model that suits your needs.
图像是报告的重要组成部分; 无论是出于商业目的还是出于娱乐目的。 图片有助于描述我们出售的产品以及人们为什么应该向我们购买。 当我们从集邮的角度来攻击这种“火边聊天”时,相同的技术可能会应用于公司产品目录。 我衷心希望您能尝试这种巧妙的技术,并构建适合您需求的模型。
Until the next time, happy programming!
直到下一次,编程愉快!
附录1 (Addenda 1)
use SQLShack
go

Insert into dbo.PostageStamps
Select 'Serbia' ,'2016', 12.98, (SELECT * FROM OPENROWSET(BULK N'C:\SQL Shack\Photo\FirstPostageStamps.jpg', SINGLE_BLOB) AS StampImage)
go
Insert into dbo.PostageStamps
Select 'Serbia' , '2016',5.98, (SELECT * FROM OPENROWSET(BULK N'C:\SQL Shack\Photo\OlympicSheet.jpg', SINGLE_BLOB) AS StampImage)
go
Insert into dbo.PostageStamps
Select 'United States' , '2016',5.98, (SELECT * FROM OPENROWSET(BULK N'C:\SQL Shack\Photo\Diwali.jpg', SINGLE_BLOB) AS StampImage)
go
Insert into dbo.PostageStamps
Select 'United States' , '2016',5.98, (SELECT * FROM OPENROWSET(BULK N'C:\SQL Shack\Photo\Christmas.jpg', SINGLE_BLOB) AS StampImage)
go
Insert into dbo.PostageStamps
Select 'Australia' , '2016',5.98, (SELECT * FROM OPENROWSET(BULK N'C:\SQL Shack\Photo\colours.jpg', SINGLE_BLOB) AS StampImage)
Go
附录2 (Addenda 2)
USE [SQLShack]
GO

/****** Object:  StoredProcedure [dbo].[GetStampInventory]    Script Date: 10/18/2016 11:26:12 AM ******/
SET ANSI_NULLS ON
GO

SET QUOTED_IDENTIFIER ON
GO

CREATE Procedure [dbo].[GetStampInventory]
(
@Country  Varchar(50),
@Yearr    Varchar(4)
)
as
SELECT  RefNo, [Country]
      , Yearr
      ,[CatalogueValue]
      ,[StampImage]
  FROM [SQLShack].[dbo].[PostageStamps]
  where (Country = @Country) and (Yearr = @Yearr)
GO
参考资料 (References)
- OPENQUERY (Transact-SQL)OPENQUERY(Transact-SQL)
- Storing Images and Photos in SQL Server在SQL Server中存储图像和照片
- Add a Background Image (Report Builder and SSRS)添加背景图像(报表生成器和SSRS)
翻译自: https://www.sqlshack.com/create-image-cataloging-system-using-sql-server-repoting-services/


 被折叠的 条评论
为什么被折叠?
被折叠的 条评论
为什么被折叠?
 到【灌水乐园】发言


