


As a Microsoft SQL Server Database Consultant, I have to visit multiple companies with variety of SQL Server versions and patch level. Generally speaking, we need to analyze the environment of these clients and get information about the infrastructure. To do so, we have to run multiple scripts and tools on almost all the machines at client. Though it’s a part of our job but at times it takes hours to get even the basic information about the SQL Server versions, patch level, configuration and small details which even client does not have.
作为Microsoft SQL Server数据库顾问,我必须访问具有各种SQL Server版本和补丁程序级别的多家公司。 一般来说,我们需要分析这些客户端的环境并获取有关基础架构的信息。 为此,我们必须在客户端的几乎所有计算机上运行多个脚本和工具。 尽管这是我们工作的一部分,但有时甚至需要花费数小时才能获得有关SQL Server版本,补丁程序级别,配置以及客户甚至没有的小细节的基本信息。
Microsoft is really good at providing tools for the assistance of Database Administrators and Consultants. To make our job easy we use a tool known as “Microsoft Assessment and Planning” Toolkit, the MAP. This is really handy and does the job really well on getting the inventory information about the infrastructure of Windows Platform.
Microsoft确实擅长提供帮助数据库管理员和顾问的工具。 为了简化工作,我们使用了称为“ Microsoft评估和计划”工具箱的工具MAP。 这确实很方便,并且在获取有关Windows Platform基础结构的清单信息方面确实做得很好。
MAP is an agentless utility which automates getting the inventory for the Microsoft Platform. Though this utility does more than what I mentioned earlier but I will squarely focus on SQL Server related inventory information which this utility collects very easily.
MAP是一种无代理实用程序,可自动获取Microsoft平台的清单。 尽管此实用程序的功能比我之前提到的要多,但我将直接关注与SQL Server相关的清单信息,该实用程序非常容易收集。
I will explain the features and functions of MAP and how we can easily install, configure and collect the inventory information about any domain or workgroup. Though this can also assess an organization’s readiness of upgrading to new technologies like Office 365 or Cloud Technologies. MAP is also capable of providing you with data about the Hyper-V technologies and its utilization.
我将解释MAP的特性和功能,以及我们如何轻松安装,配置和收集有关任何域或工作组的清单信息。 尽管这也可以评估组织是否准备升级到Office 365或Cloud Technologies等新技术。 MAP还能够为您提供有关Hyper-V技术及其利用率的数据。
Mentioned below are some of the common utilities for which MAP is used (other than I mentioned above).
下面提到的是一些使用MAP的常见实用程序(除了我上面提到的以外)。
- Windows 10, 8.1 and Server 2012 R2 deployment with software and hardware related readiness capabilities. Windows 10、8.1和Server 2012 R2部署,具有与软件和硬件相关的就绪功能。
- Detailed information about the On-Premise Office 2013 or the cloud based Office 365. 有关本地Office 2013或基于云的Office 365的详细信息。
- Assess and Plan you upgradation and migration to Microsoft Azure VM. 评估和计划您的升级并迁移到Microsoft Azure VM。
- Detailed information about Microsoft Volume Licensing and compliance accordingly to your organization’s need. 根据您的组织需要,有关Microsoft批量许可和合规性的详细信息。
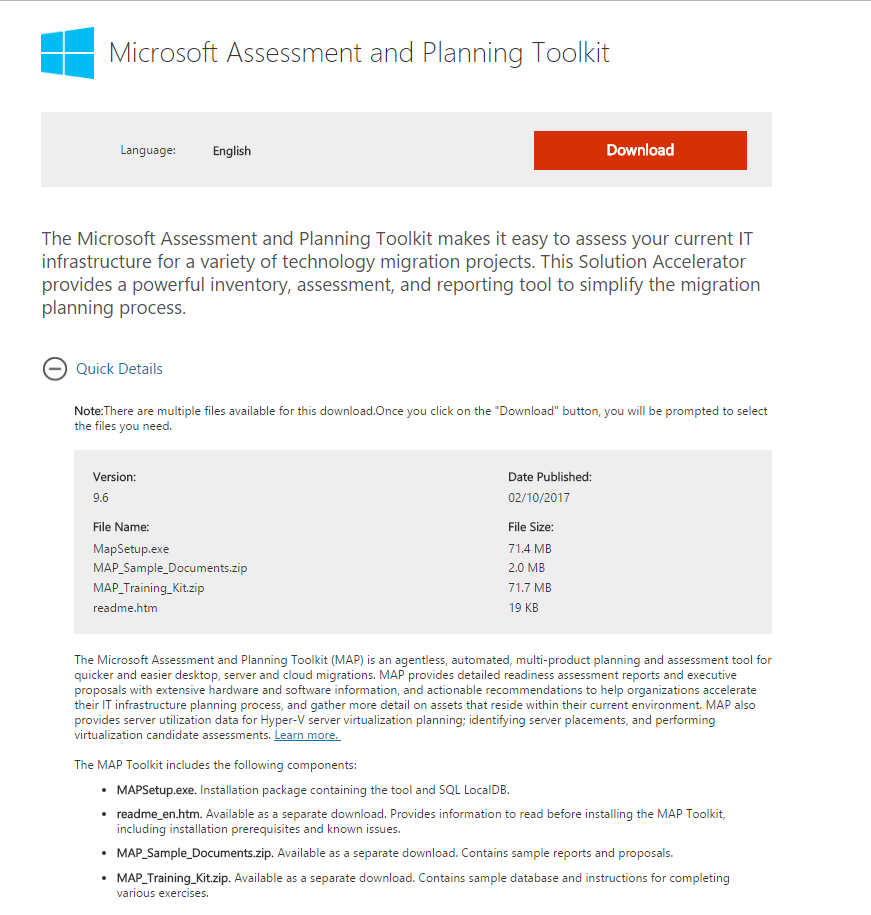
So enough said, let get started onto the technical details about the MAP. You can download the MAP from the link here. It’s a simple download like 150 MB file(s) with a pretty simple setup to install.
如此说来,让我们开始了解有关MAP的技术细节。 您可以从此处的链接下载MAP。 这是一个简单的下载程序,例如150 MB的文件,并且安装起来非常简单。
After the install, open then utility and you find the mentioned below screen:
安装之后,打开then实用程序,您会发现下面提到的屏幕:
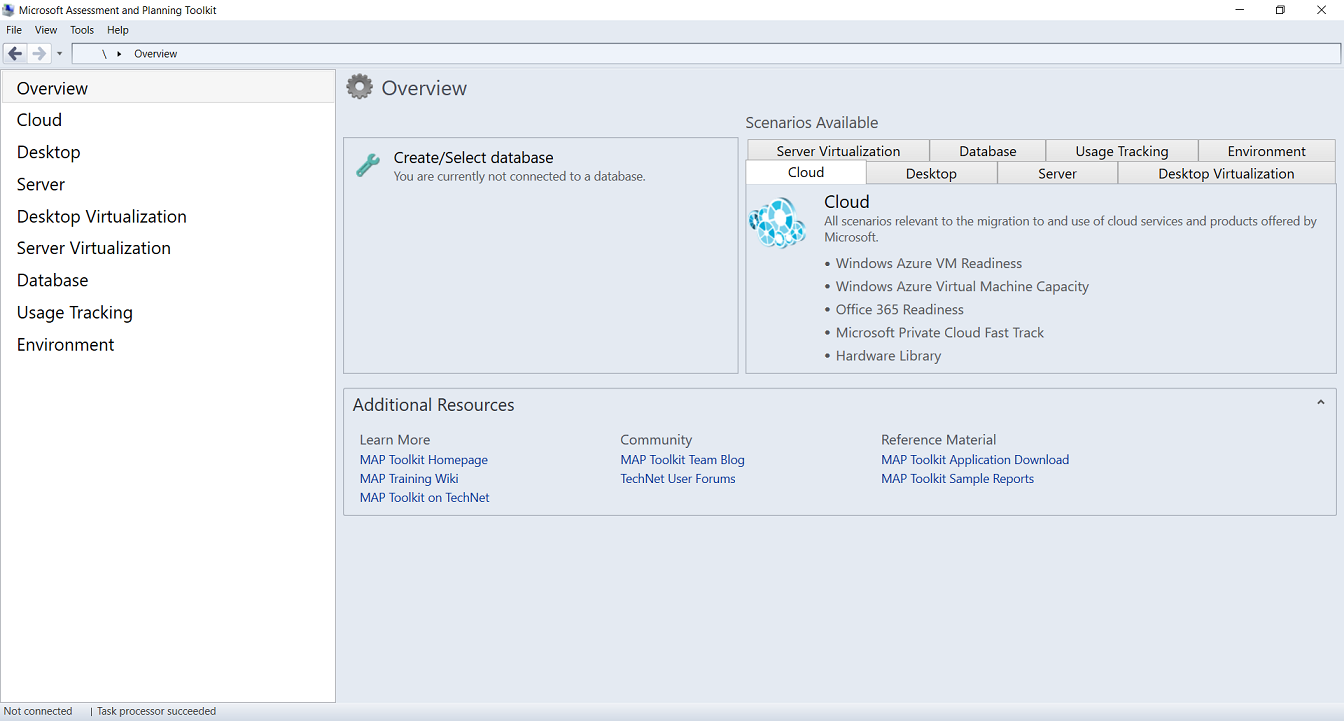
This screen is mostly self-explanatory but just to give an overview, the left hand side has all the platforms for which we may want to get assessment. And the right hand side are the tools (in general) which will allow us to actually perform assessment, view summary and generate reports.
该屏幕大部分是不言自明的,但仅作概述,左侧是我们可能要评估的所有平台。 右侧是工具(通常),这些工具将使我们能够实际执行评估,查看摘要并生成报告。
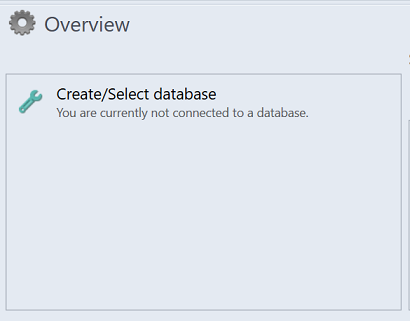
When you open the MAP for the first time, you will see the Overview window at the center of the screen. As the utility has to store data about your environment, it needs an Inventory Database to be created. So, you can go ahead and create it by Clicking on “Create/Select database” (as shown below) or go directly to “Database” section on the left hand side.
首次打开MAP时,您将在屏幕中央看到Overview窗口。 由于该实用程序必须存储有关您的环境的数据,因此需要创建一个库存数据库。 因此,您可以通过单击“创建/选择数据库”(如下所示)继续创建它,或直接转到左侧的“数据库”部分。
As we want to focus on the Database section only so I will take you to that screen and will discuss the options accordingly.
因为我们只想关注数据库部分,所以我将带您到该屏幕并相应地讨论选项。
Once you click on the left hand side “Database” option, you will see the mentioned below Discovery options available at the right hand side window.
单击左侧的“数据库”选项后,您将在右侧窗口中看到以下提到的发现选项。
Here you can clearly see that the utility is capable of discovering SQL Server and Oracle Database products on the Desktop Machine or on the Network. Also it can create a report for Azure VM Readiness.
在这里,您可以清楚地看到该实用程序能够在台式机或网络上发现SQL Server和Oracle数据库产品。 它还可以为Azure VM准备情况创建报告。
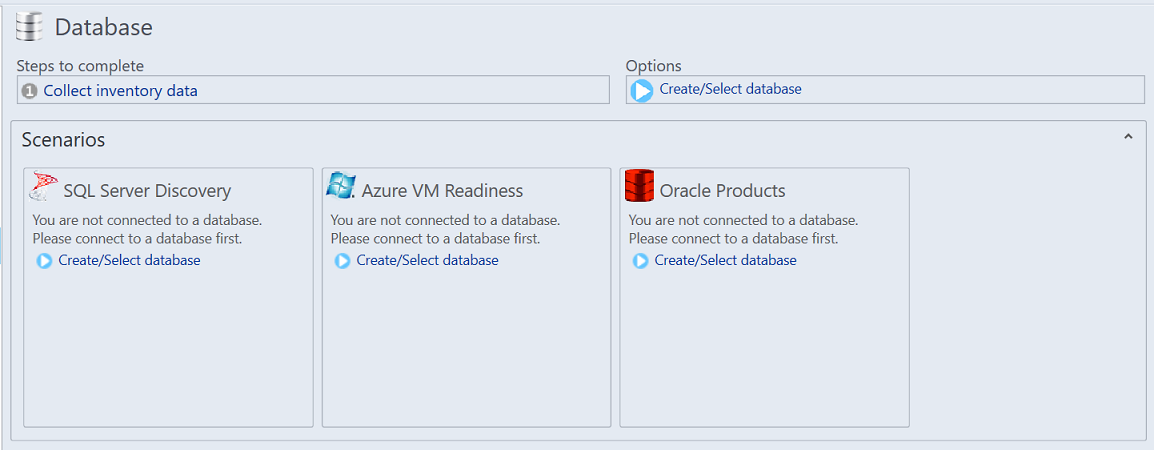
We will now create a Database for collecting Inventory of SQL Server Instances on the local machine.
现在,我们将创建一个数据库,用于在本地计算机上收集SQL Server实例的清单。
So, click on the “Create/Select database” option right in the SQL Server Discovery section.
因此,单击“ SQL Server发现”部分中的“创建/选择数据库”选项。
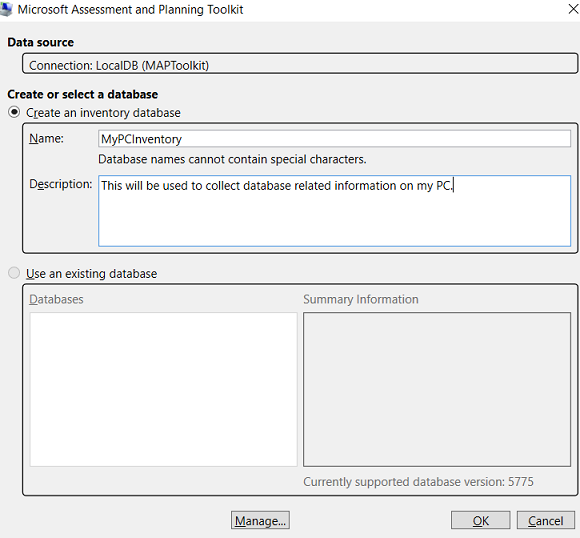
Next you will see the mentioned below screen where you can enter the name of Inventory Database and mention a short description about it and click “OK”.
接下来,您将看到下面提到的屏幕,您可以在其中输入库存数据库的名称并提及其简短描述,然后单击“确定”。
Now you have an inventory database, next step will be to collect the data about SQL Servers. Now, you will have the mentioned below screen in the database section.
现在您有了一个清单数据库,下一步将是收集有关SQL Server的数据。 现在,您将在数据库部分中看到下面提到的屏幕。
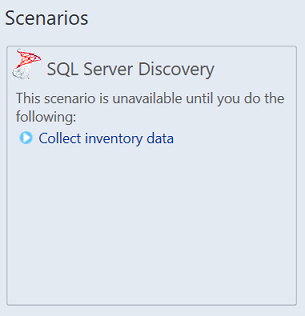
Now click on “Collect inventory data” and it will open a window which will allow you to choose options about what and how to discover.
现在,单击“收集库存数据”,它将打开一个窗口,您可以通过该窗口选择有关发现内容和方式的选项。
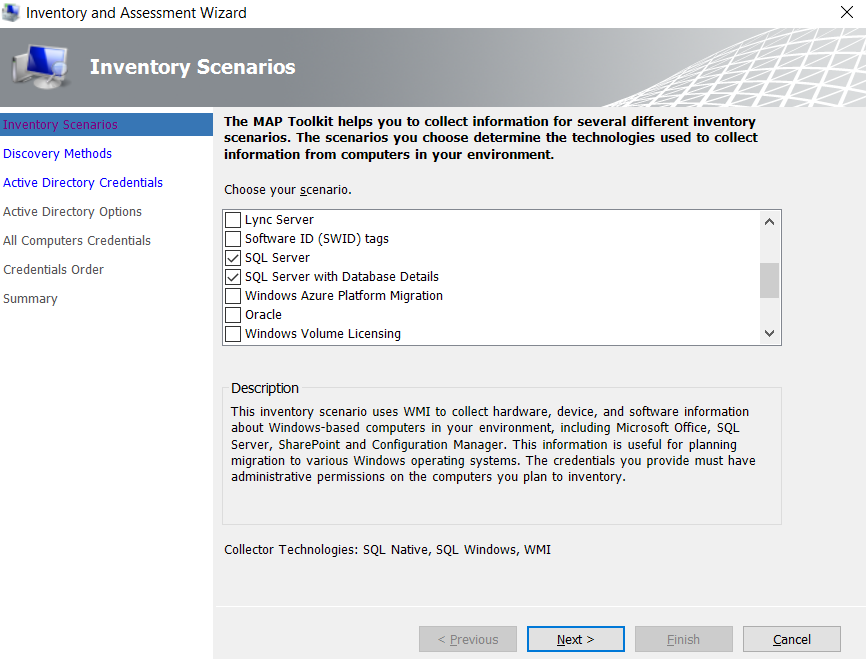
We will choose SQL Server and SQL Server with Database Details. This first option “SQL Server” will allow you to collect basic information about SQL Server, operating system and hardware information for assessment and planning. The second option “SQL Server with Database Details” will allow you to have much more detailed information about database sizes, growth rates, compatibility level and even configuration of each database. So, for initial analysis we will use both the options.
我们将选择“ SQL Server”和“ 带有数据库详细信息SQL Server” 。 第一个选项“ SQL Server”将允许您收集有关SQL Server的基本信息,操作系统和硬件信息,以进行评估和计划。 第二个选项“带有数据库详细信息SQL Server”将使您获得有关数据库大小,增长率,兼容性级别甚至每个数据库的配置的更多详细信息。 因此,对于初始分析,我们将同时使用这两个选项。
Click “Next” and you will see the discovery methods options. This will allow you to enter a method to search computers on which Microsoft Products are hosted. The methods will be like Active Directory Domain Services, Windows Network protocols, System Center Configuration Manager, IP Address Range, Manual computer names or system names in files.
单击“下一步”,您将看到发现方法选项。 这将允许您输入一种方法来搜索托管Microsoft产品的计算机。 这些方法将类似于Active Directory域服务,Windows网络协议,System Center Configuration Manager,IP地址范围,手册中的计算机名称或文件中的系统名称。
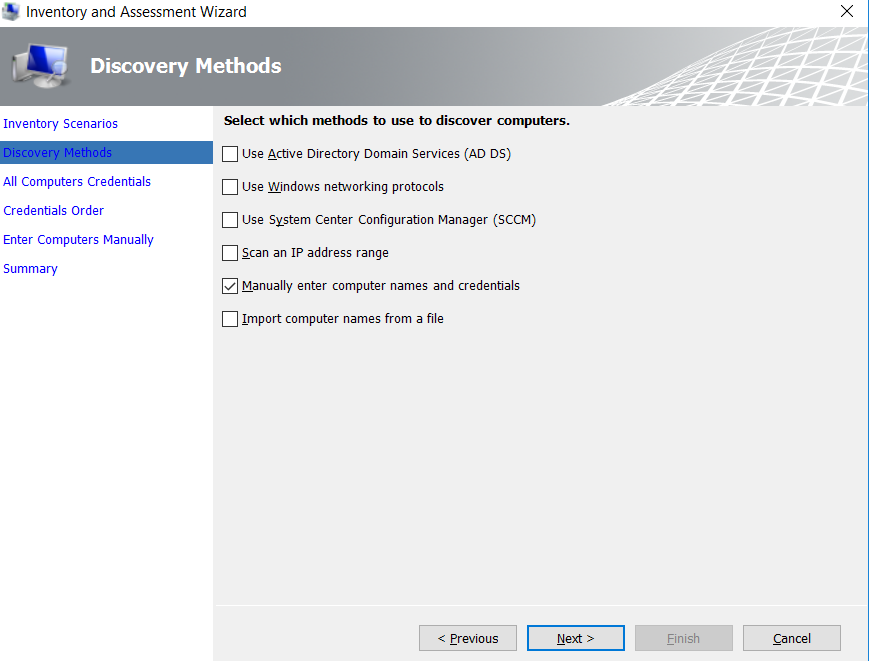
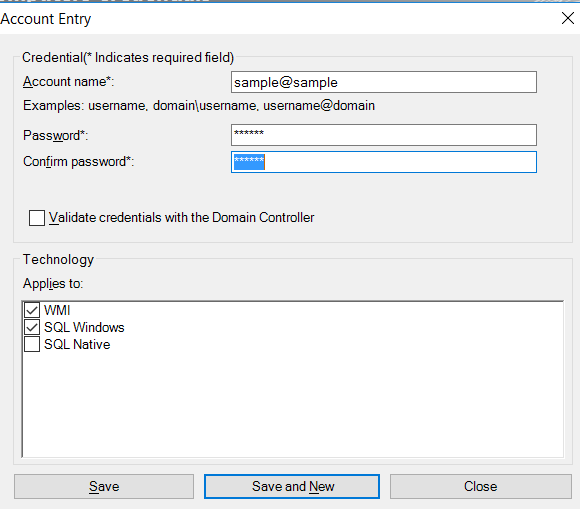
After you have chosen what is best suitable for you (I just wanted my own system so I choose to Manually enter computer names and credentials) you can go for entering the appropriate credentials for the utility to access the database systems.
在选择了最适合您的内容之后(我只是想要我自己的系统,所以我选择手动输入计算机名称和凭据),您可以为实用程序输入适当的凭据以访问数据库系统。
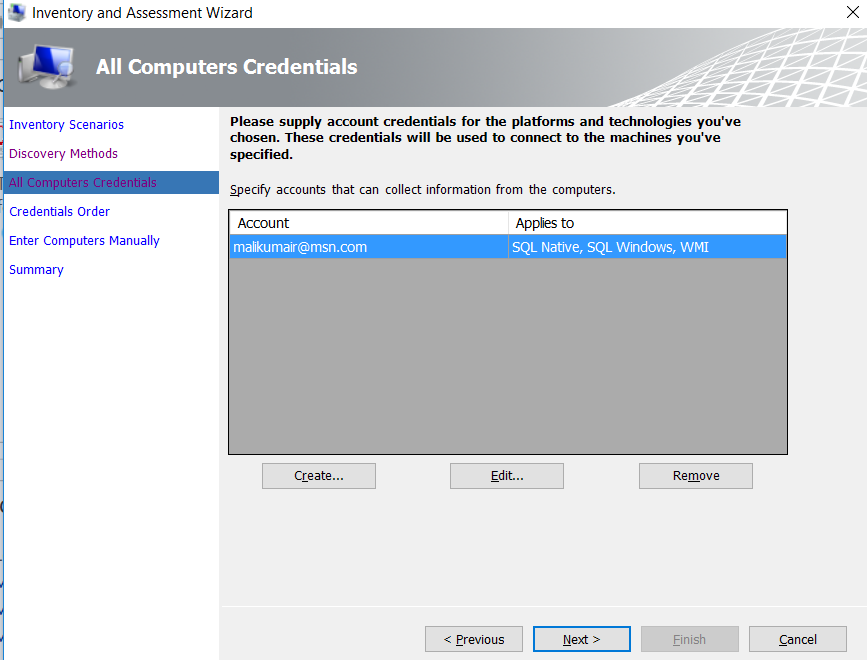
On the next page you can choose to “Create” new credentials for the systems you want to explore.
在下一页上,您可以选择为要浏览的系统“创建”新凭据。
You can create multiple credentials for multiple services so that if one fails the utility will try to access the component with another credential in the order specified. To choose the order of the credentials click “Next” and you will be taken to the mentioned below screen.
您可以为多种服务创建多个凭证,以便如果一项服务失败,实用程序将尝试以指定的顺序使用另一凭证来访问组件。 要选择凭据的顺序,请单击“下一步”,您将进入下面提到的屏幕。
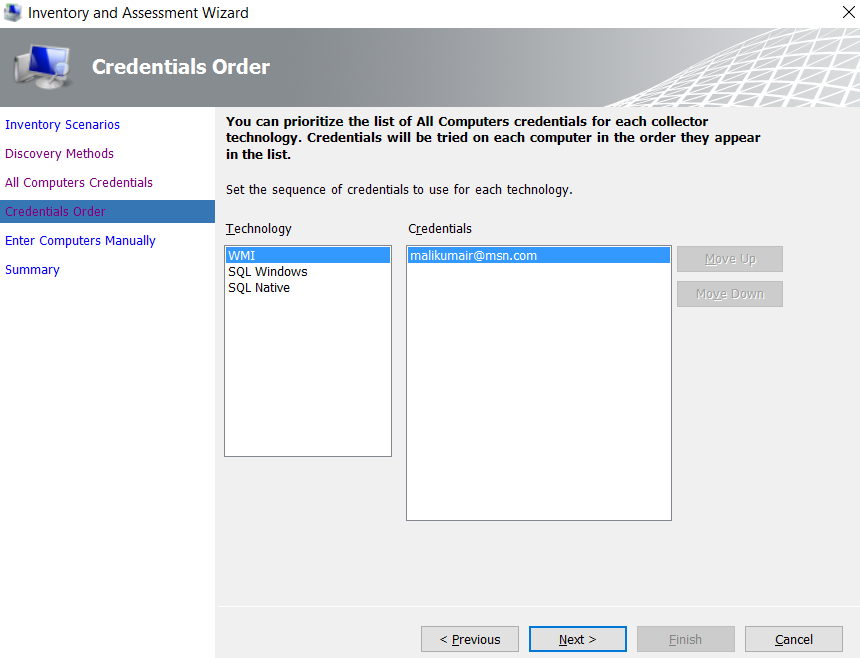
After setting the order of the credentials, you need to specify the credentials for each computer you want to discover. You can mention unique credentials for every computer/machine or can choose to use all computer credentials list. The screen on which all these options are available is shown below:
设置凭据的顺序后,您需要为要发现的每台计算机指定凭据。 您可以为每台计算机/计算机提及唯一的凭据,也可以选择使用所有计算机凭据列表。 所有这些选项均可用的屏幕如下所示:
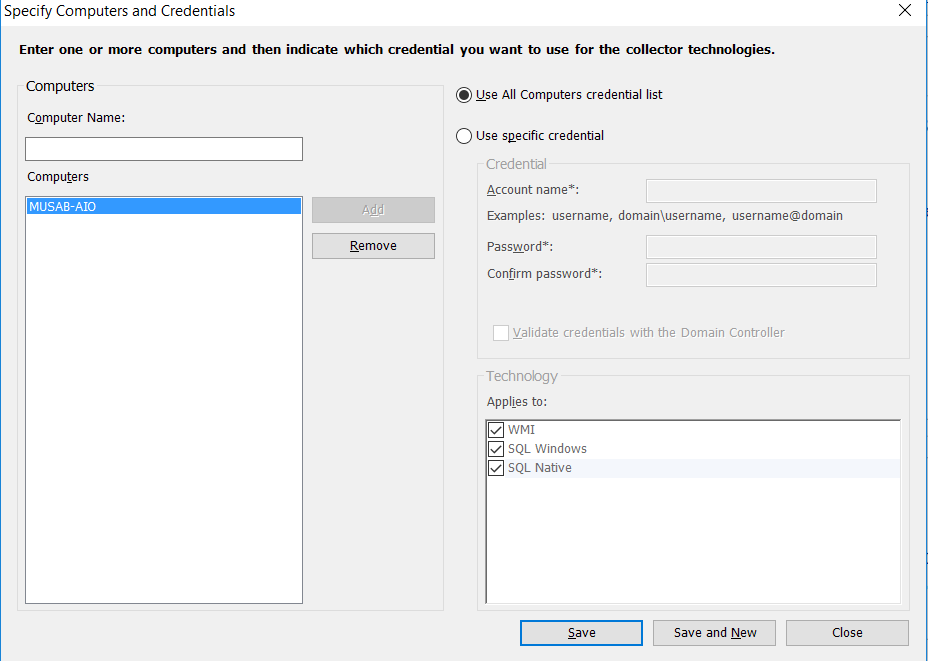
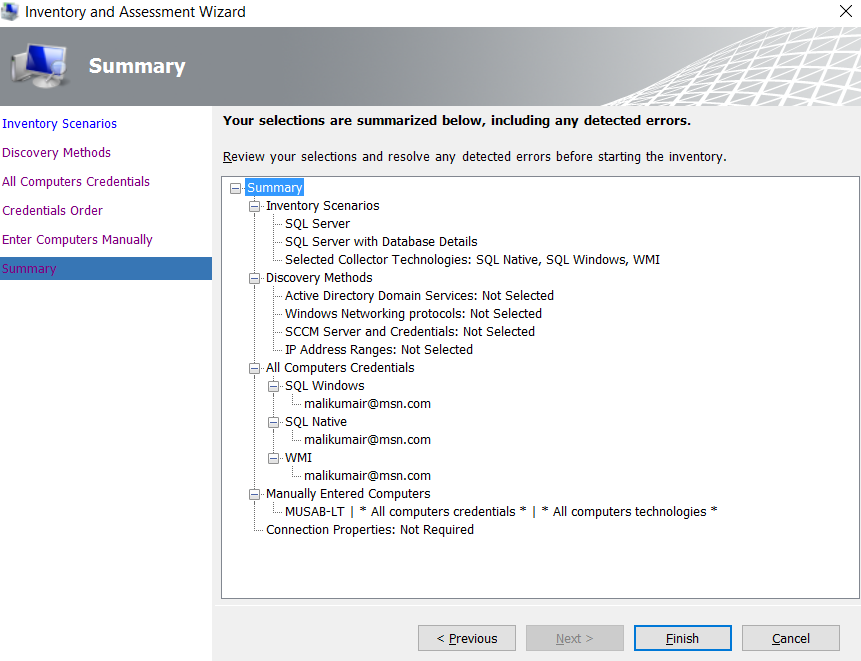
Click “Save” and then on “Next” to go to the Summary windows. Here you will see all the summary of options and methods you have chosen so far. So, verify all the settings and if everything looks good, click “Finish” to close the wizard and start the assessment process.
单击“保存”,然后在“下一步”上转到“摘要”窗口。 在这里,您将看到到目前为止选择的所有选项和方法的摘要。 因此,请验证所有设置,如果一切看起来都不错,请单击“完成”以关闭向导并开始评估过程。
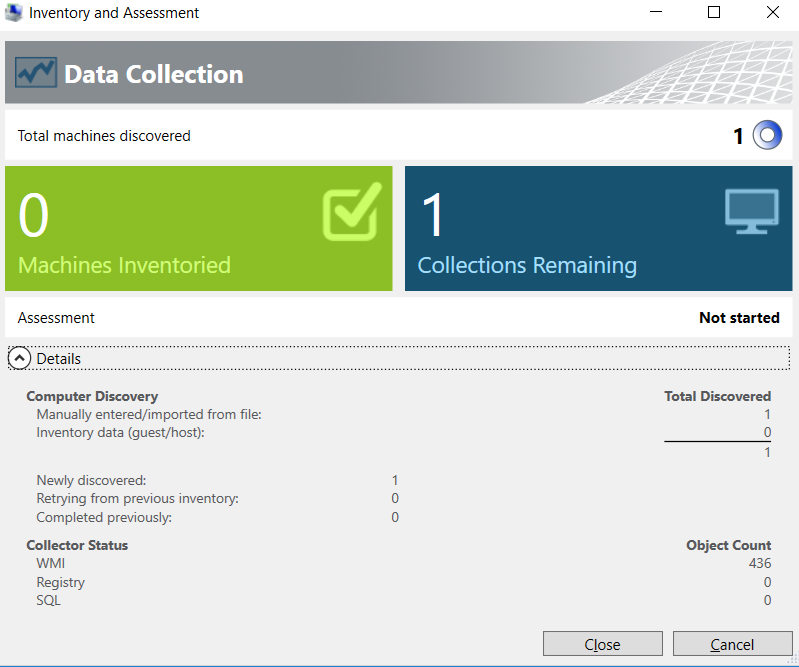
Now you will see a screen of the utility, trying to discover the machines and services running on them. This might take some times depending upon the number of machines and services you wanted to discover. On my machine which had 3 SQL Server instances, it took around 2-3 minutes. On production system, with like 20k plus machines it took around half an hour to discover 100s of instances of SQL Server. So be patient here.
现在,您将看到该实用程序的屏幕,试图发现它们上运行的机器和服务。 这可能需要花费一些时间,具体取决于您要发现的机器和服务的数量。 在我的具有3个SQL Server实例的计算机上,大约需要2-3分钟。 在生产系统上,大约有2万多台计算机,花了大约半小时才能发现100多个SQL Server实例。 因此,请耐心等待。
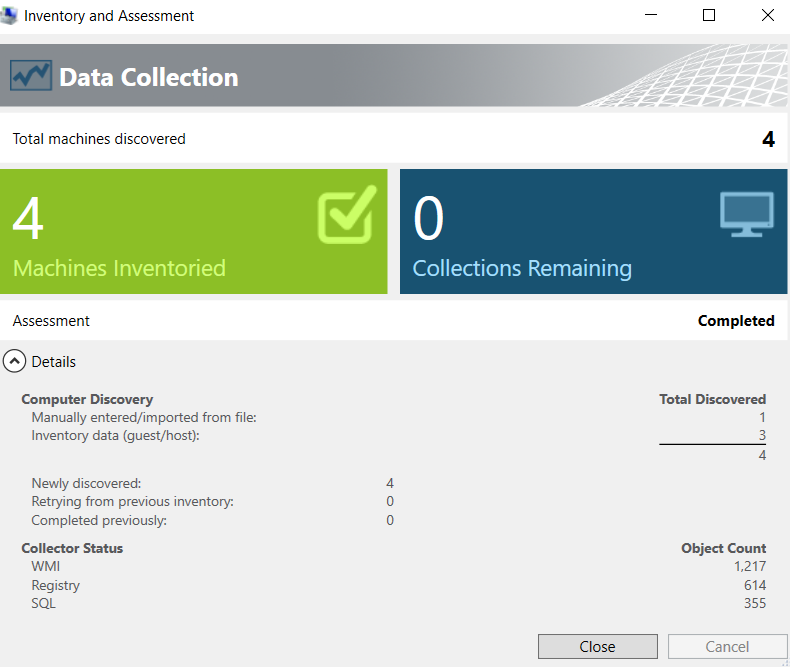
After the assessment is completed you will see a summary of the system and services discovered. This is really a good way to know how many machines you have in your network or how many objects are discovered in your system. The completed assessment screen is as follows:
评估完成后,您将看到发现的系统和服务的摘要。 这是了解网络中有多少台计算机或系统中发现了多少对象的一种好方法。 完成的评估屏幕如下:
After you click on “Close” you will be taken back to the Main window of the utility and you will see a summary of the Database Discovery done so far.
单击“关闭”后,将返回到实用程序的主窗口,您将看到到目前为止完成的数据库发现的摘要。
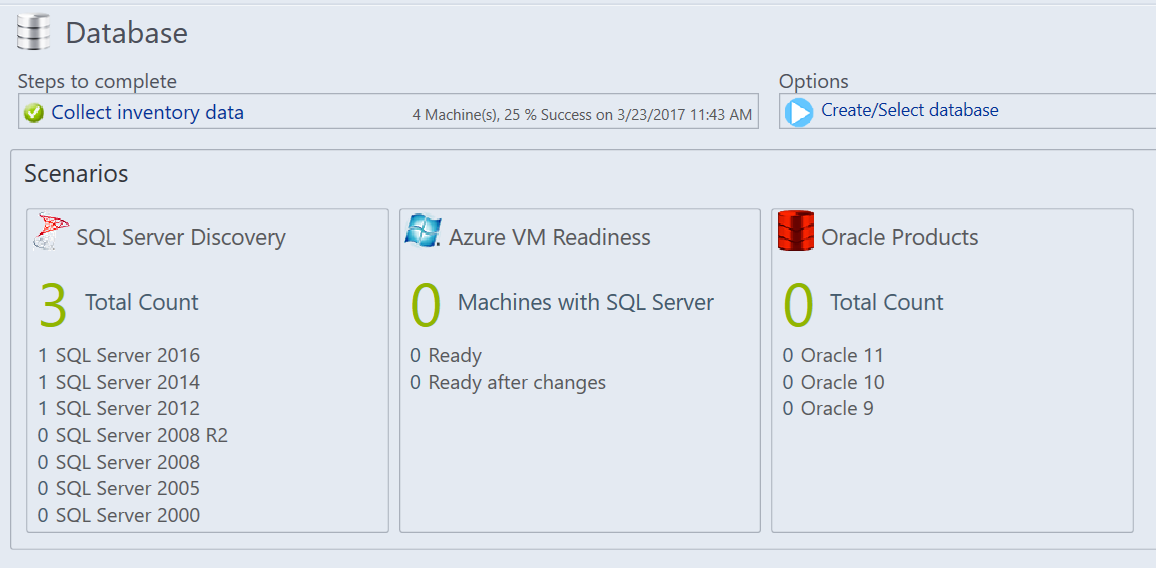
Here you will see that it has detected 3 instances on my machine with the version details. This is really good information. So, click on the “SQL Server Discovery” to see more details in graphical model about the SQL Server instances discovered. You will see some pie charts which will display really good and easy to read information about the SQL Server discovery. Screens are as follows:
在这里,您将看到它在我的计算机上检测到3个实例,其中包含版本详细信息。 这确实是很好的信息。 因此,单击“ SQL Server发现”可在图形模型中查看有关发现SQL Server实例的更多详细信息。 您将看到一些饼形图,这些饼形图将显示有关SQL Server发现的非常好且易于阅读的信息。 屏幕如下:
 The mentioned below screen shows 3 SQL Server Instances with version details.
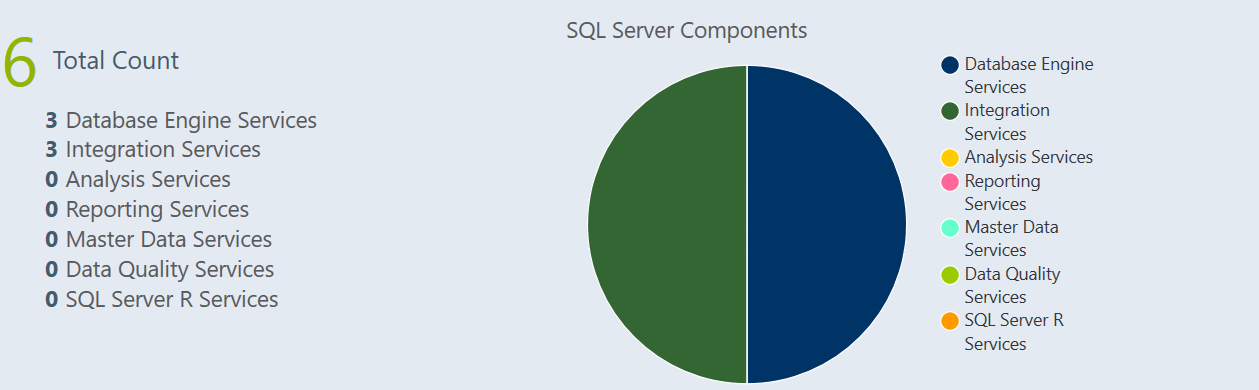
The screen below screen shows the installed components on the machines we did discovery on:
屏幕下方的屏幕显示了我们在其上发现的机器上的已安装组件:
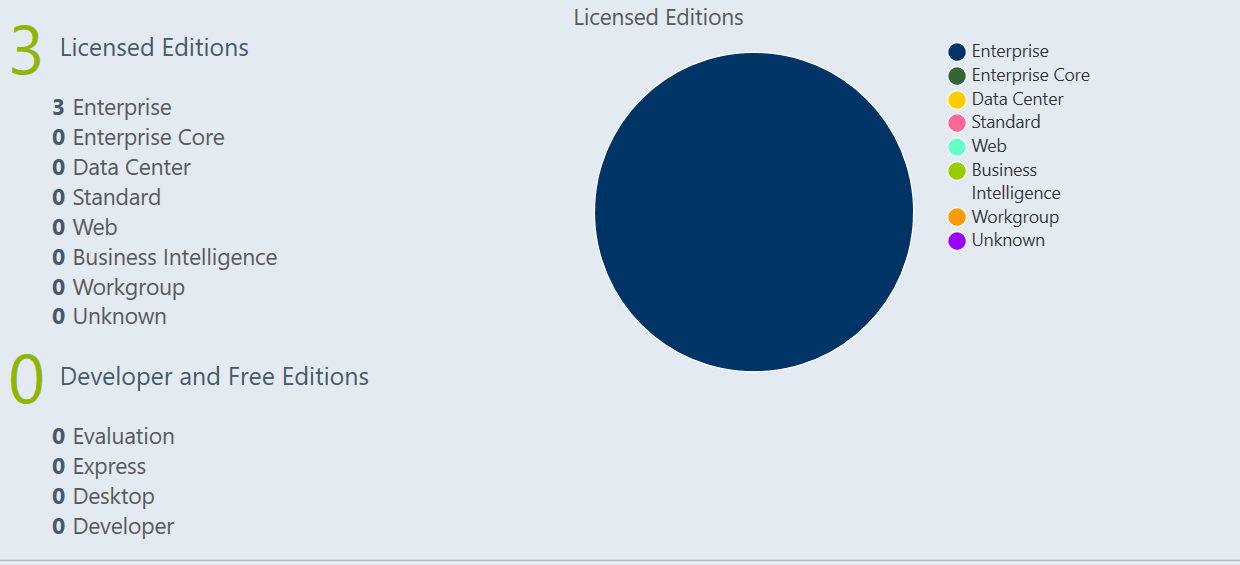
The third screen shows the database editions:
第三个屏幕显示数据库版本:
So far the discovery seems to be so amazing and it looks really good that we can get all this information in such a great way with just few clicks.
到目前为止,发现似乎是如此惊人,而且看起来确实不错,我们只需单击几下就能以一种很棒的方式获得所有这些信息。
So, let’s go ahead and generate the actual Summary and Details reports which will give you a detailed insight about the discovery.
因此,让我们继续生成实际的“摘要”和“详细信息”报告,这些报告将为您提供有关发现的详细见解。
On top right corner of the utility you will have “Options” page and here you can generate report about the SQL Server Assessment and the Database Details.
该实用程序的右上角将显示“选项”页面,您可以在此处生成有关SQL Server评估和数据库详细信息的报告。

Click on both (one by one) and it will generate report. This will take couple of seconds to few minutes depending upon the size of the inventory done from the discovery.
单击两者(一个接一个),它将生成报告。 这将需要几秒钟到几分钟的时间,具体取决于发现所完成的清单的大小。

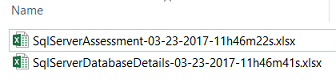
After reports are generated, the window will open automatically which will show files containing the Excel reports.
生成报告后,窗口将自动打开,其中将显示包含Excel报告的文件。
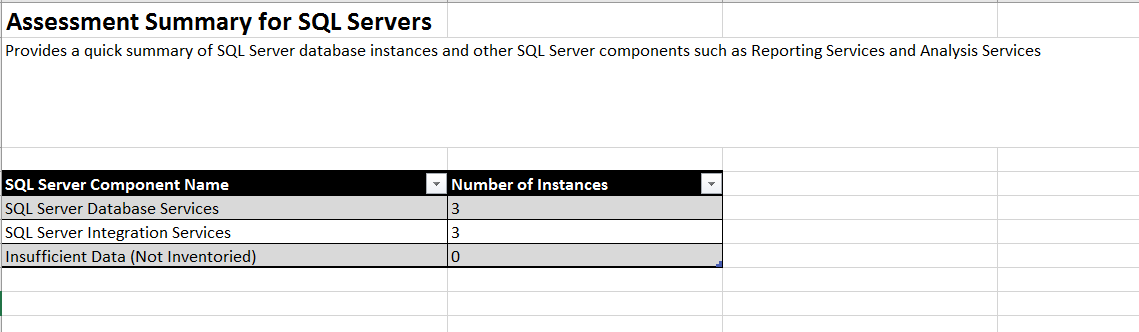
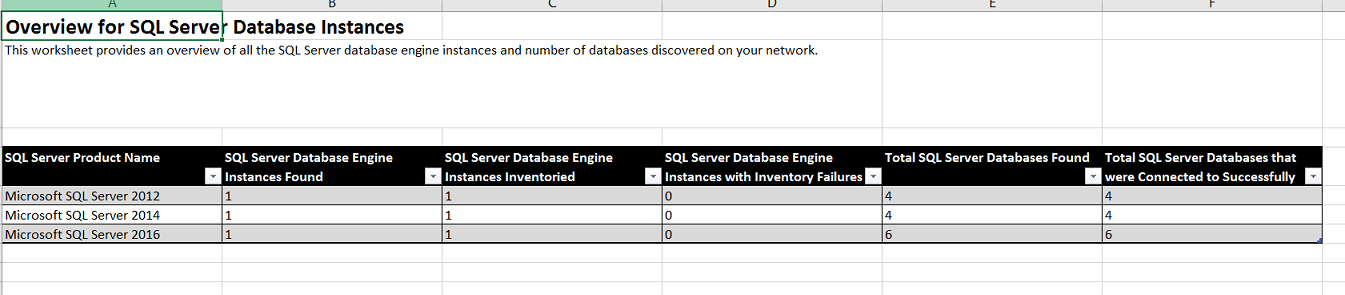
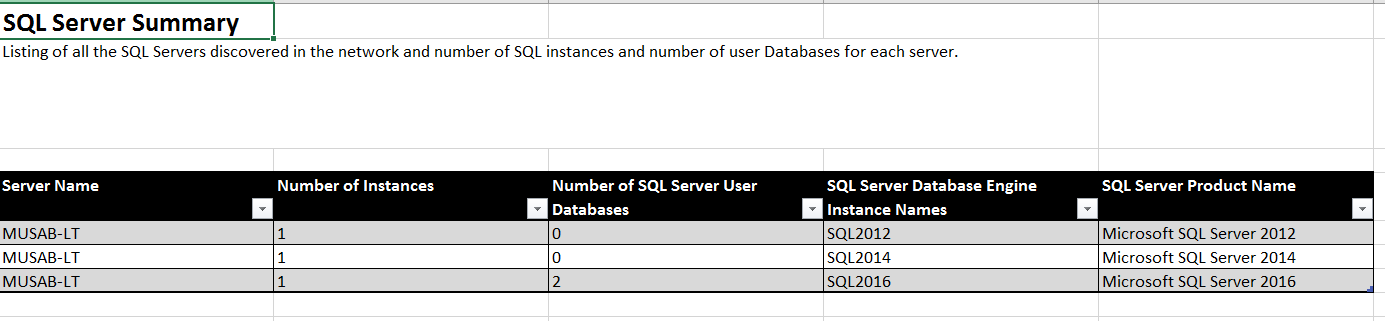
The first report will be a summary about the Instances and database components. This is the overview and high level summary.
第一份报告将是有关实例和数据库组件的摘要。 这是概述和高层概述。
Please see some of the sample screenshots as mentioned below:
请查看下面提到的一些示例屏幕截图:


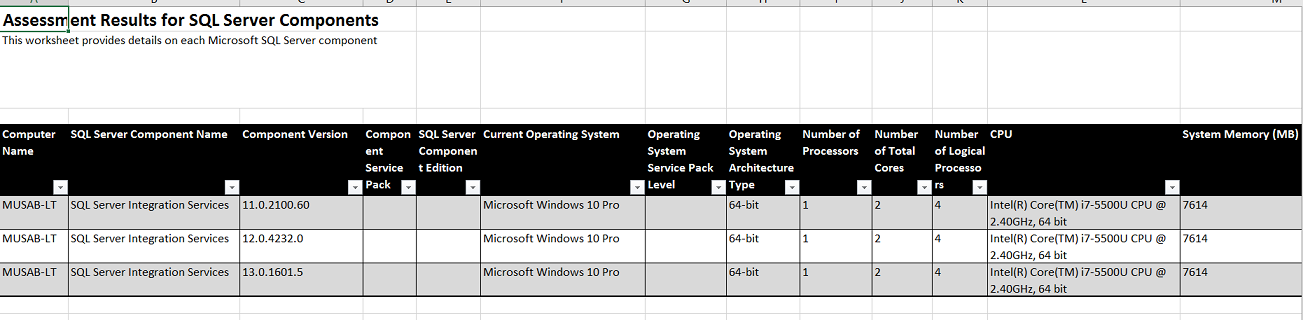
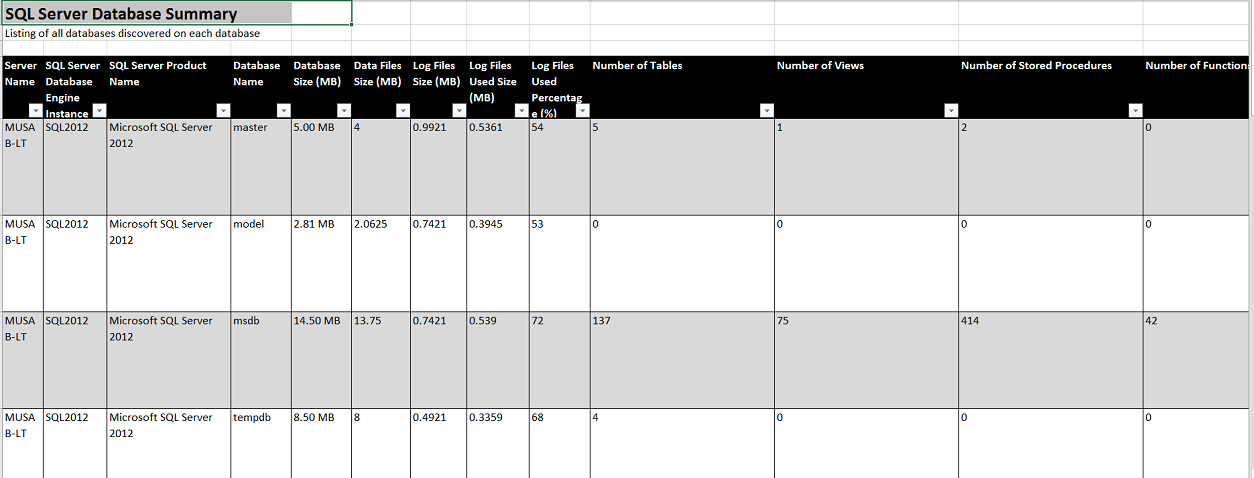
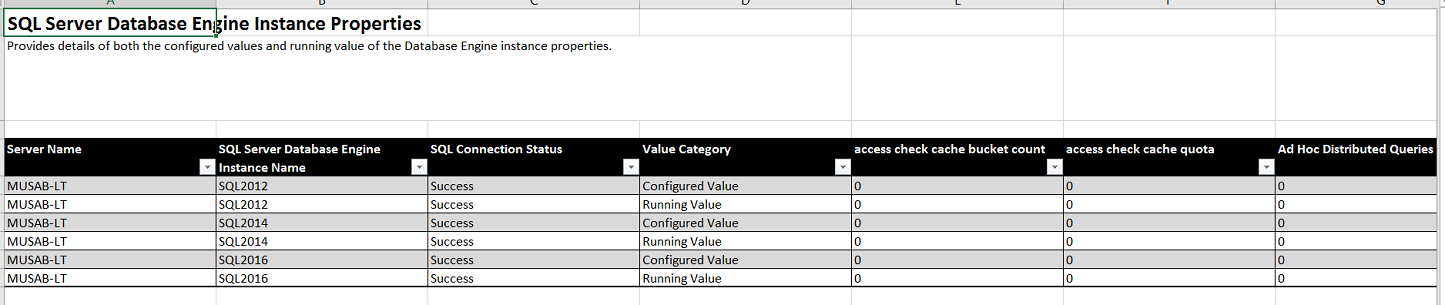
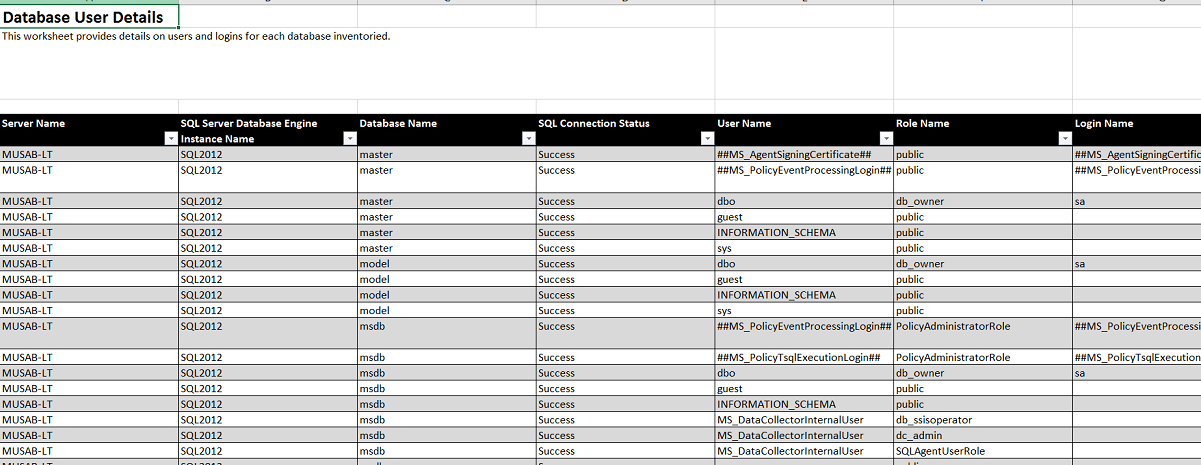
The second report is much more detailed and it will give you all the necessary information about instances, Databases, Users, Growth, Rights and configurations information.
第二份报告要详细得多,它将为您提供有关实例,数据库,用户,增长,权限和配置信息的所有必要信息。
Please see the sample screenshots mentioned below:
请参阅下面提到的示例屏幕截图:


摘要 (Summary)
The MAP toolkit is really useful and does a lot more than just discovering the SQL Server instance names. So far we only looked at how to discover SQL Server on a system or on a network. This is a quick way to discover detailed information about your SQL Server environment.
MAP工具包非常有用,它不仅发现SQL Server实例名称,还提供了更多功能。 到目前为止,我们仅研究了如何在系统或网络上发现SQL Server。 这是发现有关SQL Server环境的详细信息的快速方法。
翻译自: https://www.sqlshack.com/how-to-use-microsoft-assessment-and-planning-map-toolkit-for-sql-server/


 被折叠的 条评论
为什么被折叠?
被折叠的 条评论
为什么被折叠?
 到【灌水乐园】发言


