


iscsi发起程序chap
In this article, we will continue our journey to configuring a SQL Server AlwaysOn High availability configuration and failover nodes, by setting up iSCSI including an iSCSI initiator, setting up disk drives on notes, configuring our Quorum and finally installing the SQL Server cluster.
在本文中,我们将继续进行配置SQL Server AlwaysOn高可用性配置和故障转移节点的过程,方法是设置包括iSCSI启动器的iSCSI,在注释上设置磁盘驱动器,配置Quorum,最后安装SQL Server群集。
iSCSI安装 (iSCSI Installation )
iSCSI is storage protocol which creates storage to the client node and domain controller.
iSCSI是一种存储协议,可创建到客户端节点和域控制器的存储。
To install Go to Server manager > Tools > iSCSI
要安装,请转到服务器管理器>工具> iSCSI
Click on To install iSCSI target server, start the Add Roles and Features wizard
单击以安装iSCSI目标服务器,启动“添加角色和功能”向导
Click Next and Install. Once these features are installed, we will create iSCSI disk. We are creating these disks on the domain controller, but we can also create these disks on other nodes. If, however, the node server goes down, then the iSCSI configuration will also be down, so we will create a virtual disk configuration on the domain controller and other nodes which are configured as targets.
单击下一步并安装。 一旦安装了这些功能,我们将创建iSCSI磁盘。 我们正在域控制器上创建这些磁盘,但也可以在其他节点上创建这些磁盘。 但是,如果节点服务器关闭,则iSCSI配置也将关闭,因此我们将在域控制器和其他配置为目标的节点上创建虚拟磁盘配置。
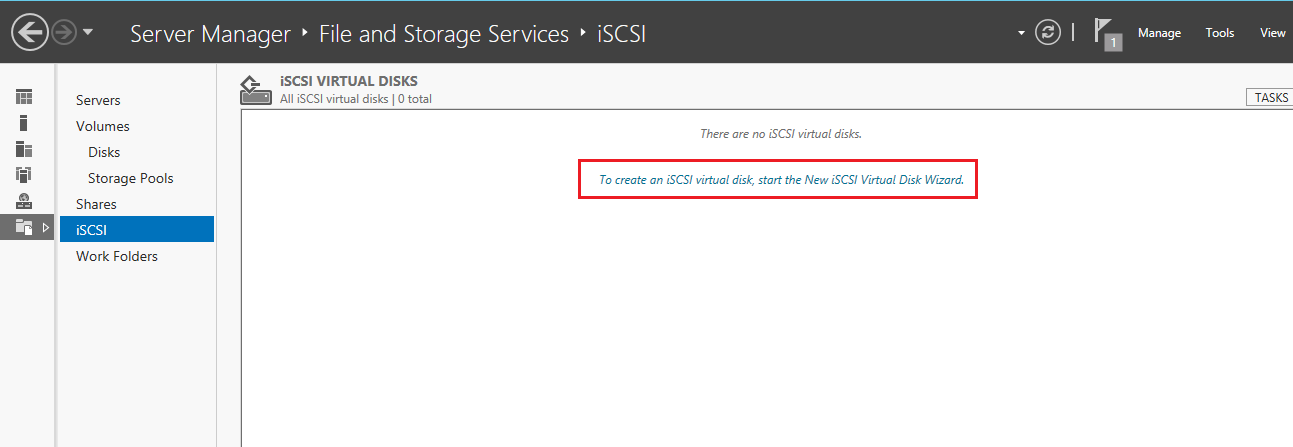
Once we installed the iSCSI feature, it will get back to the main iSCSI page as below.
安装完iSCSI功能后,它将返回到iSCSI主页面,如下所示。
As shown in the following fig. we will use the C drive to configure as the Target disk. Click Next
如下图所示。 我们将使用C驱动器将其配置为目标磁盘。 点击下一步
In the following screen, we need to specify the disk name. We can create a separate disk for Data and log. We will create a disk now for Data drive. we will specify a name like “data” and It will get saved in following the mentioned path.
在以下屏幕中,我们需要指定磁盘名称。 我们可以为数据和日志创建一个单独的磁盘。 现在,我们将为数据驱动器创建一个磁盘。 我们将指定一个名称,例如“ data”,并将其保存在上述路径中。
In the following screen, we will specify a size for each disk. The total free space is 81.8 GB and out of that I am allocating 10 GB for Data for demo purpose. You can provide a size as per your local requirements.
在以下屏幕中,我们将为每个磁盘指定大小。 总可用空间为81.8 GB,其中我将为演示目的为数据分配10 GB。 您可以根据当地要求提供尺寸。
Select the default option New iSCSI target as shown below and click Next
选择默认选项“ 新建iSCSI目标” ,如下所示,然后单击“ 下一步”。
Specify the Target name and (optionally) a description and click Next
指定目标名称和(可选)描述,然后单击下一步
In the following screen, we will set-up an iSCSI initiator by assigning a private IP of a node server.
在以下屏幕中,我们将通过分配节点服务器的专用IP来设置iSCSI启动器。
 最低0.47元/天 解锁文章


 8792
8792


 被折叠的 条评论
为什么被折叠?
被折叠的 条评论
为什么被折叠?
 到【灌水乐园】发言


