


qnx neutrino
 Utilize tooling that harnesses the power of Webpack with ease of simple presets to quickly start JavaScript projects, all without upfront configuration.
Taking the plunge into starting a new JS project often brings along a significant effort into preparing your environment prior to starting development on the project. Many developers have a preference for using cutting-edge features and modern tooling workflows to make the process enjoyable. Unfortunately, this approach can often have quite a bit of learning curve as people spend time researching best practices, following complex configuration tutorials, and experimenting with boilerplates. What if we could take the work that the community has put into configuring their own projects, and capture that into shareable packages that anyone can use? This is why we created Neutrino.
投入大量精力开始新的JS项目通常会花费大量精力来准备环境,然后再开始对该项目进行开发。 许多开发人员偏爱使用最先进的功能和现代的工具工作流程来使过程愉快。 不幸的是,随着人们花时间研究最佳实践,遵循复杂的配置教程并尝试样板,这种方法通常会有很多学习曲线。 如果我们可以将社区投入的工作用于配置自己的项目,并将其捕获到任何人都可以使用的可共享软件包中,该怎么办? 这就是我们创建Neutrino的原因。
Neutrino is a tool that combines the build and configuration power of Webpack and bolts on the capability to build JavaScript-based projects with presets. A preset is the fundamental building block of Neutrino. With it you can supplement a project with a number of features including how it is compiled, ensuring code quality, and even quickly add testing. By breaking up configuration into composable units we can foster an ecosystem where customizing a project becomes plug and play.
Neutrino是一种工具,它结合了Webpack的构建和配置功能以及螺栓的功能,可以使用预设构建基于JavaScript的项目。 预设是Neutrino的基本构建块。 有了它,您可以为项目补充许多功能,包括如何编译,确保代码质量,甚至快速添加测试。 通过将配置分解为可组合的单元,我们可以构建一个生态系统,使定制项目成为即插即用的过程。
To get an idea of how easy it is to get started with Neutrino, I'll walk through creating a couple simple projects.
为了了解Neutrino入门的难易程度,我将逐步创建一些简单的项目。
Note: In the upcoming examples I am using the Yarn package manager for installing dependencies and creating scripts. This is only my personal preference, and you are free to use the npm client if you desire.
注意:在接下来的示例中,我将使用 Yarn软件包管理器 来安装依赖项并创建脚本。 这只是我个人的喜好,如果需要,您可以自由使用npm客户端。
Node.js快速入门 (Node.js Quickstart)
Wait, you can use Neutrino to build Node.js apps? 等一下,您可以使用Neutrino来构建Node.js应用程序吗?
To get started with our first Neutrino-based Node.js project, we are going to be using neutrino-preset-node. According to its documentation it enables:
为了开始我们的第一个基于Neutrino的Node.js项目,我们将使用neutrino-preset-node 。 根据其文档,它可以:
- No upfront configuration, and easy overrides if necessary 没有前期配置,必要时可以轻松覆盖
- Compiles to support Node.js v6.9+, ES Modules, Async Functions 编译以支持Node.js v6.9 +,ES模块,异步功能
- Auto-wired sourcemaps 自动连线的原始图
Cool, let's get started!
酷,让我们开始吧!
First up, we need a directory to start working from. From your terminal, create a new directory and change into it. Then we are going to install neutrino and neutrino-preset-node as development dependencies.
首先,我们需要一个目录来开始工作。 在您的终端上,创建一个新目录并进行更改。 然后,我们将安装neutrino和neutrino-preset-node作为开发依赖项。
❯ mkdir project && cd project
❯ yarn add --dev neutrino neutrino-preset-node
By default the Node.js preset looks for source code in a src directory, with the main entry point being index.js. Let's create this file and edit it, just with a simple HTTP server that echoes whatever we send to it.
默认情况下,Node.js预设在src目录中查找源代码,主要入口点是index.js 。 让我们使用一个简单的HTTP服务器来创建并编辑该文件,该服务器将回显我们发送给它的所有内容。
import { createServer } from 'http';

const port = process.env.PORT || 3000;

createServer(({ url }, response) => {
  console.log(`Received message at ${url}`);
  response.end(url.slice(1));
})
.listen(port, () => console.log(`Running on :${port}`));
Next, let's add a couple scripts to our package.json which will give us some easy commands to start and build our app:
接下来,让我们在package.json中添加几个脚本,这将为我们提供一些简单的命令来启动和构建我们的应用程序:
{
  "scripts": {
    "start": "neutrino start --presets neutrino-preset-node",
    "build": "neutrino build --presets neutrino-preset-node",
    "serve": "yarn start && node build"

  },
  "devDependencies": {
    "neutrino": "^4.0.1",
    "neutrino-preset-node": "^4.0.1"
  }
}
We are ready to start our app! Using yarn serve in one terminal, and curl in another, we can see our code in action:
我们准备启动我们的应用程序! 在一个终端中使用yarn serve ,而在另一个终端中curl ,我们可以看到我们的代码正在运行:
❯ yarn serve
Warning: This preset does not support watch compilation. Falling back to a one-time build.
Hash: 8fa3faf9cbe8ca235884
Version: webpack 2.2.1
Time: 632ms
       Asset     Size  Chunks             Chunk Names
    index.js   3.6 kB       0  [emitted]  index
index.js.map  3.53 kB       0  [emitted]  index

Running on :3000

---

❯ curl http://localhost:3000/Hello\!
Hello!
That's it?!
而已?!
Yep. That's it.
是的 而已。
No upfront cost needed to start your project with a completely modern toolchain.
无需使用完全现代化的工具链即可开始项目的前期费用。
React快速入门 (React Quickstart)
Okay, I'll admit that was simple enough. But certainly a complex environment like React needs more than this, right?
好吧,我承认这很简单。 但是可以肯定的是,像React这样的复杂环境还需要更多,对吧?
For fun, let's just change this project from Node.js to React. According to the Neutrino documentation, the React preset features:
为了好玩,让我们将这个项目从Node.js更改为React。 根据Neutrino文档, React预设具有以下特点:
- JSX syntax, ES Modules, support for last 2 browser versions, and Async Functions JSX语法,ES模块,对最近2个浏览器版本的支持以及异步函数
- Support for import CSS, HTML, images, fonts, and icons directly from JavaScript 支持直接从JavaScript导入CSS,HTML,图像,字体和图标
- Hot module replacement, no HTML templating, and much more 热模块更换,无HTML模板等等
Let's swap presets and install some React dependencies.
让我们交换预设并安装一些React依赖项。
❯ yarn remove neutrino-preset-node && yarn add --dev neutrino-preset-react
❯ yarn add react react-dom
Our package.json commands need to be changed to use the React preset now:
我们的package.json命令需要更改为现在使用React预设:
{
  "scripts": {
    "start": "neutrino start --presets neutrino-preset-react",
    "build": "neutrino build --presets neutrino-preset-react"
  },
}
Instead of creating a Node.js server, let's render some content to a web app. By convention our preset allows us to mount our application at ID “root”:
让我们向Web应用程序呈现一些内容,而不是创建Node.js服务器。 按照约定,我们的预设允许我们将应用程序安装在ID为“ root”的位置:
import React from 'react';
import { render } from 'react-dom';
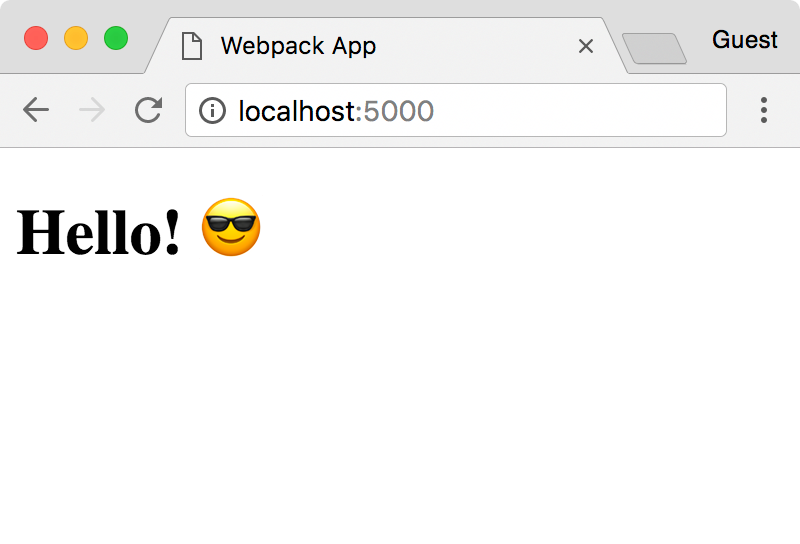
render((
<main>
<h1>Hello! 😎</h1>
</main>
), document.getElementById('root'));
Back to the terminal, and we can start up our app, and load it up in the browser:
回到终端,我们可以启动我们的应用程序,并将其加载到浏览器中:
❯ yarn start
✔ Development server running on: http://localhost:5000
✔ Build completed
Hopefully that demonstrates how simple it is to get up and running with a new React project! If you aren't working with React for your web project, consider using neutrino-preset-web for other libraries or generic web applications.
希望这证明了启动和运行新的React项目是多么简单! 如果您不为Web项目使用React,请考虑将neutrino-preset-web用于其他库或常规Web应用程序。
多个预设 (Multiple presets)
Neutrino makes it simple to compose multiple presets together. To demonstrate, let's add a linting preset which will conform our project to the Airbnb style guide. Install neutrino-preset-airbnb-base:
Neutrino使组合多个预设变得简单。 为了演示,让我们添加一个棉绒预设,使我们的项目符合Airbnb样式指南 。 安装neutrino-preset-airbnb-base :
❯ yarn add --dev neutrino-preset-airbnb-base
To reduce some repetition, we are going to take advantage of a Neutrino feature which will pull from an array of presets in our package.json. This saves us from having to name all the presets we want to use for every command. Remove the presets from the script commands and move them to config.presets.
为了减少重复,我们将利用Neutrino功能,该功能将从package.json中的一系列预设中提取。 这使我们不必命名每个命令要使用的所有预设。 从脚本命令中删除预设,并将其移动到config.presets 。
{
  "config": {
    "presets": [
      "neutrino-preset-airbnb-base",
      "neutrino-preset-react"
    ]
  },
  "scripts": {
    "start": "neutrino start",
    "build": "neutrino build"
  }
}
Note: neutrino-preset-airbnb-base needs to be loaded before our React preset according to the documentation.
注意: 根据文档,需要在我们的React预设之前加载neutrino-preset-airbnb-base 。
If we modify our code and introduce something in violation of the preset, we are clearly notified in the console:
如果我们修改代码并引入了一些违反预设的内容,则会在控制台中清楚地通知我们:
❯ yarn start
✔ Development server running on: http://localhost:5000
✔ Build completed

ERROR in ./src/index.js

/node-project/src/index.js
  6:10  error  Strings must use singlequote  quotes

✖ 1 problem (1 error, 0 warnings)
I'm starting to sense a pattern here…
我开始在这里感觉到一种模式…
也测试! (Testing, too!)
Let's quickly add a simple Jest test, because why not? The Neutrino preset neutrino-preset-jest uses a convention of a test directory, with some expectations on file extensions:
让我们快速添加一个简单的Jest测试,因为为什么不呢? Neutrino预设 neutrino-preset-jest使用test目录的约定,并对文件扩展名有所期望:
❯ yarn add --dev neutrino-preset-jest
❯ mkdir test && touch test/add.test.js
❯ touch src/add.js
Let's write a quick test which verifies a function correctly performs simple addition, which we will shortly create:
让我们编写一个快速测试,以验证一个函数正确执行了简单的加法运算,我们将很快创建它:
import add from '../src/add';

describe('addition', () => {
  it('adds 2 numbers', () => {
    expect(add(3, 5)).toBe(8);
  });
});
Now our addition module in src/add.js:
现在在src/add.js添加模块:
export default (x, y) => x + y;
Edit the package.json once more, adding the Jest preset to our list, along with a command to run tests:
再次编辑package.json,将Jest预设添加到我们的列表中,并附带运行测试的命令:
{
  "config": {
    "presets": [
      "neutrino-preset-airbnb-base",
      "neutrino-preset-react",
      "neutrino-preset-jest"
    ]
  },
  "scripts": {
    "start": "neutrino start",
    "build": "neutrino build",
    "test": "neutrino test"
  }
}
Let's run the test!
让我们运行测试!
❯ yarn test

 PASS  test/add.test.js
  addition
    ✓ adds 2 numbers (3ms)

Test Suites: 1 passed, 1 total
Tests:       1 passed, 1 total
Snapshots:   0 total
Time:        1.228s
Ran all test suites.
If we had made a mistake writing our addition module and accidentally used multiplication:
如果我们在编写加法模块时犯了一个错误,并且偶然使用了乘法:
export default (x, y) => x * y;
This would have caused the test to fail:
这会导致测试失败:
❯ yarn test

 FAIL  test/add.test.js
  ● addition › adds 2 numbers

expect(received).toBe(expected)

Expected value to be (using ===):
      8
    Received:
      15

at Object.<anonymous> (test/add.test.js:5:38)
      at process._tickCallback (internal/process/next_tick.js:103:7)

addition
    ✕ adds 2 numbers (5ms)

Test Suites: 1 failed, 1 total
Tests:       1 failed, 1 total
Snapshots:   0 total
Time:        1.221s
Ran all test suites.
修改构建 (Modifying the build)
One of the great features of Neutrino is that you don't have to trade simplicity for lock-in or lack of extensibility. By following the documentation you can supplement your project build process with additional features that don't come with your preset. If you find you use these features or changes across multiple projects, you can roll that into your own preset, and share it with your team and the community!
Neutrino的一大特色是您不必为了锁定或缺乏可扩展性而牺牲简单性。 通过遵循文档,您可以为您的项目构建过程补充预置所没有的其他功能。 如果发现您在多个项目中使用了这些功能或进行了更改,则可以将其滚动到自己的预设中 ,并与您的团队和社区共享!
结论 (Conclusion)
Making Neutrino into the tool it is today has been a lot of hard work, but we hope you enjoy it. Try it in your projects, give feedback, create your own presets, and share with others. We want to see everyone be successful with Neutrino.
要使Neutrino成为今天的工具,需要付出很多努力,但我们希望您喜欢它。 在您的项目中进行尝试,提供反馈,创建自己的预设并与他人共享。 我们希望看到每个人都可以在Neutrino上取得成功。
If you would like to get involved with development or documentation, please visit the contributing section of the docs for complete details, or visit our GitHub repo.
如果您想参与开发或文档,请访问文档的贡献部分以获取完整的详细信息,或访问我们的GitHub存储库。
Neutrino Documentation: https://neutrino.js.org/
Neutrino文档: https : //neutrino.js.org/
Neutrino GitHub: https://github.com/mozilla-neutrino/neutrino-dev
Neutrino GitHub: https : //github.com/mozilla-neutrino/neutrino-dev
Thanks! Eli Perelman & Hassan Ali — Mozilla
谢谢! Eli Perelman和Hassan Ali — Mozilla
qnx neutrino


 396
396

 被折叠的 条评论
为什么被折叠?
被折叠的 条评论
为什么被折叠?
 到【灌水乐园】发言


