


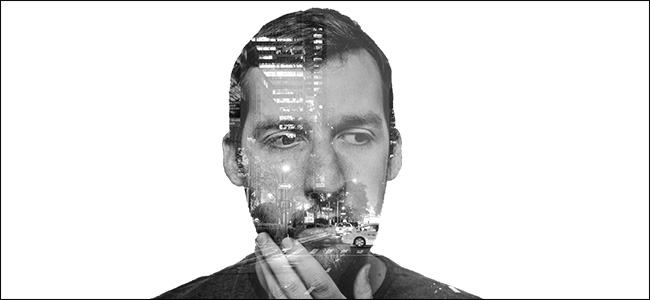
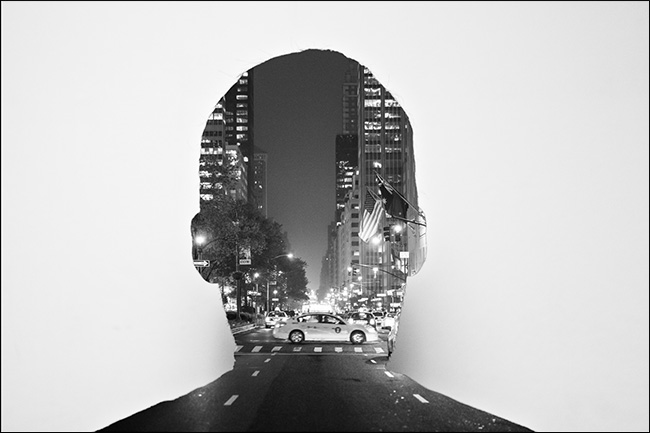
Double exposure images are popular at the moment. Taylor Swift’s Style music video and the True Detective opening theme both used the effect. It’s a technique where two separate photos—typically a portrait and a landscape—are blended together into one unusual image. Originally photographers took two photos (“exposures”) on the same piece of film to combine them, but now it’s usually done with software like Photoshop or GIMP.
目前,双曝光图像很流行。 泰勒·斯威夫特(Taylor Swift)的风格音乐视频和《真实侦探》的开幕主题都使用了这种效果。 这是一种将两张单独的照片(通常是肖像和风景)融合在一起成为一张不寻常图像的技术。 最初,摄影师在同一张胶片上拍摄了两张照片(“曝光”)以将它们组合在一起,但是现在通常是使用Photoshop或GIMP之类的软件完成的。
In this guide, we’ll show you how to make your own double exposure images. I’m using Photoshop, but you should be able to follow along in any other image editor. Just use the equivalent tools and shortcuts.
在本指南中,我们将向您展示如何制作自己的双曝光图像。 我正在使用Photoshop,但是您应该可以在任何其他图像编辑器中继续学习。 只需使用等效的工具和快捷方式。
第一步:选择图片 (Step One: Select Your Images)
The images you pick at the start can make or break this technique. If the images you choose are too complicated, making things look good is next to impossible.
您在一开始就选择的图像可以使这种技术成败。 如果您选择的图像过于复杂,则使事情看起来不错几乎是不可能的。
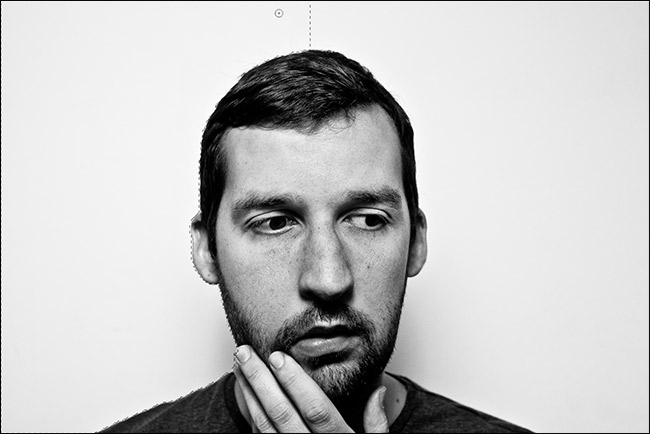
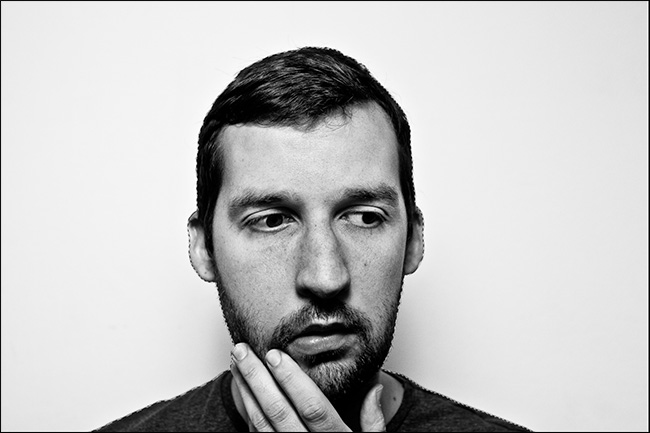
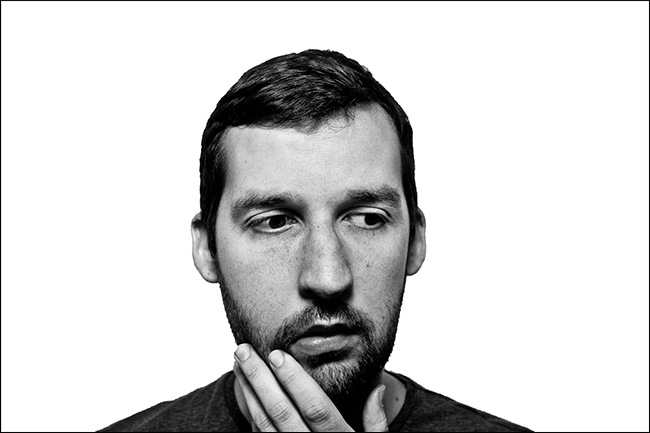
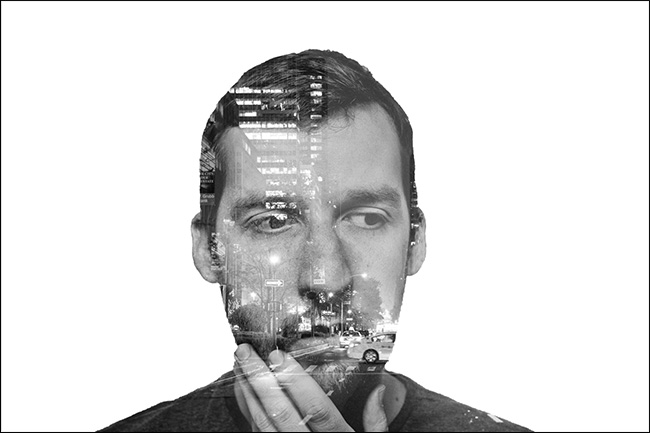
For a portrait, you want something simple, clean, shot against a white background, and converted to black and white. This self portrait from Chris Marchant is a perfect example. It’s the image I’m using.
对于人像,您需要简单,干净,在白色背景下拍摄并转换为黑白的东西。 克里斯·马尔琴( Chris Marchant )的这张自画像就是一个很好的例子。 这是我正在使用的图像。

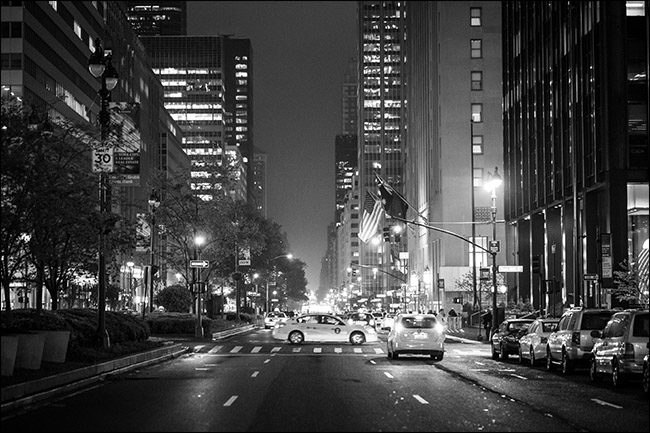
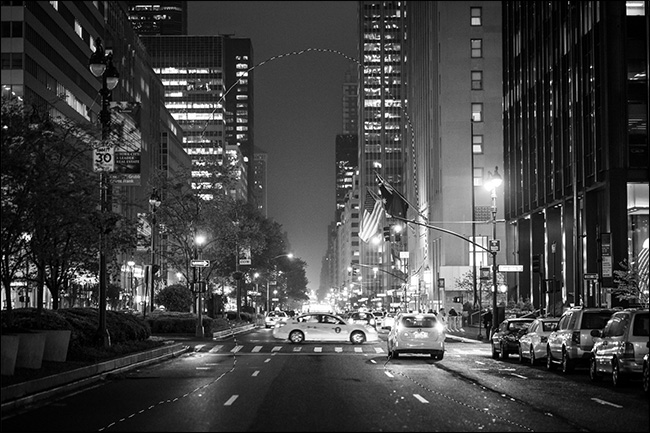
For the landscape, you have a lot more flexibility. Just pick something that will complement the portrait. Black and white images can be a little easier, but color images will also work. I’m using this New York City night scene by Luca Sartoni.
对于景观,您具有更大的灵活性。 只要选择一些可以补充人像的东西即可。 黑白图像可能会更容易一些,但彩色图像也可以使用。 我正在使用Luca Sartoni的纽约夜景。
第二步:掩盖肖像 (Step Two: Mask the Portrait)
Open the portrait image in Photoshop, or your image editor of choice. The first thing you’ll need to do is make a good layer mask. If you’re not familiar with them, check out our guide to layers and masks before continuing.
在Photoshop或您选择的图像编辑器中打开肖像图像。 您需要做的第一件事是制作一个好的图层蒙版。 如果您不熟悉它们,请先阅读我们的图层和蒙版指南,然后再继续。
Since I’m working with a portrait shot against a white background, it’s relatively easy to remove with Photoshop’s automated tools. Duplicate the background to a new layer (the keyboard shortcut is Control+J, or Command+J on a Mac) and grab the Quick Selection Tool (you can tap W on your keyboard).
由于我使用的是在白色背景下拍摄的人像,因此使用Photoshop的自动化工具删除它相对容易。 将背景复制到新图层(键盘快捷键为Control + J,在Mac上为Command + J),然后抓住快速选择工具(可以在键盘上点按W)。

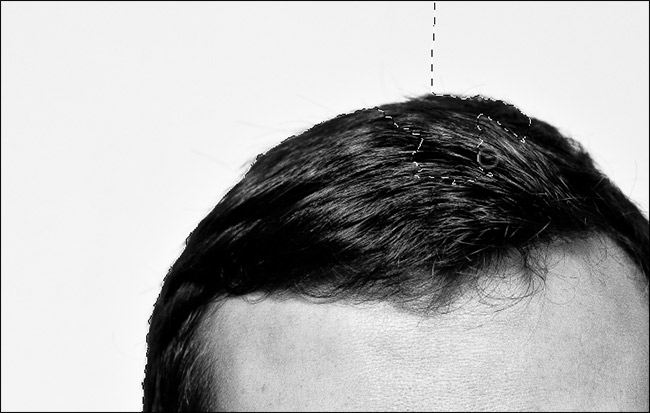
Drag the cursor around the white areas of the background and Photoshop will automatically select everything.
将光标拖到背景的白色区域周围,Photoshop将自动选择所有内容。
If you accidentally select some of the model, hold down the Alt or Option key and drag over the areas you don’t want selected. If you want to add other areas to the selection, hold down the Shift key.
如果您不小心选择了某些模型,请按住Alt或Option键,然后在不需要的区域上拖动。 如果要向选择区域添加其他区域,请按住Shift键。
Once you have everything selected, go to Select > Inverse or use the keyboard shortcut Control+Shift+I (Command+Shift+I on a Mac) to invert your selection. Next, go to Select > Modify > Smooth and put in a value of about 5 pixels.
选定所有内容后,请转到“选择”>“反向”,或使用键盘快捷键Control + Shift + I(在Mac上为Command + Shift + I)来反转选择。 接下来,转到“选择”>“修改”>“平滑”,并输入大约5个像素的值。
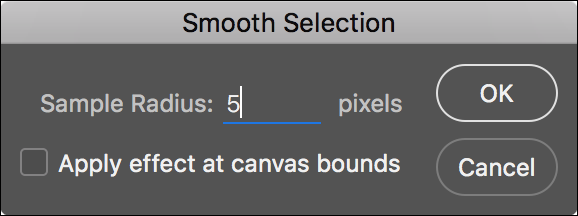
This will help with any rough edges.
这将有助于处理任何粗糙的边缘。
Finally, click the new layer mask button to turn the selection into a layer mask.
最后,单击新的图层蒙版按钮以将所选内容转换为图层蒙版。
第三步:添加景观 (Step Three: Add the Landscape)
Go to File > Place Embedded, select the landscape image you’re using, and press Embed. This will load the landscape image into the same document. Press Enter or Return to place it.
转到“文件”>“嵌入嵌入”,选择您正在使用的风景图像,然后按“嵌入”。 这会将风景图像加载到同一文档中。 按Enter或Return放置它。

Hold down Control (Command on a Mac) and click on the mask on the portrait layer.
按住Control键(在Mac上为Command),然后在纵向图层上单击蒙版。
This will load it as a selection.
这会将其作为选择加载。
Click the new layer mask button to mask the landscape to the silhouette of the portrait.
单击新的图层蒙版按钮,将风景蒙版到肖像的轮廓。

Now things are starting to take shape.
现在事情开始成形。
第四步:修复背景 (Step Four: Fix the Background)
Before continuing, let’s step back and sort the background. Although it looked pure white in the original image, there are actually some dark spots from the model’s shadow. We don’t want these in the final image.
在继续之前,让我们退后一步,对背景进行排序。 尽管它在原始图像中看起来是纯白色的,但实际上模型阴影中存在一些暗点。 我们不希望这些出现在最终图像中。
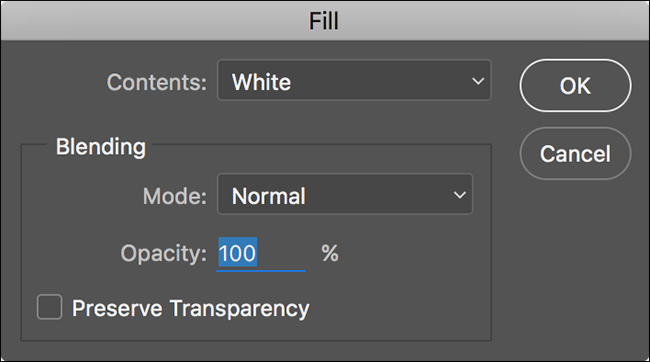
Create a new layer with the keyboard shortcut Control+Shift+N or Command+Shift+N. Fill it with white by going to Edit > Fill and selecting White.
使用键盘快捷键Control + Shift + N或Command + Shift + N创建新层。 通过转到“编辑”>“填充”并选择“白色”,将其填充为白色。
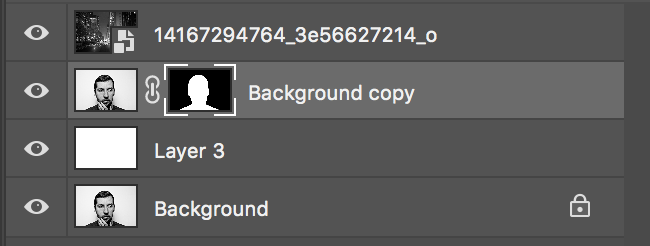
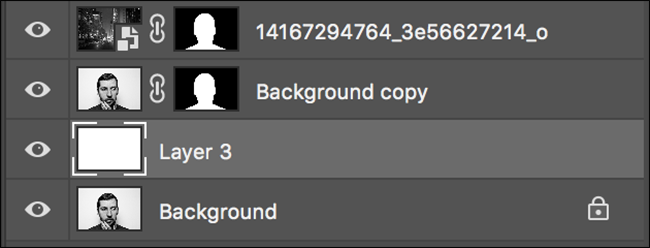
Drag this new layer beneath the Background copy layer but above the Background Layer.
将此新层拖到“背景”副本层下但在“背景层”上。
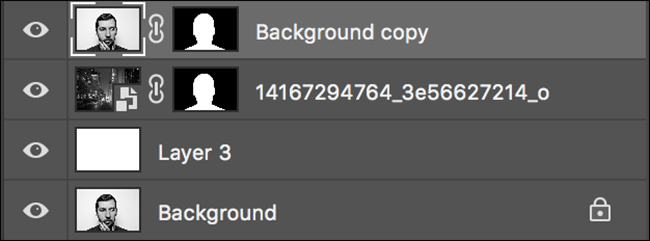
While we’re moving layers, let’s re-position the portrait layer to the top of the stack. Drag the Background copy layer above the landscape layer as it needs to be on top for the next step.
在移动图层时,让我们将纵向图层重新放置到堆栈的顶部。 将背景复制层拖到风景层上方,因为下一步需要在顶部。
Now the unsightly blemishes on the background are gone and it’s time to create the final effect.
现在,背景上的难看斑点消失了,现在是时候创建最终效果了。
第五步:创建两次曝光 (Step Five: Create the Double Exposure)
Select the Background copy layer and from the Blend Mode drop-down (by default it’s set to Normal) select either Multiply or Screen.
选择Background复制图层,然后从Blend Mode下拉菜单(默认情况下将其设置为Normal)选择Multiply或Screen。

With Multiply, the portrait layer is going to darken things in the landscape layer.
使用Multiply,纵向层将使横向层的内容变暗。

With Screen, the portrait layer is going to brighten things in the landscape layer.
使用Screen,纵向层将使横向层中的事物变亮。
Which looks better will depend on your two images. I think Screen works better for mine so that’s the one I’m going to use. Try both options and decide for yourself.
哪种效果更好取决于您的两个图像。 我认为Screen对我来说效果更好,所以这就是我要使用的那个。 尝试两种选择,然后自己决定。
The double exposure is now pretty much done. It’s just a matter of tweaking things to create the final image.
现在几乎完成了两次曝光。 只需进行调整即可创建最终图像。
第六步:完成 (Step Six: Finish It Off)
None of these steps are strictly necessary. Some will benefit your image, while others won’t. Play around with them and see what works best for you.
这些步骤均非严格必要。 有些将使您的形象受益,而另一些则不会。 和他们一起玩,看看什么最适合您。
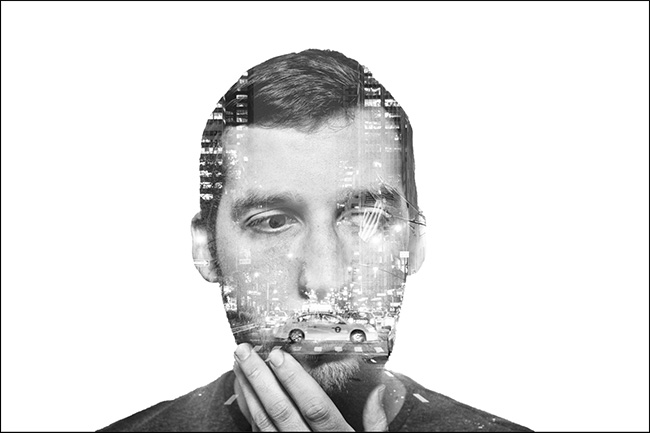
The first thing to consider doing is re-positioning the landscape. As it stands, we just dropped it in wherever Photoshop wanted. Select the Move tool (keyboard shortcut V) and click on the little chain link icon between the landscape layer and it’s mask. This will unlink the layer and mask so you can manipulate them independently.
首先要考虑的是重新放置景观。 就目前而言,我们只是将其放在Photoshop想要的任何地方。 选择“移动”工具(键盘快捷键V),然后单击横向图层与其蒙版之间的小链链接图标。 这将取消链接图层和蒙版,因此您可以独立操作它们。
Select the landscape layer and move it around. See where it looks best. Pay special attention to the lips and eyes in the portrait layer; they’re what most people will notice first. I prefer the positioning below.
选择风景层并四处移动。 查看最合适的位置。 要特别注意肖像层中的嘴唇和眼睛; 这是大多数人会首先注意到的。 我喜欢下面的位置。
Second, play around with the opacity of the portrait layer.
其次,处理纵向图层的不透明度。

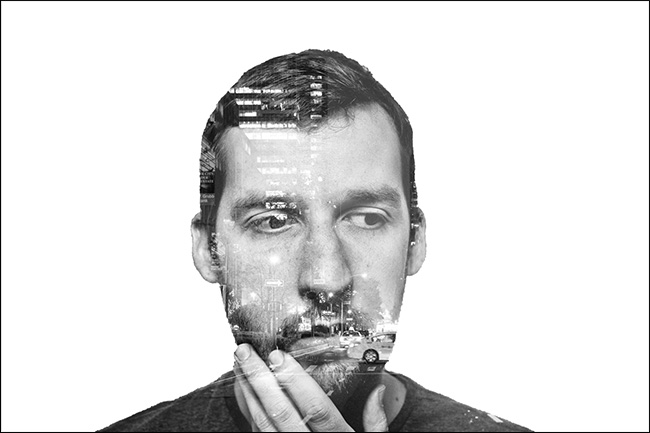
At a lower opacity, you may get a more pleasing effect. I think mine looks better at about 78% opacity.
在较低的不透明度下,您可能会得到更令人满意的效果。 我认为我的不透明度大约为78%,看起来更好。
With that done, the double exposure effect is finished. You can save your image now or continue to play around with it. It’s a pretty fun little effect, and you can do some cool things if you’re willing to experiment. Have some fun with it!
这样,完成了两次曝光效果。 您可以立即保存图像或继续使用它。 这是一个非常有趣的小效果,如果愿意尝试,您可以做一些很酷的事情。 玩得开心!
翻译自: https://www.howtogeek.com/278702/how-to-make-a-double-exposure-image-in-photoshop/


 2761
2761

 被折叠的 条评论
为什么被折叠?
被折叠的 条评论
为什么被折叠?
 到【灌水乐园】发言


