
easy 解析器
If you’re running XP and skipped the Vista update and need a good way to transfer files and settings, today we take a look at using Windows Easy Transfer and an external USB drive to easily complete the task.
如果您运行的是XP而跳过了Vista更新,并且需要一种很好的方式来传输文件和设置,那么今天我们来看看如何使用Windows轻松传输和外部USB驱动器轻松完成任务。
Start Windows Easy Transfer
启动Windows轻松传输
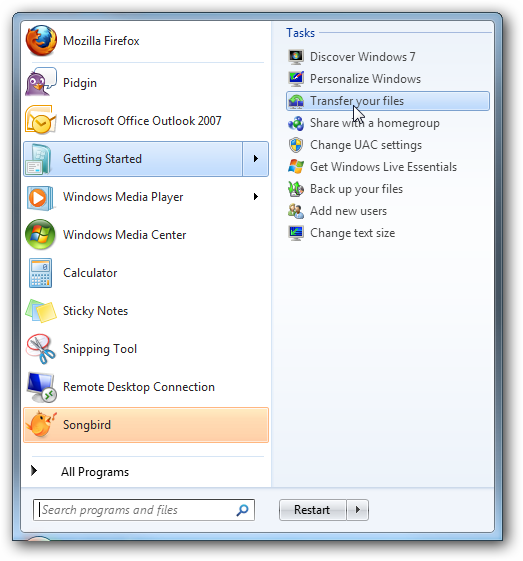
Start with the new Windows 7 machine and go to Start \ Getting Started \ Transfer your files.
从新的Windows 7计算机开始,然后转到开始\入门\传输文件。
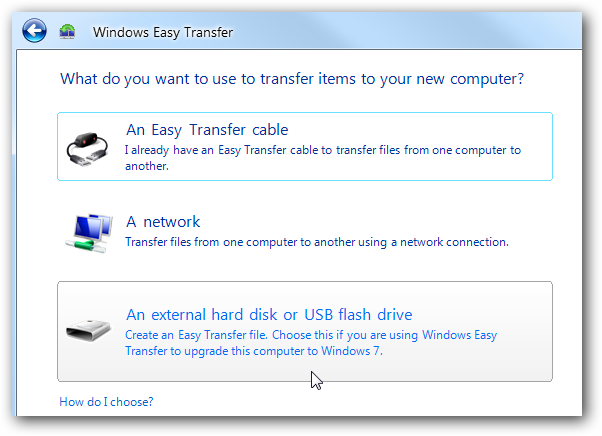
Click through the Welcome screen and select “An external hard disk or USB flash drive”.
单击“欢迎”屏幕,然后选择“外部硬盘或USB闪存驱动器”。
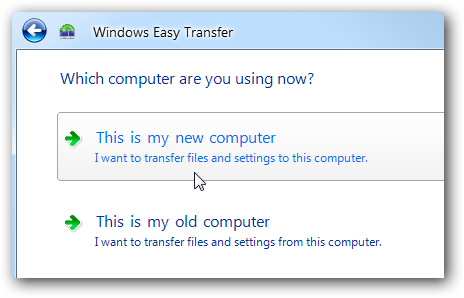
Next choose “this is my new computer”.
接下来选择“这是我的新计算机”。
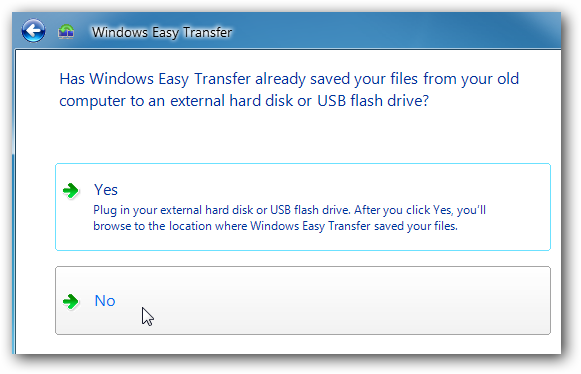
Answer this screen as No.
将此屏幕回答为否。
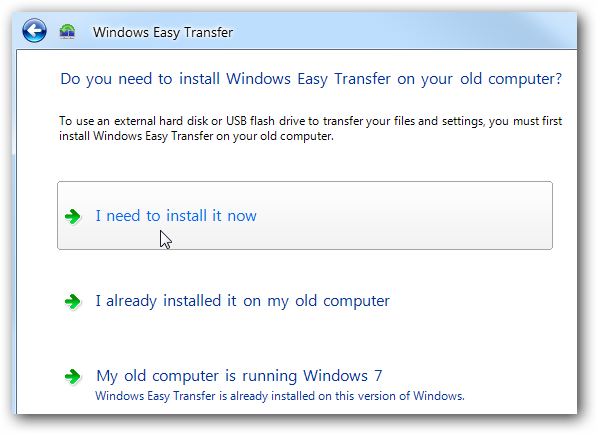
Select “I need to install it now” to install Windows Easy Share now so you get the latest updated version. At this point you want to make sure the external drive you want to use is plugged into the Windows 7 machine.
选择“我需要立即安装”以立即安装Windows Easy Share,以便您获取最新的更新版本。 此时,您要确保要使用的外部驱动器已插入Windows 7计算机。
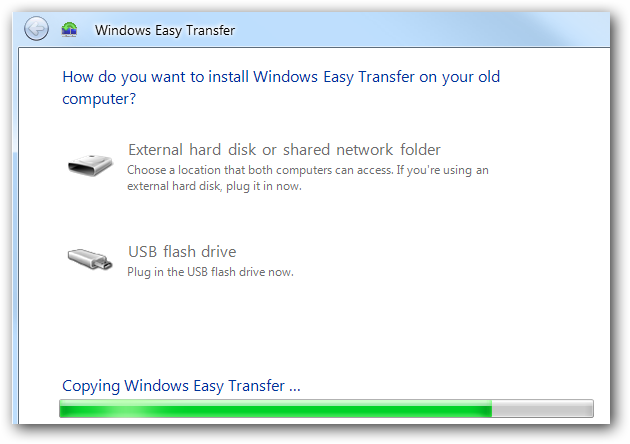
Now choose “External hard disk or shared network folder” to copy the Easy Transfer program to it.
现在,选择“外部硬盘或共享网络文件夹”将Easy Transfer程序复制到其中。
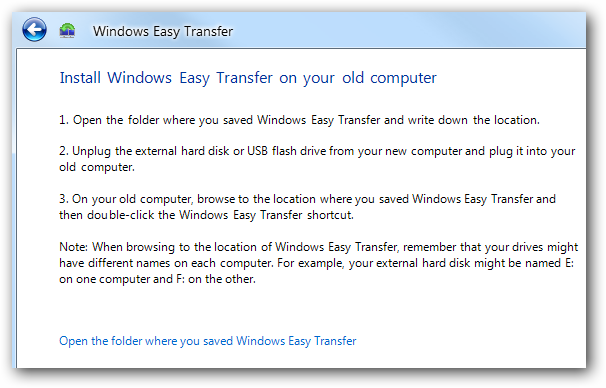
After the Easy Transfer file is copied over you will be prompted to head over the old computer.
复制Easy Transfer文件后,系统将提示您转到旧计算机上。
Configure XP Transfer Process
配置XP传输过程
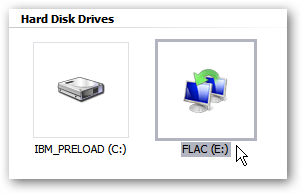
Now over on the XP machine plug in the external hard drive and launch Easy Transfer.
现在,在XP机器上插入外部硬盘驱动器,然后启动Easy Transfer。
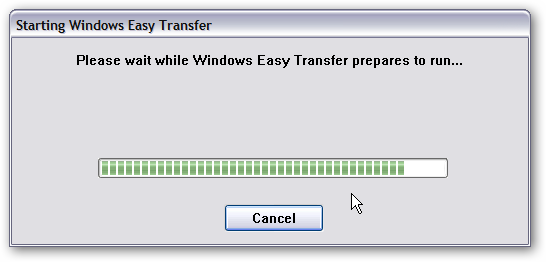
You’re presented with a progress display while it prepares to run.
准备运行时,会显示一个进度显示。
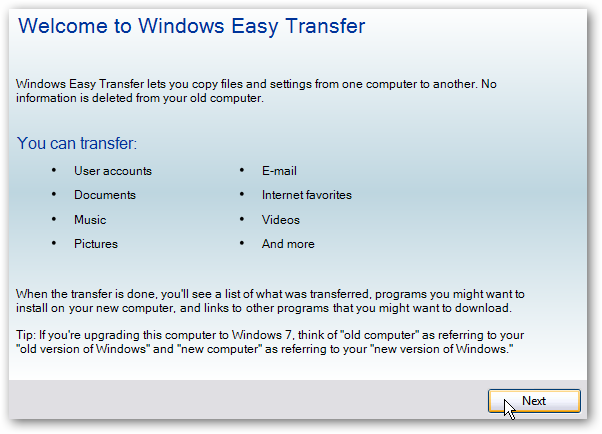
A Welcome screen is displayed just like on the Windows 7 machine.
就像在Windows 7计算机上一样,显示欢迎屏幕。
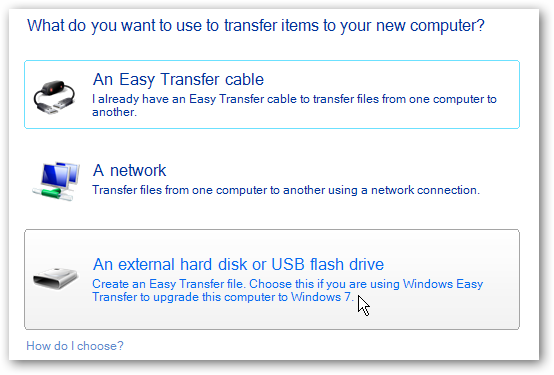
Again choose “An external hard disk or USB flash drive”.
再次选择“外部硬盘或USB闪存驱动器”。
After scanning the user accounts and their settings you’re presented with a general list where you can select what to save.
扫描用户帐户及其设置后,将显示一个常规列表,您可以在其中选择要保存的内容。
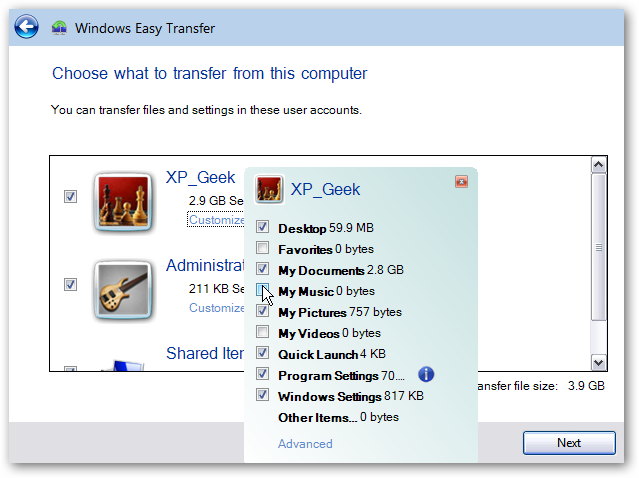
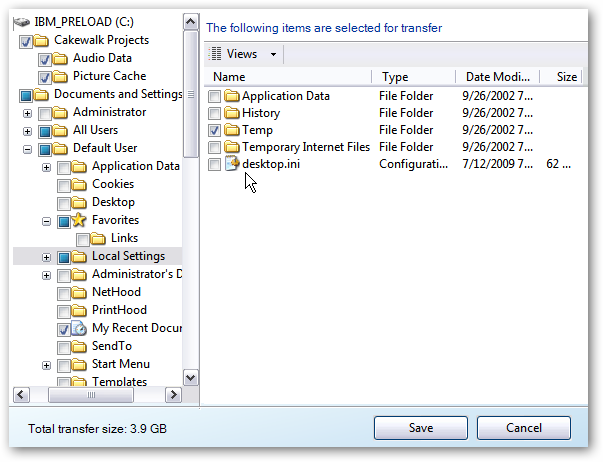
Clicking on the Advanced link allows a much more detailed way to select individual files and folders, when complete click on Save.
单击“高级”链接后,可以更详细地选择单个文件和文件夹,完成后单击“保存”。
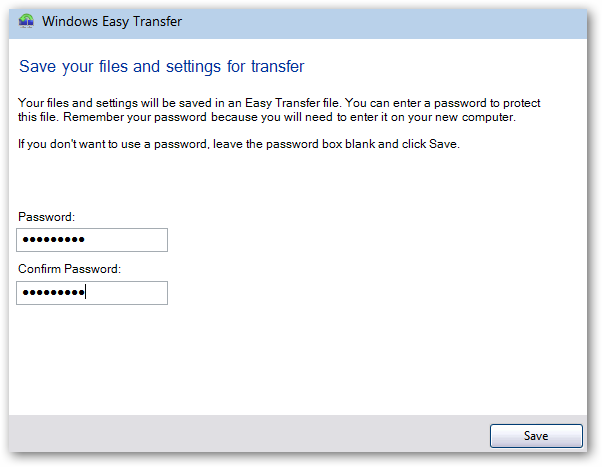
You have the option to password protect the backup.
您可以选择密码保护备份。
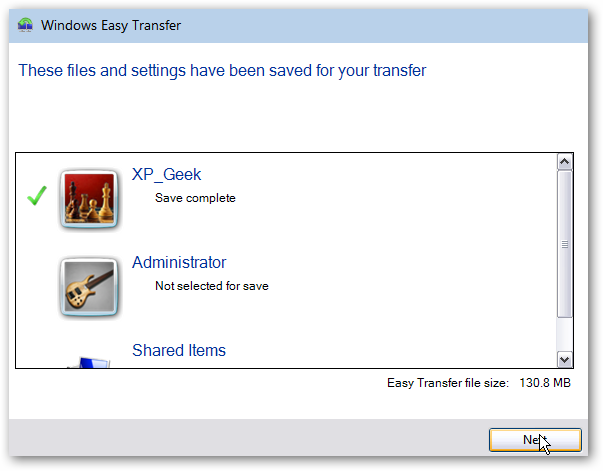
A successful save is complete and now time to go back and plug the external drive into the new Windows 7 machine.
成功完成保存,现在可以返回并将外部驱动器插入新的Windows 7计算机中了。
Restore Settings
恢复设置
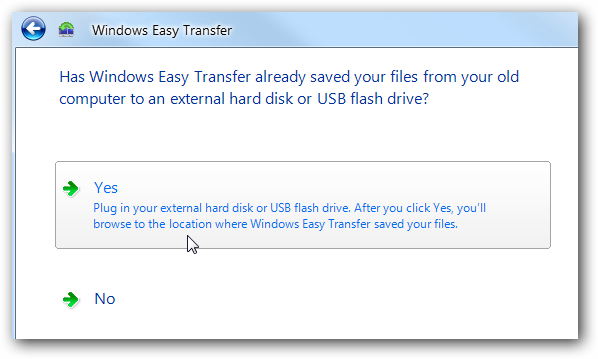
On the Windows 7 machine this time click Yes to this question.
这次在Windows 7计算机上,单击“是”。
Explorer opens and navigate to the location of the backup on the external drive.
资源管理器打开并导航到外部驱动器上备份的位置。
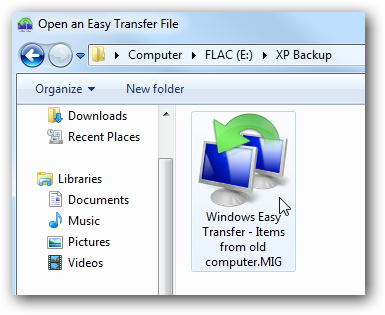
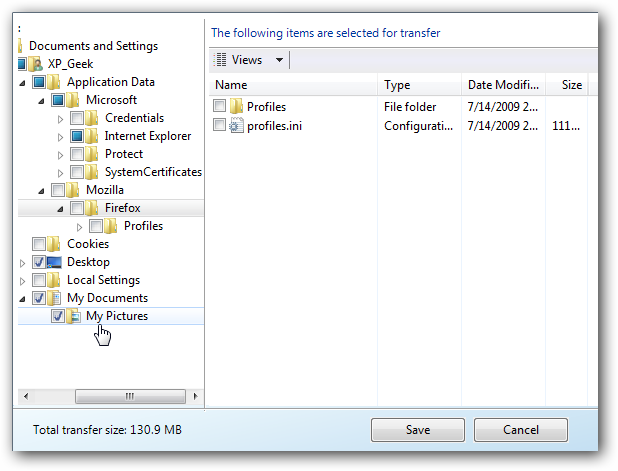
Now you can restore the entire backup or you can chose specific files and folders to restore, save your selection and begin the transfer.
现在,您可以还原整个备份,也可以选择要还原的特定文件和文件夹,保存选择并开始传输。
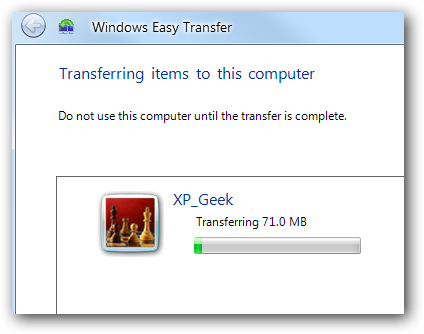
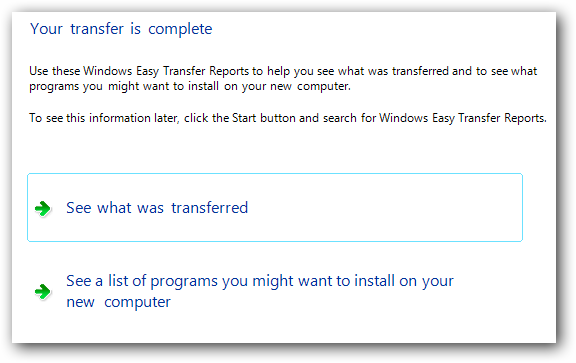
When the transfer is complete you can see a report of what transferred or suggestions for additional programs
转移完成后,您可以看到转移内容的报告或其他程序的建议
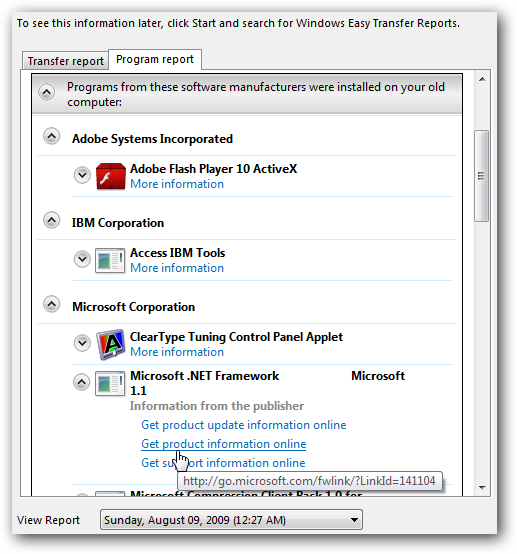
Not all programs and settings are going to transfer to your new OS but this definitely makes it easier to transfer compatible program settings, your files, folders and important documents.
并非所有程序和设置都将转移到新的OS,但这无疑使转移兼容程序设置,文件,文件夹和重要文档变得更加容易。
Also check out: Copy Files and Settings from XP to Windows 7 Over a Network with Windows Easy Transfer
还要签出:使用Windows Easy Transfer通过网络将文件和设置从XP复制到Windows 7
翻译自: https://www.howtogeek.com/howto/3179/migrate-xp-to-windows-7-with-easy-transfer-and-a-usb-drive/
easy 解析器


 被折叠的 条评论
为什么被折叠?


