


使用npoi创建excel

Whether you’re a freelancer doing work for multiple companies, or a business that plans on extending a credit line to its customers, you’re going to need an invoice. Creating a custom invoice in Excel isn’t difficult. You’ll be ready to submit your invoice and receive payments in no time.
无论您是为多家公司工作的自由职业者,还是计划向其客户提供信贷额度的企业,都将需要发票。 在Excel中创建自定义发票并不难。 您将可以随时提交发票并接收付款。
使用发票模板 (Using an Invoice Template)
Creating a simple invoice in Excel is relatively straightforward. Create a few tables, set a few rules, add a bit of information, and you’re good to go. Alternatively, there are many websites out there that provide free invoice templates created by actual accountants. You can use these instead, or even download one to use as inspiration for when you’re making your own.
在Excel中创建简单的发票相对简单。 创建一些表,设置一些规则,添加一些信息,您就可以开始了。 另外,那里有许多网站提供由实际会计师创建的免费发票模板。 您可以改用这些软件,甚至下载自己的软件作为灵感。
Excel also provides its own library of invoice templates you can use. To access these templates, open Excel and click the “File” tab.
Excel还提供了自己的发票模板库供您使用。 要访问这些模板,请打开Excel并单击“文件”选项卡。

Here, select “New” and type “Invoice” into the search bar.
在这里,选择“新建”,然后在搜索栏中输入“发票”。
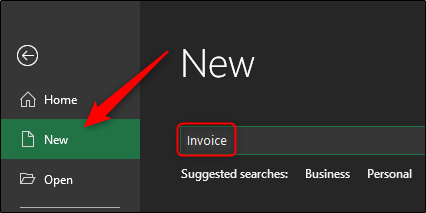
Press Enter and a collection of invoice templates will appear.
按Enter键,将显示发票模板集合。
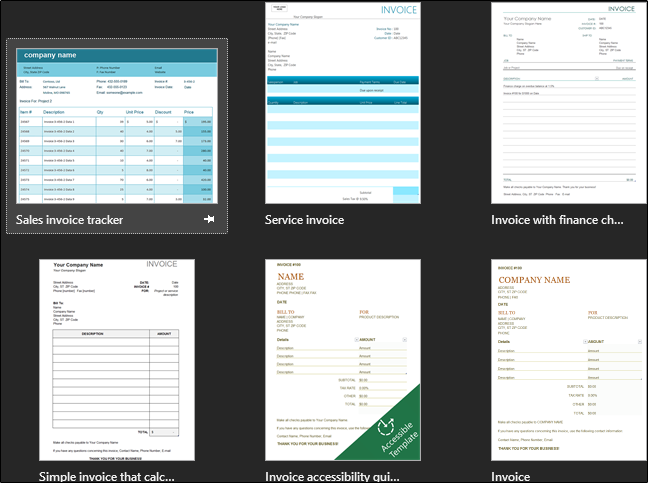
Browse through the available templates to find one you like.
浏览可用模板以找到所需的模板。
从头开始在Excel中创建简单发票 (Creating a Simple Invoice in Excel from Scratch)
To make a simple invoice in Excel, we need first to understand what information is required. To keep it simple, we’ll create an invoice using only the information necessary to receive payment. Here’s what we need:
要在Excel中制作简单的发票,我们首先需要了解所需的信息。 为简单起见,我们将仅使用接收付款所需的信息来创建发票。 这是我们需要的:
Seller Information
卖家信息
- Name名称
- Address地址
- Phone Number电话号码
Buyer Information
买家须知
- Company Name公司名
- Address地址
- Date of Invoice开票日期
- Invoice Number发票号码
- Item Description (of service or product sold)项目描述(服务或产品的出售)
- Item Price (of individual product or service) 项目价格(单个产品或服务的价格)
- Total Amount Due 应付总金额
- Method of Payment付款方式
Let’s get started.
让我们开始吧。
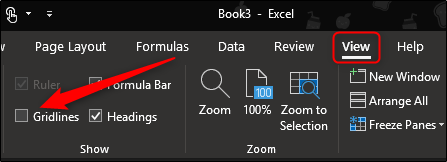
First, open up a blank Excel sheet. The first thing we’re going to want to do is to get rid of the gridlines, giving us a clean excel sheet to work in. To do so, head over to the “View” tab and uncheck “Gridlines” in the “Show” section.
首先,打开一个空白的Excel工作表。 我们要做的第一件事是摆脱网格线,为我们提供一个干净的Excel工作表。为此,转到“查看”选项卡,然后取消选中“显示”中的“网格线”。 “ 部分。
Now let’s resize some of the columns and rows. This will give us extra room for some of the lengthier information like item descriptions. To resize a row or column, click and drag.
现在让我们调整一些列和行的大小。 这将使我们有更多空间来容纳一些较长的信息,例如物品说明。 要调整行或列的大小,请单击并拖动。
By default, rows are set to a height of 20 pixels and columns are set at a width of 64 pixels. Here’s how we recommend setting your rows and columns to have an optimized setup.
默认情况下,行的高度设置为20像素,列的宽度设置为64像素。 建议您通过以下方式设置行和列,以进行优化设置。
Rows:
行数:
- Row 1: 45 pixels 第1行:45像素
Columns:
列:
- Column A: 385 pixels A栏:385像素
- Column B: 175 pixelsB栏:175像素
- Column C: 125 pixelsC栏:125像素
Row 1 will have your name and the word “Invoice.” We want that information to be immediately apparent to the recipient, so we give a little extra space to increase the font size of this information to ensure it grabs the recipient’s attention.
第1行会显示您的姓名和“发票”字样。 我们希望该信息对接收者立即可见,因此我们留出一些额外的空间来增加此信息的字体大小,以确保它引起接收者的注意。
Column A contains the majority of important (and potentially lengthy) information in the invoice. This includes buyer and seller information, item description, and method of payment. Column B contains the specific dates of the items listed, so it doesn’t require as much space. Finally, column C will include the invoice number, invoice date, the individual price of each item listed, and the total amount due. This information is also short in length, so it doesn’t require much room.
列A包含发票中的大多数重要信息(可能很长)。 这包括买卖双方的信息,商品说明和付款方式。 B列包含列出项目的特定日期,因此不需要太多空间。 最后,C列将包括发票编号,发票日期,列出的每个项目的单独价格以及应付款总额。 该信息的长度也很短,因此不需要太多空间。
Go ahead and adjust your rows and cells to the suggested specifications, and let’s get started with plugging in our information!
继续并根据建议的规格调整行和单元格,然后开始插入我们的信息!
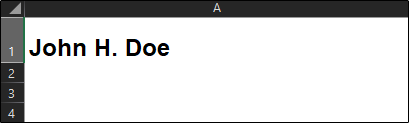
In column A, row 1, go ahead and enter your name. Give it a larger font size (Around 18pt font) and bold the text so that it stands out.
在A列第1行中,继续输入您的姓名。 为其提供较大的字体(约18pt字体),并加粗文本,使其突出。
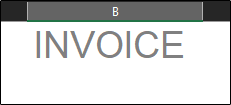
In column B, row 1, type “Invoice” to make it immediately clear what the document is. We recommend a 28pt font using all caps. Feel free to give it a lighter color if you’d like.
在B列第1行中,键入“发票”以立即清除文档内容。 我们建议使用所有大写字母的28pt字体。 如果您愿意,可以给它一个较浅的颜色。
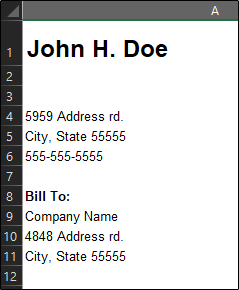
In Column A, Rows 4, 5, and 6, we will input our address and phone number.
在A列的第4、5和6行中,我们将输入我们的地址和电话号码。

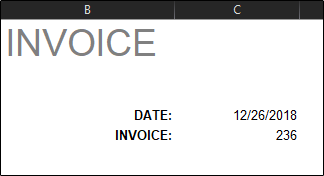
In column B, rows 4 and 5, type “DATE:” and “INVOICE:” with bold text and align the text to the right. Column C rows 4 and 5 is where you’ll enter the actual date and invoice number.
在B列的第4行和第5行中,用粗体文本键入“ DATE:”和“ INVOICE:”,并将文本向右对齐。 C列的第4行和第5行是您输入实际日期和发票编号的地方。
Finally, for the last part of the basic information, we’ll enter the text “Bill To:” (in bold) in column A, row 8. Below that in rows 9, 10, and 11, we’ll enter the recipient information.
最后,对于基本信息的最后一部分,我们将在A列第8行中输入文本“ Bill To:”(粗体),在第9、10和11行中,我们将输入收件人信息。
Now we need to make a table to list our items, fulfillment dates, and specific amounts. Here’s how we’ll set it up:
现在,我们需要创建一个表格以列出我们的项目,实现日期和具体金额。 这是我们的设置方法:
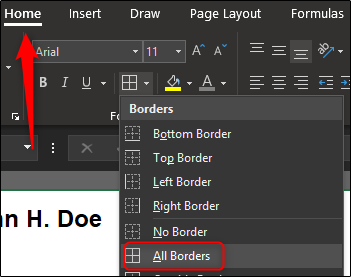
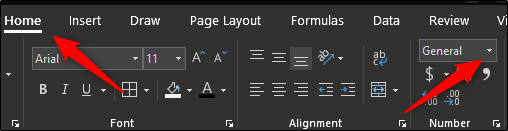
First, we’ll merge column A and B in row 14. This will act as the header for our listed items (column A, rows 15-30) and our fulfillment dates (column B, rows 15-30). After you’ve merged column A and B in row 14, give the cell a border. You can do so by going to the “Font” section of the “Home” tab, selecting the border icon, and choosing your desired border type. For now, we’ll use “All Borders.”
首先,我们将在第14行中合并A列和B列。这将用作列出的项目(A列,第15-30行)和履行日期(B列,第15-30行)的标题。 合并第14行的A列和B列后,为单元格添加边框。 您可以通过转到“主页”选项卡的“字体”部分,选择边框图标,然后选择所需的边框类型来实现。 现在,我们将使用“所有边界”。
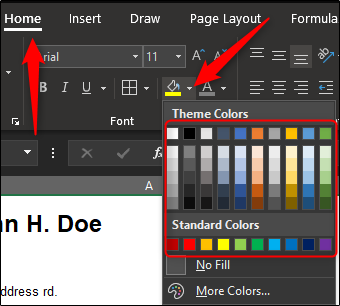
Do the same for cell C14. Feel free to shade your cells if you like. We’ll do a light gray. To fill your cells with a color, select the cells, select the arrow next to the “Fill Color” icon in the “Font section of the “Home” tab, and select your color from the drop-down menu.
对单元格C14执行相同的操作。 如果您愿意,可以随意遮盖细胞。 我们将做浅灰色。 要用颜色填充单元格,请选择单元格,选择“主页”选项卡“字体”部分中“填充颜色”图标旁边的箭头,然后从下拉菜单中选择颜色。
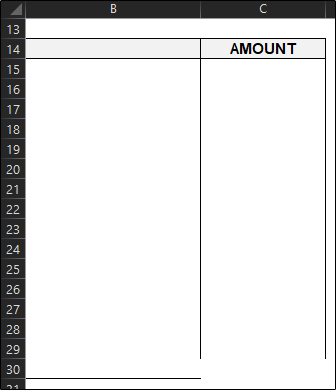
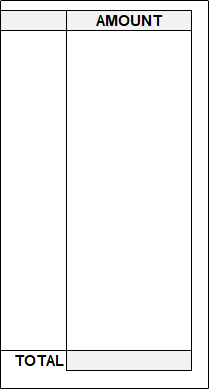
In the first highlighted cell, type “DESCRIPTION” and align the text in the center. For C14, type “AMOUNT” with center alignment. Bold the text for both. Now you’ll have your table header.
在第一个突出显示的单元格中,键入“ DESCRIPTION”,然后将文本居中对齐。 对于C14,键入“ AMOUNT”并居中对齐。 两者均以粗体显示。 现在,您将拥有表标题。

We want to make sure we have a table big enough to list all of our items. In this example, we’ll use sixteen rows. Give or take as many as you need.
我们要确保我们有一个足够大的表来列出所有项目。 在此示例中,我们将使用十六行。 根据需要给予或服用。
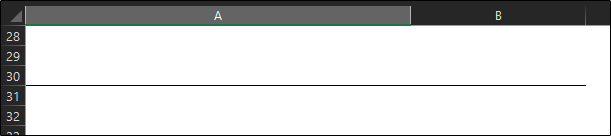
Go to the bottom of where your table will be and give the first two cells in the row a bottom border.
转到表格所在的底部,并为行中的前两个单元格添加底边框。
Now highlight cells C15-29 and give them all left and right borders.
现在突出显示单元格C15-29,并为它们提供所有左边界和右边界。
Now, select cell C30 and give it left, right, and bottom borders. Finally, we’ll add a “Total Sum” section on our table. Highlight cell C31 and give it borders around the entire cell. You may also give it a shade of color so that it stands out. Be sure to label it with “TOTAL” in the cell next to it.
现在,选择单元格C30,并为其设置左边界,右边界和底边界。 最后,我们将在表格中添加“总计”部分。 突出显示单元格C31,并在整个单元格周围加上边框。 您也可以给它加上阴影以使其突出。 确保在其旁边的单元格中将其标记为“ TOTAL”。
That completes the frame of our table. Now let’s set some rules and add a formula to wrap it up.
这样就构成了我们桌子的框架。 现在,我们设置一些规则并添加一个公式以将其包装起来。
We know our fulfillment dates will be in column B, rows 15-30. Go ahead and select those cells. Once all of them are selected, click the “Format Number” box in the “Number” section of the “Home” tab.
我们知道我们的履行日期将在B列15-30行中。 继续并选择那些单元格。 选择所有这些选项后,单击“主页”选项卡的“数字”部分中的“格式数字”框。
Once selected, a drop-down menu will appear. Select the “Short Date” option. Now if you enter a number such as 12/26 in any of those cells, it will automatically reformat it to the short date version.
选择后,将出现一个下拉菜单。 选择“短日期”选项。 现在,如果您在任何这些单元格中输入数字(例如12/26),它将自动将其重新格式化为短日期版本。
Similarly, if you highlight cells C15-30, which is where our item amount will go, and select the “Currency” option, then enter an amount in those cells, it will be reformatted to reflect that amount.
同样,如果突出显示单元格C15-30(这是我们的项目金额所在的位置),并选择“货币”选项,然后在这些单元格中输入金额,则将重新设置格式以反映该金额。
To automatically add all of the individual amounts and have it reflected in the “Sum” cell we created, select the cell (C31 in this example) and enter the following formula:
要自动添加所有单个金额并将其反映在我们创建的“总和”单元格中,请选择该单元格(在此示例中为C31),然后输入以下公式:
=SUM(C15:C30)
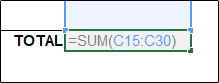
Now if you enter (or remove) any number in the individual amount cells, it will automatically reflect in the sum cell.
现在,如果您在单个数量单元格中输入(或删除)任何数字,它将自动反映在总和单元格中。
This will make things more efficient for you in the long run.
从长远来看,这将使您的工作效率更高。
Moving on, enter the text “Method of Payment:” in A34.
继续,在A34中输入文字“付款方式:”。
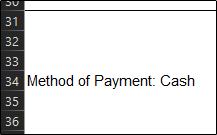
The information you put next to that is between you and the recipient. The most common forms of payment are cash, check, and wire. Sometimes you may be asked to accept a money order. Some companies even prefer to make a direct deposit or use PayPal.
您旁边放置的信息在您和收件人之间。 最常见的付款方式是现金,支票和电汇。 有时可能会要求您接受汇票。 一些公司甚至更喜欢直接存款或使用PayPal。
Now for the finishing touch, don’t forget to thank your customer or client!
现在画龙点睛,别忘了感谢您的客户或客户!
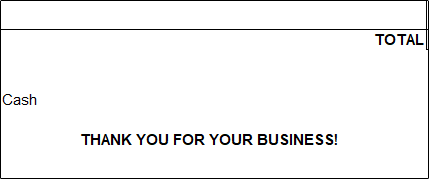
Start sending out your invoice and collecting your pay!
开始发送发票并收取工资!
翻译自: https://www.howtogeek.com/399929/how-to-create-a-simple-invoice-using-excel/
使用npoi创建excel


 6324
6324


 被折叠的 条评论
为什么被折叠?
被折叠的 条评论
为什么被折叠?
 到【灌水乐园】发言


