


react hooks使用
React v16.7.0-alpha introduced Hooks, and I’m excited.
React v16.7.0-alpha引入了Hooks ,我很兴奋。
什么是挂钩? (What Are Hooks?)
They’re functions that give you React features like state and lifecycle hooks without ES6 classes.
它们是为您提供React功能的功能,例如没有ES6类的状态和生命周期挂钩。
Some benefits are
一些好处是
- Isolating stateful logic, making it easier to test. 隔离状态逻辑,使其更易于测试。
- Sharing stateful logic without render props or higher-order components. 共享状态逻辑而无需渲染道具或高阶组件。
- Separating your app’s concerns based on logic, not lifecycle hooks. 根据逻辑而不是生命周期挂钩来分离应用程序的关注点。
Avoiding ES6 classes, because they’re quirky, not actually classes, and trip up even experienced JavaScript developers.
避免使用ES6类,因为它们很古怪, 而不是真正的类,甚至会使经验丰富JavaScript开发人员失望。
For more detail see React’s official Hooks intro.
有关更多详细信息,请参见React的官方Hooks介绍 。
逐渐采用挂钩 (Adopt Hooks Gradually)
At the time of writing, Hooks were in alpha, and their API could have changed any time.
在撰写本文时,Hooks处于alpha状态,并且它们的API随时可能发生变化。
React 16.8.0 was the first stable release to support Hooks, and there are more tutorials and example code every day. However, since there are no plans to remove classes from React and Hooks will work with existing code, the React team recommends avoiding "big rewrites". Instead, they suggest practicing Hooks in non-critical components first, then using them in place of classes going forward.
React 16.8.0是第一个支持Hooks的稳定版本,并且每天都有更多的教程和示例代码。 但是,由于没有计划从React中删除类,并且Hooks可以与现有代码一起使用,因此React团队建议避免“大改写”。 相反,他们建议先在非关键组件中练习Hook,然后再使用它们代替以后的类。
让我们建立一个待办事项清单 (Let’s Build a Todo List)
Todo lists are the most overused example for a good reason — they’re fantastic practice. I recommend this for any language or library you want to try out.
有充分的理由,待办事项列表是使用最多的示例-这是一种了不起的做法。 对于您想尝试的任何语言或库,我都建议您这样做。
Ours will only do a few things
我们只会做几件事
- Display todos in a nice Material Design fashion 以出色的材料设计方式显示待办事项
- Allow adding todos via input 允许通过输入添加待办事项
- Delete todos 删除待办事项
建立 (Setup)
Here are the GitHub and CodeSandbox links.
这是GitHub和CodeSandbox链接。
git clone https://github.com/yazeedb/react-hooks-todo
cd react-hooks-todo
npm install
The master branch has the finished project, so checkout the start branch if you wish to follow along.
master分支具有完成的项目,因此,如果您希望继续,请签出start分支。
git checkout start
git checkout start
And run the project.
并运行该项目。
npm start
npm start
The app should be running on localhost:3000, and here’s our initial UI.
该应用程序应在localhost:3000上运行,这是我们的初始UI。
It’s already set up with material-ui to give our page a professional look. Let’s start adding some functionality!
它已经使用material-ui设置,以使我们的页面具有专业外观。 让我们开始添加一些功能!
TodoForm组件 (The TodoForm Component)
Add a new file, src/TodoForm.js. Here’s the starting code.
添加一个新文件src/TodoForm.js 。 这是开始代码。
import React from 'react';
import TextField from '@material-ui/core/TextField';

const TodoForm = ({ saveTodo }) => {
  return (
    <form>
      <TextField variant="outlined" placeholder="Add todo" margin="normal" />
    </form>
  );
};

export default TodoForm;
Given the name, we know its job is to add todos to our state. Speaking of which, here’s our first hook.
有了这个名字,我们知道它的工作就是将待办事项添加到我们的州。 说到这, 这是我们的第一个钩子 。
useState (useState)
Check this code out
签出此代码
import { useState } from 'react';

const [value, setValue] = useState('');
useState is just a function that takes initial state and returns an array. Go ahead and console.log it.
useState只是一个具有初始状态并返回数组的函数。 继续进行console.log 。
The array’s first index is your state’s current value, and the second index is an updater function.
数组的第一个索引是状态的当前值,第二个索引是更新程序功能。
So we appropriately named them value and setValue using ES6 destructuring assignment.
因此,我们使用ES6解构分配将它们适当地命名为value和setValue 。
useState和Forms (useState with Forms)
Our form should track the input’s value and call saveTodo upon submit. useState can help us with that!
我们的表单应该跟踪输入的值,并在提交时调用saveTodo 。 useState可以帮助我们!
Update TodoForm.js, the new code’s in bold.
更新TodoForm.js ,新代码以粗体显示 。
import React, { useState } from 'react';
import TextField from '@material-ui/core/TextField';

const TodoForm = ({ saveTodo }) => {
  const [value, setValue] = useState('');

  return (
    <form
      onSubmit={(event) => {
        event.preventDefault();
        saveTodo(value);
      }}
    >
      <TextField
        variant="outlined"
        placeholder="Add todo"
        margin="normal"
        onChange={(event) => {
          setValue(event.target.value);
        }}
        value={value}
      />
    </form>
  );
};

export default TodoForm;
Back in index.js, import and use this component.
返回index.js ,导入并使用此组件。
// ...
import TodoForm from './TodoForm';
// ...
const App = () => {
return (
<div className="App">
<Typography component="h1" variant="h2">
Todos
</Typography>
<TodoForm saveTodo={console.warn} />
</div>
);
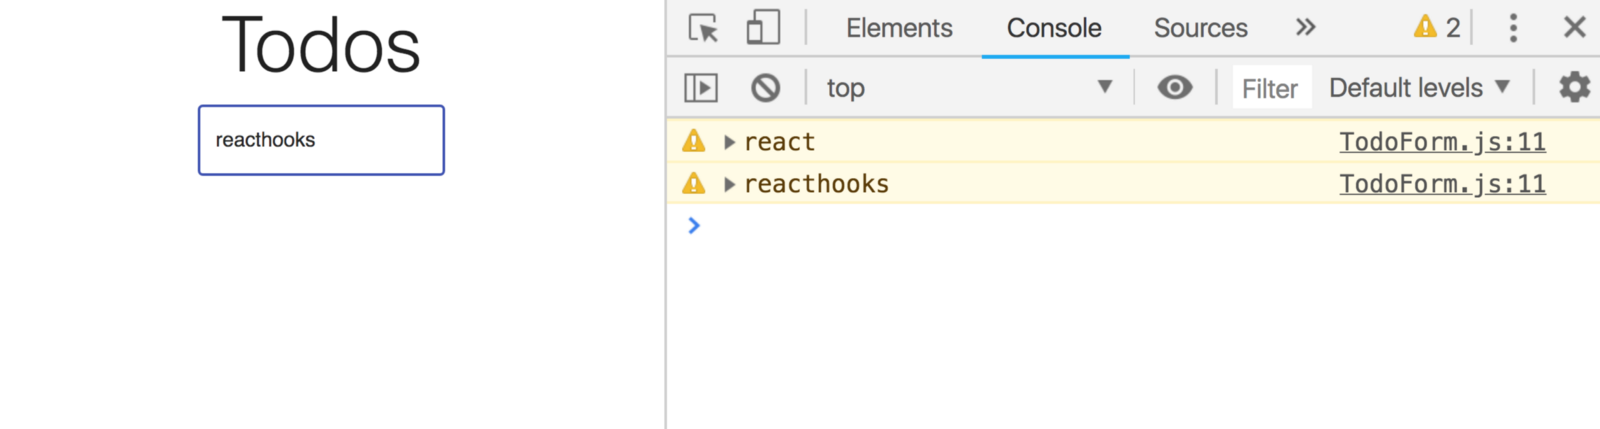
};Now your value’s logged on submit (press enter).
现在,您的值已登录并提交(按Enter)。
useState与Todos (useState With Todos)
We also need state for our todos. Import useState in index.js. Our initial state should be an empty array.
我们还需要待办事项的状态。 将useState导入index.js 。 我们的初始状态应该是一个空数组。
import React, { useState } from 'react';

// ...

const App = () => {
  const [todos, setTodos] = useState([]);

  // ...
};
TodoList组件 (TodoList Component)
Create a new file called src/TodoList.js.
创建一个名为src/TodoList.js的新文件。
Edit: Thank you Takahiro Hata for helping me move onClick to the correct spot!
编辑:谢谢高aka孝弘帮助我将onClick移到正确的位置!
import React from 'react';
import List from '@material-ui/core/List';
import ListItem from '@material-ui/core/ListItem';
import ListItemSecondaryAction from '@material-ui/core/ListItemSecondaryAction';
import ListItemText from '@material-ui/core/ListItemText';
import Checkbox from '@material-ui/core/Checkbox';
import IconButton from '@material-ui/core/IconButton';
import DeleteIcon from '@material-ui/icons/Delete';

const TodoList = ({ todos, deleteTodo }) => (
  <List>
    {todos.map((todo, index) => (
      <ListItem key={index.toString()} dense button>
        <Checkbox tabIndex={-1} disableRipple />
        <ListItemText primary={todo} />
        <ListItemSecondaryAction>
          <IconButton
            aria-label="Delete"
            onClick={() => {
              deleteTodo(index);
            }}
          >
            <DeleteIcon />
          </IconButton>
        </ListItemSecondaryAction>
      </ListItem>
    ))}
  </List>
);

export default TodoList;
It takes two props
需要两个道具
todos: The array of todos. Wemapover each one and create a list item.todos:todos的数组。 我们在每个map并创建一个列表项。deleteTodo: Clicking a todo’sIconButtonfires this function. It passes theindex, which will uniquely identify a todo in our list.deleteTodo:单击待办事项的IconButton会触发此功能。 它通过index,该index将唯一地标识我们列表中的待办事项。
Import this component in your index.js.
将此组件导入到index.js 。
import TodoList from './TodoList';
import './styles.css';

const App = () => {
  //...
};
And use it in your App function like so
像这样在您的App函数中使用它
<TodoForm saveTodo={console.warn} />
<TodoList todos={todos} />
添加待办事项 (Adding Todos)
Still in index.js, let’s edit our TodoForm’s prop, saveTodo.
仍在index.js ,让我们编辑TodoForm的saveTodo 。
<TodoForm
  saveTodo={(todoText) => {
    const trimmedText = todoText.trim();

    if (trimmedText.length > 0) {
      setTodos([...todos, trimmedText]);
    }
  }}
/>
Simply merge the existing todos with our new one, extra whitespace cut out.
只需将现有的待办事项与我们的新待办事项合并,便可以额外留出空白。
We can add todos now!
我们现在可以添加待办事项!
清除输入 (Clearing the Input)
Notice the input isn’t clearing after adding a new todo. That’s a bad user experience!
请注意,添加新的待办事项后,输入不会清除。 那是糟糕的用户体验!
We can fix it with a small code change in TodoForm.js.
我们可以通过在TodoForm.js进行少量的代码更改来修复它。
<form
  onSubmit={(event) => {
    event.preventDefault();

    saveTodo(value);

    setValue('');
  }}
/>
Once a todo’s saved, set the form state to an empty string.
保存待办事项后,将表单状态设置为空字符串。
It’s looking good now!
现在看起来不错!
删除待办事项 (Deleting Todos)
TodoList provides each todo’s index, as it’s a guaranteed way to find the one we want to delete.
TodoList提供每个待办事项的index ,因为这是找到我们要删除的index的保证方法。
TodoList.js
TodoList.js
<IconButton
  aria-label="Delete"
  onClick={() => {
    deleteTodo(index);
  }}
>
  <DeleteIcon />
</IconButton>
We’ll take advantage of that in index.js.
我们将在index.js利用它。
<TodoList
  todos={todos}
  deleteTodo={(todoIndex) => {
    const newTodos = todos.filter((_, index) => index !== todoIndex);

    setTodos(newTodos);
  }}
/>
Whatever todos don’t match the provided index are kept and stored in state using setTodos.
任何与提供的index不匹配的待办事项都将使用setTodos保留并存储在状态中。
Delete functionality is complete!
删除功能已完成!
抽象Todos useState (Abstracting Todos useState)
I mentioned that Hooks are great for separating state and component logic. Here’s what that may look like in our todo app.
我提到过,Hooks非常适合分离状态和组件逻辑。 这就是我们的待办事项应用程序中的外观。
Create a new file called src/useTodoState.js.
创建一个名为src/useTodoState.js的新文件。
import { useState } from 'react';

export default (initialValue) => {
  const [todos, setTodos] = useState(initialValue);

  return {
    todos,
    addTodo: (todoText) => {
      setTodos([...todos, todoText]);
    },
    deleteTodo: (todoIndex) => {
      const newTodos = todos.filter((_, index) => index !== todoIndex);

      setTodos(newTodos);
    }
  };
};
It’s our same code from index.js, but separated! Our state management’s no longer tightly coupled to the component.
这是与index.js相同的代码,但是分开了! 我们的状态管理不再与组件紧密耦合。
Now just import it.
现在,只需导入即可。
import React from 'react';
import ReactDOM from 'react-dom';
import Typography from '@material-ui/core/Typography';
import TodoForm from './TodoForm';
import TodoList from './TodoList';
import useTodoState from './useTodoState';
import './styles.css';

const App = () => {
  const { todos, addTodo, deleteTodo } = useTodoState([]);

  return (
    <div className="App">
      <Typography component="h1" variant="h2">
        Todos
      </Typography>

      <TodoForm
        saveTodo={(todoText) => {
          const trimmedText = todoText.trim();

          if (trimmedText.length > 0) {
            addTodo(trimmedText);
          }
        }}
      />

      <TodoList todos={todos} deleteTodo={deleteTodo} />
    </div>
  );
};

const rootElement = document.getElementById('root');
ReactDOM.render(<App />, rootElement);
And everything still works like normal.
一切仍然正常进行。
抽象表单输入useState (Abstracting Form Input useState)
We can do the same with our form!
我们可以用表格做同样的事情!
Create a new file, src/useInputState.js.
创建一个新文件src/useInputState.js 。
import { useState } from 'react';

export default (initialValue) => {
  const [value, setValue] = useState(initialValue);

  return {
    value,
    onChange: (event) => {
      setValue(event.target.value);
    },
    reset: () => setValue('')
  };
};
And now TodoForm.js should look like this.
现在TodoForm.js应该看起来像这样。
import React from 'react';
import TextField from '@material-ui/core/TextField';
import useInputState from './useInputState';

const TodoForm = ({ saveTodo }) => {
  const { value, reset, onChange } = useInputState('');

  return (
    <form
      onSubmit={(event) => {
        event.preventDefault();

        saveTodo(value);
        reset();
      }}
    >
      <TextField
        variant="outlined"
        placeholder="Add todo"
        margin="normal"
        onChange={onChange}
        value={value}
      />
    </form>
  );
};

export default TodoForm;
And we’re all done! Hope you enjoyed, until next time!
我们都完成了! 希望您喜欢,直到下次!
翻译自: https://www.freecodecamp.org/news/how-to-build-a-todo-list-with-react-hooks-ebaa4e3db3b/
react hooks使用


 692
692

 被折叠的 条评论
为什么被折叠?
被折叠的 条评论
为什么被折叠?
 到【灌水乐园】发言


