


nodemailer使用
In the previous articles on sending emails with Node.js using Nodemailer module, we looked at the various means of sending emails with Node.js and Nodemailer, we also looked at various options for sending emails using the Gmail transporter, we looked at sending attachments from URL or from the local machine.
在之前的有关使用Nodemailer模块使用Node.js发送电子邮件的文章中,我们介绍了使用Node.js和Nodemailer发送电子邮件的各种方法,还讨论了使用Gmail传输器发送电子邮件的各种选项,以及发送附件的方法。从URL或从本地计算机。
Today, we will study the code of a little project on sending emails from a form running in a web browser.
今天,我们将研究一个小项目的代码,该代码用于从在Web浏览器中运行的表单发送电子邮件 。
If you are a newbie in the world of Node.js or the Nodemailer module, please check out previous tutorials and read patiently.
如果您是Node.js或Nodemailer模块领域的新手,请查看以前的教程并耐心阅读。
Note: You should have a basic understanding of Node.js, Nodemailer, express and html.
注意:您应该对Node.js,Nodemailer,express和html有基本的了解。
Code:
码:
This code is just to give you an idea and get you started. You can edit and add better CSS or features later. We are going to use an old method of rendering HTML in the node. In this project, we'll use the Gmail transporter. Your PC should be connected to the internet.
这段代码只是为了给您一个想法并让您入门。 您以后可以编辑和添加更好CSS或功能。 我们将使用一种在节点中呈现HTML的旧方法。 在此项目中,我们将使用Gmail传输器。 您的PC应该已连接到Internet。
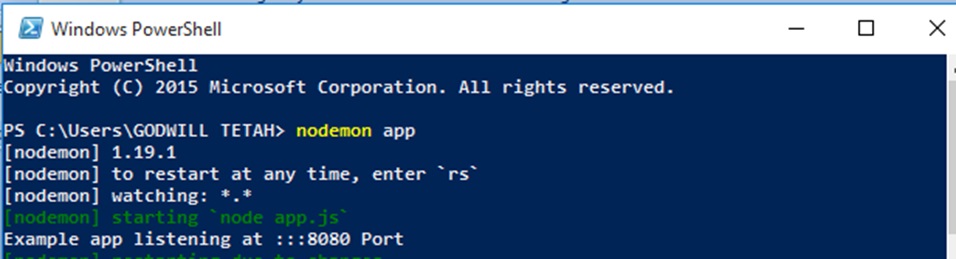
In your project folder, create a file called app.js. Type the following code in app.js:
在您的项目文件夹中,创建一个名为app.js的文件。 在app.js中输入以下代码:
var http = require ( "http" ) ;
const puppeteer = require ('puppeteer');
const fs = require ('fs');

var nodemailer = require('nodemailer');
var express = require ( 'express' ) ;
var app = express () ;
var bodyParser = require ( 'body-parser' ) ;
var urlencodedParser = bodyParser.

urlencoded ({ extended : true }) ;
// Running Server Details.
var server = app. listen(8080 , function ()
{
	var host = server. address() . address
	var port = server. address() . port
	console.log( "Example app listening at %s:%s Port" , host, port )
}) ;

// we used just one route which is the /form
app. get( '/form' , function ( req, res ) {
	var html = '' ;
	html += "<body>" ;
	html += "<body bgcolor = lightgrey>";
	html += "<center>";
	html += "<form action='/thank' method='post' name='form1'></br>" ;
	html += "<fieldset>";
	html += " <legend>COMPOSE MAIL:</legend>";
	html += "To:<input type= 'text' name='to' ></br></br>" ;
	html += "Email:<input type='text' name='email' ></br></br>" ;
	html += "Subject:<input type='text' name='subject' ></br></br>" ;
	html += "<textarea name='body' rows='10' cols='30'></textarea></br></br>" ;
	html += "<input type='submit' value='submit'></br></br>";
	html += "<INPUT type='reset'  value='reset'>" ;
	html += "</fieldset>";
	html += "</form>" ;
	html += "</body>" ;
	// form action
	res. send ( html) ;
}) ;
app. post ('/thank' , urlencodedParser, function ( req, res ){
var reply ='' ;
The code above creates a form at the form route (/form). Our port has been set to 8080.
上面的代码在表单路径(/ form)处创建一个表单。 我们的端口已设置为8080。
Now, let's add the code responsible for sending email. Open the app.js file and add the following code bellow.
现在,让我们添加负责发送电子邮件的代码。 打开app.js文件,并添加以下代码bellow 。
var transporter = nodemailer.createTransport({
  service: 'gmail',
  auth: {
    user: YOUR_GMAIL_ ADDRESS',
    pass: 'YOUR_PASSWORD'
  }
});

var mailOptions = {
  from: req.body.email,
  to: req.body.to,
  subject: req.body.subject,
  html: req.body.body
};

transporter.sendMail(mailOptions, function(error, info){
  if (error) {
    console.log(error);
  } else {
    console.log('Email sent: ' + info.response);
  }
});
res. send ( 'email sent' + " " +  'to' + " " +  req.body.to ) ;

}) ;
Using Gmail as your transporter, you can also enable the less secure app access setting.
使用Gmail作为传输者,您还可以启用安全性较低的应用访问设置。

Sending email requires internet connection.
发送电子邮件需要互联网连接。
In the code above add your Gmail address and password before running your code.
在上面的代码中,在运行代码之前添加您的Gmail地址和密码。
Do not fear about your password security. It's a tested and secured module used by many since 2010.
不要担心您的密码安全性。 自2010年以来,它已被许多人使用并经过测试和保护。
Finally, run your code and open in your browser.
最后,运行您的代码并在浏览器中打开。
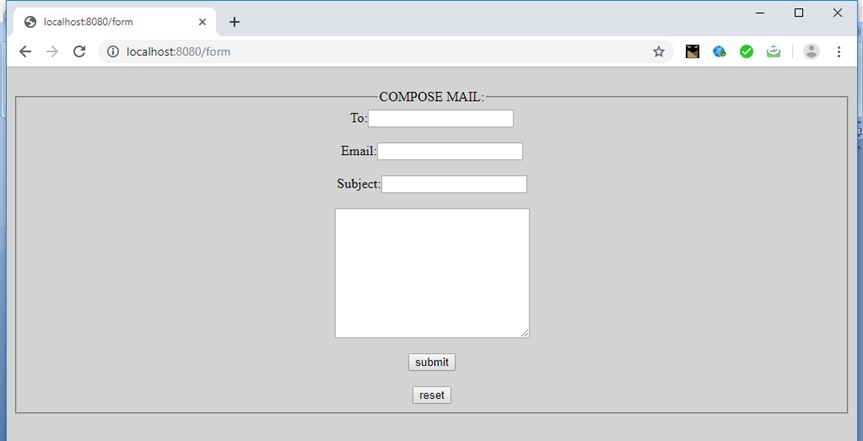
Finally, fill the form and click submit to send.
最后,填写表格,然后单击提交进行发送。
Thanks for coding with me! See you @ the next article. Feel free to drop a comment or question.
感谢您与我编码! 下次见。 随意发表评论或问题。
翻译自: https://www.includehelp.com/node-js/email-form-using-nodemailer-and-node.js-project.aspx
nodemailer使用


 690
690

 被折叠的 条评论
为什么被折叠?
被折叠的 条评论
为什么被折叠?
 到【灌水乐园】发言


