


sudoku me
介绍: (Introduction:)
动态窗体上的窗口放置和绘图,简单地将Windows注册表用作信息存储位置。Continuing from the first article about sudoku. There we have designed the application and put a lot of user interface elements into place. Now open the project in visual studio.
继续关于数独的第一篇文章。 在那里,我们设计了应用程序,并放置了许多用户界面元素。 现在,在Visual Studio中打开该项目。
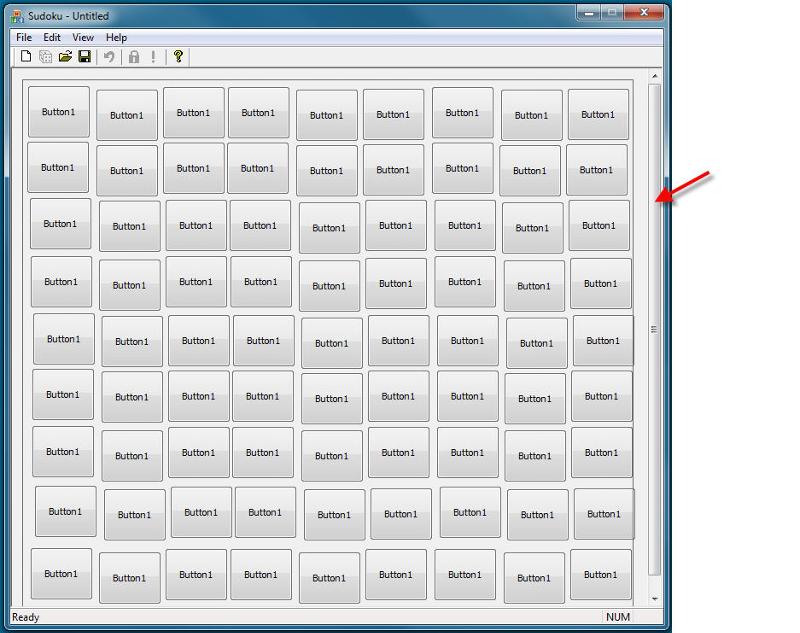
Pressing the F5 key to test I get the following on my system:
按F5键测试我在系统上得到以下内容:
From the class view select CSudokuView in the top tree view and in the list below double click the OnInitialUpdate. You should spring to the code editor and see the following code:
从类视图中,在顶部树视图中选择CSudokuView,然后在下面的列表中双击OnInitialUpdate。 您应该跳到代码编辑器,然后查看以下代码:
void CSudokuView::OnInitialUpdate()
{
    CFormView::OnInitialUpdate();
    GetParentFrame()->RecalcLayout();
    ResizeParentToFit();
}
Now change the line ResizeParentToFit(); to ResizeParentToFit(FALSE); The default parameter (TRUE) will instruct the system to shrink the frame to fit but not to enlarge the frame should that be required. Changing the parameter to FALSE instructs the function to make the frame fit even if it must be enlarged.
现在更改行ResizeParentToFit(); 调整为ParentToFit(FALSE); 默认参数(TRUE)将指示系统缩小框架以适合,但在需要时不扩大框架。 将参数更改为FALSE将指示该功能使框架合适,即使必须将其放大。
void CSudokuView::OnInitialUpdate()
{
    CFormView::OnInitialUpdate();
    GetParentFrame()->RecalcLayout();
    ResizeParentToFit(FALSE);
}
Now run it again – no scroll bar, but still doesn’t look nice. Let’s finish the layout with some code to demonstrate how one can do some things outside of the resource editor.
现在再次运行它-没有滚动条,但看起来仍然不太好。 让我们用一些代码完成布局,以演示如何在资源编辑器之外执行某些操作。
First the buttons will be positioned to be in their 3x3 groupings. This will be done in the OnInitialUpdate of the View. Now for an SDI type application (like this) the OnInitialUpdate is called every time a new document is created or a document is loaded – we only need to position the buttons once. In the header file we will add a boolean variable to act as a flag to control this so the positioning only occurs once. This is just for neatness (efficiency) as the first repositioning will move the buttons to the correct position, any later times the code is run will not actually move them. We also want an array to hold the buttons – later we will subclass the buttons to a custom class for some owner drawing.
首先,将按钮定位在其3x3分组中。 这将在View的OnInitialUpdate中完成。 现在,对于SDI类型的应用程序(如此类),每次创建新文档或加载文档时都会调用OnInitialUpdate –我们只需将按钮定位一次。 在头文件中,我们将添加一个布尔变量以用作控制该标志的标志,因此定位仅发生一次。 这仅是为了简洁(高效),因为第一次重新定位会将按钮移到正确的位置,而在以后的任何时候运行代码都不会实际将其移动。 我们还希望有一个数组来保存按钮-稍后,我们将把按钮子类化为某些所有者图形的自定义类。
In the SudokuView.h we add the following declaration just before the final }; in the file
在SudokuView.h中,我们在最终}之前添加以下声明; 在文件中
private:
    bool m_bInitialised;
    CButton m_arWndButtons[81];
};
In the constructor of the view we set it to an initial value
在视图的构造函数中,我们将其设置为初始值
CSudokuView::CSudokuView()
    : CFormView(CSudokuView::IDD)
    , m_bInitialised(false)
{
Note I have done it before the body of the constructor – in most cases it doesn’t make any real difference if done the way shown here or in the body of the constructor.
请注意,我已经在构造函数的主体之前完成了此操作–在
And in the OnInitialUpdate we need the following code after the ResizeParentToFit function call:
在OnInitialUpdate中,在ResizeParentToFit函数调用之后,我们需要以下代码:
    if(!m_bInitialised)
    {
        //Set the flag - prevent reentry and duplication of effort.
        m_bInitialised = true;

        //Attach the controls in the dialog editor to our array of buttons
        for(int i = 0; i < 81; i++)
            m_arWndButtons[i].SubclassDlgItem(IDC_BUTTON1 + i, this);

        //Get width and height of a button
        CRect rcBtn;
        GetDlgItem(IDC_BUTTON1)->GetWindowRect(rcBtn);
        int iBtnWidth = rcBtn.Width();
        int iBtnHeight = rcBtn.Height();

        //Get the position of the frame
        CRect rcFrame;
        GetDlgItem(IDC_STATIC_BOUNDARY)->GetWindowRect(rcFrame);
        //Convert from screen to client area of the application coordinates
        ScreenToClient(&rcFrame);

        //Size of the 'mini' Frame blocks
        int iOffsetX = rcFrame.Width() / 3;
        int iOffsetY = rcFrame.Height() / 3;

        //Calculate the spacing inside the mini blocks
        int iSpaceX = (iOffsetX - 3*iBtnWidth)/2;
        int iSpaceY = (iOffsetY - 3*iBtnHeight)/2;

        //First row is offset from the frame
        int x, y = rcFrame.top + iSpaceY;

        //Position one row at a time
        for(int row = 0; row < 9; row++)
        {
            //Location of first button, offset a bit from the frame
            x = rcFrame.left + iSpaceX;

            //Now process the nine buttons in the row
            for(int col = 0; col < 9; col++)
            {
                //NULL - A window used in the tab ordering, SWP_NOZORDER tells system to ignore that parameter
                m_arWndButtons[row * 9 + col].SetWindowPos(NULL, x, y, iBtnWidth-1, iBtnHeight-1, SWP_NOZORDER);

                //This is to provide a little extra spacing to display groups of three
                if(col == 2)
                    x = rcFrame.left + iOffsetX + iSpaceX;
                else if (col == 5)
                    x = rcFrame.left + 2*iOffsetX + iSpaceX;
                else
                    x += iBtnWidth;
            }

            //This is to provide a little extra spacing to display groups of three
            if(row == 2)
                y = rcFrame.top + iOffsetY + iSpaceY;
            else if(row == 5)
                y = rcFrame.top + 2*iOffsetY + iSpaceY;
            else
                y += iBtnHeight;
        }
    }
<If necessary we could manually edit the resource.h file to achieve the series. In fact if you look into the .rc file (where resources are stored by the dialog editor) you will find it is a text file and can be edited with notepad for example – make a copy first.>
<如有必要,我们可以手动编辑resource.h文件以完成该系列。 实际上,如果您查看.rc文件(对话框编辑器在其中存储资源),您会发现它是一个文本文件,可以用记事本编辑,例如–先进行复制 。
To complete the grid we would like some vertical and horizontal lines. We will draw these ourselves. This we can not do in the OnInitialUpdate because they must be drawn everytime the window needs to redrawn eg. After being behind another window this window is brought to the front. In the class view select the CSudokuView, right click to get the context menu and select properties. On the properties view there will be a button (overrides) which we click to get a list of various functions that can be overridden, scroll down until OnDraw is visible, click the blank field to the right and select <Add> OnDraw from the combobox. There should now be the following in the CSudokuView code window:
为了完成网格,我们需要一些垂直和水平线。 我们将自己绘制这些。 我们无法在OnInitialUpdate中执行此操作,因为每次需要重绘窗口时都必须绘制它们。 在另一个窗口后面之后,该窗口将移到前面。 在类视图中,选择CSudokuView,右键单击以获取上下文菜单并选择属性。 在属性视图上,将有一个按钮(替代),我们单击以获取可以替代的各种功能的列表,向下滚动直到可见OnDraw,单击右侧的空白字段,然后从组合框中选择<Add> OnDraw 。 现在,CSudokuView代码窗口中应包含以下内容:
void CSudokuView::OnDraw(CDC* /*pDC*/)
{
    // TODO: Add your specialized code here and/or call the base class
}
This needs to be as follows:
这需要如下:
void CSudokuView::OnDraw(CDC* pDC)
{
    CRect rcFrame;
    GetDlgItem(IDC_STATIC_BOUNDARY)->GetWindowRect(&rcFrame);
    ScreenToClient(&rcFrame);
    int iOffsetX = rcFrame.Width() / 3;
    int iOffsetY = rcFrame.Height() / 3;

    pDC->MoveTo(rcFrame.left + iOffsetX, rcFrame.top);
    pDC->LineTo(rcFrame.left + iOffsetX, rcFrame.bottom);

    pDC->MoveTo(rcFrame.left + 2*iOffsetX, rcFrame.top);
    pDC->LineTo(rcFrame.left + 2*iOffsetX, rcFrame.bottom);

    pDC->MoveTo(rcFrame.left, rcFrame.top + iOffsetY);
    pDC->LineTo(rcFrame.right, rcFrame.top + iOffsetY);

    pDC->MoveTo(rcFrame.left, rcFrame.top + 2*iOffsetY);
    pDC->LineTo(rcFrame.right, rcFrame.top + 2*iOffsetY);
}
Now press F5 again to compile and run – we should now see a much more organised grid, looking rather like a Sudoku grid apart from all the buttons having the same text (Button1) on them.
现在再次按F5进行编译和运行-现在我们应该看到一个更有条理的网格,看起来像Sudoku网格,除了所有按钮上都带有相同文本(Button1)的按钮。
You have probably seen that the sudoku app starts at a new location in windows everytime you run it. For those of you with a multi monitor system then always on the main monitor (typically in front of visual studio – a nuisance for debugging isn’t it). Let’s make it ‘remember’ where you move it to, even if on another monitor.
您可能已经看到,sudoku应用程序每次运行时都会在Windows中的新位置启动。 对于使用多监视器系统的用户,则始终在主监视器上(通常在Visual Studio的前面–调试不是一件麻烦事)。 让它“记住”您将其移动到的位置,即使在另一台显示器上也是如此。
When the frame window is being shown initially we will attempt to read the settings from the registry, if we don’t find any then we just center the window in the main monitor.
最初显示框架窗口时,我们将尝试从注册表中读取设置,如果找不到任何设置,则将窗口置于主监视器的中央。
From the class view select the CMainFrame class and double click the OnCreate function. I have the following:
从类视图中选择CMainFrame类,然后双击OnCreate函数。 我有以下几点:
int CMainFrame::OnCreate(LPCREATESTRUCT lpCreateStruct)
{
    if (CFrameWnd::OnCreate(lpCreateStruct) == -1)
        return -1;

    if (!m_wndToolBar.CreateEx(this, TBSTYLE_FLAT, WS_CHILD | WS_VISIBLE | CBRS_TOP
        | CBRS_GRIPPER | CBRS_TOOLTIPS | CBRS_FLYBY | CBRS_SIZE_DYNAMIC) ||
        !m_wndToolBar.LoadToolBar(IDR_MAINFRAME))
    {
        TRACE0("Failed to create toolbar\n");
        return -1;      // fail to create
    }

    if (!m_wndStatusBar.Create(this) ||
        !m_wndStatusBar.SetIndicators(indicators,
          sizeof(indicators)/sizeof(UINT)))
    {
        TRACE0("Failed to create status bar\n");
        return -1;      // fail to create
    }

    // TODO: Delete these three lines if you don't want the toolbar to be dockable
    m_wndToolBar.EnableDocking(CBRS_ALIGN_ANY);
    EnableDocking(CBRS_ALIGN_ANY);
    DockControlBar(&m_wndToolBar);

    return 0;
}
First we will comment out the final three lines (before the line return 0) concerning the toolbar – to keep the toolbar fixed in one location in our application.
首先,我们将注释掉与工具栏有关的最后三行(在返回0之前),以将工具栏固定在应用程序中的某个位置。
Now add the following code befoer the line return 0:
现在在返回0之前添加以下代码:
    WINDOWPLACEMENT wp;
    if(ReadWindowPlacement(&wp))
    {
        wp.length = sizeof(wp);
        SetWindowPlacement(&wp);
    }
    else
    {
        CenterWindow();
    }
We also need a new function for the ReadWindowPlacement. There is a wizard to assist one in adding a new function (class view, select class, right mouse click for context menu, add) but I don’t like it for simple things like this. I’m going to add the function directly into the .h/.cpp files myself because I find it quicker than using the wizard. Open MainFrm.h and add the following at the end of the class declaration, directly before the }; to give
我们还需要一个用于ReadWindowPlacement的新功能。 有一个向导可以帮助您添加新功能(类视图,选择类,右键单击上下文菜单,添加),但是我不喜欢这种简单的操作。 我自己将函数直接添加到.h / .cpp文件中,因为我发现它比使用向导更快。 打开MainFrm.h并将以下内容添加到类声明的末尾,即}之前; 给
protected:
    bool ReadWindowPlacement(WINDOWPLACEMENT *pWP);
};
Now add the following to the MainFrm.cpp file
现在将以下内容添加到MainFrm.cpp文件中
bool CMainFrame::ReadWindowPlacement(WINDOWPLACEMENT *pWP)
{
    CRegKey regKey;
    long lRes;
    CString szRegKey;
    szRegKey.Format("%s\\%s", "SOFTWARE\\AndyAinscow", "Sudoku");

    char szBuffer[sizeof("-32767")*8 + sizeof("65535")*2 + sizeof(" ")];
    ZeroMemory(szBuffer, sizeof(szBuffer));
    DWORD dwSize;

    lRes = regKey.Open(HKEY_CURRENT_USER, szRegKey, KEY_READ);
    if(lRes == ERROR_SUCCESS)
    {
        dwSize = sizeof(szBuffer)/sizeof(TCHAR);
        lRes = regKey.QueryStringValue("MainWindow", szBuffer, &dwSize);
        if(lRes != ERROR_SUCCESS)
        {
            return false;
        }
    }
    else
        return false;

    char szFormat[] = "%u,%u,%d,%d,%d,%d,%d,%d,%d,%d";
    int nRead = sscanf_s(szBuffer, szFormat,
        &pWP->flags, &pWP->showCmd,
        &pWP->ptMinPosition.x, &pWP->ptMinPosition.y,
        &pWP->ptMaxPosition.x, &pWP->ptMaxPosition.y,
        &pWP->rcNormalPosition.left, &pWP->rcNormalPosition.top,
        &pWP->rcNormalPosition.right, &pWP->rcNormalPosition.bottom);

    if (nRead != 10)
        return false;

    return true;
}
We also need to add #include “atlbase.h” at the top of this file (after #include “MainFrm.h”) so that the compiler knows what the CRegKey class is – this is an MFC class to provide support for the registry.
我们还需要在此文件的顶部(在#include“ MainFrm.h”之后)添加#include“ atlbase.h”,以便编译器知道CRegKey类是什么–这是一个为注册表提供支持的MFC类。 。
Press F7 to compile and – oops, error messages.
按F7编译并提示错误消息。
I see an Error C2664 about a CStringT….
我看到有关CStringT…的错误C2664。
This is our ‘mistake’ in generating the project where we kept the default setting of UNICODE. We are trying to mix ‘wide’ chars and ‘narrow’ chars (ANSI) with the strings in the code.
这是在生成保留了UNICODE默认设置的项目时的“错误”。 我们正在尝试将“宽”字符和“窄”字符(ANSI)与代码中的字符串混合使用。
For certain reasons not yet explained I don’t want a UNICODE based app so we need to change a project setting. Go to the solution explorer, there will be a tree view with a solution Sudoku and this contains a project also called Sudoku. Right click with the mouse on the project and select properties. You should get dialog called Sudoku Property Pages.
出于某些原因(尚未解释),我不需要基于UNICODE的应用程序,因此我们需要更改项目设置。 转到解决方案资源管理器,将有一个带有解决方案Sudoku的树形视图,其中包含一个也称为Sudoku的项目。 用鼠标右键单击项目,然后选择属性。 您应该获得一个名为Sudoku属性页的对话框。
Look to the top of the dialog and see a combobox labelled Configuration. That should contain Active(Debug) – change that to All Configurations. In the tree view at the left expand the Configuration Properties then select the General node. To the right you should see a number of settings, fairly close to the bottom is Character Set, change that from ‘Use Unicode Character Set’ to ‘Use Multi-Byte Character Set’ then click the Apply button.
查看对话框顶部,并看到一个标记为Configuration的组合框。 它应该包含Active(Debug)-将其更改为All Configurations。 在左侧的树视图中,展开“配置属性”,然后选择“常规”节点。 在右侧,您应该看到许多设置,在字符设置的底部非常接近底部,将其从“使用Unicode字符集”更改为“使用多字节字符集”,然后单击“应用”按钮。
Have a browse through the settings available – this is command central for how the applications code is converted into the exe (dll…) by Visual Studio. Pathways for libraries and other files, predefined variables, ability to run programs before and after compilation, well way too much to describe here. We have updated the project with the apply button so now hit cancel – just in case you accidentally made a change to something else.
浏览可用的设置-这是命令中心,用于说明如何通过Visual Studio将应用程序代码转换为exe(dll ...)。 库和其他文件的路径,预定义的变量,在编译之前和之后运行程序的能力,在此不多描述。 我们已经使用“应用”按钮更新了项目,因此现在单击“取消”,以防万一您不小心更改了其他内容。
Now try to compile again (F7 key) and now it should compile without error. (Sometimes I see a general error about the manifest – it seems to to be Visual Studio not behaving properly, just press Ctrl+ Alt+ F7 <note the Ctrl and Alt keys – this forces a complete rebuild> and it will compile properly this time without error). If you ran the application it should at least display at the same location each time – now to store the position when the app is closed.
现在尝试再次编译(F7键),现在它应该编译而没有错误。 (有时,我会看到有关清单的一般错误–似乎是Visual Studio行为不正常,只需按Ctrl + Alt + F7 <注意Ctrl和Alt键–这会强制进行完全重建>,并且这次它将正确编译而不会出现错误)。 如果您运行该应用程序,则它每次至少应显示在同一位置–现在在关闭该应用程序时存储该位置。
From the class view select the CMainFrame class then go to the properties. This time we want a message to respond to (not an override as previously - different button to control which information is displayed in the IDE). Select the WM_CLOSE message and add an OnClose handler. Modify it to be as follows:
从类视图中选择CMainFrame类,然后转到属性。 这次,我们希望消息能够响应(不是以前的替代-不同的按钮来控制在IDE中显示哪些信息)。 选择WM_CLOSE消息并添加一个OnClose处理程序。 对其进行如下修改:
void CMainFrame::OnClose()
{
    WINDOWPLACEMENT wp;
    wp.length = sizeof wp;
    if (GetWindowPlacement(&wp))
        WriteWindowPlacement(&wp);

    CFrameWnd::OnClose();
}
Then add a new function as we did before for the WriteWindowPlacement function. The code in the cpp file is (note this has no return value)
然后像以前一样为WriteWindowPlacement函数添加一个新函数。 cpp文件中的代码是(请注意,这没有返回值)
void CMainFrame::WriteWindowPlacement(WINDOWPLACEMENT *pWP)
{
    char szFormat[] = "%u,%u,%d,%d,%d,%d,%d,%d,%d,%d";
    char szBuffer[sizeof("-32767")*8 + sizeof("65535")*2 + sizeof(" ")];

    sprintf_s(szBuffer, sizeof(szBuffer), szFormat,
        pWP->flags, pWP->showCmd,
        pWP->ptMinPosition.x, pWP->ptMinPosition.y,
        pWP->ptMaxPosition.x, pWP->ptMaxPosition.y,
        pWP->rcNormalPosition.left, pWP->rcNormalPosition.top,
        pWP->rcNormalPosition.right, pWP->rcNormalPosition.bottom);

    CRegKey regKey;
    long lRes;
    CString szRegKey;
    szRegKey.Format("%s\\%s", "SOFTWARE\\AndyAinscow", "Sudoku");

    lRes = regKey.Create(HKEY_CURRENT_USER, szRegKey);
    if(lRes == ERROR_SUCCESS)
    {
        lRes = regKey.SetStringValue("MainWindow", szBuffer);
        if(lRes != ERROR_SUCCESS)
        {
            ASSERT(FALSE);
        }
    }
}
If you compare the code in the ReadWindowPlacement and WriteWindowPlacement functions you should see a lot of similarities. The size and location of the application is converted to a string then stored in the registry when the application is closed. When it is started the values are read from the registry as a string, parsed into the WINDOWPLACEMENT structure and used to position the application where it was last time.
如果比较ReadWindowPlacement和WriteWindowPlacement函数中的代码,应该会看到很多相似之处。 应用程序的大小和位置转换为字符串,然后在关闭应用程序时存储在注册表中。 启动时,将从注册表中读取值作为字符串,将其解析为WINDOWPLACEMENT结构并用于将应用程序放置在上次所在的位置。
HINT: If you don’t understand a (windows) function select it with the cursor then press the F1 key. The help file should start with the help about that function. Read it and the options / default settings. Failure to do that is a source of numerous questions here at EE, and think just how much quicker it is to do that than to ask a question. If you don’t understand the help then you can still ask a question for more explanation about the part you don’t understand.
提示 :如果您不了解(Windows)功能,请使用光标将其选中,然后按F1键。 帮助文件应以有关该功能的帮助开头。 阅读它以及选项/默认设置。 未能做到这一点是EE众多问题的根源,并认为这样做比提问题要快多少。 如果您不了解帮助,则仍然可以提出问题,以获取有关您不了解的部分的更多说明。
Press the F5 key to compile and run. Move the Sudoku app somewhere then close it. Run Sudoku again and it should start where you last closed it.
按F5键编译并运行。 将Sudoku应用程序移到某个位置,然后将其关闭。 再次运行Sudoku,它应该从上次关闭它的位置开始。
结论: (Conclusion:)
We have moved window elements (buttons) into the place we want using code.
我们已经使用代码将窗口元素(按钮)移到了想要的位置。
We have modified the settings for the solution - settings about how the source code of the app is compiled and linked.
我们已经修改了解决方案的设置-有关如何编译和链接应用程序源代码的设置。
We have used the registry to store information for positioning the main window where it was located the last time the app was run.
我们已经使用注册表来存储信息,以将主窗口定位在上一次运行该应用程序时所处的位置。
Previous article in the series is here: Sudoku in MFC: Part 1
该系列中的上一篇文章在这里: MFC中的Sudoku:第1部分
There we used the project wizard to create a new application skeleton. We also started using the resource editor to modify how the compiled application would look.
在那里,我们使用了项目向导来创建新的应用程序框架。 我们还开始使用资源编辑器来修改已编译应用程序的外观。
Next article in the series is here: Sudoku in MFC: Part 3
该系列的下一篇文章在这里: MFC中的Sudoku:第3部分
There we will be looking at loading and saving to file on disc. We also look at the interaction between the document and the view in the application architecture.
在那里,我们将研究如何加载并保存到光盘上的文件。 我们还将研究应用程序体系结构中文档和视图之间的交互。
Two points to bear in mind.
需要牢记两点。
You may use the code but you are not allowed to distribute the resulting application either for free or for a reward (monetary or otherwise). At least not without my express permission.
您可以使用代码,但不能免费或以奖励(货币或其他方式)分发结果应用程序。 至少没有我的明确许可。
I will perform some things to demonstrate a point – it is not to be taken as that meaning it is a ‘best’ practice, in fact an alternative might be simpler and suitable. Some points in the code would even be called poor design and a possible source of errors.
我将做一些事情来说明一个观点–不能认为它是“最佳”实践,实际上,另一种选择可能更简单,更合适。 代码中的某些要点甚至被称为不良设计和可能的错误源。
翻译自: https://www.experts-exchange.com/articles/3741/Sudoku-a-complete-MFC-application-Part-2.html
sudoku me


 330
330


 被折叠的 条评论
为什么被折叠?
被折叠的 条评论
为什么被折叠?
 到【灌水乐园】发言


